Configuring CentOS 7 Network in an article that explains how to configure the IP address on the network interface to the CentOS. We will show how to configure the interface to acquire the IP settings from DHCP and also to set the IP settings as Static.
We have an article that explains how to install CentOS 7. Click HERE to see this article.
Understanding the Interface Name Convention
RHEL7 and downstream distributions such as CentOS 7 use systemd predictable network interface names by default instead of the traditional interface naming scheme which existed in Linux distributions since the earliest days of Linux, i.e. eth0, wlan0, etc.
A predictable way of determining a network interface’s name was introduced in CentOS 6. However, it wasn’t until CentOS 7 was released that the feature was enabled by default.
The predictable naming convention assigns a name to an interface based on a number of factors. For an ethernet card, the following are used: device type, bus, and slot.
Some examples of device type:
en = Ethernet
sl = Serial Line IP (slip)
wl = WLAN
ww = SWAN
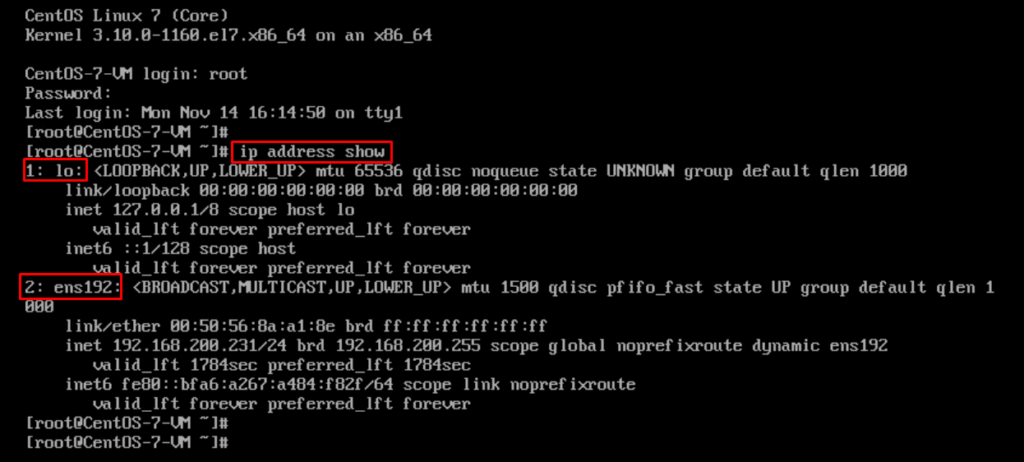
In our lab, we can use the command “ip address show” to see all interfaces. We have both interfaces:
lo = Loopback interface
ens192 = LAN Network Interface
Acquiring IP settings from DHCP
By default, after the system installation, the network interface acquires IP settings from DHCP.
We can confirm it on the file /etc/sysconfig/network-scripts/ifcfg-ens192.
Important: In our lab, as the interface is “ens192”, the configuration file has the name “ens192” in the final of the filename.
The instruction “BOOTPROTO=”dhcp” represents that the IP settings will get by DHCP:
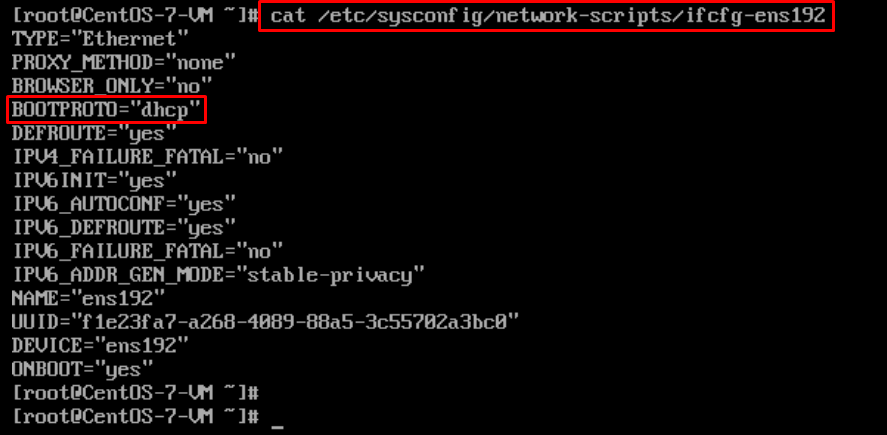
Below is the file content for reference:
| [root@CentOS-7-VM ~]# cat /etc/sysconfig/network-scripts/ifcfg-ens192 TYPE=”Ethernet” PROXY_METHOD=”none” BROWSER_ONLY=”no” BOOTPROTO=”dhcp” DEFROUTE=”yes” IPV4_FAILURE_FATAL=”no” IPV6INIT=”yes” IPV6_AUTOCONF=”yes” IPV6_DEFROUTE=”yes” IPV6_FAILURE_FATAL=”no” IPV6_ADDR_GEN_MODE=”stable-privacy” NAME=”ens192″ UUID=”f1e23fa7-a268-4089-88a5-3c55702a3bc0″ DEVICE=”ens192″ ONBOOT=”yes” |
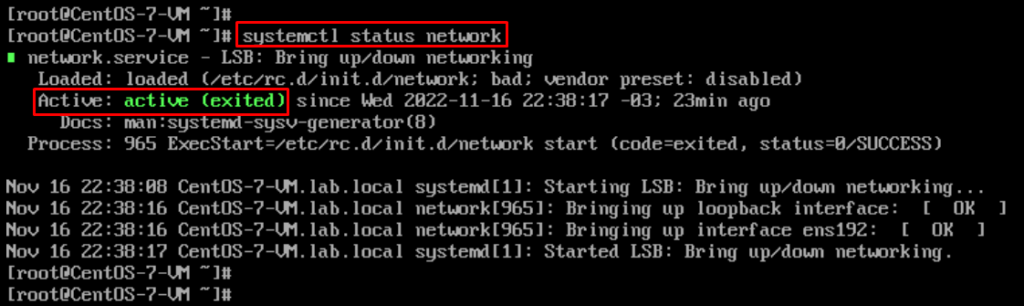
The service (daemon) responsible to manage the network settings is “network”. With the command “systemctl status network” it’s possible to see the service status.
If you need to change something in the network interface file, this service should restart to apply the new configurations:
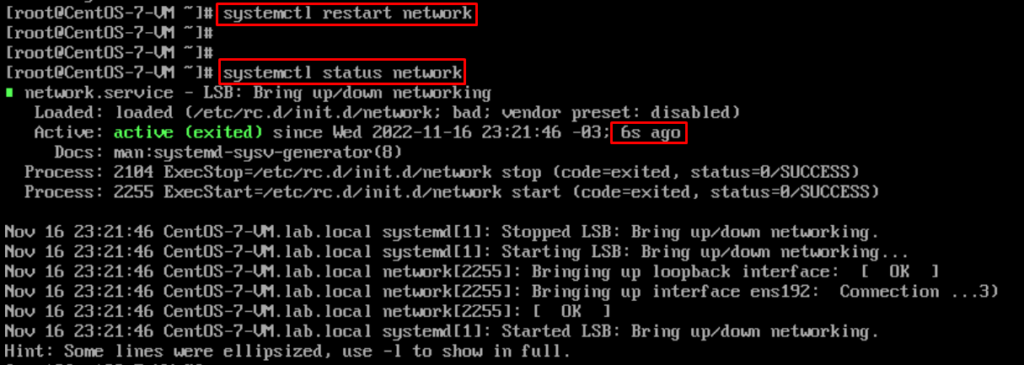
To restart the “network” service, the commando “systemctl restart network” can be used:

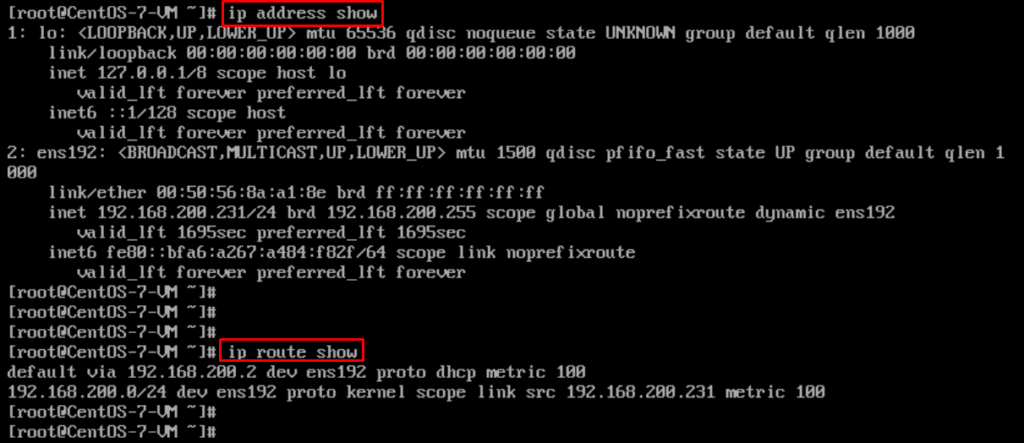
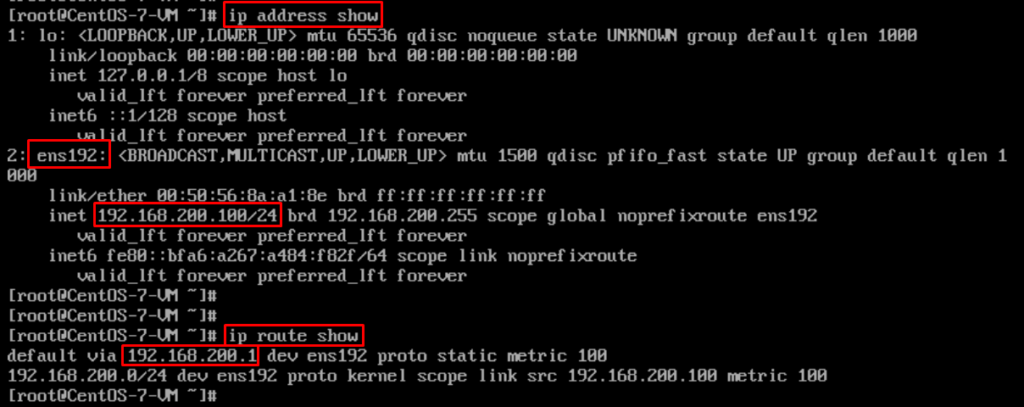
Note: To see the IP, Network Mask, and Route Table, use the commands below:
ip address show
ip route show
Defining IP settings as Static
With your preferred text editor, edit the file /etc/sysconfig/network-scripts/ifcfg-ens192. Adjust this file as shown in the picture below:

Below is the file content for reference:
| [root@CentOS-7-VM ~]# cat /etc/sysconfig/network-scripts/ifcfg-ens192 TYPE=”Ethernet” PROXY_METHOD=”none” BROWSER_ONLY=”no” BOOTPROTO=”none” IPADDR=”192.168.200.100″ PREFIX=24 GATEWAY=”192.168.200.1″ DNS1=”192.168.200.3″ DNS2=”8.8.8.8″ DNS3=”8.8.4.4″ DEFROUTE=”yes” IPV4_FAILURE_FATAL=”no” IPV6INIT=”yes” IPV6_AUTOCONF=”yes” IPV6_DEFROUTE=”yes” IPV6_FAILURE_FATAL=”no” IPV6_ADDR_GEN_MODE=”stable-privacy” NAME=”ens192″ UUID=”f1e23fa7-a268-4089-88a5-3c55702a3bc0″ DEVICE=”ens192″ ONBOOT=”yes” |
Restart the network file to apply the new configurations:
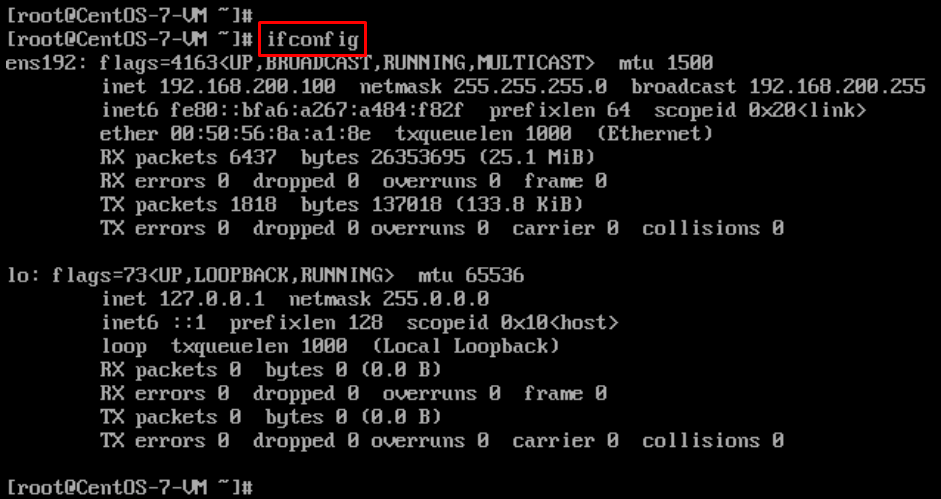
All settings were changed with success:
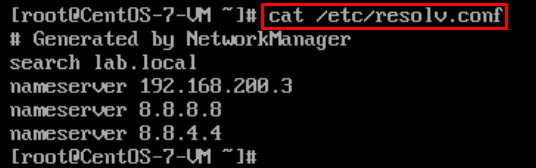
Also, the DNS servers were changed too:
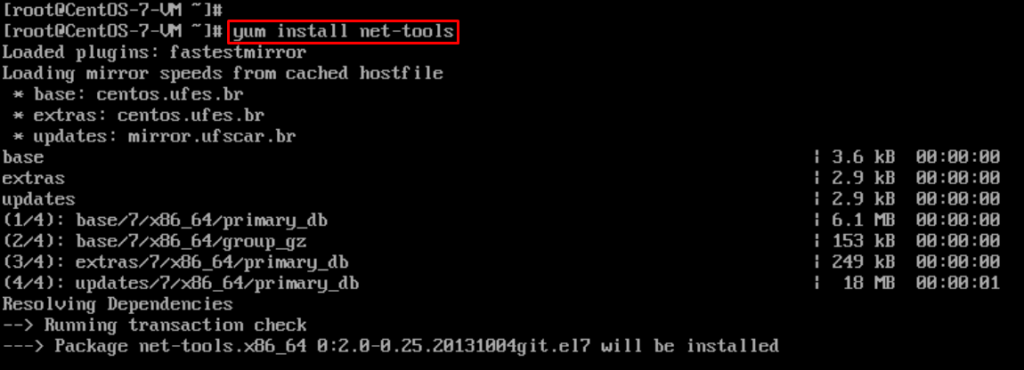
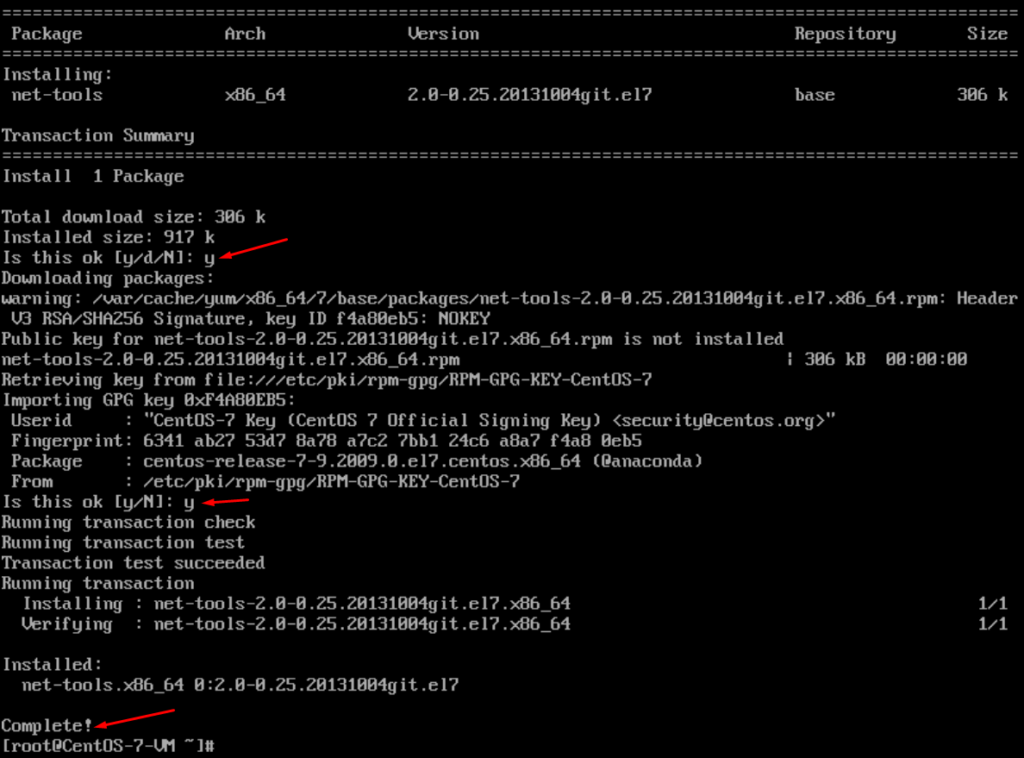
Note: ifconfig and netstat commands are not available by default. But, if you would like to use these commands, it’s possible to install them on CentOS 7. Install the package “net-tools” – it’s necessary to have Internet Access to install this package:
yum install net-tools