Applying a patch on the ESXi host is an article that explains how to update the ESXi host. There are some ways to perform it. But, in this example, we will apply the patch from the CLI (Command Line Interface).
The VMware Article 2143832 shows the build numbers and versions of all ESXi systems. It’s highly recommended to check this link before performing patching:
https://kb.vmware.com/s/article/2143832
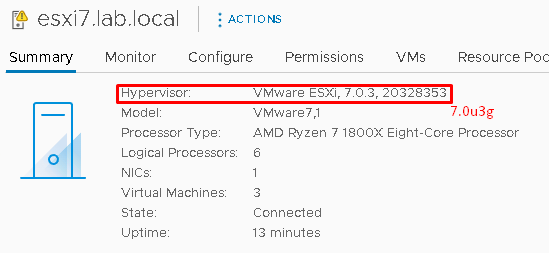
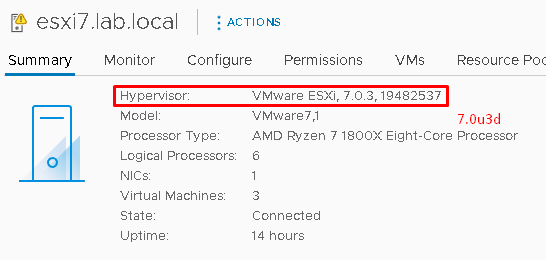
In our lab environment, the current ESXi host version is:
Note: During the patching, it’s necessary to put the ESXi host into maintenance mode. So, it is recommended to create a schedule to apply the patch (Create an internal Change Request or something like that).
Download the Patch File
Firstly, we need to download the file that will use to patch the vCenter Server.
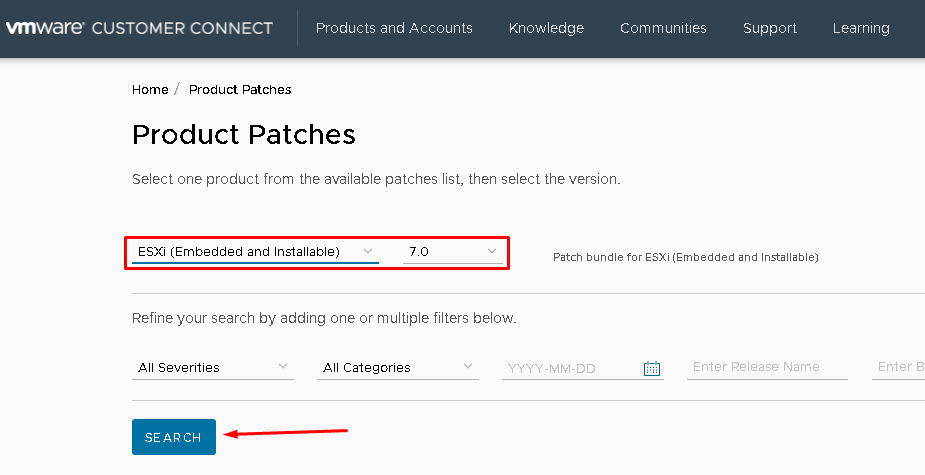
Access the VMware Customer Connect site, perform the login on this site and get the iso patch file:
https://customerconnect.vmware.com/patch
Select “ESXi (Embedded and Installable)” and “7.0” and then, click on “SEARCH”:
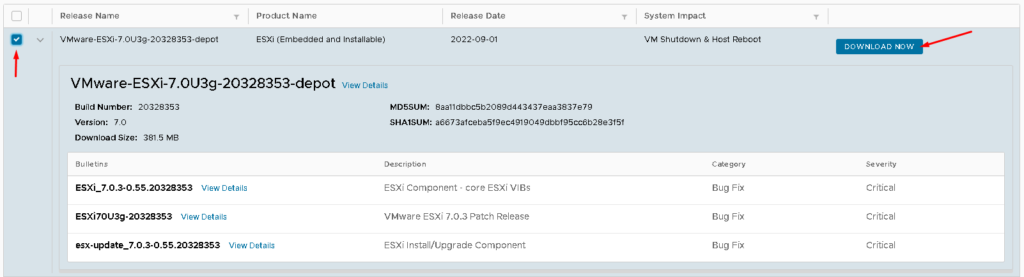
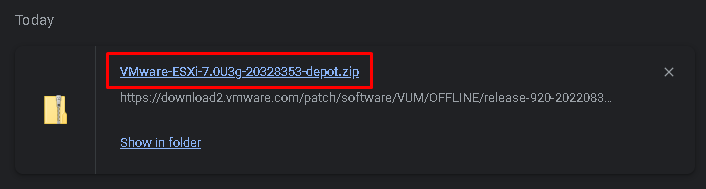
So, a list of all patch versions available is showing. Select the latest version and then click on “DOWNLOAD NOW”. In this case, the latest version of VMware-ESXi-7.0U3g-20328353:
Upload the Patch File to the ESXi Datastore
In our lab environment, we are using one ESXi host. So, in this example, it’s necessary to upload the patch iso file inside this local datastore.
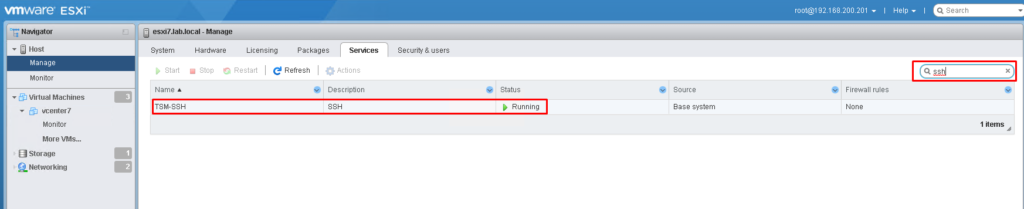
Firstly, it’s necessary to enable the SSH service on the ESXi host. Login on the Management Interface –> Manage –> Services –> Search by SSH –> select the SSH service and then, click on “Start”:
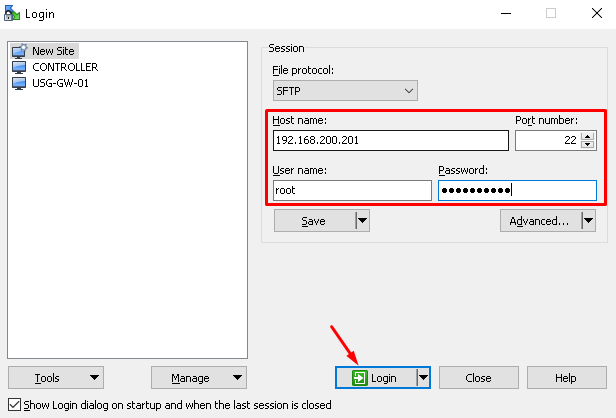
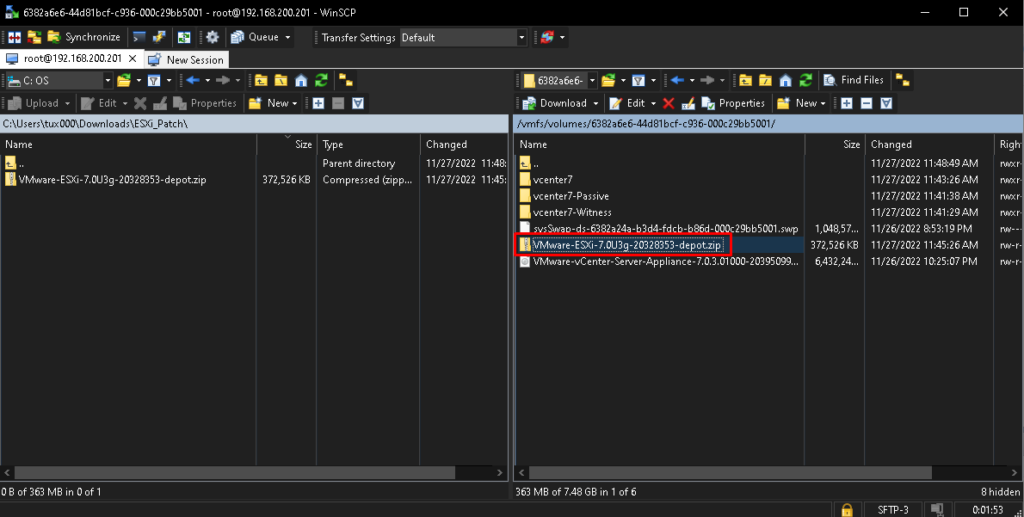
We will use the WinSCP application to copy the patch file to the host’s local datastore. Open the WinSCP, type the details of the ESXi host (IP address, root, and password), and then, click on “Login”:
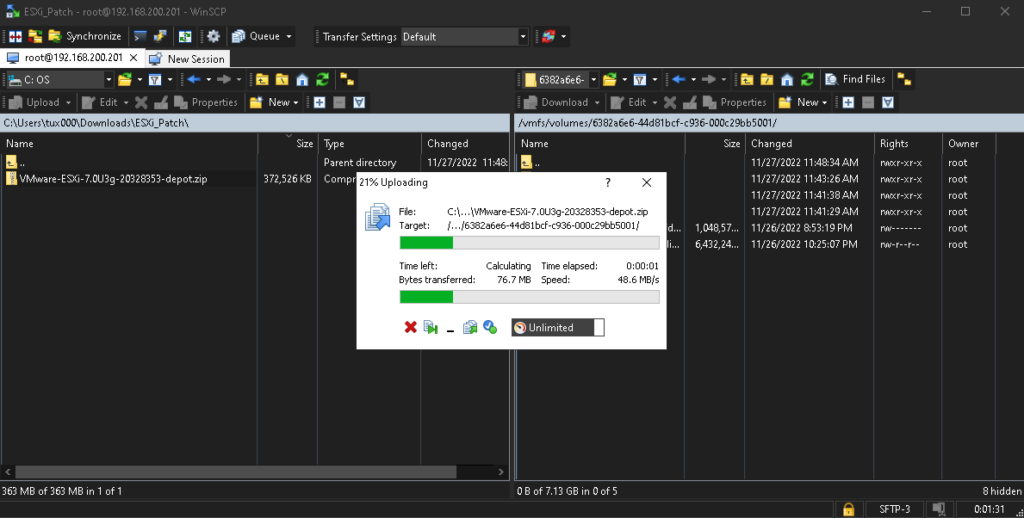
Copy the patch file from left to right on the WinSCP. Wait some minutes for the copy to be finished:
Now, it’s possible to see the file inside the local datastore (on the right on the WinSCP application):
Apply the Patch on the ESXi Host by CLI
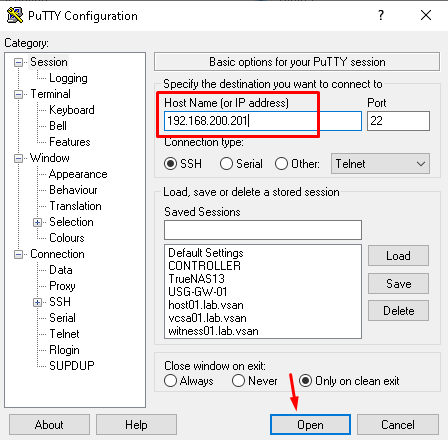
With your SSH client, connect to the ESXi host. In this case, we are using the Putty software:
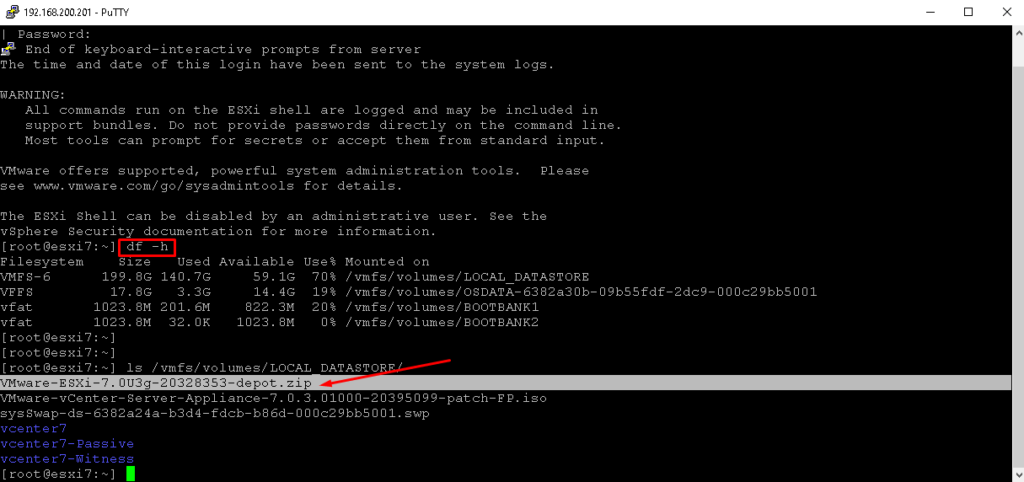
Check inside the mount point of the local datastore if the patch bundle is OK:
df -h –> To list all mount points
ls /vmfs/volumes/LOCAL_DATASTORE –> To list all items inside the mount point of the local datastore
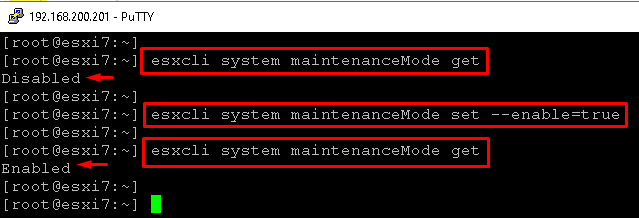
Before that, it’s necessary to put this ESXi host in maintenance mode. To do it, type the commands below:
esxcli system maintenanceMode get –> To check if the ESXi host is in maintenance mode
esxcli system maintenanceMode set –enable=true –> To put the ESXi host into maintenance mode
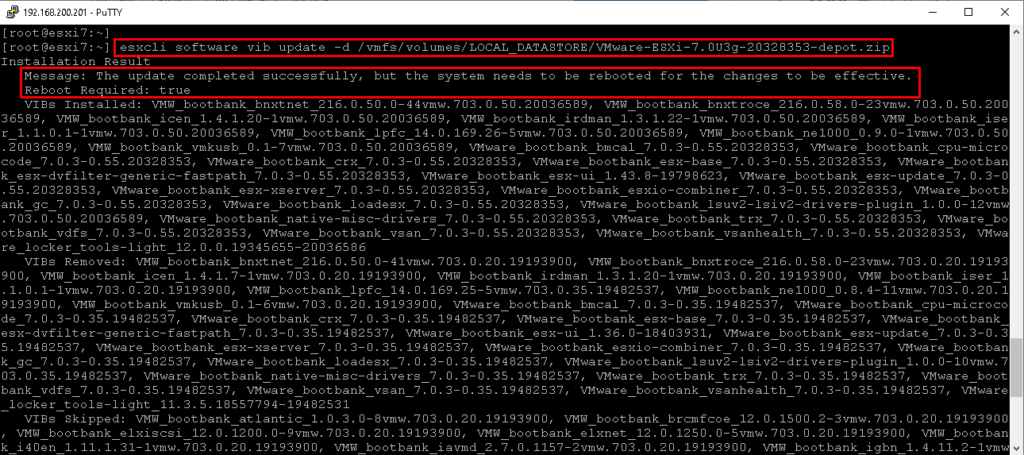
Apply the patch, by typing the command:
esxcli software vib update -d /vmfs/volumes/LOCAL_DATASTORE/VMware-ESXi-7.0U3g-20328353-depot.zip
Note: After applying the patch, the message “The update completed successfully, but the system needs to be rebooted for the changes to be effective” indicate the success of the procedure:
To reboot the ESXi, type “reboot”:
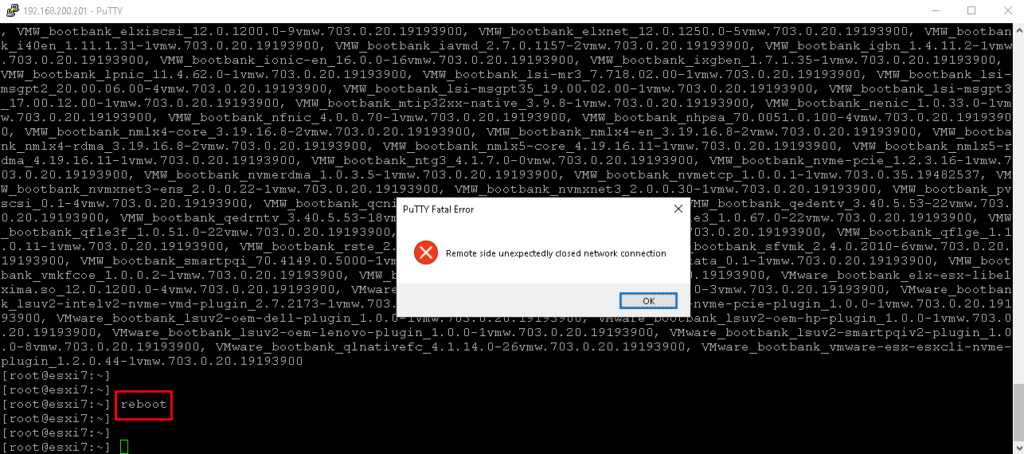
Here, the ESXi host has been updated successfully 🙂
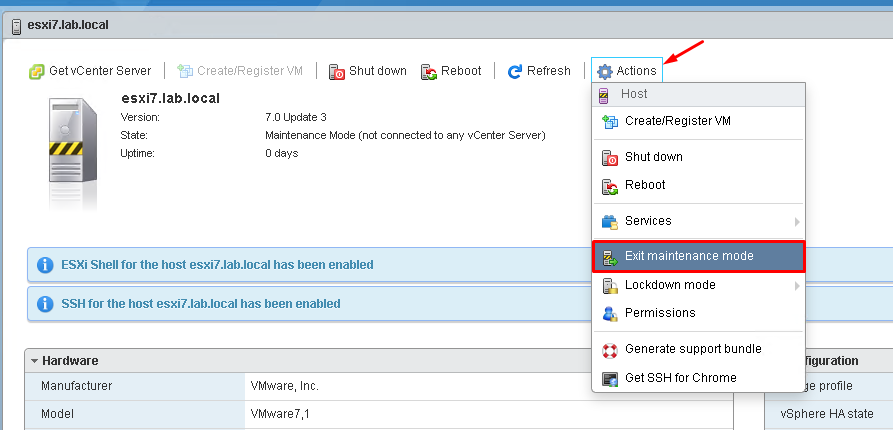
Access the host’s management interface and then, remove the host from the maintenance mode.
Select Actions –> Exit maintenance mode:
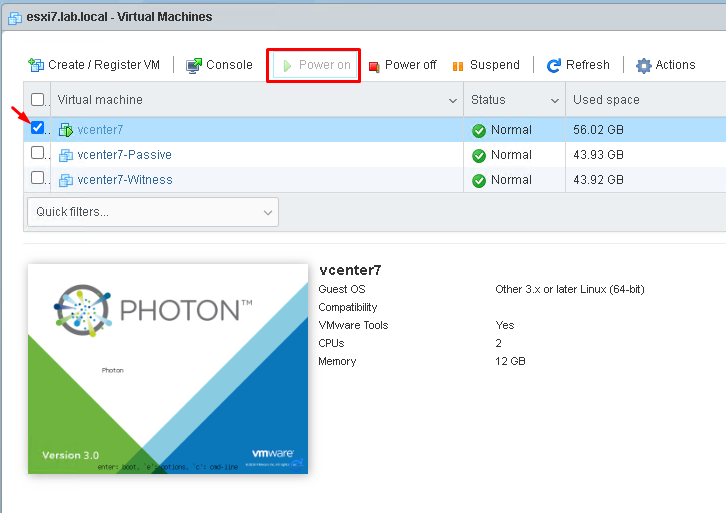
In our lab, the vCenter Server uses this ESXi host to run. Power on the vCenter Server VM:
BEFORE:

AFTER: