Updating vCenter Server 6.7 to 7 is an article that explains how Updating vCenter Server 6.7 to 7.
About Our Environment
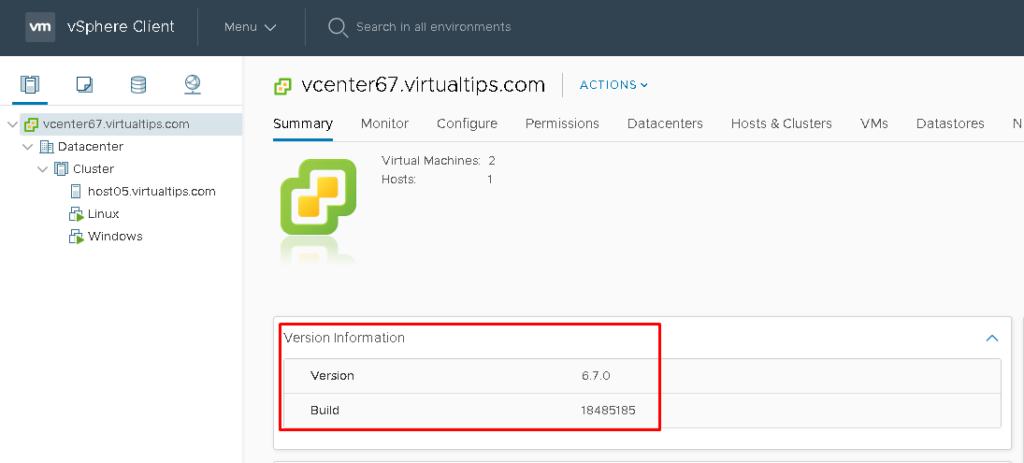
In our lab environment, there is a vCenter Server version 6.7.0 build 18485185 with Embedded PSC:
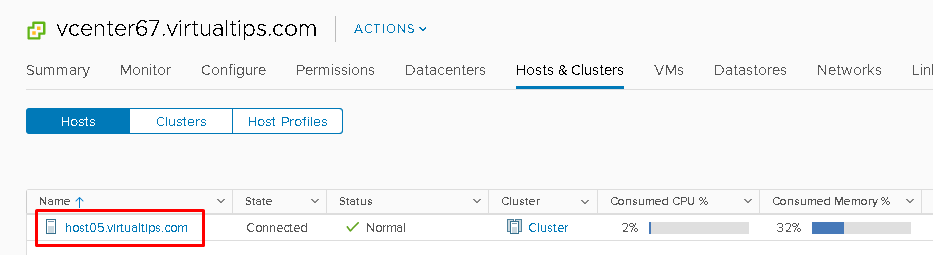
We have one ESXi host and both VMs running in this environment:

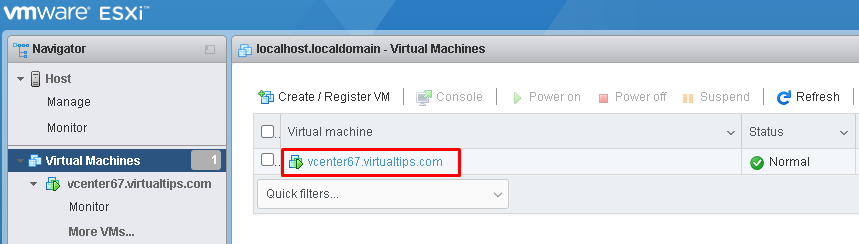
Accessing the ESXi host web console, it is possible to see the vCenter Server virtual machine (VM). So, in this case, the VM name in the vCenter Server Inventory is “vcenter67.virtualtips.com”:
Creating a manual “Clone” of the current vCenter Server VM
Before we update the vCenter Server, is a good idea to have a valid backup or a clone. In case of update failures, for instance, it is possible to recover the vCenter Server from backup and/or from a clone VM.
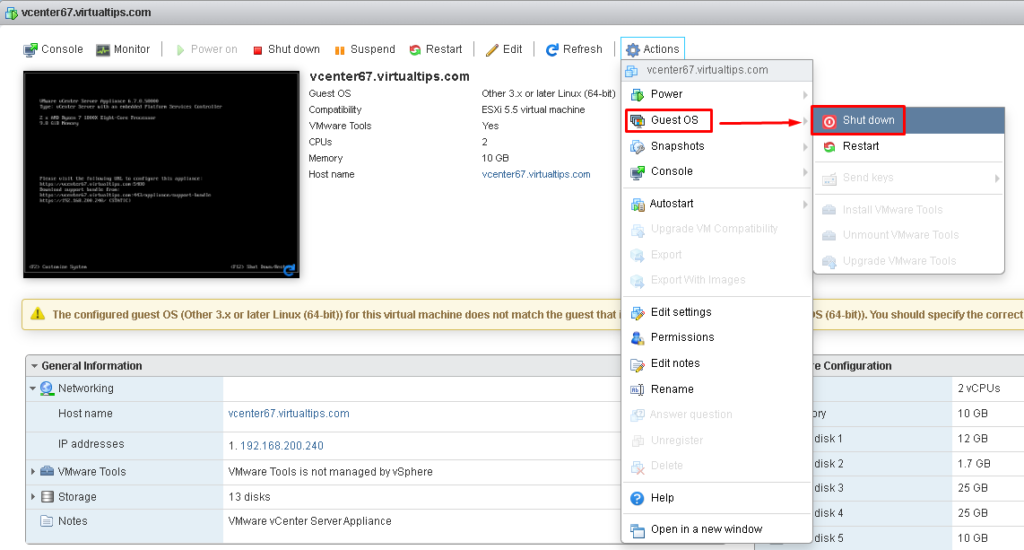
Firstly, we need to shut down the vCenter Server. On the host web console, select the vCenter Server VM –> Actions –> Guest OS –> Shut down. Wait a few minutes while the VM is powered off:
We will create the vCenter Server clone by CLI. We need to enable the SSH service on the physical host, and then, access the host by SSH.
Activating the SSH service on the physical host:

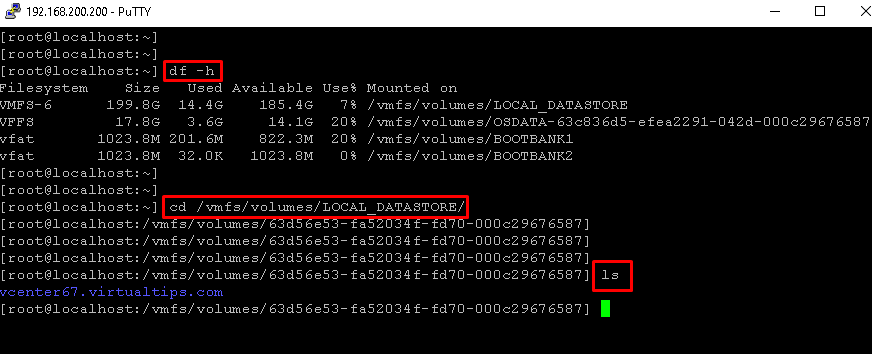
On the CLI (Command Line Interface), use the “df -h” command to display the partitions and volumes.
In this case, the local datastore is “LOCAL_DATASTORE” and the path to access the datastore’s mount point is /vmfs/volumes/LOCAL_DATASTORE.
Inside the datastore’s mount point, the command “ls” can be used to list all VM’s directory names. In this case, we have only VM and this VM is the vCenter Server:
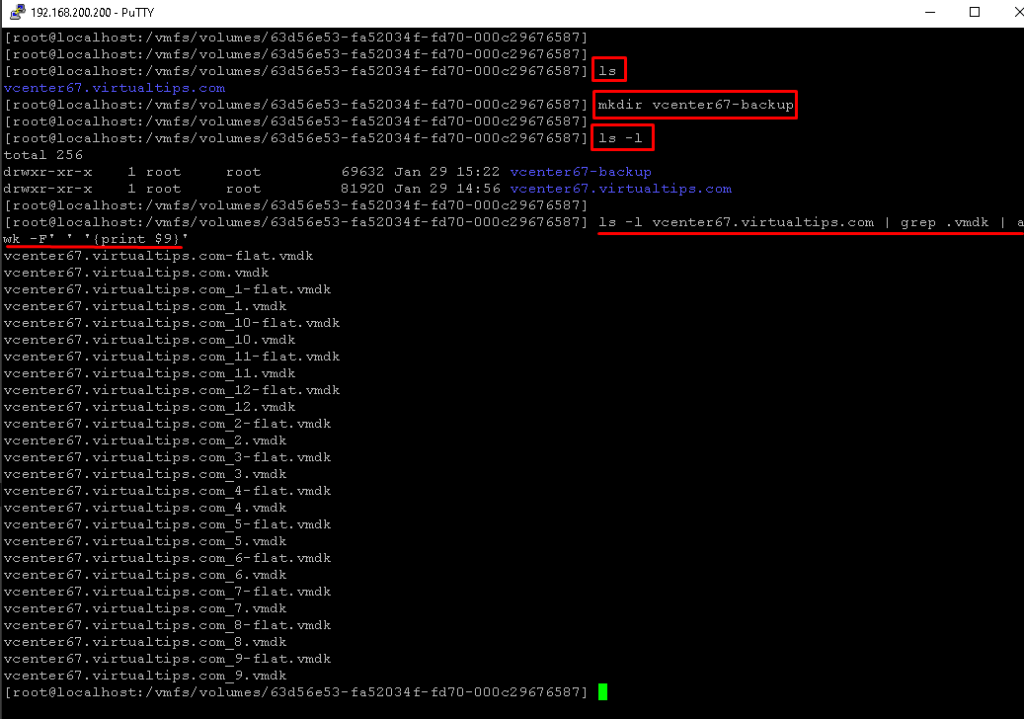
The next step is to create a new directory that will receive the clone files.
So, we are using the command “mkdir vcenter67-backup” to create the directory.
After that, we need to know all “.vmdk” files that the source VM has. A simple way to do it, in this case, is using the command below:
ls -l vcenter67.virtualtips.com | grep .vmdk | awk -F’ ‘ ‘{print $9}’
Where:
vcenter67.virtualtips.com = The name of the VM directory
The result is to list all “.vmdk” files that exists inside the VM directory:
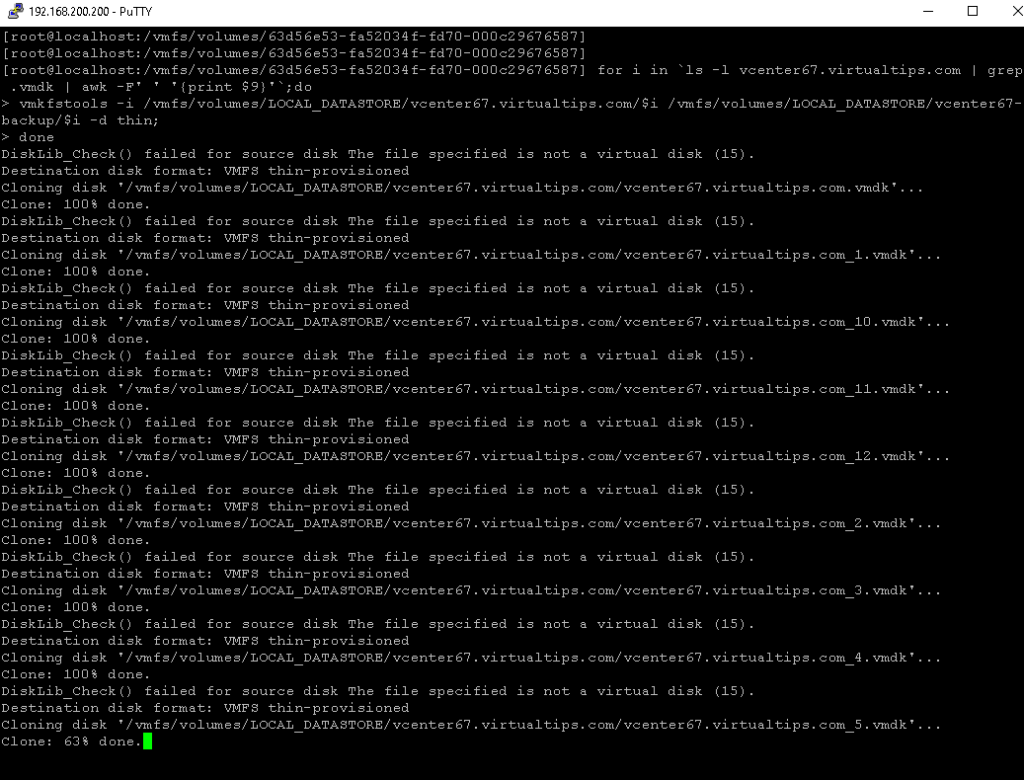
So, we need to clone the vmdk files from the source directory to the backup directory. We will do it with the below command:
for i in ls -l vcenter67.virtualtips.com | grep .vmdk | awk -F' ' '{print $9}';do
vmkfstools -i /vmfs/volumes/LOCAL_DATASTORE/vcenter67.virtualtips.com/$i /vmfs/volumes/LOCAL_DATASTORE/vcenter67-backup/$i -d thin;
done
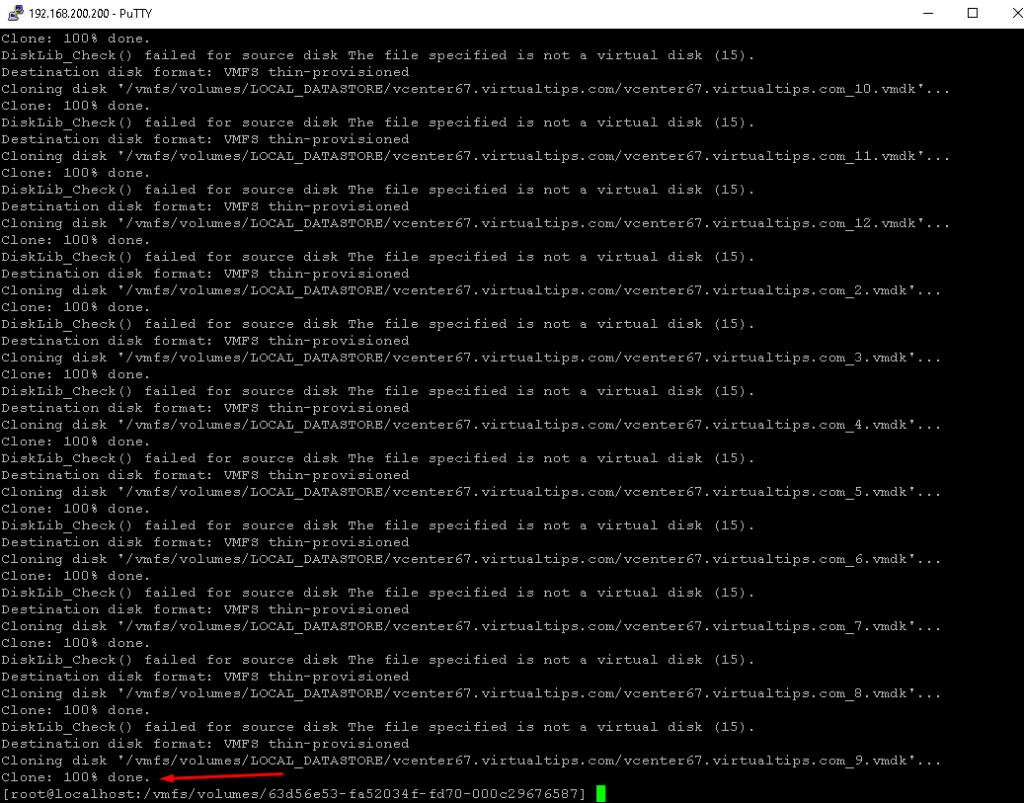
This “for” command will read the source vmdk files and use these detail with the command “vmkfstools” to clone each vmdk file to the destination VM directory:
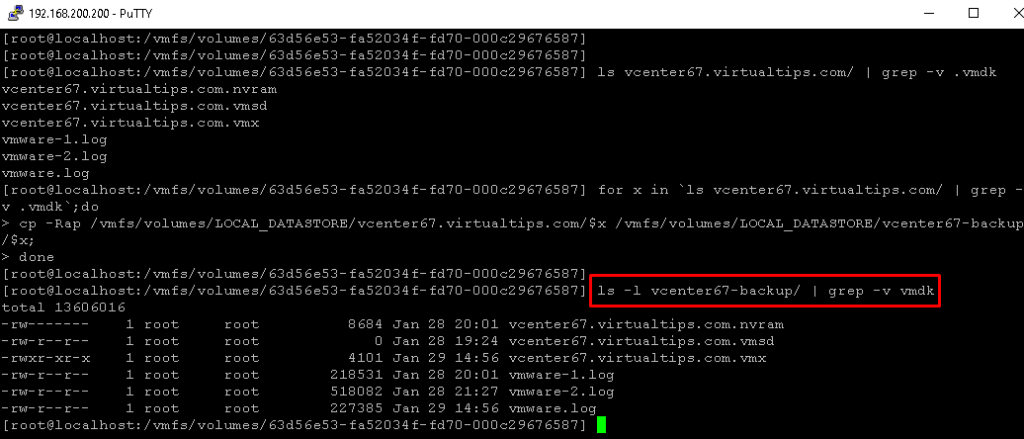
Inside the VM directory, we have other types of files. In this case, we need to know the other files (except the vmdk files) that are in the VM directory. We can do that with the below command:
ls vcenter67.virtualtips.com/ | grep -v .vmdk
We have other files such as .nvram, .vmsd, .vmx, and .log:

So, we need to copy these files to the backup VM directory too. We can do it with the below command:
for x in ls vcenter67.virtualtips.com/ | grep -v .vmdk;do
cp -Rap /vmfs/volumes/LOCAL_DATASTORE/vcenter67.virtualtips.com/$x /vmfs/volumes/LOCAL_DATASTORE/vcenter67-backup/$x;
done
After that, it is possible to see these files in the backup VM directory:
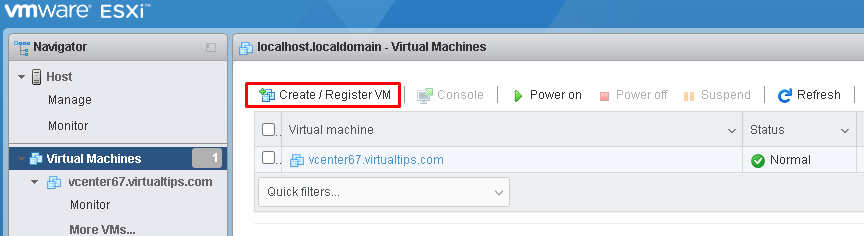
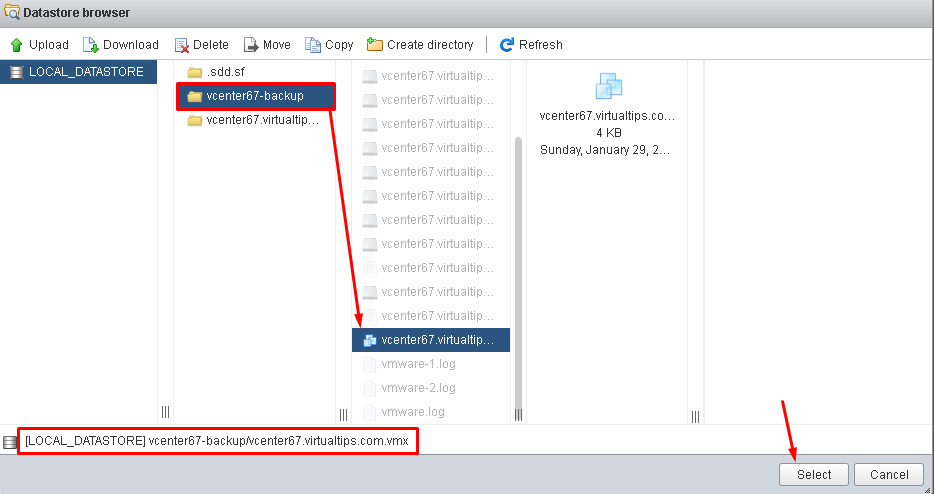
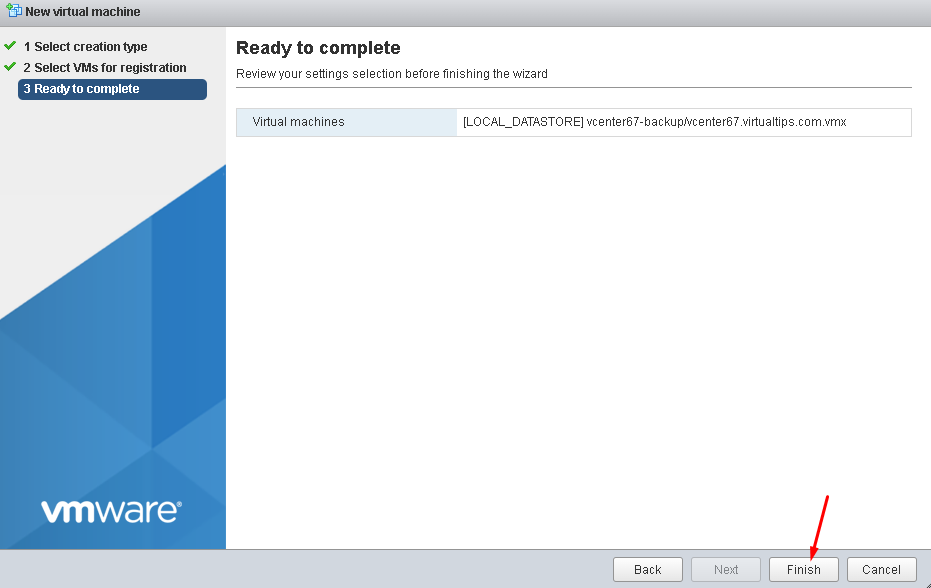
The last step is to register this backup VM and test it. The pictures below will show this process:


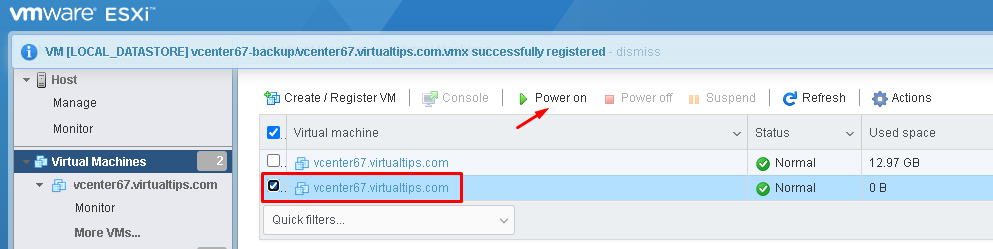
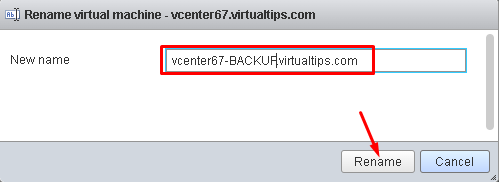
After validating that the vCenter Server VM worked OK, shut down this VM and rename it:
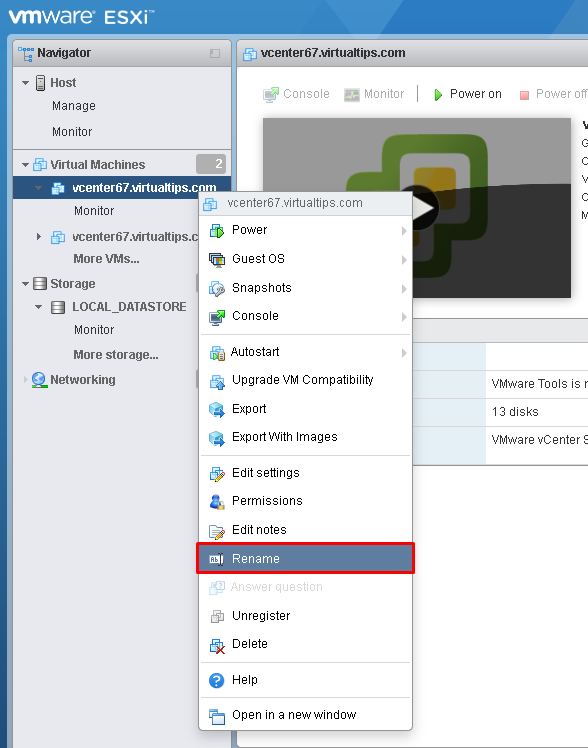
In this example, we are putting the prefix “-BACKUP” in the VM name (this will only change in the vCenter Server Inventory):
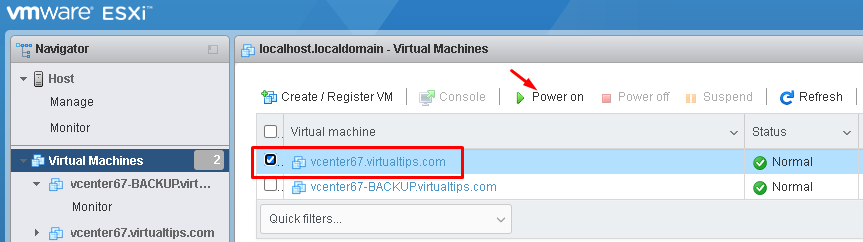
At this point, we have a valid backup of the vCenter Server 🙂

Deployment of the NEW vCenter Server
Here, the first step is to power on the vCenter Server 6.7 VM:
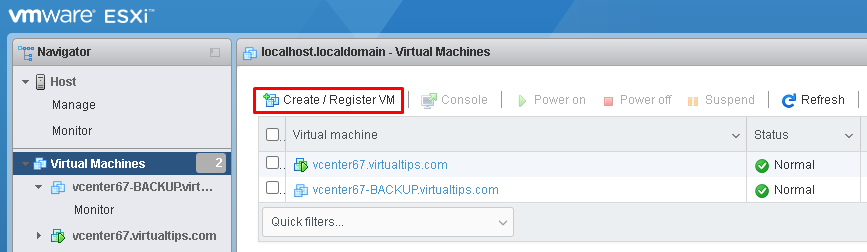
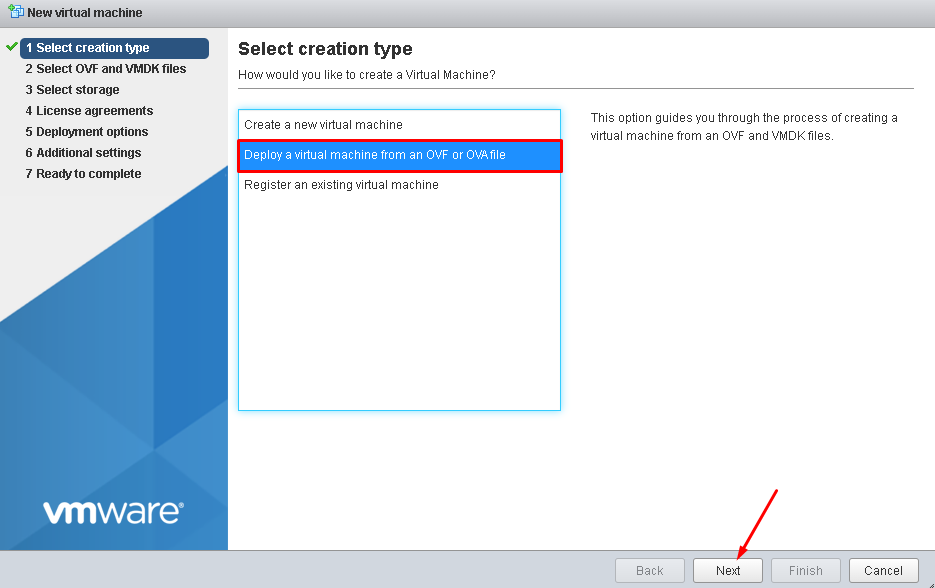
After that, select Virtual Machines –> Create/Register VM –> Deploy a virtual machine from an OVF or OVA file.
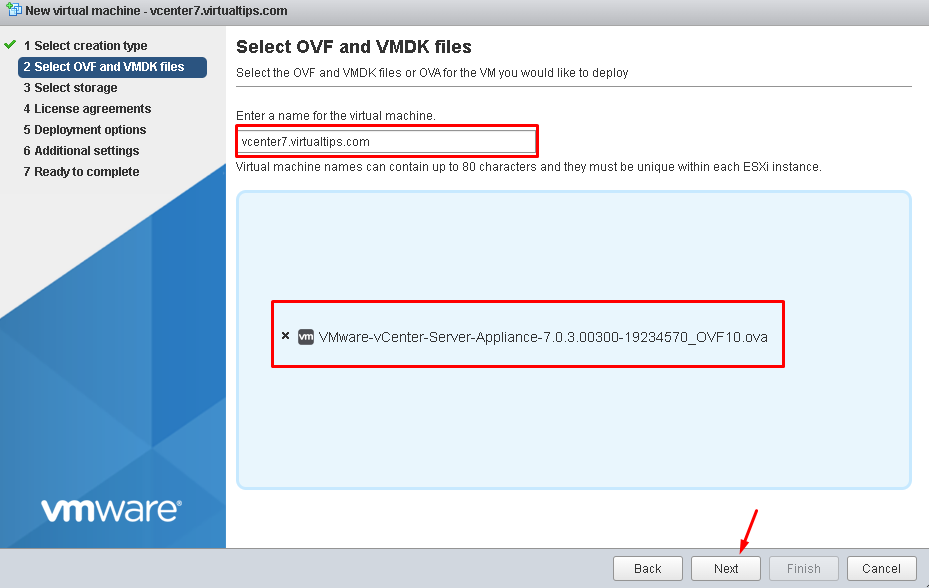
In this step, we will deploy the new vCenter Server VM. In this case, we will use the vCenter Server version 7.0.3 build 19234570:
Enter a name for the virtual machine and select the vCenter Server ova file. Click on NEXT to continue:
Select the storage that the VM will use and click on NEXT:

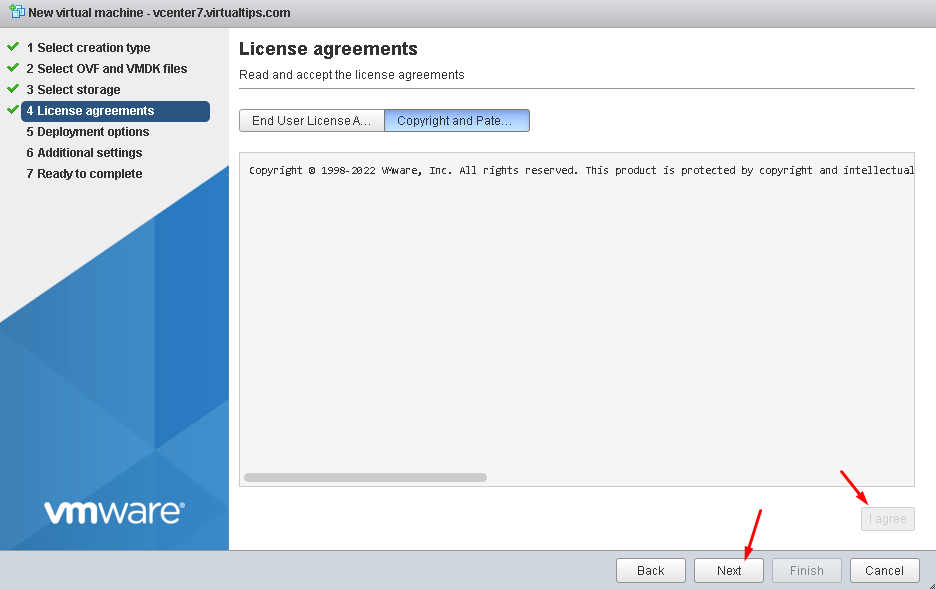
Accept the License Agreements and click on NEXT:
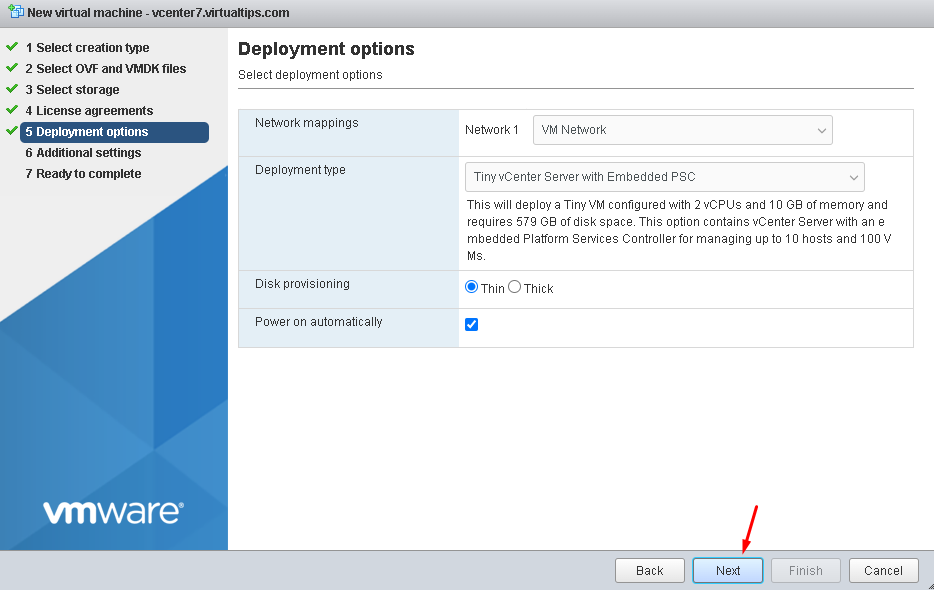
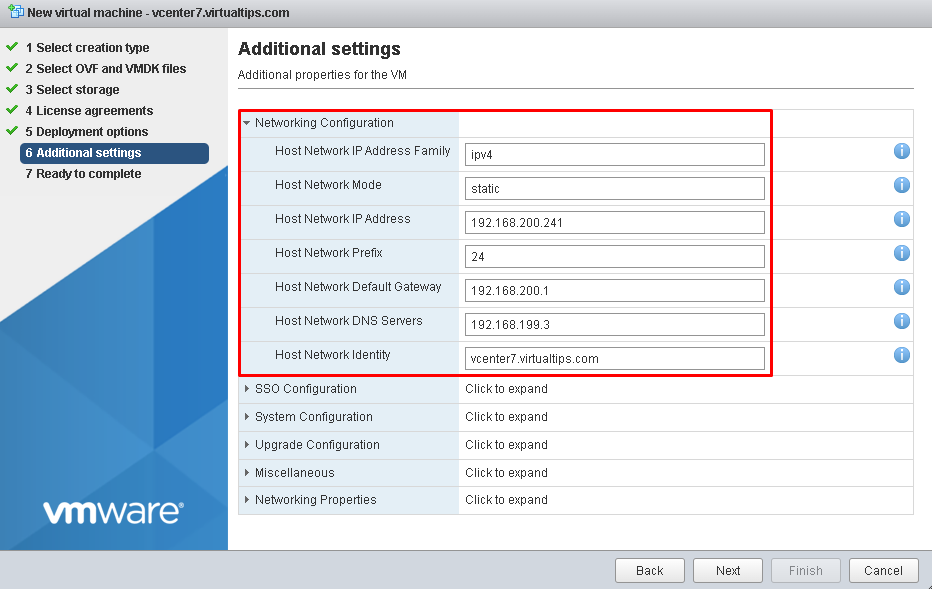
So, in this step, it is necessary to put the temporary IP settings. These settings only will be used during the updating process.
In this case, the IP address 192.168.200.241 is a temporary IP, but, it is in the same subnet that the official vCenter Server IP address:
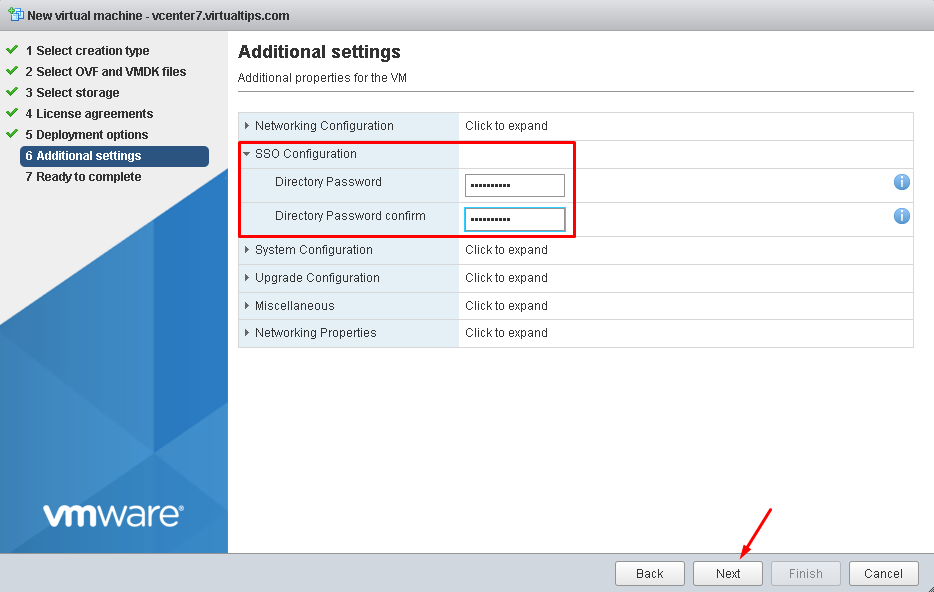
On the SSO Configuration, set the root password and click on NEXT to continue:
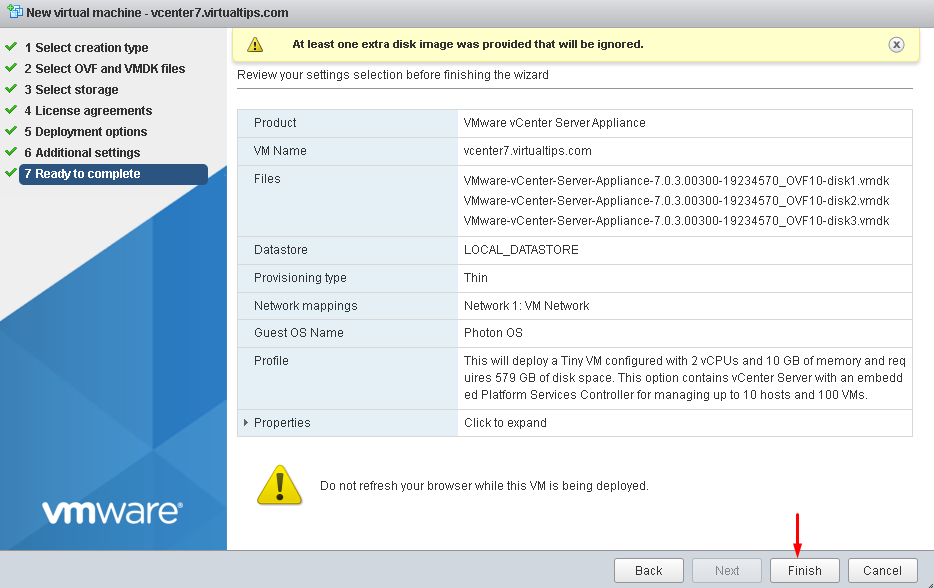
Click on FINISH to finish the wizard and start the OVA deployment:
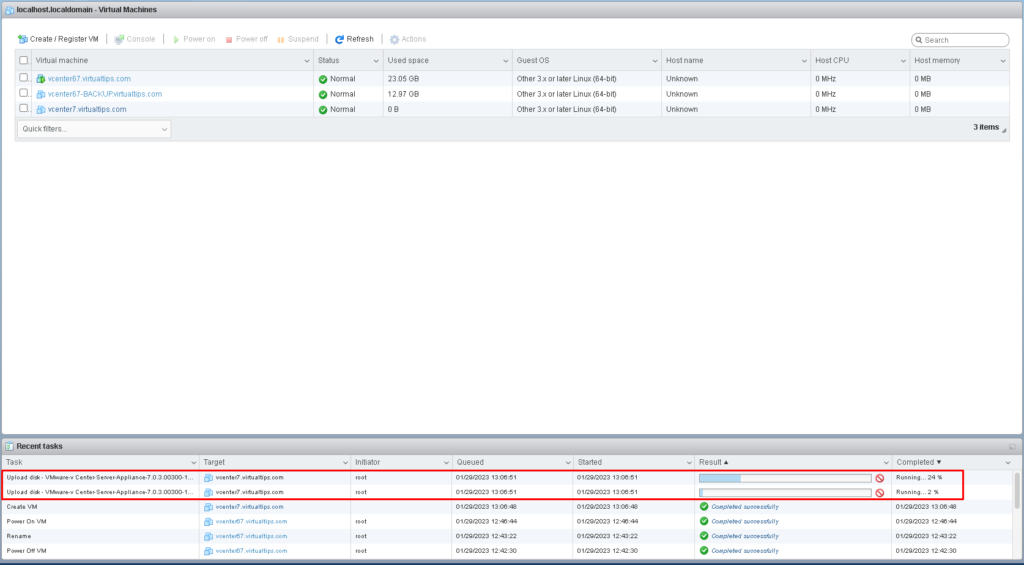
On the host recent tasks it is possible to follow the deployment process:
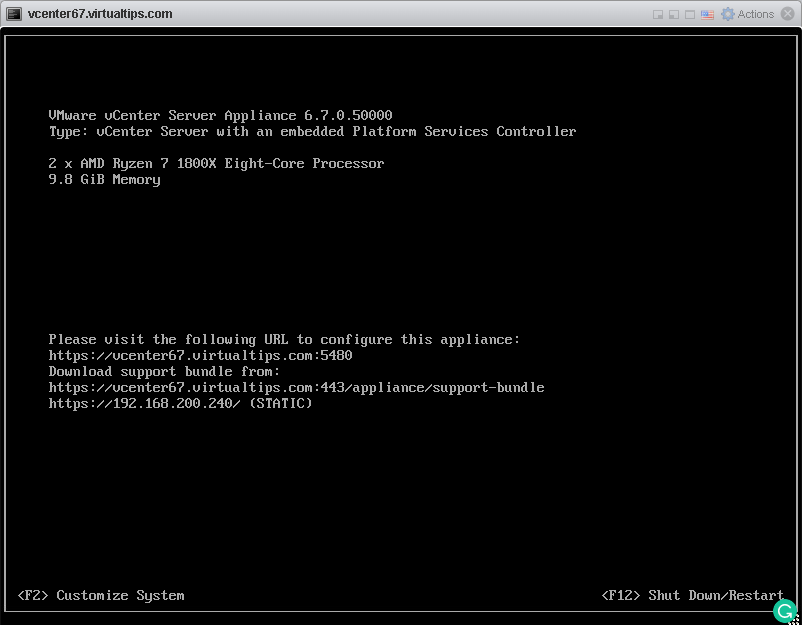
After that, the process will power on the new vCenter Server VM:

Doing the vCenter Server Upgrade
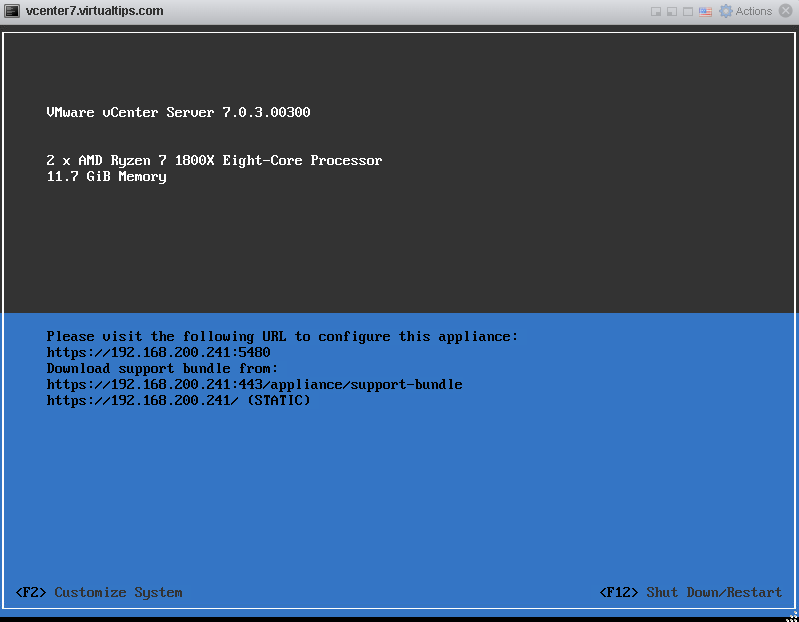
After the new vCenter Server (vCenter 7) it is available, access the VAMI interface through the TCP port 5480:

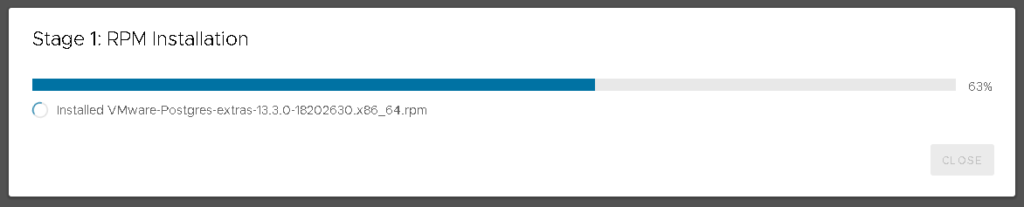
Wait a few minutes while the RPM installation process is running:
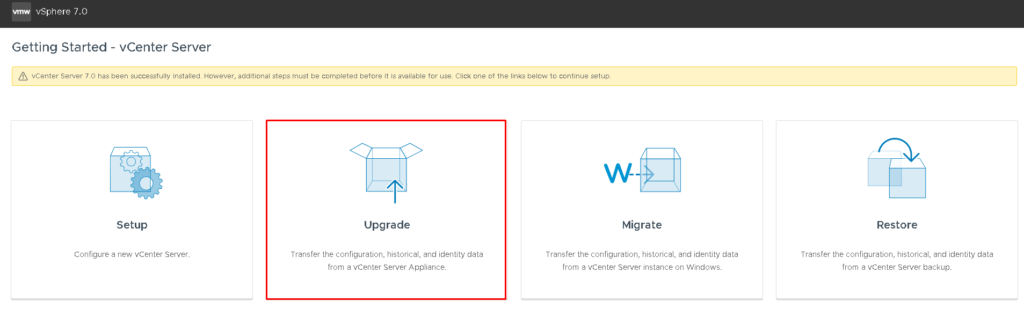
So, after the RPM installation process is finished, we will select the option “Upgrade”:
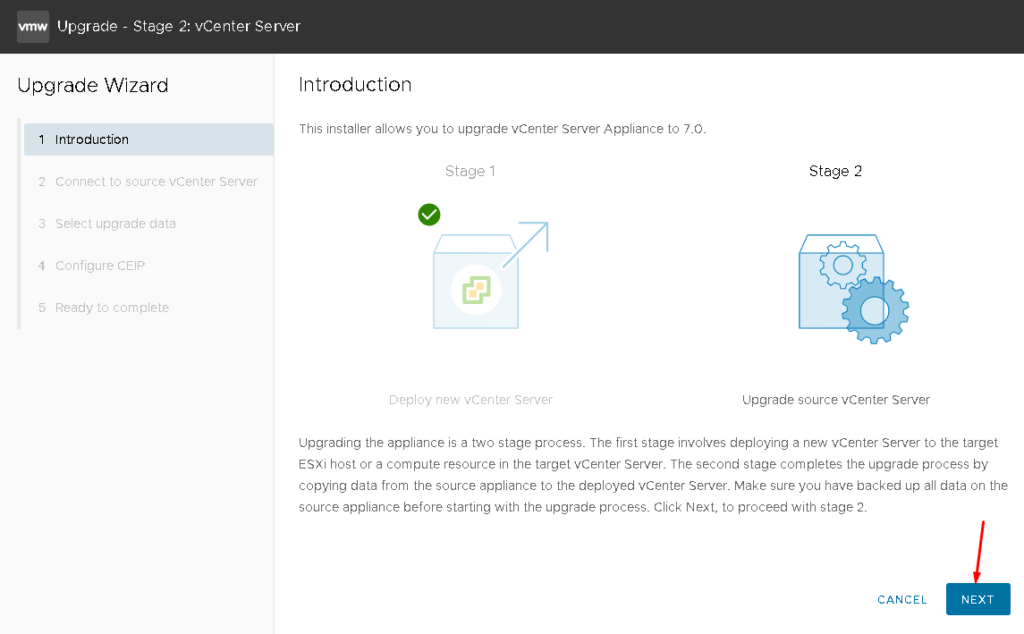
At this point, Stage 1 of the vCenter Server 7 deployment process is OK.
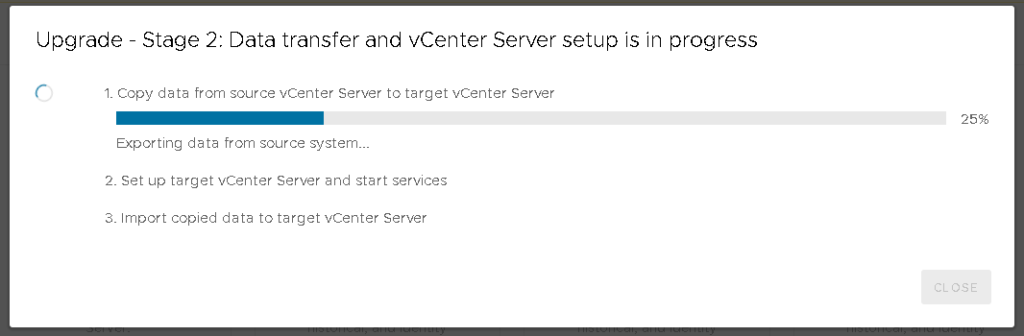
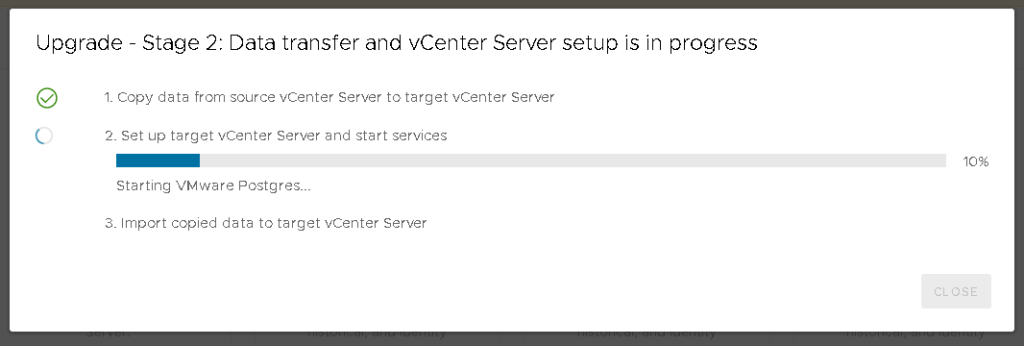
The next step (Stage 2) is upgrading the source vCenter Server to the destination vCenter Server.
The pictures below will guide all processes that are necessary to do it:
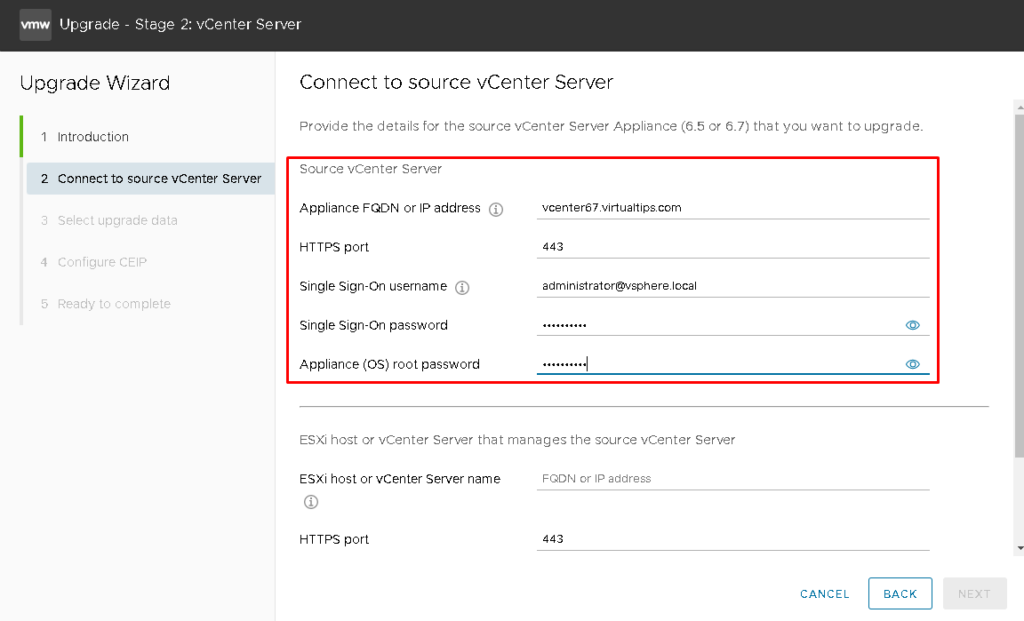
Here, we need to type the source vCenter Server details (vCenter Server 6.7 details):
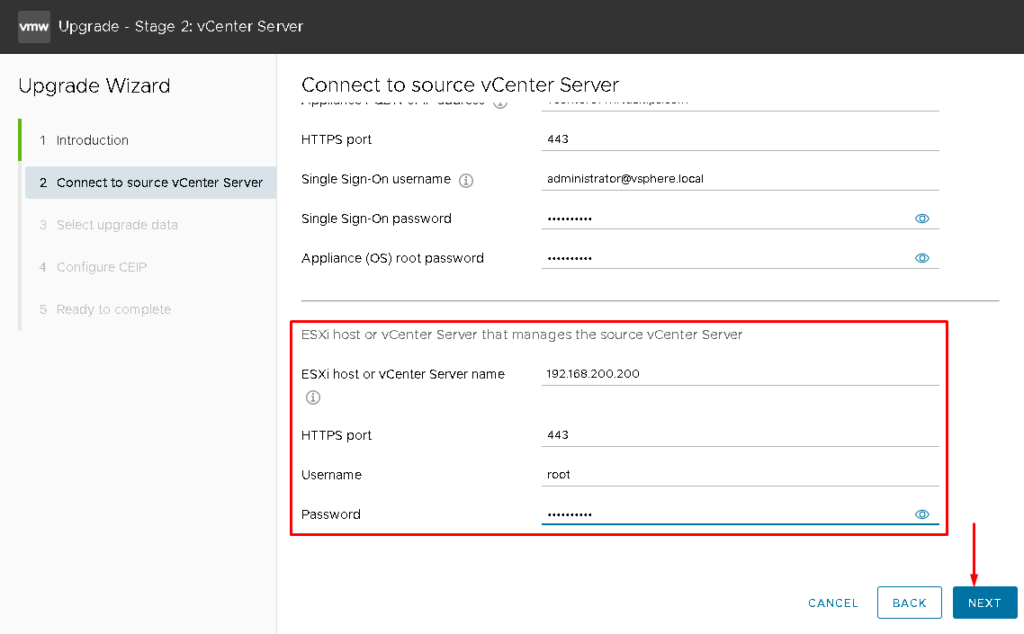
Here, we need to type the ESXi host that manages the source vCenter Server. In this case, the ESXi hosts that run the vCenter Server 6.7 is 192.168.200.200. Click on NEXT to continue:
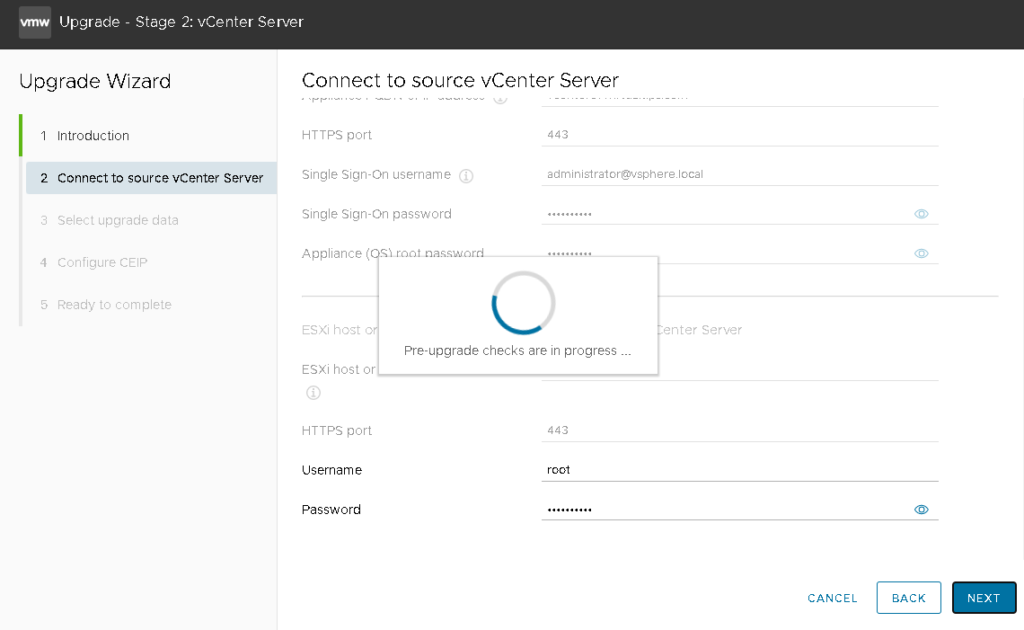
The pre-upgrade check is running. Wait a few seconds while this task is running:
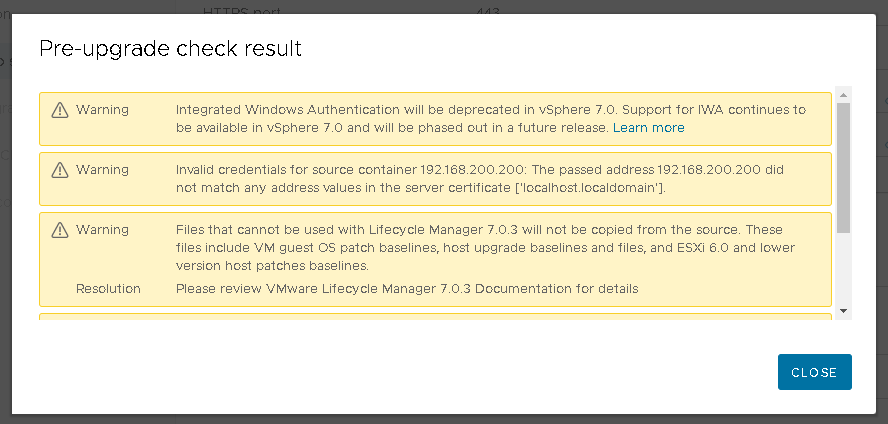
Analyze the pre-upgrade check result with attention. Click on CLOSE to continue:
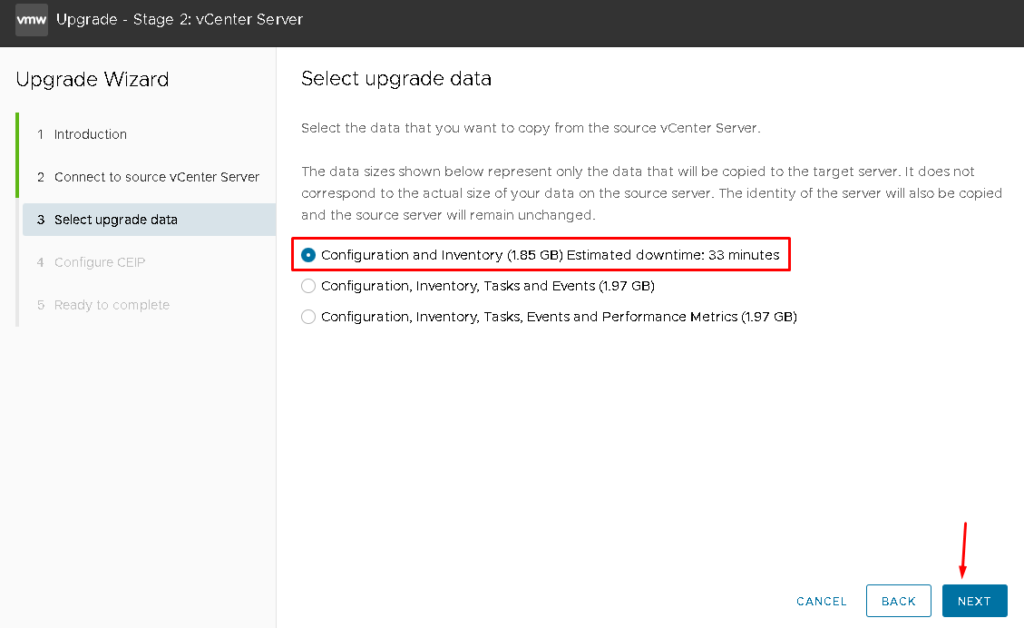
In our case, we will migrate the configuration and inventory data. So, select this option and click on NEXT to continue:
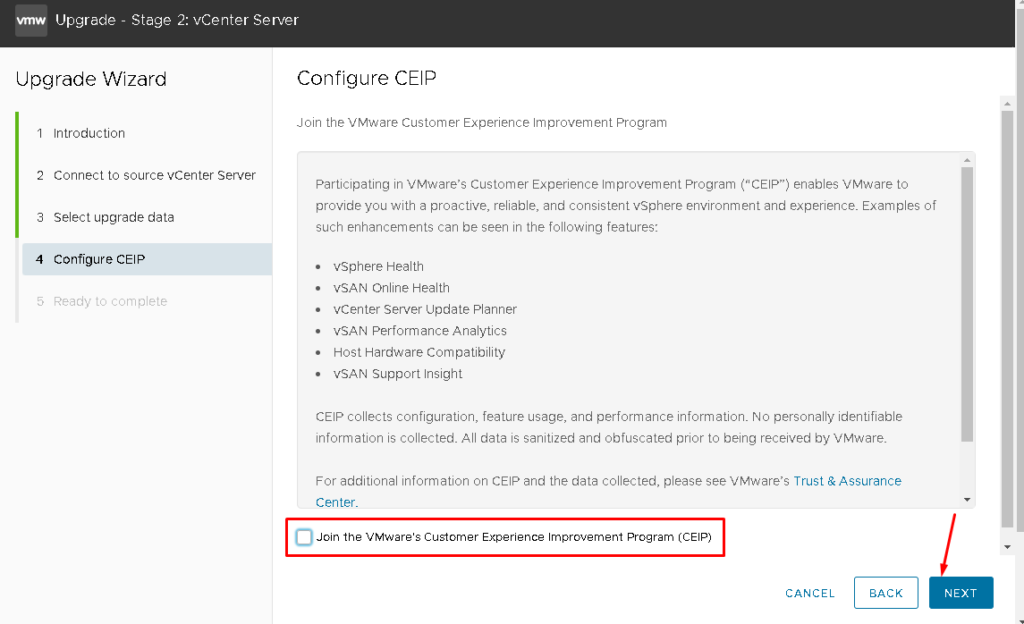
Configuring CEIP is optional. Click on NEXT:
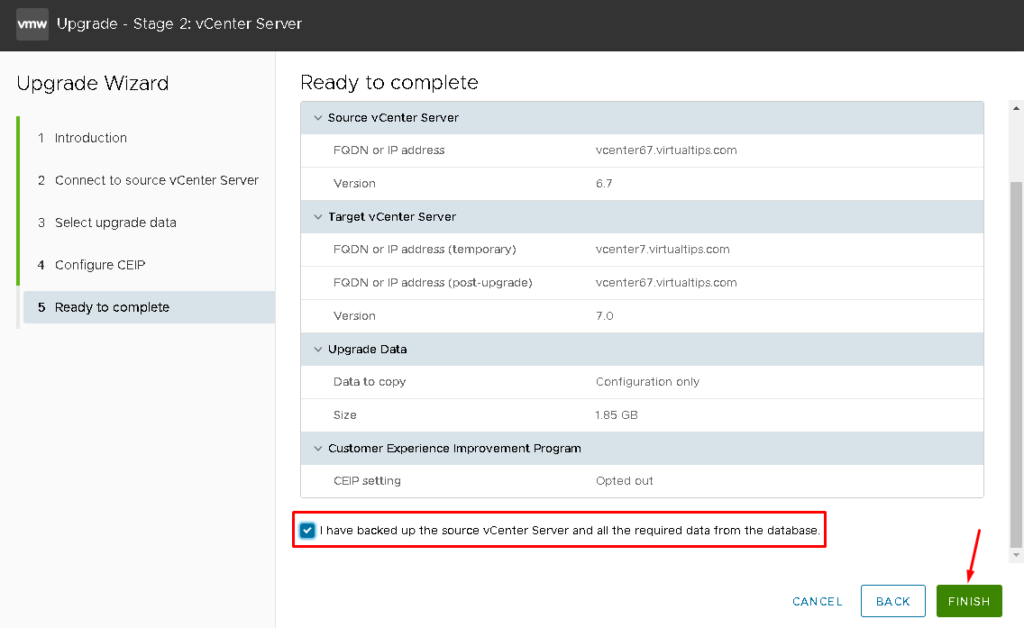
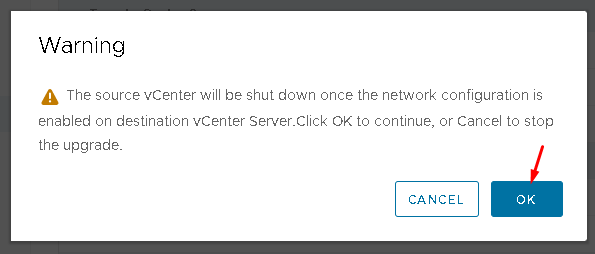
So, click on FINISH to finish the wizard and start the migration process:
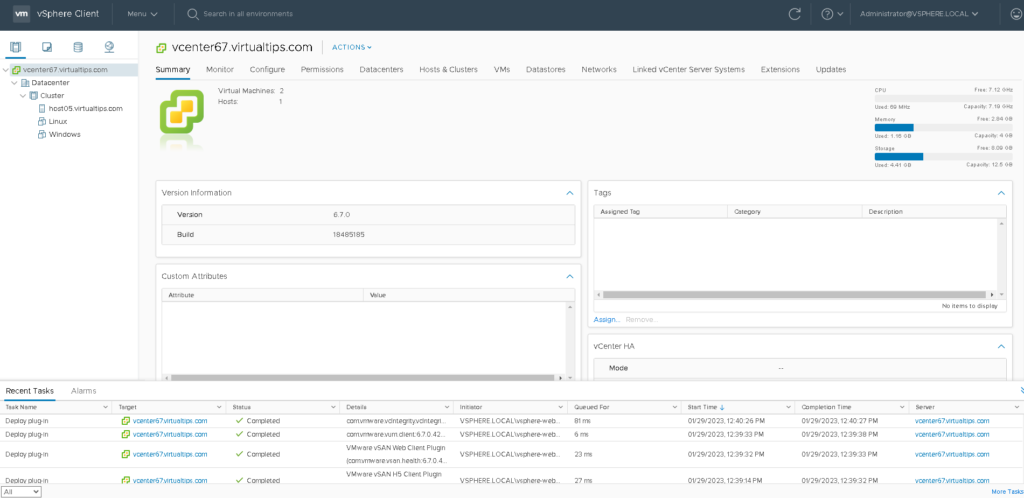
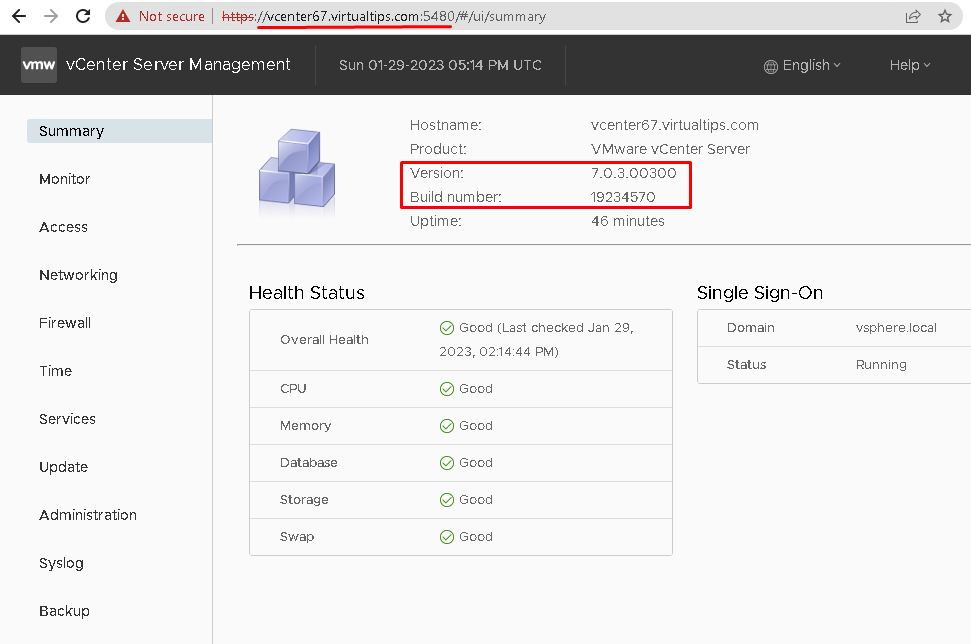
After a lot of minutes, it is possible to access the vCenter Server with the official IP.
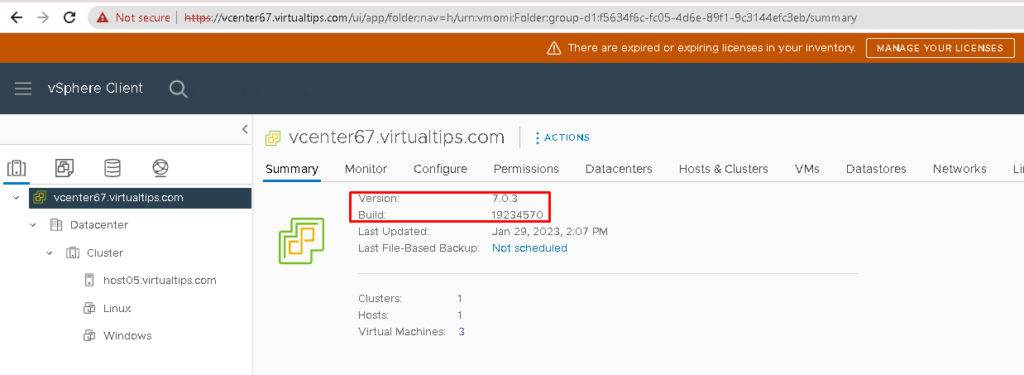
In this case, the vCenter Server FQDN is vcenter67.virtualtips.com. It is possible to see that the upgrade has been finished successfully:
And the VMs are running OK 🙂

Additional links:
Prerequisites for Upgrading the vCenter Server Appliance:
https://docs.vmware.com/en/VMware-vSphere/7.0/com.vmware.vcenter.upgrade.doc/GUID-913F49FC-E0F4-4AEE-8848-A0FE34F05E1D.html
vCenter Server Build Numbers:
https://kb.vmware.com/s/article/2143838
vSphere 7 Update Best Practices:
https://kb.vmware.com/s/article/78205
Updating vCenter Server 6.7 to 7:
https://thesleepyadmins.com/2020/12/23/upgrading-from-vcenter-server-appliance-6-7-to-7-0/