NSX Manager Deployment Steps is an article that explains all steps to deploy the first NSX Manager for an NSX-T Data Center environment.
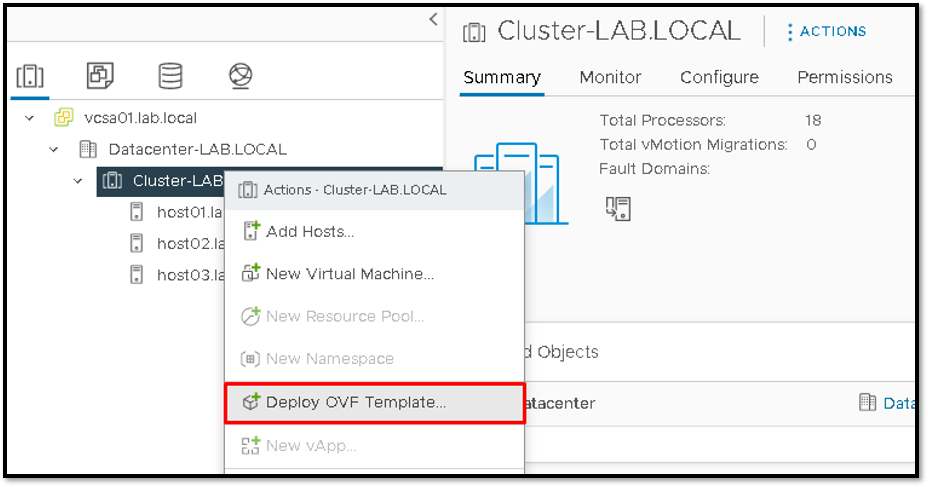
The first step is to deploy the first NSX Manager. In this phase, we need to deploy the NSX Manager from the OVA file. Firstly, select the Cluster –> Right Click on it –> Deploy OVF Template:
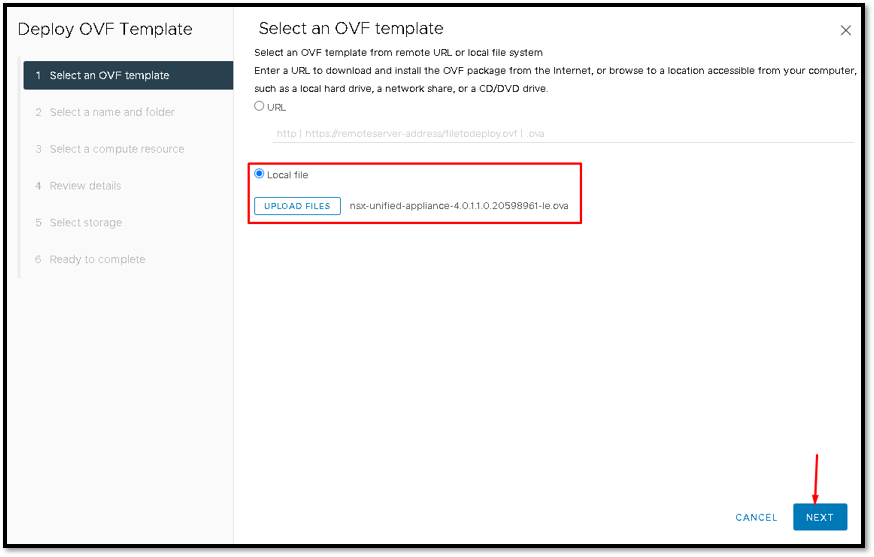
Secondly, select the OVA file and click on NEXT:
Type the virtual machine name and select the location when this virtual machine will be placed inside the vCenter Server inventory and click on NEXT to continue:

Select the compute resource. In our lab, the compute resource name is “Cluster-LAB.LOCAL”:
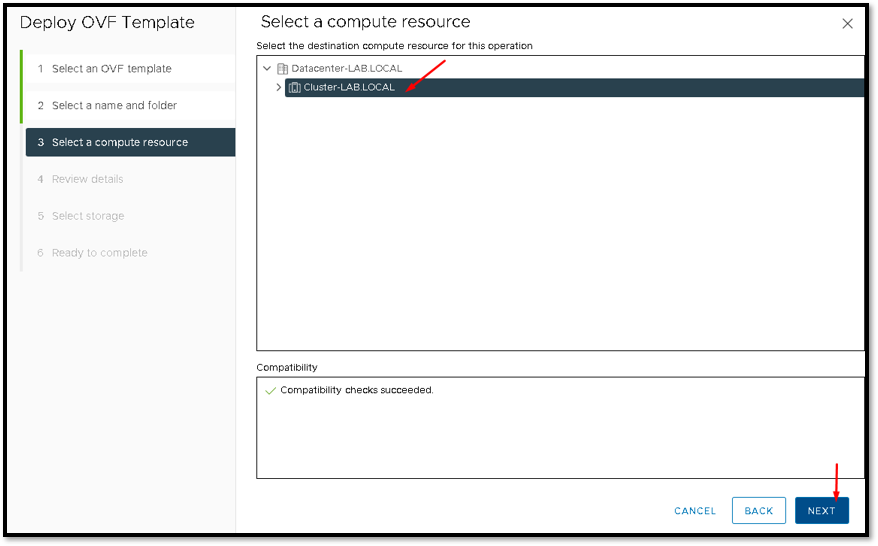
Click on NEXT to continue:
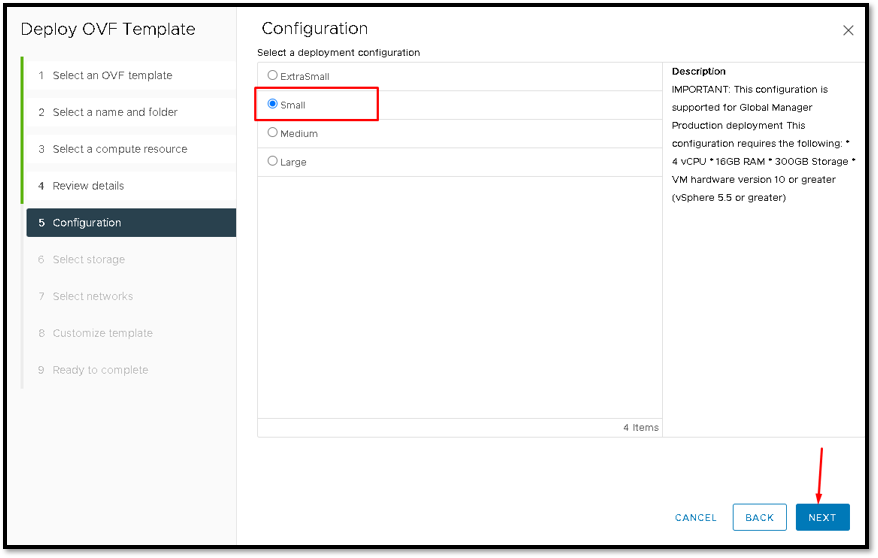
Select a deployment configuration. In this case, we need to choose the deployment size of the NSX Manager. In this case, due to we have our small lab environment, we are using the “Small” size of the NSX Manager.
This type of size requires 4 vCPU, 16GB of RAM memory, and 300GB of Storage space.
After selecting the deployment size, click on NEXT to continue:
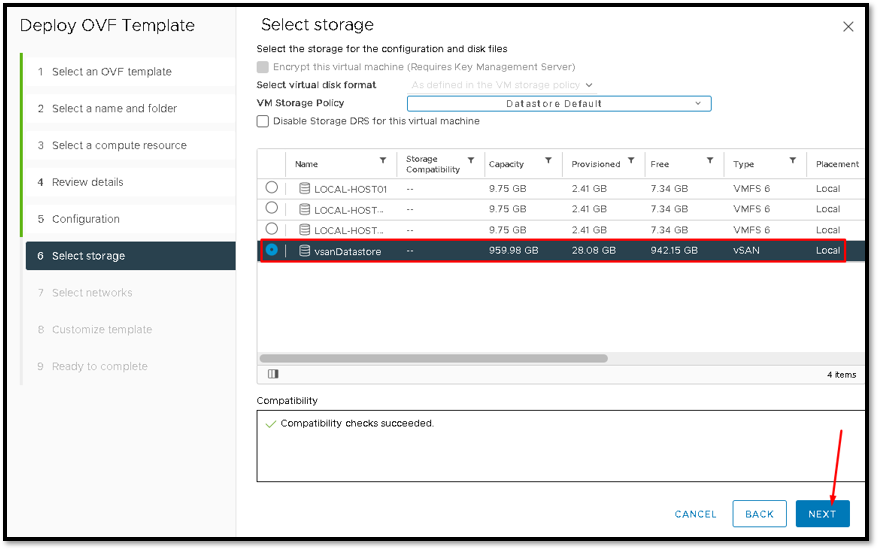
Select the storage to store the NSX Manager VM.
In this case, we are using the vSAN Datastore. Click on NEXT to continue:
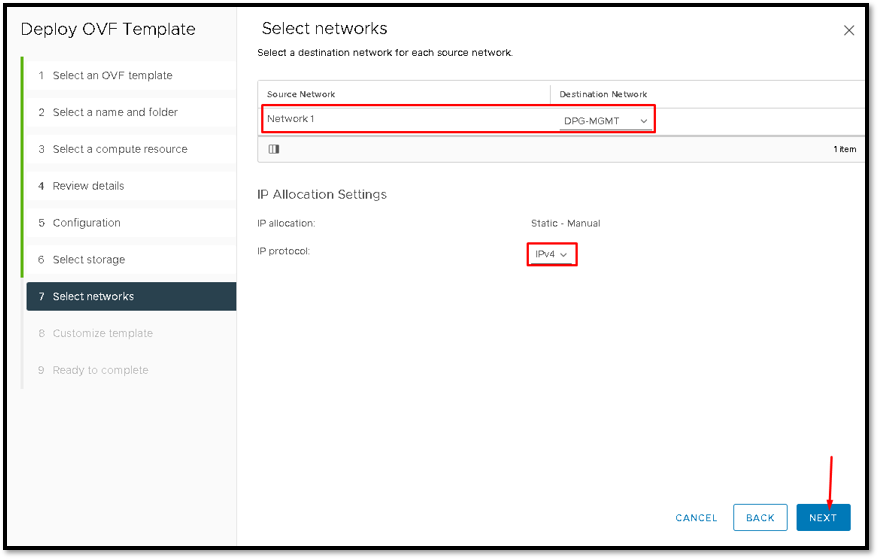
Select what network (Port Group) is for the management network. In our lab, the management Port Group name is “DPG-MGMT”. After that, click on NEXT to continue:
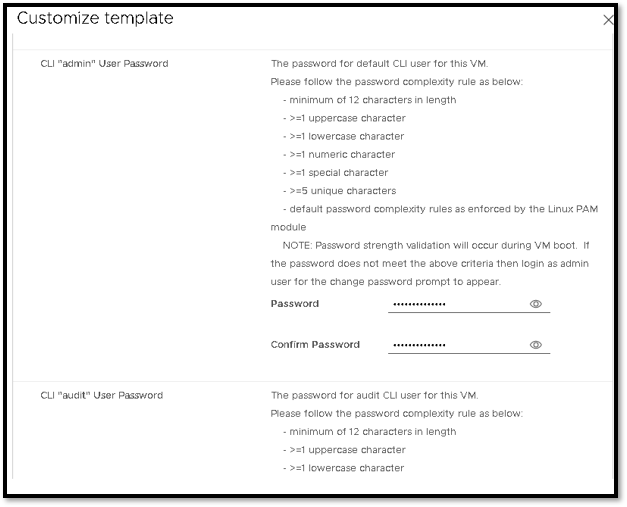
Here, we need to type the GRUB root user password. This password, for example, is used to protect the GRUB access:

After that, we need to type de admin user password:
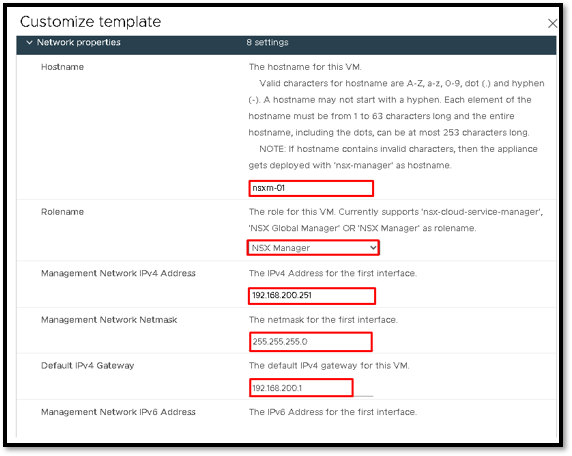
Type the hostname, and select the Role name as NSX Manager, IP, Network Mask, and Default gateway IP:
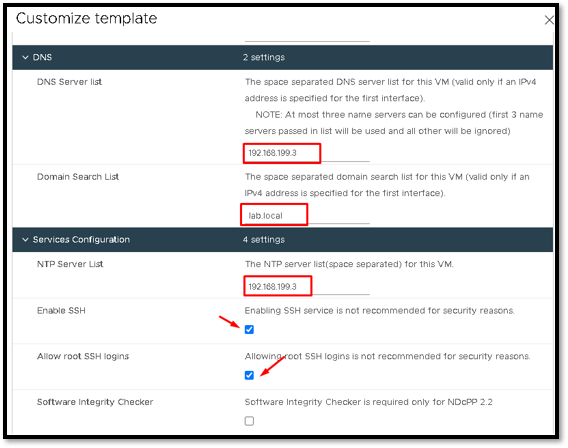
Additionally, type the DNS, Domain search list, and NTP server list.
Also, mark both options: Enable SSH and Allow root SSH logins
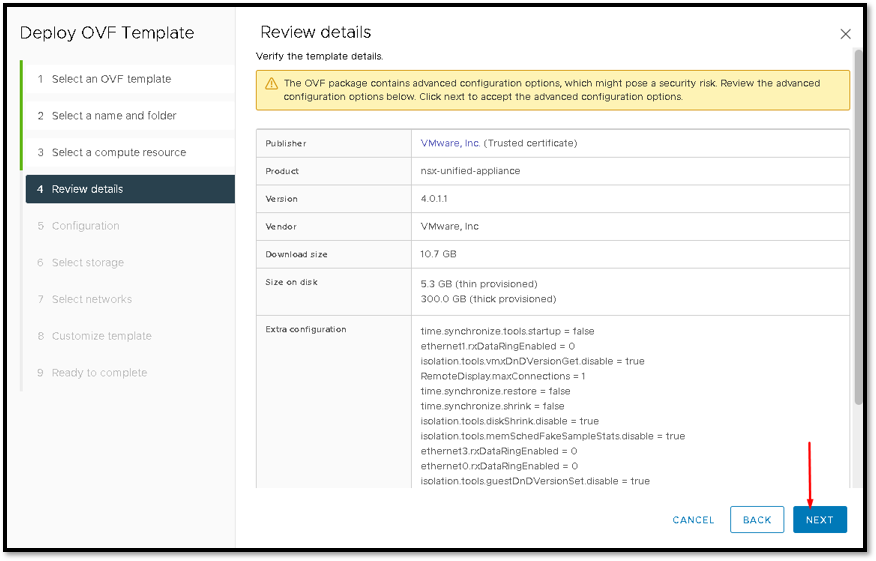
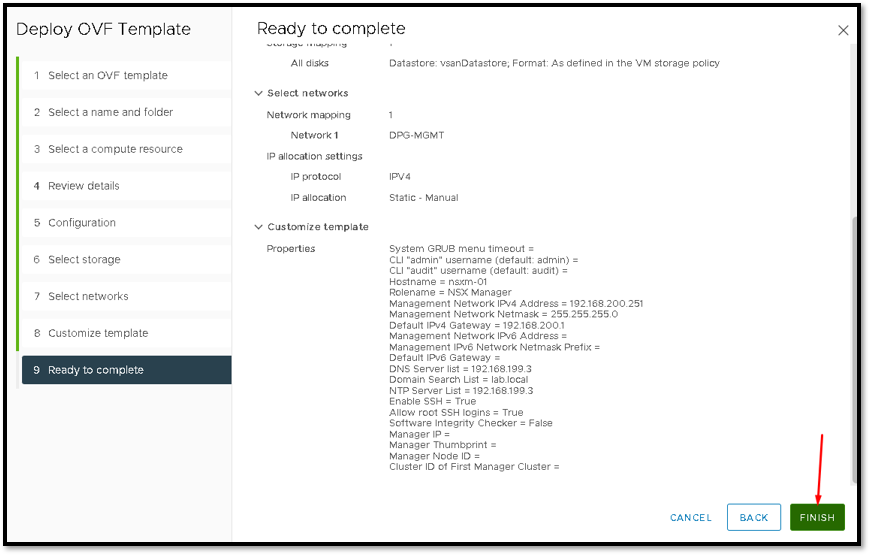
After that, we can see an overview of all configurations that we selected.
Finally, click on FINISH to finish the OVA deployment wizard:
The NSX Manager deployment process is running. It can need a lot of minutes to finish. So, in this case, we need to wait:
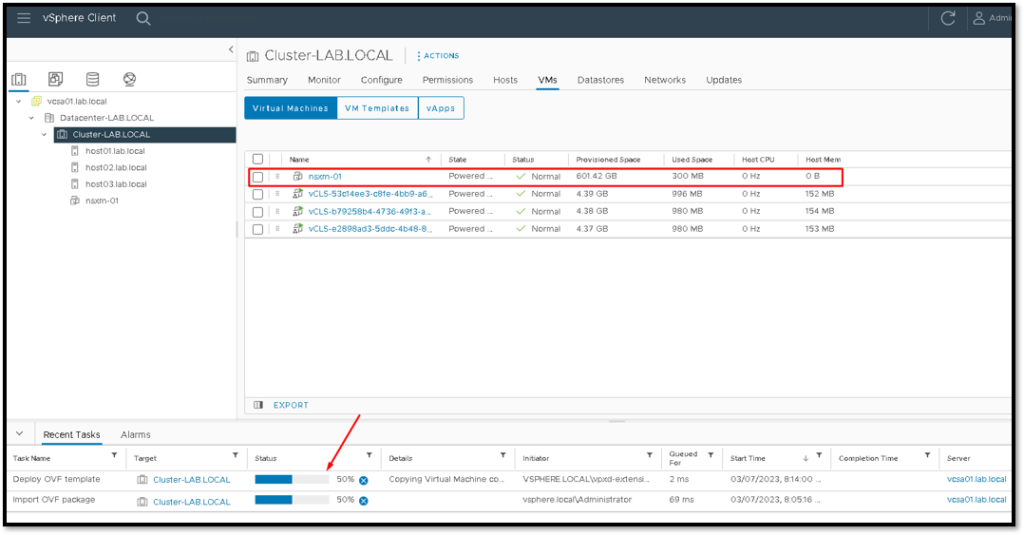
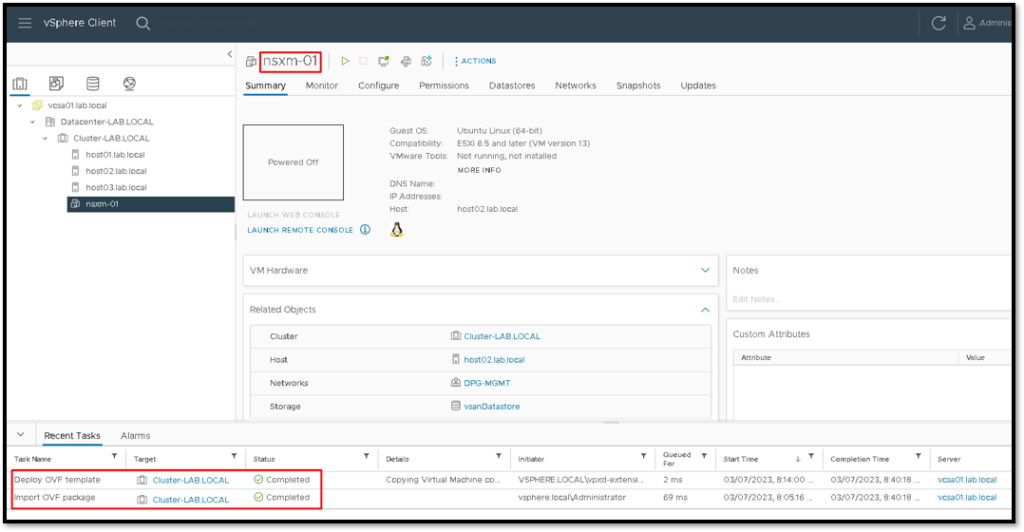
After a lot of minutes, the NSX Manager deployment will be finished and also we can see it on the vCenter Server Recent Tasks:
Select the NSX Manager VM and click on Power ON to power the VM:
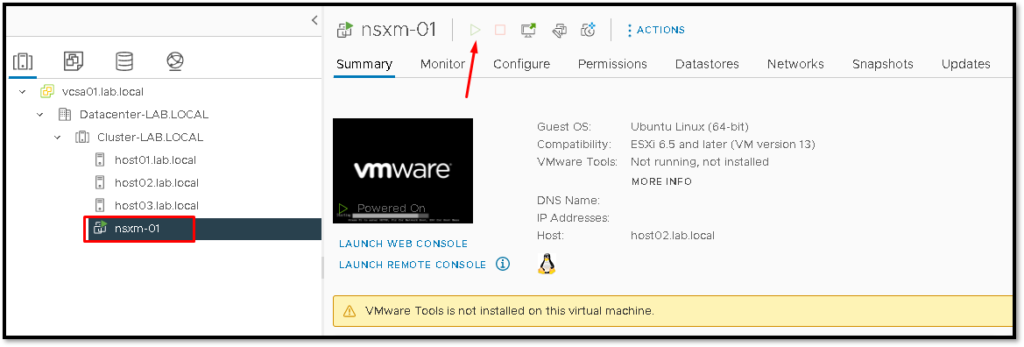
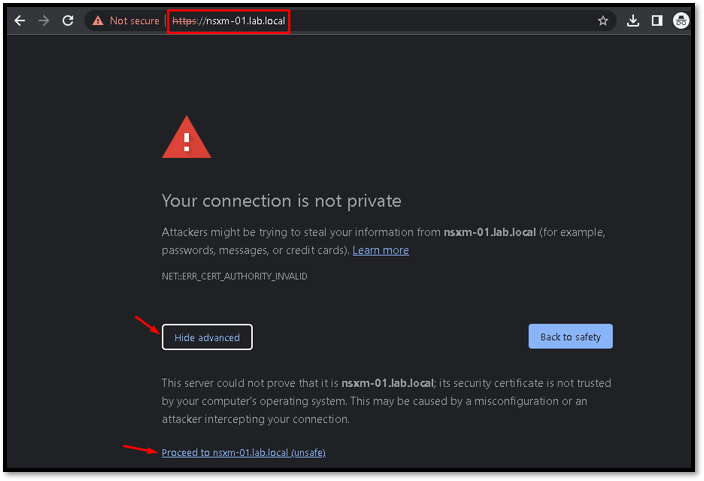
After powering on the NSX Manager VM, it is necessary to wait some minutes while services are being started. To access the NSX Manager UI:
https://nsxm-01.lab.local
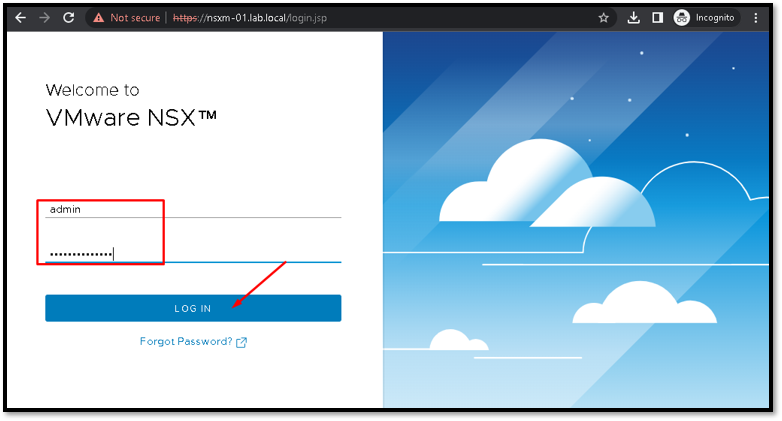
Type the user admin and password defined during the NSX Manager deployment:
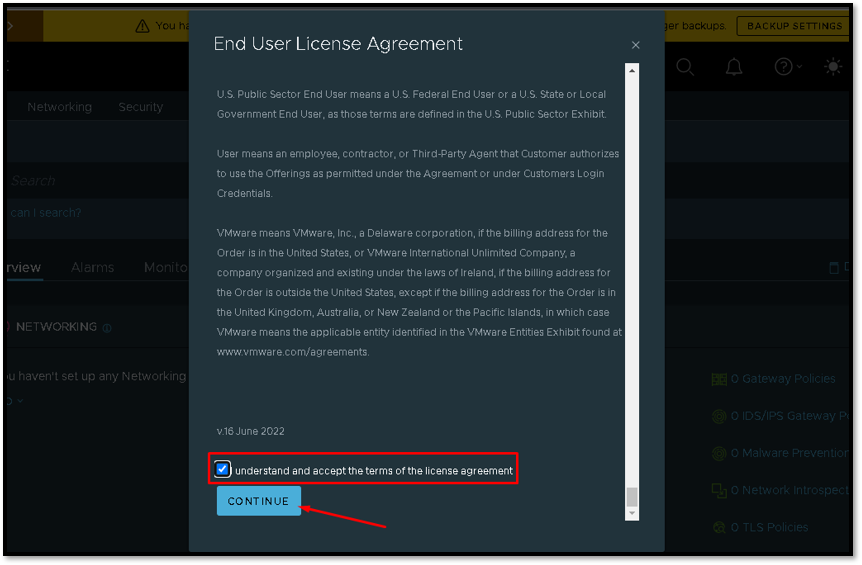
Mark the box “I understand and accept the terms of the license agreement” and click on CONTINUE:
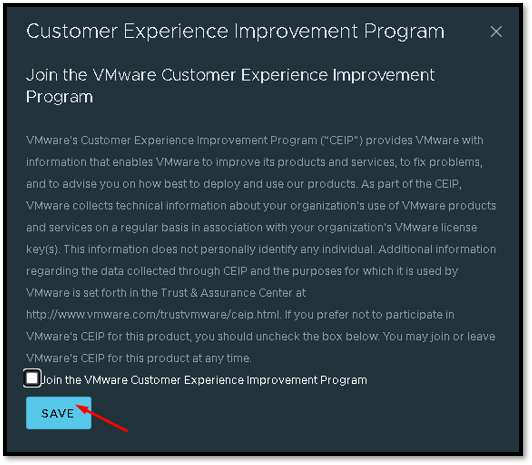
Join the Customer Experience Improvement Program is optional. So, you can mark it or not.
Click on SAVE to continue:

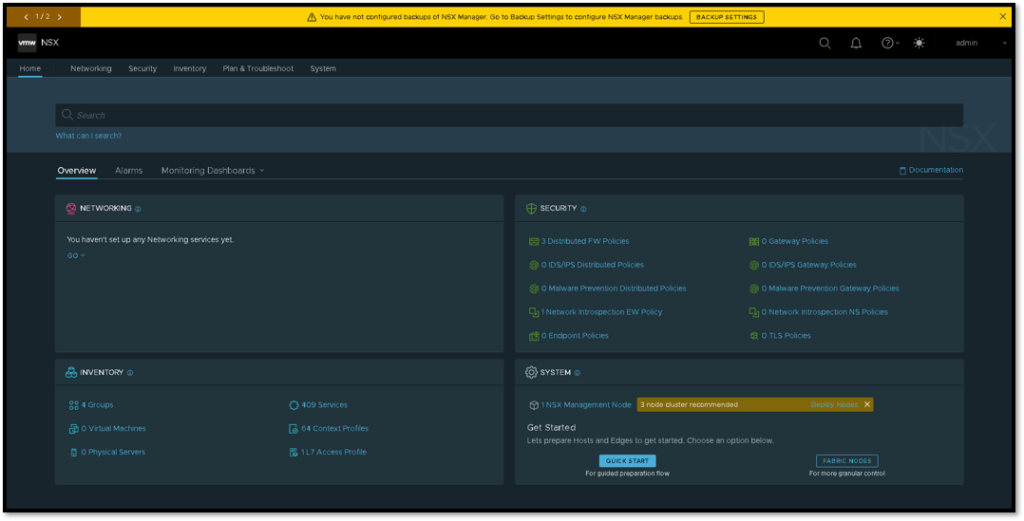
At this point, we have the NSX Manager Dashboard 🙂
So, We can configure all things related to the NSX-T environment:
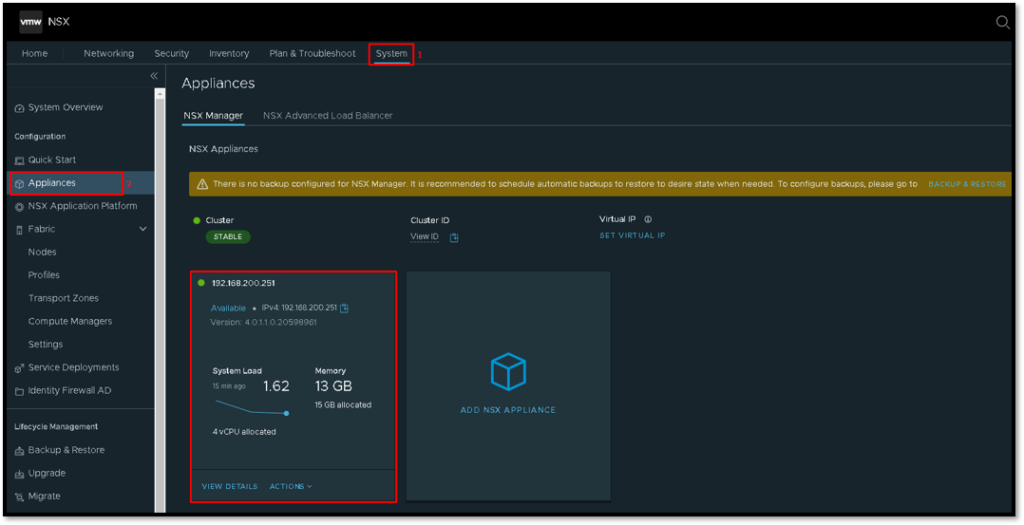
Click on System –> Appliances it is possible to see additional detail about the NSX Manager:
So, to get more detail, follow the below link:
https://docs.vmware.com/en/VMware-NSX-T-Data-Center/3.2/quick_start/GUID-1669F047-97DC-46A9-BD42-61C1ED8EF2C0.html