Configuring NSX Manager Virtual IP is an article that explains how to configure the Virtual IP (VIP) on NSX Manager for redundancy purposes.
If you are interested to know more about NSX-T, we wrote an article that introduces the NSX-T Data Center. Click here to read the article.
Also, we wrote an article that explains how to deploy the NSX Manager. There are two article parts about that. Click here to read the first part and click here to read the second part.
Basically, when we talk about the NSX Manager, the recommendation is to have 3 instances or appliances of the NSX Manager in the environment. This is for redundancy and reliability purposes because the NSX Manager is very important for the NSX-T Data Center architecture.
What is the Virtual IP (VIP)?
VIP is an acronym for Virtual IP. Basically, we can define a single IP to access the NSX Manager (this IP is called VIP or Virtual IP). But, how it works if we have 3 NSX Managers and each appliance has your own IP address?
So, when the VIP is configured on the NSX Manager, the NSX-T administrators can access the NSX Manager GUI through the VIP address, and the connection will redirect to the NSX Manager elected as a “Leader” or “Master”.
We have 2 types of VIP configuration on the NSX Manager:
- We can use the VIP built-in on the NSX Manager
- or we can use an external Load balancer appliance to balance the connections (we will explain it later)
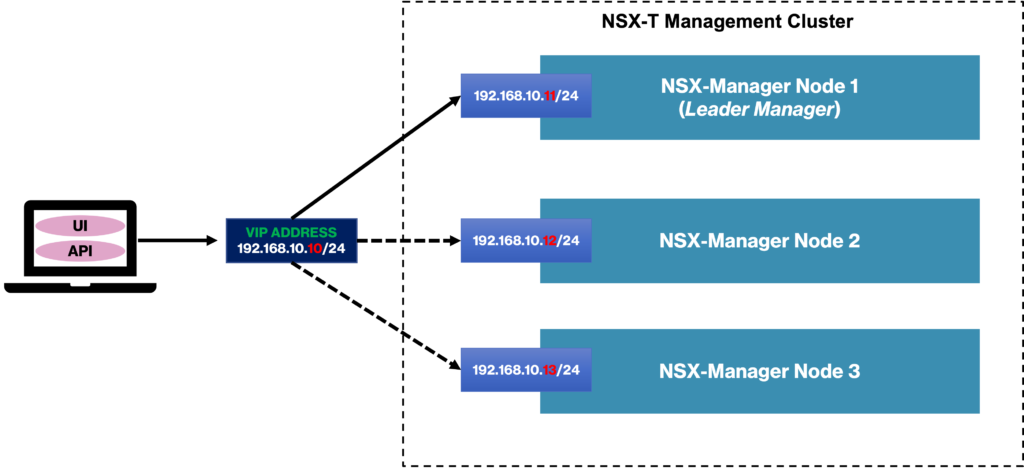
In the below picture, we are explaining how to work when we are using the NSX Manager internal VIP configuration. When we use this configuration, one NSX Manager appliance is elected as a Leader and all connections to the VIP address will be redirected to the NSX Manager “Leader”appliance. If the Leader appliance will be unavailable, the next available NSX Manager will be a Leader.
Note: For this configuration, all IP addresses are necessary to be on the same L3 subnet. This is a requirement:
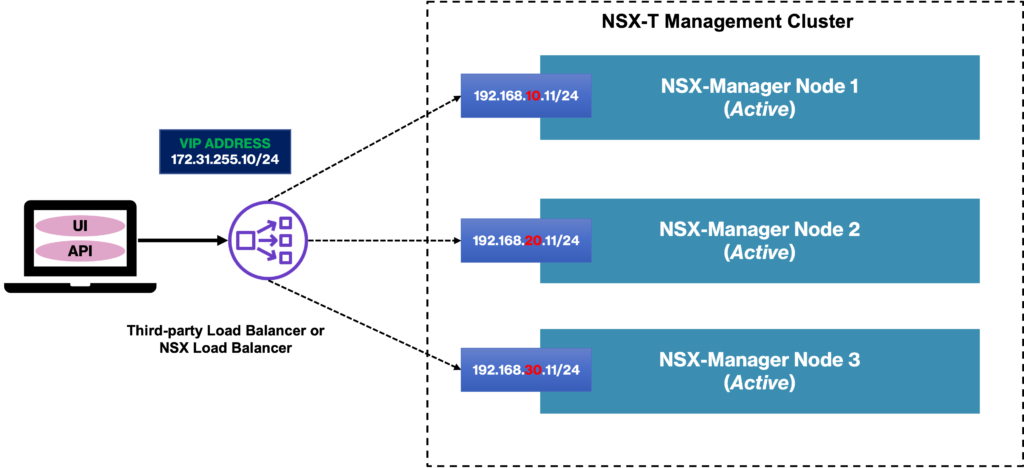
The another supported configuration is to use an external load balancer, as showed in the below picture. In this configuration, the load balancer appliance is responsible to handle the connections to the VIP address and redirect it to each NSX Manager, based on internal and configurable algorithms.
Note: For this configuration, the VIP address can be on a different L3 subnet:
Important: Even when we are using the VIP configuration, we can access each NSX Manager directly. There is no requirement for access only by the VIP address!
Enabling the VIP on the NSX Manager
In this example, we will configure the NSX Manager to use the internal “built-in” VIP available on the NSX Manager.
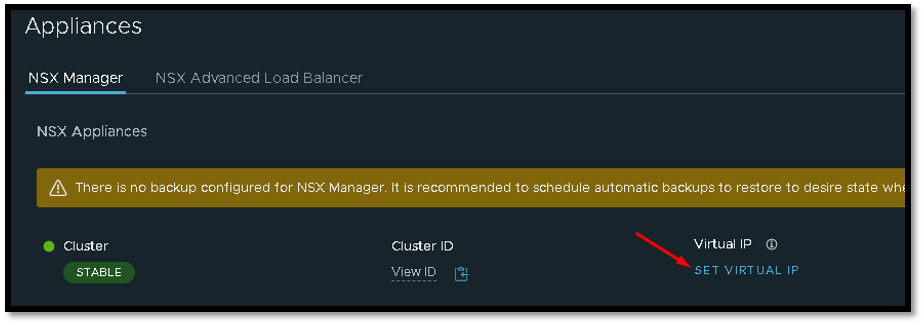
We can access the NSX Manager, under System –> Appliances and then we can click on “SET VIRTUAL IP”:
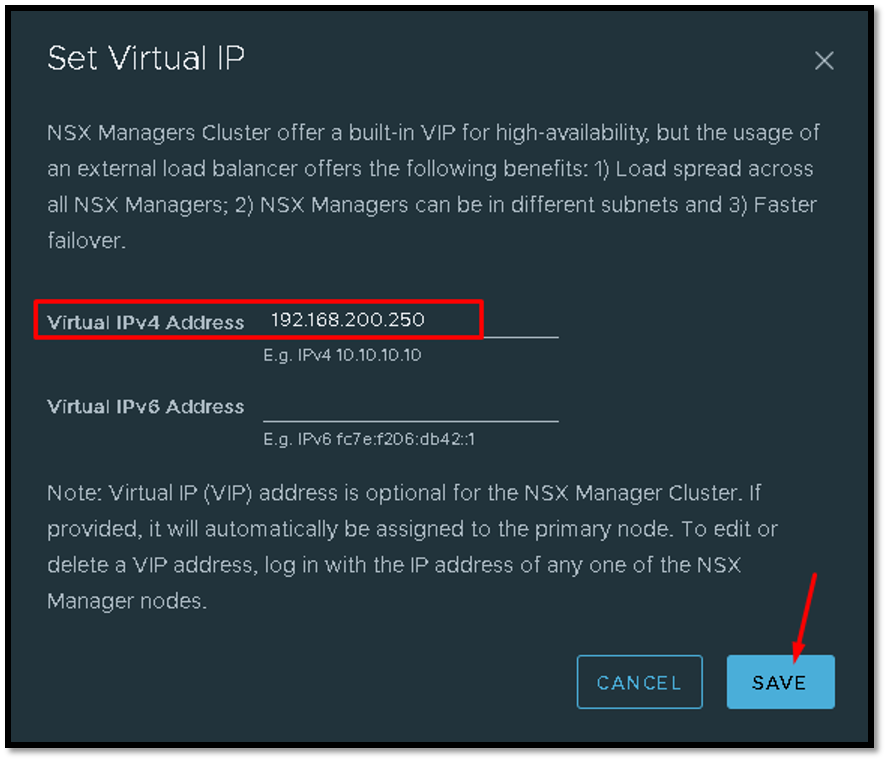
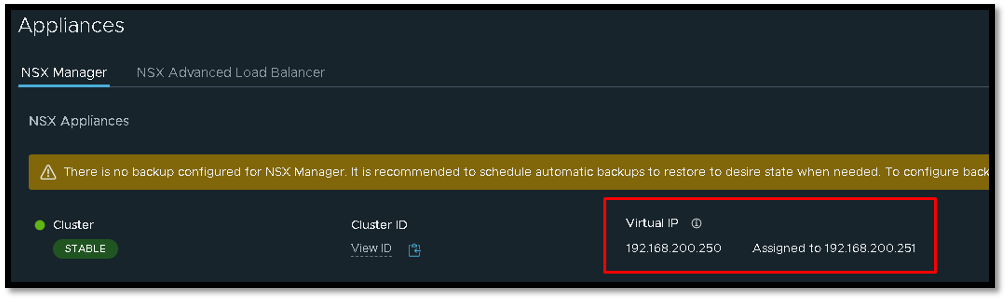
In this example, we are using the IP 192.168.200.250 for the VIP address:
After that, we can see the VIP IP and what NSX Manager appliance was defined as a “Leader”. In this example, the information “Assigned to 192.168.200.251” is the IP address of NSX Manager Leader:
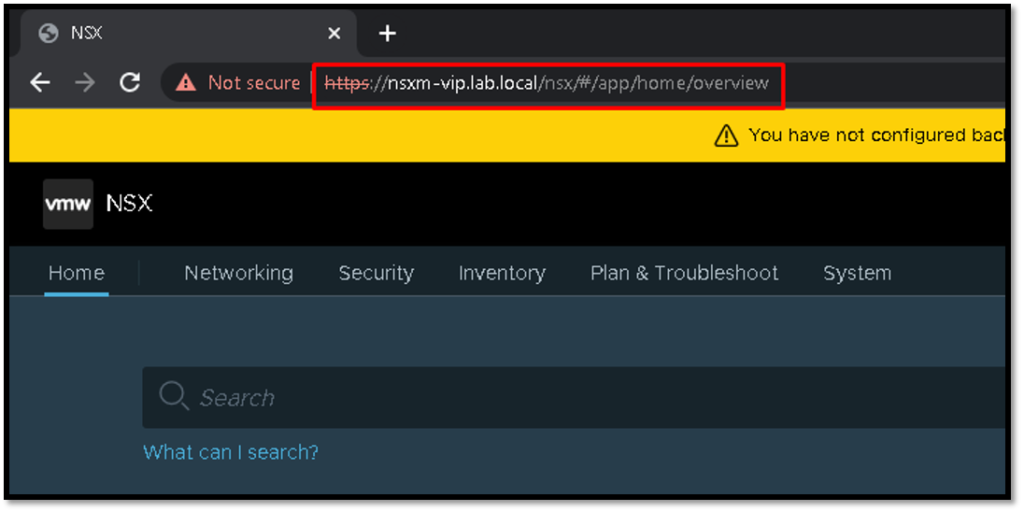
So, we can access the NSX Manager through the VIP address.
In this example, the FQDN “nsxm-vip.lab.local”resolves to the VIP IP address (you can create the entry in your DNS server to achieve that) 🙂
You can get more detail about that in the below link:
https://docs.vmware.com/en/VMware-NSX-T-Data-Center/3.2/installation/GUID-A8DF27CC-B3A6-45F2-856D-4278A7DBC98E.html