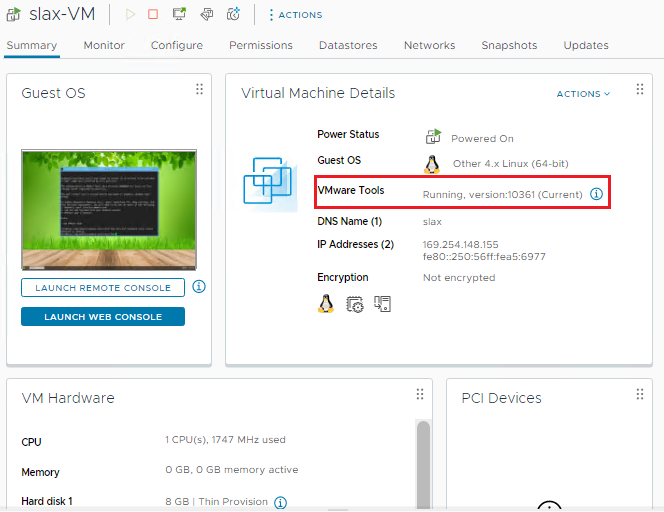
Installing Slax in a Lab Environment is an article that explains how to install the Slax OS in a Lab Environment. Slax is a live OS, based on Linux, very tinny and we can use it for tests or other related actions. Besides Slax is a Live OS system, we can install it on a disk to boot directly from the disk. We will show how we can do that 🙂
To know more about Slax, I would like to recommend the below link:
https://www.slax.org/introduction.php
I am used to using Slax in lab environments to simulate VMs, do networking tests between VMs, and other related tests.
Nowadays, we have two choices for Slax:
— Slax based on Slackware Linux
— Slax based on Debian Linux
Getting Slax
In this lab, we are using the Debian-based version. To download the Slax .iso file, access the below link:
https://www.slax.org/#getslax

After that, select your best processor architecture. We are using the 64-bit option:

Now, you need to select the best option for you. In our case, we are selecting the option “Download Slax for a free CD or USB yourself…”:

Click here to download without providing your email
Creating a Virtual Machine to install Slax
In our lab environment, we are using vSphere 8. Firstly, we need to create the Virtual Machine.
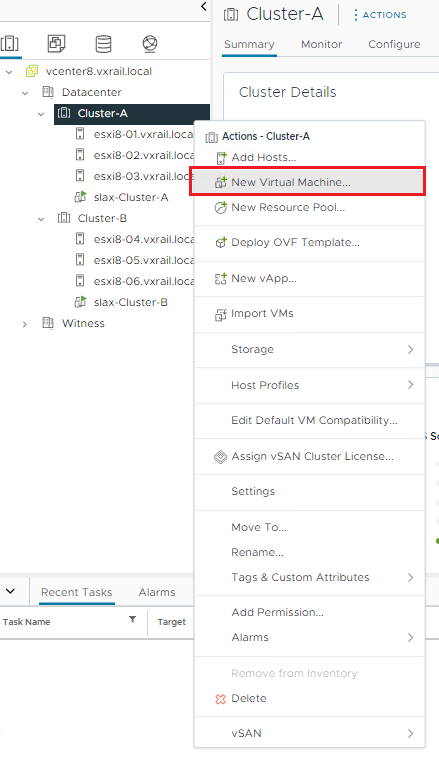
Select the cluster object –> Right-click on it –> New Virtual Machine:
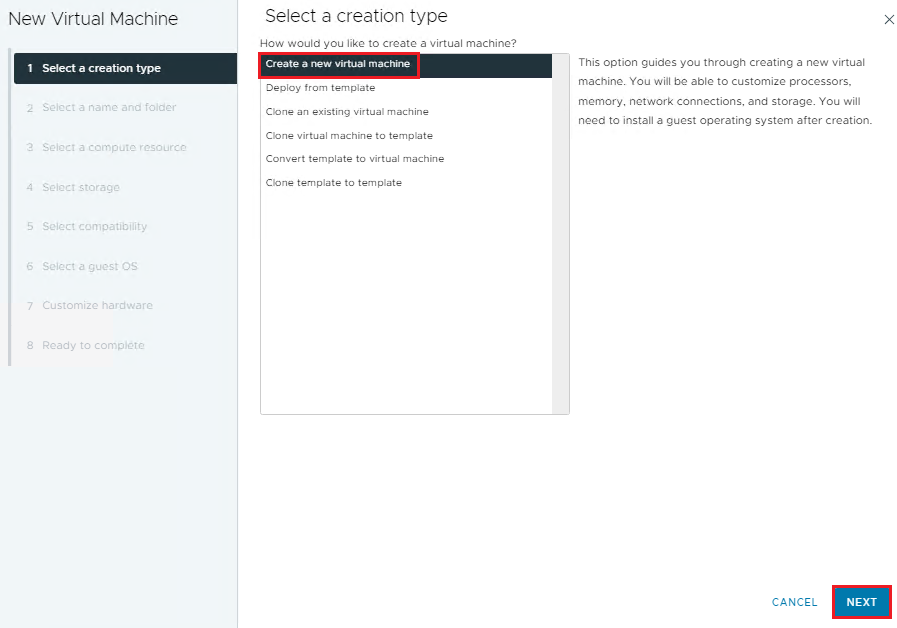
Click on “Select a new virtual machine” and then click on NEXT:
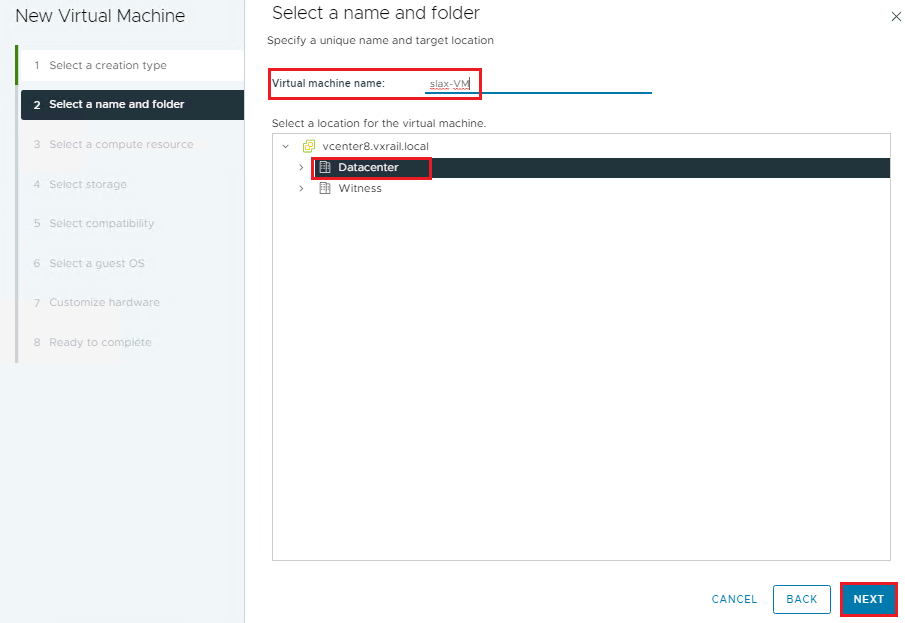
Type the Virtual Machine name. In this example, the VM name is “slax-VM”.
Select the datacenter object and click on NEXT to continue:
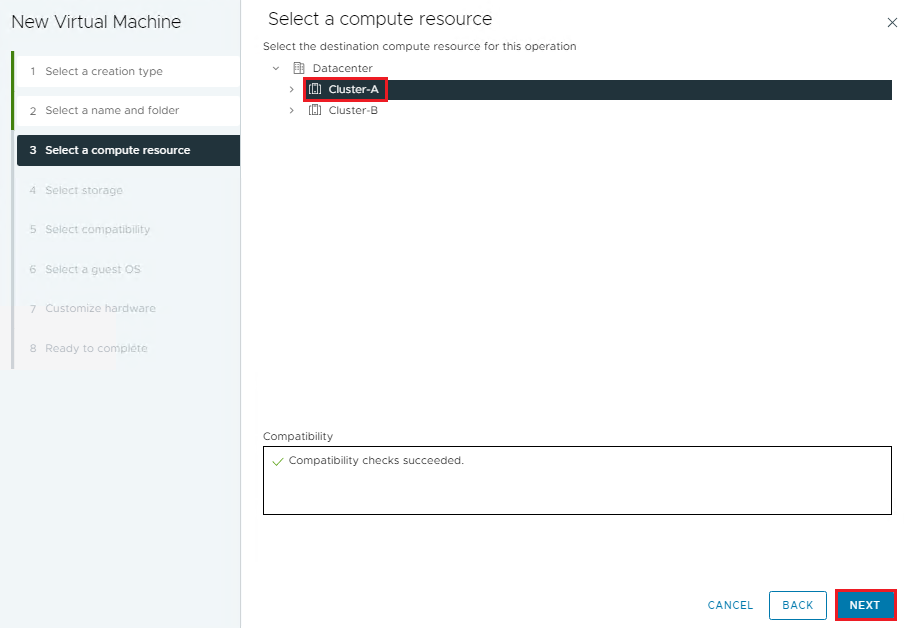
Select a compute resource that this VM will use. In this example, we have two clusters in our lab environment. We are using the “Cluster-A”. Click on NEXT to continue:
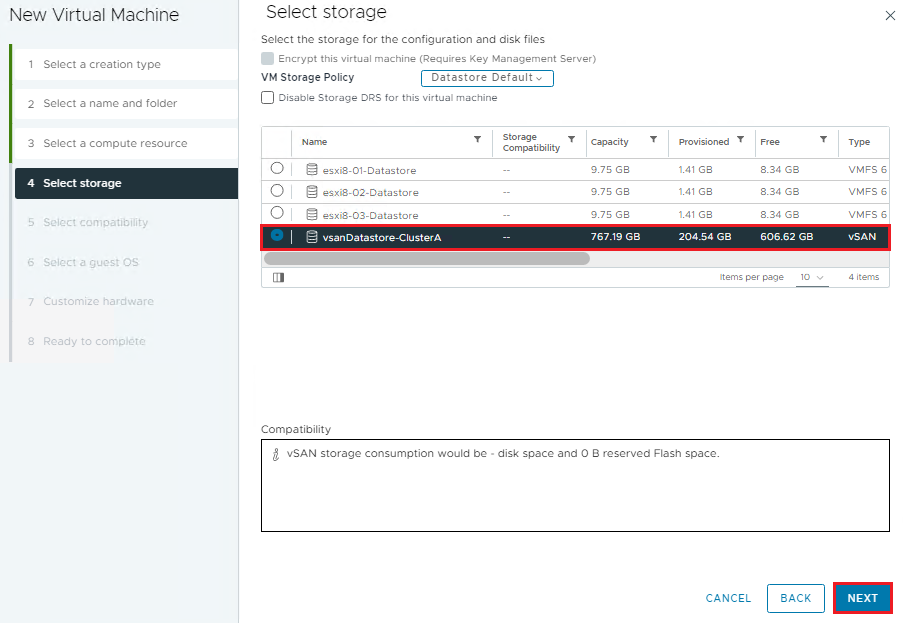
Select the datastore. Click on NEXT to continue:
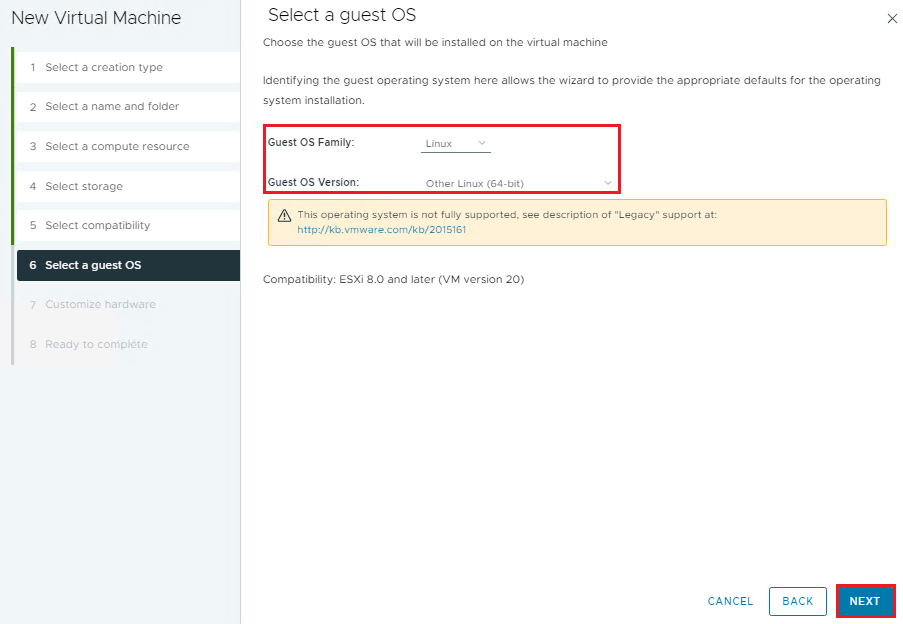
Now, we need to select the Guest OS family and version:
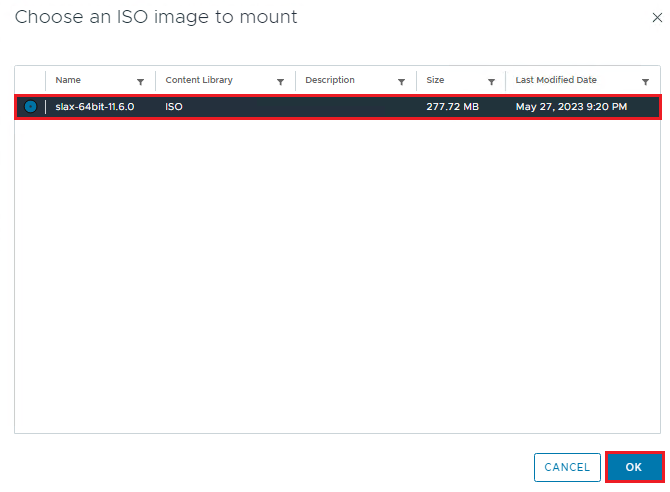
The Slax installation file (.iso) is placed in a Content Library. Here, we need to select the file inside the Content Library:
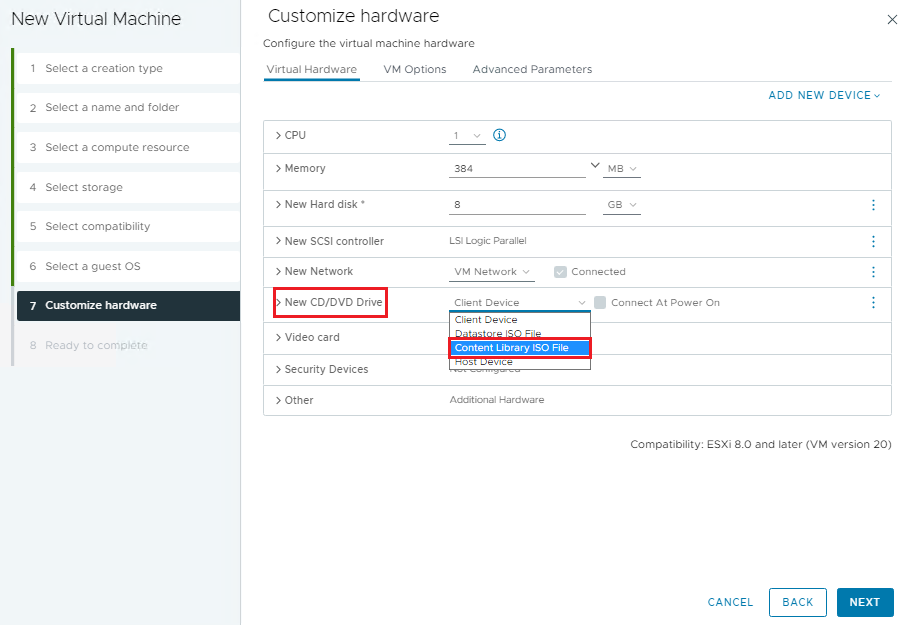
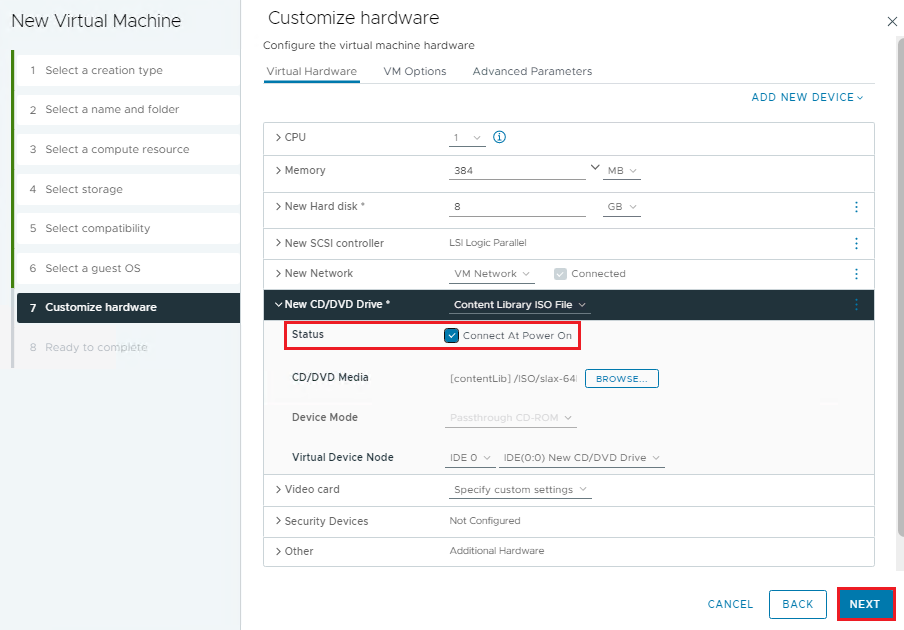
After that, under New CD/DVD drive, mark the option “Status –> Connect At Power On” and click on NEXT to continue:
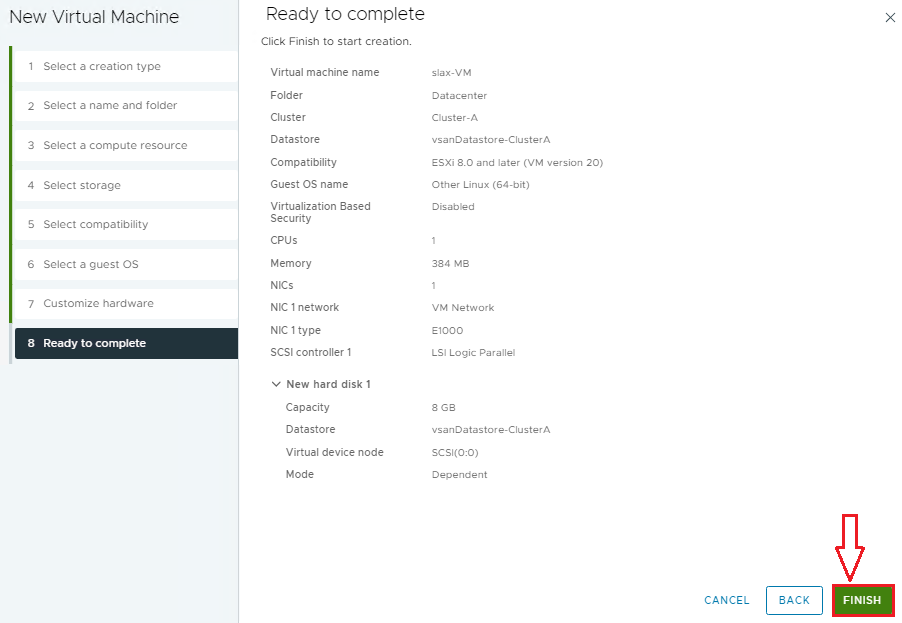
Click on FINISH to finish the VM creation wizard:
Power on the Slax VM:
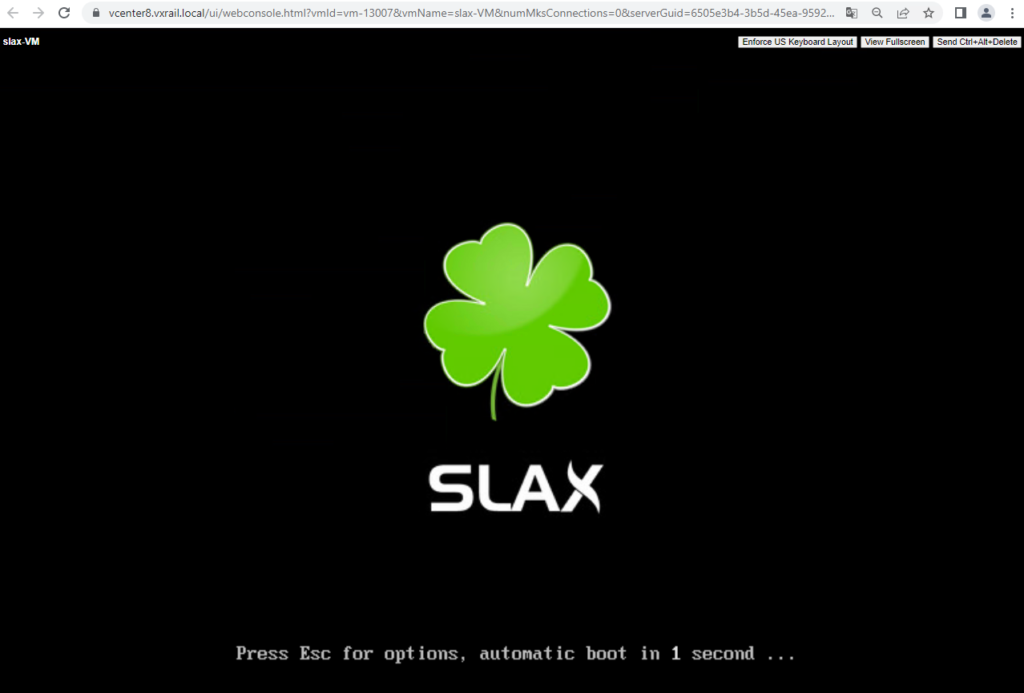
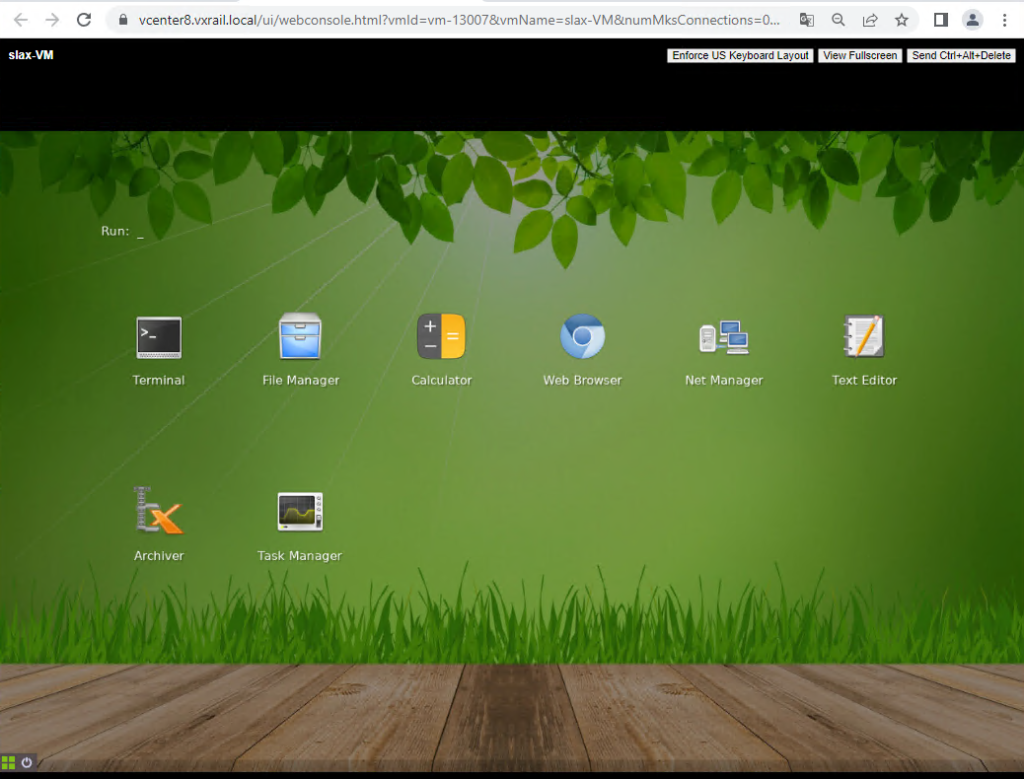
Here, our Slax VM is working 🙂
But remember that we did not install the Slax on the disk. We are executing Slax over Memory (Live OS). Any configuration change or something like that will be lost if the VM is rebooted or powered off:
Creating the disk partition to install Slax on the disk
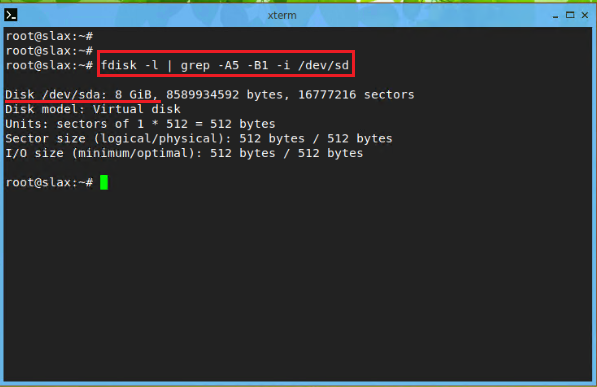
Open the Terminal. We need to identify what identification was given to the physical disk.
The command below can help it:
fdisk -l | grep -A5 -B5 -i /dev/sd
In this example, we have only one disk in this VM. So, this disk is identified as /dev/sda with 8GB of size:
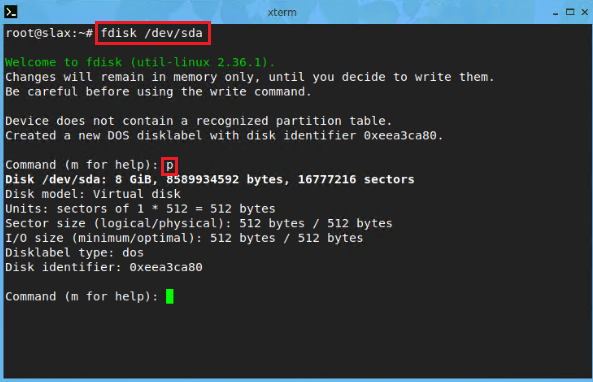
In the next pictures, we are showing how to use the fdisk tool to create the partition inside the disk /dev/sda (in your case, follow these steps based on your disk identification):

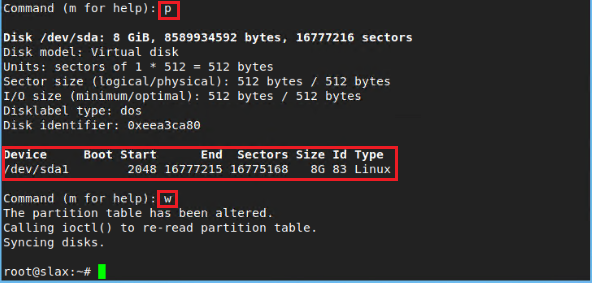
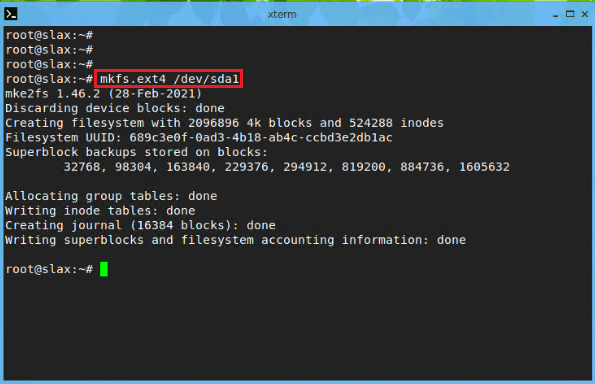
After creating the disk partition with the fdisk tool, we need to create the file system inside this partition. In this example, we are creating an EXT4 file system:
mkfs.ext4 /dev/sda1
Installing Slax on the disk
To install and boot the Slax OS from disk, we need to follow the below steps.
First, we need to copy the “slax” directory to the disk partition that we created before:
cp -Rap /media/sr0/slax /media/sda1/
Where:
/media/sr0/slax –> Source directory mounted by the Slax .iso file
/media/sda1 –> Target directory on the disk partition

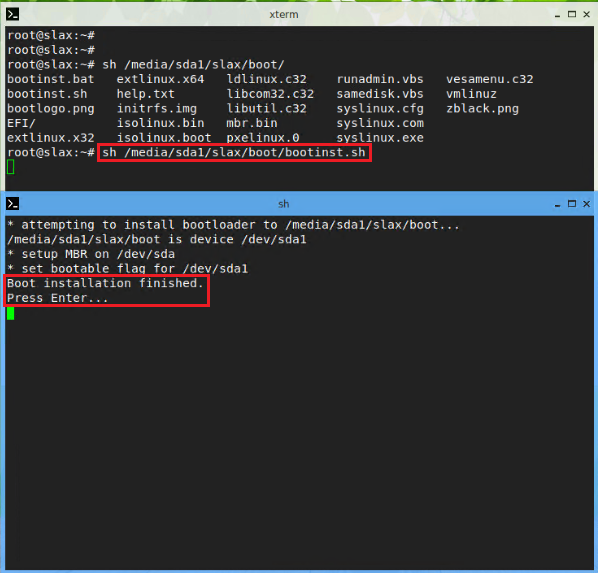
Next, we need to install the bootloader on the disk partition. We need to execute a shell script to do it:
sh /media/sda1/slax/boot/bootinst.sh
Look that in this case, the target shell script “bootinst.sh” is placed on the disk partition (not in the .iso mount directory).
After executing the shell script, type ENTER to continue:
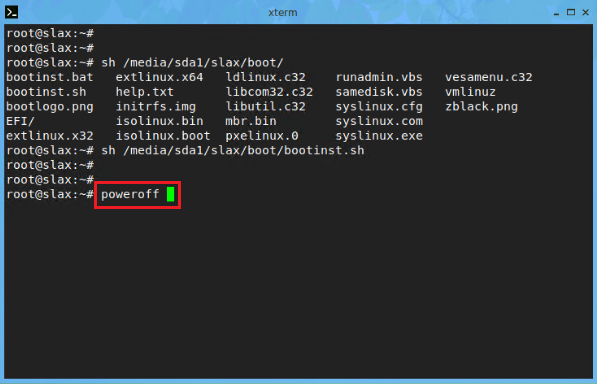
Power off the Slax and configure it to boot from the disk:
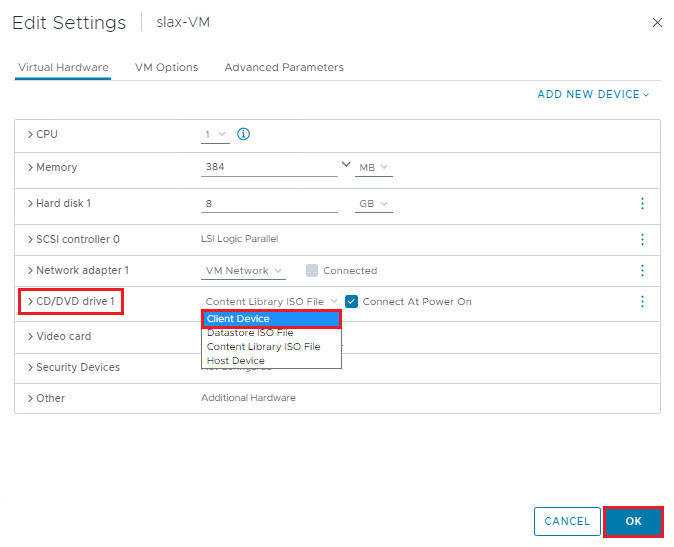
After the Slax OS is powered off, click on Edit settings and change the CD/DVD drive 1 to “Client Device”:
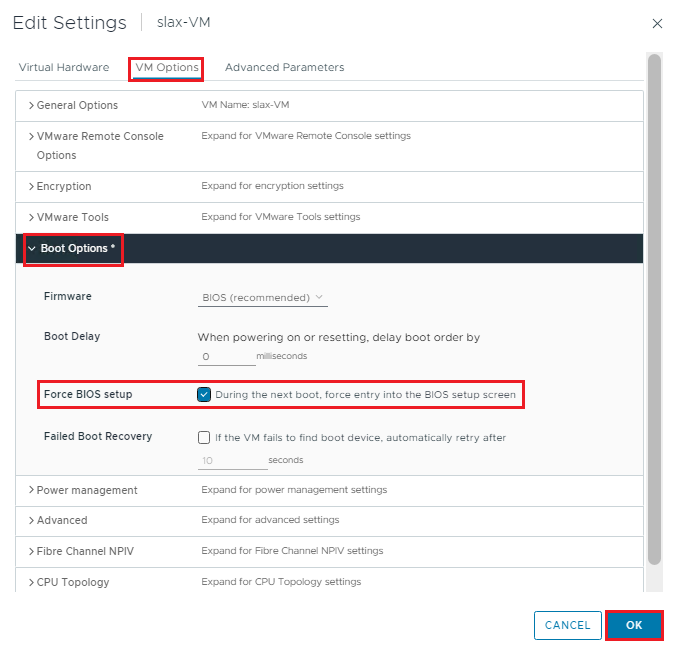
Under the VM Options tab, expand the Boot Options and mark the option “Force BIOS setup”.
Power on the VM again. The BIOS setup will enter automatically:
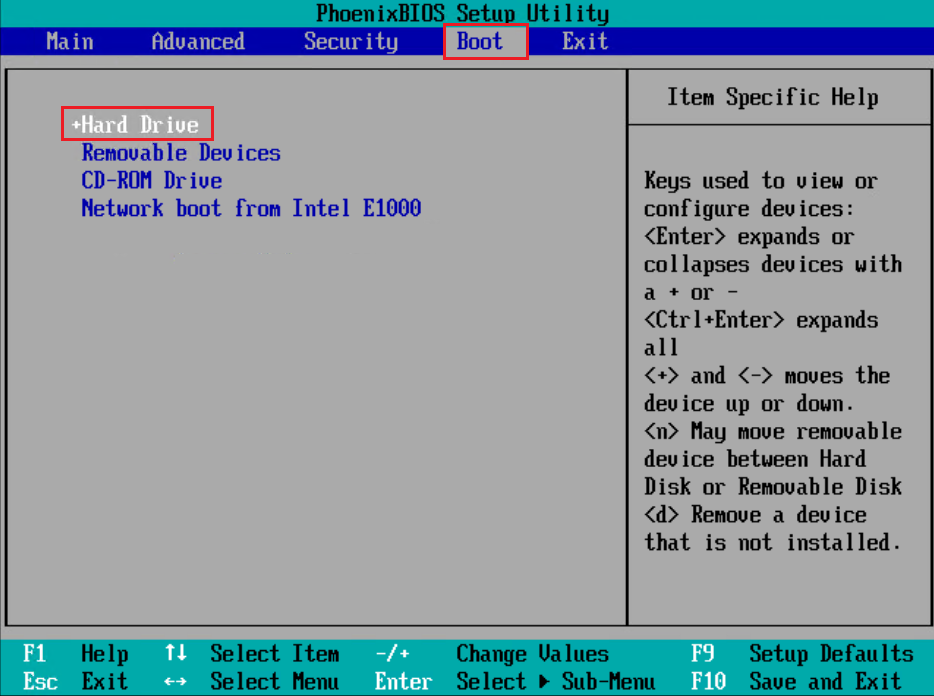
Under the Boot menu, select the Hard Drive as a primary in the list:
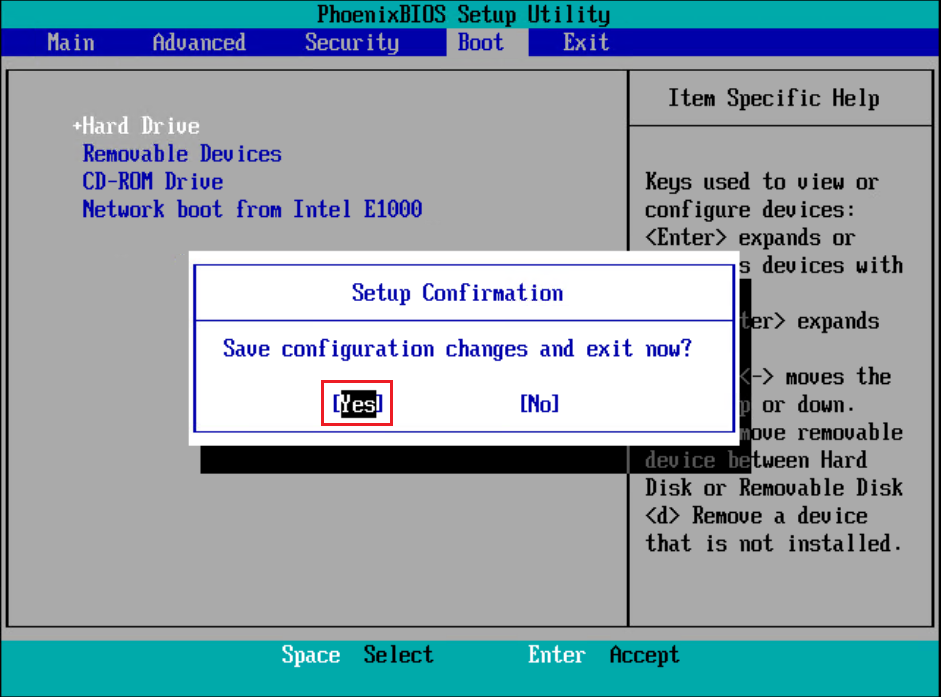
Type F10 and then Yes to save this new configuration:
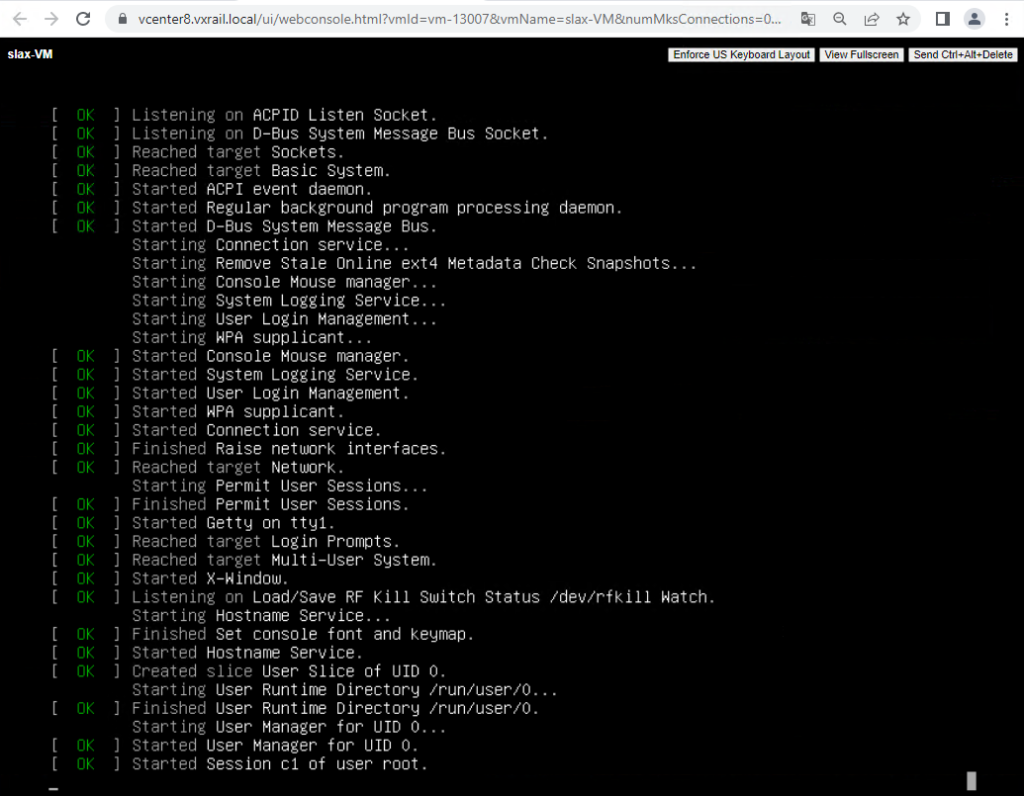
Here, the Slax VM was booted successfully from the disk 🙂 :
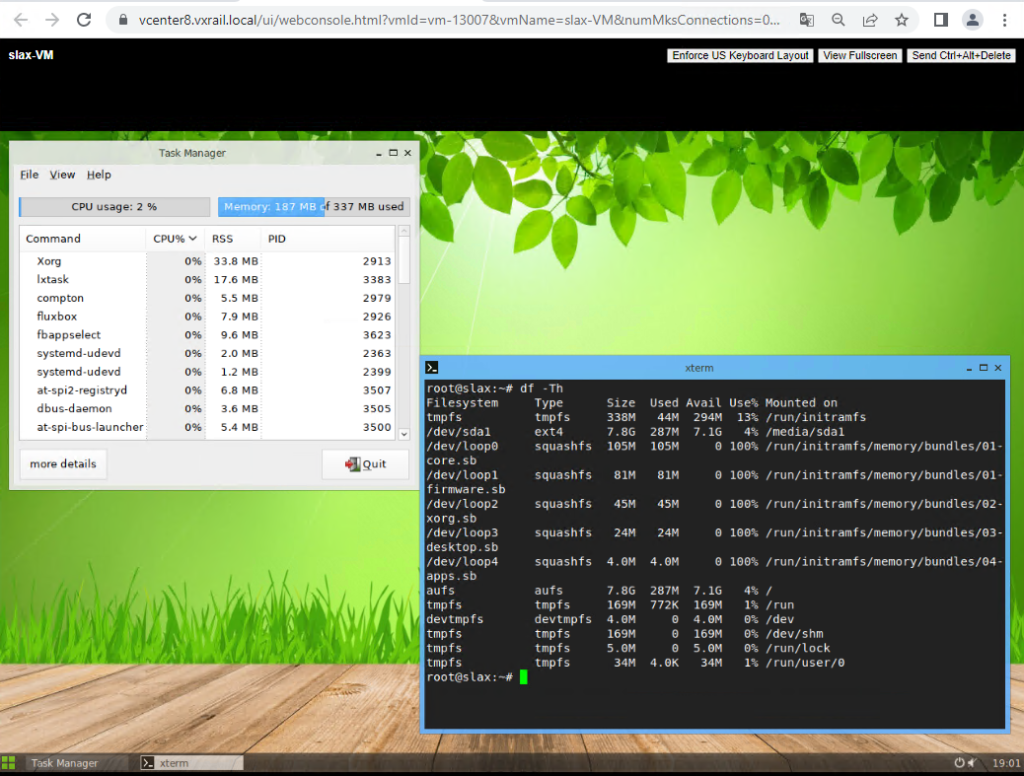
How to install VMware Tools on this VM?
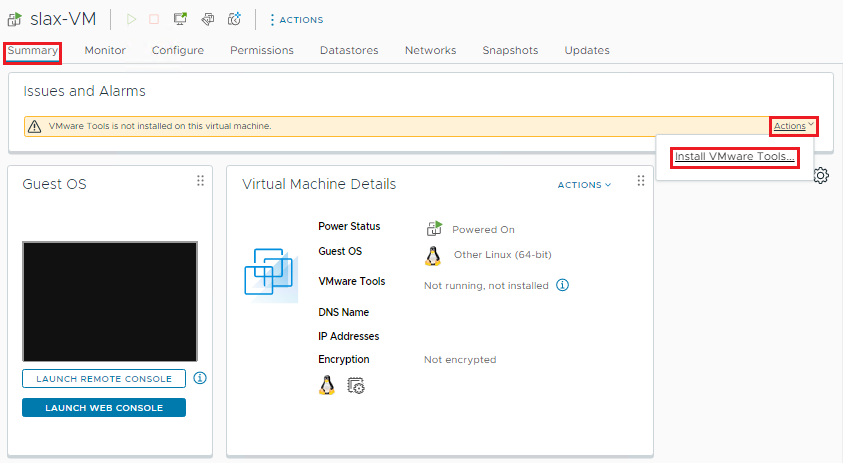
To install VMware Tools on the Slax VM, click on Summary tab –> Actions –> Install VMware Tools:
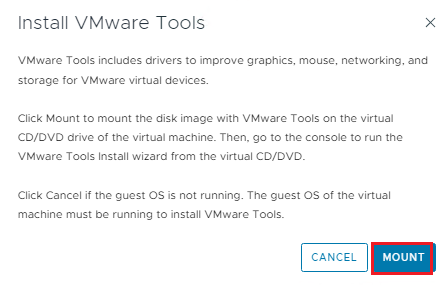
Click on MOUNT:
In our case, we have an error during the mounting process of the VMware Tools .iso file:
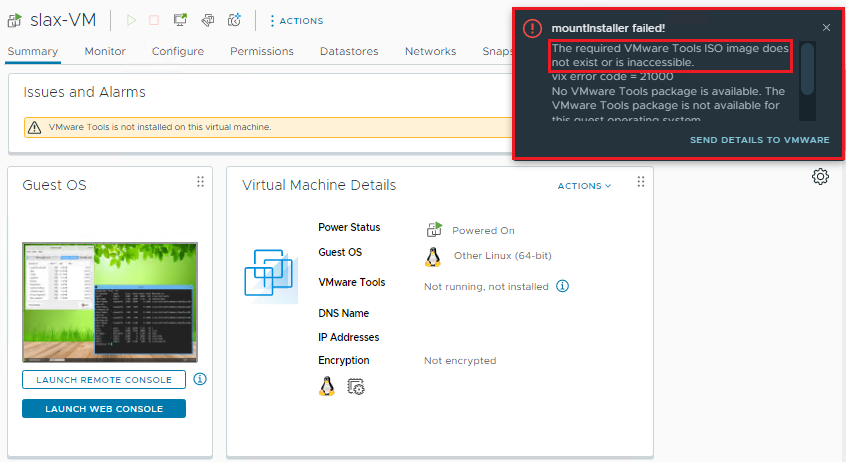
If you receive an error like it, power off the Slax OS VM and change the Guest OS Version.
In this case, we are choosing the Debian GNU/Linux 10 (64-bit). After that, click on OK and power on the VM again:
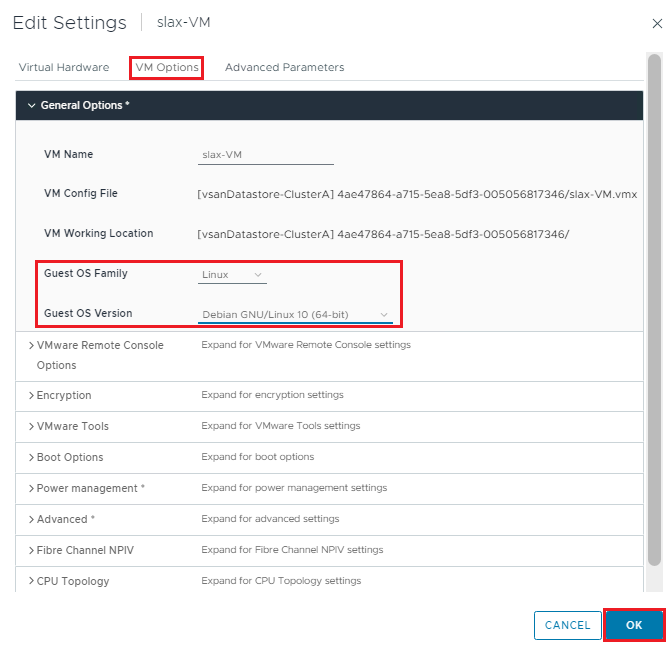
Click on Actions –> Install VMware Tools again. Look that the VMware Tools Installer Mount task was executed successfully:
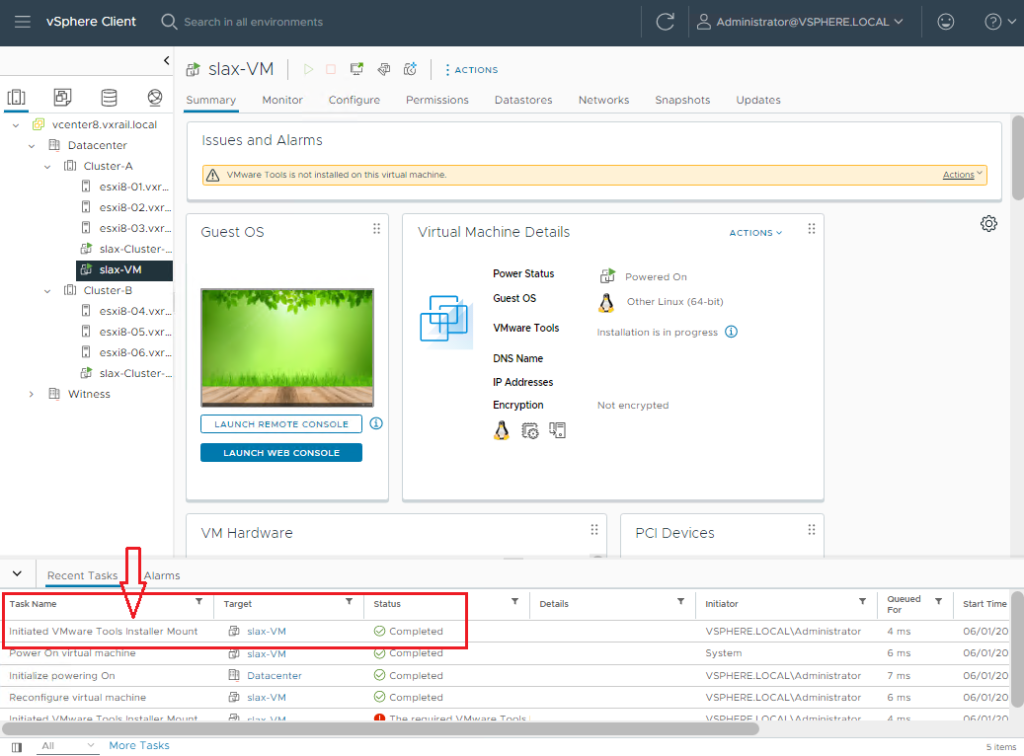
Now, we need to copy the VMware Tools files to the VM local disk:
mkdir -p /tmp/vmtools
cp -Rap /media/sr0/* /tmp/vmtools/
cd /tmp/vmtools/
tar -zxvf VMwareTools-10.3.25-20206839.tar.gz
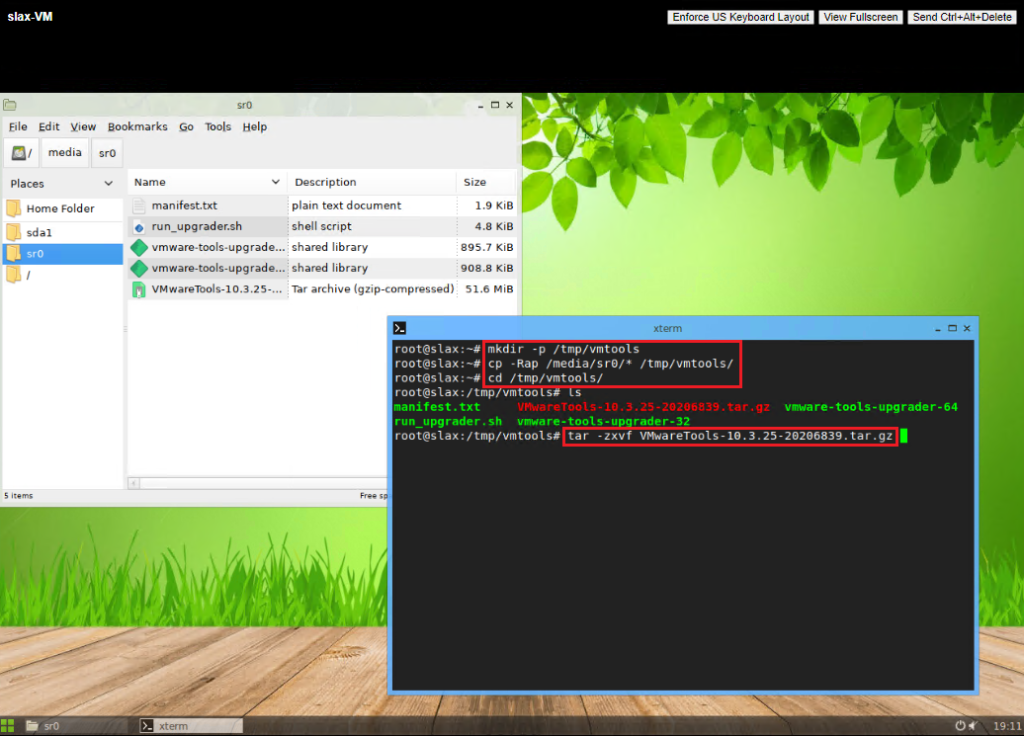
Run the VMware Tools installer:
./vmware-install.pl
Follow the VMware Tools wizard:
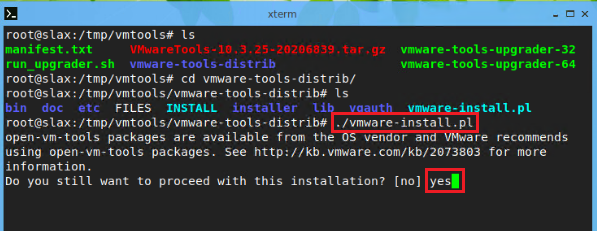
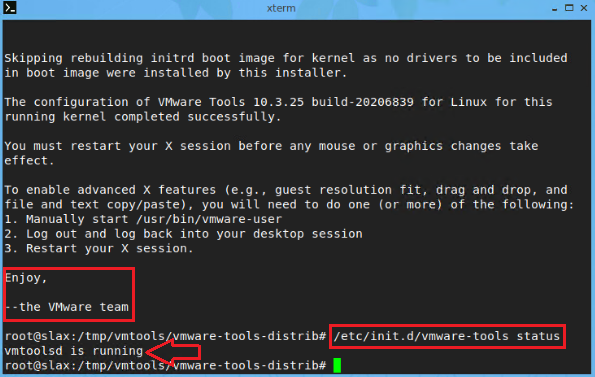
After the installation process is finished, we can check the status of the vmware-tools daemon:
/etc/init.d/vmware-tools status
Look that the vmware-tools process is running. This is the expected status:
Now, the VMware Tools is installed in our Slax VM 😉
