How to configure DHCP Relay for an NSX-T Segment is an article that explains how VMs inside an NSX-T Segment can acquire an IP address from an external DHCP Server.
Firstly, What is DHCP?
I researched on the Internet and found a good explanation for DHCP:
“Dynamic Host Configuration Protocol (DHCP) is a client/server protocol that automatically provides an Internet Protocol (IP) host with its IP address and other related configuration information such as the subnet mask and default gateway.”
Source: https://learn.microsoft.com/en-us/windows-server/networking/technologies/dhcp/dhcp-top
DHCP is a client/server protocol. In other words, we have the DHCP Server and the DHCP Client.
The principal role of the DHCP Server is to give the IP addresses and other configurations for DHCP Clients. A DHCP Client in this context, can be any network device. For example, A Windows PC, a Switch, a Smartphone, etc (any device that can be connected to the network). Everyone uses this protocol every day 🙂
Basically, How it works?
So, when a DHCP Client connects to the network, it sends a broadcast package for the broadcast domain searching by one DHCP Server. If there is not any DHCP Server available in the same broadcast domain, the DHCP Client is not acquired any IP address. This is normal behavior because DHCP boundaries are the broadcast domain (or the same L2 segment).
If you want to use a centralized DHCP Server for all networks, you just need to use the DHCP Relay to address it!
In this context:
- We have a DHCP Server (Windows Server 2022 with DHCP Server role)
- The DHCP Clients are VMs running in NSX-T Segments
Hmm.. So, what is DHCP Relay?
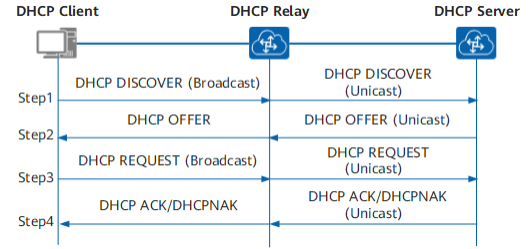
DHCP Relay provides a way for DHCP clients to communicate with DHCP servers when none are available on its local subnet. A Relay Agent uses IP routing to forward discovered messages to a provisioned DHCP server. The relay agent then relays the DHCP offer back to the client network.
In other words, the DHCP Relay Agent listens to the broadcasted DHCP messages and sends unicast packages to the IP configured in the DHCP Relay.
In the picture below we can see how DHCP Relay works in detail:
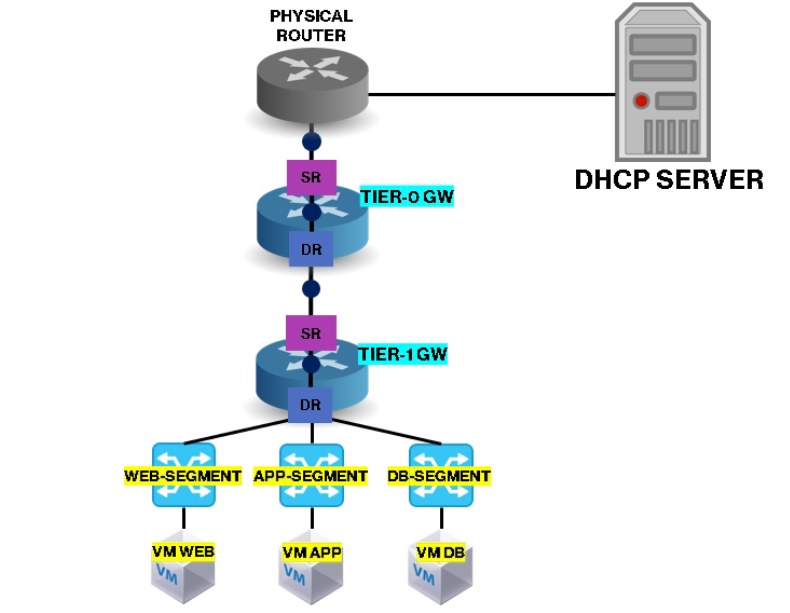
About our Lab Topology
Below, it is possible to see our lab topology. The DHCP Server is connected to the Physical Network and all VMs are running in different NSX-T Segments.
All VMs will acquire an IP address from the same DHCP Server. But of course, for each NSX-T Segment, we will have a dedicated and different DHCP Scope:
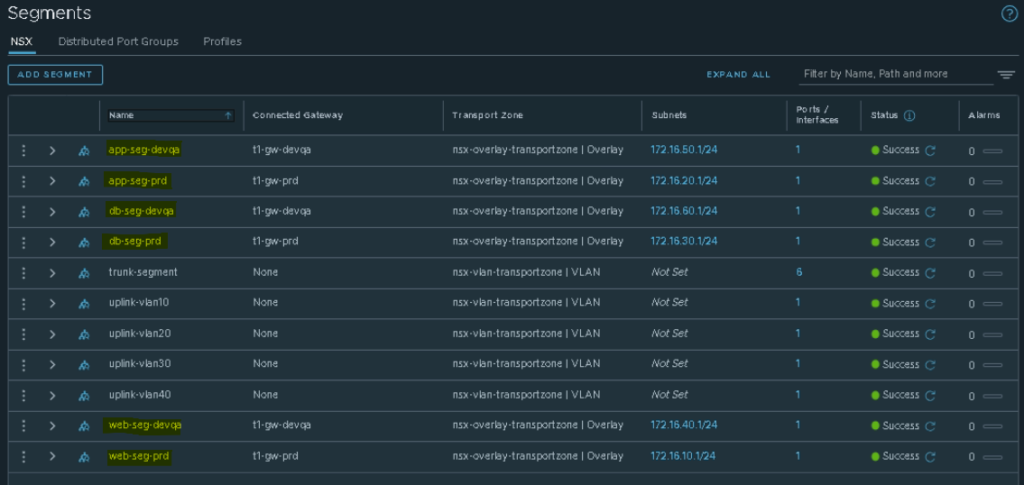
We have six NSX-T Segments and for each Segment, we have a dedicated DHCP Scope:
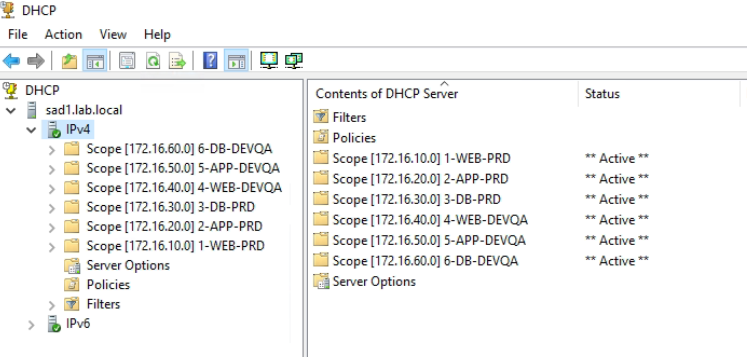
Our NSX-T Segments are highlighted in yellow:
Creating a DHCP Relay Profile
The first step here is to create the DHCP Relay Profile. To do it:
Select the Network Tab –> Under Settings select Networking Profiles –> Select the DHCP tab
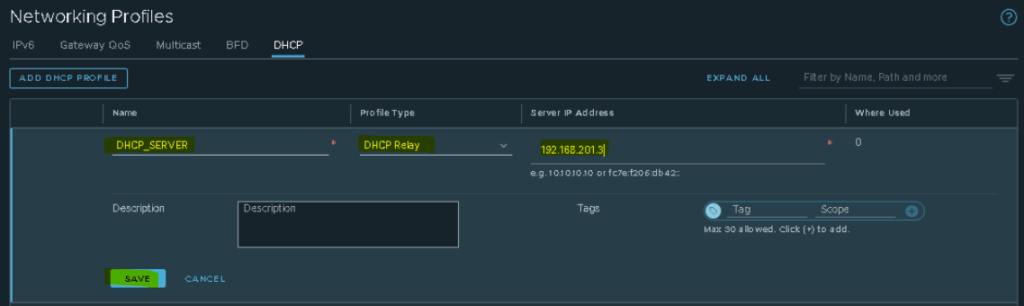
ADD DHCP PROFILE

Type the name for the DHCP Relay Profile and, under Profile Type, select the DHCP Relay option.
Type the IP address of the DHCP Server and click on SAVE:
Settings the DHCP Relay Profile to an NSX-T Segment
The next step is to set up the DHCP Relay Profile to an NSX-T Segment. To do it:
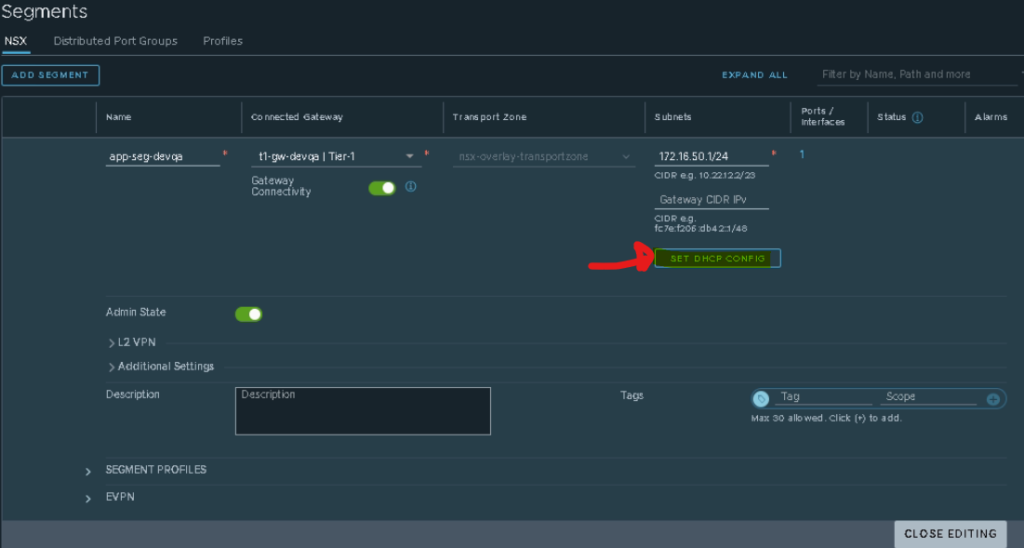
Select the NSX-T Segment –> Edit –> Click on SET DHCP CONFIG:
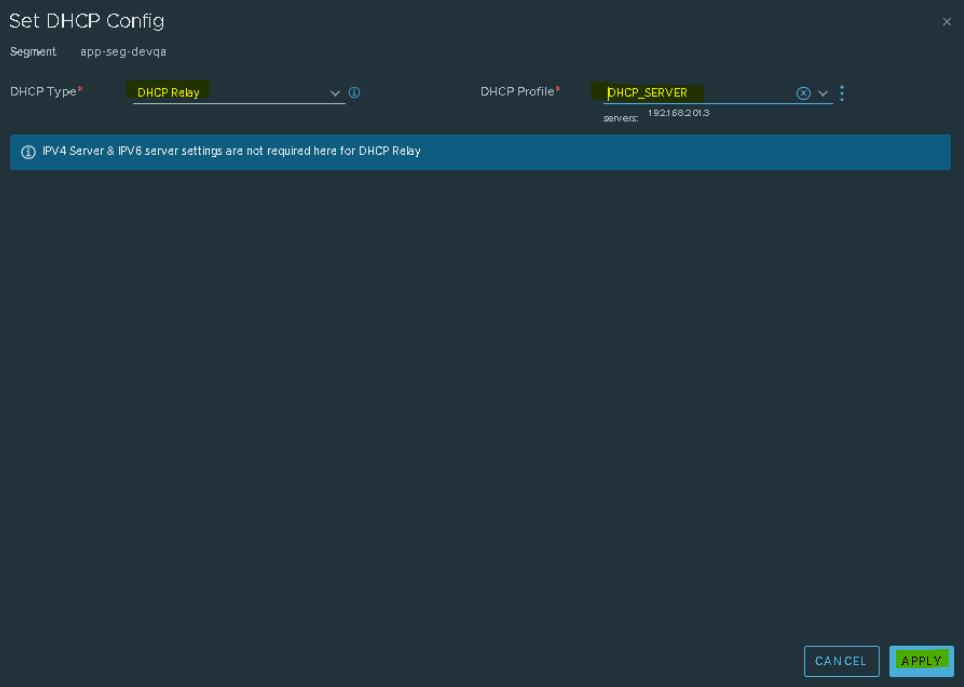
Under DHCP Type, select the DHCP Relay option.
Under DHCP Profile, select the DHCP Relay profile that we created before. Click on APPLY:
After that, we need to save the Segment edition. Click on SAVE to save the changes:
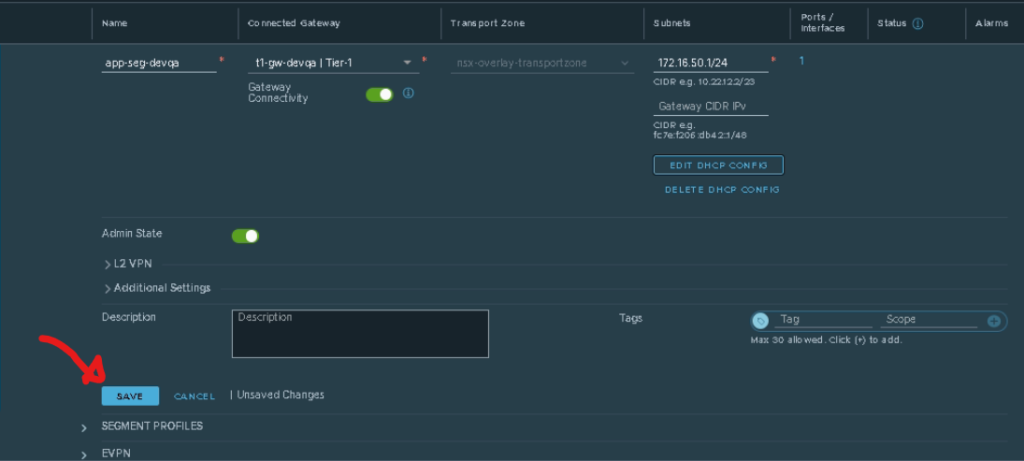
So, if it will not have any routing issues, all DHCP Clients in the NSX-T Segment will be able to acquire IP information from the centralized DHCP Server 🙂