

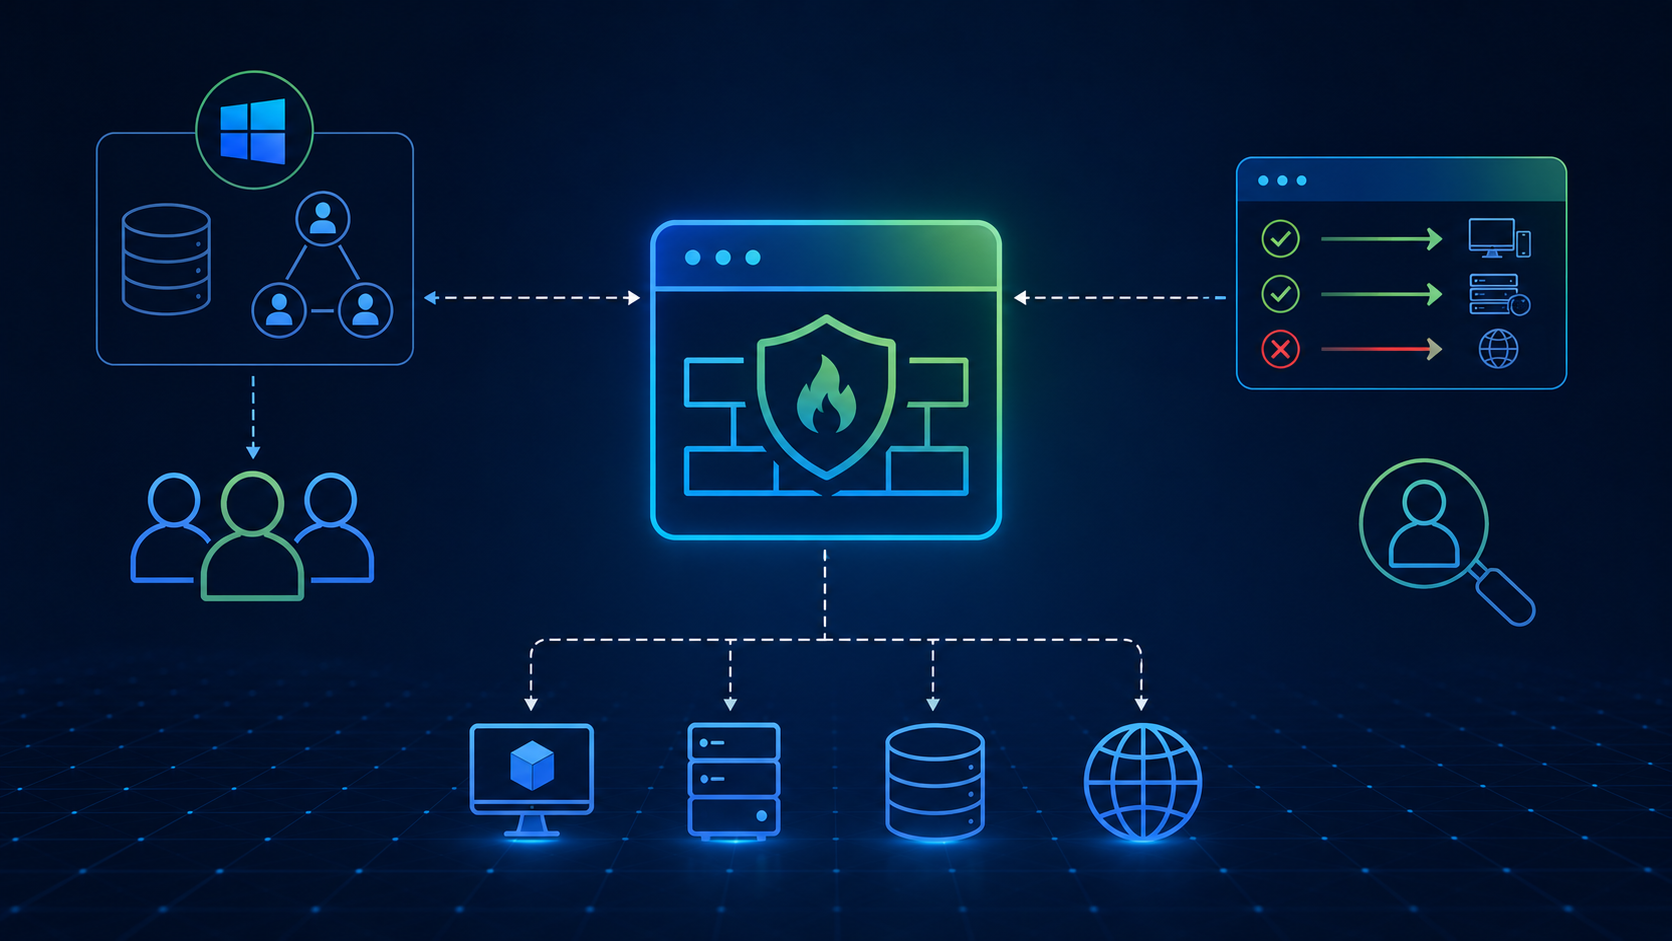
Working with IDFW on NSX-T is an article that shows what are the IDFW rules and how to create your IDFW rules on the NSX-T environment.
IDFW is an acronym for Identity Distributed Firewall. Basically, with this feature, we can create DFW (Distributed Firewall) rules based on users and groups of users from Microsoft Active Directory (AD).
This type of rule is useful when the aim is to create rules based on users or groups independent what is the source address of the end-user.
For example, with an IDFW rule, we can permit the group user “Sales” to access the Web Server hosted on an NSX-T Segment and block the group user “HR” from accessing the same Web Server (both groups in this example are AD groups). And of course, we have a lot of possibilities when we are working with this type of rule.
We have written an article about DFW. I highly recommend you check this article before continuing to read the current article:
How does the IDFW work?
As we said before, IDFW is a type of DFW rule whose main aim is matching the traffic based on users or groups from the Microsoft Active Directory (AD). Whatever the user is, it can be matched by an IDFW rule (generally the end-user uses a computer that has joined in the Active Directory domain).
So, for it to work as expected, the NSX-T needs to know when the end-user logged in on the Active Directory Domain. Basically, we have two ways to describe it:
- By Guest Introspection: During the VMware Tools installation process, a driver called “NSX Introspection” needs to be installed together. This driver will be responsible for catching up on all logins and sending this information to the NSX Manager Cluster.
- By Event Log Scraping: With this method, the NSX-T is responsible for getting the Windows Event Logs and searching by all logins.
In our example here, we will use the first method (Guest Introspection).
VMware Tools Installation Process
Our first step here is to install the VMware Tools under a VM (Virtual Machine) running in an NSX-T Segment. This VM is part of an NSX-T Segment.
In this example, we select the desired VM on the vSphere Client –> ACTIONS –> Guest OS –> Install VMware Tools.
Access the Guest OS and start the VMware Tools Installation wizard. In the pictures below we can see all the details related to the installation process:
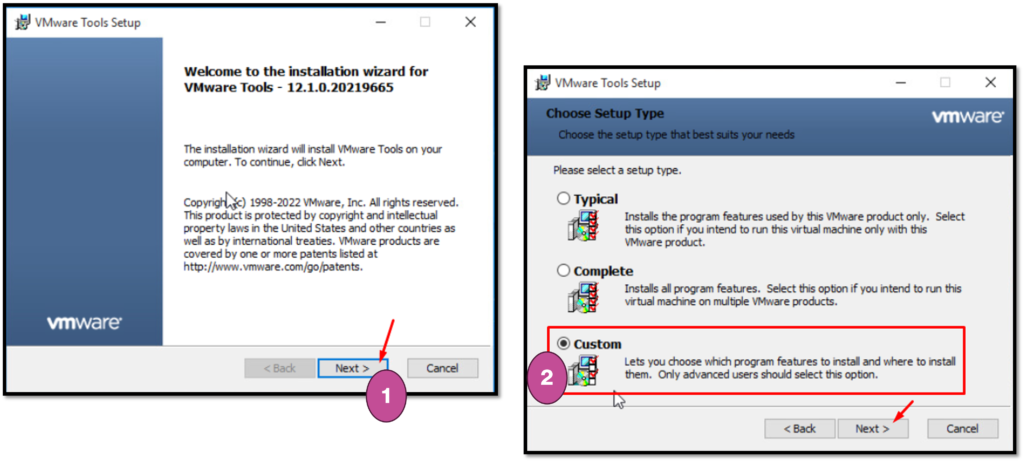
After selecting the “Custom” setup type, we need to install the drive called “NSX File Introspection” as we can see in the picture below:
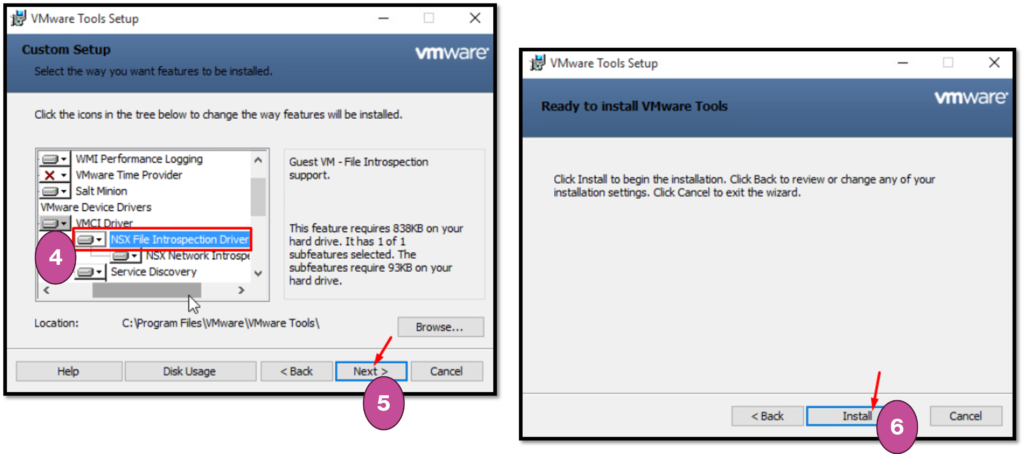
After that, we have the VMware Tools installed with the required module for doing the NSX Introspection in the user logins.
Enable Identity Firewall
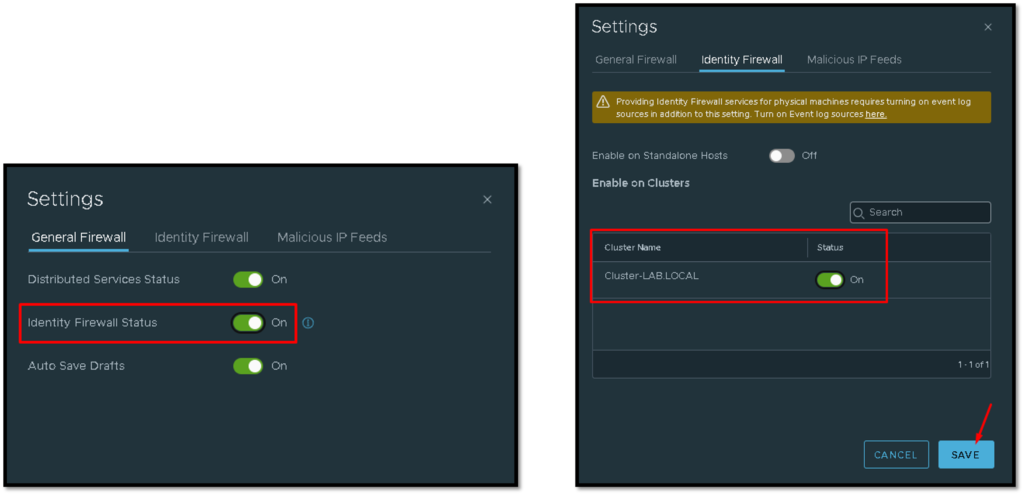
It is necessary to enable the IDFW feature. To do that, on the NSX Manager GUI, access the below menu:
Security –> Policy Management –> Distributed Firewall –> Select the Tab “Category Specific Rules” –> ACTIONS –> General Settings:
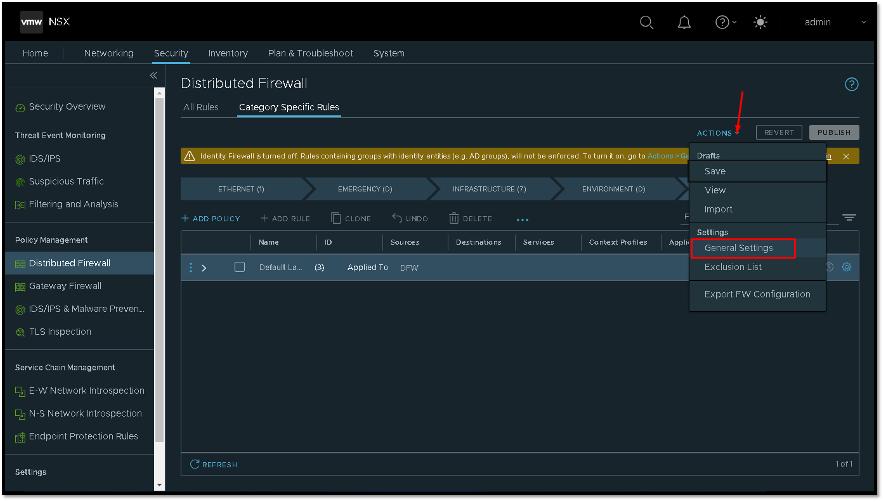
After that, we need to select in what vSphere Cluster we need to enable the IDFW feature.
As we can see in the picture below, we are selecting the cluster “Cluster-LAB.LOCAL” under the tab Identity Firewall:
Active Directory Integration
So, now it is necessary to integrate the NSX-T with the Active Directory. On the NSX Manager GUI, access the below menu:
System –> Configuration –> Identity Firewall AD –> ADD ACTIVE DIRECTORY
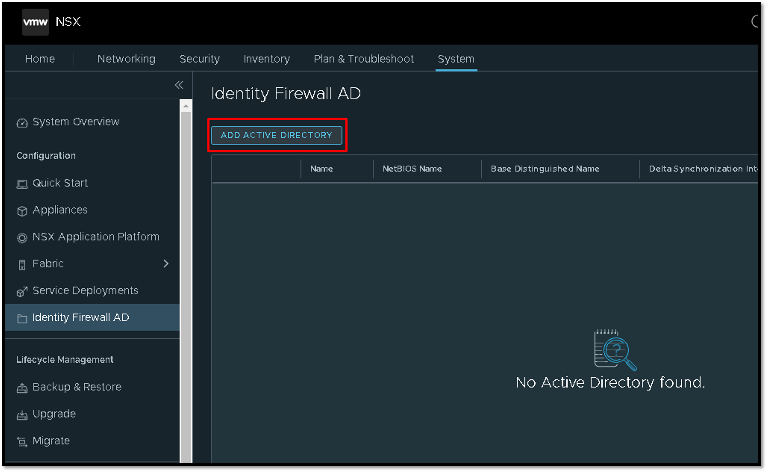
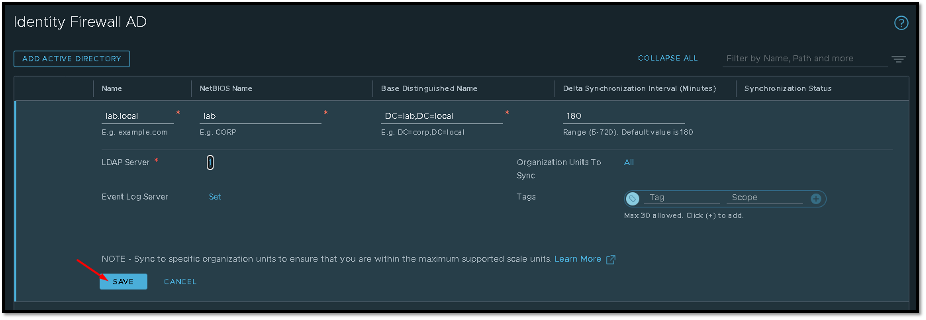
Here we need to type details about the Active Directory domain. In this example, our domain name is “lab.local”. After typing all required configurations on this page, we need to click on LDAP Server to set up the details of the LDAP Server:
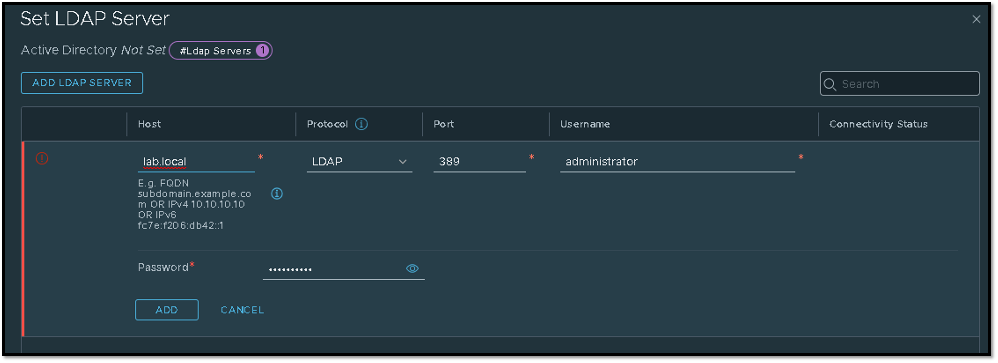
About the LDAP Server configuration. Basically, here we need to type the IP address or hostname/FQDN of the LDAP Server (AD), select the protocol and port (LDAP, LDAPS), and type the username and password to read the Active Directory database:
After that, click on SAVE to finish the configuration wizard:
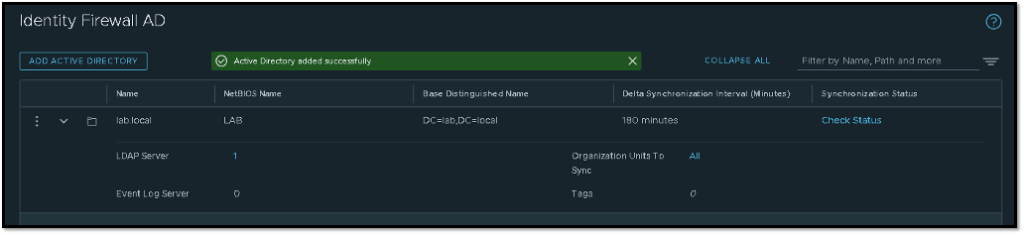
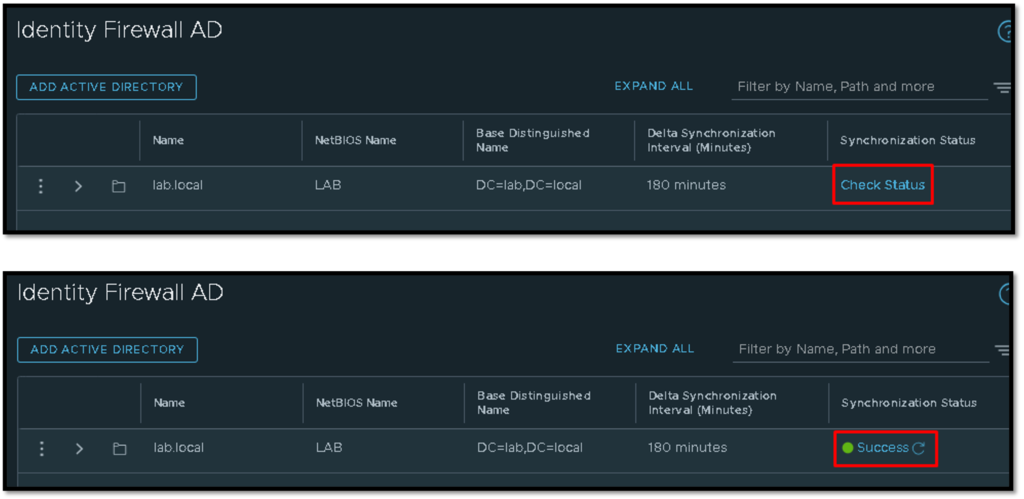
We can click on “Check Status” to check the integration with Active Directory. If the result is equal to “Success”, the integration is done with success:
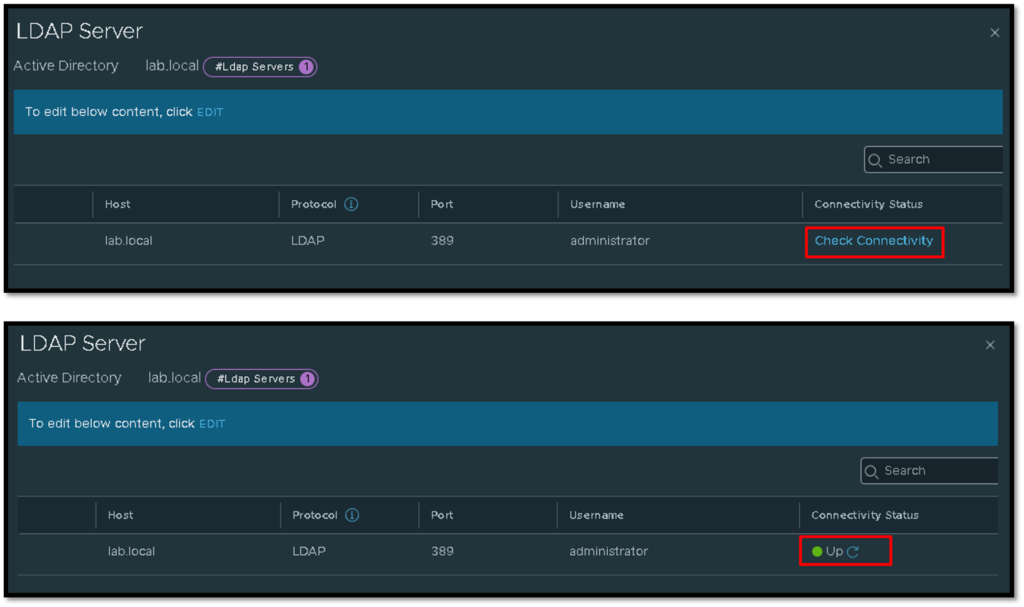
Under LDAP Server, also we can check the connectivity status by clicking on “Check Connectivity”:
Group Creation
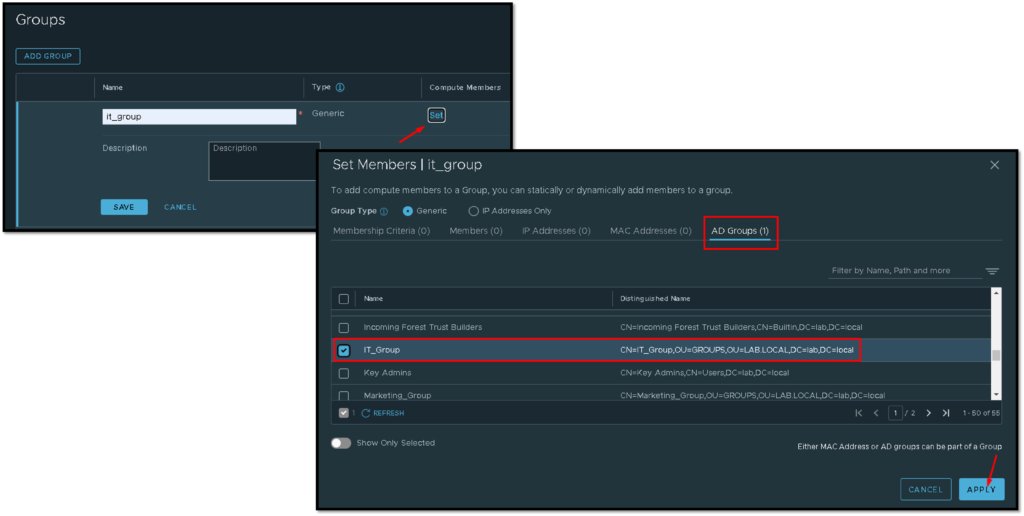
To use the Active Directory Users and Groups, first, we need to create a group on the NSX Manager and then map this local group with the group from the Active Directory. To create a group, we need to access the menu:
Inventory –> Groups –> ADD Group
In this example, the group name is “it_group”. Click on “Set” on Compute Members and then under the tab “AD Groups”, select the group (here we must see all Active Directory Groups):
Creating Firewall Rules
At this moment, we can create the firewall policy and firewall rules under this firewall policy. As we explained before, the process to create an IDFW is the same as to create a DFW. The BIG DETAIL here is on the field “Sources” on the firewall rule:
- For the IDFW feature to work as expected, we must select the AD Group on the SOURCE field on the firewall rule!
In this example, we have two firewall rules. In the first one, the source AD group is “it_group”. In the second firewall rule, the source AD group is “c-level_group”. Look at the field Action – each firewall rule is doing a specific action for each AD group:

Expected Results
Based on our firewall policy, when users on the AD group “it_group” log in on the VM and access any web page using HTTP or HTTPS protocol, they will not have success on it because the firewall rule action is “Reject”.
On the other hand, users on the AD group “c-level_group” will have success because the firewall rule action is “Allow” 😉
To read more about IDFW, you can check the below link:
