Accessing vCenter with MFA is an article that shows how to configure MFA (Multi-Factor Authentication) for accessing the vSphere Client.
First and Foremost, What is “MFA”?
MFA is an acronym for Multi-Factor Authentication. In simple words, MFA is a security approach to prevent data breaches caused by stolen or compromised credentials and protect your systems from unauthorized access.
Normally, to protect a system or an application we use a username and password. The majority of systems use this approach to prevent unauthorized access. But, with MFA, we can add an extra layer of security. Besides having the username and password, with MFA, you need to provide extra information to validate that you are you and not a hacker or something like that. This “extra information” can be a number received by an SMS message, a push notification on your cell phone, an email, etc (there are a lot of ways to do this second authentication method).
Nowadays, we have a lot of applications for MFA. In this article, we are using the MFA solution provided by LoginTC (https://www.logintc.com/why-logintc-mfa/).
Disclaimer: Feel free to use the MFA solution that you want. I researched a lot for MFA solutions and I liked the LoginTC. So, in this case, I just explained my setup with this solution.
About Our Lab
Our vCenter Server is using an external Identity Provider. In this example, vCenter Server is using the Microsoft ADFS as an Identity Provider.
We have written both articles and I highly recommend you to read both (if you want, of course):
Setting Up Windows ADFS – https://dpcvirtualtips.com/setting-up-windows-ad-fs/
Integrating vCenter Server with ADFS – https://dpcvirtualtips.com/integrating-vcenter-with-windows-adfs/
At this moment, we can log in on the vCenter Server with AD credentials normally.
How does the MFA work in a practical way?
Here, we have an excellent picture explaining the MFA process:
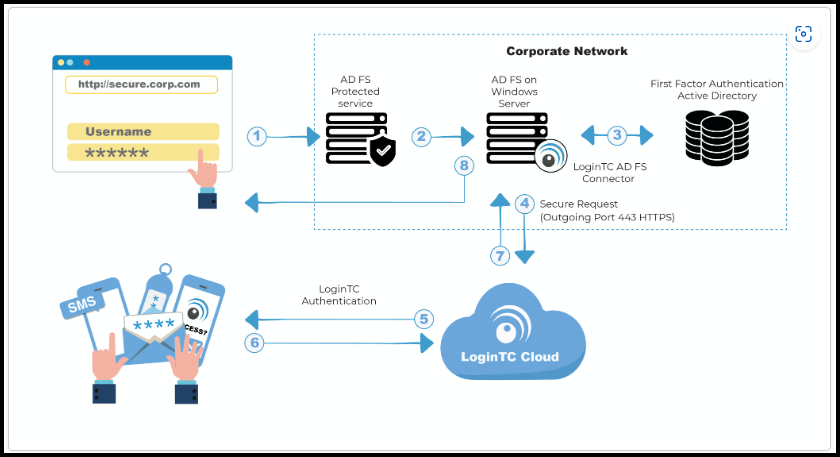
1- The end user is requesting access to the system and this system is using ADFS to handle the authentication – In this case, this system can be the vCenter Server using an external Identity Provider (ADFS, for example)
2– The ADFS Server handles the user credentials and does the first authentication on the Active Directory Database
3- If the username and password provided by the end user are correct, the Active Directory backs to the ADFS with this information
4- After that, on the ADFS we have a LoginTC connector and this connector is responsible for communicating with LoginTC Cloud to start the second authentication method
5- Based on the configuration, the end user can receive a code on your cell phone, a push notification, a token, or an email message – it depends on the configuration
6- The end user needs to provide an answer for the second authentication requested by the LoginTC
7- The end user’s answer is sent to the ADFS Server through the LoginTC cloud – Here the LoginTC Cloud checks if the answer for the challenge is OK
8- The ADFS Server goes back to the user, permitting or denying access to the application
Creating the Application on the LoginTC Management Page
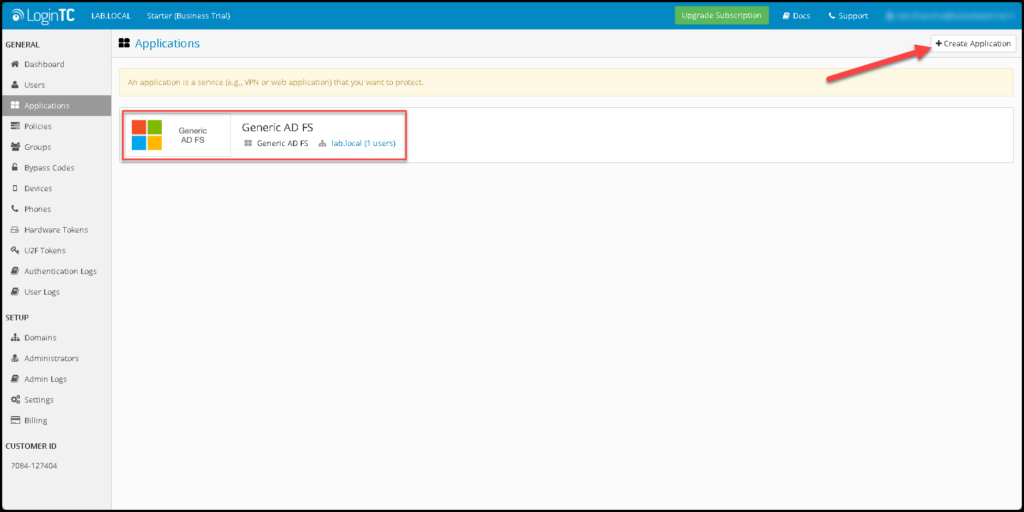
Firstly, we need to create the application that we are integrating with the LoginTC.
In this case, we need to integrate the Microsoft ADFS. So, simply click on “Create Application” and select the desired application:
Here, we are accessing the application that we created before. We will use the Application ID and Application API Key values during the installation of the LoginTC Connector on the ADFS Server:
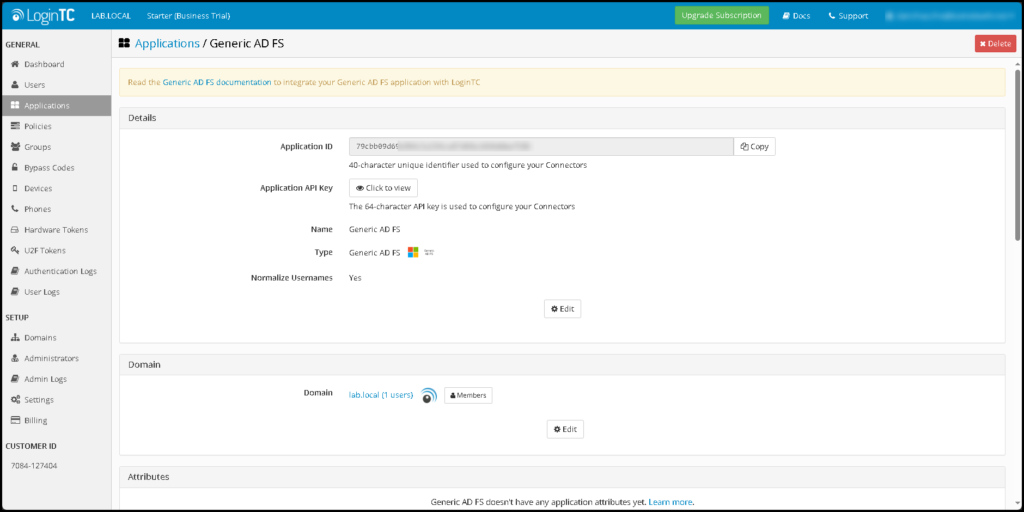
Note: The configuration is pretty straightforward and LoginTC provided excellent documentation for that. I used this link to make the configurations:
https://www.logintc.com/docs/connectors/adfs/
Installing the Connector on the ADFS Server
On the above link, we can find all steps to install the LoginTC ADFS Connector. Below, we can download the LoginTC ADFS Connector:
https://www.logintc.com/docs/downloads/adfs-connector
Configuration for ADFS MFA
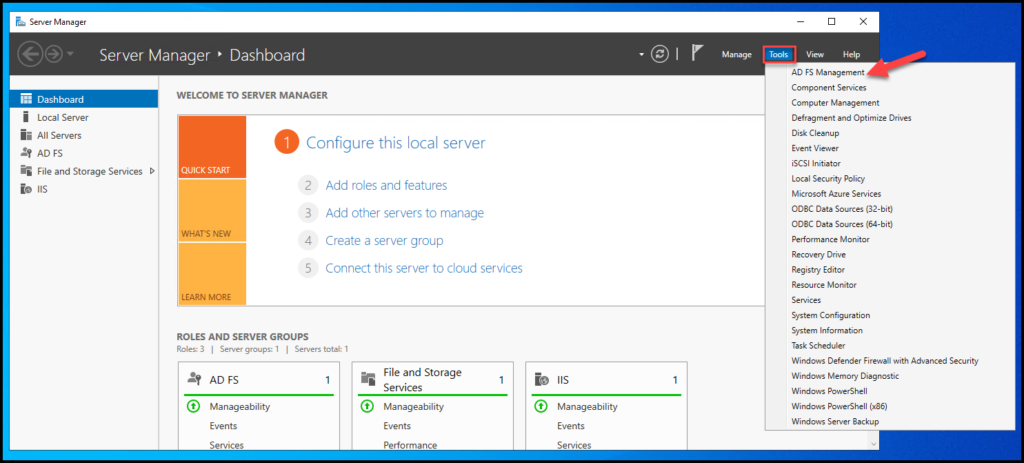
The next step is to configure our ADFS application to use MFA authentication. Open the ADFS Management Console:
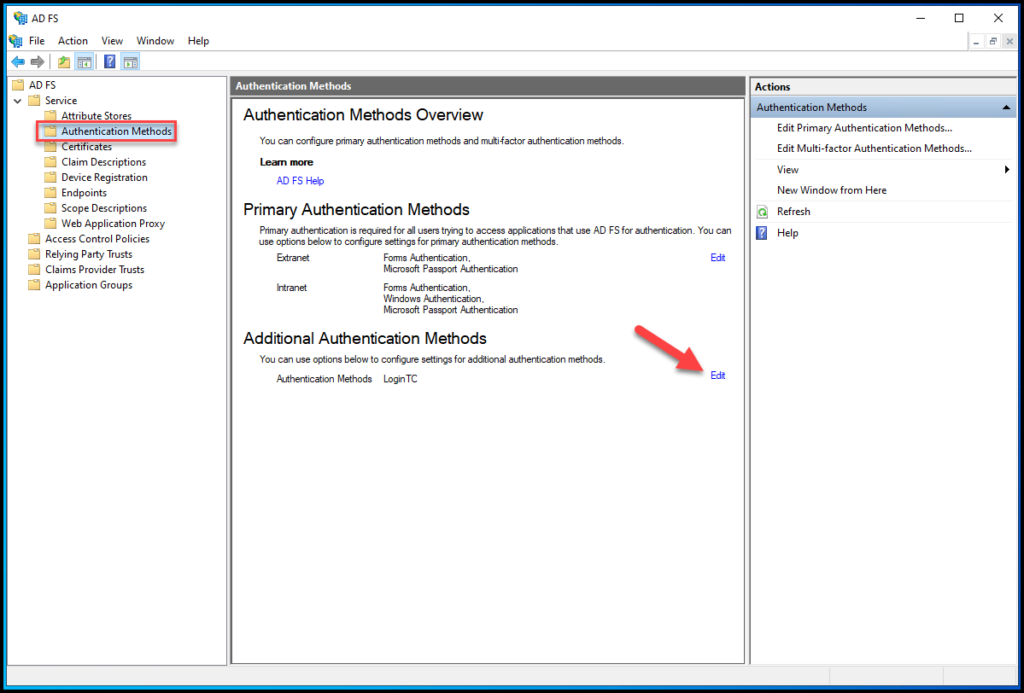
Select “Authentication Methods” and under “Additional Authentication Methods” click on Edit:
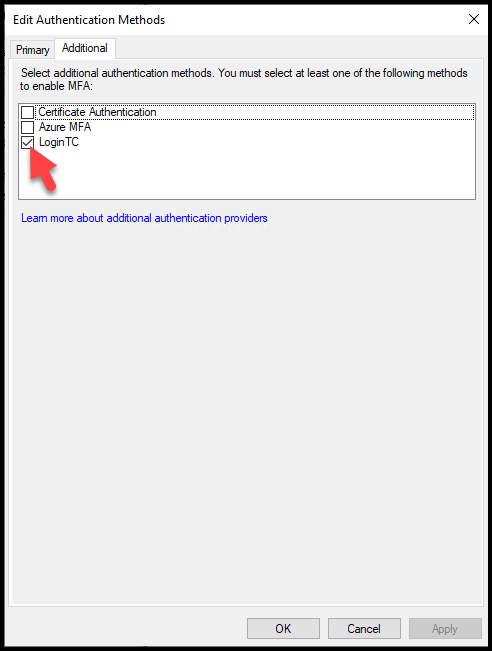
Here we need to select the Login TC connector (if your LoginTC Connector is not showing on this page, something wrong happened during the installation process – go back and check the LoginTC connector):
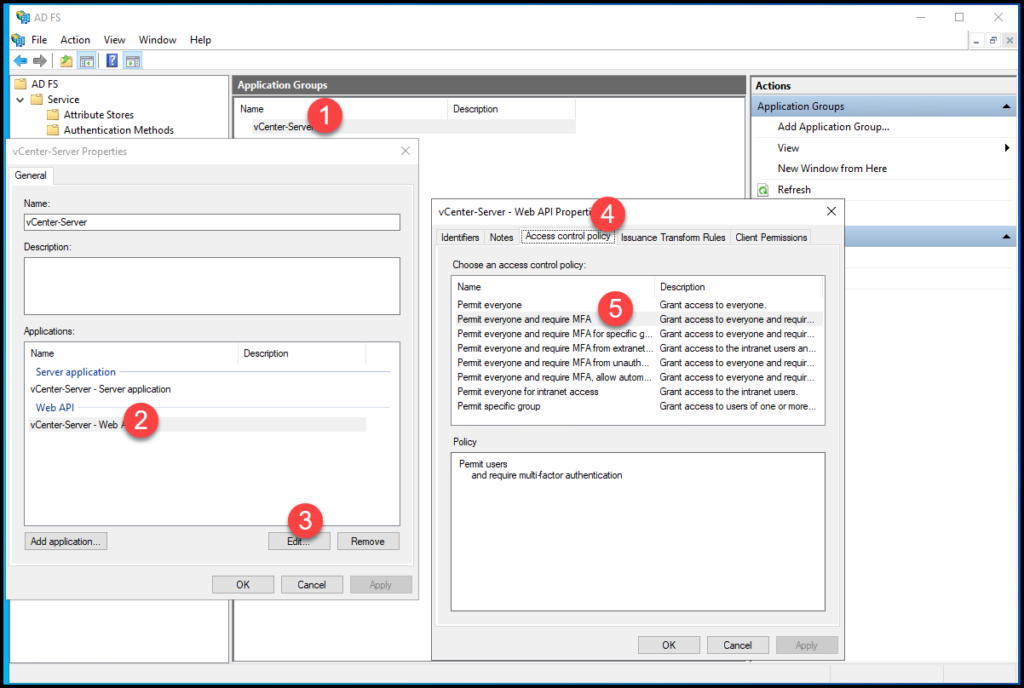
Next, we need to select our Application under Application Groups and Edit the Web API.
Under the “Access control policy” we need to select the option “Permit everyone and require MFA”:
Important: If you are using the ADFS on Windows Server 2019 or later, open the Windows Powershell with admin rights and execute the below command – This command is necessary to show the embedded LoginTC page inside the ADFS login page:
Set-AdfsResponseHeaders -SetHeaderName "Content-Security-Policy" -SetHeaderValue "frame-src 'self' https://cloud.logintc.com"After that, I recommend to restart the ADFS service:
Restart-Service adfssrv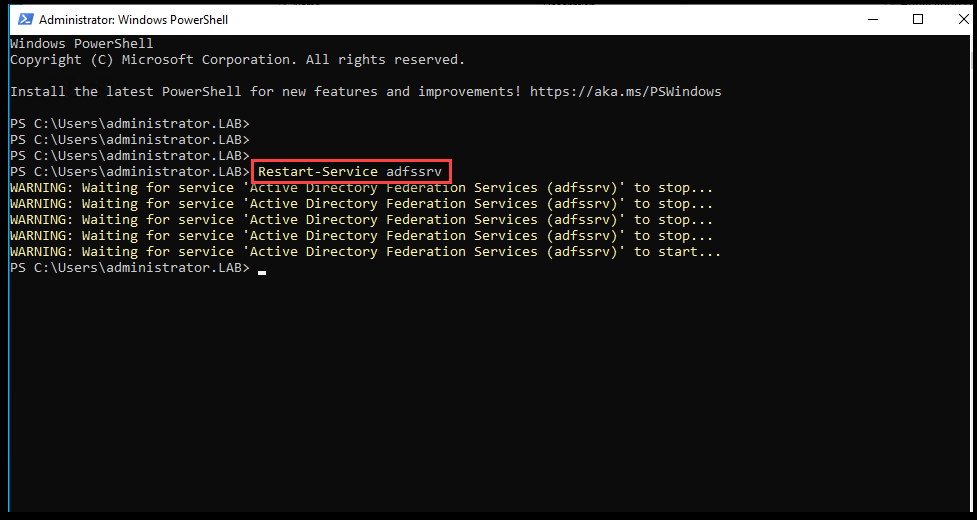
Testing the vCenter Server access with MFA
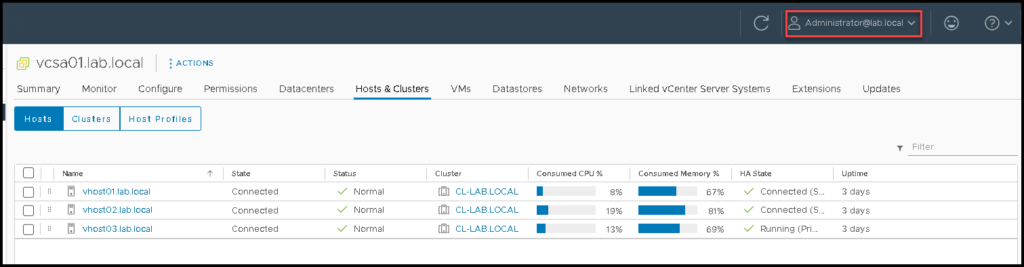
Access the vCenter Server through the vSphere Client with an Active Directory username. In our example, we are using the administrator@lab.local (our AD Domain is lab.local):
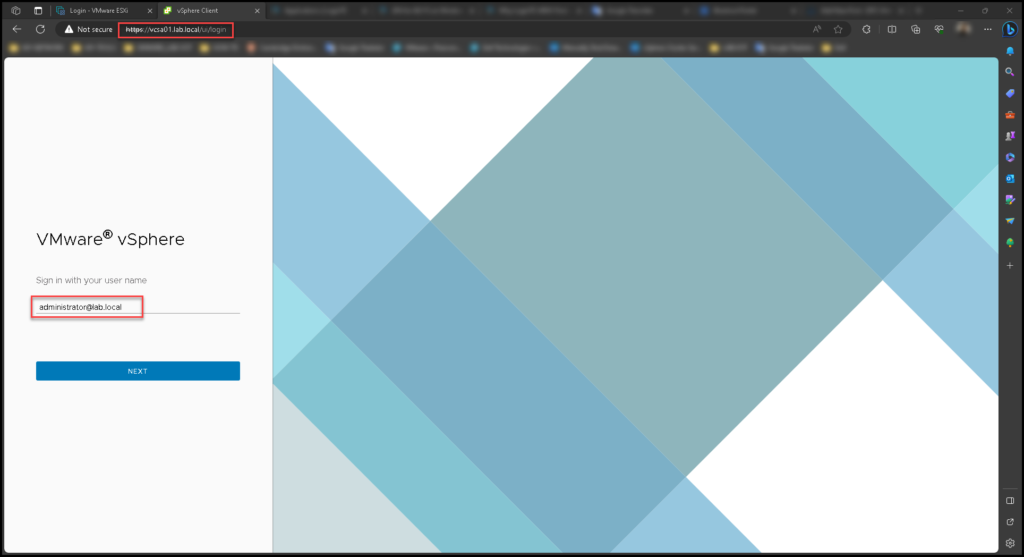
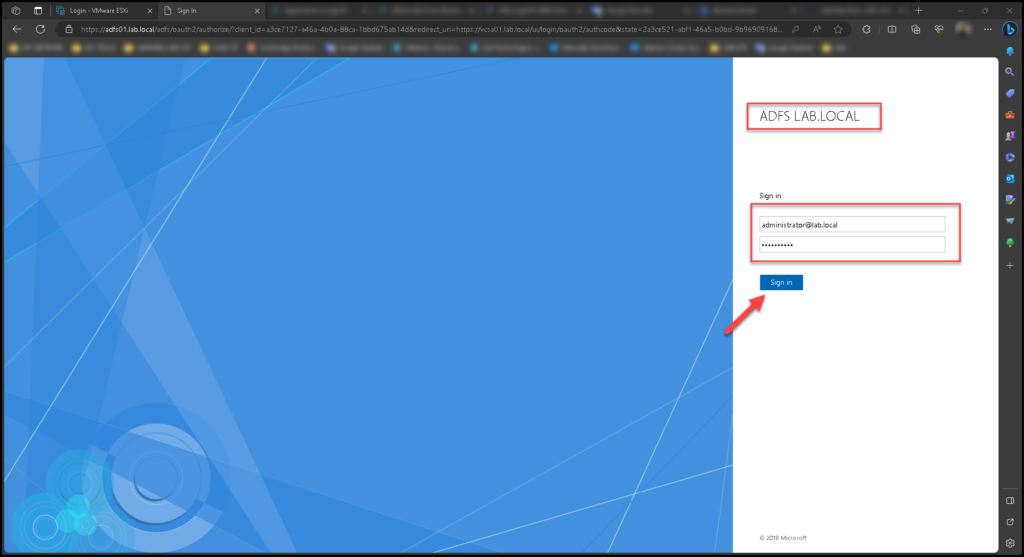
It will redirect you to the ADFS Server login page.
Type your credentials:
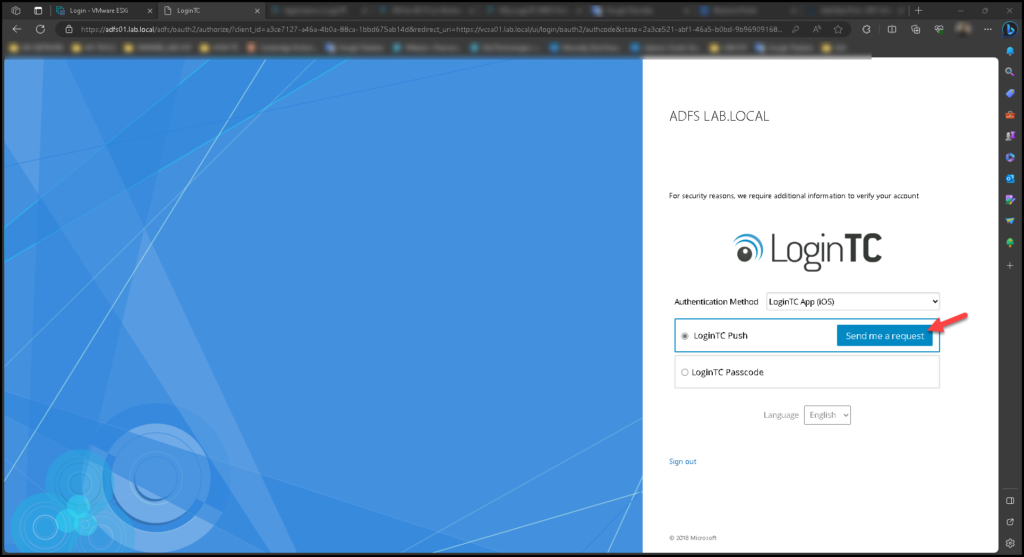
And here the magic happens 🙂
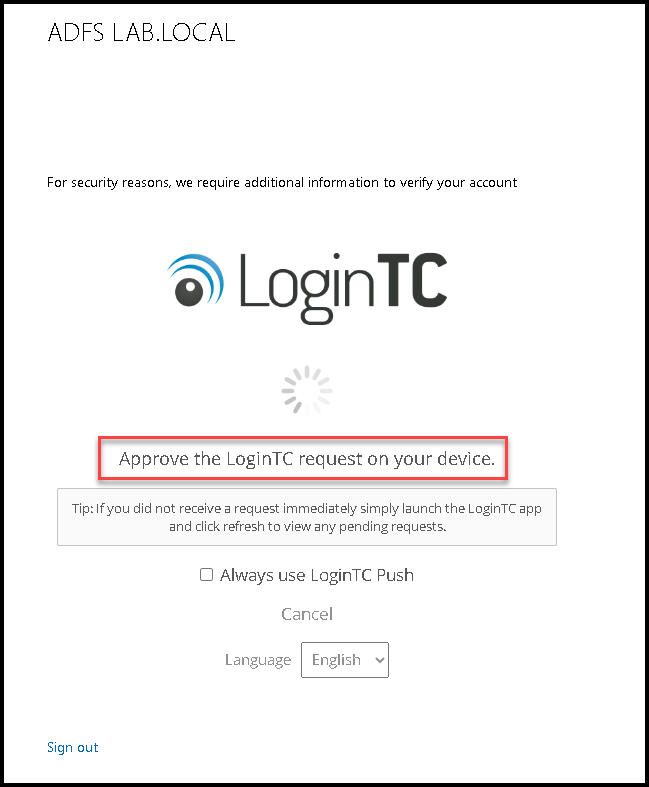
We can see the LoginTC frame inside the ADFS page. Look that we have two authentication options: LoginTC Push and LoginTC Passcode. In this example, we will choose LoginTC Push and we should click on “Send me a request”:
If you have the LoginTC application installed on your cell phone and configured OK under the LoginTC Cloud pannel, you should receive the push notification in a few seconds:
Here is the push notification on the cell phone:
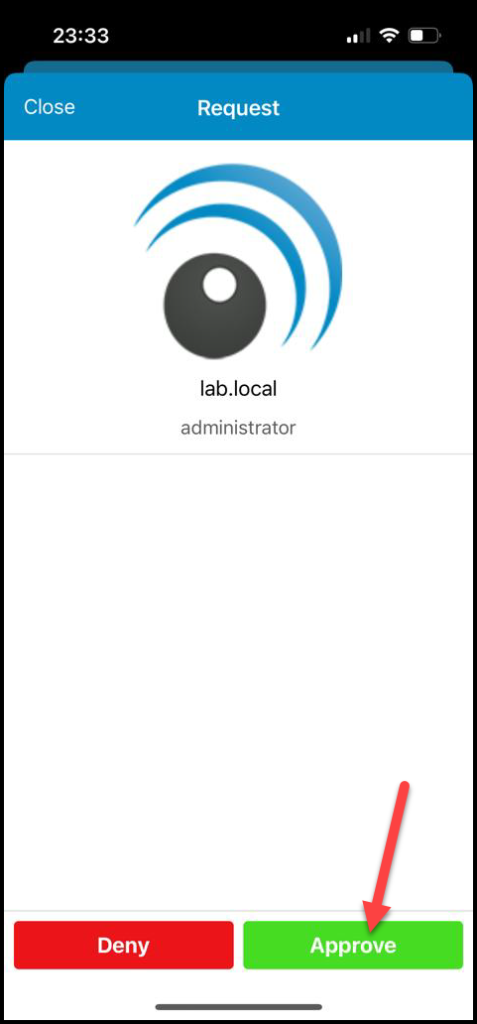
And after “Approve” the access from the push notification, you will be redirected to the vCenter page 🙂
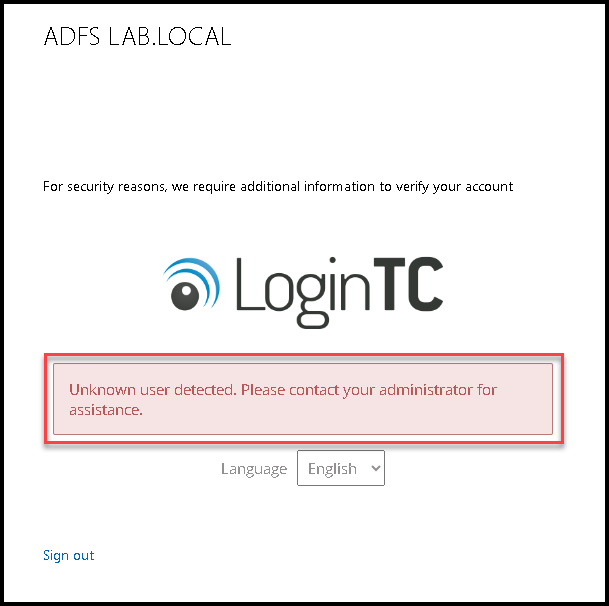
Note: If the domain user trying to access the vSphere Client and receives a message like below, it is probably because this user does not exist on the LoginTC Cloud panel. You need to create this user on the LoginTC Cloud panel, assign a token for this user and then, try login again: