Basic VRRP Configuration on VyOS is an article that explains how to configure the VRRP protocol on the VyOS for router redundancy purposes.
Basically, What is VRRP?
VRRP is an acronym for Virtual Router Redundancy Protocol. Is a computer networking protocol for providing IP gateway redundancy for IP networks. If you need to know more about it, please, access the below link:
Virtual Router Redundancy Protocol – Wikipedia
About Our Lab Environment
So, our goal here is to provide a gateway redundancy for a specific network subnet.
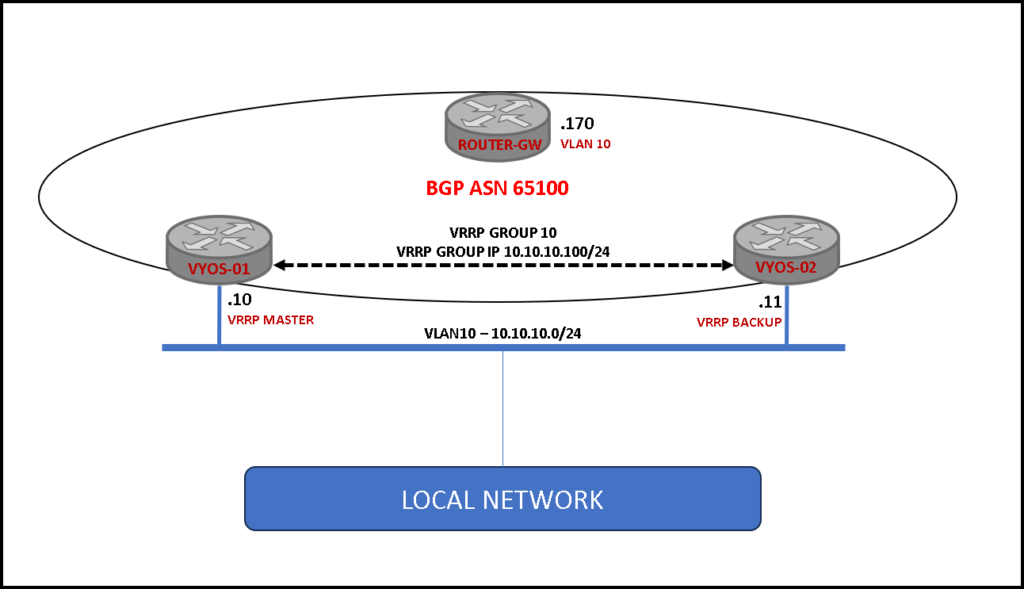
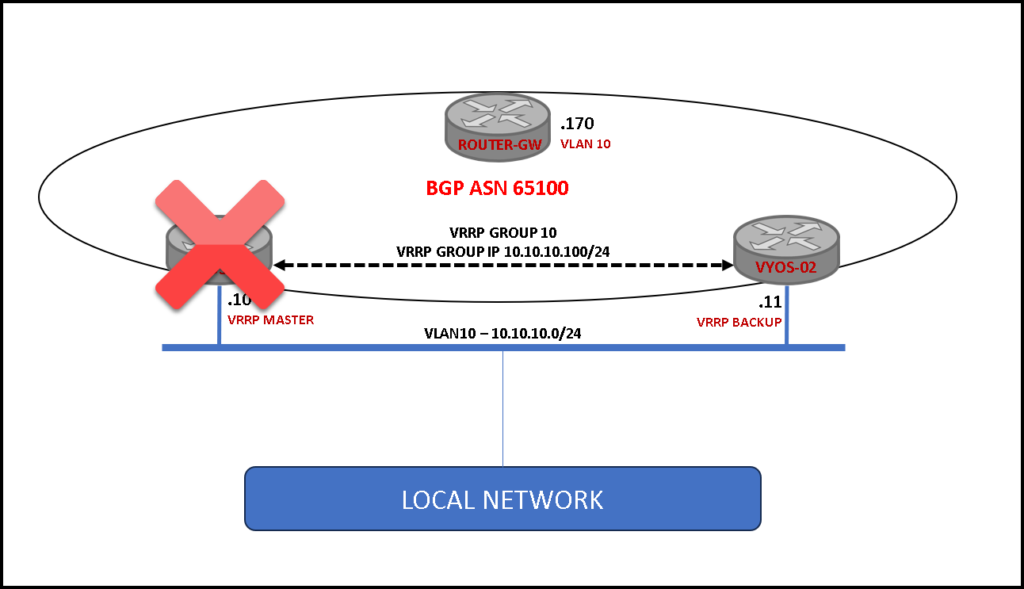
Below, we can see our lab topology:
- We have both VyOS routers placed on the same VLAN Segment (in this example, we are using the VLAN ID 10)
- Each VyOS router has an IP address on this VLAN ID 10
- The Virtual IP that will be used for the VRRP is 10.10.10.100
- Inside the VRRP topology, one VyOS router has a MASTER role and the other VyOS router has a BACKUP role. In this example, the “vyos-01” is the MASTER, and the “vyos-02” is the BACKUP
VRRP Configuration for the MASTER VyOS Router
Here, we have the basic VRRP configuration for the “vyos-01”. As we can see, the option “priority” is used to control what router will be the MASTER role or the BACKUP role. Which higher the priority, the more the chances to be a MASTER:
configure
set high-availability vrrp group int hello-source-address '10.10.10.10'
set high-availability vrrp group int interface 'eth1.10'
set high-availability vrrp group int peer-address '10.10.10.11'
set high-availability vrrp group int no-preempt
set high-availability vrrp group int priority '200'
set high-availability vrrp group int address '10.10.10.100/24'
set high-availability vrrp group int vrid '10'
commit
save
VRRP Configuration for the BACKUP VyOS Router
Here, we have the VRRP configuration for the “vyos-02”:
configure
set high-availability vrrp group int hello-source-address '10.10.10.11'
set high-availability vrrp group int interface 'eth3.10'
set high-availability vrrp group int peer-address '10.10.10.10'
set high-availability vrrp group int no-preempt
set high-availability vrrp group int priority '100'
set high-availability vrrp group int address '10.10.10.100/24'
set high-availability vrrp group int vrid '10'
commit
save
Checking VRRP operation on the vyos-01
Applying the commando “show vrrp” on the “vyos-01”, we can see that this router has the MASTER role on the VRRP infrastructure:
vyos@vyos-01:~$ show vrrp
Name    Interface      VRID  State      Priority  Last Transition
------  -----------  ------  -------  ----------  -----------------
int     eth1.10          10  MASTER          200  30m59s
Checking VRRP operation on the vyos-02
Applying the same command on the “vyos-02”, we can see that this router has the BACKUP role:
vyos@vyos-02:~$ show vrrp
Name    Interface      VRID  State      Priority  Last Transition
------  -----------  ------  -------  ----------  -----------------
int     eth3.10          10  BACKUP          100  22m9s
Testing the VRRP Virtual IP
The local network can reach the VRRP Virtual IP normally:

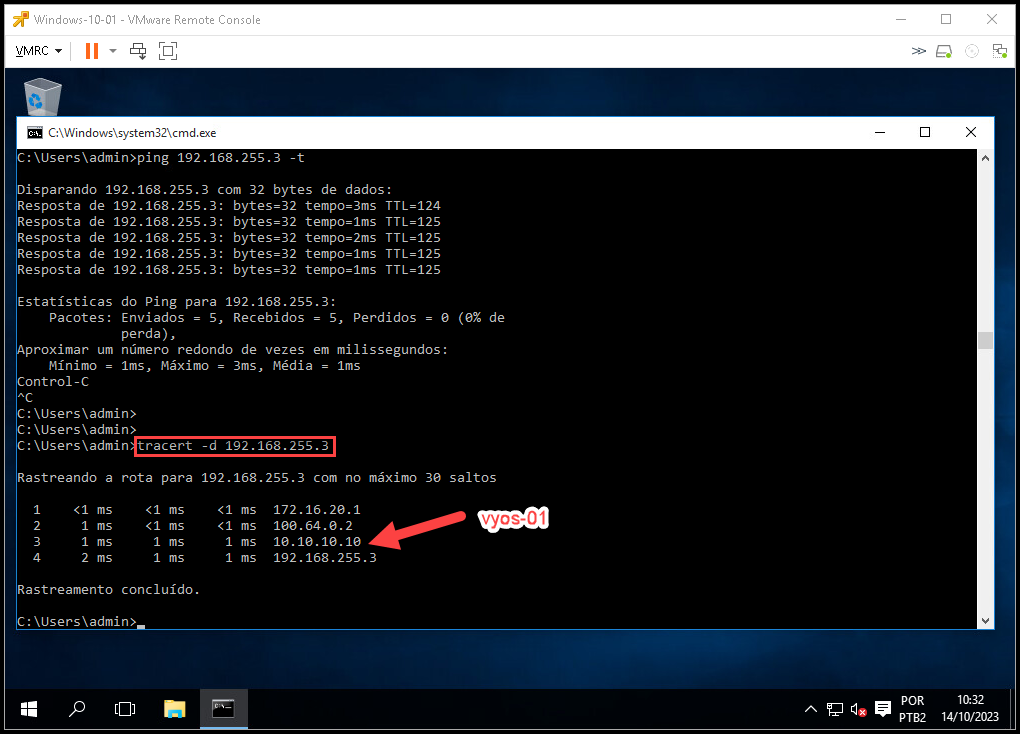
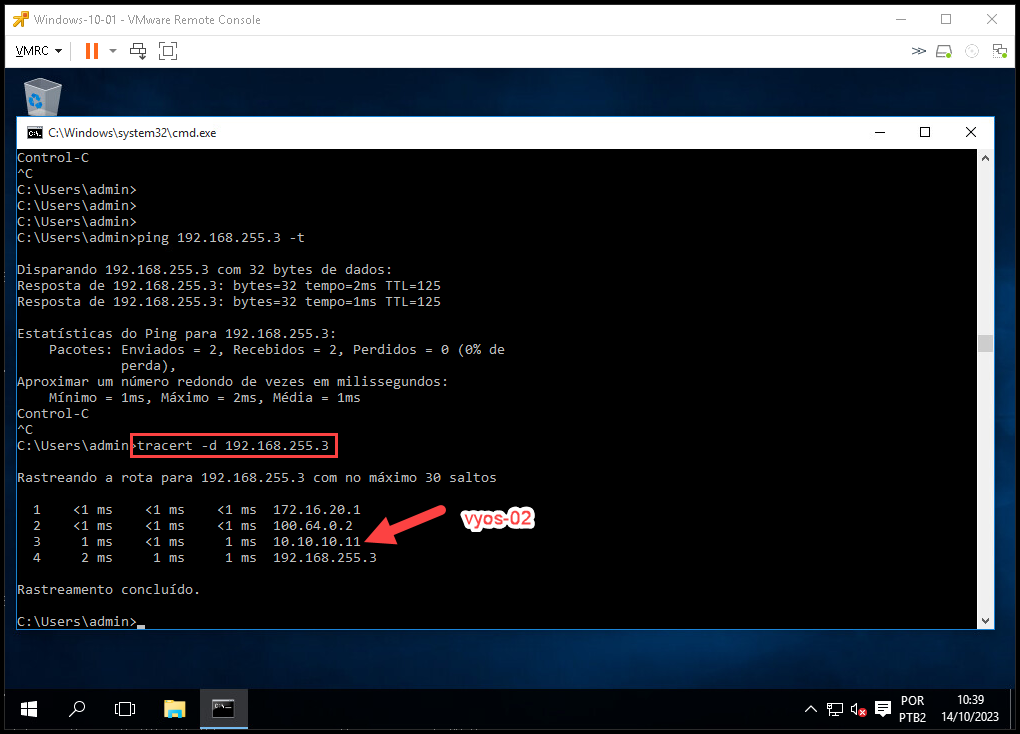
Testing a ping commando to the IP address 192.168.255.3. In this example, the traffic from our Windows client to this IP address is flowing through the VRRP infrastructure. With the “tracert” command, we can see that the traffic is flowing through the first VyOS router (vyos-01):
So, from the local network, we can access the VRRP Virtual IP from SSH (just to test):

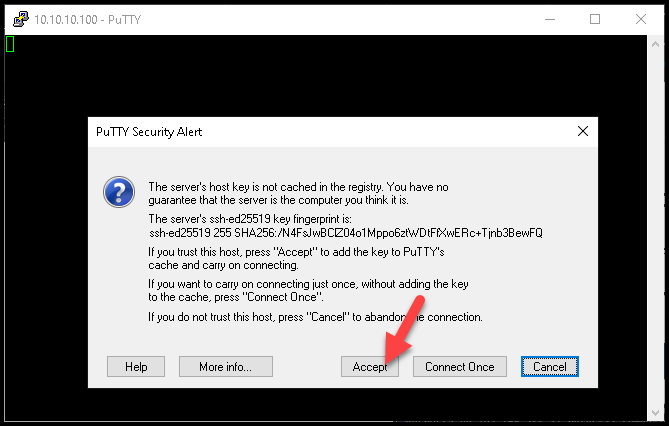
Type the username and password for our VyOS router and, that’s it 🙂
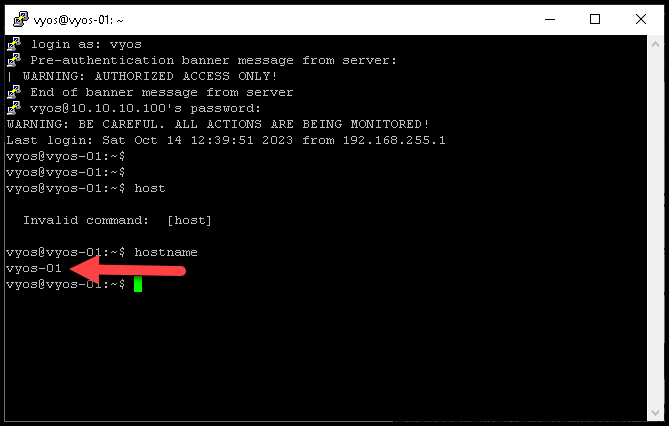
As we can see in the below picture, the VRRP Virtual IP 10.10.10.100 redirects our connection to the “vyos-01” – this is the MASTER router on the VRRP infrastructure:
But, if we have problems with the “vyos-01”:
The traffic will be redirected to the “vyos-02” automatically, as we can see in the below picture:
At this point, our VRRP configuration is working as expected and we can use the VRRP Virtual IP for our local clients normally!
External reference:
High Availability Walkthrough — VyOS 1.4.x (sagitta) documentation