Deploying and Edge Transport Node is an article that shows all the necessary steps to deploy an NSX Edge Transport Node. We are deploying an Edge VM (Virtual Machine) format in this example.
We had written an article to explain basic concepts around the NSX. Access the below link to access this article:
https://dpcvirtualtips.com/introduction-to-nsx-t/
What is an Edge Transport Node?
Basically, an Edge Transport Node is a component of the NSX infrastructure. The Edge Transport Node resides on the NSX Data Plane and hosts the NSX gateways Tier-0 and Tier-1. Additionally, some services that cannot be distributed under the Host Transport Nodes are executing on the Edge Transport Nodes.
Services such as NAT, VPN, Load Balancing, and Gateway Firewalling are examples of services that need to run into an Edge Transport Node.
An Edge Transport Node can be:
- A Virtual Machine (VM)
- Physical Server (Bare Metal)
Important: In scenarios when we need high performance (to handle a high traffic volume), VMware recommends using the physical server (Bare Metal). However, the Edge VM has different sizes. So, you can choose the best size to fit your needs!Before We Start
The Edge Transport Node is a network device that has its management IP. We highly recommend you separate the management IP address for the Edge Transport Node and, create the necessary DNS entries for this Edge Transport Node.
Steps to Deploy an Edge Transport Node
Firstly, we need to access the NSX Graphical User Interface (GUI):
Next, access the menu:
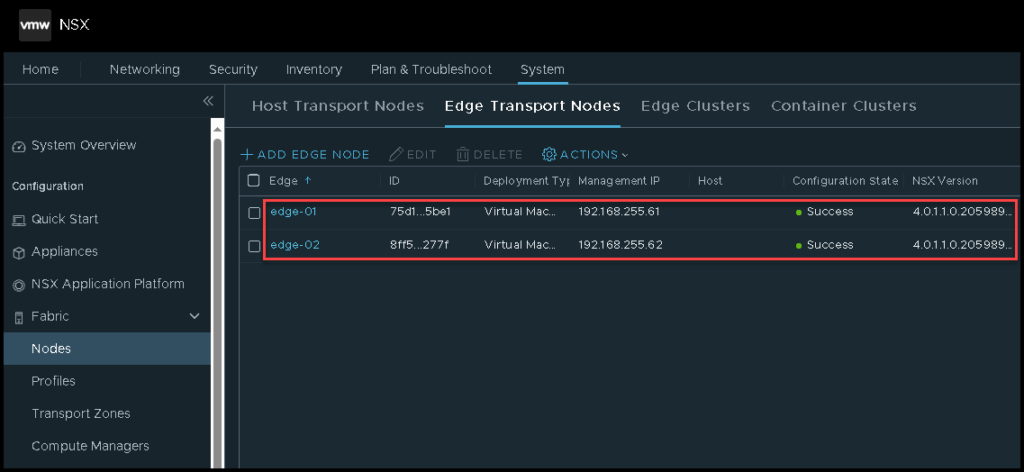
System –> Fabric –> Nodes –> Edge Transport Nodes
In our example, we can see that we already deployed two Edge Transport Nodes in VM format:
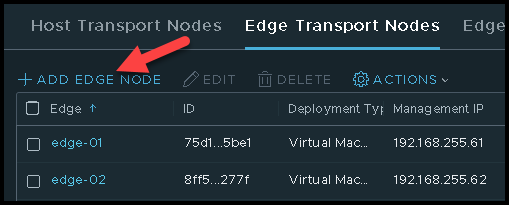
Our aim here is to deploy additional Edge VMs. So, click on “ADD EDGE NODE”:
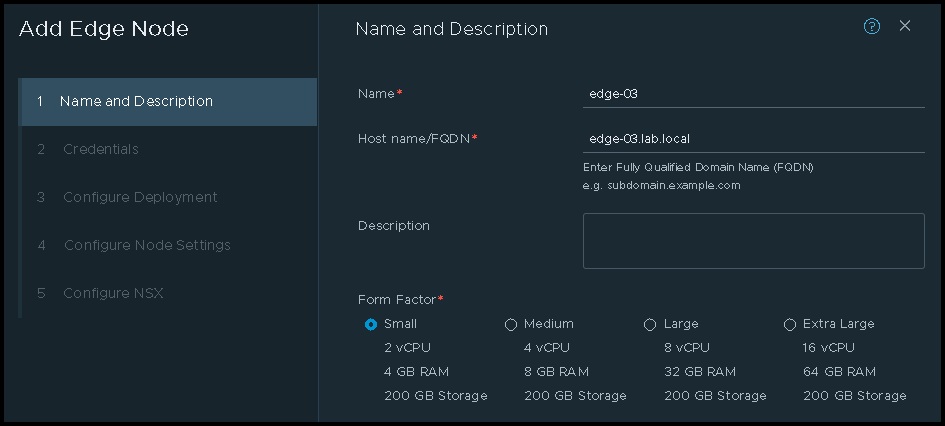
A wizard will show up to guide us during the Edge Node deployment.
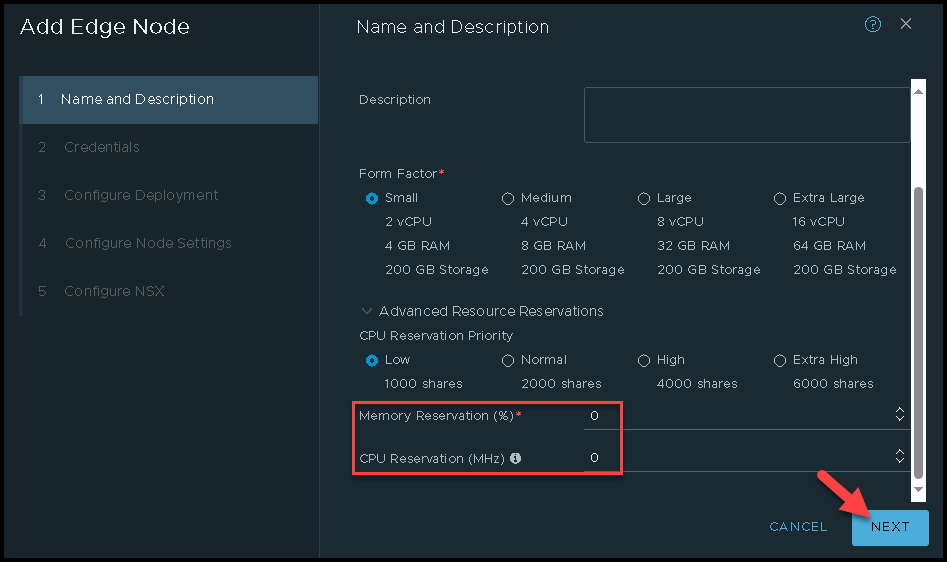
Here, we need to type the Edge VM Name, FQDN, and choose the Edge VM Form Factor. As we can see, we have four Form Factor sizes. The basic difference between all is related to the amount of vCPU and Memory.
Due to the we are using a lab environment with limited resources, we are choosing the Small Form Factor:
Scroll down and under Advanced Resource Reservations we can select the level of resource reservations for the Edge VM. The default value is High.
Again, we are using a lab environment. So, we are choosing the Low CPU Reservation Priority, and under Memory and CPU Reservation we are typing “0” to not reserve anything. Click on “NEXT” to continue:
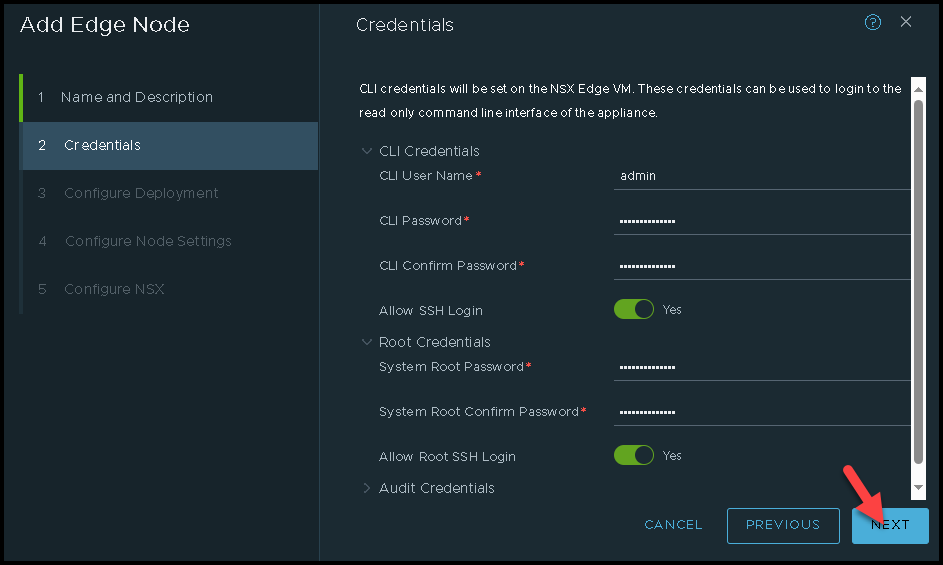
The next step is to type the “admin” and “root” credentials. Additionally, toggle the button “Allow SSH Login” to enable the SSH service with the username. Click on “NEXT” to continue:
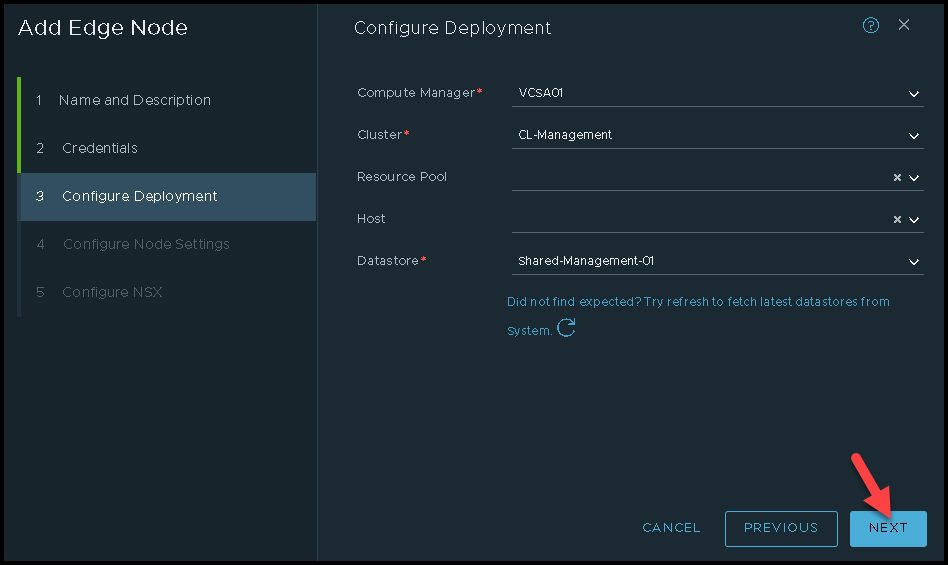
Under Configure Deployment, we need to specify where the Edge VM will run. We need to select the Compute Manager, the Cluster Name, and the Datastore. After that, click on “NEXT”:
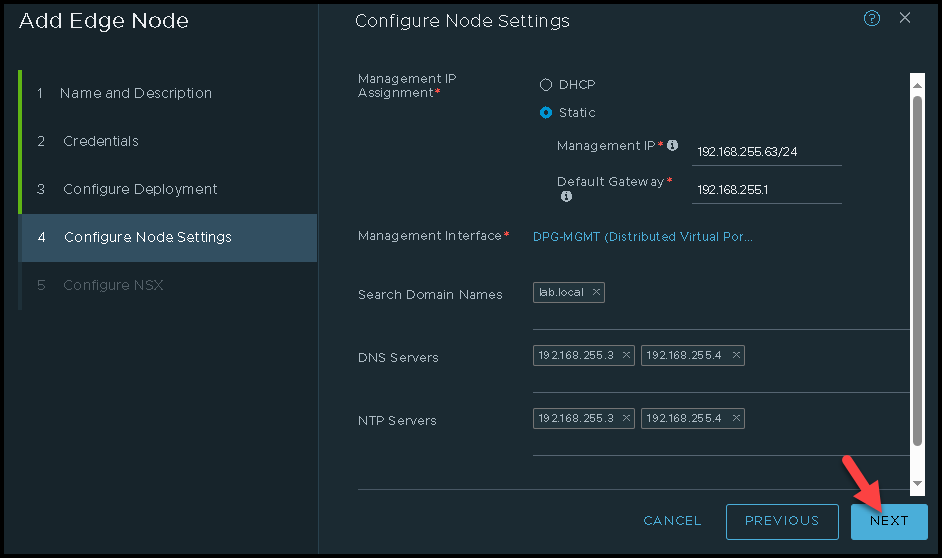
Under Configure Node Settings, we need to specify the management details for the Edge VM. In other words, we need to specify the IP, Network Mask, Default Gateway, Search Domain Name, DNS, and NTP Server.
Suggestion: Look that we can get the IP address from DHCP or Static. I highly recommend you set up the Static IP address.
Click on “NEXT” to continue:
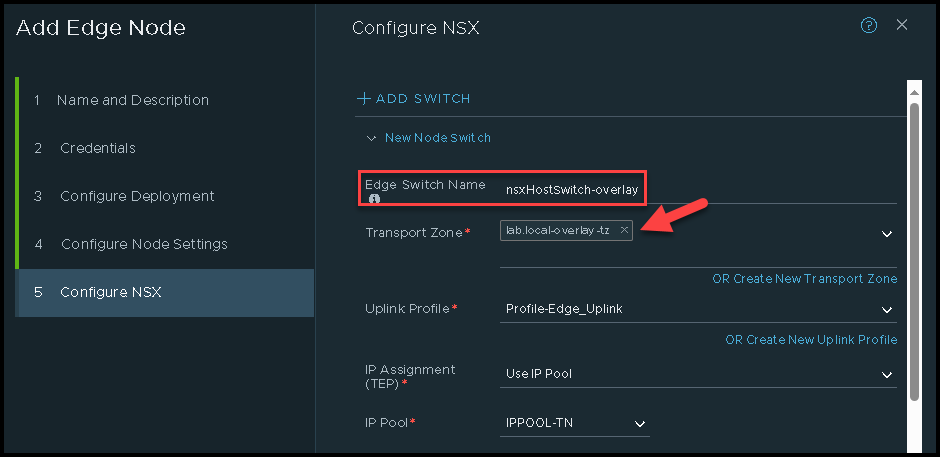
Under Configure NSX, we need to configure all necessary things for this Edge VM to be part of the Overlay Network, and also, to communicate with Uplink devices (traffic North-South).
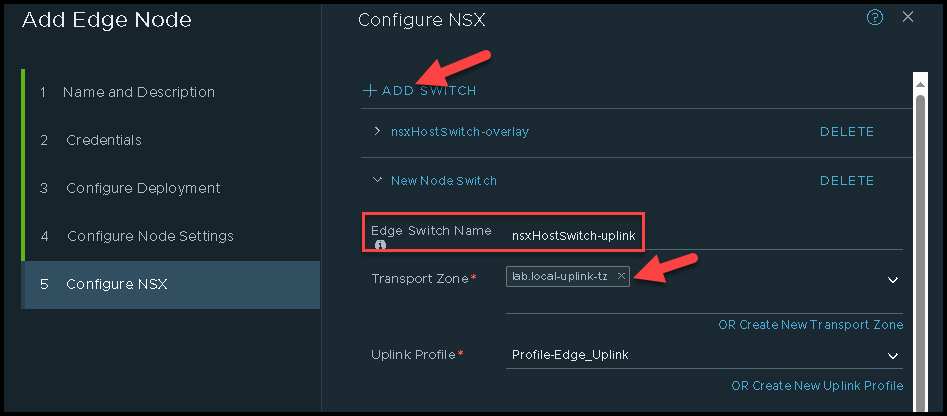
Here, we are creating two N-VDS switches:
- One N-VDS will be used for the Overlay Traffic
- Another N-VDS will be used for the Uplink (VLAN-Based) Traffic
Look that the first N-VDS has an Overlay Transport Zone and the other N-VDS has the Uplink (VLAN-Based) Transport Zone.
Overlay N-VDS:

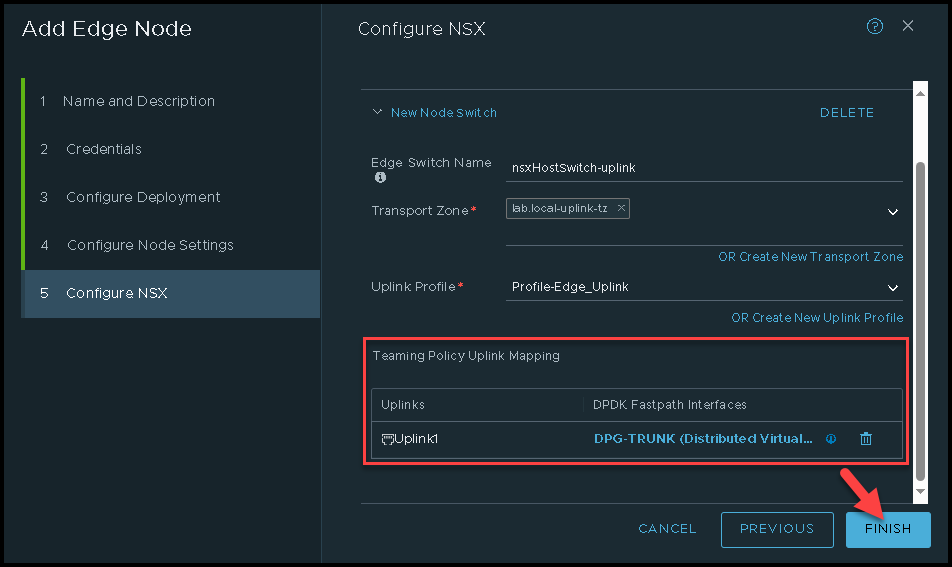
Uplink (VLAN-Based) N-VDS:
Click on “FINISH” for starting the deployment process:
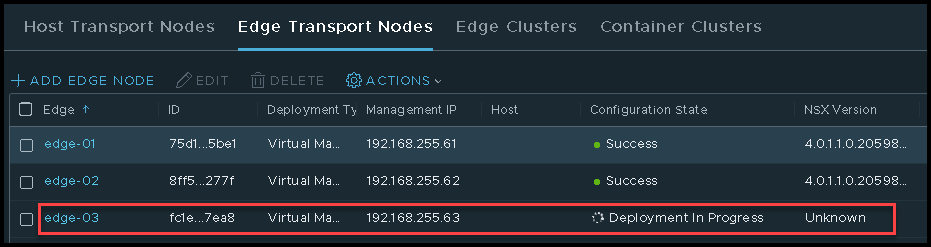
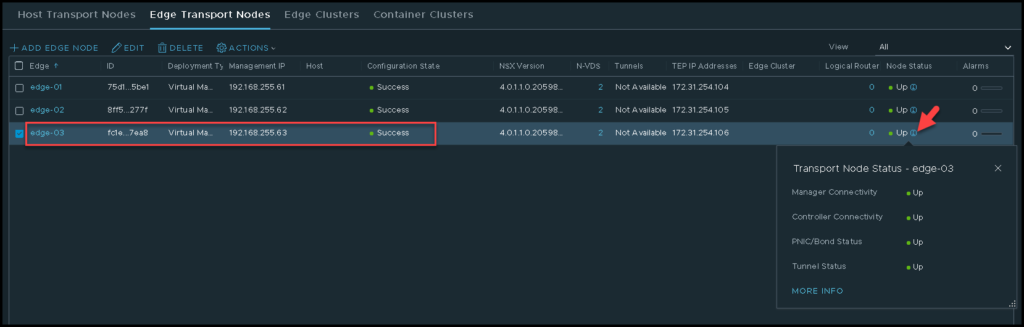
Under the Edge Transport Nodes tab, we can see that the Deployment of the “edge-03” is in progress:
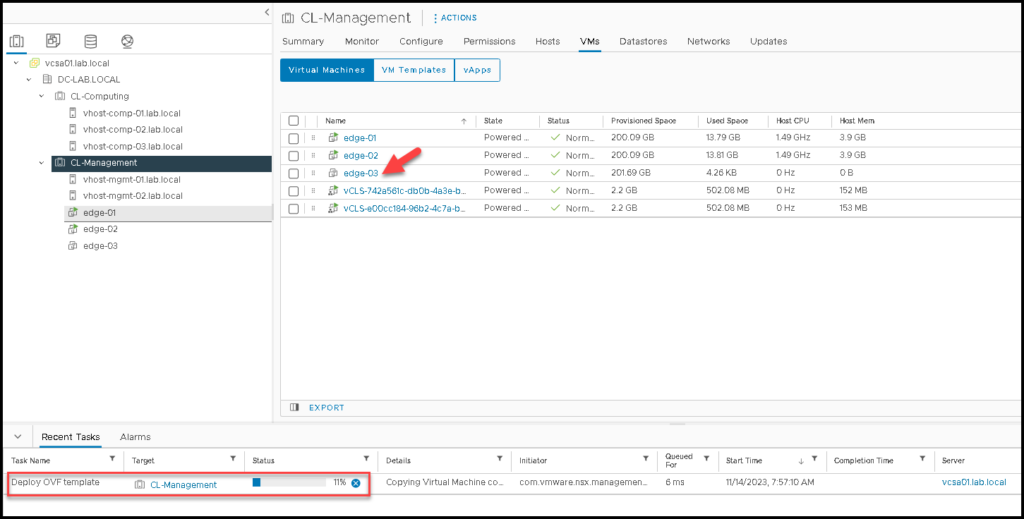
Under the vSphere Client page, we can see a task related to it:
After a few minutes, the Edge VM deployment is done and we can see the new Edge deployed successfully:
At this point, our deployment is finished and we can deploy additional Edge VMs, if necessary to create an Edge Cluster 🙂