VMware Cloud Build Deployments Steps is an article that outlines all the necessary steps to deploy the VMware Cloud Builder VM and bring up the management domain.
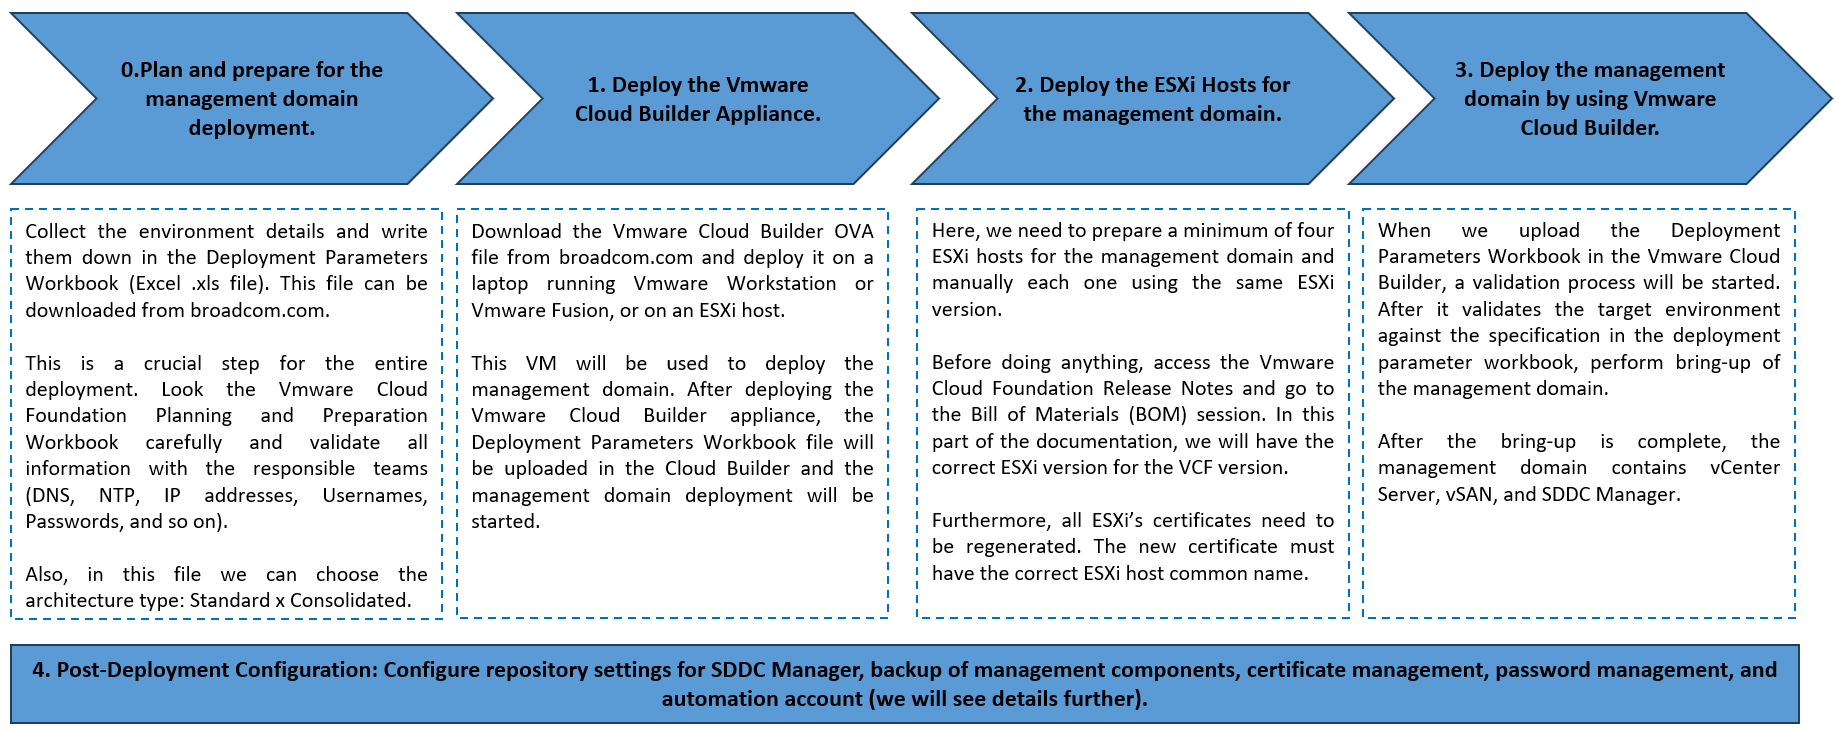
Deployment Overview of VMware Cloud Foundation (VCF)
The deployment of VMware Cloud Foundation is automated by the VMware Cloud Builder. It deploys the management domain and the SDDC Manager. The SDDC Manager VM will deploy all other workloads (Virtual Infrastructure workload domains).
To deploy the management domain, we can use the following steps:
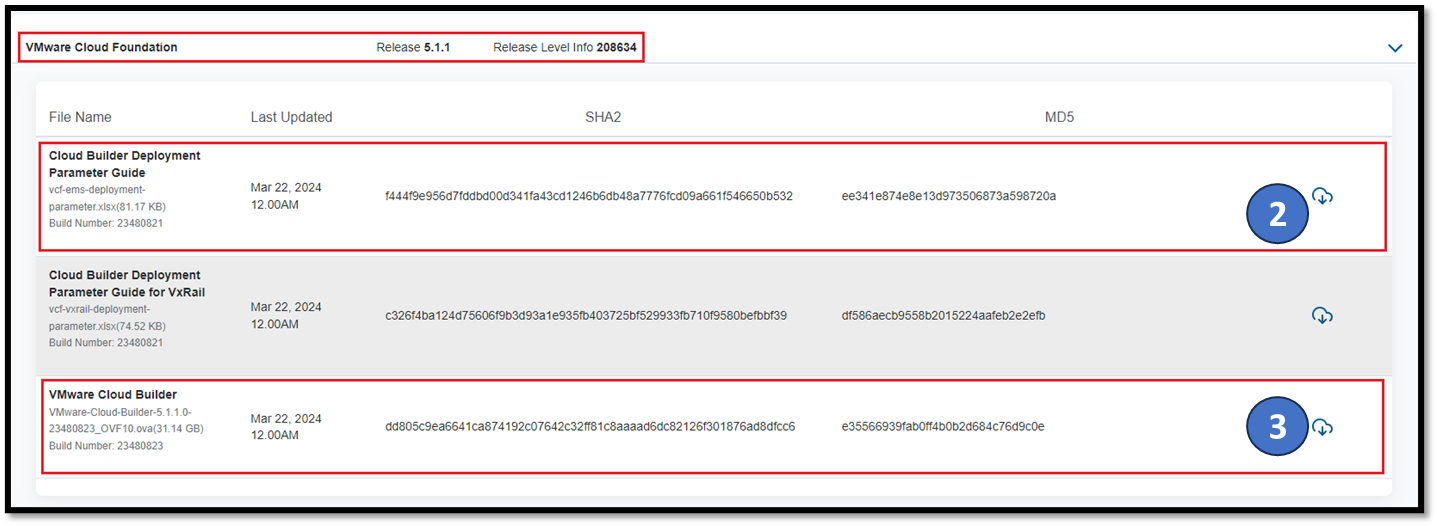
Download the VMware Cloud Builder
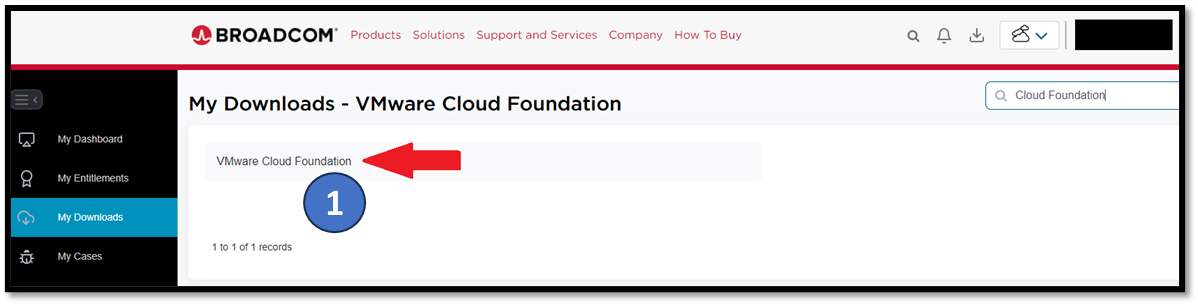
Access the Broadcom’s support page to download all the necessary files:
The “Cloud Builder Deployment Parameter Guide” will be your best friend in this journey 🙂
This Excel file (.xlsx) must be typed with all the details for deployment to the management domain. Please take your time and check all the information in this file.
The “VMware Cloud Builder” OVA file will be used to deploy the virtual machine – we will use this file to deploy the VMware Cloud Builder:
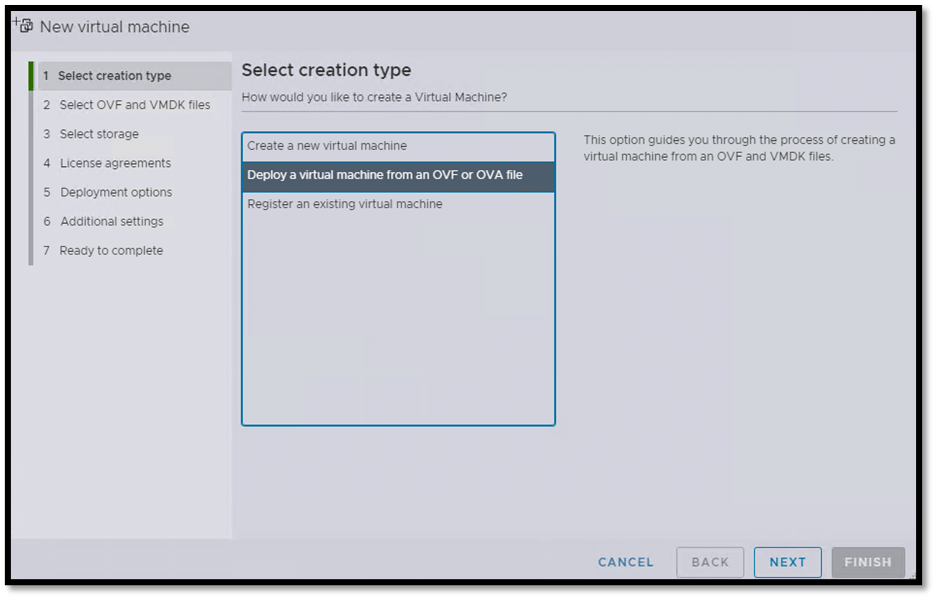
Deploy the VMware Cloud Builder
For instance, we are deploying the VMware Cloud Builder through an ESXi host in this case:
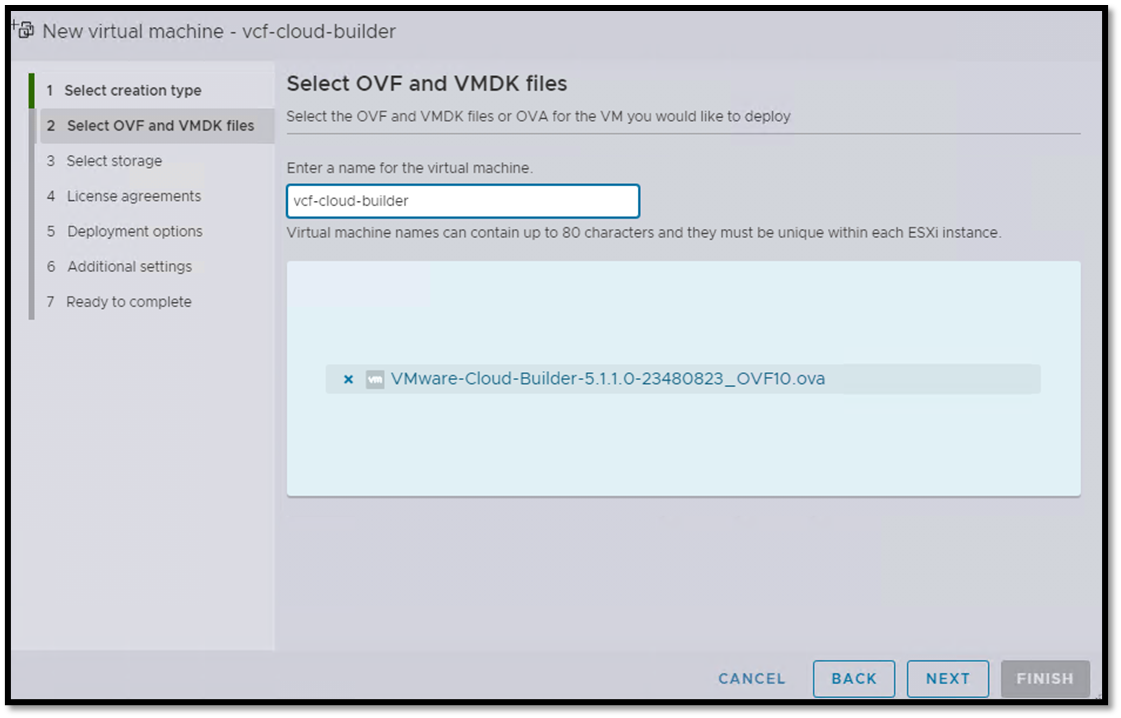
Type the virtual machine name and click on NEXT:
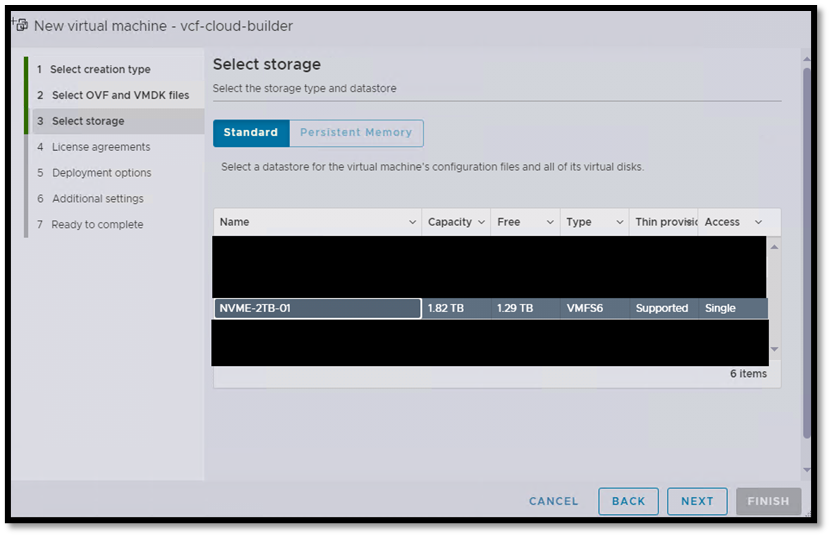
Select the storage and click on NEXT:
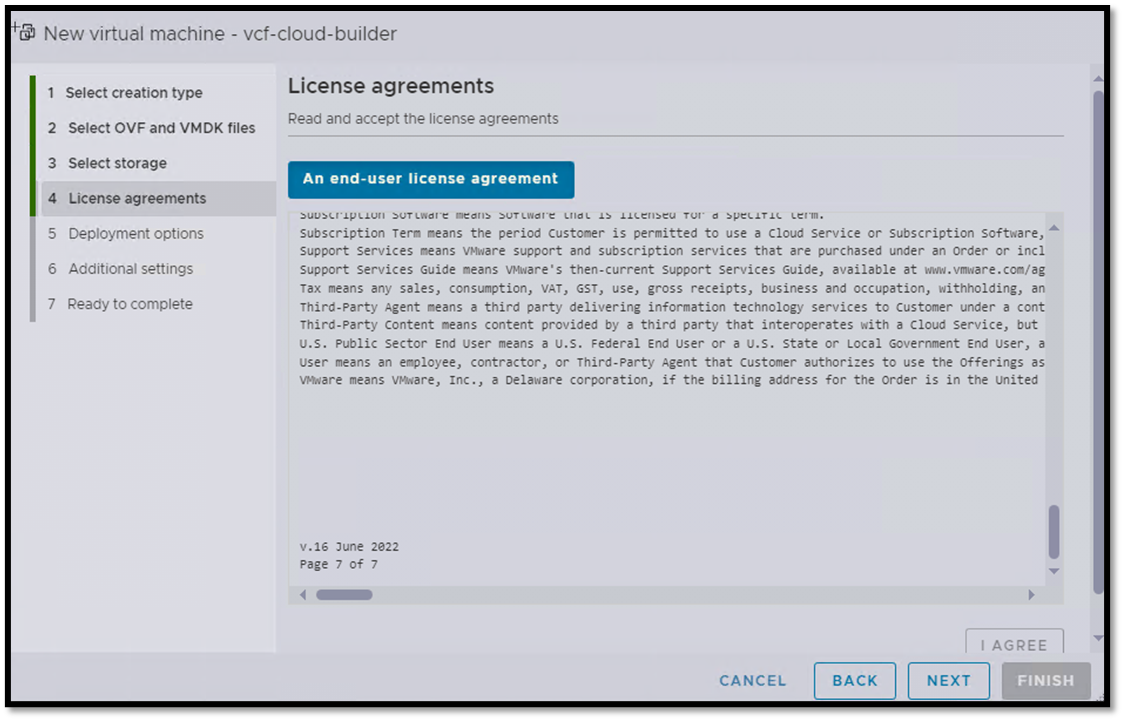
Under the license agreement page, click on “I AGREE” and then click on NEXT:
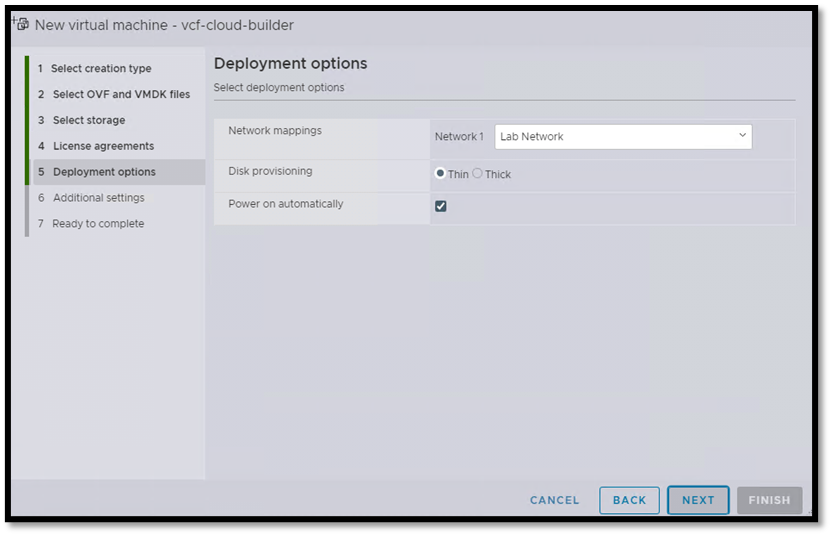
Under deployment options, we need to select the network port group that the virtual machine will use. In our lab, the port group name is “Lab Network.”
The disk provisioning should be “Thin”. Click on NEXT to continue:
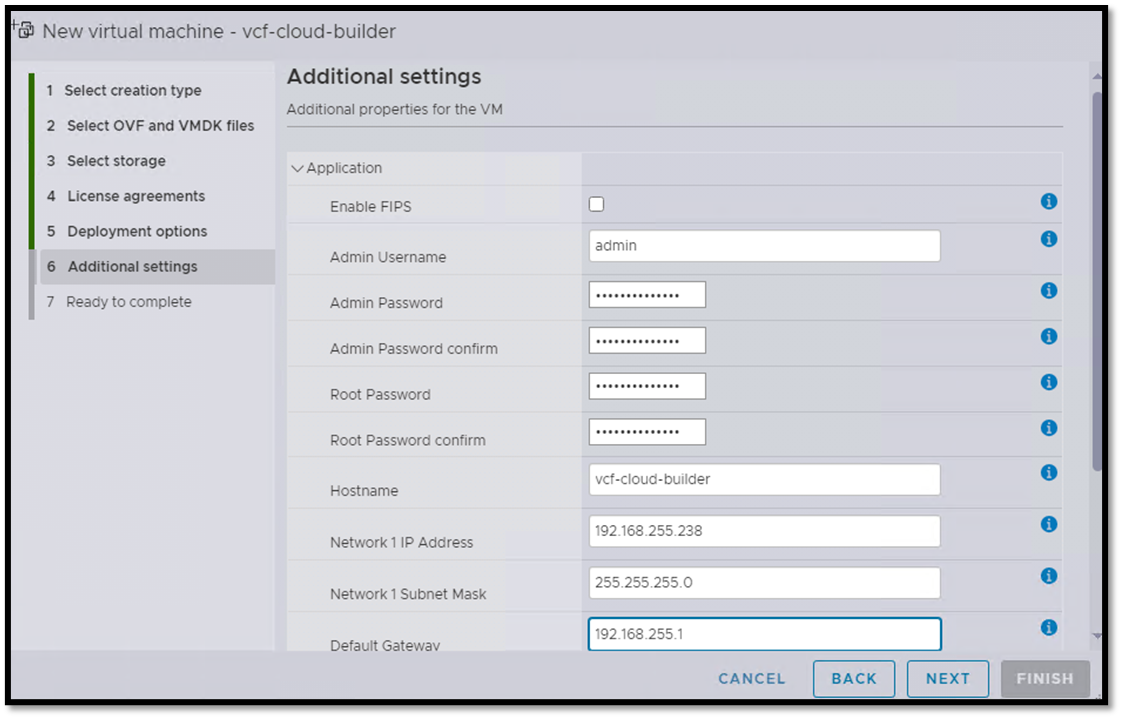
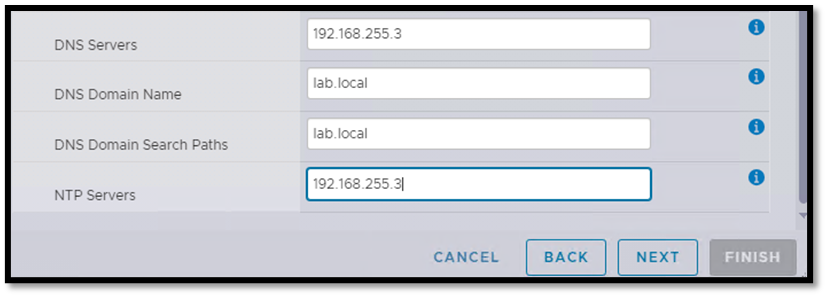
Under additional settings, we must type all passwords, IPs, names, etc:
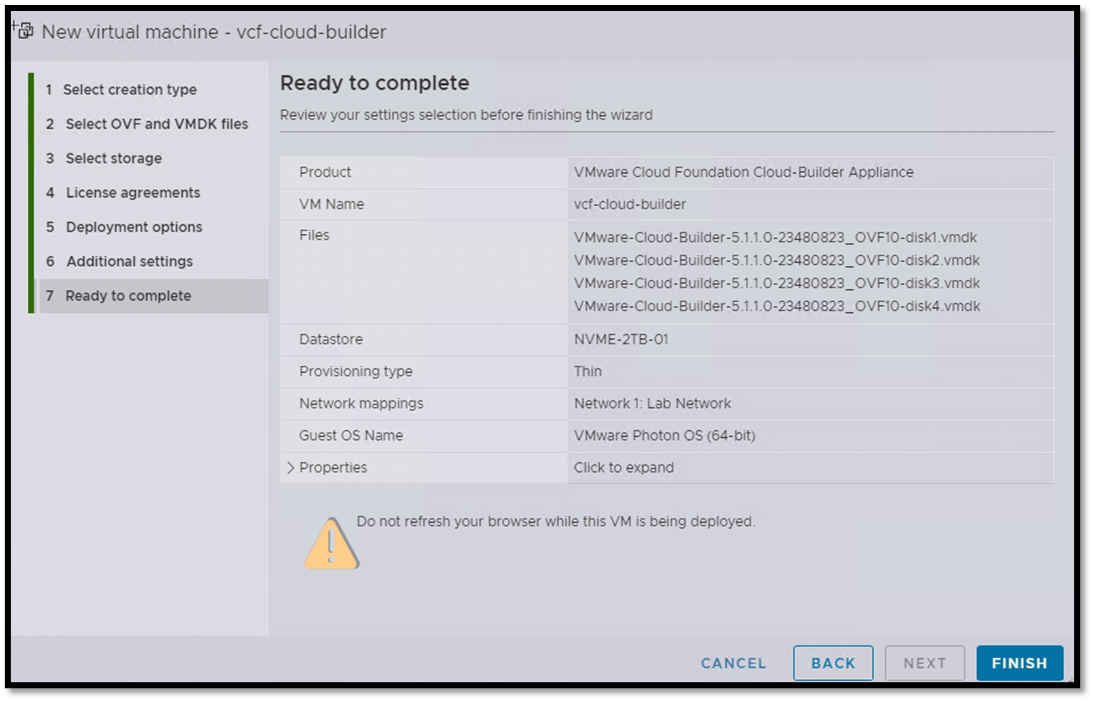
Click on FINISH to start the VM deployment process:
Note: After deployment, access the VM by SSH and adjust the NTP service (ensure this service is properly running). If your NTP server is an AD-based server (Active Directory), maybe you need to adjust the NTP server configuration file to be more precisely:
echo “tos maxdist 30” >> /etc/ntp.conf
systemctl restart ntpd
ntpq –p
ntpq –c assoc
Additionally, we can change the required number of ESXi hosts to bring up the management domain. By default, four ESXi hosts are required to create the management domain. However, for lab or proof-of-concept environments, we can create the management domain with only one ESXi host:
1. Acess the VMware Cloud Builder by SSH;

2. Add the following line into the configuration file:
echo "bringup.mgmt.cluster.minimum.size=1“ >> /etc/vmware/vcf/bringup/application.properties

3. Reboot the VMware Cloud Builder appliance.
Access the VMware Cloud Builder UI
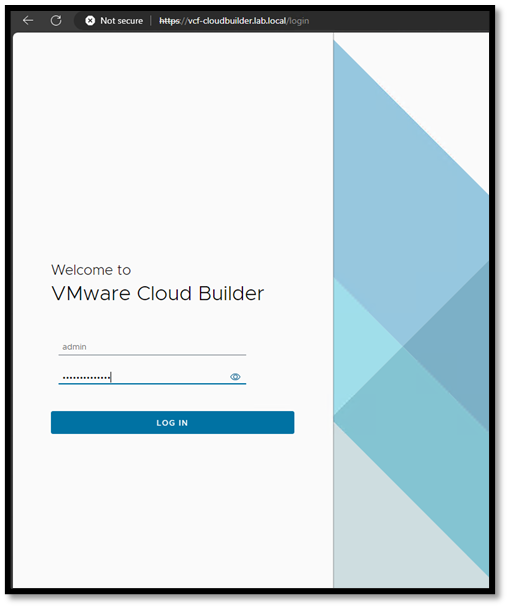
To access the VMware Cloud Builder user interface:
https://IP_VMware_Cloud_Builder
or
htps://FQDN_VMware_Cloud_Builder
The “admin” user is necessary to log in to this page:
As we can see, there are two supported platforms: VMware Cloud Foundation and VMware Cloud Foundation on Dell EMC VxRail.
Select the desired option and click on NEXT:

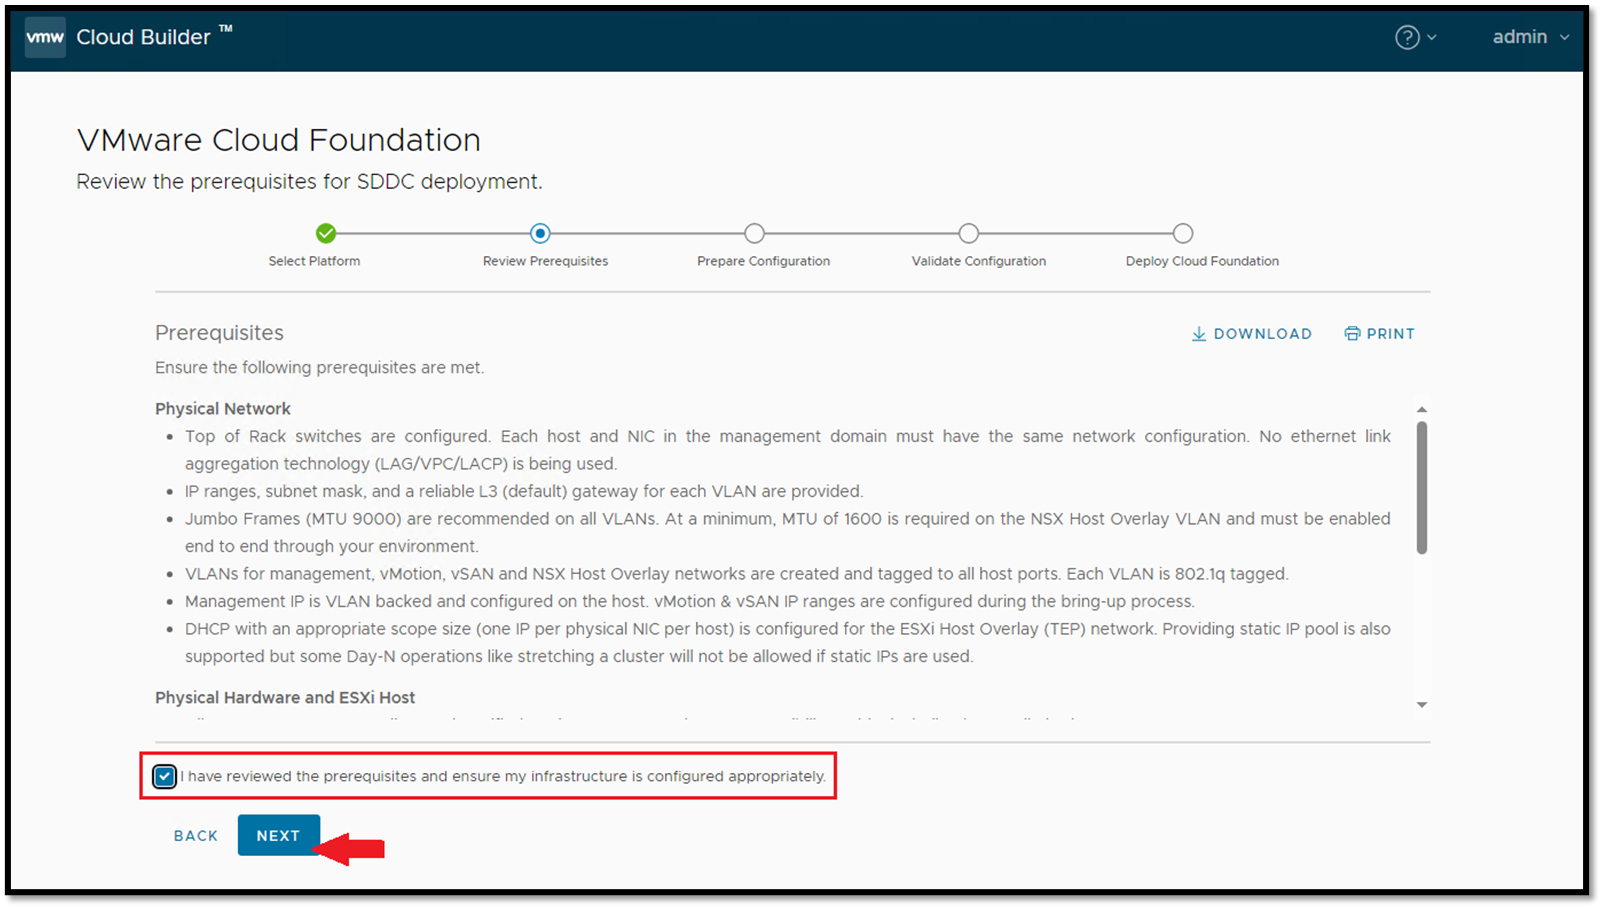
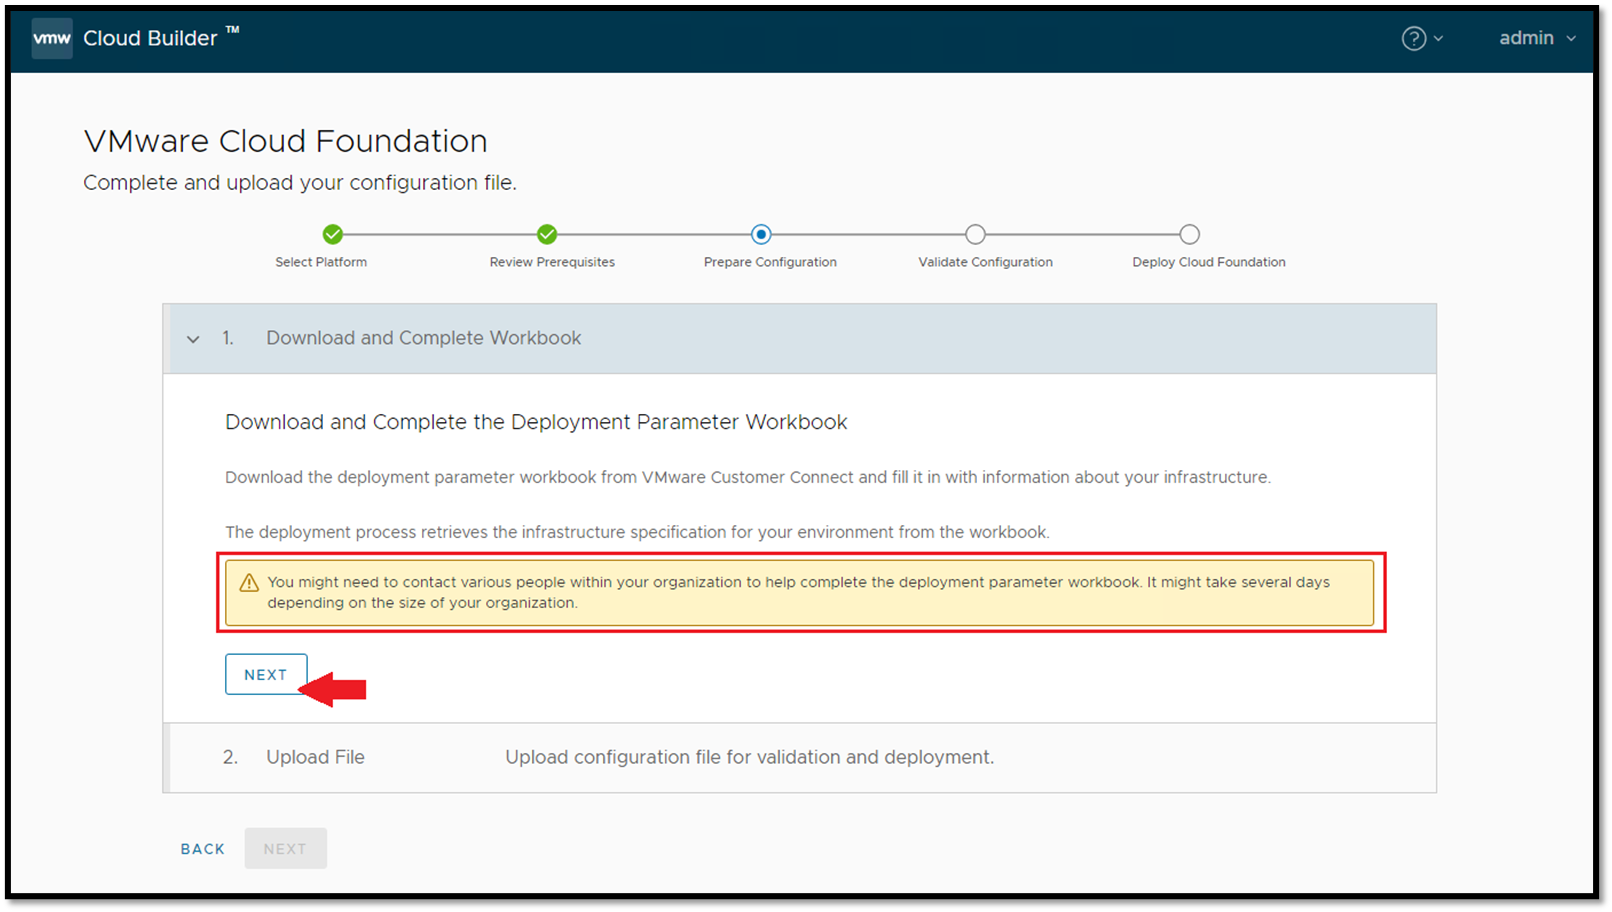
On this page, we recommend already having the Deployment Parameter Workbook done. Click on NEXT:
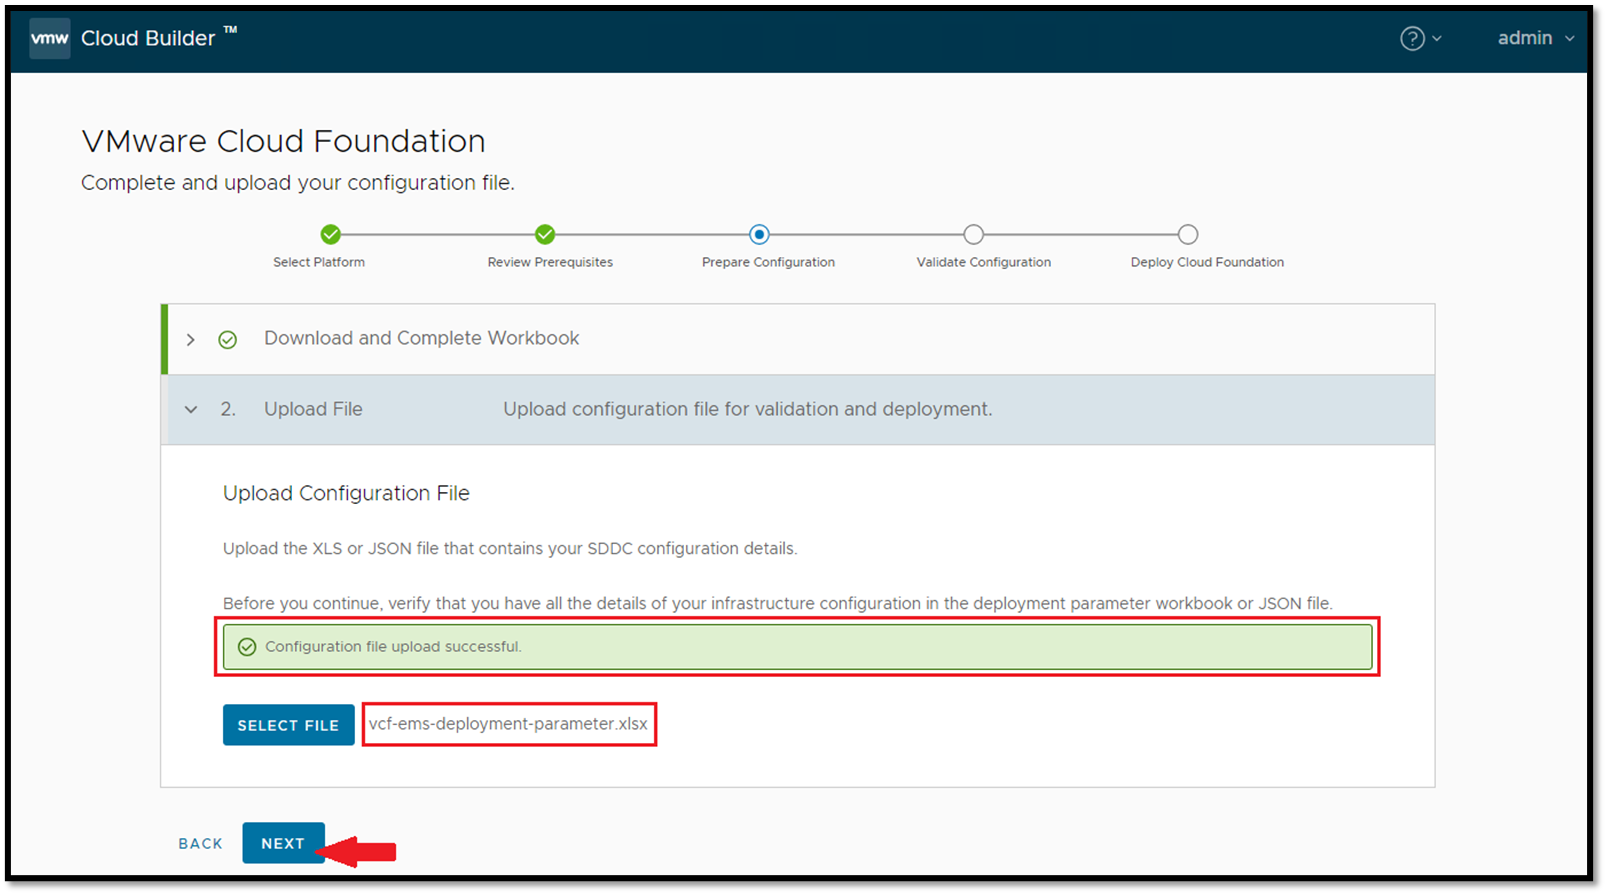
Select the Deployment Parameter Workbook file and click on NEXT:
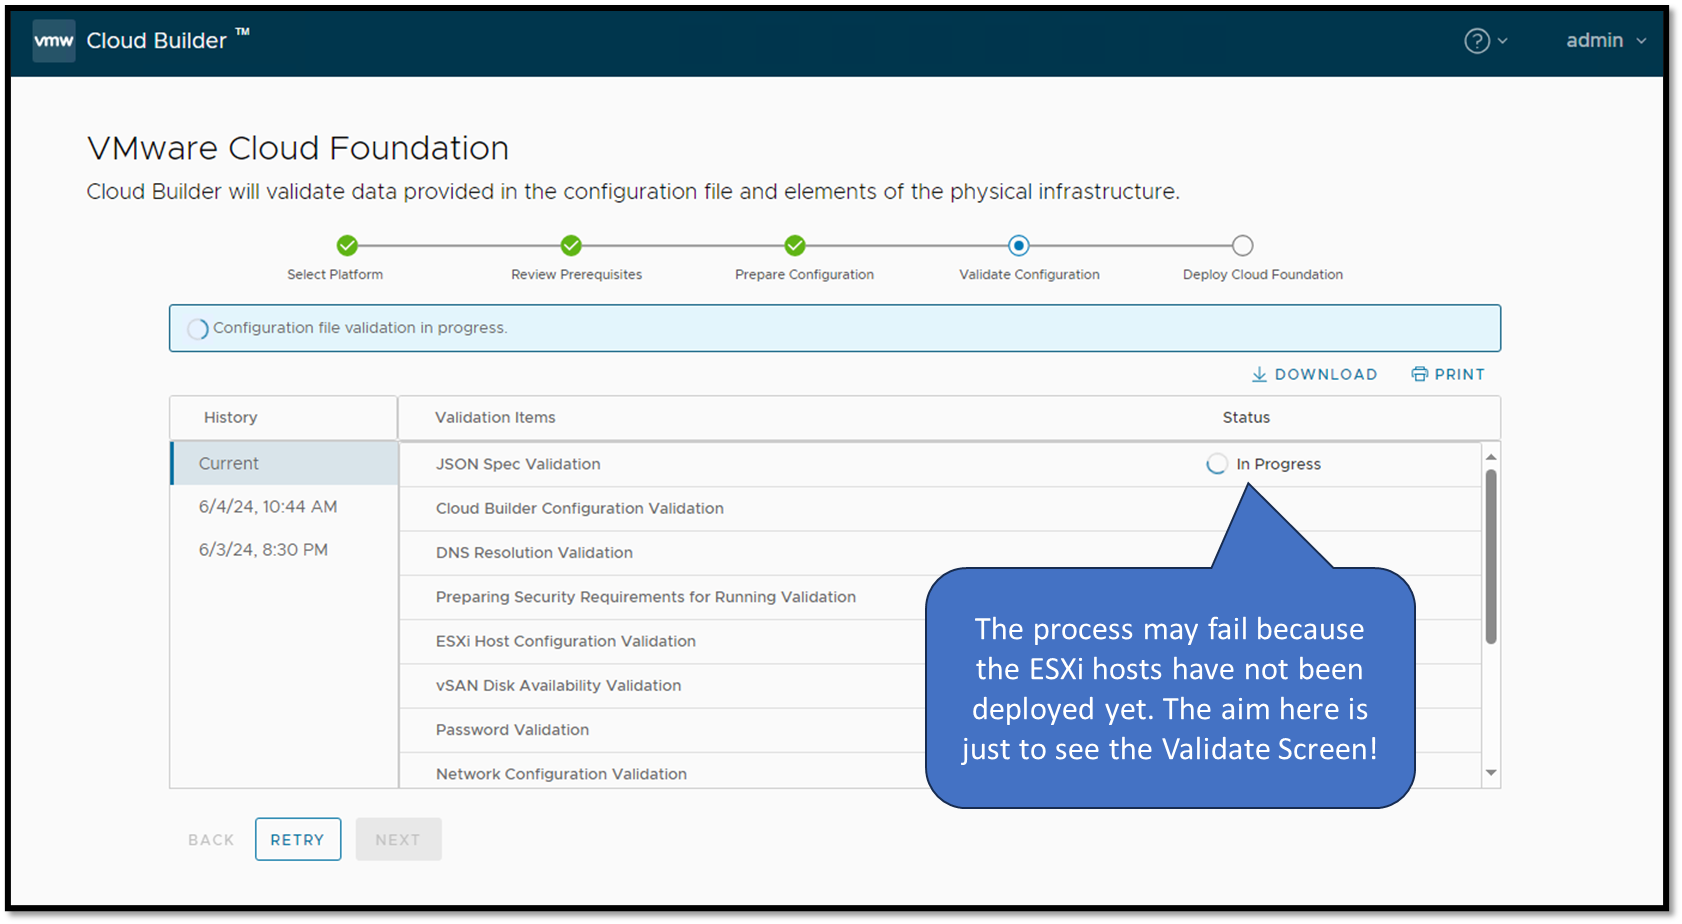
After that, a validation of all configurations will be started. If all tests pass OK, we can begin the deployment process effectively:
To Wrapping This Up
To succeed in the bring-up process, check all information in the Deployment Parameter Workbook file. Most failures in this process are due to wrong information in this file.