Accessing an RDP Server Pool Through the NSX ALB is an article that shows how to load balance user access to an RDP Server Pool using the NSX Advanced Load Balancer solution.
First and Foremost, Did you know what is the NSX Advanced Load Balancer (ALB)?
Welcome to the VMware NSX Advanced Load Balancer (formerly known as Avi Networks). The NSX Advanced Load Balancer makes it easy to apply load balancing, web application firewall, and container ingress to any application in any data center and cloud.
If you would want to know more details about the NSX ALB, I highly recommend you to access the below link:
https://docs.vmware.com/en/VMware-NSX-Advanced-Load-Balancer/index.html
We have written some articles related to it. I will share the access link here as well – I recommend you check each one to understand practically how the NSX ALB works and how we can deploy it:
NSX Advanced Load Balancer Deployment Steps:
https://dpcvirtualtips.com/nsx-advanced-load-balancer-deployment-steps/
Balancing a Web Application with NSX ALB:
https://dpcvirtualtips.com/balancing-a-web-application-with-nsx-alb/
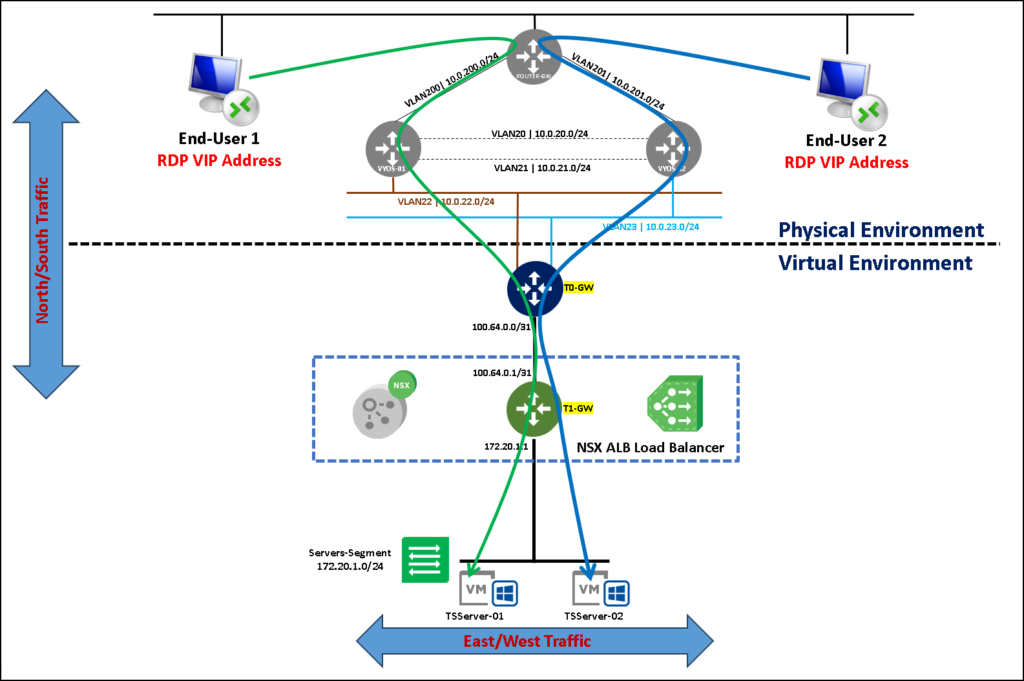
About the Lab Environment
So, as I said, I would like to bring up the main idea of this article: A way for users to access the RDP Farm Server with high availability and failover.
In this case, to meet our goal, we can use the NSX ALB for that.
In the below picture, we can see our topology. Our RDP Server Pool is composed of two RDP Servers. Users can access each one as a Jump Server, and then, access the internal resources or applications.
We can select the Load Balance algorithm to fit our needs. For example, we can use “Round Robin”, “Consistent Hash”, “Least Connections” and so on – we have a lot of possibilities here.
To follow the next steps of this article, we are considering that you already deployed the NSX ALB Controller and made all necessary configurations to create a new Virtual Service (if you have any questions here, reach me or check both links that I put above on this article):
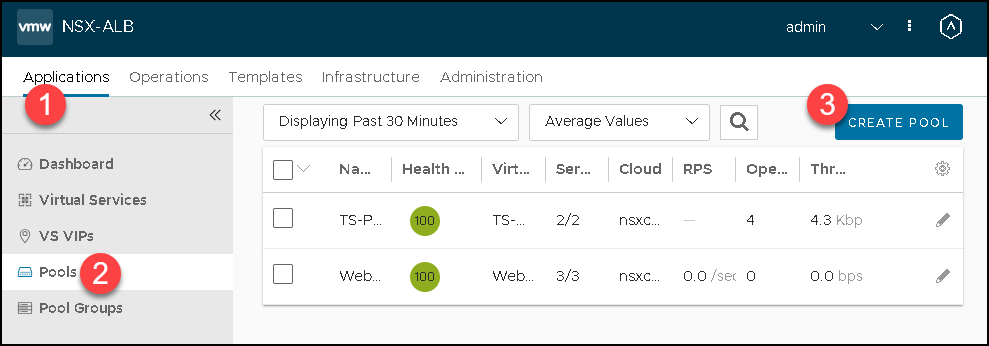
Creating the Application Pool
Firstly, we need to access the NSX ALB Controller GUI and create the Application Pool:
Access the following menu:
Applications –> Pools –> CREATE POOL
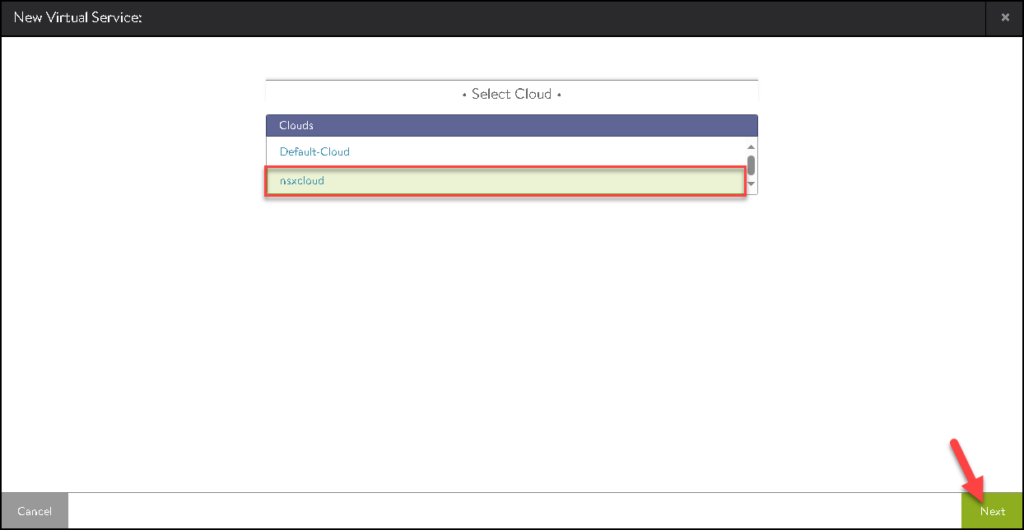
Here, we need to select the Cloud. Select “nsxcloud” and click on NEXT to continue:
Note: In this example, "nsxcloud" is the name of our NSX Cloud Conector. In our case, this name can be the same or not!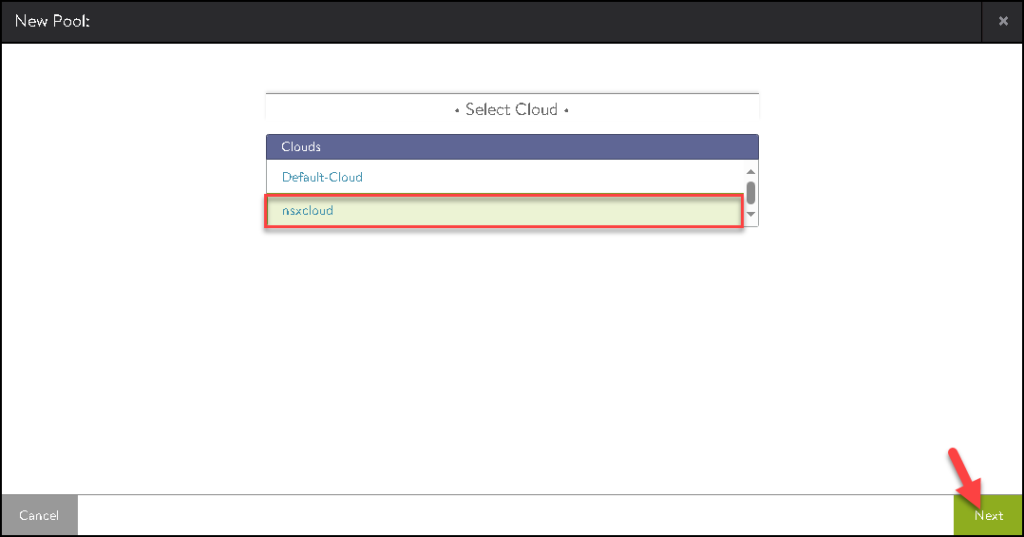
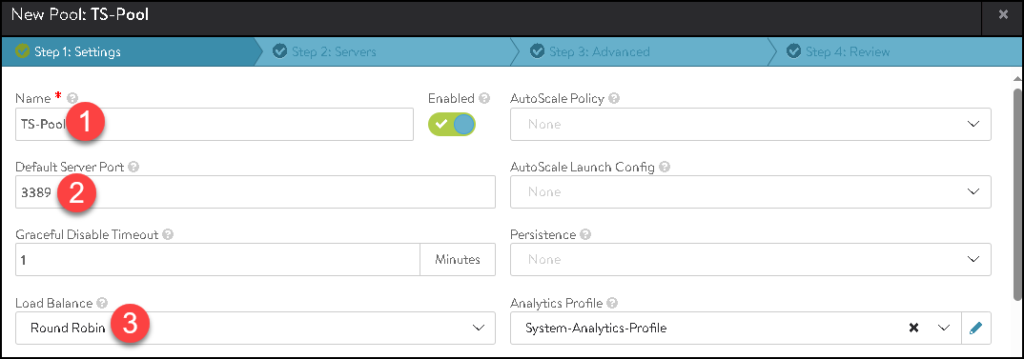
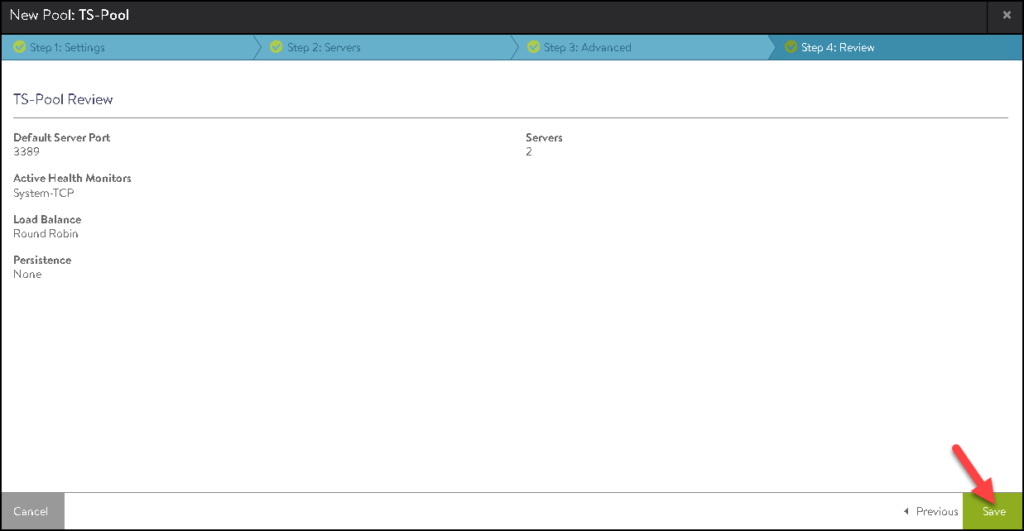
Type the Pool Name, Default Server Port, and the Load Balance algorithm. In this example:
- Name: TS-Pool
- Default Server Port: 3389 –> This is the default TCP/UDP port for the RDP service
- Load Balance: Round Robin
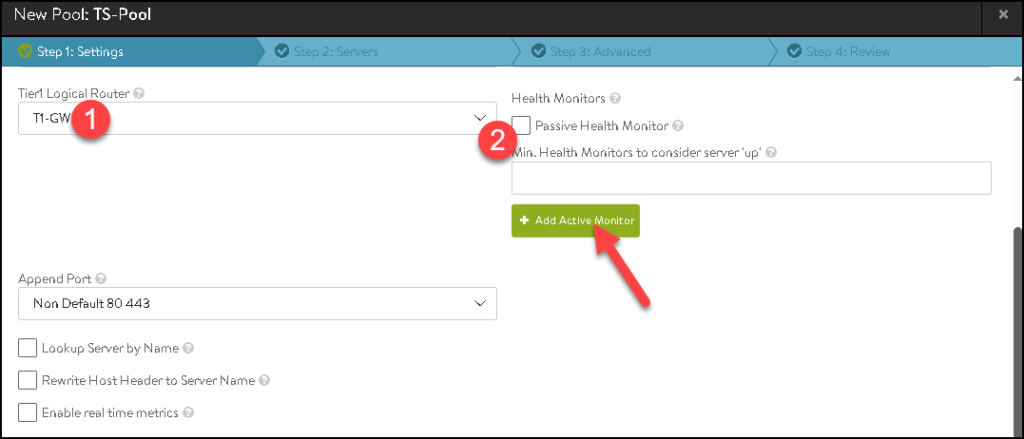
Scroll down the page and select what Tier-1 gateway will be used in this Application Pool. In this example, the Tier-1 gateway is “T1-GW”.
Under Health Monitors, uncheck the option “Passive Health Monitor” and click on “Add Active Monitor”:
After that, select “System-TCP”. This will be the method by which the backend servers will be monitored to check whether them is available or not.
After that, click on NEXT to continue:

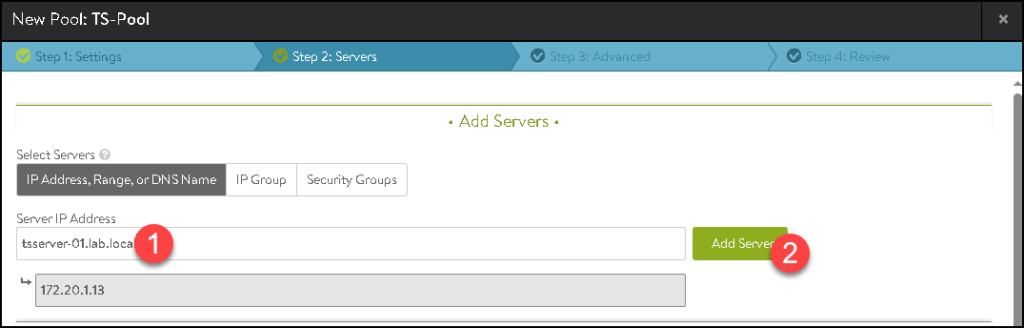
Under Servers, we need to add the servers that will be part of this Application Pool.
In our example, our both RDP servers are:
- tsserver-01.lab.local
- tsserver-02.lab.local
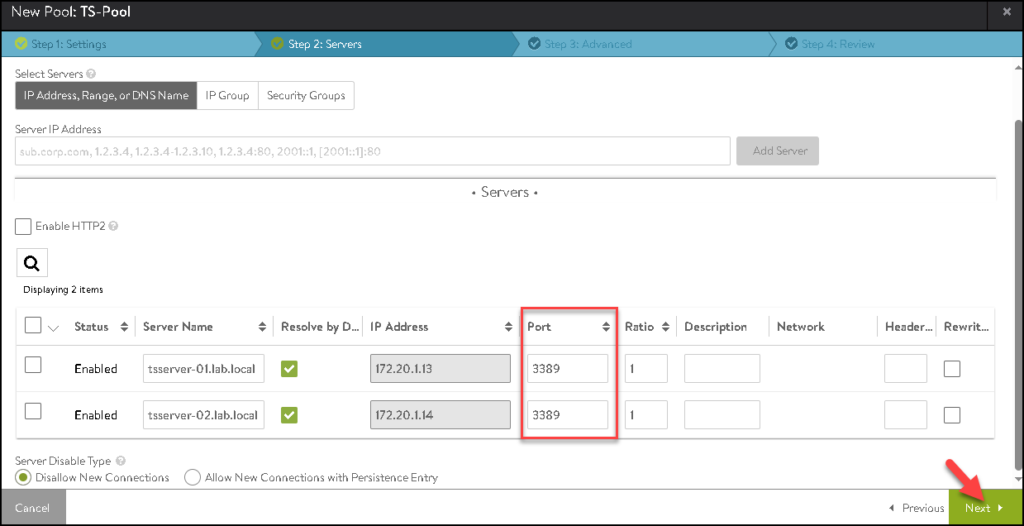
Under the Port Column, specify the logical port used by the RDP server (3389). Click on NEXT to continue:
Click on SAVE to finish the Application Pool creation wizard:
Creating the Virtual Services
After creating the Application Pool, we need to create the Virtual Services. Basically, the Virtual Service is used to provide the Virtual IP address (VIP) that will be used for users to access the service.
In the below picture, we can see a diagram explaining the flow:

To do that, we need to access the following menu:
Applications –> Virtual Services –> CREATE VIRTUAL SERVICE –> Advanced Setup
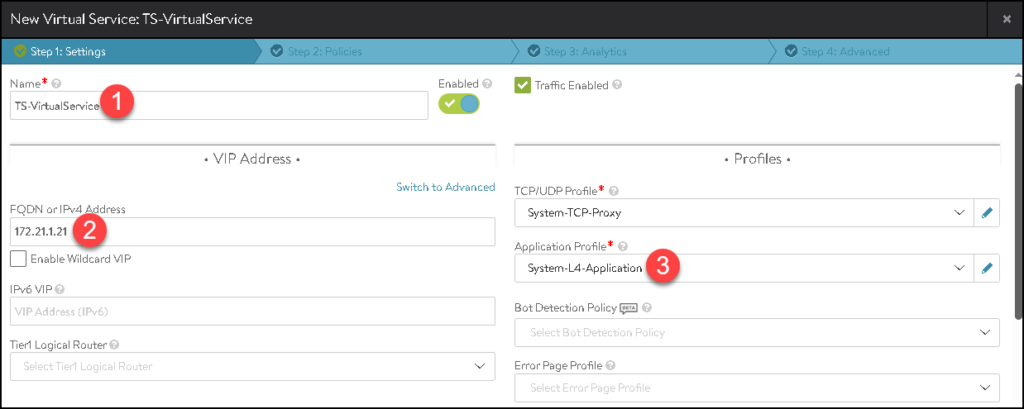
Type the Name, FQDN, or IP address of the Virtual IP and the Application Profile. In this example:
- Name: TS-VirtualService
- FQDN or IPv4 Address: 172.21.1.21
- Application Profile: System-L4-Application
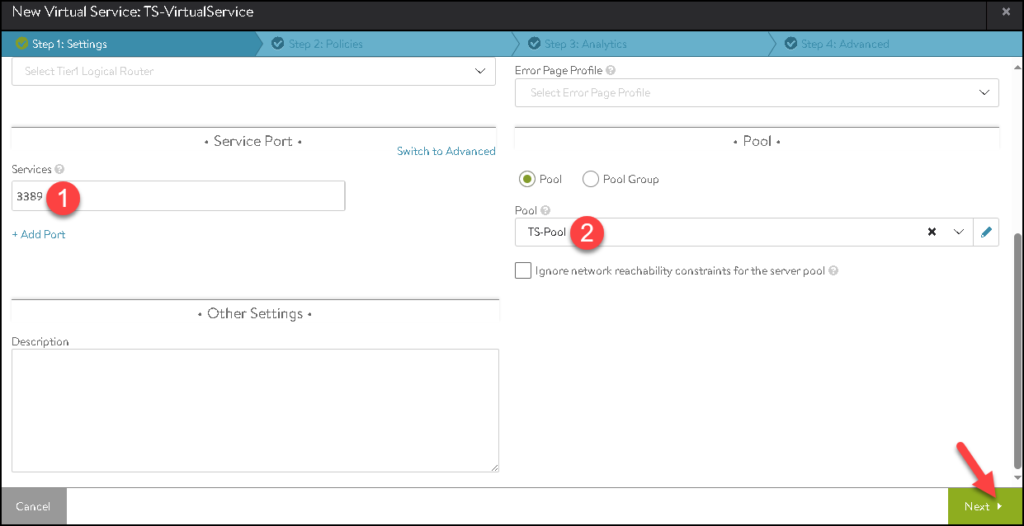
Scroll the page, and set the Services port as 3389. Additionally, select the Application Pool that will be used for this Virtual Service. In this case, the Application Pool is “TS-Pool”. Click on NEXT to continue:
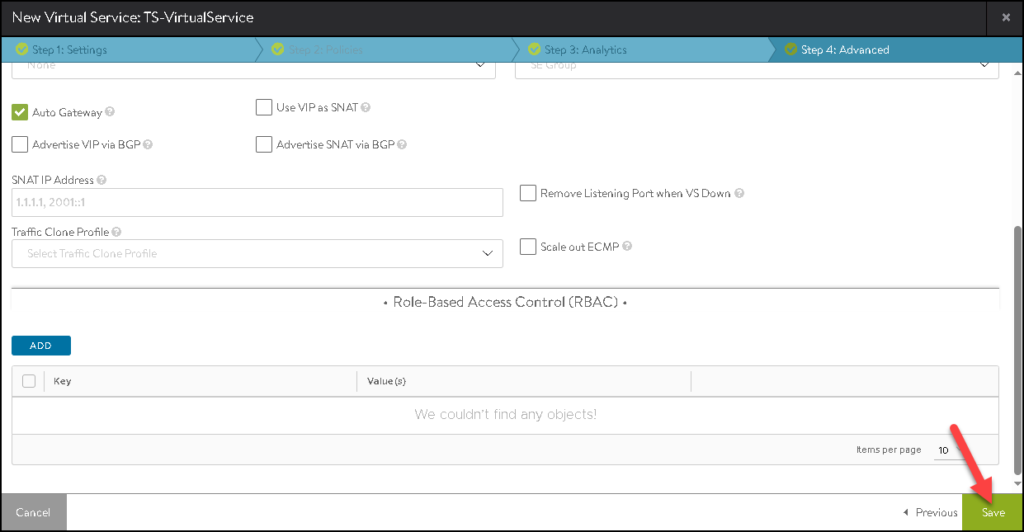
Keep the other things with default values and click on SAVE to finish:
Keep some minutes while the NSX ALB Controller prepares all necessary configurations.
After that, under Dashboard, click on the Virtual Service that we created before:
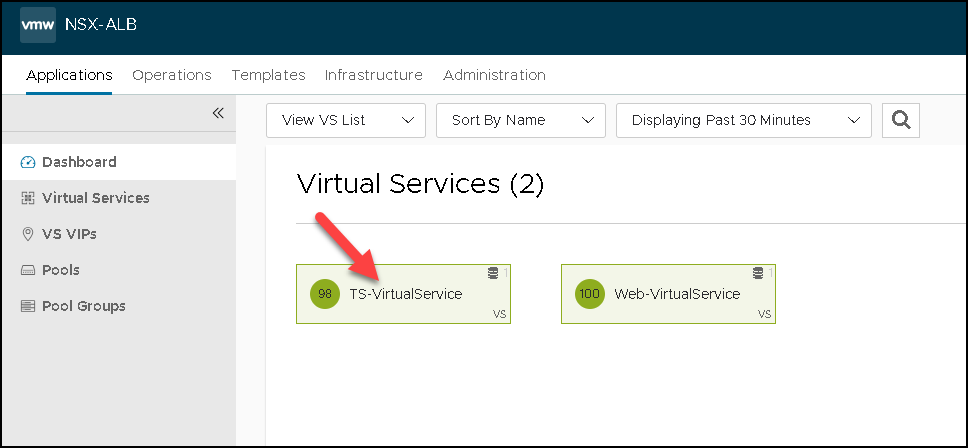
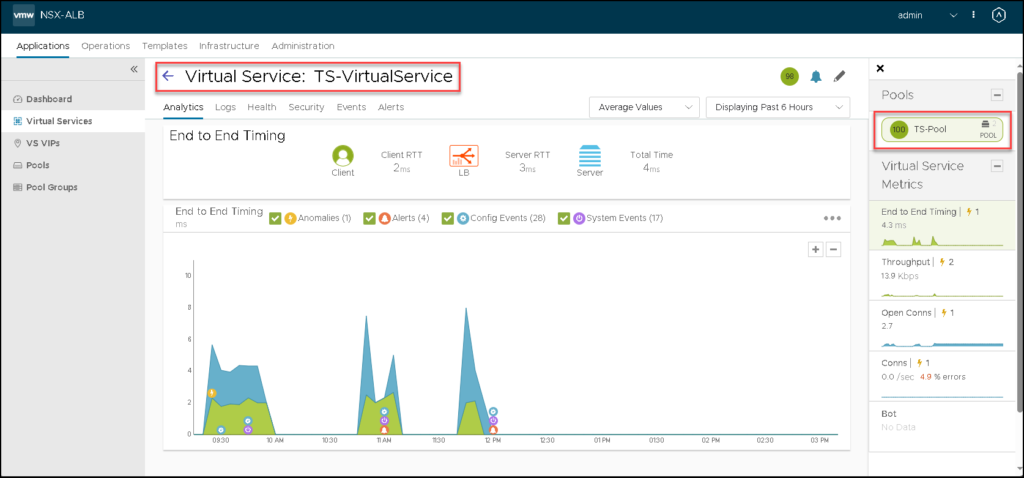
We can see a lot of details and statistics of this Virtual Service:
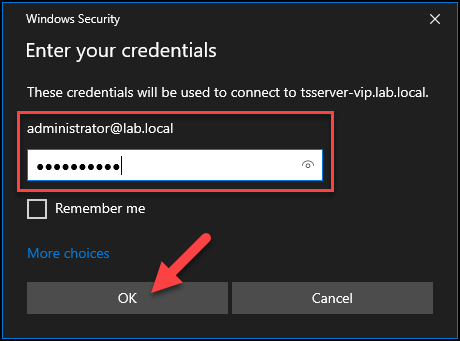
Accessing the RDP Application Through the Virtual IP
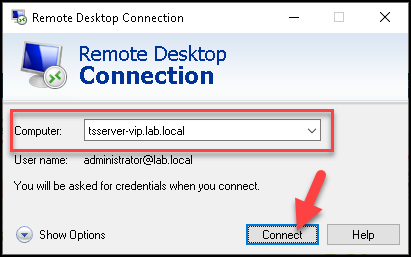
Now, all users can access the RDP farm servers using the Virtual IP. We already created an FQDN to point the Virtual IP:
FQDN: tsserver-vip-lab.local
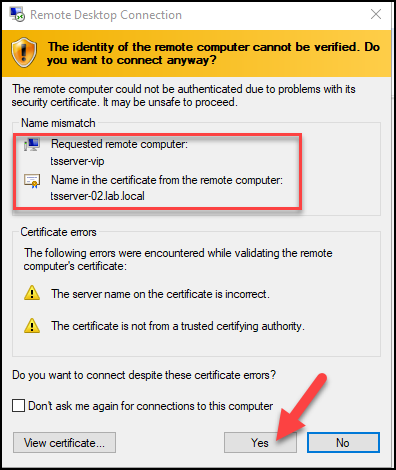
IP: 172.21.1.21In our example, we are testing the access from a Windows Client, using the Remote Desktop Connection client:
In this attempt, the connection will be redirected to the tsserver-01.lab.local:

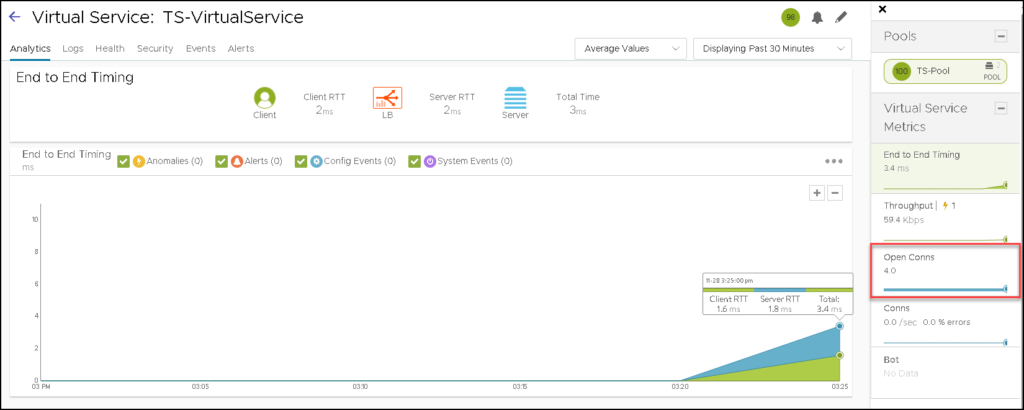
We realized a lot of connections for this Virtual IP.
Under the Virtual Service Dashboard, we can see the number of open connections and other statistics, as we can see in the below picture:
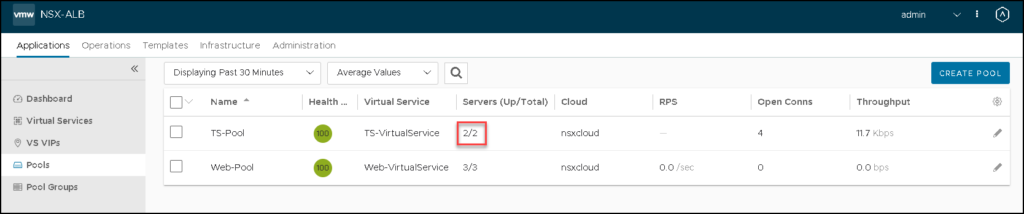
Under Pools, we can see that we have two servers and both are up/available:
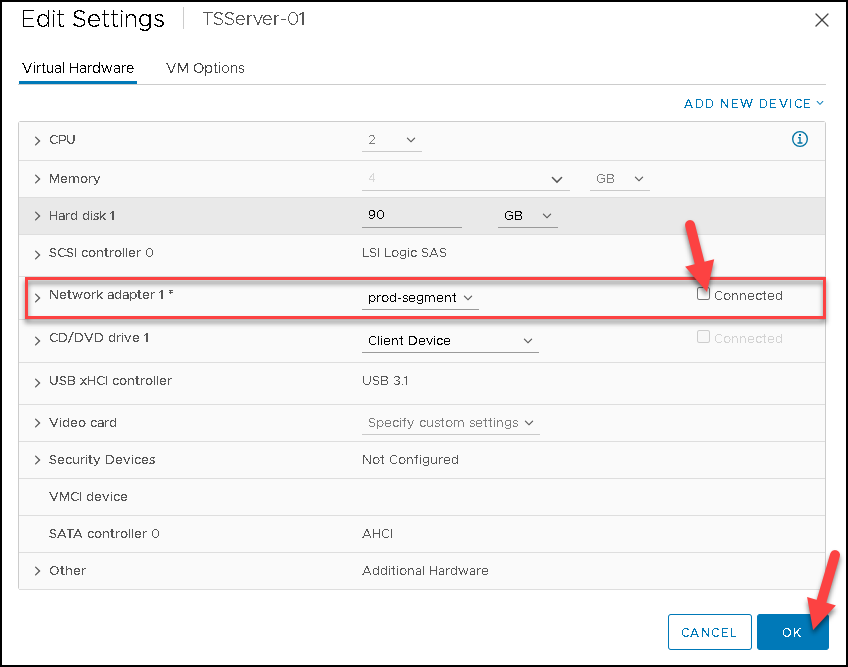
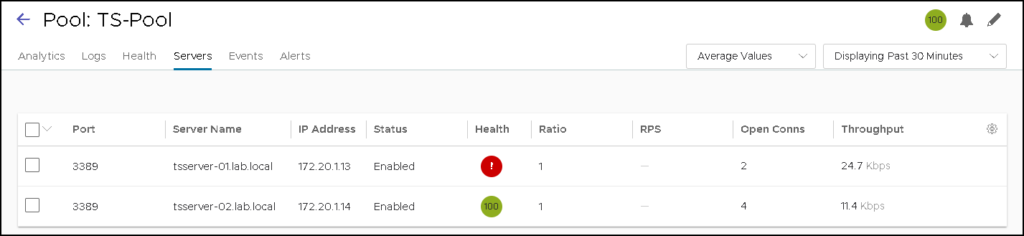
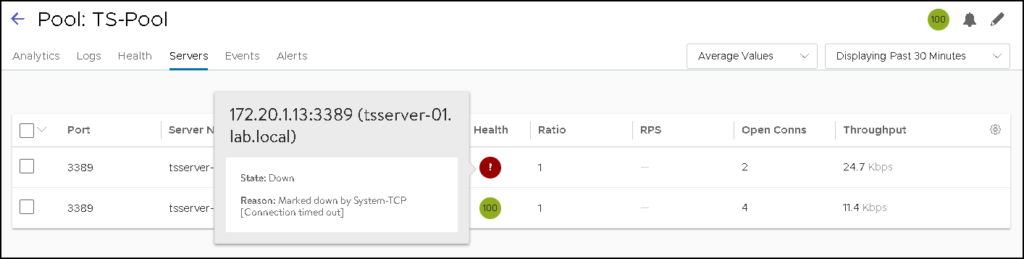
Simulating a Server Failure
Now, we will simulate a failure on the RDP server tsserver-01.lab.local. We will just disable the network card of this VM:
After a few seconds, under the Pools menu, we can see that it only has one server available:

Now, if we can try to access the Virtual IP, we will redirect to the RDP server available. Here, we can see that the failover is working fine 🙂
After that, we enabled the NIC of the tsserver-01.lab.local and all Servers are available again:
