Creating a vSphere 7 Cluster is an article to show how to create a vSphere Cluster, step-by-step, using a lab environment for that. We split this article into 3 parts, where is the first part called “Creating a vSphere 7 Cluster – Part 2”.
This is Part 2 of the Creating a vSphere 7 Cluster. But, If you want to read Part 1, click on the button below:
As detailed in Part 1, we will use TrueNAS with our Storage for this lab. TrueNAS is network storage where is possible to create different types of network shares, such as NFS, SMB, and iSCSI for example.
Install the TrueNAS
The first step here is to install TrueNAS in our lab. We have an article that will help in this process:
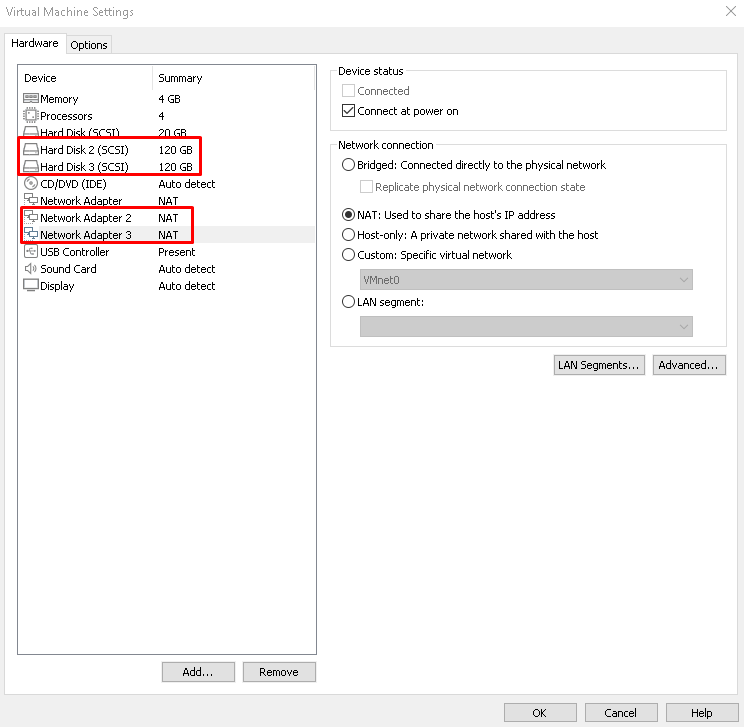
Additionally, we added two virtual disks each one with 120GB because these disks will be used to create the iSCSI shares for our cluster.
Also, we added two additional network adapters. Each additional adapter will be used for the iSCSI service:
Change TrueNAS’ network settings
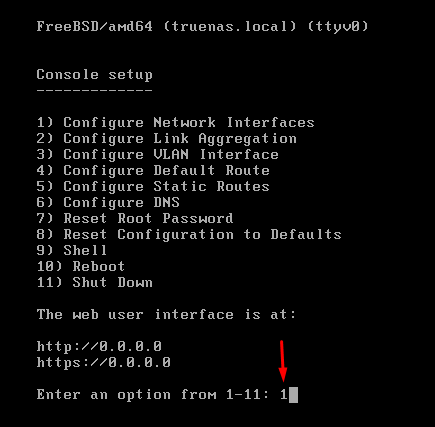
The next step, power on TrueNAS and configure the management interface:
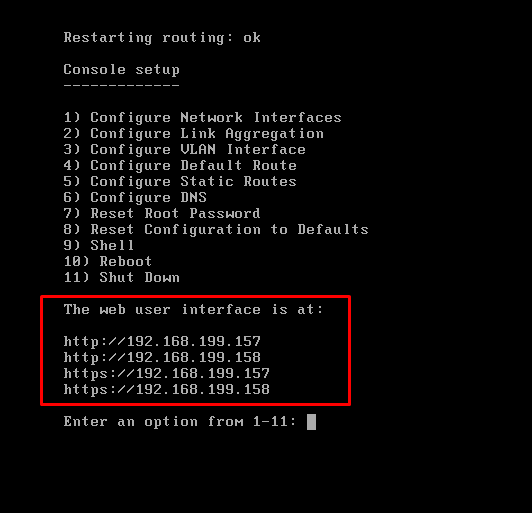
Access the web console with the address http://192.168.199.157 and put the static IP configuration on all interfaces. Also, we will change other configurations such as domain name and DNS Server:
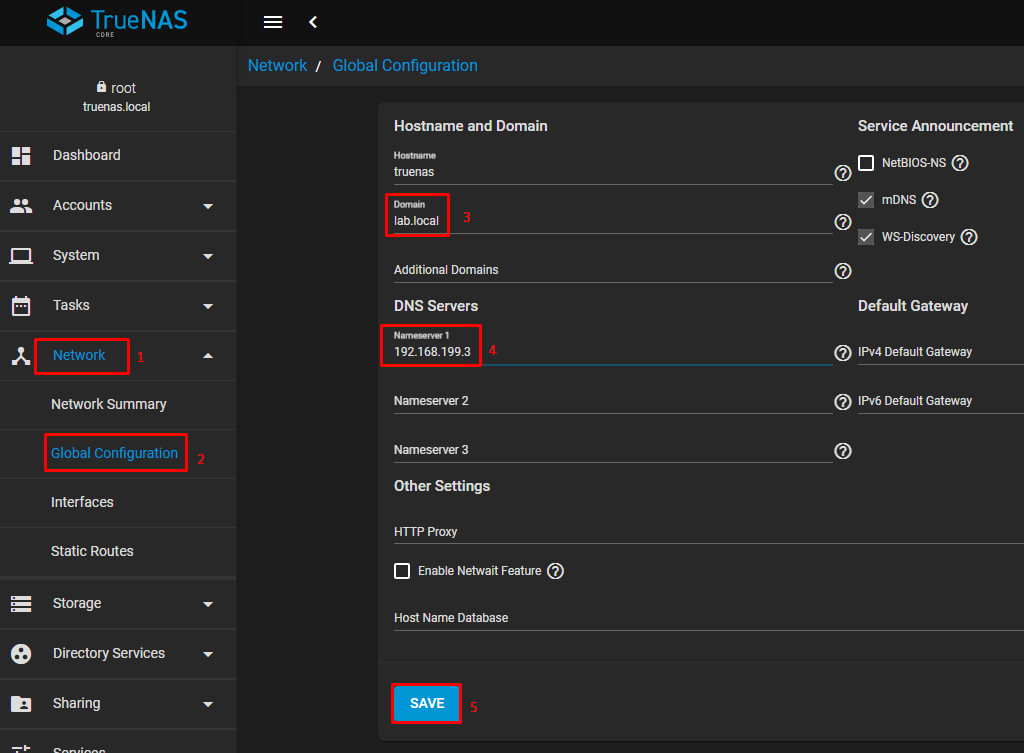
Here, we will change the domain name and DNS Server. For instance, the domain name is “lab.local” and the nameserver 1 is “192.168.199.3”:
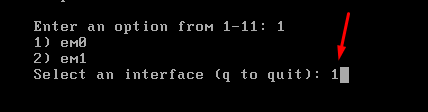
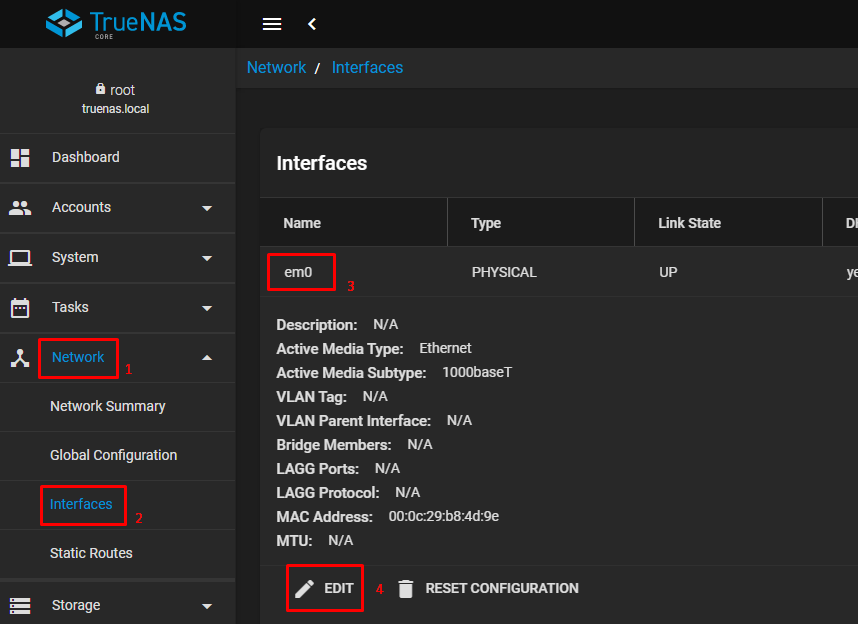
Insert the static IP on the management interface. However, the management interface is “em0”:
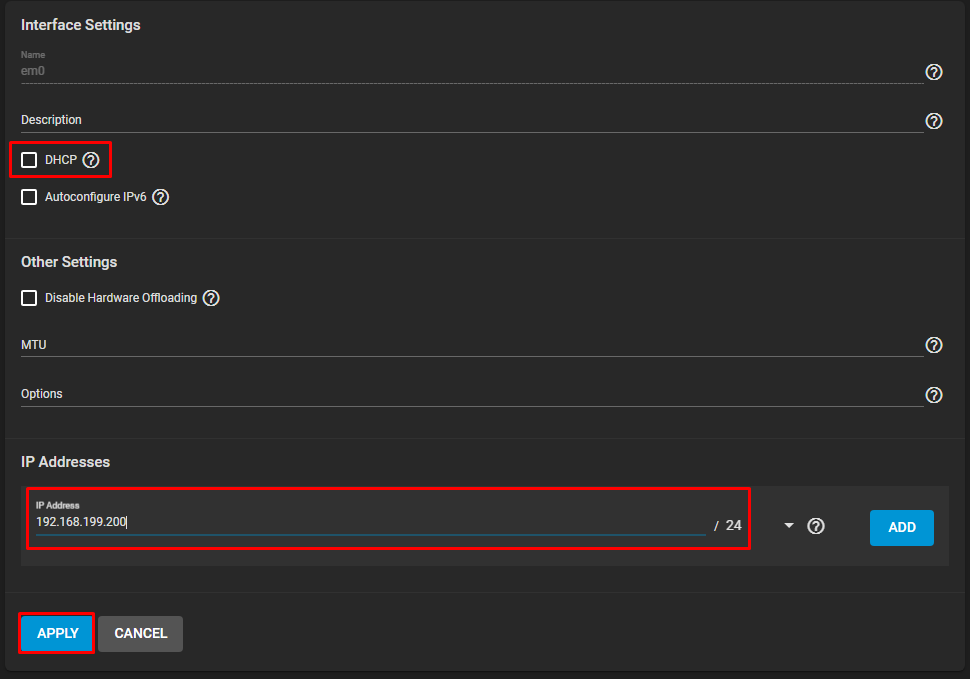
Unmark the “DHCP” option and type the static IP. Then, click on “APPLY”:


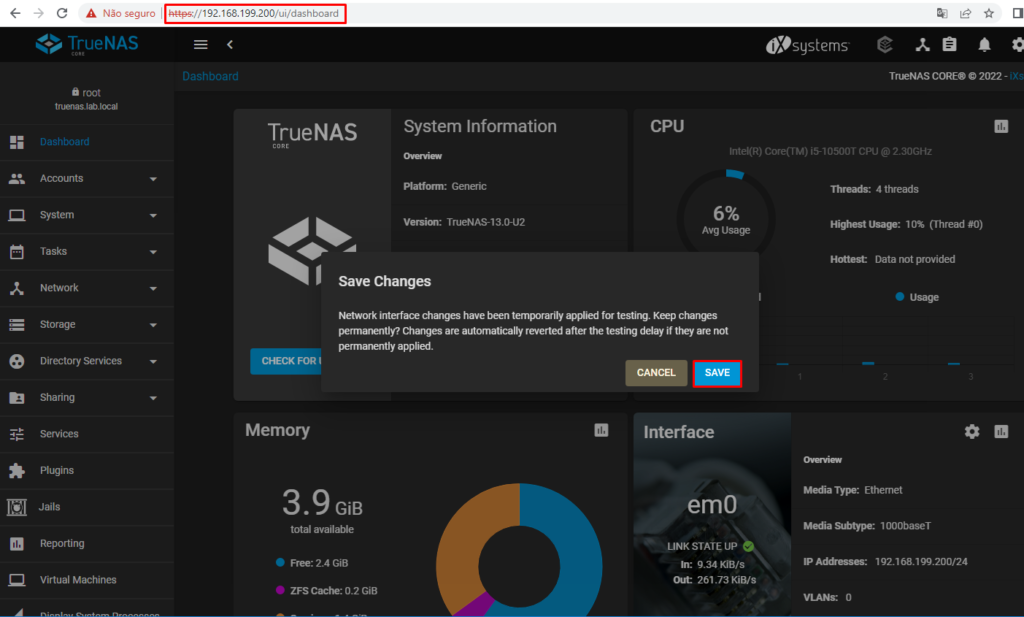
Access the TrueNAS with the new address (https://192.168.199.200) and click on “SAVE” to save the changes:
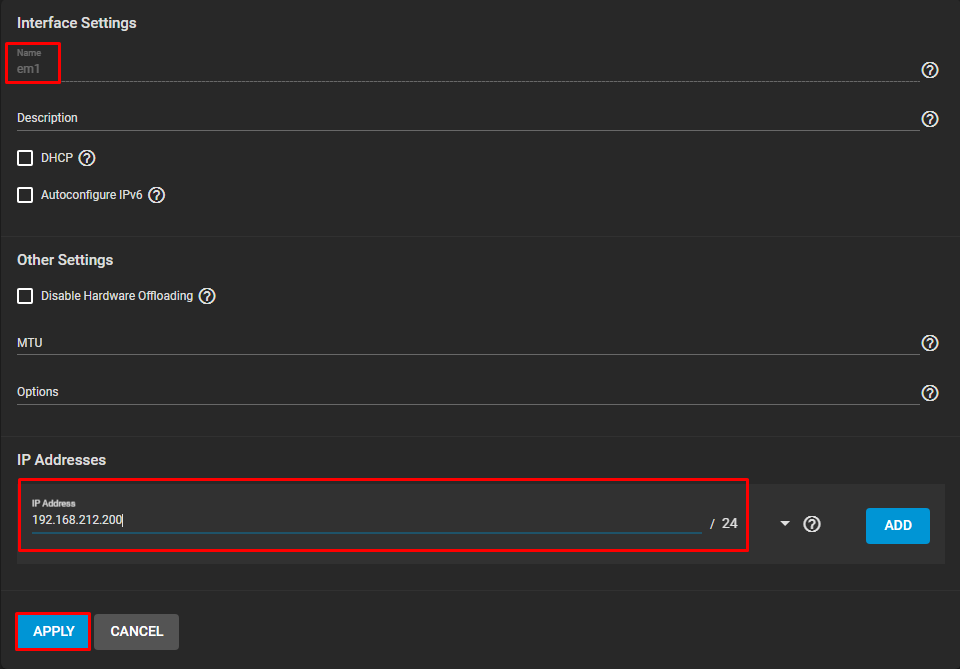
Set the static IP on the “em1” interface. This IP address is used to bind with the Distributed Port Group called “PG-iSCSI-01” :
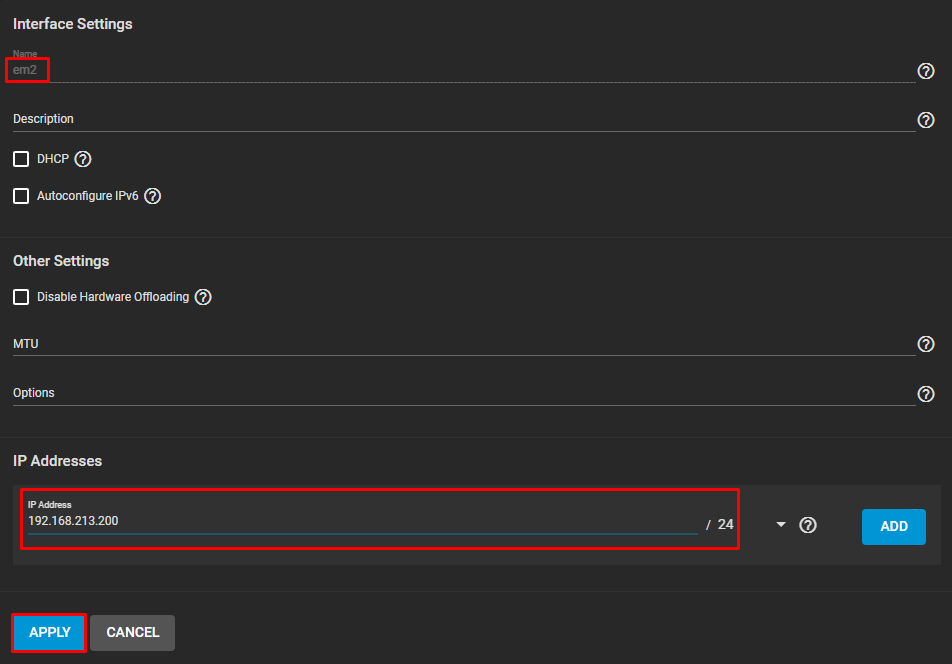
Set the static IP on the “em2” interface. This IP address is used to bind with the Distributed Port Group called “PG-iSCSI-02” :
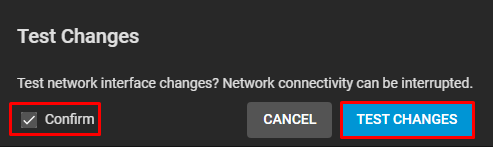
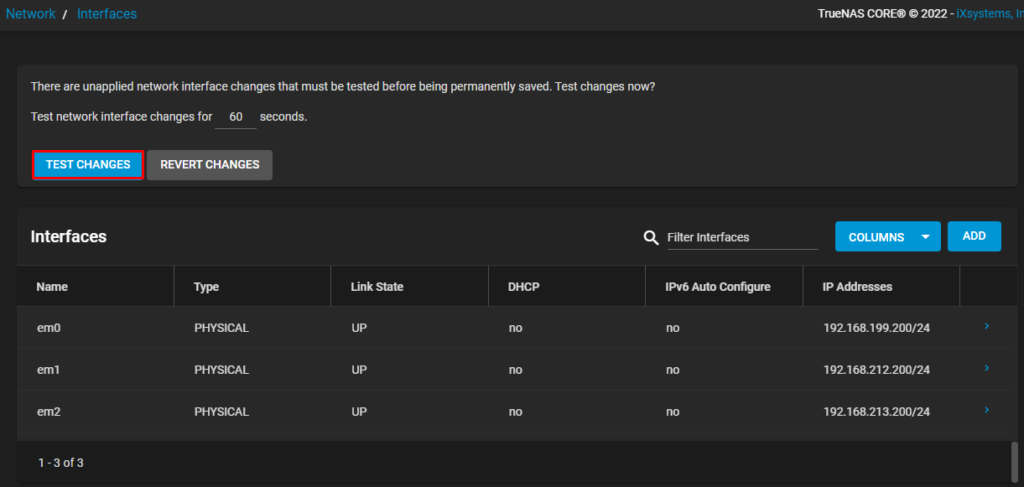
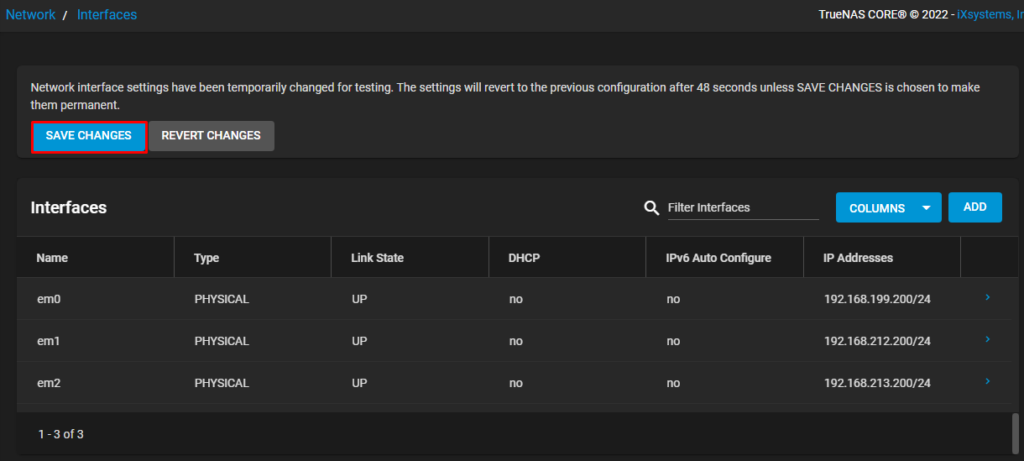
Click on “TEST CHANGES” and “SAVE CHANGES”:
Creating ZFS Pools and ZVOLs on TrueNAS
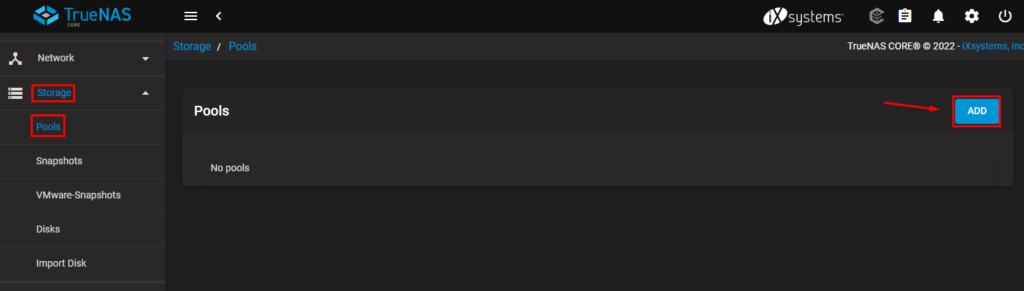
The next step on TrueNAS is to create the ZFS Pool. This is a logical unit on TrueNAS used to group the physical disks and share the logical space for all services that can be used on TrueNAS.
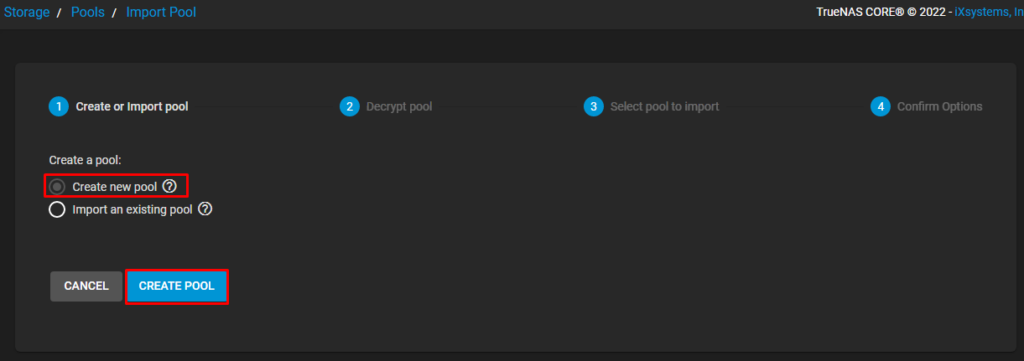
To create a ZFS Pool, click on Storage –> Pools –> ADD:
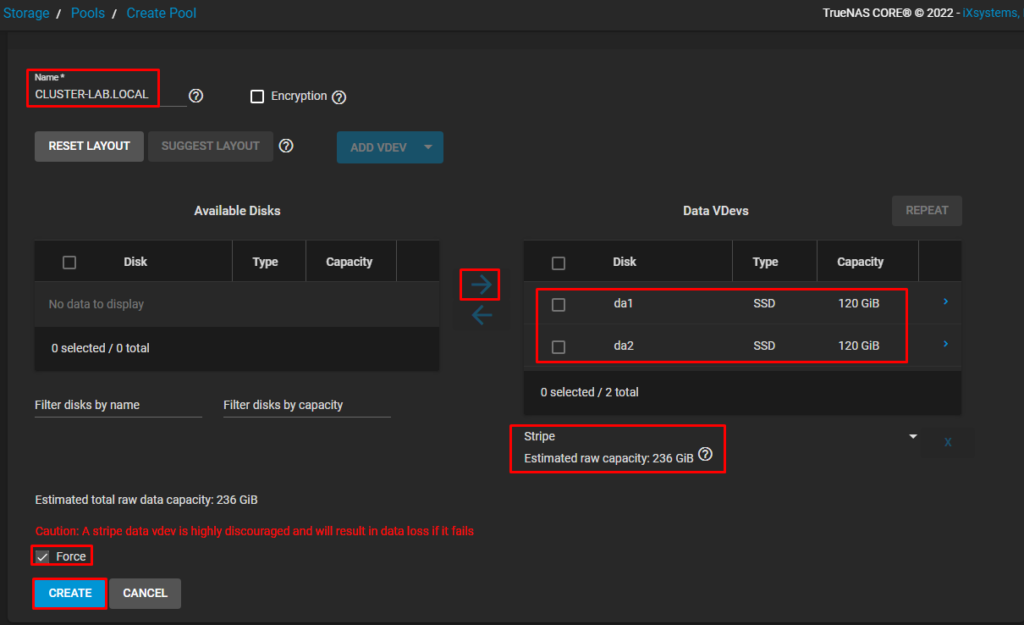
Type the name of the ZFS Pool. In this lab, the name is “CLUSTER-LAB.LOCAL”.
On Available Disks, mark both disks and click on the arrow to put them to the right. Configure the RAID level as “Stripe”. A warning message will show when you select Stripe. Mark the option “Force” and click on “CREATE”:
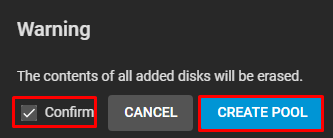
A warning message will show to confirm the operation:
After that, it is possible to see the ZFS Pool called “CLUSTER-LAB.LOCAL”:

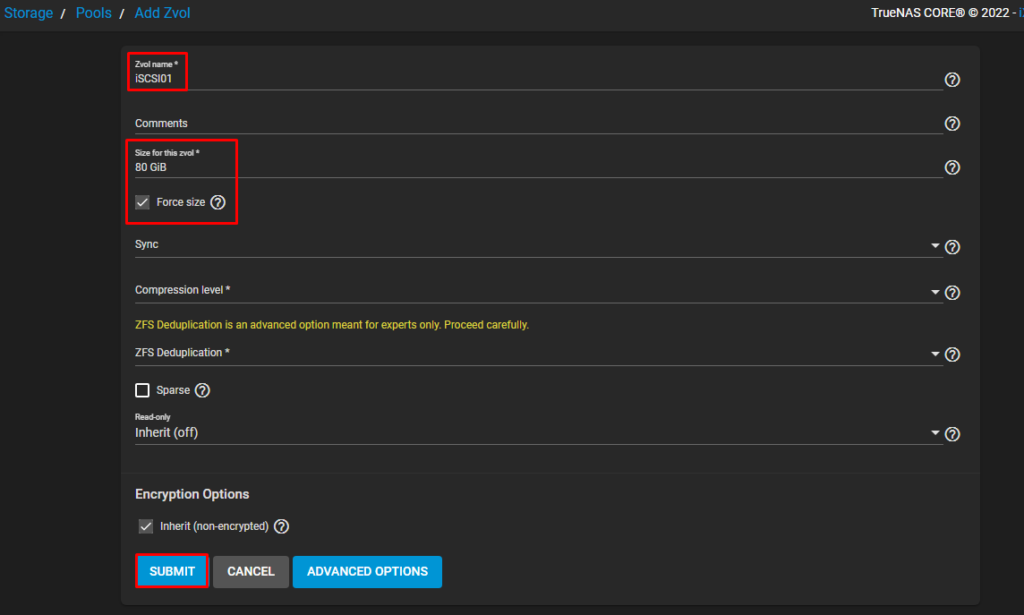
On this ZFS Pool, create both ZVOL. Each ZVOL will be used to share an iSCSI block with our vSphere Cluster:

The first ZVOL is “iSCSI01” and has 80GiB of size. Mark the option “Force size”:
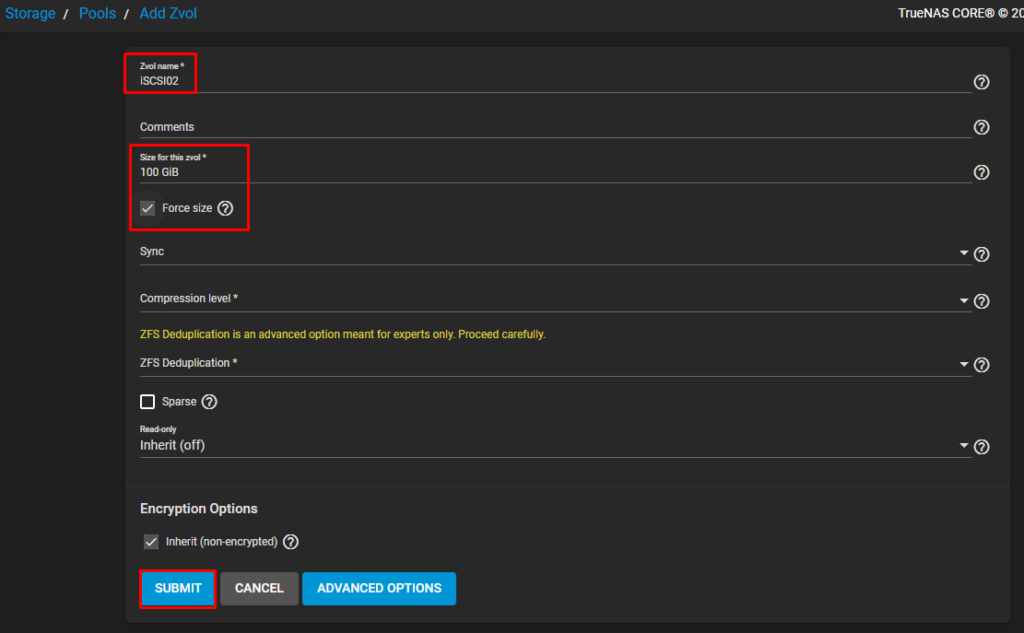
The second ZVOL is “iSCSI02” and has 100GiB of size. Mark the option “Force size”:
After that, we have both ZVOL:

Note: To get more details about ZFS Pools, check the link below:
https://www.truenas.com/docs/core/uireference/storage/pools/poolsscreens/
Configure the iSCSI service on TrueNAS
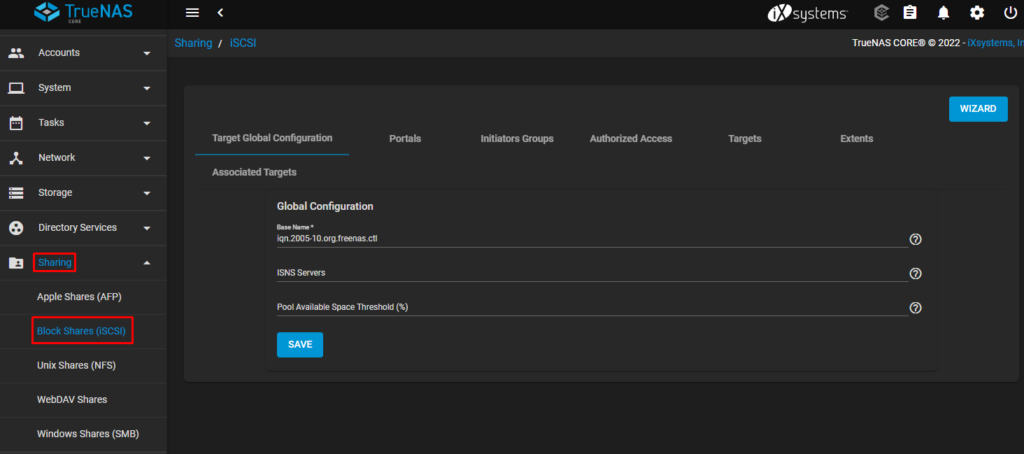
The next step is to configure the iSCSI service on TrueNAS. Click on “Sharing” menu –> Block Shares (iSCSI) to configure the iSCSI service.
On the Target Global Configuration tab, click on SAVE and go to the next tab:
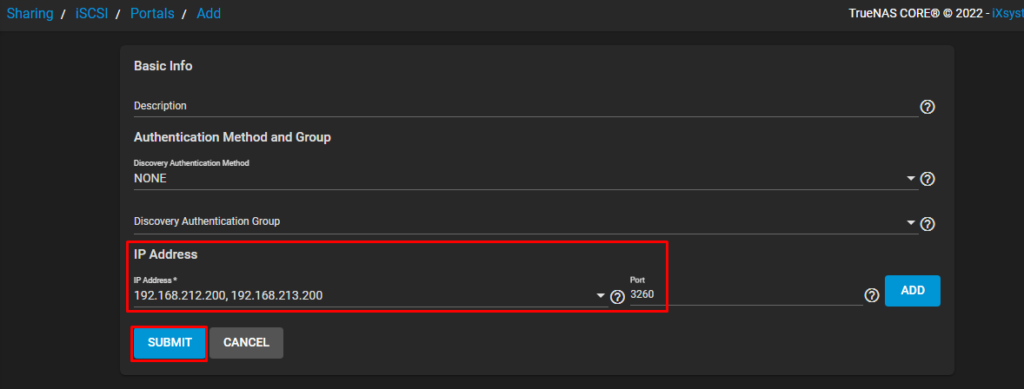
On the Portals tab, select both interfaces for the iSCSI service. In this lab, the interfaces are 192.168.212.200 and 192.168.213.200. Click on SUBMIT after selecting that and go to the next tab:
On the Initiators Group tab, put both networks for the iSCSI service. On Authorized Networks, put each network and then click on SAVE.
With this configuration, only iSCSI Initiators (iSCSI clients) that are part of this network will use the iSCSI target service on TrueNAS:

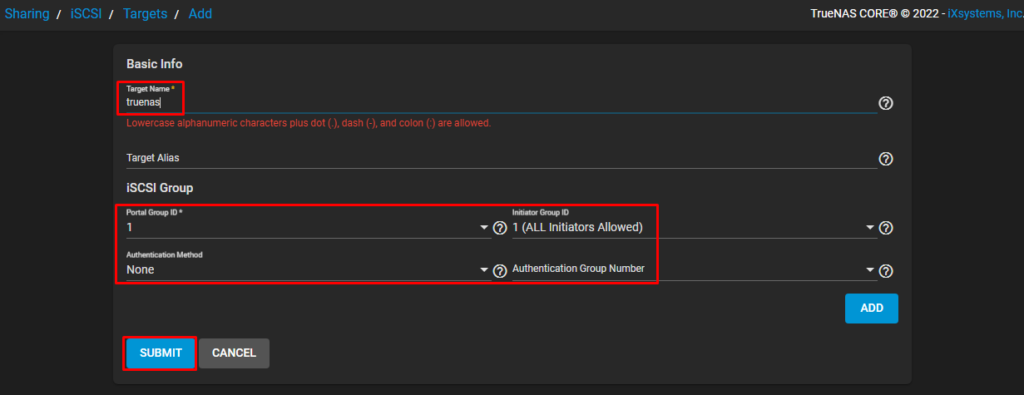
On the Targets tab, type the name of the Target and adjust the iSCSI Group sections as necessary. Click on SUBMIT and go to the next tab:
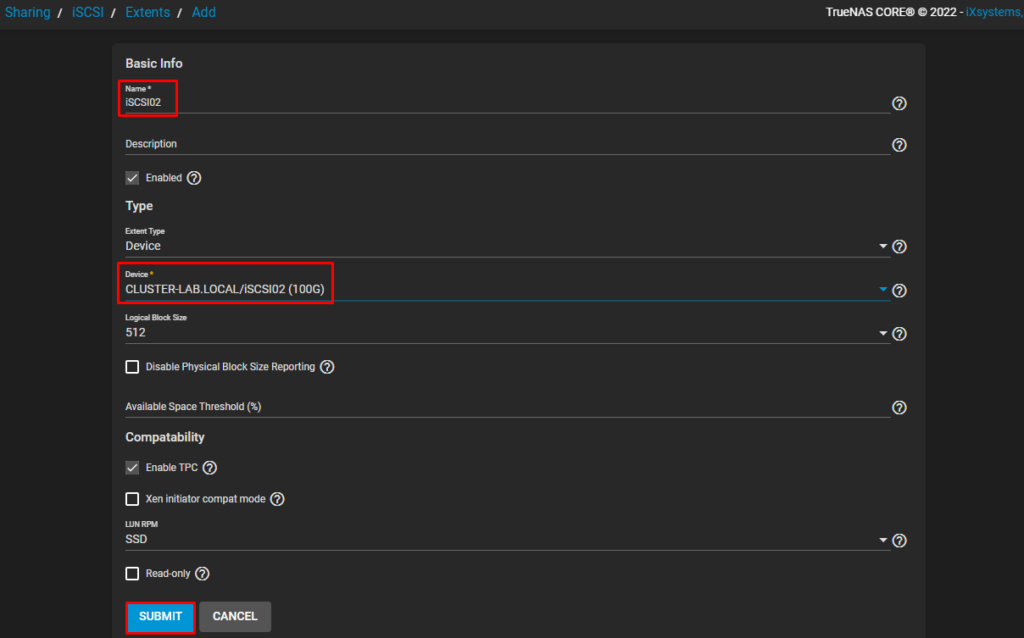
On the Extents tab, we will create both extents, one for each ZVOL that we created before.
The first extent is “iSCSI01” and the device is the ZVOL with 80GiB of size:

The second extent is “iSCSI02” and the device is the ZVOL with 100GiB of size:
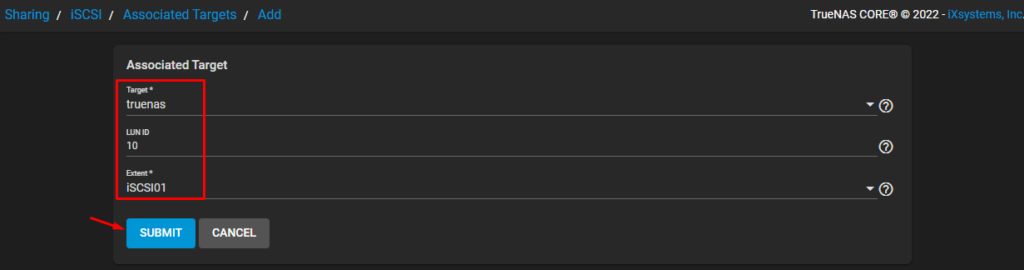
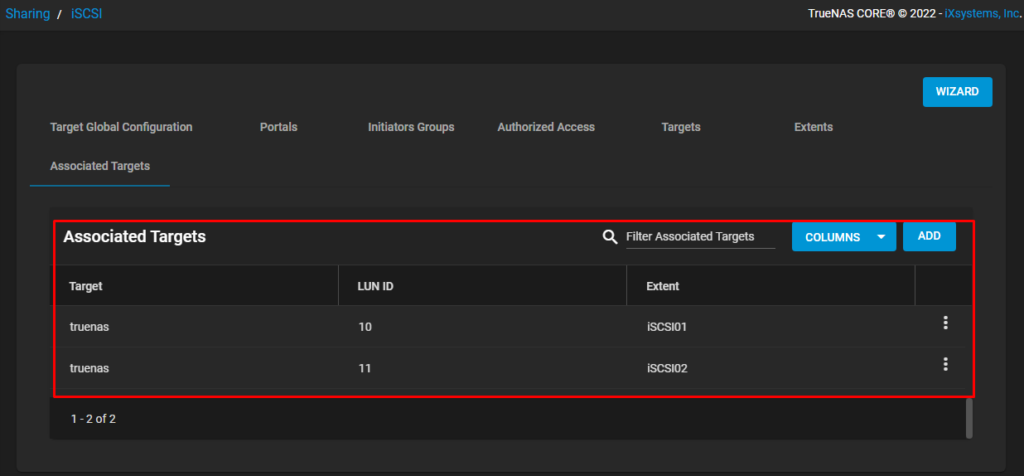
And the final step is to associate the iSCSI Target with the iSCSI Extents.
The extent called “iSCSI01” will be a LUN number 10:
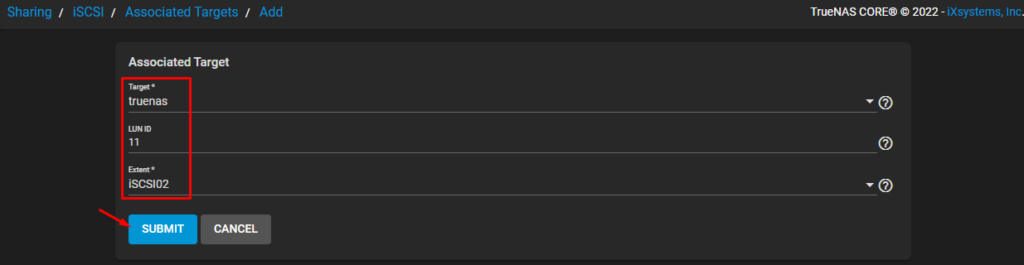
The extent called “iSCSI02” will be a LUN number 11:
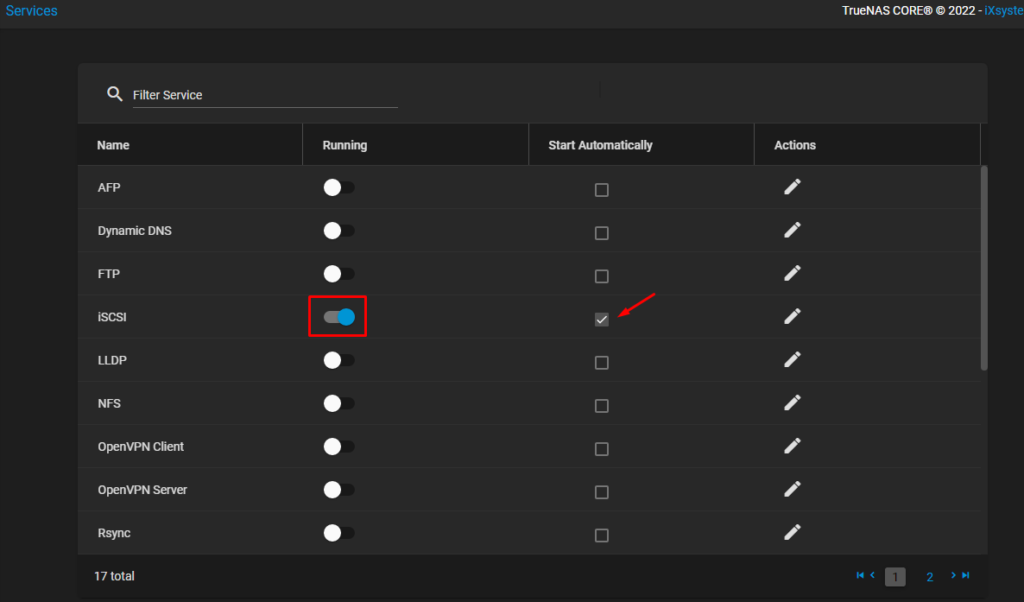
On the Services menu, put the iSCSI service is running and mark it to start automatically on TrueNAS boot:
In the next Part of this article, we will create the vSphere Cluster.
To read Part 3, click on the button below: