Prep a vLCM Cluster to be part of NSX-T is an article that shows all configurations necessary to prep hosts inside a vLCM cluster for working in an NSX-T infrastructure.
We have written a short article explaining how the vLCM works in a practical way. Click on the below link to check this article:
https://dpcvirtualtips.com/applying-esxi-patch-with-vlcm/
Also, we have written another article explaining a short introduction to NSX-T:
https://dpcvirtualtips.com/introduction-to-nsx-t/
About our environment
In this example:
- NSX-T version 4.0.1.1.0.20598957.
- vCenter Server is 7.0.3 build 21958406
- ESXi hosts have version 7.0.3 build 21930508.
Note: You need to guarantee that the vCenter Server and all NSX Manager Appliances have the same time configured. Our recommendation is to use the same NTP server for all devices – below are some interesting links about it:
https://kb.vmware.com/s/article/57146
https://docs.vmware.com/en/VMware-NSX-T-Data-Center/3.2/administration/GUID-5B91BE88-FEA7-4DAA-A819-66800C3B00E6.html#GUID-5B91BE88-FEA7-4DAA-A819-66800C3B00E6
NSX Installation Error
Firstly, we need to log in to the NSX Manager Web Interface.
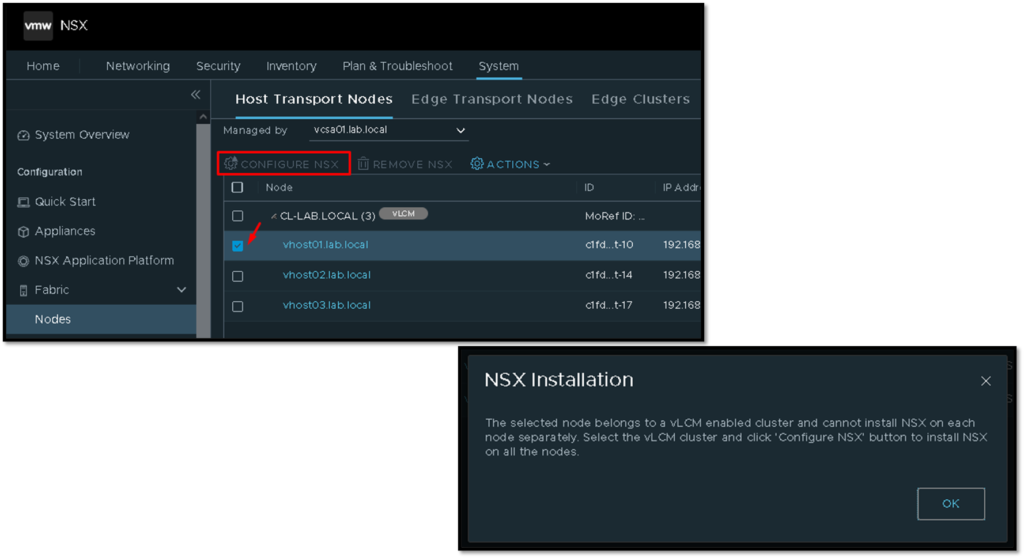
After that, access the menu System –> Fabric –> Nodes –> Host Transport Nodes and select your vCenter Server (that you previously added as a Compute Manager):

After that, if we select an ESXi host, the option “CONFIGURE NSX” is unavailable (gray-out) and if we click under the hostname’s ESXi host, we receive an alert about the NSX Installation, as we can see in the picture below:
So, by selecting the cluster “CL-LAB.LOCAL” we can click on the “CONFIGURE NSX” option.
We can select the Transport Node Profile and click on APPLY to follow the process. But, in this stage, we receive an error:
NSX cannot ne enabled on vLCM cluster as trust is not enabled on Compute Manager. Please enable trust on Compute Manager.....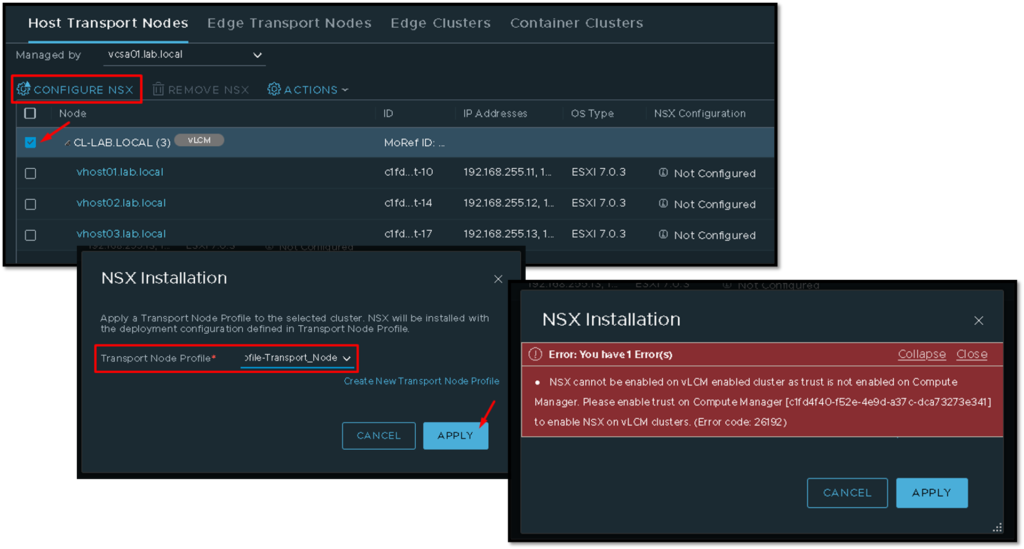
Enabling Trust on Compute Manager
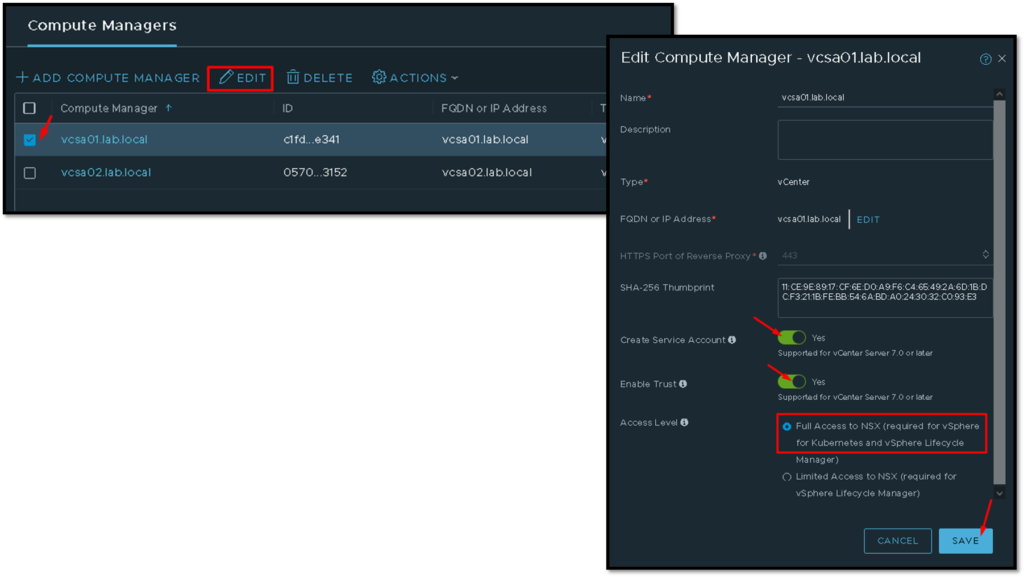
To fix the error shown in the past step, we need to edit the Compute Manager where our Cluster resides.
To do that, access the menu System –> Fabric –> Compute Managers –> Select the desired vCenter and click on Edit. Under this page:
- Enable the option “Create Service Account”
- Enable the option “Enable Trust”
- Select the option “Full Access to NSX”
- and click on SAVE to finish
Configure NSX
So, now we can select the cluster again and start the configure NSX process. It is possible to see that the process started with success:
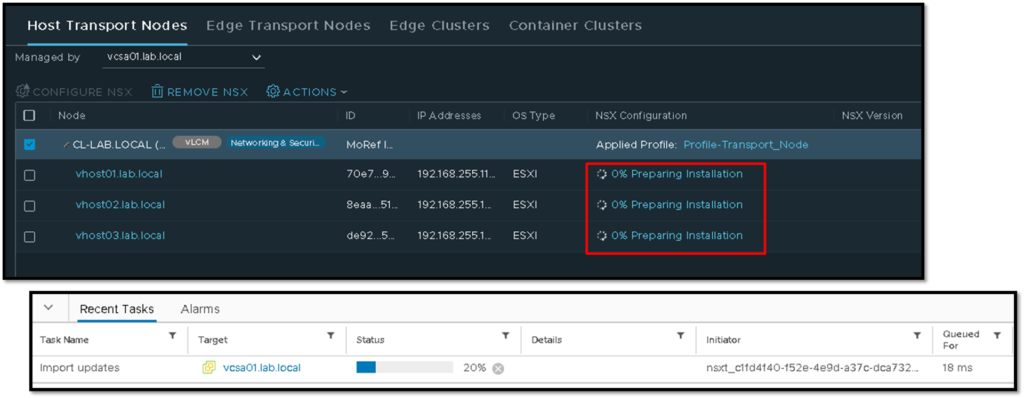
Look under the vCenter Server recent tasks. We can see the task started by the NSX Manager appliance:
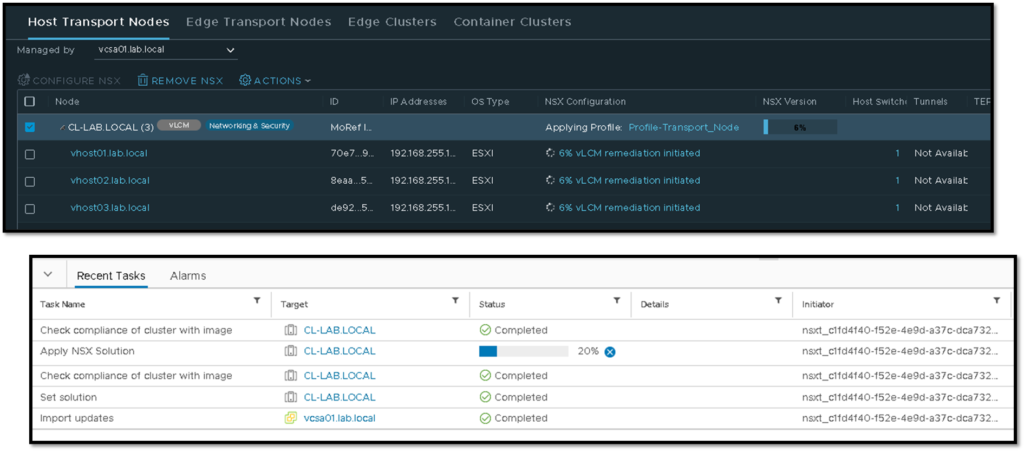
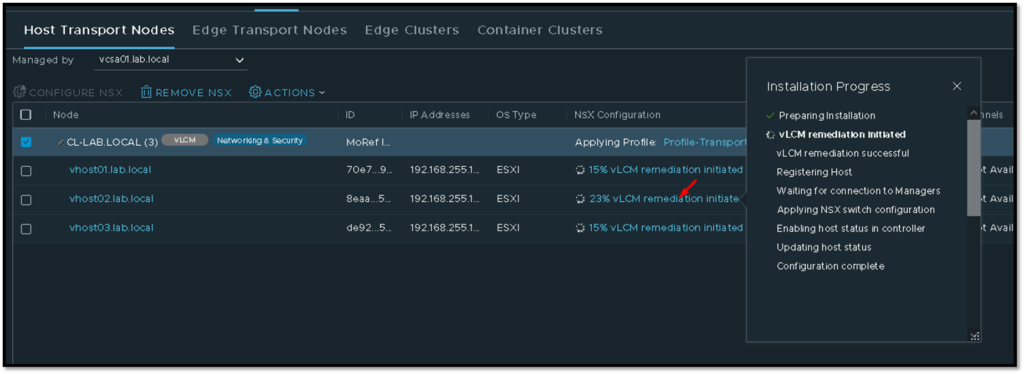
Under the column NSX Configuration, we can click on some host to check the installation progress, as we can see in the picture below:
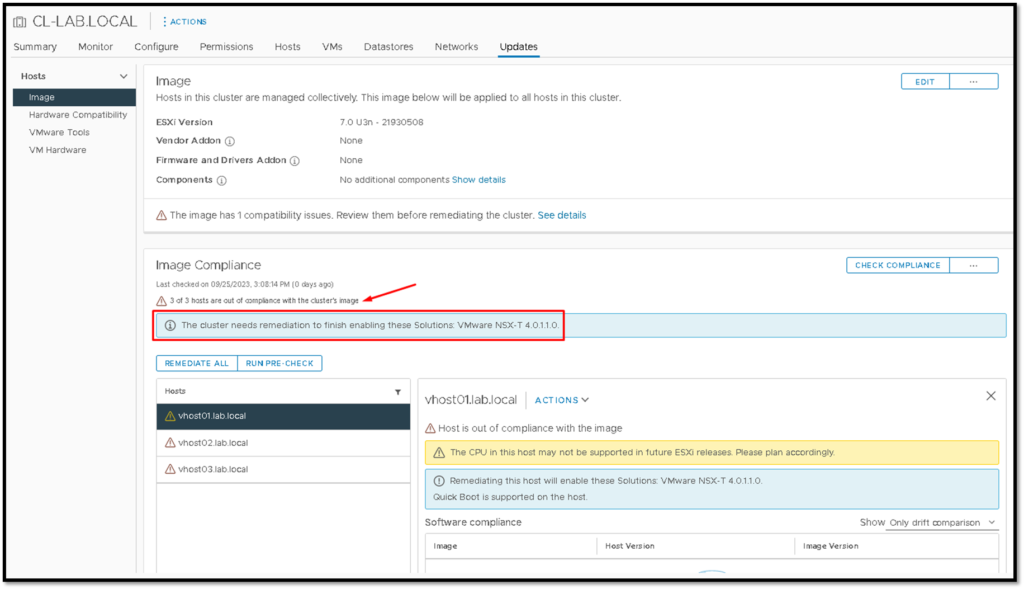
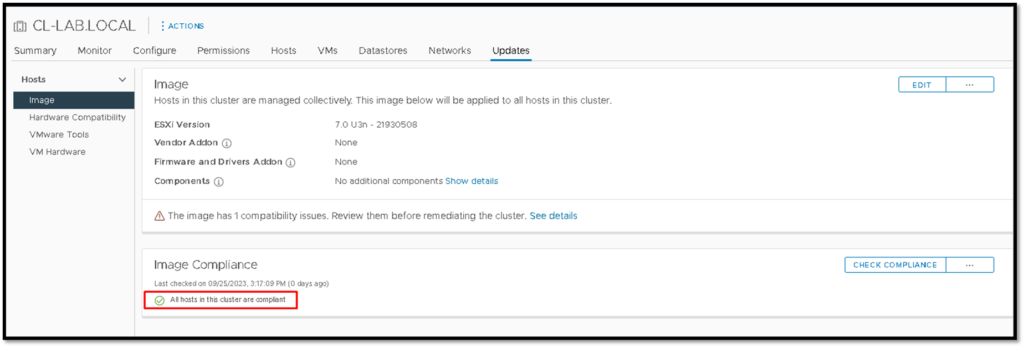
Just out of curiosity, in parallel, if we click on the Updates tab on the vCenter Server, we can see that all ESXi hosts inside the cluster are out of compliance. Just because the NSX-T vibs installation process is running – this is normal here (please, do not click on anything on this page):
After some minutes, the preparation process will be finished on each ESXi host inside the cluster:
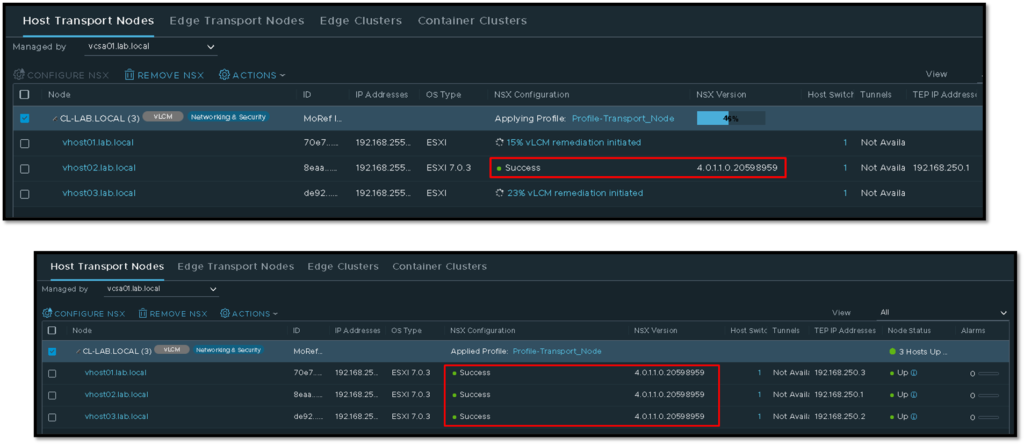
And all ESXI hosts will be compliance with the vLCM optic:
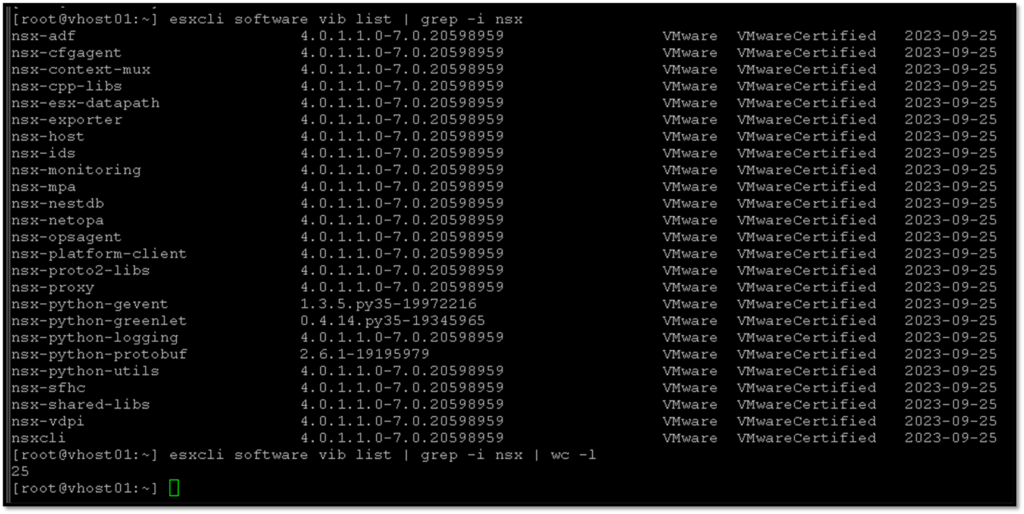
Checking the ESXi prepped Host
Here, we can access one ESXi host that has been prepared for the NSX-T and check all NSX-T vibs that have been installed:
Also, we can access the “nsxcli” shell and check the connection to the NSX Management Cluster:
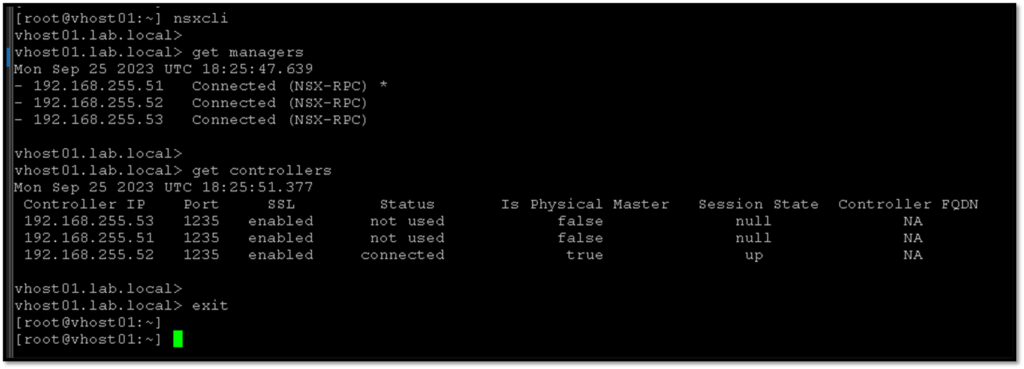
At this point, our hosts are prepared to work on the NSX-T environment 🙂