Creating a vSphere 7 Cluster is an article to show how to create a vSphere Cluster, step-by-step, using a lab environment for that. We split this article into 3 parts, where is the first part called “Creating a vSphere 7 Cluster – Part 1”.
I’m using VMware® Workstation 16 Pro version 16.1.2 build-17966106 installed on Windows 10 Machine.
Below is possible to see the lab topology that can we use in this post. We will use 3 ESXi hosts + vCenter Server to create the vSphere layer. Also, we will use the DNS and external Storage to provide LUNs for our cluster. The DNS service is provided by Windows Server 2016 and the Storage is provided by TrueNAS 13.
We are using the Windows Server 2016 as a DNS Server, but, you can use another “flavor” of the DNS Server 🙂
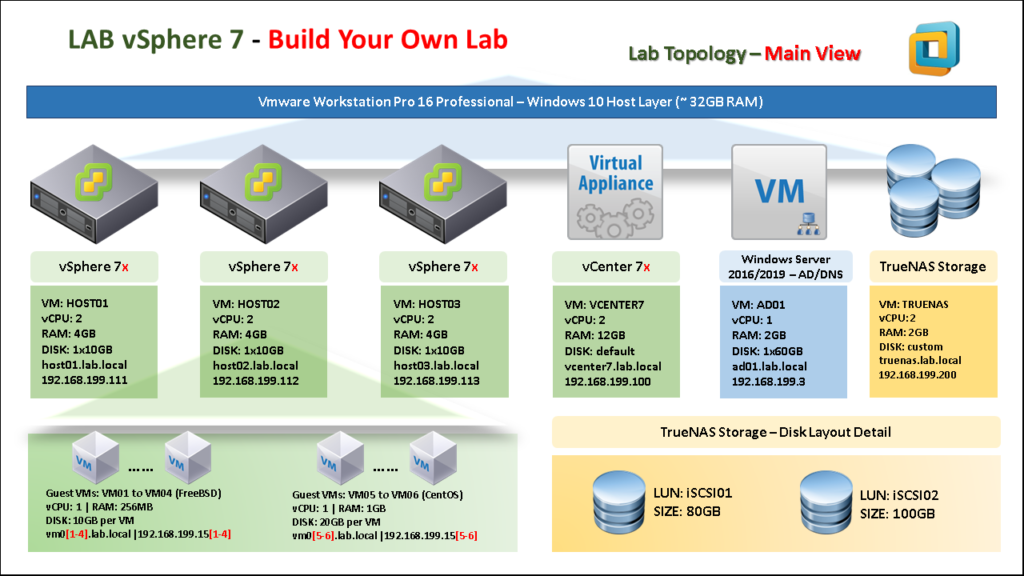
For the virtual networking layer, we will use a VDS (Virtual Distributed Switch) and some DPG (Distributed Port Groups) to connect the Virtual Machines (Guest VMs) to the network.
So, is possible to see the network topology of this lab:
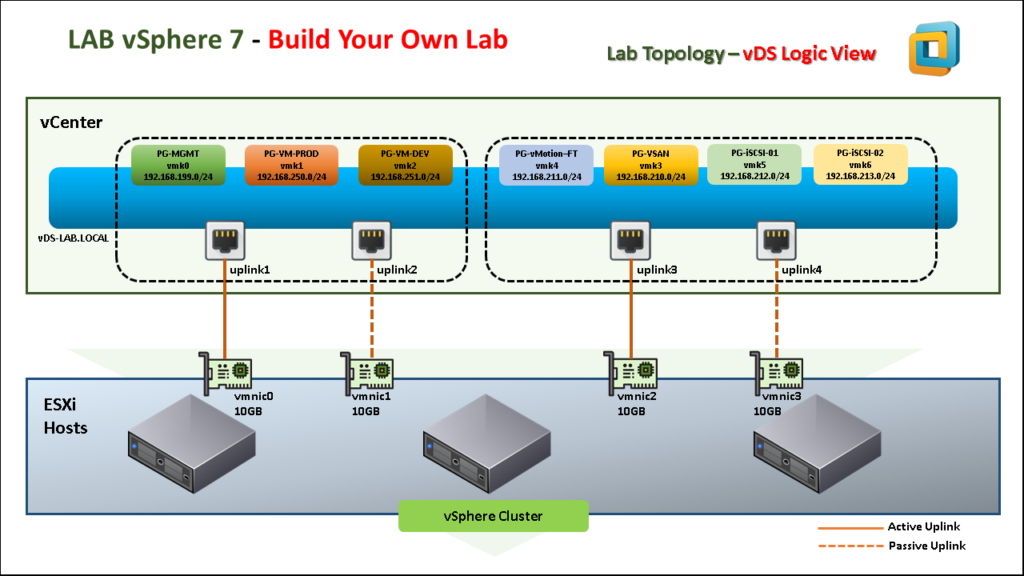
Note: Each PG (Port Group) is associated with a subnet, then, a PG is used to segment the Virtual Machine traffic from Virtual Environment to the Physical Environment.
To get more details about vSphere 7, check the link below:
https://blogs.vmware.com/vsphere/2020/03/vsphere-7-features.html
Creating all DNS entries
The first step here is to create all DNS entries on the DNS Server for the management of all devices. It is a best practice to create all “A” entries and all “PTR” entries. To remember, “A” entries are used to direct resolution (name to Ip) and “PTR” entries are used to reverse resolution (IP to name).
The table below shows all DNS entries that will be necessary:
| DNS “A” entry | DNS “PTR” entry |
| host01.lab.local | 192.168.199.111 |
| host02.lab.local | 192.168.199.112 |
| host03.lab.local | 192.168.199.113 |
| vcenter7.lab.local | 192.168.199.100 |
| truenas.lab.local | 192.168.199.200 |
Note: So, we should create the DNS entries.
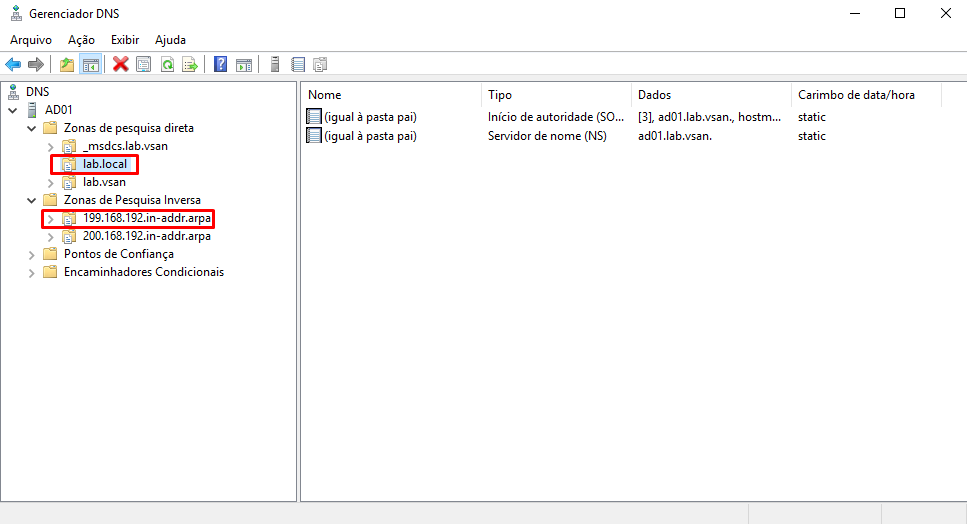
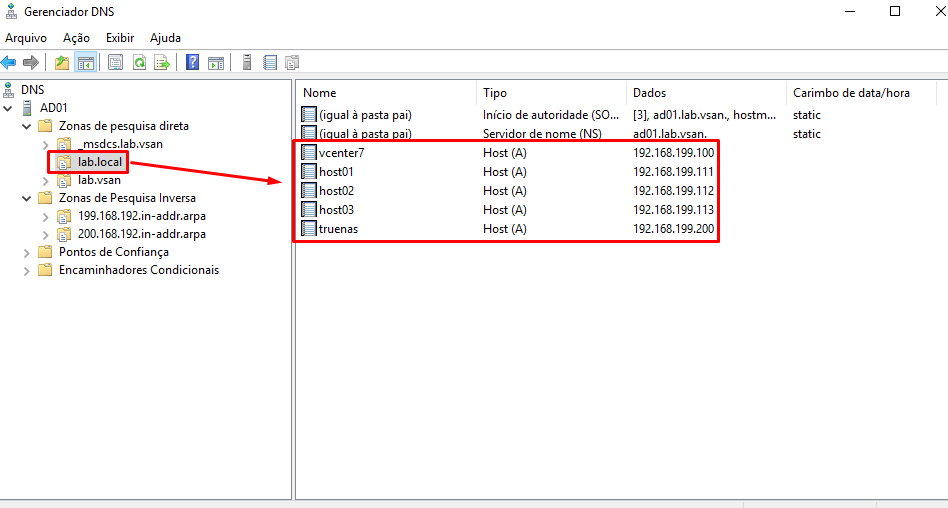
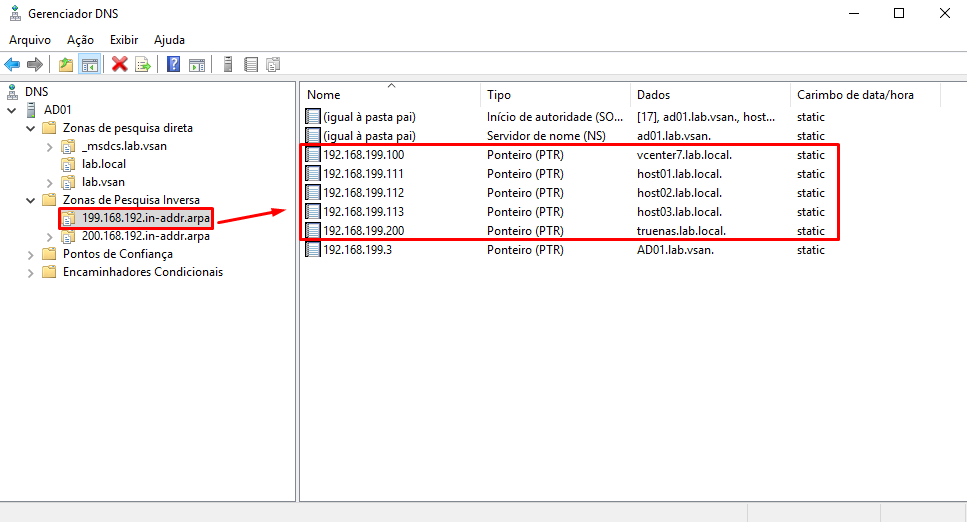
To create all DNS entries, open the DNS Management Console. Observe that in this case:
- lab.local –> Direct DNS zone (resolution from name to ip)
- 199.168.192.in-addr.arpa –> Reverse DNS zone (resolution from IP to name)
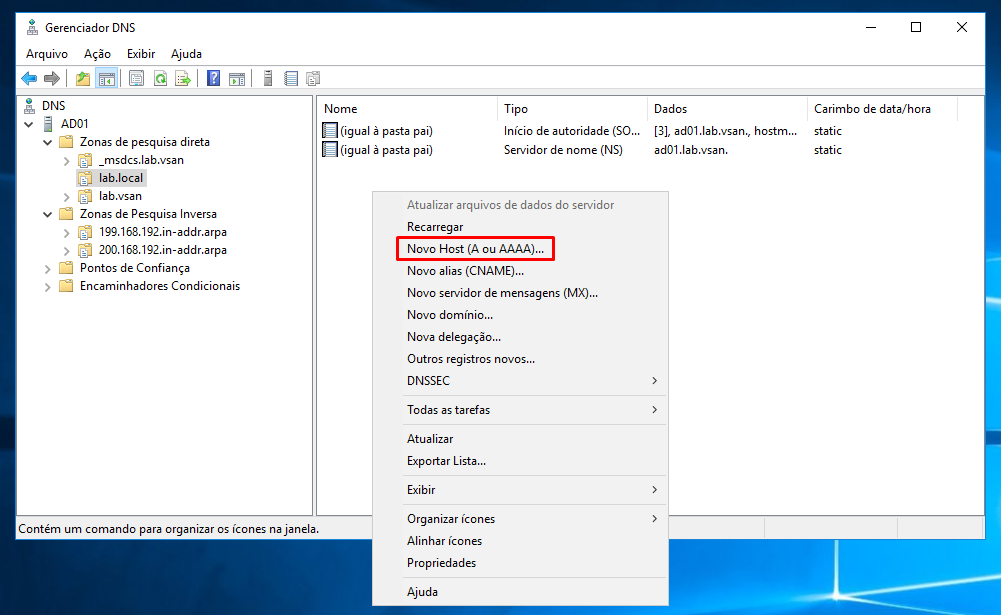
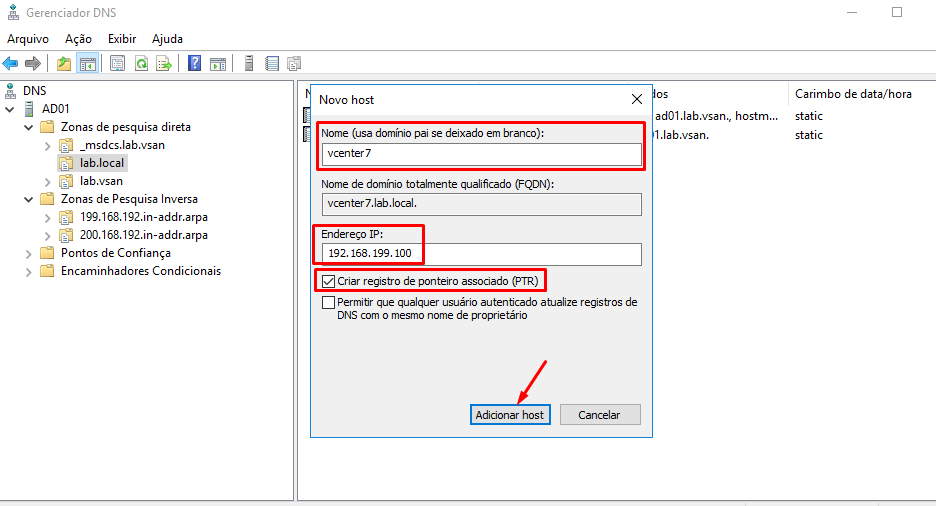
To create an “A” register, double click on “lab.local” zone name and select “Novo Host (A ou AAAA)” or “New Host (A or AAAA):
Put the hostname and the IP address of the device. In this example, we are creating the vCenter Server register.
Mark the option “Criar registro de ponteiro associado (PTR)” to create the “PTR” register during this step:
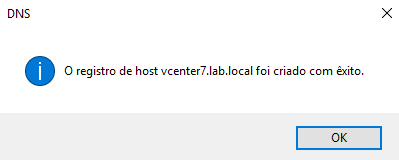
After the creation, the message below will be shown, indicating success:
Repeat this process to create all DNS entries as necessary.
Below, we can show all DNS entries created on both DNS zones (Direct Zone and Reverse DNS):
Install the ESXi hosts
The next step is to install and configure ESXi hosts. If you have questions about the installation process, we have a post to help in this process (and also, you can post your question at the final of this article):
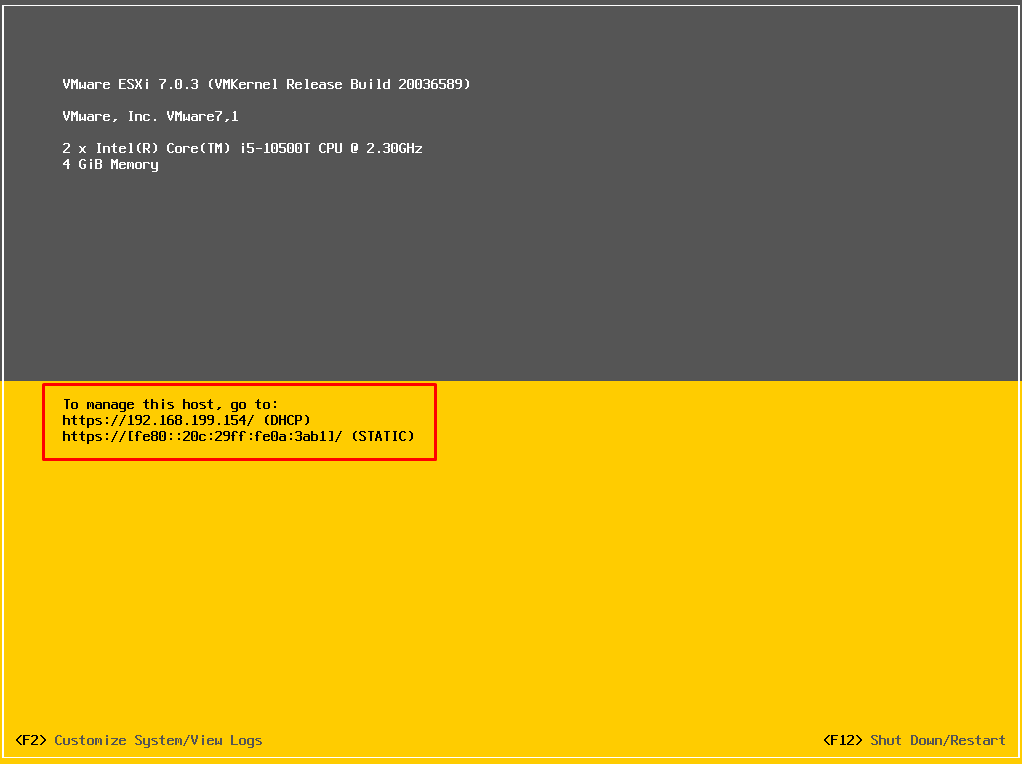
Before creating a vSphere 7 Cluster, we need to do some initial configurations on each ESXi host, such as hostname, management IP address, default gateway, etc. After powering on each ESXi host, in this case, the IP address was acquired by DHCP:
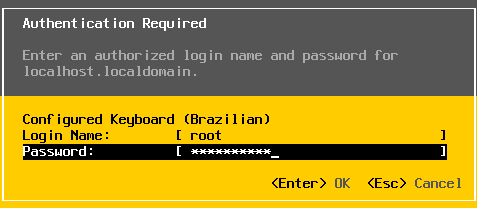
Press “F2” to Customize the ESXi options. Put the root credentials:
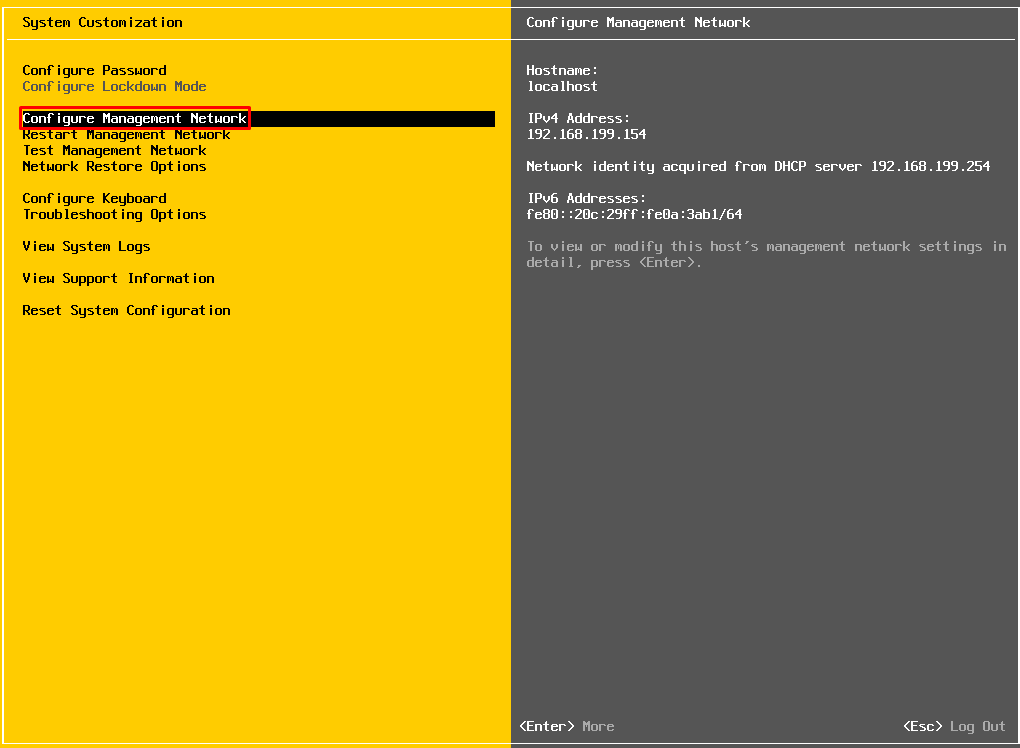
Press ENTER on “Configure Management Network”:
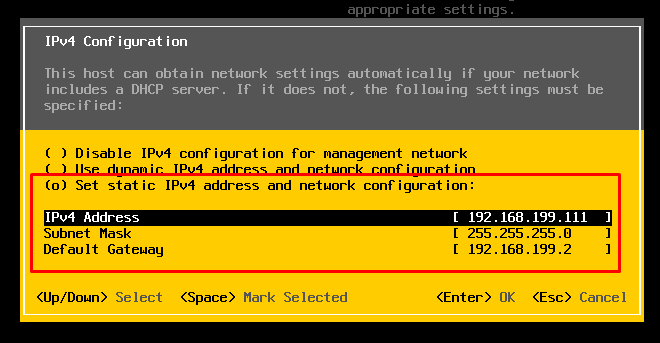
Select “IPv4 Configuration” and press ENTER:
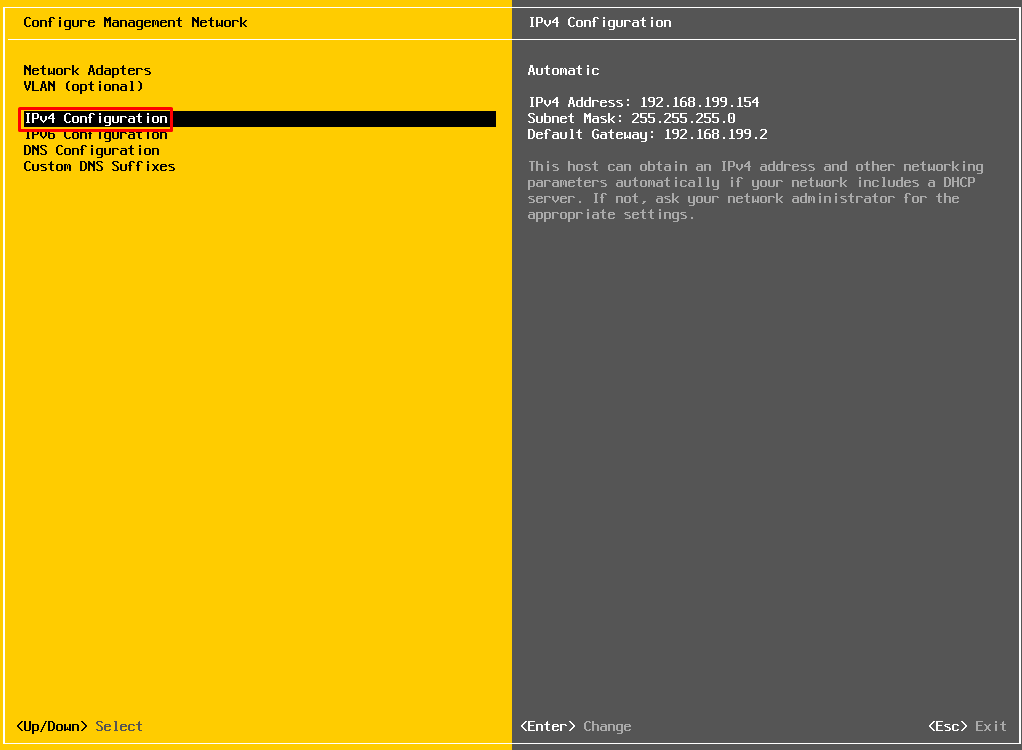
Now, select the last option “Set static IPv4 address and network configuration” and put the details about the ESXi host01 – Details as described in the table before.
Use the space key on your keyboard to select the desired option. After that, press ENTER to confirm:
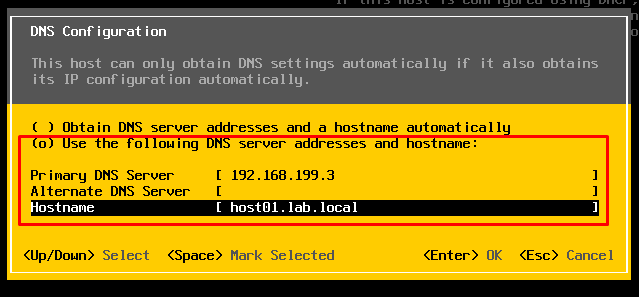
On DNS Configuration, put the address of each DNS Server. In this lab, our DNS Server has an IP 192..168.199.3.
Put the ESXi FQDN. In this case, the hostname of the ESXi host is “host01” and the domain name is “lab.local”. So, the FQDN is “host01.lab.local”:
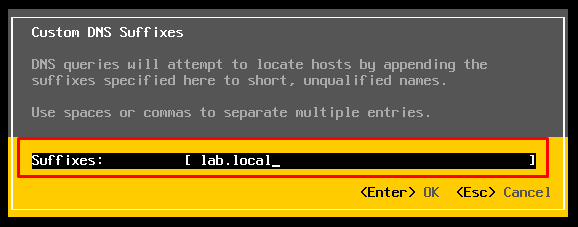
On Custom DNS Suffixes, put the DNS suffix used to name resolution – In our lab, the DNS suffix is “lab.local”:
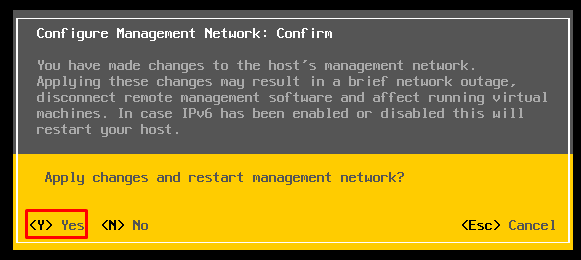
After that, press ESC. So, is necessary to press “Y” (Yes) to apply all changes and restart the management network:
As a result, the correct management IP address has been defined on this ESXi host:
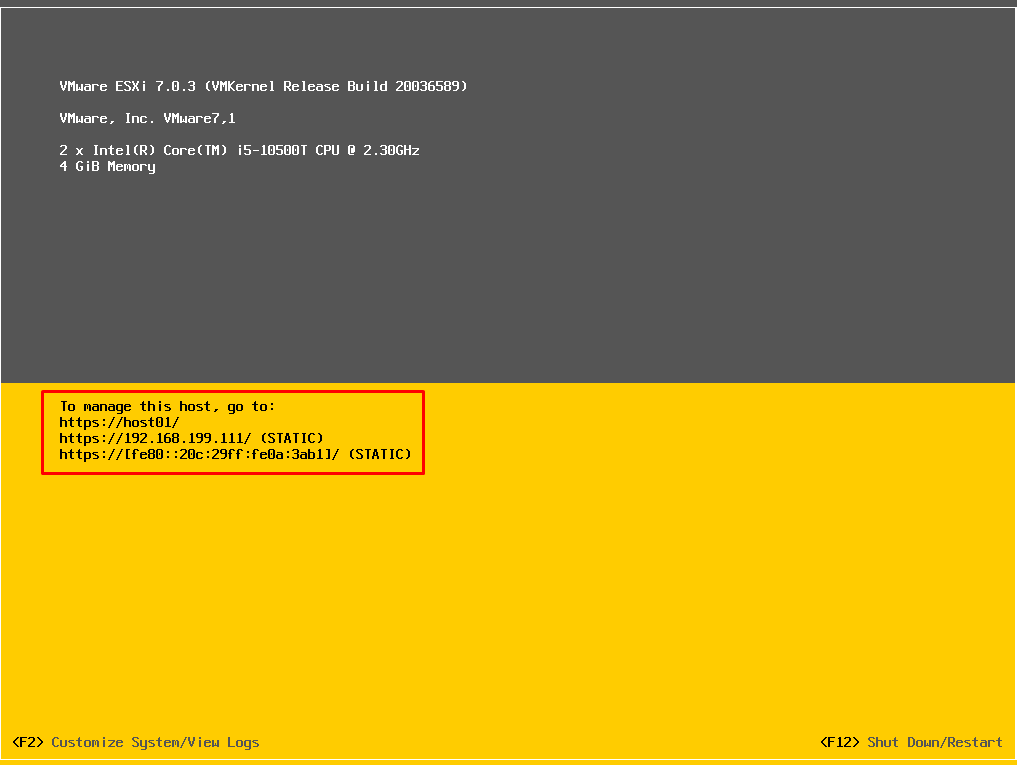
Note: Execute the same steps on the ESXi “host02” and “host03”.
Configure the ESXi hosts
The next step is to open the host management console on the web browser and perform the configurations below:
- Create a Local Datastore: We will use the 10GB virtual disk to create the local datastore. If your ESXi host doesn’t have an additional virtual disk, please, shutdown each ESXi host and add a 10GB virtual disk for this purpose
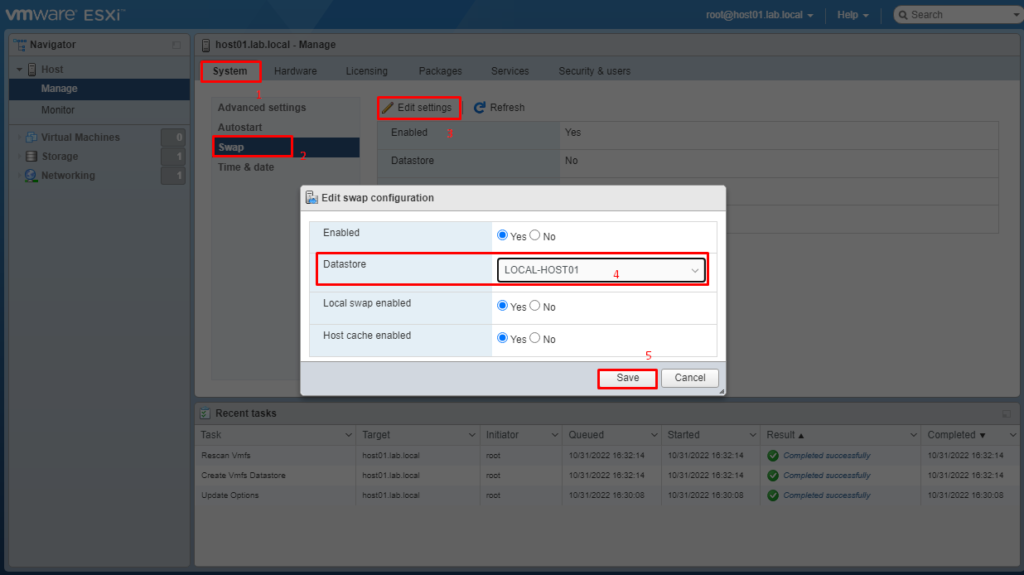
- Configure the swap to use this Local Datastore
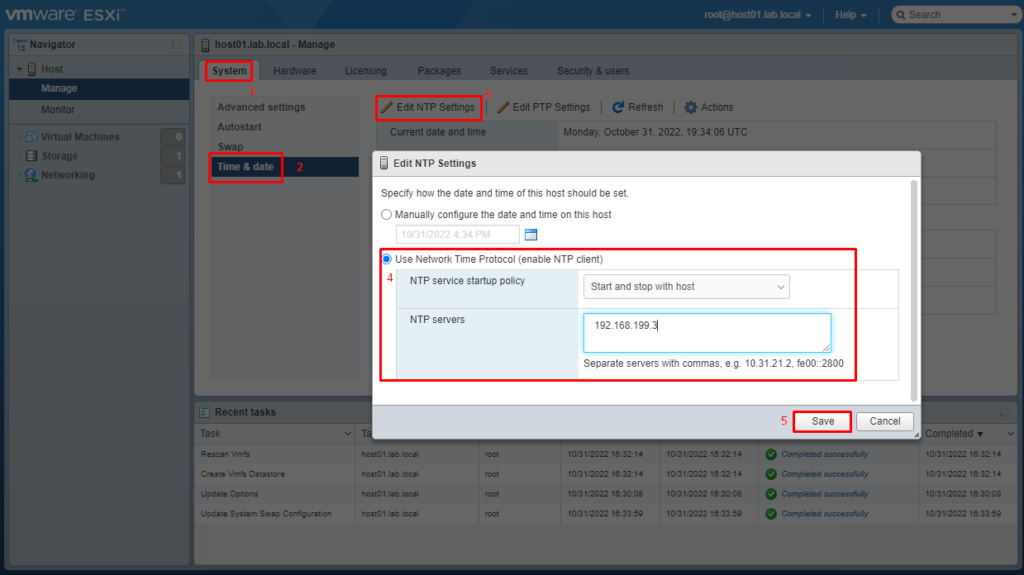
- Configure the NTP server to sync with IP 192.168.199.3 and mark this service (ntpd) to start with the ESXi
Open the host management console on the web browser:
https://host01.lab.local/ui
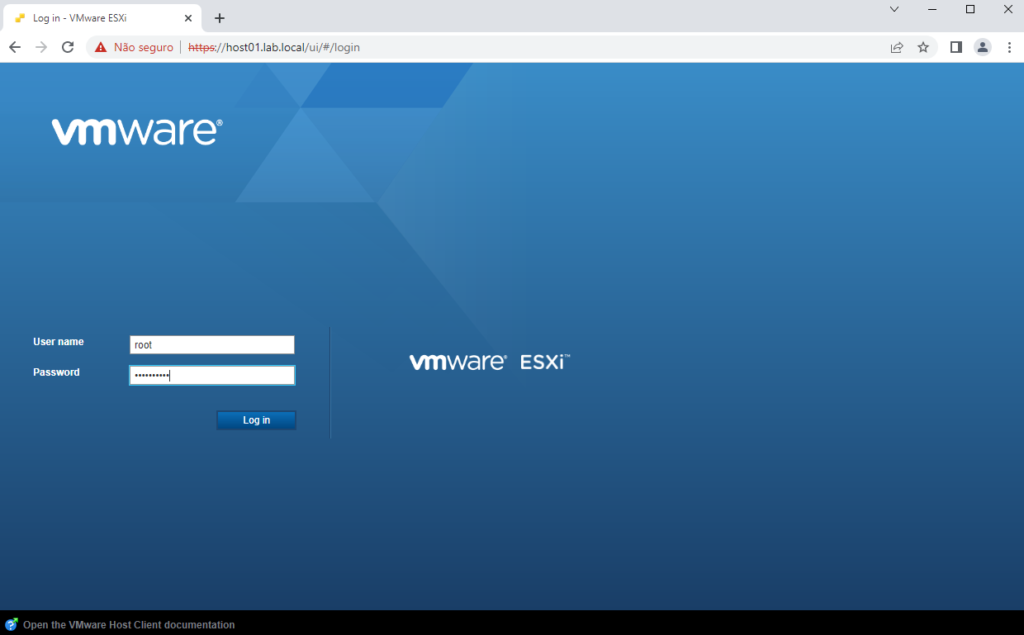
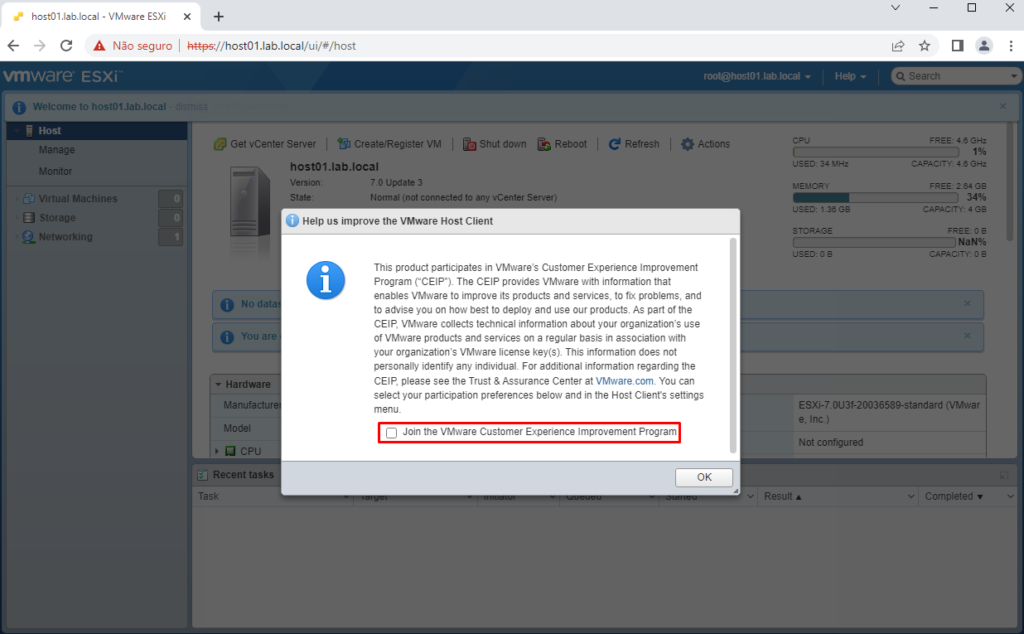
Enable or disable the CEIP (Customer Experience Improvement Program) – It’s optional:
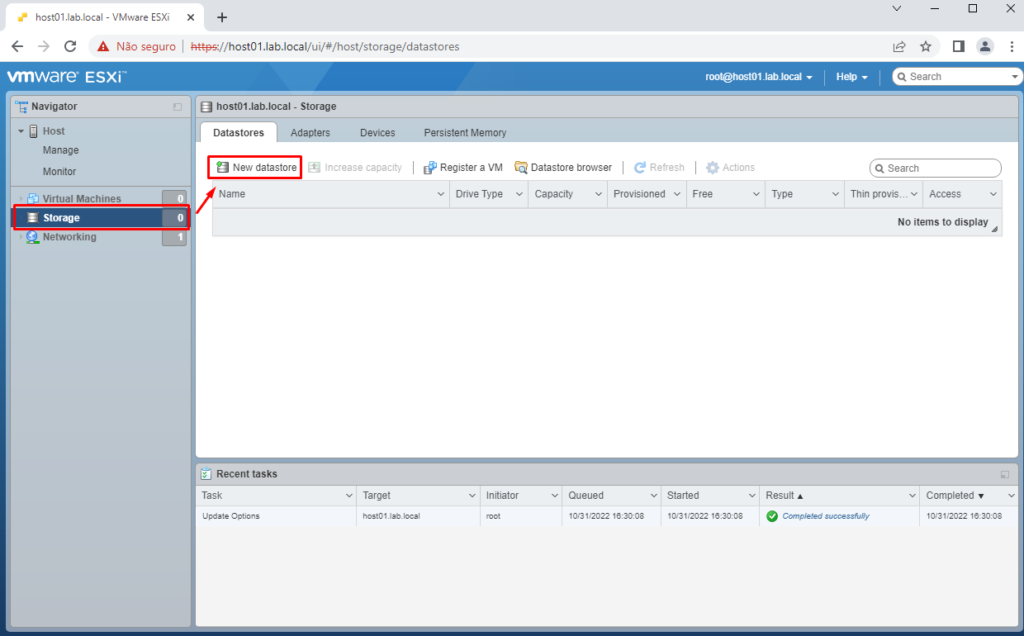
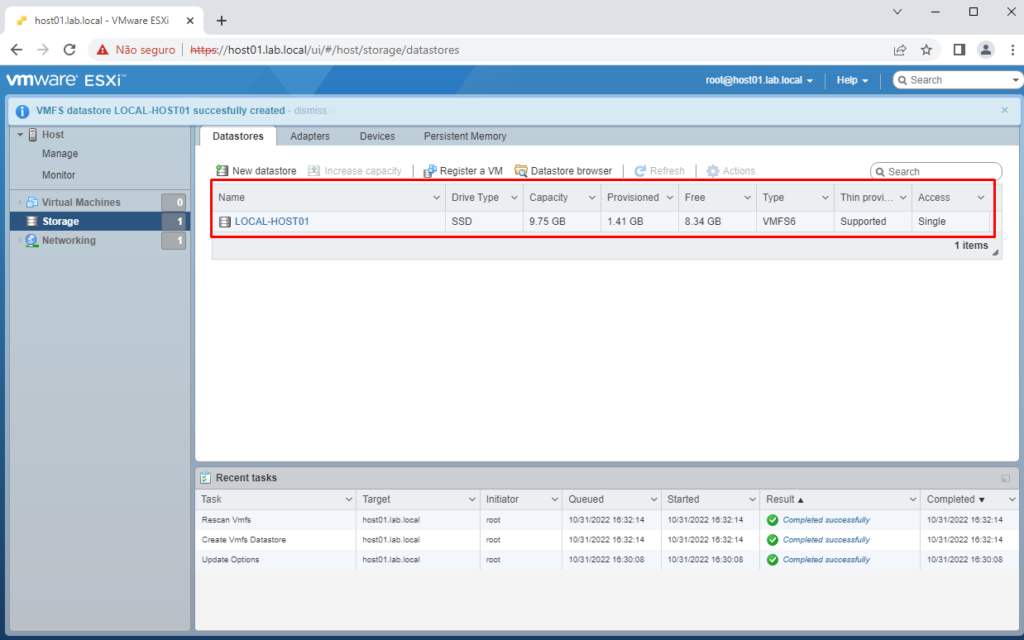
Click on “Storage” and then click on “New datastore”:
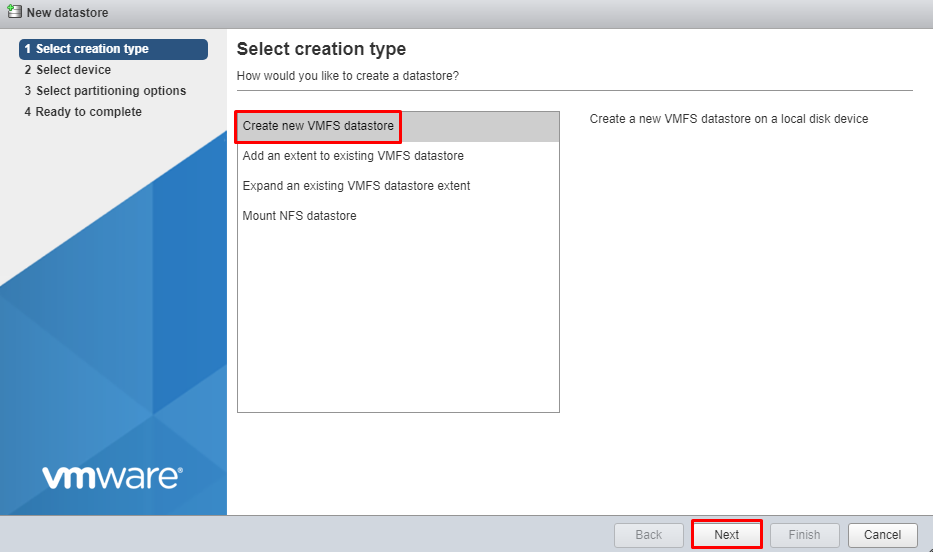
Type the Datastore Name and select what disk will be used to create this datastore:
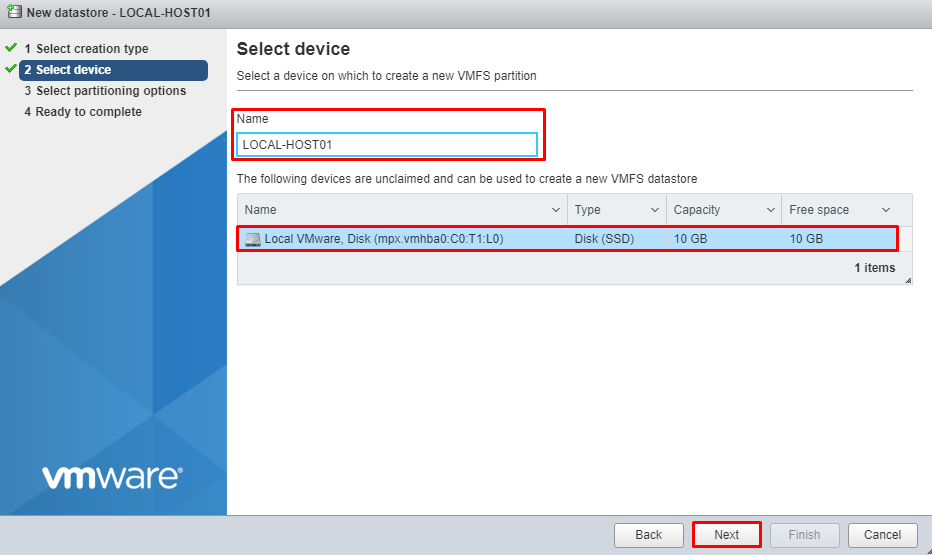
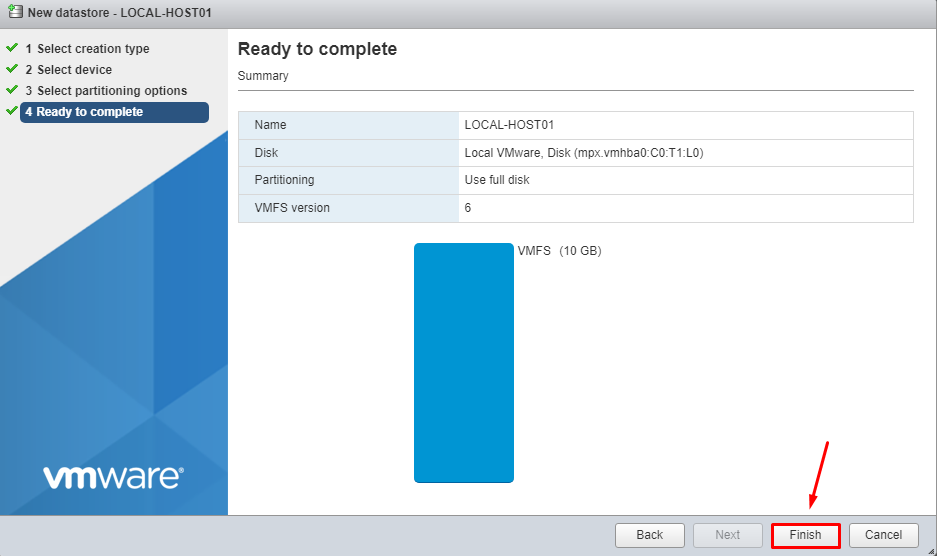
Click on “Finish” to end the Datastore creation wizard:
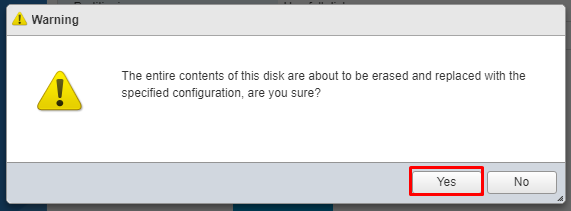
Warning: All disk content will be erased. So, click on “Yes” to continue:
Here, the Datastore “LOCAL-HOST01′ has been created:
The next step is to configure the swap to use this local Datastore.
Under the System menu, click on Swap –> Edit settings –> On Datastore, select the Datastore “LOCAL-HOST01” and click on “Save”:
To configure the NTP service, under the System menu, click on “Time & date” –> “Edit NTP Settings” and select the option “Use Network Time Protocol (Enable NTP Client)”.
In this lab, the NTP Server is 192.168.199.3 (the same IP as DNS Server):
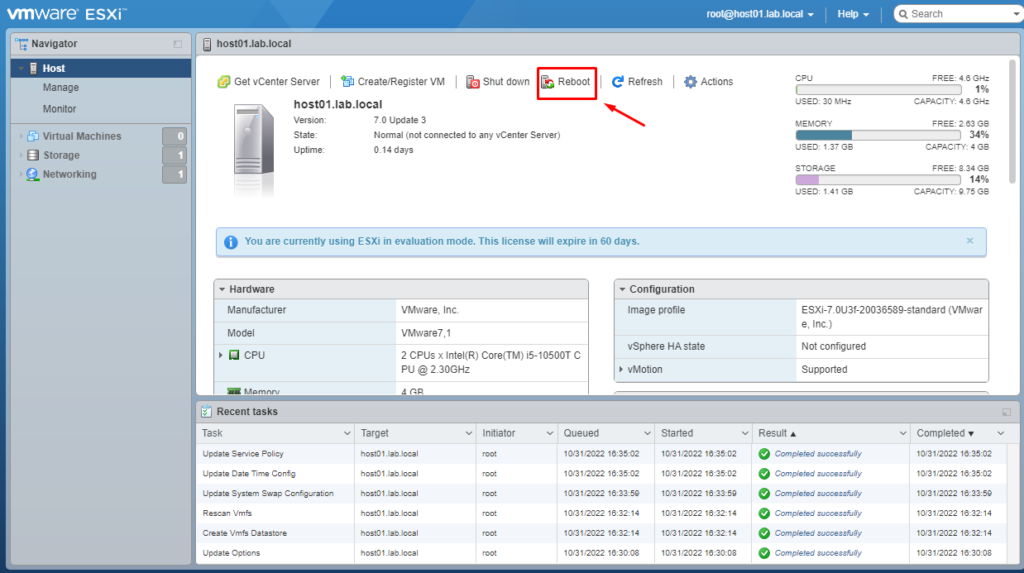
Click on “Host” and then click on “Reboot” to apply all changes that we realized:
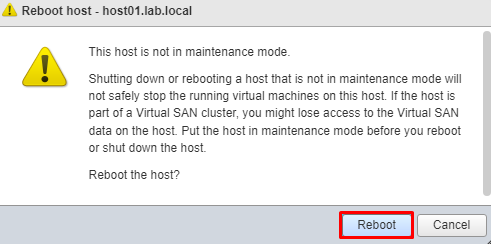
Note: Execute the same steps on the ESXi “host02” and “host03”.
Here, we have all ESXi hosts prepared to join into vCenter Server. In the next part of this post, we will discuss the Storage that will be used to provide the iSCSI volumes to our cluster and we will prepare the vCenter Server for creating a vSphere 7 Cluster.
To read Part 2, click on the button below: