Increasing the vSAN Datastore Capacity is an article that shows how to add disks to an existent vSAN Disk Group to increase the vSAN Datastore Capacity.
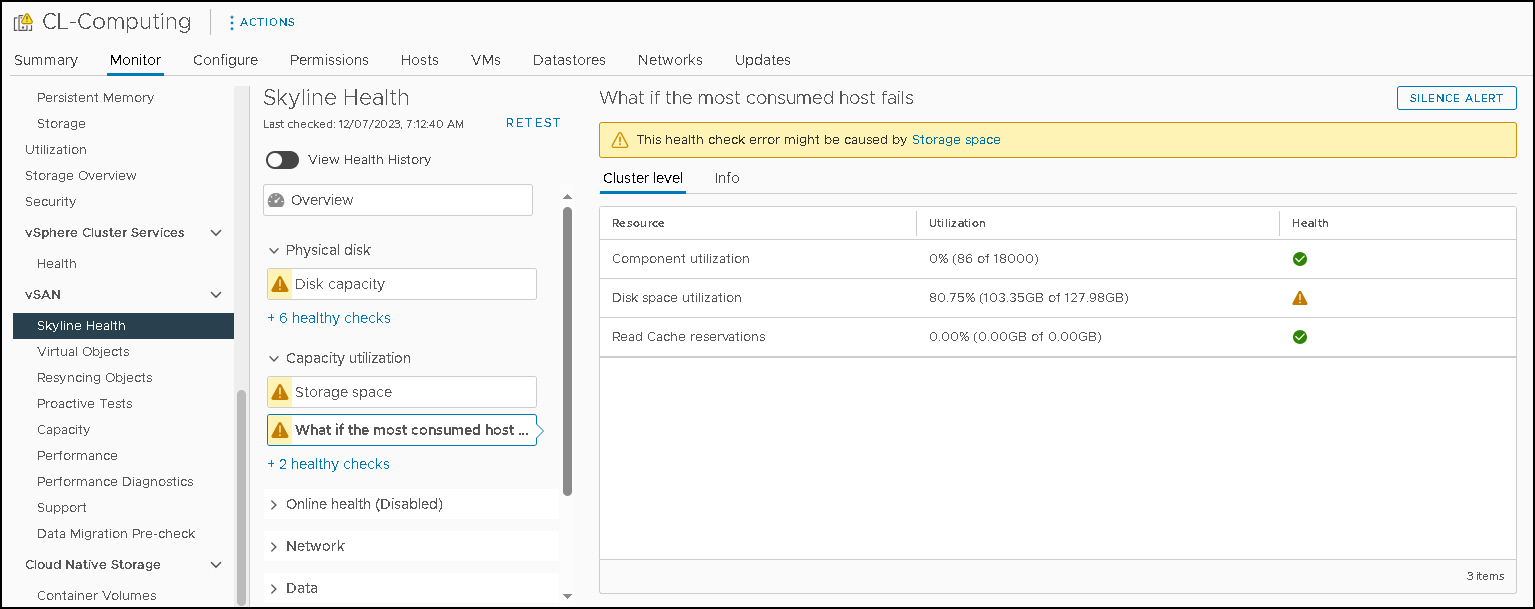
So, if you have a vSAN Cluster, you could receive some alerts related to the Storage Capacity, Disk Capacity, or Capacity Utilization, as we can see in the picture below:

Under the vSAN Skyline Health, for instance, we can see more details of each alarm:
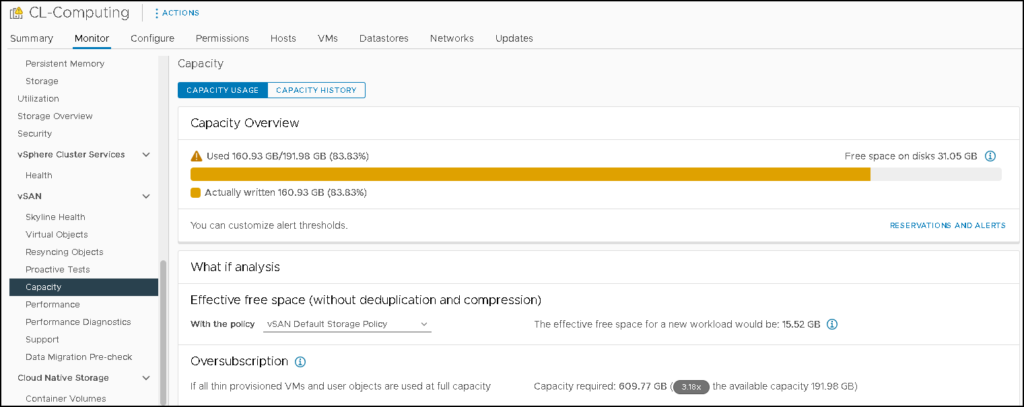
Under the vSAN Capacity menu, we can see the capacity overview of the vSAN Datastore:
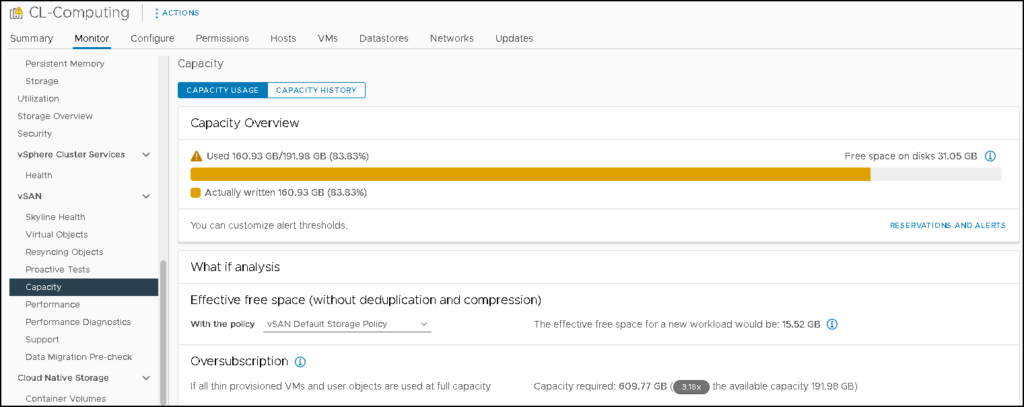
On a vSAN Cluster, the vSAN Datastore is built using local disks for all hosts on this cluster (generally, the best practice guide is that all hosts contribute to the vSAN Datastore).
The above pictures are from our lab environment. We have a small cluster with 3 ESXi hosts. Our aim here is to increase the vSAN Datastore capacity by adding more disks to the existing vSAN Disk Group.
We have an All Flash cluster and the vSAN Deduplication and Compression are not enabled!
Overview in the Current vSAN Disk Group
As we said, our vSAN Cluster is composed of three (3) ESXi hosts. Each host has one (1) vSAN Disk Group.
The vSAN Disk Group has one cache disk and one capacity disk, as we can see in the picture below:
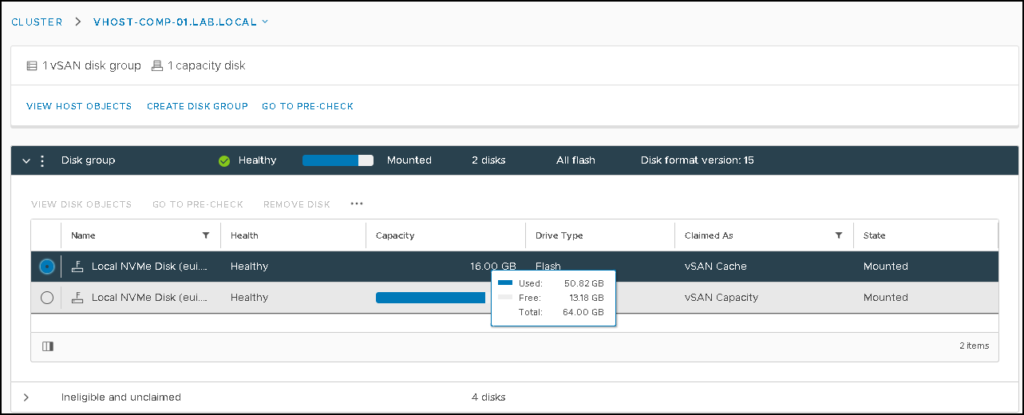
As we can see, the only capacity disk is almost full. We will add one more capacity disk here!
Putting the vSAN Host in Maintenance Mode
Firstly, we recommend you put the affected ESXi host in maintenance mode. We highly recommend you execute the pre-check before putting the ESXi host in maintenance mode.
Under the Maintenance Mode page, click on “GO TO PRE-CHECK”. You will be redirected to the Data Migration Pre-check page:

Under the Data Migration Pre-check page, select the desired vSAN data migration mode and click on “PRE-CHECK”. In this case, for instance, the vSAN data migration is the default (Ensure accessibility):
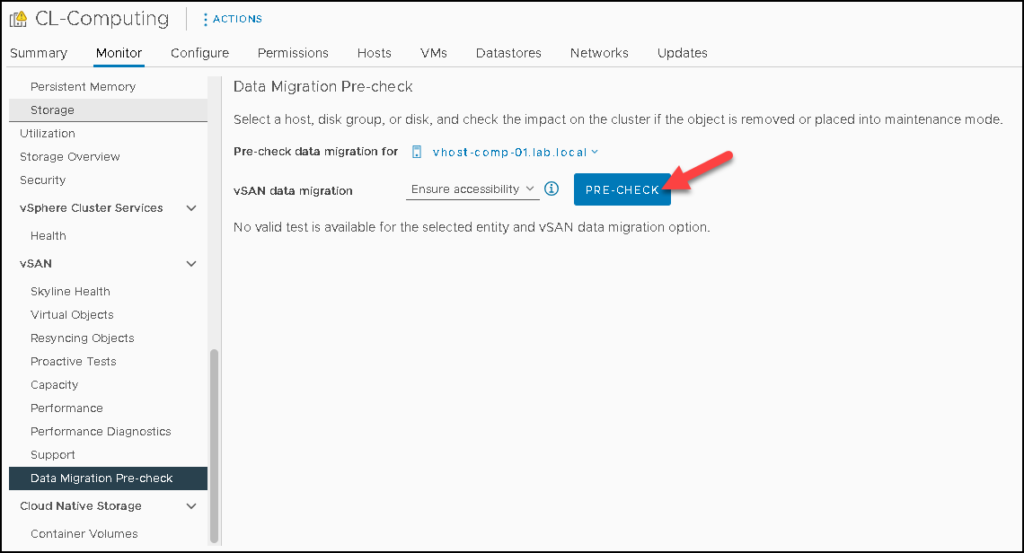
Wait for a few seconds while the pre-check is running. After that, we can see the pre-check results.
In this case, for instance, we have a clear message that this host can enter maintenance mode.
We will have 43 vSAN objects non-compliance – This is the expected behavior here. We can click on “ENTER MAINTENANCE MODE”:


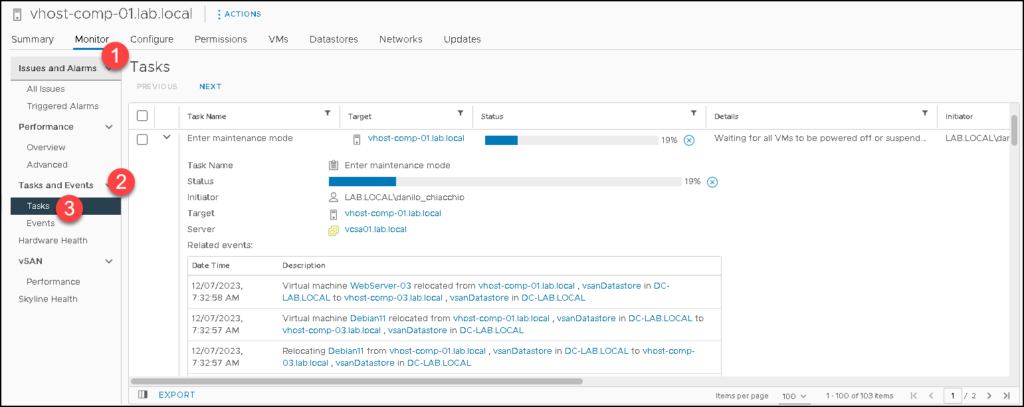
Under the host’s tasks view, we can follow up on the maintenance mode task:
As the host enters maintenance mode, we can shut down it:


Now, our ESXi host has powered off and we can add the new disk. After installing the new disk, power on the ESXi host!
Adding the New Disk into the vSAN Disk Group
So, now we need to add the new disk to the vSAN Disk Group.
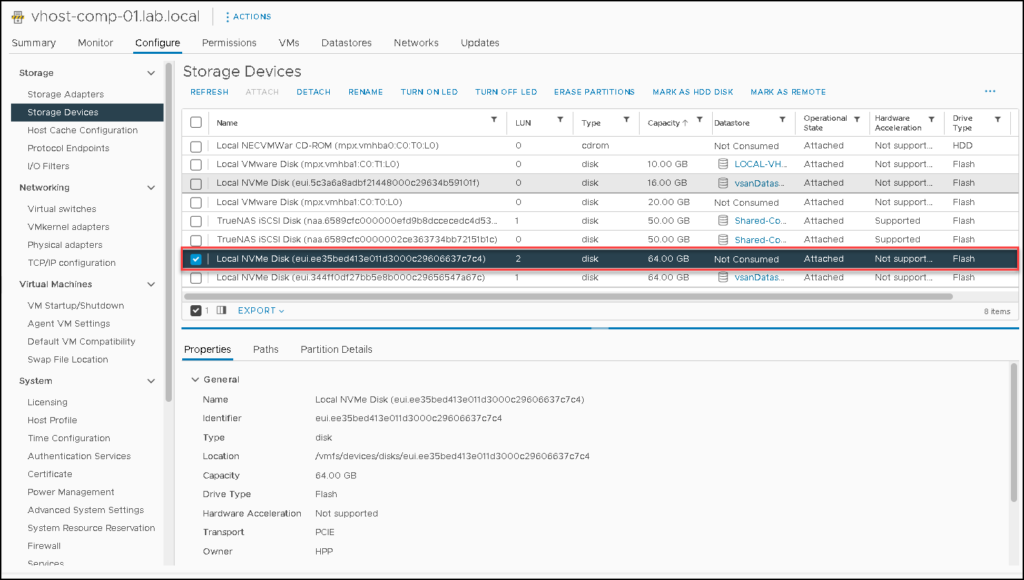
Under the Storage Devices menu, we can confirm if the OS recognized the new disk. In this case, for instance, the new disk is an NVMe disk with 64 GB (just to remember, we are in a virtual lab environment):
Go to the vSAN Disk Management and select the host to which we will add the new disk.
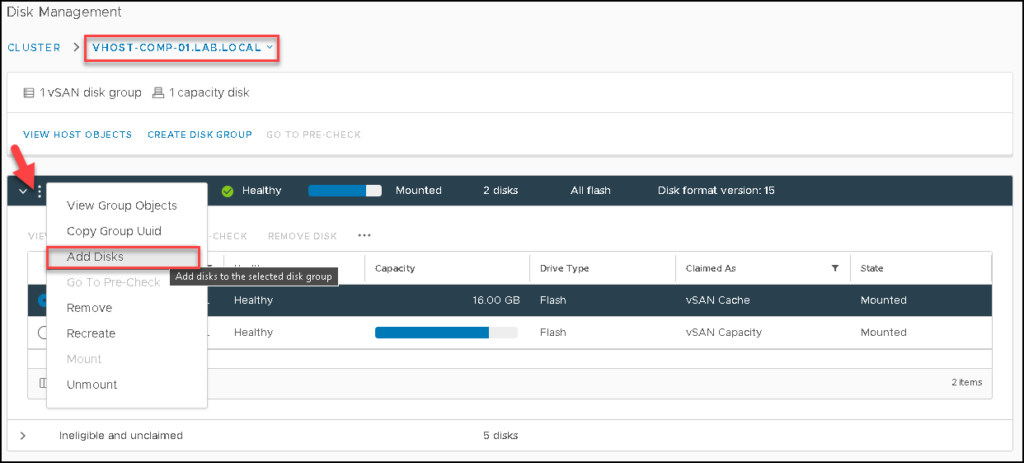
In our example, the host is “vhost-comp-01.lab.local”. Look that we only have one vSAN Disk Group.
Under the vSAN Disk Group, click on three dots –> Add Disks:
Select the new disk and click on ADD:

After that, the task to add the new disk will be started. We can follow up on this task under the Recent Tasks on the vSphere Client:

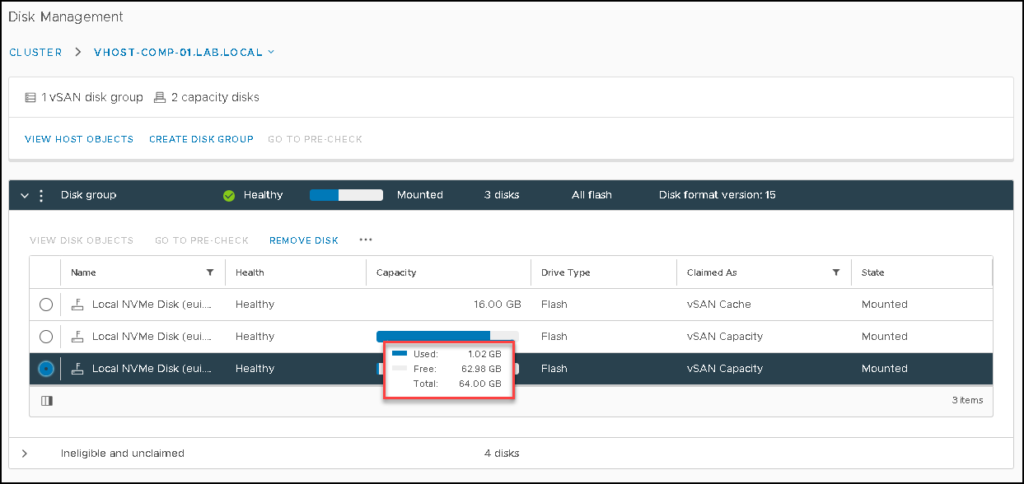
Now, we can see the new disk in the vSAN Disk Group 🙂
Checking the Cluster Health with the vSAN Skyline Health
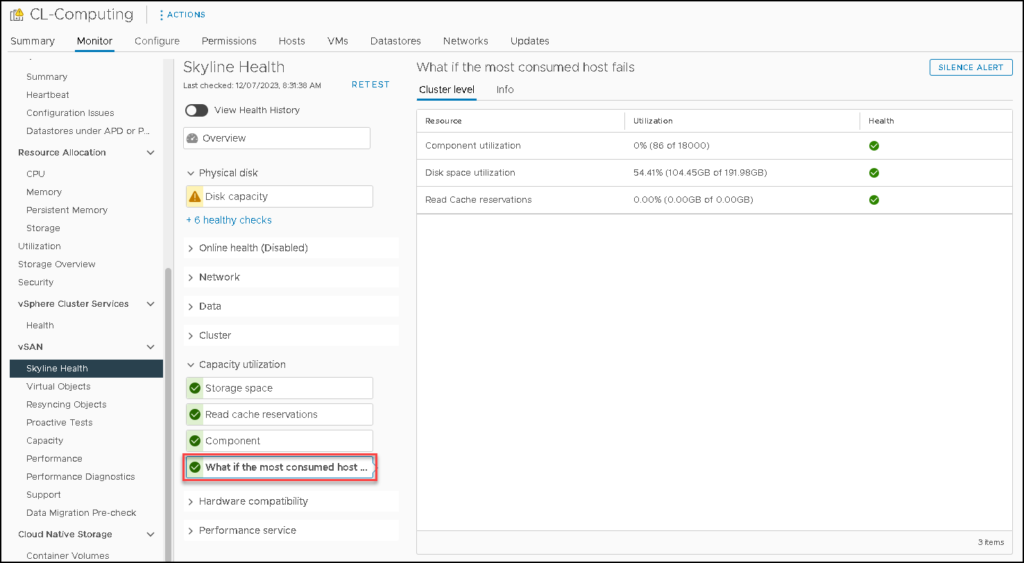
Executing the vSAN Skyline Health, we can see that the alert about Storage Capacity has been solved!
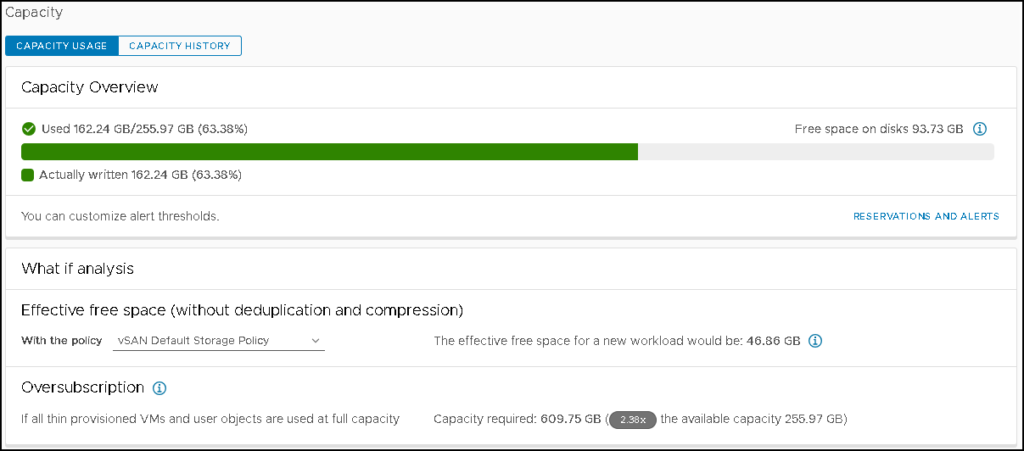
Additionally, under the Capacity Overview tab, we can see that the vSAN Datastore capacity has grown:
BEFORE THE DISK ADD PROCESS:
AFTER THE DISK ADD PROCESS:
Wrapping This Up
So, we could see how to add more disks to increase the vSAN Datastore Capacity!
We can use the same approach on the other hosts in the cluster (doing it one host per time).