Unifying file access across multiple systems is a core skill for any sysadmin. This article will provide an overview of how to work with NFS, providing some practical examples.
NFS is a client/server protocol: The NFS server is responsible for providing shares, and the NFS client mounts these shares using the network.
Prepare the NFS Server
1- Update and install NFS components:
dnf update -y
dnf install -y nfs-utils
2- Create an NFS user, group, and an export directory:
groupadd -r -g 65533 nfsnobody
useradd  -r -u 65533 -g 65533 -d /nonexistent -s /sbin/nologin nfsnobody

mkdir -p /srv/nfs/shared
chown nfsnobody:nfsnobody /srv/nfs/shared
chmod 755 /srv/nfs/shared
3- Configure exports Edit /etc/exports and add:
/srv/nfs/shared *(rw,sync,no_root_squash)Let’s break down the line added to the /etc/exports:
/srv/nfs/sharedThis is the absolute path on the server that you’re sharing. Clients mounting this export will see the contents of this folder.*Means that all clients (all IP addresses) are allowed to mount the NFS share. You can, for example, allow only clients within the subnet 192.168.10.0/24.- Export options:
rwGrants both read and write access. If you omit this, the share defaults to read-only (ro).syncForces the NFS server to confirm data is written to disk before replying. This guarantees consistency at the cost of some performance. The alternative (async) can be faster but risks data loss on a crash.no_root_squashAllows the remote client’s root user to act as root on the exported directory. By default, NFS maps (or “squashes”) root to the anonymous user (root_squash), preventing privileged operations. Useno_root_squashwith caution.
4- Enable and start services:
systemctl enable --now rpcbind nfs-server5- Apply exports:
exportfs -ra6- Open all the necessary firewall ports (Open NFS, RPC bind, and mountd permanently):
# Open NFS, RPC bind and mountd permanently
firewall-cmd --permanent --add-service=nfs
firewall-cmd --permanent --add-service=rpc-bind
firewall-cmd --permanent --add-service=mountd

# Reload to apply
firewall-cmd --reloadNote: Check if SELinux is enforcing:
getenforceIf it’s set to Enforcing, run the following command to allow NFS to export files:
setsebool -P nfs_export_all_rw 1Prepare the NFS Client and Mount a NFS Share
1- Install client utilities:
dnf install -y nfs-utils2- Check all exports on the NFS server – In this case, for instance, the NFS Server IP is 192.168.255.164:
showmount -e 192.168.255.164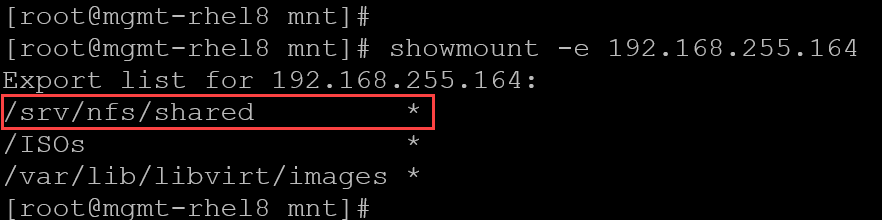
3- Manually mount the share:
mkdir /mnt/nfs_share
mount -t nfs 192.168.255.164:/srv/nfs/shared /mnt/nfs_share
4- We can use the “mount” command to inspect details of the mounted filesystem:
mount | grep -i -E "192.168.255.164"
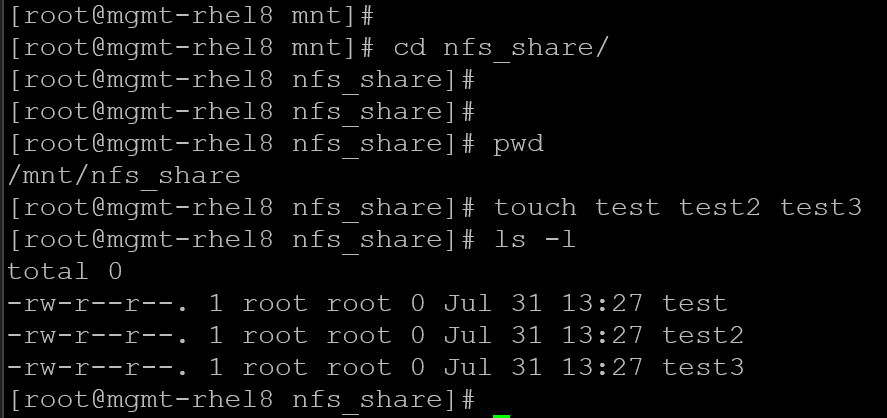
5- We can create some files to test the read/write access:
6- Enable automatic mount at boot, add to /etc/fstab:
192.168.255.164:/srv/nfs/shared /mnt/nfs_share nfs defaults,_netdev 0 07- Mount to test:
mount -aNFS Server Export Options: no_root_squash and root_squash
no_root_squash Allows the remote client’s root user to act as root on the exported directory. By default, NFS maps (or “squashes”) root to the anonymous user (root_squash), preventing privileged operations. Use no_root_squash with caution.
So, if you don’t want to give the root privilege to the clients on that specific NFS share, let’s explore a way to fix it:
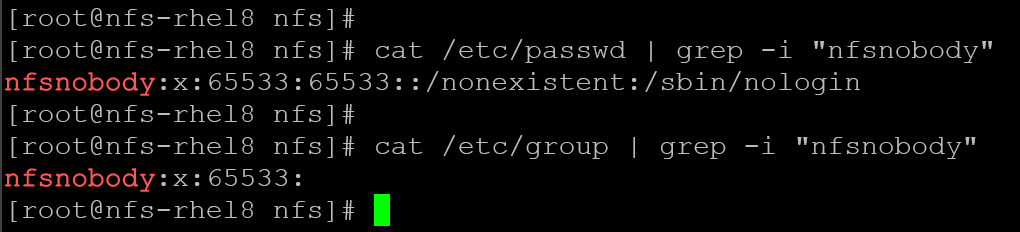
1- We’ve created a user and group to use on the NFS server. To inspect it:
cat /etc/passwd | grep -i "nfsnobody"
cat /etc/group | grep -i "nfsnobody"
In our example, the user and group ID is 65533:
2- Edit the entry on /etc/exports, and adjust like the following – we’ve highlighted in red the changes that we’ve made:
/srv/nfs/shared *(rw,sync,root_squash,anonuid=65533,anongid=65533)With this configuration, all clients will be mapped to the specified user ID and group ID.
3- Reload exports to apply the changes:
exportfs -raNow, when the root on the client is squashed to nfsnobody, it can create files.
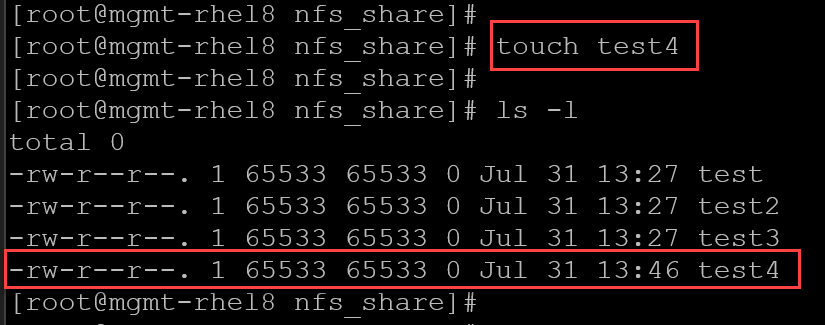
4- On the NFS client, it’s interesting to unmount and mount the NFS share and test the file creation.
As we can see, the file “test4” was created in the NFS share and its user and group were defined based on the NFS server configuration:
That’s it for now 🙂