Master Boot Record (MBR) and GUID Partition Table (GPT) on RHEL 8 show essential details of each partition scheme used by the majority of Linux flavors. All the details here will be shown using Red Hat Linux Enterprise 8.
Master Boot Record (MBR)
MBR is the traditional partitioning scheme used by legacy BIOS systems. It resides in the very first sector (512 bytes) of a disk, containing both the bootloader code and the partition table.
- Supports up to four primary partitions.
- Maximum disk size of 2 TB – with 512 B sectors.
- Partition entries are limited to 16 bytes each, stored in a single table.
- Lacks built-in integrity checks or redundancy.
GUID Partition Table (GPT)
GPT is the modern replacement for MBR, mandated by UEFI and supported by most contemporary OSes. It stores multiple copies of its header and table for redundancy and includes CRC32 checksums for corruption detection.
- Supports disks larger than 2 TB.
- Virtually unlimited partitions (Windows, for example, limits to 128 by default).
- Primary header at LBA 1; backup header at the last LBA.
- Each partition entry is 128 bytes (more metadata).
Key Differences
So, in the following table, we can see the key differences between MBR and GPT:
| Feature | MBR | GPT |
|---|---|---|
| Boot environment | Legacy BIOS | UEFI |
| Max disk size | 2 TiB | Virtually unlimited – more than 2 TiB |
| Max partitions | 4 primary | 128+ (OS-dependent) |
| Redundancy | None | Primary + backup headers |
| Integrity checks | None | CRC32 |
| Partition table offset | Single table @ LBA 0 | Table @ LBA 1 and LBA n−1 |
Creating and Inspecting Partition Tables
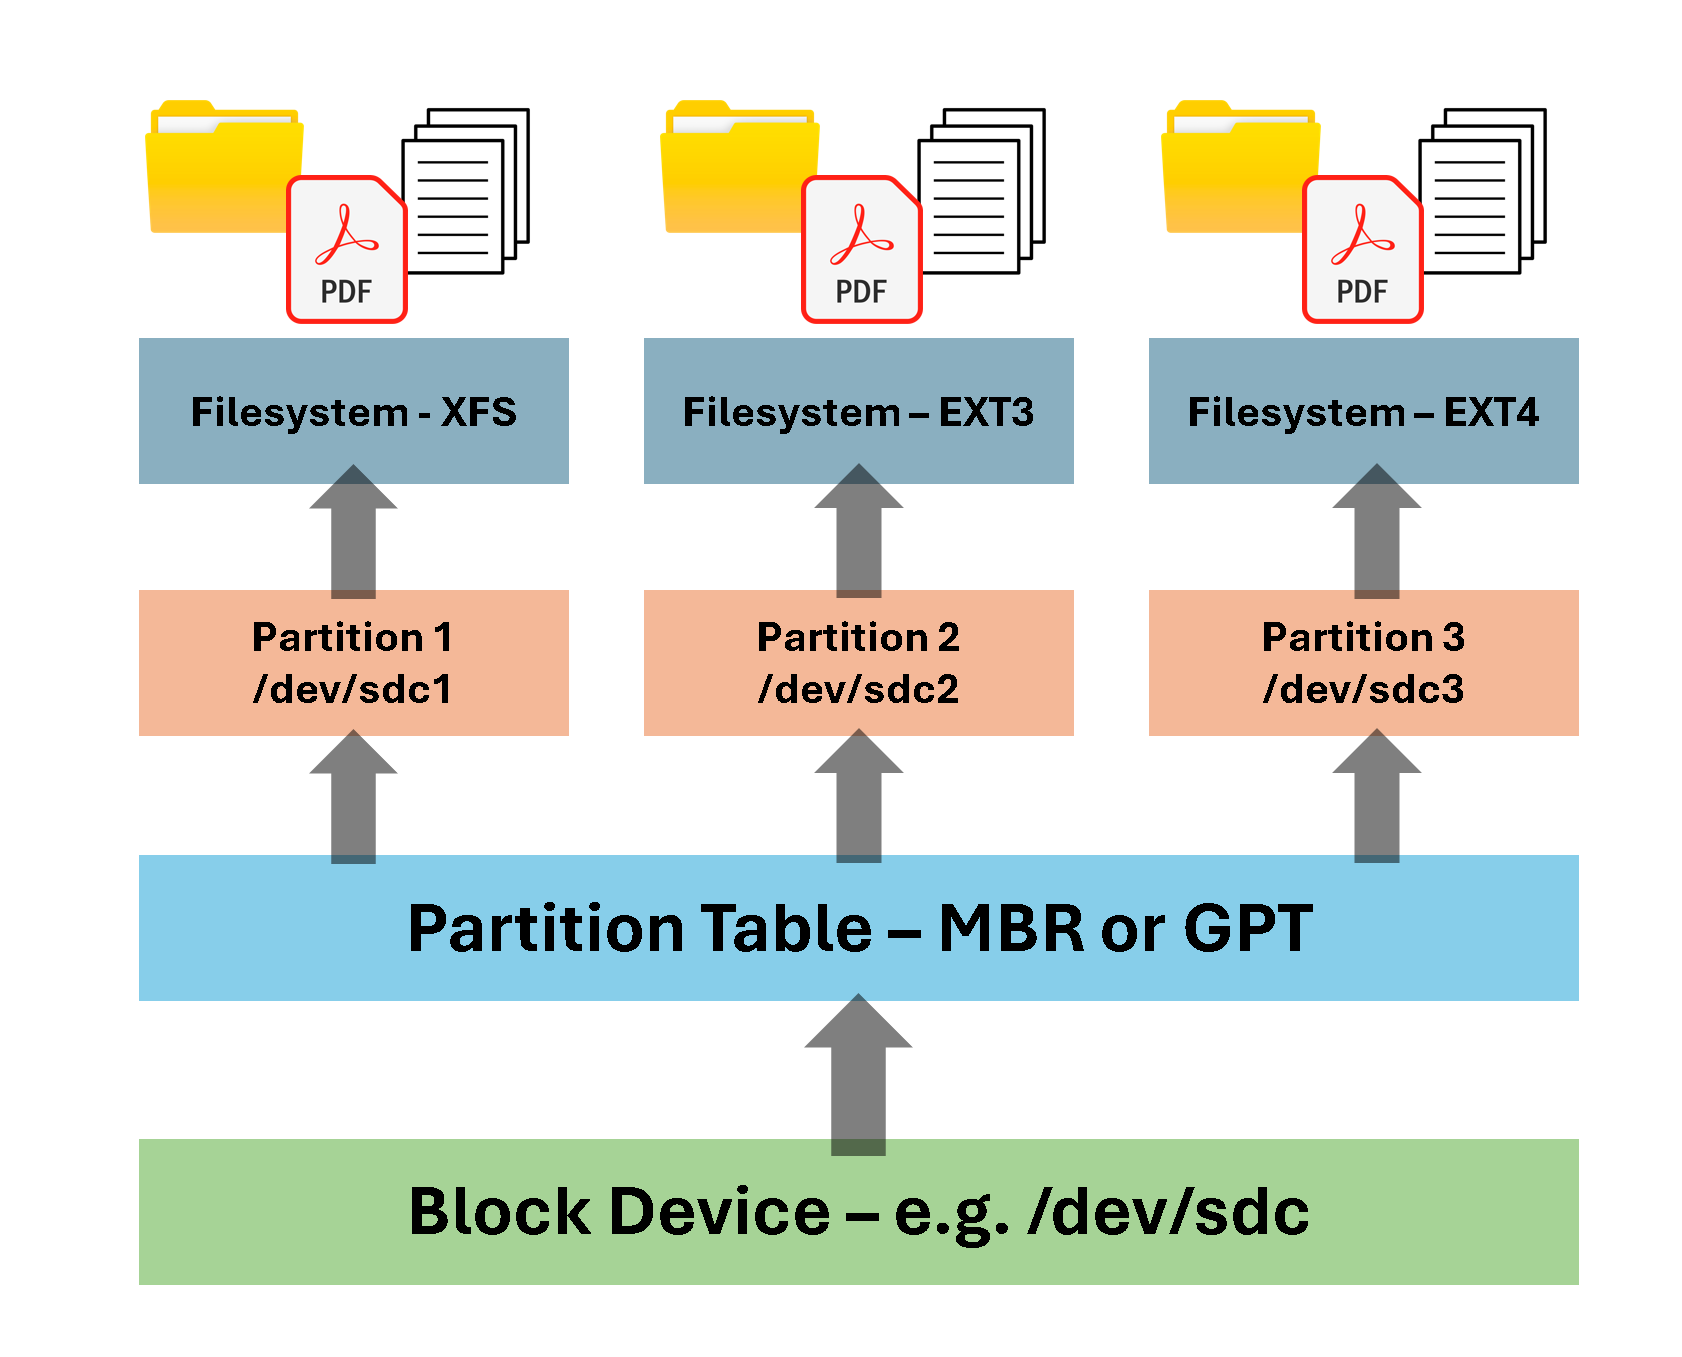
Before saving a file on the disk, for example, we need to understand what “layers” we have between the file and the physical disk. In the following picture, we have an example. If we look at the picture from bottom to top, we can see that the first layer is the physical disk. Under the physical disk, we need to create a partition table, using the partition scheme MBR or GPT. All partitions are made here (using the partition scheme). Afterward, a filesystem is required (xfs, ext2, ext3, ext4) to allow us to use effectively the disk:
Using Parted
parted is a program to manipulate disk partitions. It supports multiple partition table formats, including MS-DOS and GPT. It helps create space for new operating systems, reorganises disk usage, and copies data to new hard disks.
So, before using the parted command, let’s show the physical disks that we have in our virtual machine. We can do that using the “lsblk” command.
lsblk lists information about all available or the specified block devices:
lsblk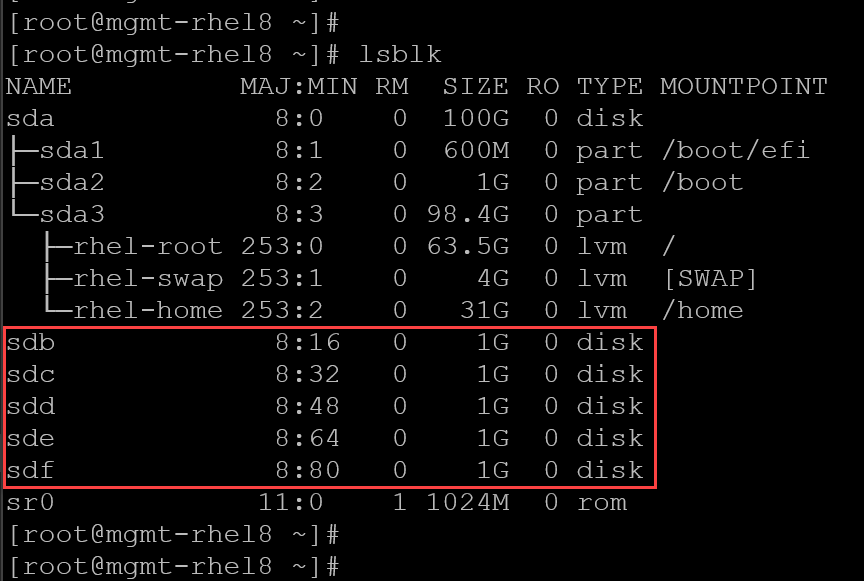
Note that we have five disks on this example, recognized from “sdb” to “sdf”, each with a size of 1 GB.
1- Create an MBR partition table on disk /dev/sdb:
parted /dev/sdb mklabel msdosAfter creating the partition table, type the following command to print its details:
parted /dev/sdb print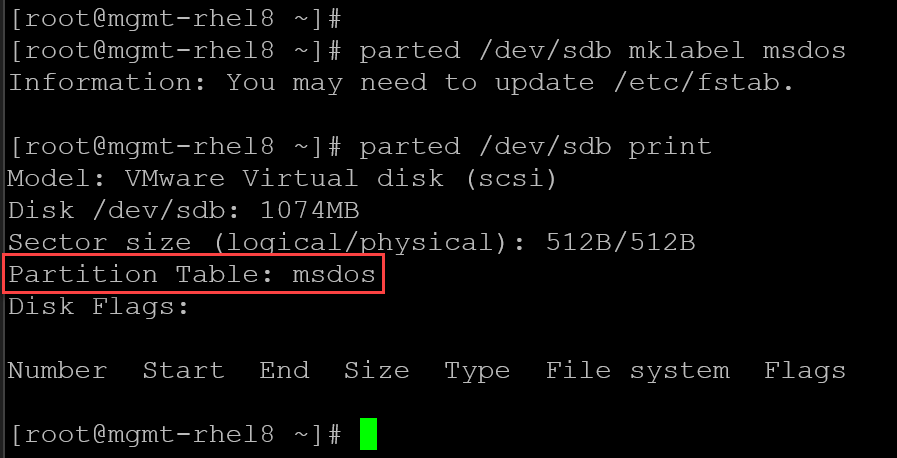
2- Create a GPT partition table on disk /dev/sdc:
parted /dev/sdc mklabel gpt
parted /dev/sdc print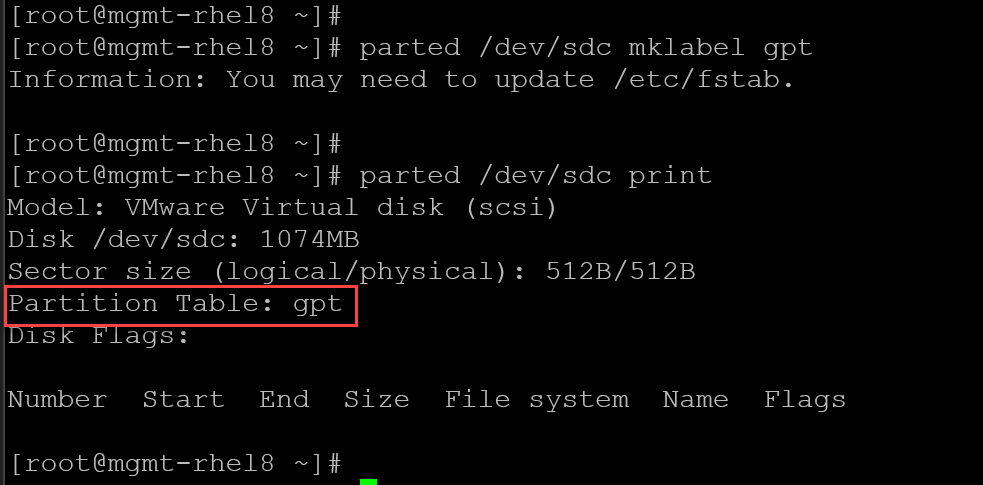
3- We can use the command “blkid” to confirm the partition type. For example:
blkid | grep -E "sdb|sdc"
Using fdisk
fdisk is a dialog-driven program for the creation and manipulation of partition tables. It understands GPT, MBR, Sun, SGI, and BSD partition tables.
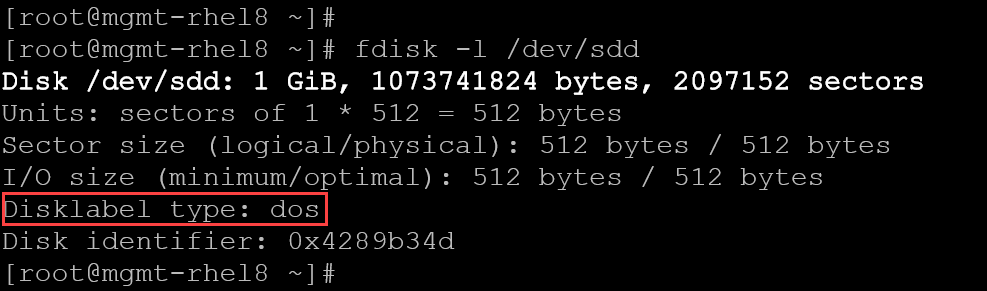
So, let’s provide an example of using fdisk to create an MBR partition table, using the block device /dev/sdd:
1- We can use the “fdisk -l” to check if a block device has partitions – in this case, for instance, the block device does not have any partitions:
fdisk -l /dev/sdd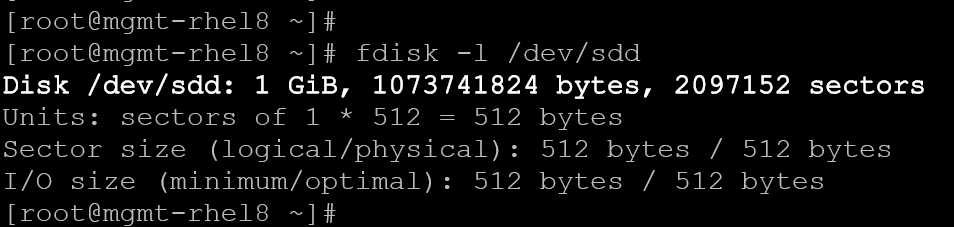
2- To create an MBR partition table:
fdisk /dev/sdd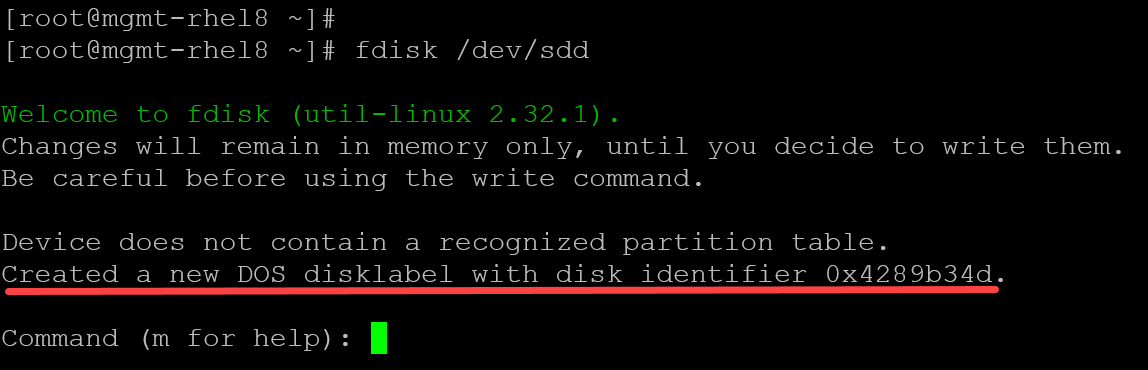
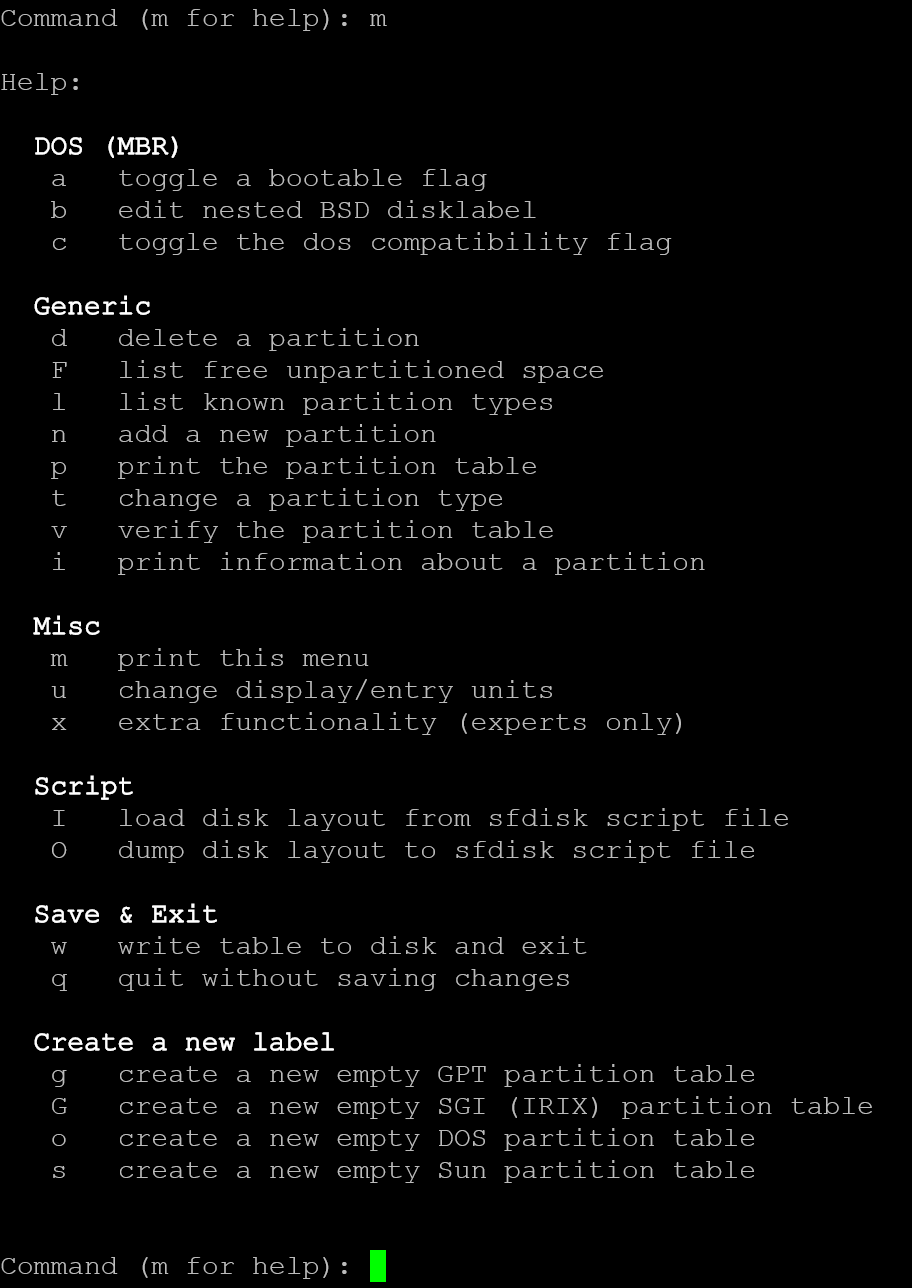
After executing the fdisk, passing the device block as a parameter, an MBR partition is automatically created. Press “m” for help:
Press “p” to print the partition table. In this case, it is expected to see no partitions here:

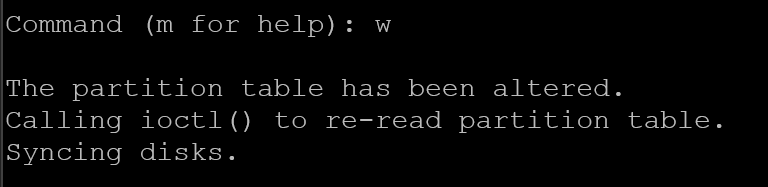
To exit the menu-driven mode of “fdisk”, press “w” to save all changes and exit:
We can execute the “fdisk -l” to confirm that the MBR partition table has been created successfully:
Using gdisk
GPT fdisk (aka gdisk) is a text-mode menu-driven program for the creation and manipulation of partition tables. It will automatically convert an old-style Master Boot Record (MBR) partition table or BSD disklabel stored without an MBR carrier partition to the newer Globally Unique Identifier (GUID) Partition Table (GPT) format, or will load a GUID partition table.
So, let’s provide an example of using gdisk to create a GPT partition table, using the block device /dev/sde:
1- The command “gdisk -l” can be used to check if there is a valid partition table on the specified block device – in this case, as we can see in the following picture, there are no partitions on the block device /dev/sde:
gdisk -l /dev/sde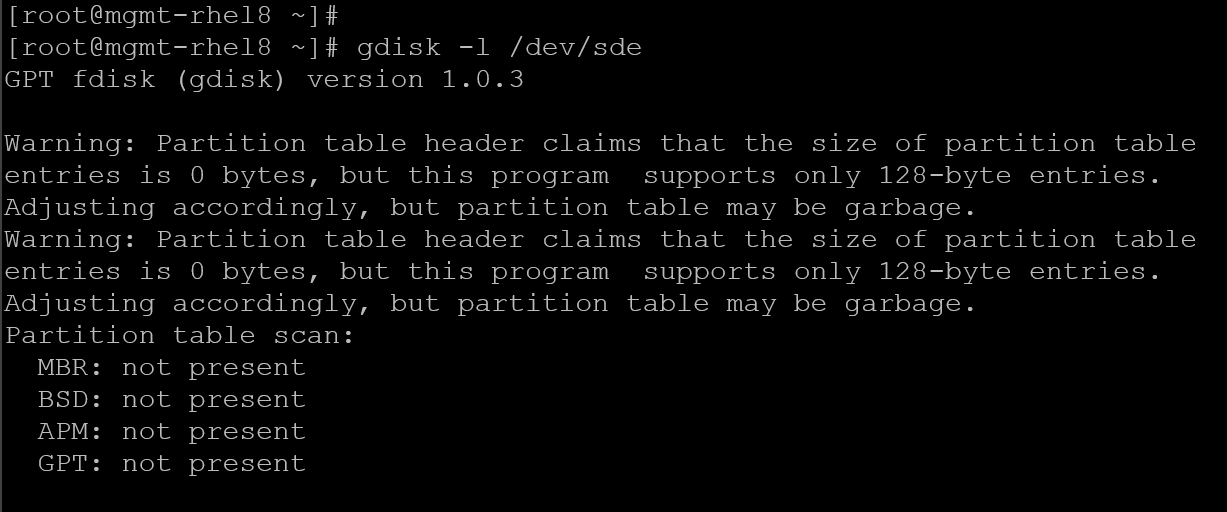
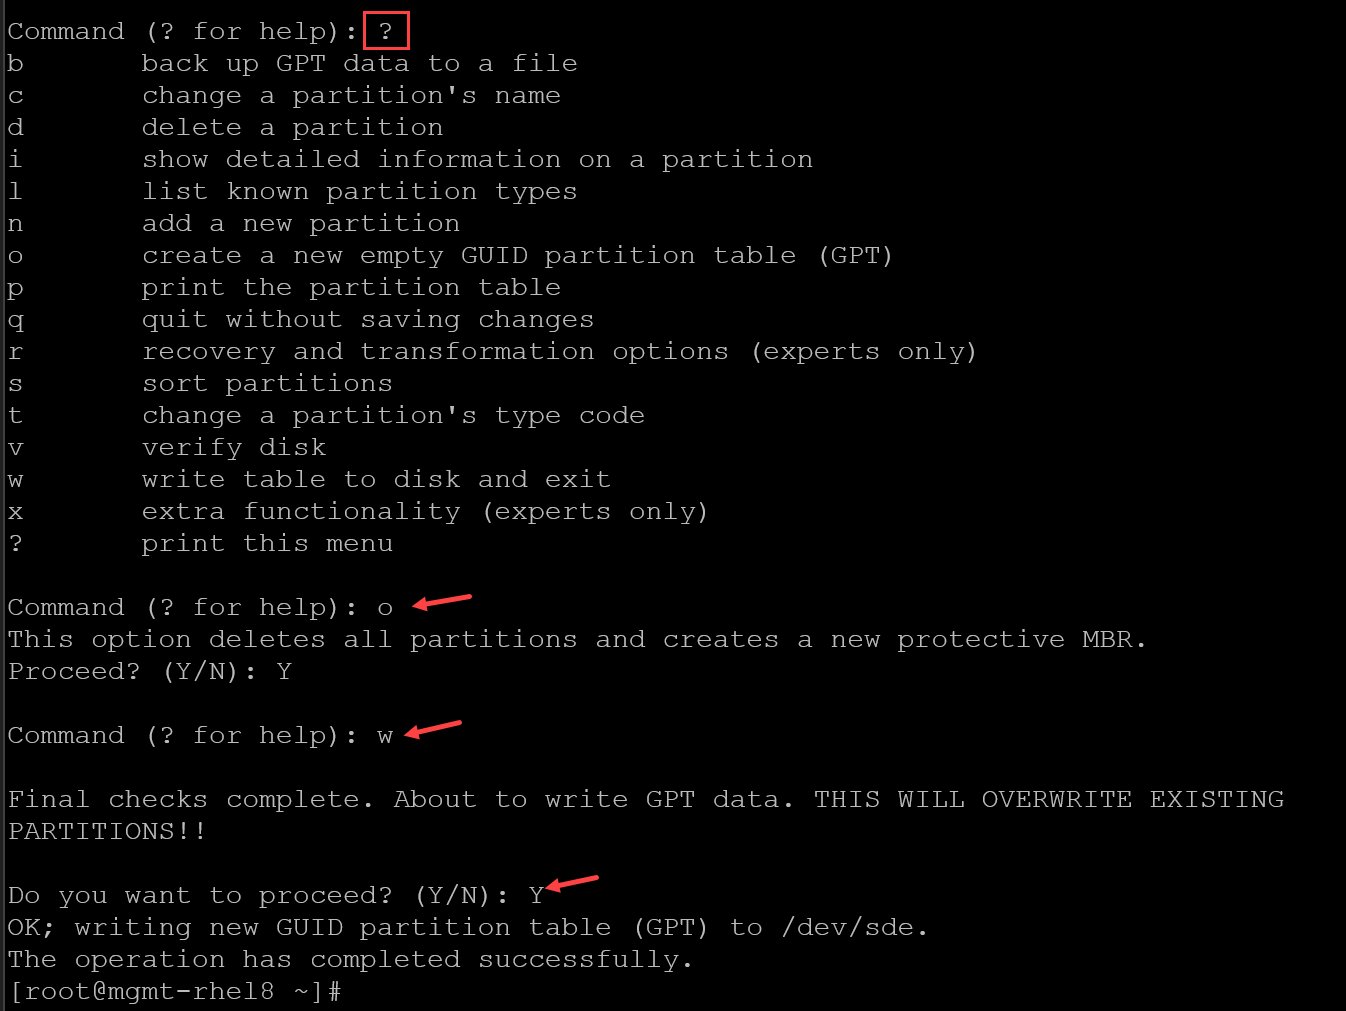
2- Like “fdisk”, the “gdisk” is a menu-driven program. Press “?” to see all menu options.
To create an empty GPT table, press “o” and then press “w” to write all changes and exit:
3- To check if there is a GPT partition on a block device:
gdisk -l /dev/sde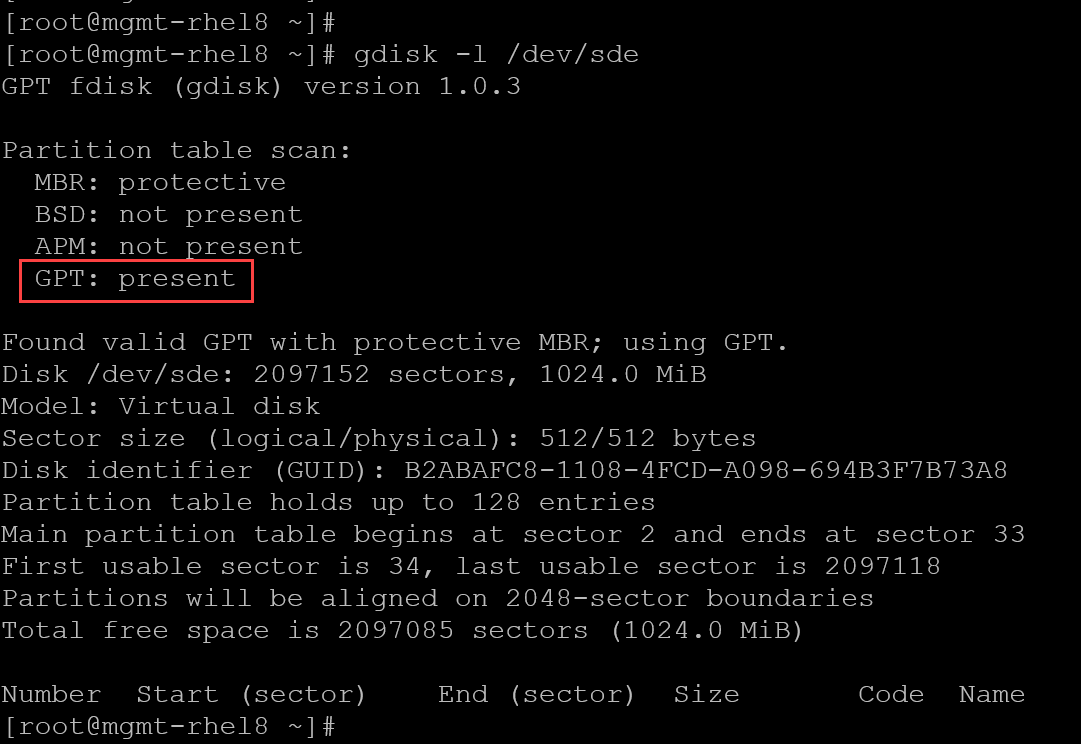
In the end of these examples, we have the following partition tables on their respective block devices:
blkid | grep -E "sd[b-f]"
That’s it for now 🙂
We’ve learned what a partition table is and both common types: MBR and GPT. In the sequence of articles, we’ll show details of how to create a partition and a filesystem!