
Installing PowerCLI is usually straightforward when the management workstation has Internet access. In isolated environments, however, Install-Module may not be an option.
This is common with administrative jump servers, secure management networks, air-gapped labs, and other environments where direct Internet access is intentionally restricted.
In this guide, I will show how to install VMware PowerCLI offline using the downloadable package, verify that PowerShell can find the modules, troubleshoot blocked files, and test the installation by connecting to a vCenter Server.
There is also an important naming change to understand before starting: VMware PowerCLI has been renamed to VCF PowerCLI. The familiar vSphere cmdlets such as Connect-VIServer, Get-VM, and Get-VMHost remain available, but new installations should use the current VCF PowerCLI package.
VMware PowerCLI vs. VCF PowerCLI
If you have worked with VMware environments for some time, you probably know the module as VMware.PowerCLI.
Broadcom has since renamed the package to VCF PowerCLI. It is the continuation of VMware PowerCLI rather than an entirely different automation tool.
Existing PowerCLI concepts and commonly used cmdlets remain relevant. For example:
Connect-VIServer
Get-VM
Get-VMHost
Get-Datastore
Disconnect-VIServer
For a new installation, however, the current package should be used instead of intentionally installing an older VMware.PowerCLI release.
This distinction is especially important when following older tutorials, because many of them still reference VMware PowerCLI 12.x or 13.x.
When an offline PowerCLI installation is useful
The normal online installation uses the PowerShell Gallery:
Install-Module -Name VCF.PowerCLIThat method requires the system to reach the necessary online repositories.
An offline installation is useful when the PowerShell workstation cannot access the Internet, including environments such as:
- administrative jump servers;
- isolated management networks;
- air-gapped environments;
- restricted production networks;
- secure labs without outbound Internet access.
In those situations, you can download the PowerCLI ZIP package from another system and transfer it to the target machine.
Prerequisites
Before starting, make sure PowerShell is installed on the target system.
For current PowerCLI releases, Broadcom recommends using a supported modern version of PowerShell rather than relying on Windows PowerShell 5.1.
You can check your PowerShell version with:
$PSVersionTable.PSVersion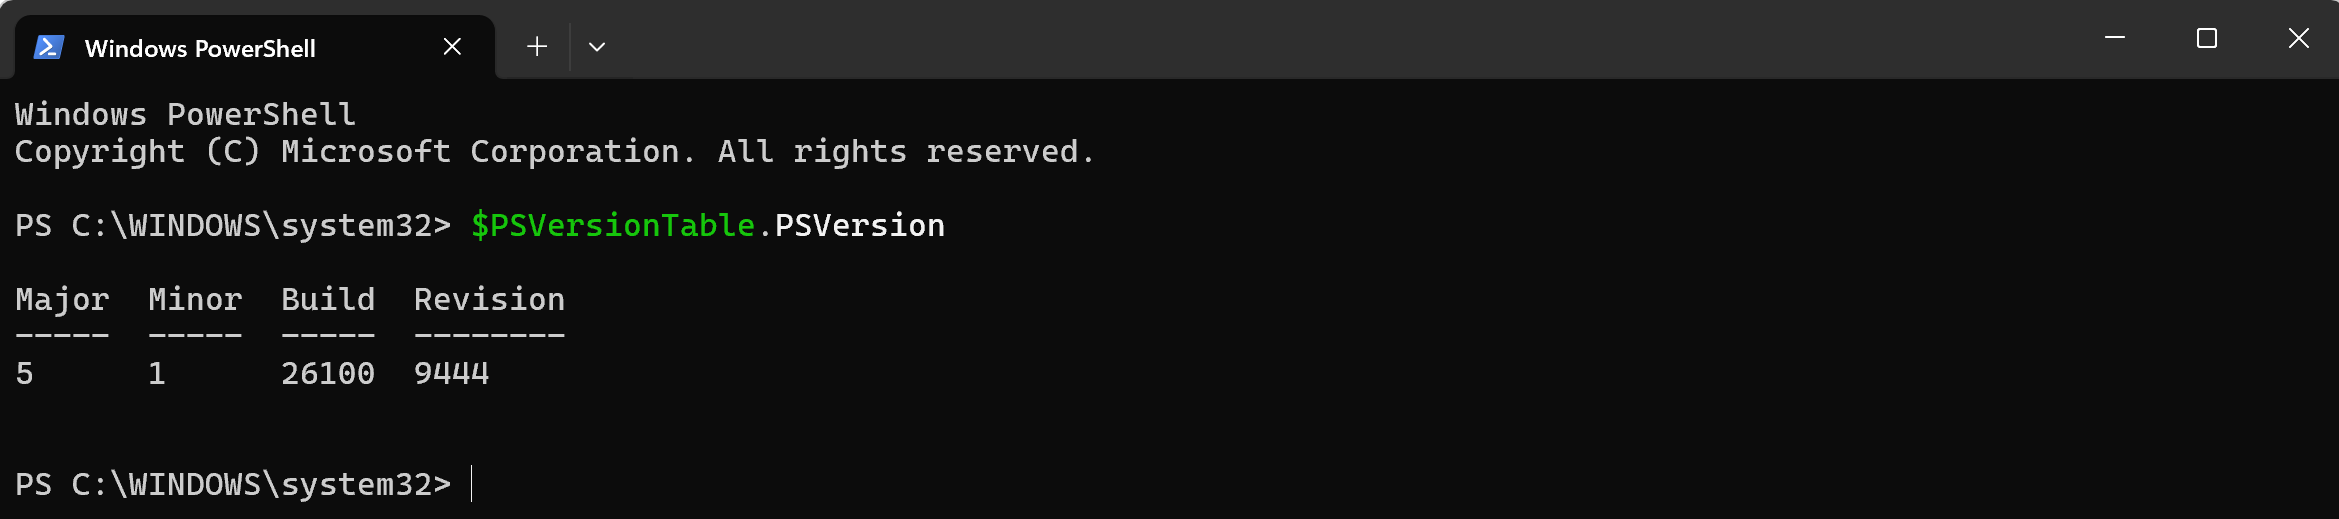
You should also have permission to write to whichever PowerShell module directory you decide to use.
Administrator privileges are required only when you choose a system-wide directory that requires elevation. A per-user module directory can avoid the need for an elevated PowerShell session.
Step 1: Download the offline PowerCLI package
From a computer with Internet access, open the official Broadcom VCF PowerCLI download page and download the current ZIP package.
By the time this post is written, the latest package is the following:
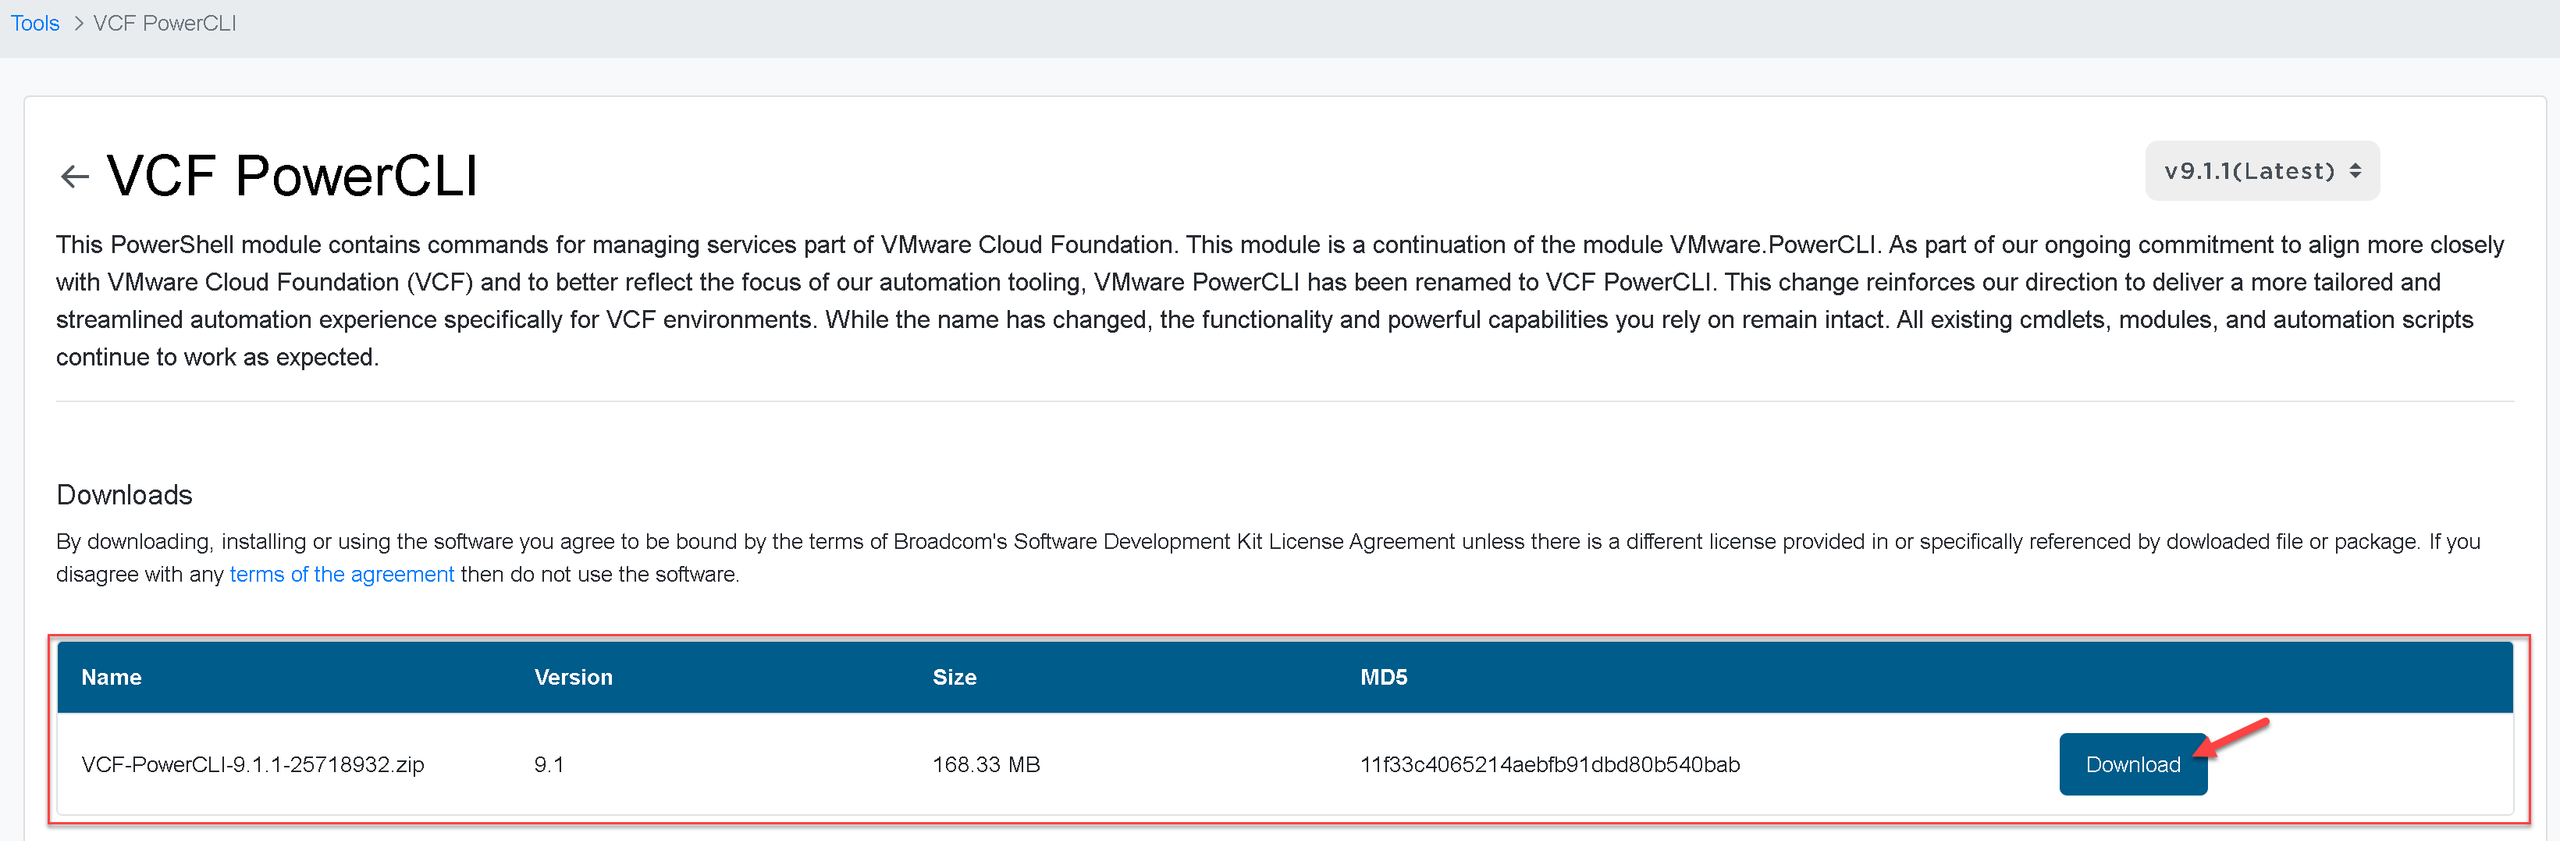
Avoid downloading PowerCLI archives from third-party software sites.
After downloading the file, transfer the ZIP archive to the offline management workstation using your organization’s approved method.
In production environments, it is also good practice to verify the source and integrity of software packages before transferring them into a restricted network.
Step 2: Check the PowerShell module paths
On the offline machine, open PowerShell and check where PowerShell searches for modules:
$env:PSModulePathFor an easier-to-read list, you can use:
$env:PSModulePath -split [System.IO.Path]::PathSeparator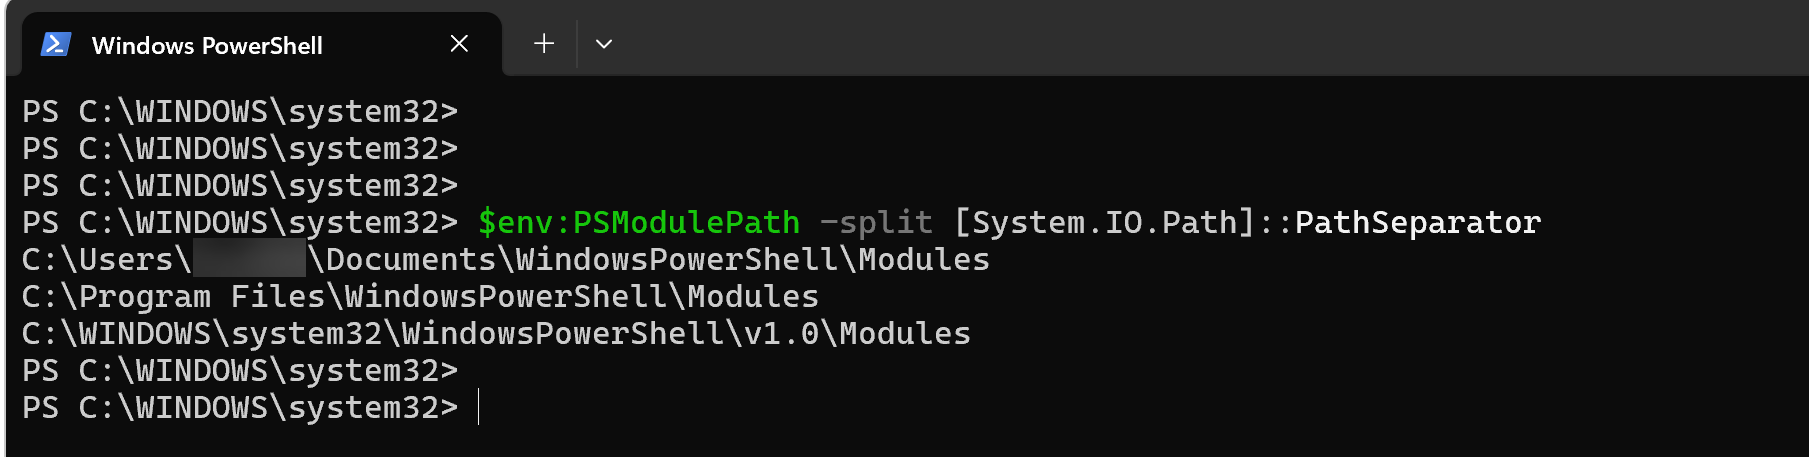
PowerShell will display the directories included in its module search path.
Do not assume that a path shown in an older tutorial is correct for your system. The actual directories depend on the PowerShell version, operating system, and installation type.
For example, a PowerShell 7 installation on Windows may include a system-wide module location similar to:
C:\Program Files\PowerShell\ModulesThe important point is to use one of the directories actually returned by $env:PSModulePath.
Step 3: Extract PowerCLI into a module directory
Extract the downloaded VCF PowerCLI ZIP archive:
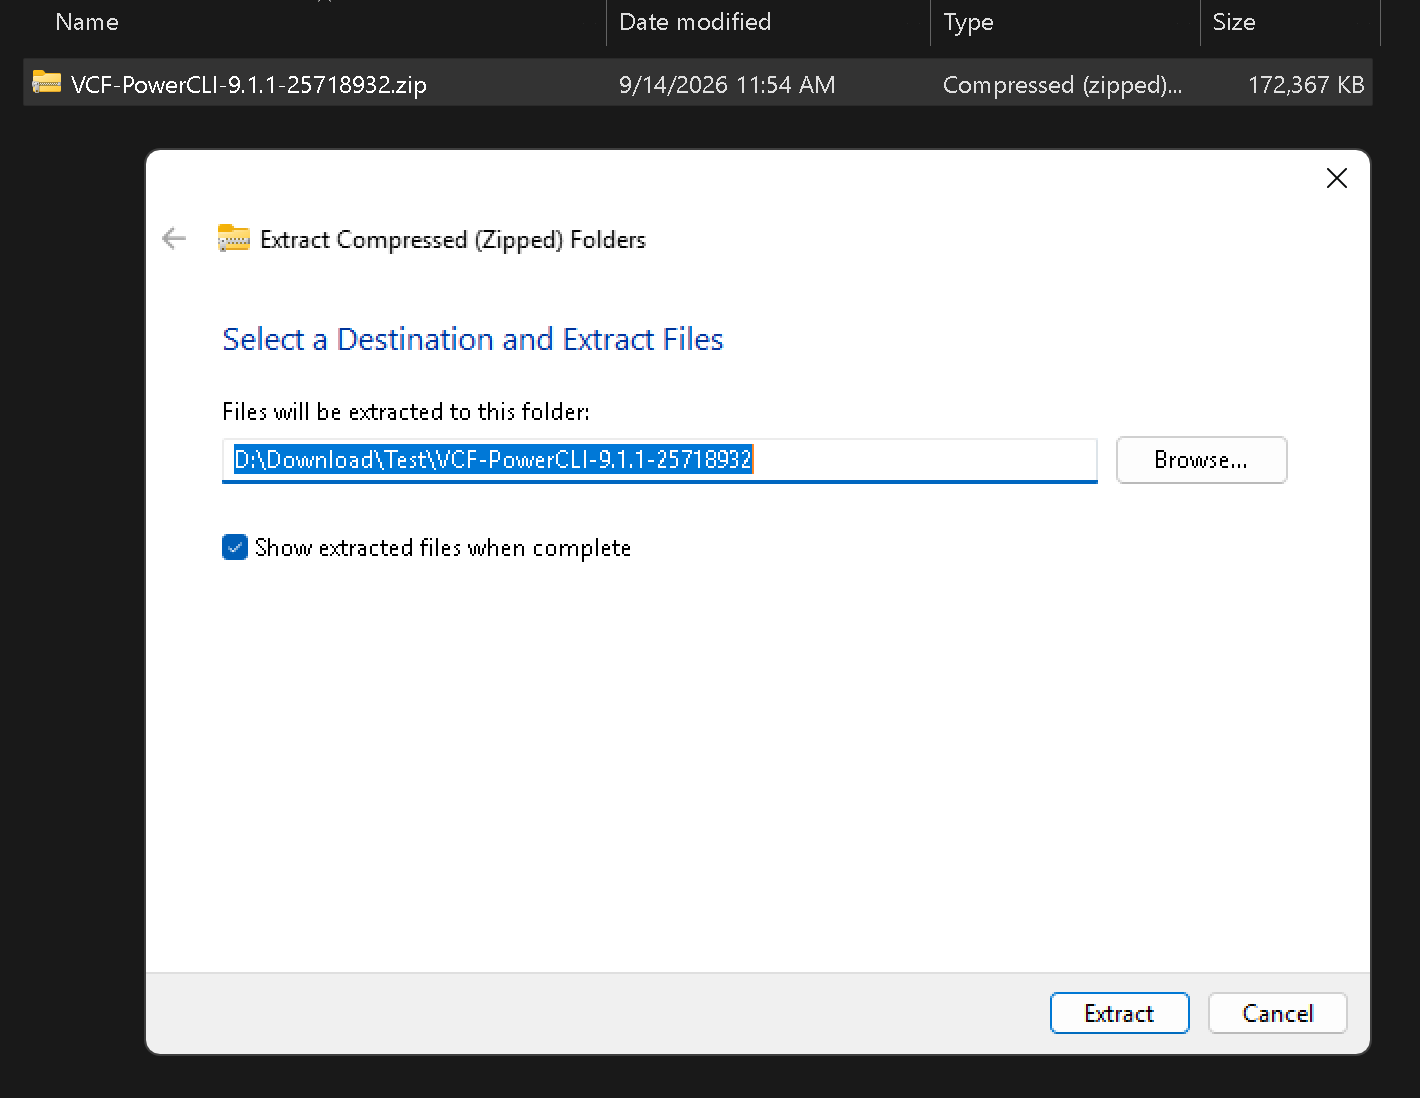
Copy the extracted module folders into one of the directories returned by:
$env:PSModulePathIf you copy the modules into a system-wide directory such as C:\Program Files\PowerShell\Modules, you may need administrator privileges:
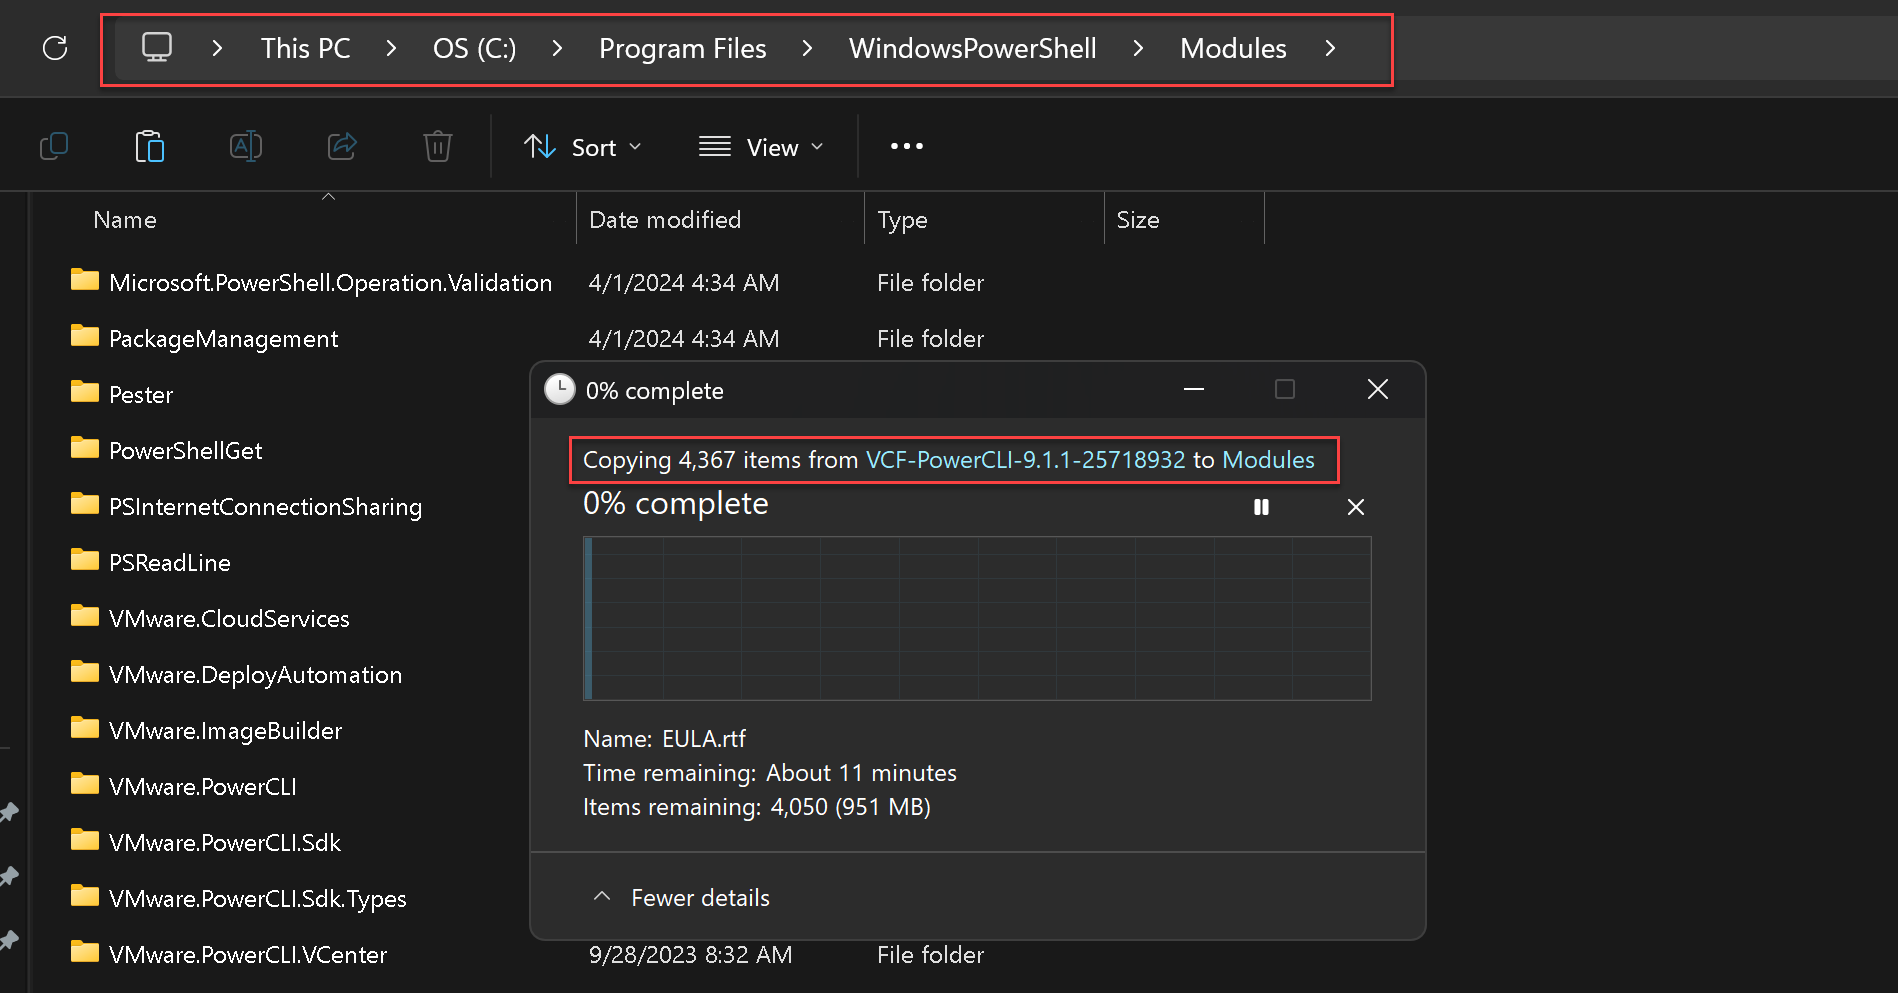
A common mistake during offline installations is adding an additional directory level while extracting the archive.
PowerShell must be able to find the individual module folders directly beneath a valid module path.
If PowerCLI is not detected later, verify the directory structure before troubleshooting anything else.
Step 4: Unblock the downloaded files on Windows
Files downloaded from the Internet can receive a Windows security marker called Zone.Identifier.
When those files are transferred and extracted, PowerShell may refuse to load some DLLs or modules.
After copying the PowerCLI modules, run:
Get-ChildItem -Path "C:\Program Files\WindowsPowerShell\Modules" -Recurse |
    Unblock-File
Important: Replace the path with the module directory you actually used.
You do not need to unblock every PowerShell module on the computer if PowerCLI was installed somewhere containing unrelated modules. You can narrow the path to the newly copied PowerCLI directories when appropriate.
Broadcom has also documented cases where Windows extraction caused PowerCLI DLLs to remain blocked. If the modules still fail to load after running Unblock-File, see the troubleshooting section later in this guide.
Step 5: Verify that VCF PowerCLI is available
Now verify that PowerShell can discover the PowerCLI module:
Get-Module -Name VCF.PowerCLI -ListAvailableIf the installation is correct, PowerShell should return information about the installed module:
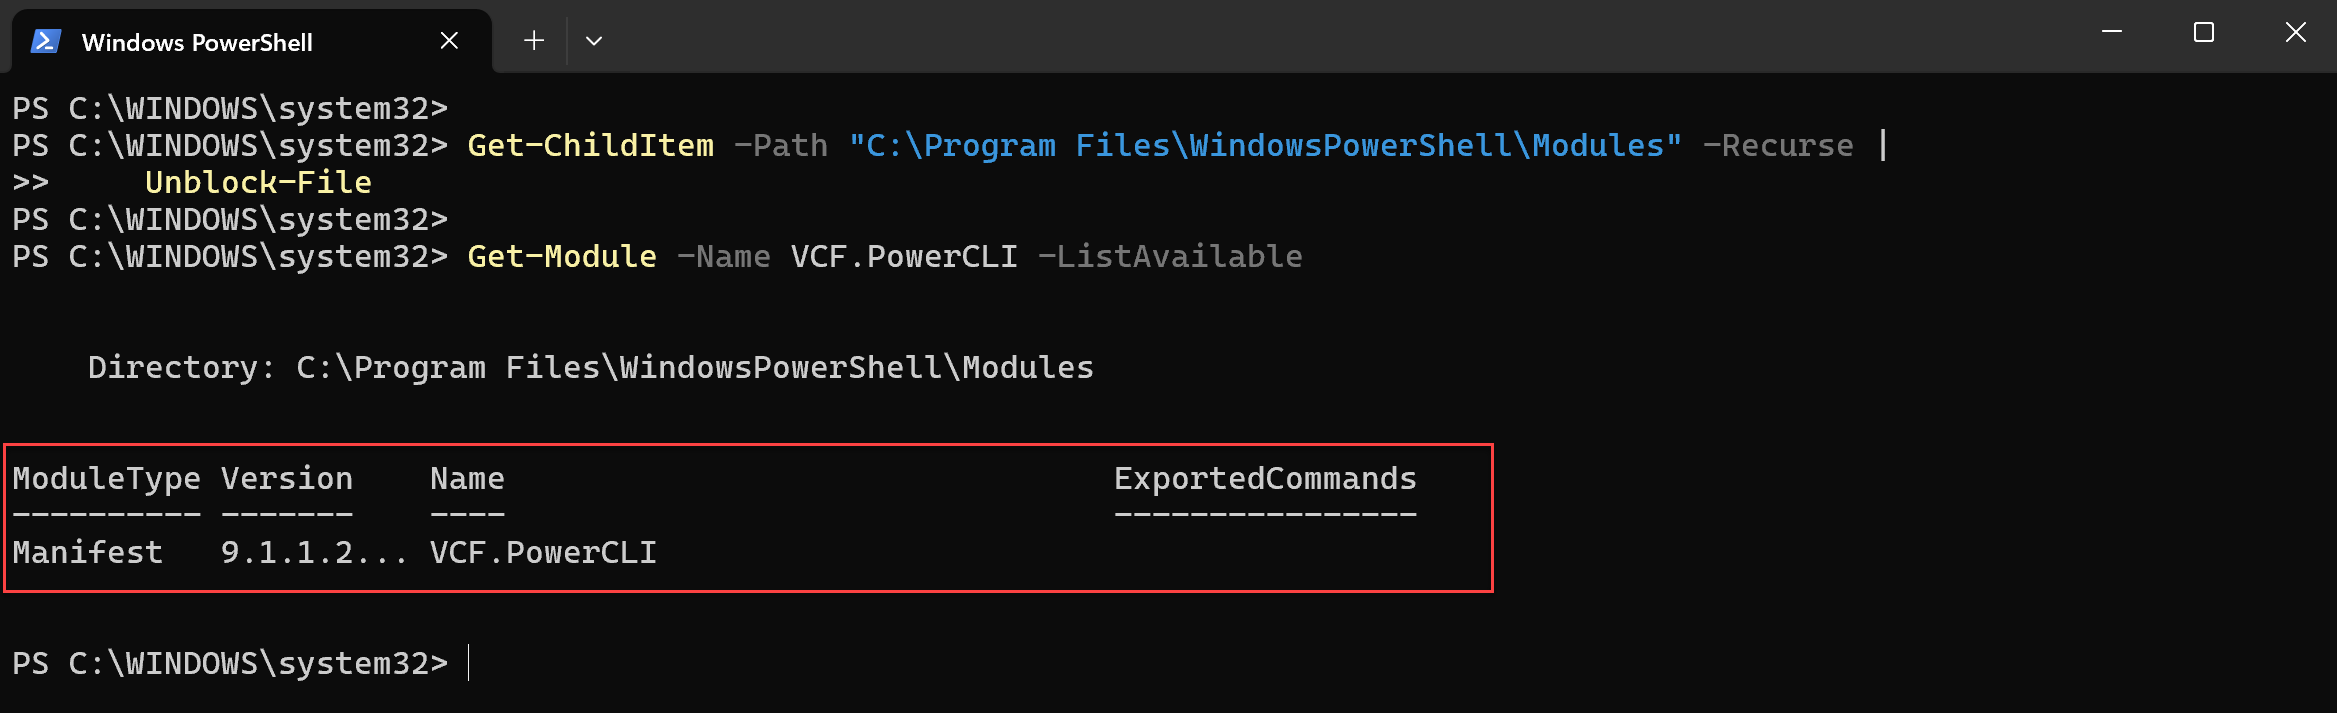
You can also import it explicitly:
Import-Module VCF.PowerCLIIf PowerShell reports that the module cannot be found, check the following first:
$env:PSModulePath -split [System.IO.Path]::PathSeparatorThen verify that the extracted PowerCLI folders are actually located inside one of those directories.
Do you need to change the PowerShell execution policy?
Older PowerCLI installation procedures frequently include this command:
Set-ExecutionPolicy RemoteSignedI do not recommend changing the execution policy automatically as part of every PowerCLI installation.
First check the policies currently configured:
Get-ExecutionPolicy -ListExample:
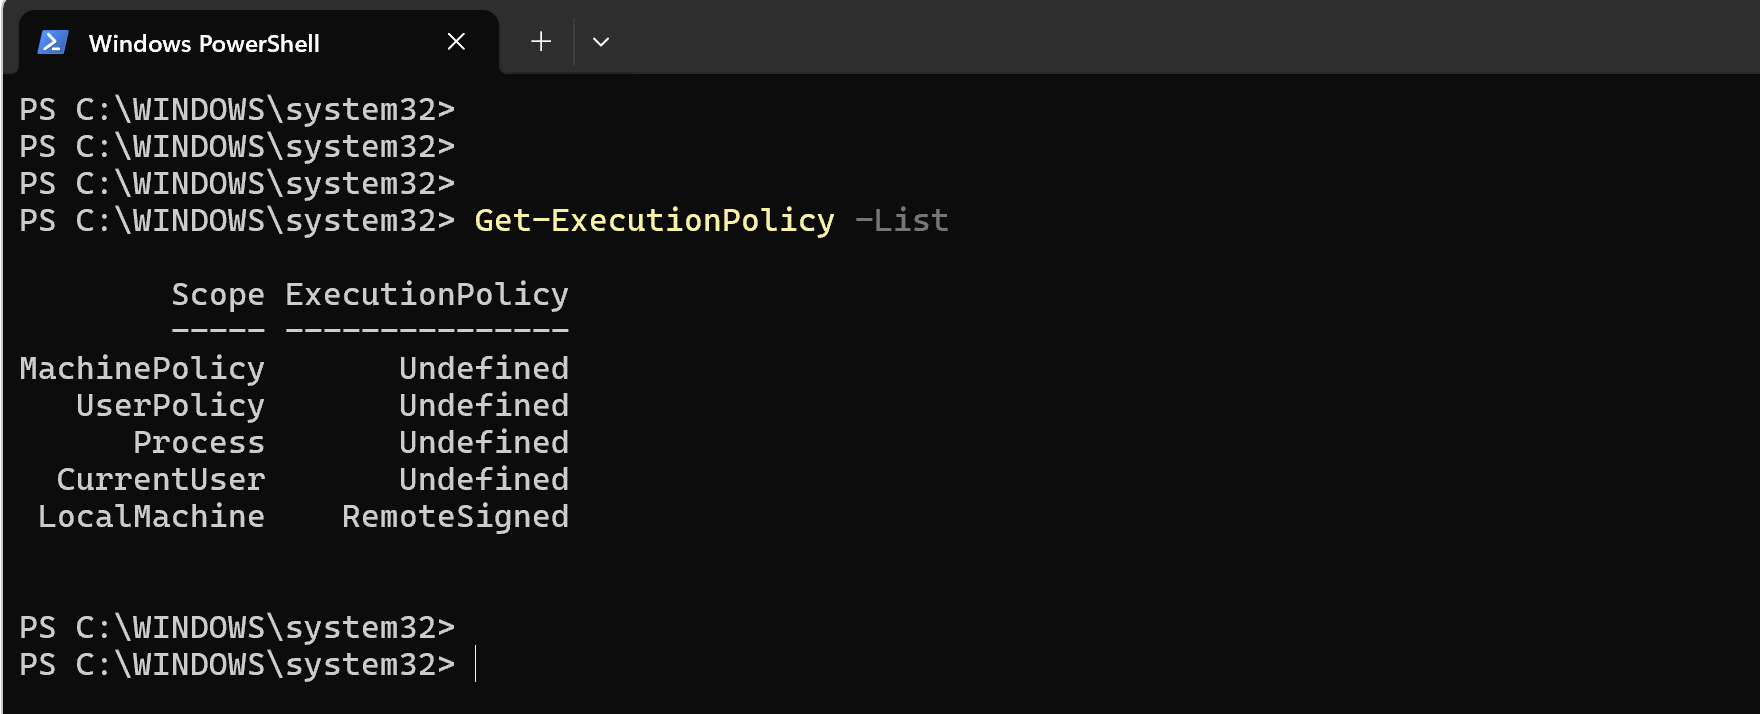
If your organization’s security configuration already allows the modules to run, no change is required.
If an execution policy really is preventing the modules from loading and your security policy permits the change, limiting the modification to the current user is preferable to unnecessarily changing it for the entire computer:
Set-ExecutionPolicy -ExecutionPolicy RemoteSigned -Scope CurrentUserIn managed enterprise environments, execution policies may also be enforced by Group Policy. Do not override organizational security controls simply to make PowerCLI work.
Step 6: Configure certificate handling
Before connecting to vCenter, consider how PowerCLI should handle TLS certificates.
The safest approach is to use a properly trusted certificate on vCenter and leave certificate validation enabled. You can review the current PowerCLI configuration with:
Get-PowerCLIConfiguration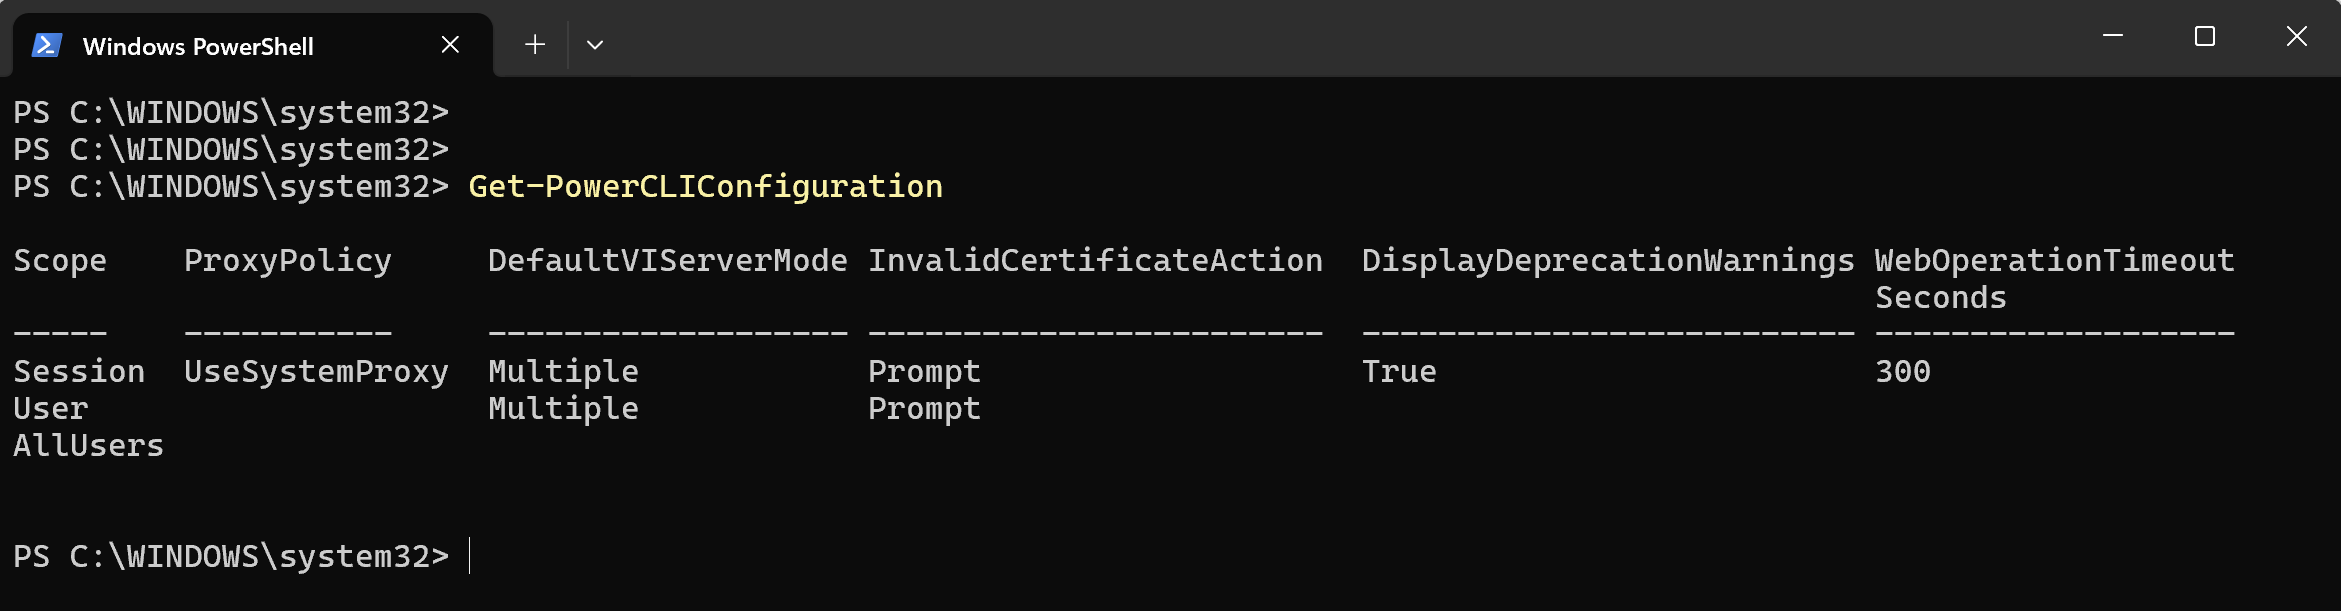
In lab environments, you may encounter vCenter systems using self-signed certificates.
Current PowerCLI versions support configuring the behavior through Set-PowerCLIConfiguration.
For example, a lab environment may be configured to ignore invalid certificates:
Set-PowerCLIConfiguration `
    -InvalidCertificateAction Ignore `
    -Scope User `
    -Confirm:$false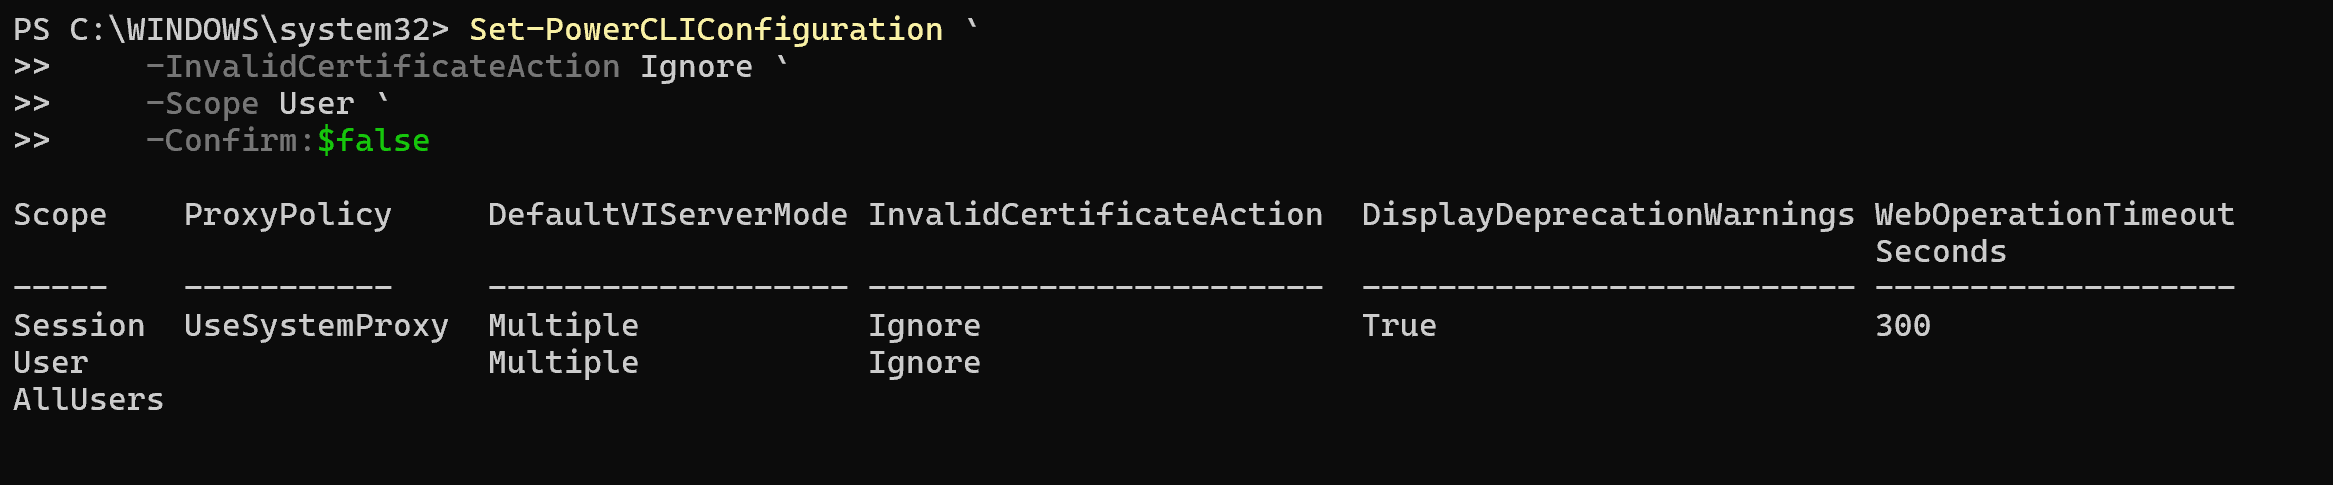
Do not use Ignore as the default solution for production systems.
Ignoring certificate validation removes an important server identity check. In production environments, fix the certificate trust relationship whenever possible instead.
This distinction is important because many older PowerCLI tutorials recommend certificate settings without explaining the security implications.
Step 7: Configure CEIP participation
PowerCLI can also be configured to participate in the Customer Experience Improvement Program.
If you do not want to participate, you can configure the preference for the current user:
Set-PowerCLIConfiguration `
    -ParticipateInCeip $false `
    -Scope User `
    -Confirm:$false
This setting is optional and does not determine whether PowerCLI itself works.
Step 8: Test the connection to vCenter
Once the modules are available, test PowerCLI against a vCenter Server.
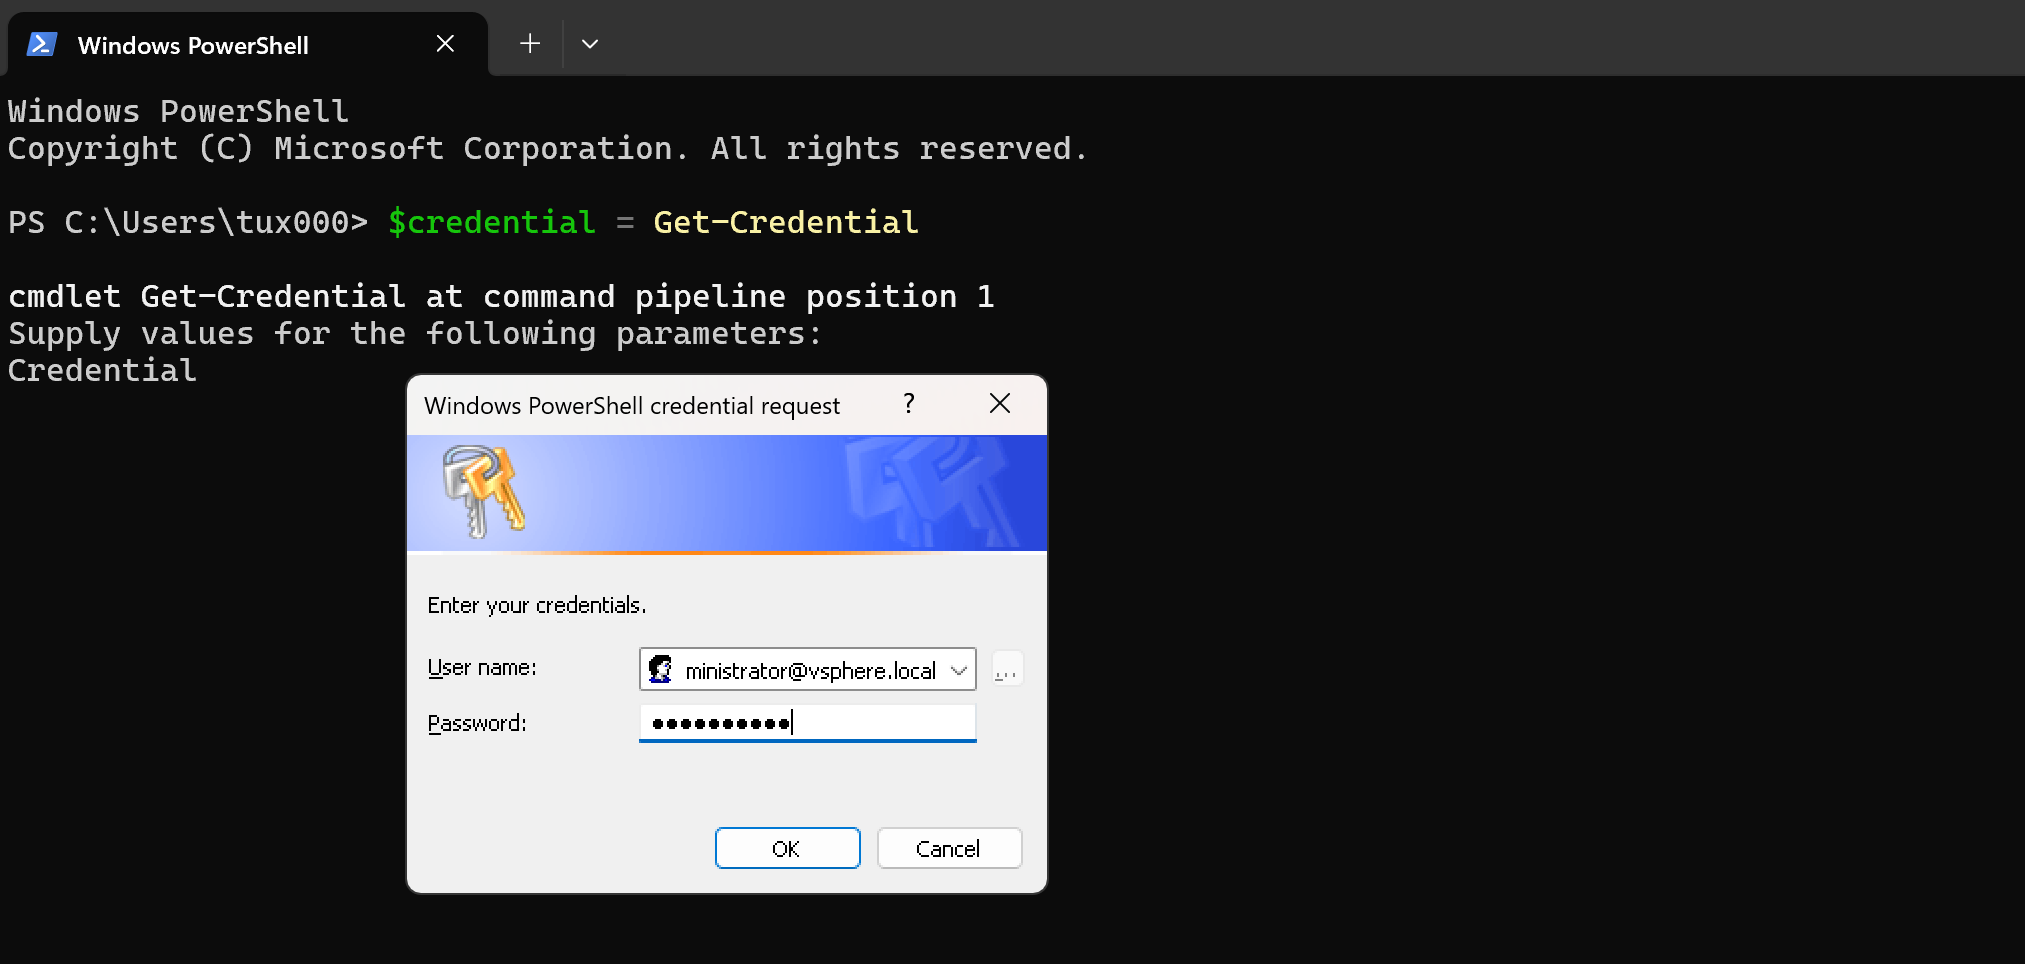
Instead of putting a password directly into the command line, create a credential object:
$credential = Get-CredentialPowerShell will securely prompt for the username and password:
Now connect to vCenter:
$vcenter = Connect-VIServer `
    -Server vcenter.example.com `
    -Credential $credential
Replace:
vcenter.example.comwith the FQDN or IP address of your own vCenter Server.
In my case, for instance, the command is:
$vcenter = Connect-VIServer `
    -Server vcsa01.lab.local `
    -Credential $credential
If the connection succeeds, PowerCLI will return information about the server connection.
Step 9: Verify PowerCLI with a few commands
After connecting, run a simple inventory query:
Get-VM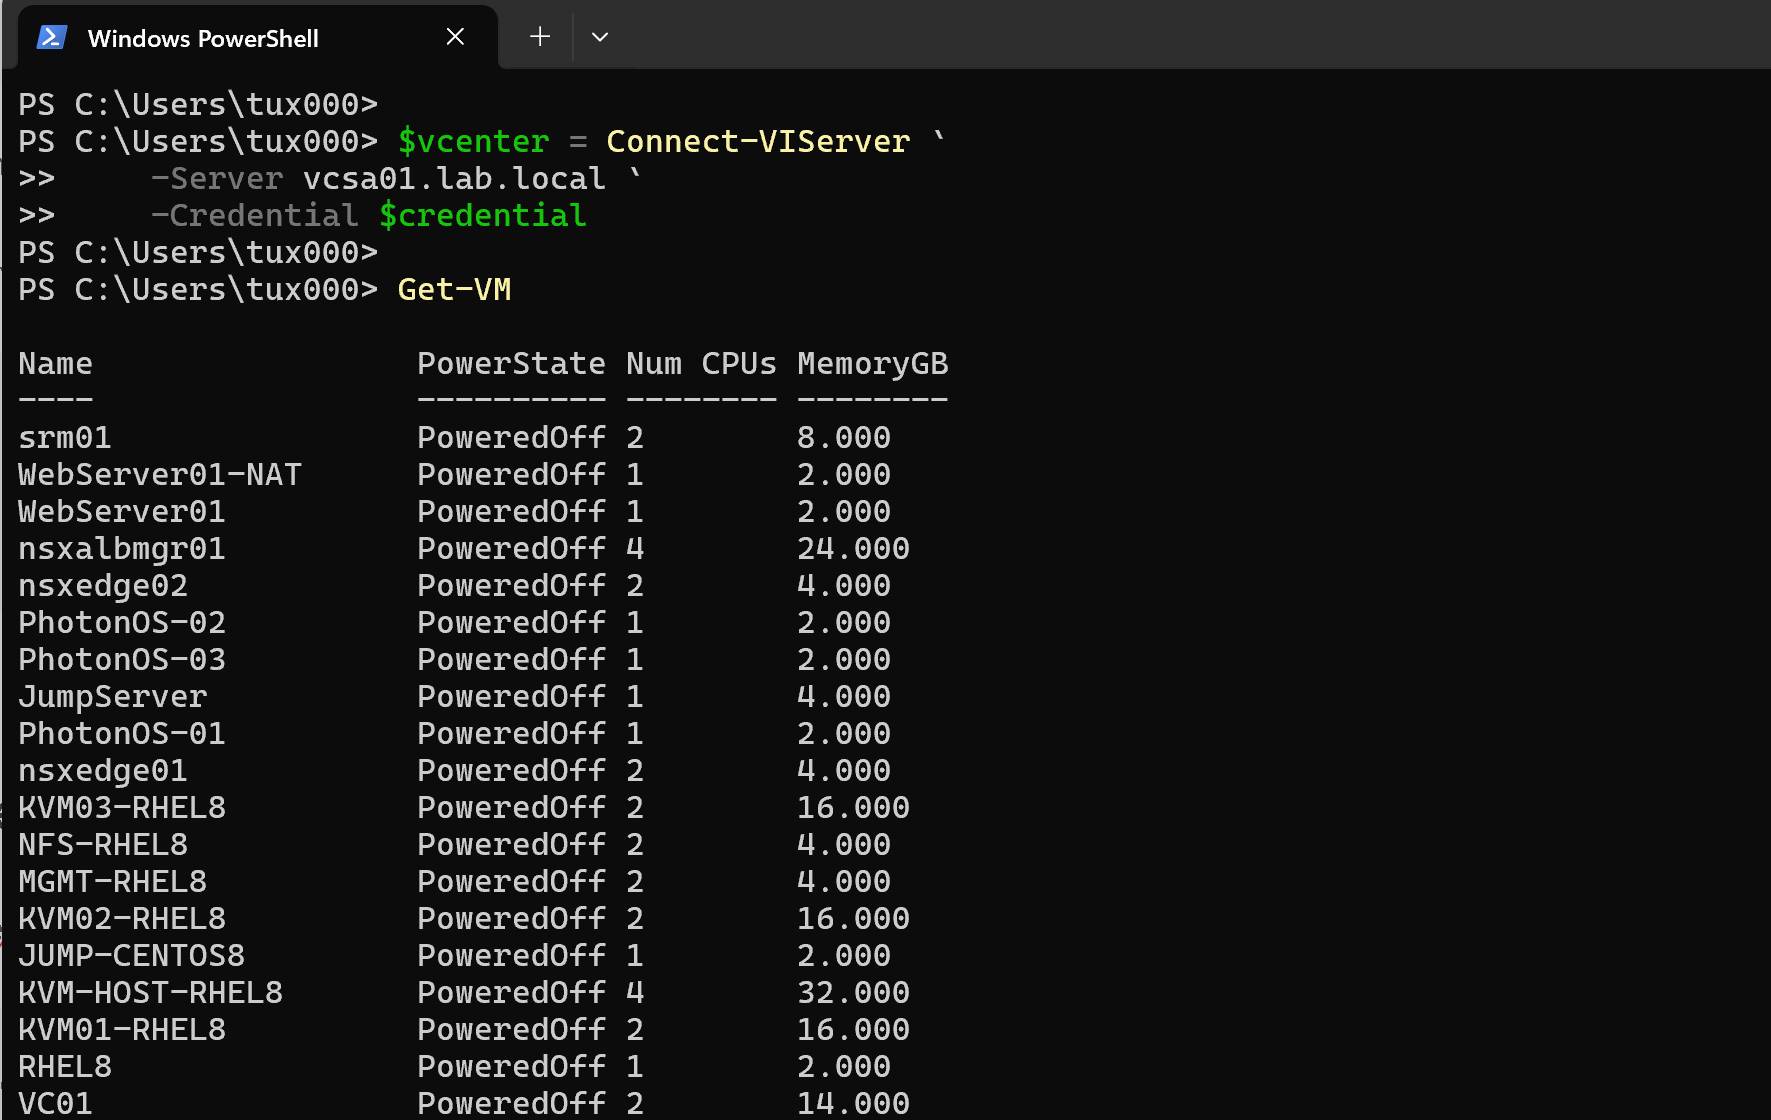
You can also check the ESXi hosts managed by the vCenter Server:
Get-VMHost |
    Select-Object Name, ConnectionState, Version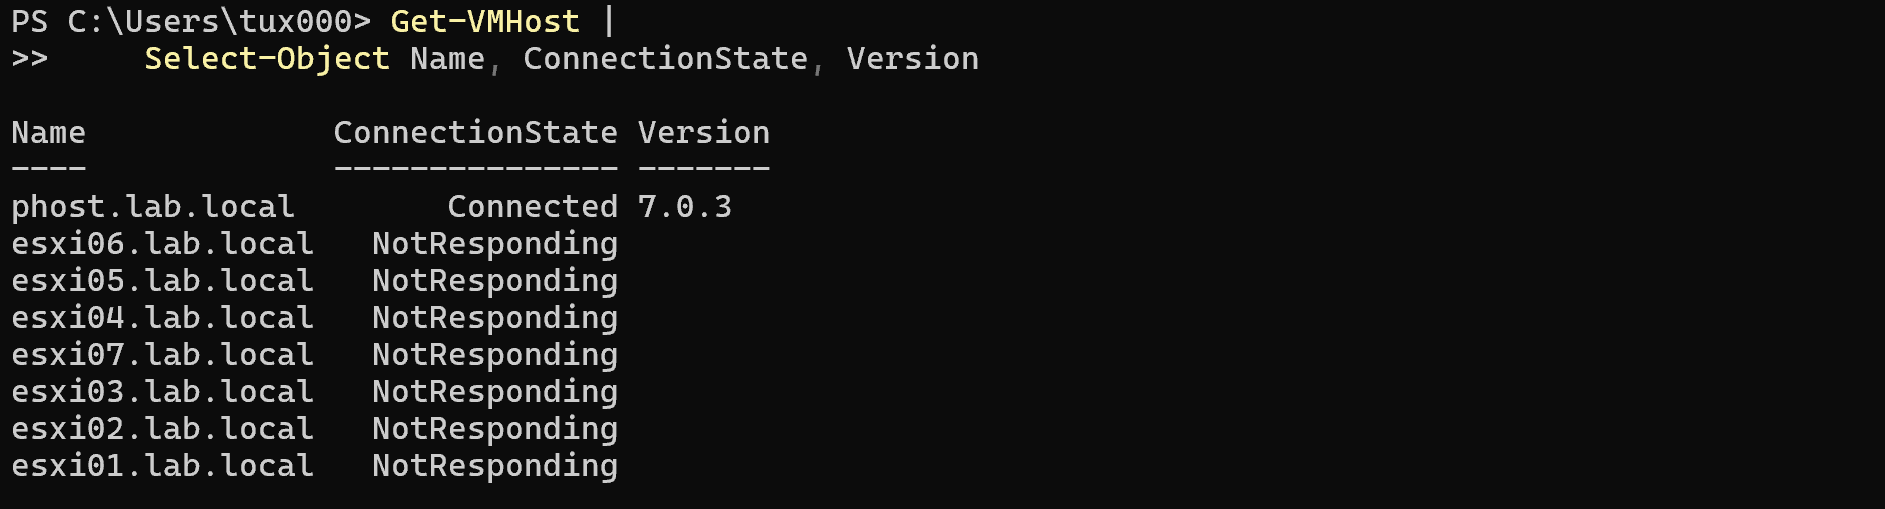
Another useful test is:
Get-DatastoreIf these commands return information from your environment, the offline PowerCLI installation is working correctly.
Step 10: Disconnect from vCenter
When you finish the session, disconnect cleanly:
Disconnect-VIServer -Server $vcenter -Confirm:$falseThis closes the PowerCLI connection associated with the server object stored earlier.
Troubleshooting an offline PowerCLI installation
VCF.PowerCLI is not found
If this command returns nothing:
Get-Module -Name VCF.PowerCLI -ListAvailablecheck the module search paths:
$env:PSModulePath -split [System.IO.Path]::PathSeparatorThen verify that the PowerCLI module folders were copied into one of those locations.
Also check for an unnecessary directory level created during extraction.
PowerCLI is detected but the module cannot be loaded
If PowerShell detects PowerCLI but produces errors when importing modules or running Connect-VIServer, the downloaded DLL files may still be blocked by Windows.
Run:
Get-ChildItem -Path "<PowerCLI module path>" -Recurse |
    Unblock-File
Broadcom has documented offline installation cases in which files extracted with the Windows built-in extraction process remained blocked.
If the problem continues, one troubleshooting option documented by Broadcom is to remove the failed copy, extract the original archive using another extraction utility such as 7-Zip, and copy the modules again.
PowerCLI works in one PowerShell version but not another
Windows PowerShell and PowerShell 7 can use different module directories.
If PowerCLI was copied into a directory used only by Windows PowerShell, it may not automatically be visible in your PowerShell 7 session.
Always inspect:
$env:PSModulePathfrom the same PowerShell executable in which you intend to use PowerCLI.
An older VMware.PowerCLI installation already exists
Older environments may still contain VMware.PowerCLI modules.
Do not assume that copying a new VCF PowerCLI archive over an existing installation is the best upgrade method.
Broadcom recommends a clean migration from older VMware.PowerCLI versions when moving to current VCF PowerCLI releases.
For an offline environment, downloading the current VCF PowerCLI package and performing a clean deployment also makes it easier to identify conflicting module versions.
Updating PowerCLI on an offline machine
An offline PowerCLI installation cannot use the normal online update workflow if the management system has no repository access.
To update it, download the newer VCF PowerCLI package on an Internet-connected system, transfer it into the restricted environment, and perform the offline installation procedure again.
This is another reason why documenting the installed PowerCLI version can be useful in managed environments.
You can check installed versions with:
Get-Module -Name VCF.PowerCLI -ListAvailable |
    Select-Object Name, Version, Path
Final thoughts
Installing PowerCLI offline is mainly a matter of placing the correct modules in a directory PowerShell actually searches and ensuring Windows has not blocked the downloaded files.
The important difference compared with many older tutorials is that new installations should now use VCF PowerCLI, the successor to the VMware.PowerCLI package.
For restricted environments, I normally verify four things before considering the installation complete: PowerShell can discover the module, the module imports without errors, certificate handling is configured appropriately for the environment, and basic vCenter inventory commands return expected results.
Once those checks succeed, the offline PowerCLI workstation is ready for normal vSphere automation tasks.
External References
- Broadcom — PowerCLI Installation Guide Official installation instructions for current VCF PowerCLI releases, including the supported offline installation procedure and PowerShell requirements.
- Broadcom — VCF PowerCLI Official PowerCLI portal with current documentation, installation information, cmdlet references, and release information.
- Broadcom — VCF PowerCLI Downloads Official download page for the current VCF PowerCLI offline package.
- Broadcom — Set-PowerCLIConfiguration Reference Official reference for certificate handling, CEIP participation, configuration scopes, and other PowerCLI settings.
- Broadcom KB — PowerCLI Commands Fail After an Offline Installation Broadcom troubleshooting guidance for Windows security attributes and blocked PowerCLI DLL files after an offline installation.
- Microsoft — PowerShell Execution Policies Microsoft documentation explaining execution policy scopes, precedence, and how policy settings affect PowerShell sessions.
