

Introduction to the VMware PowerCLI is an article that introduces the very interesting commands that helps to administrate a vSphere Environment from Powershell CLI. Besides, it’s a very useful thing to automate a lot of administrative tasks 😉
VMware PowerCLI is a command-line and scripting tool built on Windows PowerShell and provides more than 800 cmdlets for managing and automating VMware vSphere, VMware Cloud Director, vRealize Operations Manager, vSAN, VMware NSX-T Data Center, VMware Cloud Services, VMware Cloud on AWS, VMware HCX, VMware Site Recovery Manager, and VMware Horizon environments.
To access the VMware PowerCLI user’s guide, the below link can be used:
Install and Configure VMware PowerCLI
So, open a Windows Powershell with administrator rights and install the PowerCLI module:
Install-Module -Name VMware.PowerCLI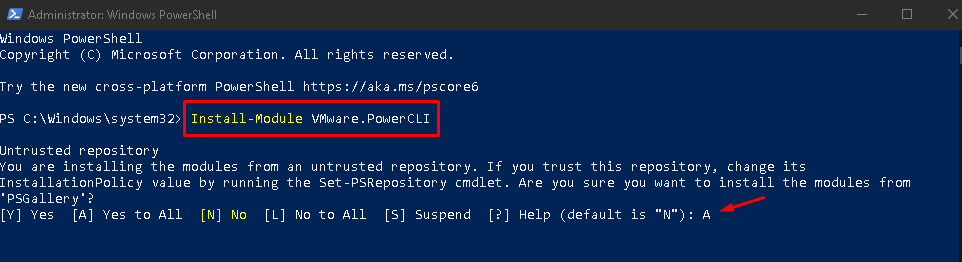
Note: An alert will show about the Untrusted repository “PSGallery”. Type “A” and then press ENTER. If you don’t have the admin rights for some reason, you can install it with the command below:
Install-Module VMware.PowerCLI -Scope CurrentUserIf necessary, update VMware.PowerCLI module:
Update-Module VMware.PowerCLI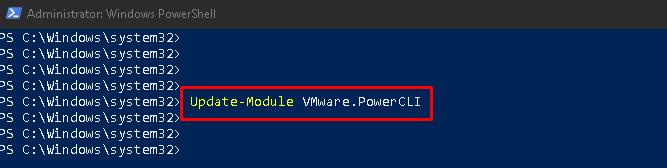
When you try to connect to a server, PowerCLI checks whether the server certificate is valid.
You might have to configure the PowerCLI settings to be able to connect to servers with untrusted certificates. So, in this example, we will configure PowerCLI to show a prompt:
Set-PowerCLIConfiguration -InvalidCertificateAction Prompt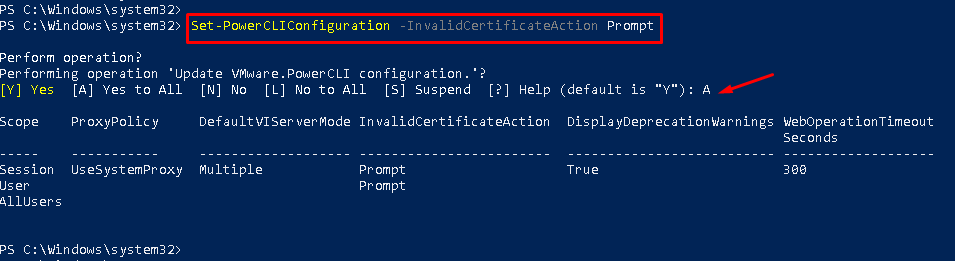
Another thing is to disable CEIP:
Set-PowerCLIConfiguration -Scope User -ParticipateInCEIP $false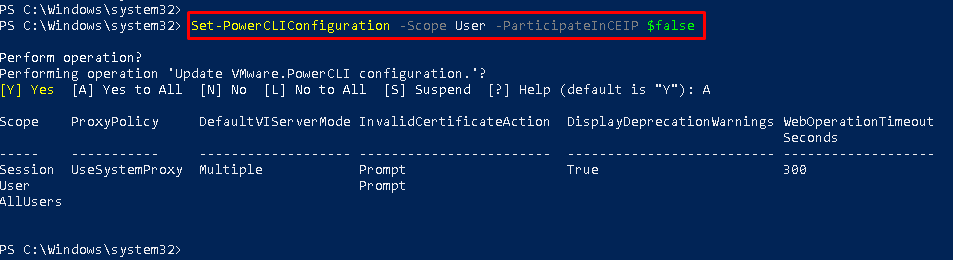
Connect to the vCenter Server
The FQDN of our vCenter Server in this lab is “vcsa01.lab.local”. So, the PowerCLI string to connect to the vCenter Server is:
Connect-VIServer -Server vcsa01.lab.local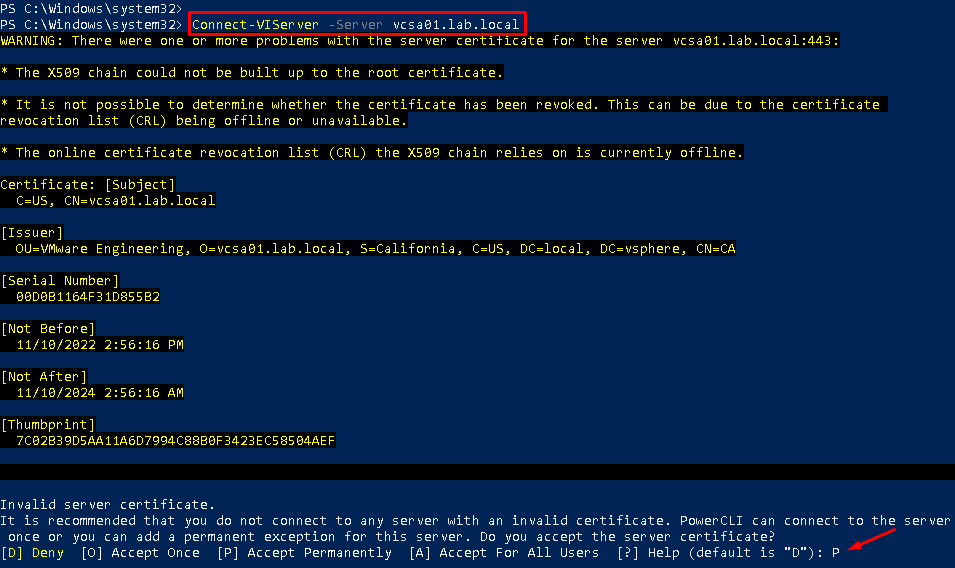
Note: A prompt with an Invalid server certificate warning is showing. Nevertheless, type “P” to accept permanently this certificate. In this context, this certificate is invalid due the client machine doesn’t trust the CA (Certificate Authority) that expedites the vCenter Server certificate.
In the meantime, a Window prompt will be shown. So, type the username and password. In this case, for instance, we are using the “administrator@vsphere.local” to connect to the vCenter Server:
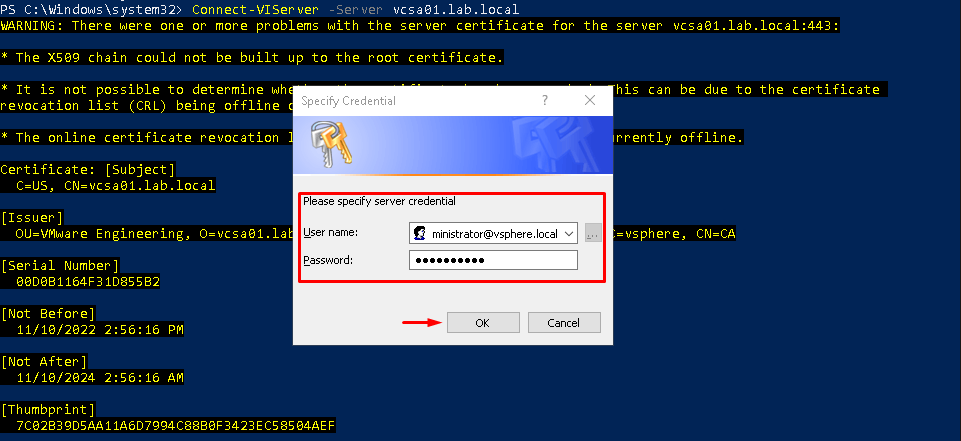
If the connection is established, a message like below will be shown. However, if you don’t receive a message like it, check if the user credentials are correct:

Search for a command, for example, that has “snapshot” on a command:
Get-Command -Name *snapshot*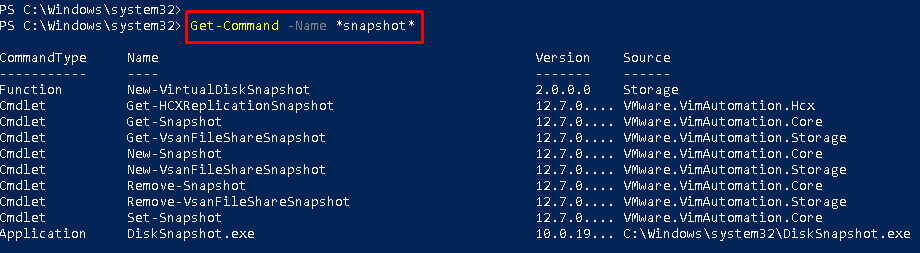
To get help with a particular command, for example:
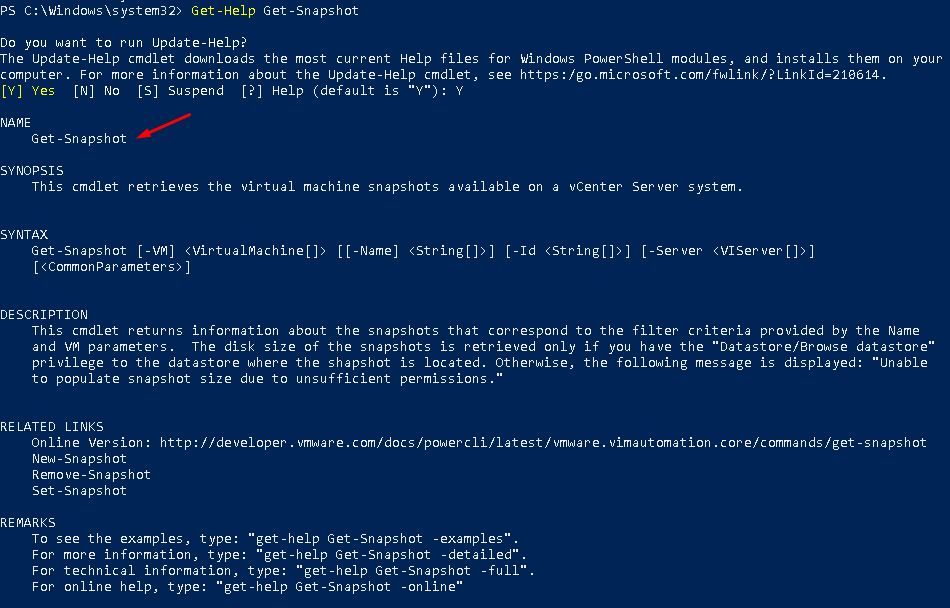
Get-Help Get-Snapshot
Note: In some cases, for example, it is necessary to run the “update-help” to update the help content. Type “Y” to update the help content for the command “Get-Snapshot”.
Manage Virtual Machines on vSphere
So, to view all Virtual machines:
Get-VM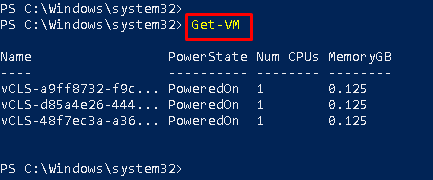
Start the VM virtual machine:
Get-VM VM_NAME | Start-VMNote: Change “VM_NAME” to the correct Virtual Machine name.
Get information on the guest OS of the VM virtual machine:
Get-VMGuest VM | fcShut down the OS of the VM virtual machine:
Stop-VMGuest VM_NAMEPower off the VM virtual machine:
Stop-VM VM_NAMEMove/migrate the virtual machine VM from the Host01 host to the Host02 host:
Get-VM -Name VM_NAME -Location Host01 | Move-VM –Destination Host02Manage Datacenter, Cluster, and ESXi hosts on vSphere
Get all data centers present on the vCenter Server:
Get-Datacenter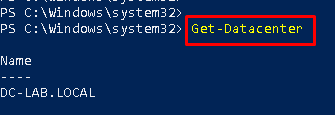
Cluster:
Get-Cluster
Get all ESXi hosts managed by the vCenter Server:
Get-VMHost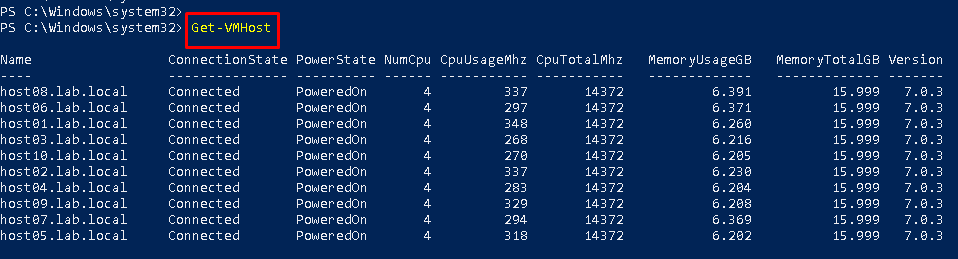
Put an ESXi host into maintenance mode – However, use this command if DRS is enabled and the fully automated method is used. In this example, the host FQDN is “host01.lab.local”:
Set-VMHost -VMHost host01.lab.local -State "Maintenance"Remove and ESXi host from maintenance mode – use this command if DRS is enabled and the fully automated method is used:
Set-VMHost -VMHost host01.lab.local -State "Connected"If DRS is enabled but not automated or partially automated, it needs first generate a DRS recommendation and wait until all powered-on virtual machines are relocated to other hosts:
Set-VMHost -VMHost host01.lab.local -State "Maintenance" -RunAsyncGet and apply the recommendations generated by DRS:
Get-DrsRecommendation -Cluster "CL-LAB.LOCAL" | where {$_.Reason -eq "Host is entering maintenance mode"} | Invoke-DrsRecommendationRemove the ESXi host from maintenance mode:
Set-VMHost -VMHost host01.lab.local -State "Connected"Get all Datastores available on the vCenter Server:
Get-Datastore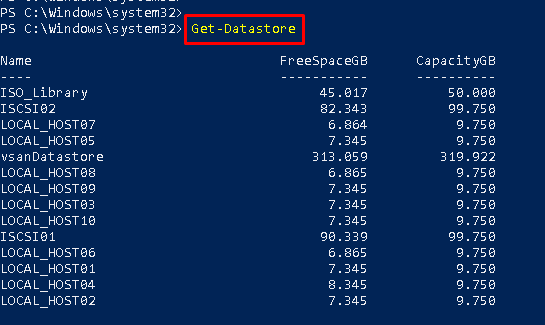
Create a VM based on a Template
Firstly, it is necessary to get all VM templates available on the vCenter Server:
Get-Template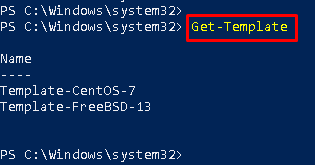
Secondly, we need to understand the basic syntax to create a VM . So, the basic syntax for it is:
New-VM –Name VM_NAME –ResourcePool CLUSTER_NAME –Template TEMPLATE_NAME -Datastore DATASTORE_NAMEIn detail:
— VM_NAME = Virtual Machine name
— CLUSTER_NAME = Cluster name or ESXi host name to host the new Virtual Machine
— TEMPLATE_NAME = Template name that will be used to create the Virtual Machine
— DATASTORE_NAME = Datastore name that will be used to store the Virtual Machine
In our lab, for instance, the syntax to create the VM is:
New-VM -Name "vm-01" -ResourcePool host01.lab.local -Template Template-FreeBSD-13 -Datastore ISCSI02

After a few seconds, the Virtual Machine is created:

On the vSphere Client interface, it’s possible to confirm the task used to create this Virtual Machine:

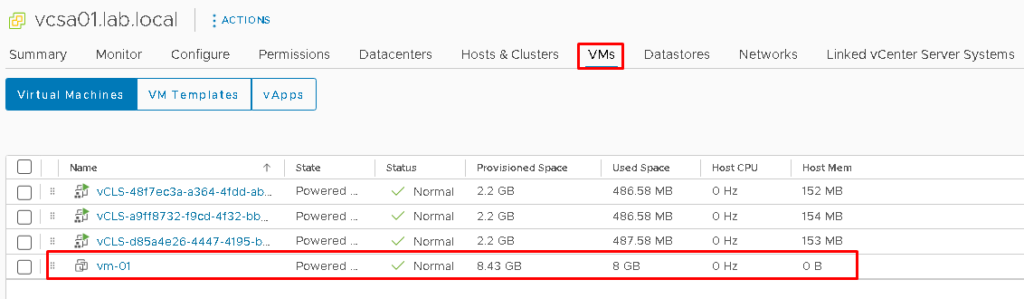
On the VMs tab, we can see the new Virtual Machine “vm-01′:
Remove a VM from the vCenter Inventory
To remove a Virtual Machine from the vCenter inventory:
Remove-VM -VM VM_NAMENote: In some cases, it’s necessary to remove a Virtual Machine, especially from Disk, the syntax of the command is:
Remove-VM -VM VM_NAME -DeletePermanentlyCreate multiple Virtual Machines from a Template
In some cases, especially for lab environments, it’s necessary to create a lot of Virtual Machines for tests or something like that. There is a way to create multiple Virtual Machines using a script. Below, we will give more details about it.
We will use a lot of variables to set the values that we want to use in our script. This is the most important step and, pay attention to it:
— Define the Cluster Name or the Hostname that the Virtual Machines will use:
Get-Cluster –> and copy the cluster name if you want to use the cluster
Get-VMHost –> and copy the hostname if you want to use the host or if the DRS service is disabled on your environment
In this case, for example, we are using the ESXi host02.lab.local. The variable for it is:
$host2 = Get-VMHost host02.lab.local
— Define the Template Name that the Virtual Machine will use:
Get-Template –> and copy the template name
In this example, we are using the template name “Template-FreeBSD-13”. The variable for it is:
$template = Get-Template Template-FreeBSD-13
— Define the Datastore Name that the Virtual Machine will use:
Get-Datastore –> and copy the datastore name
In this example, we are using the datastore name “ISCSI02”. The variable for it is:
$datastore = Get-Datastore ISCSI02We will create 10 Virtual Machines using the script below:
| $vmNameTemplate = “VM-{0:D3}” $vmList = @() for ($i = 1; $i –le 10; $i++) { $vmName = $vmNameTemplate –f $i $vmList += New-VM –Name $vmName –ResourcePool $host2 -Template $template -Datastore $datastore } |
Note: So, each Virtual Machine will be created with the name “VM-0XX”. In this example, the Virtual Machines’ name there is:
VM-001
VM-002
…
…
VM-010
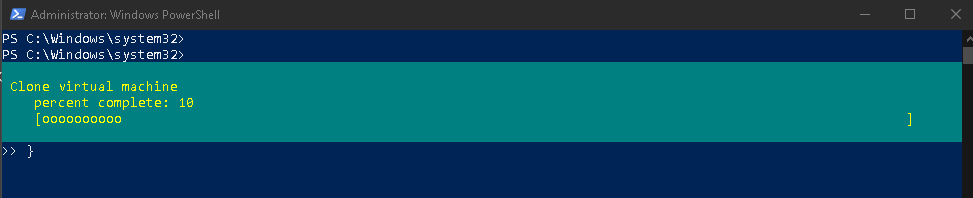
After running the loop script, each Virtual Machine will be created in a serial way:
In parallel, it’s possible to follow the tasks on the vSphere Client:
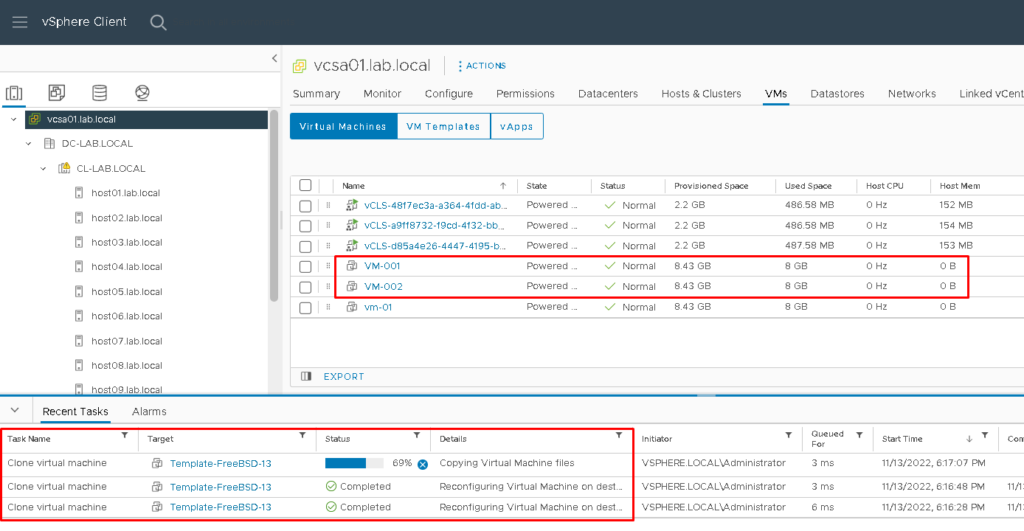
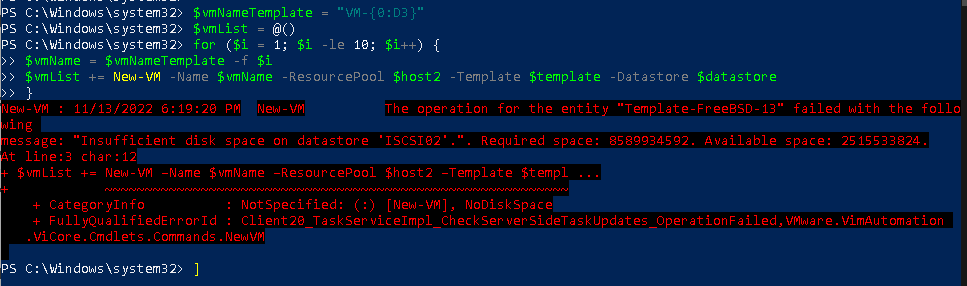
In this case, for example, the loop script ended with an error because the datastore is full 🙂
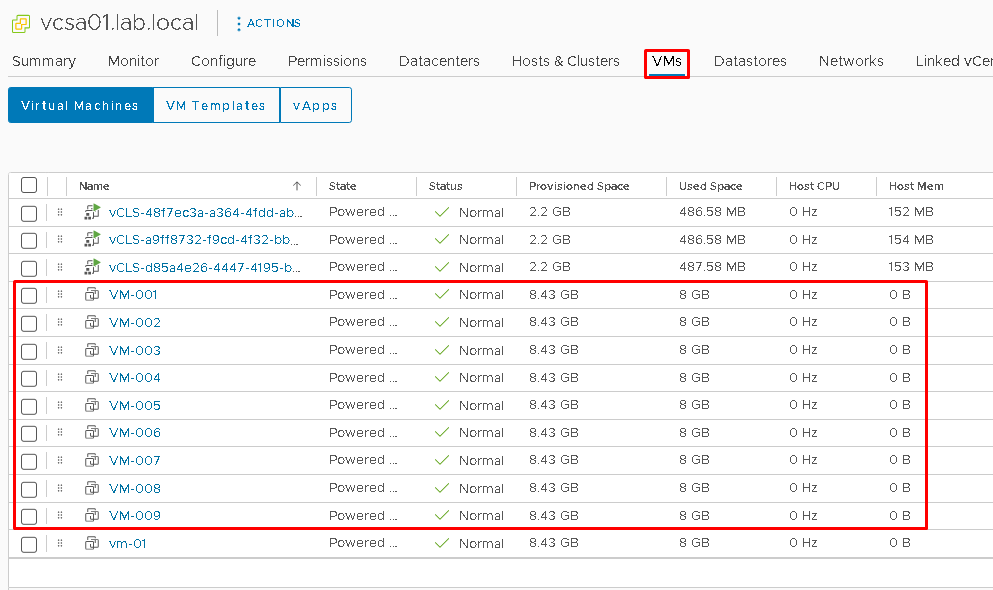
However, 9 Virtual Machines have been created by the loop script:
To disconnect to the vCenter Server, you can use the below command:
Disconnect-VIServer