

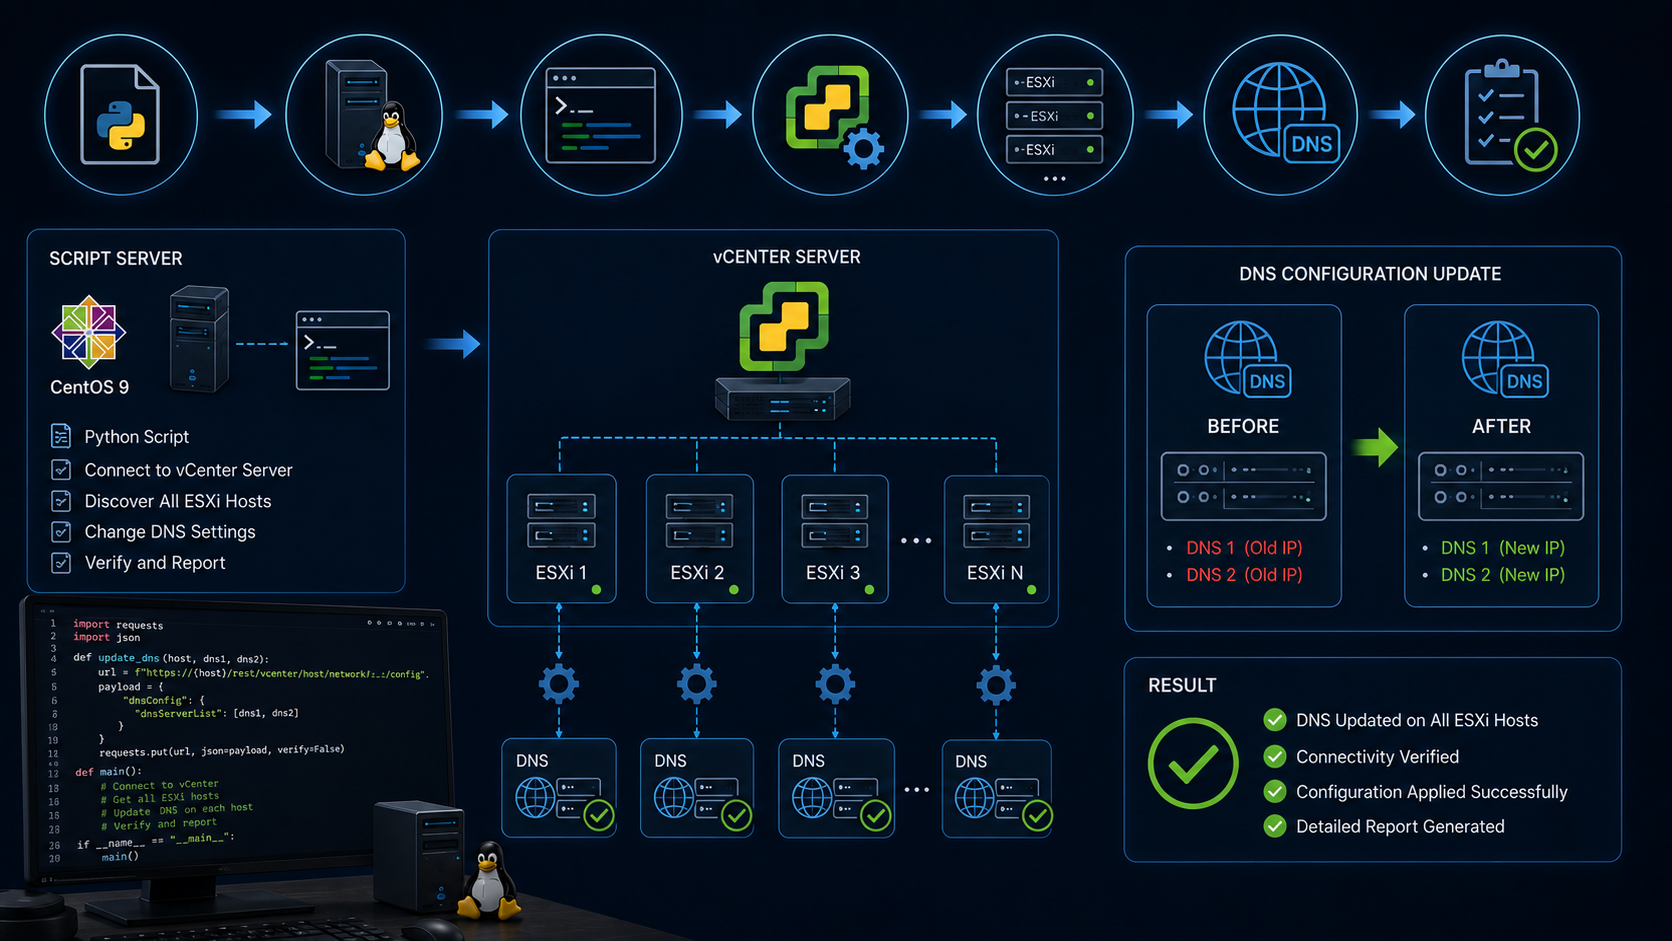
Changing DNS Settings on ESXi Hosts is an article that shows an automated approach to changing the DNS configurations on all connected ESXi hosts under the same vCenter Server, using a Python script.
When you have several ESXi hosts, changing the DNS configuration manually through the vSphere Client is repetitive and error-prone: you open each host, edit the DNS settings, save, and repeat. With many hosts, this takes a long time and it is easy to miss one. Running it from a single script makes the change consistent and repeatable.connect to each ESXi host and upgrade the VMware Tools.
The approach
The idea is to use a Linux server (CentOS 9) as a “script server”. From this server, a Python script connects to vCenter and to each ESXi host, updates the DNS settings, and lets you verify the result.
The script uses two Python libraries:
- pyvmomi — the official VMware vSphere Python SDK. It talks to the vCenter API to list the ESXi hosts and change their DNS configuration.
- paramiko — a Python SSH library. It connects directly to each ESXi host over SSH to run verification commands such as ping.
Prerequisites
Before starting, you need:
- A Linux server to act as the script server (we tested CentOS 9, but any Linux flavor works if you adjust the script).
- Root SSH access to that server.
- Network access from the script server to vCenter and to each ESXi host.
- vCenter credentials with permission to manage the ESXi hosts.
Step 1 — Install the Linux server
Install CentOS 9 without a GUI. We tested the procedure with CentOS 9, but feel free to use a different Linux distribution and adjust the script to run on it.
Step 2 — Install Python on the server
Access the server by SSH with root rights and run the following to install Python automatically:
curl -O https://raw.githubusercontent.com/danchiacchio/scripts/refs/heads/main/sh_PythonInstall/install-python.sh

chmod +x install-python.sh

./install-python.sh
Grab a coffee and wait for a while. The automated Python install takes a while to complete! ☕
Step 3 — Create a working directory
Create a directory for the script (you can choose any name):
mkdir -p /root/scripts/py_vESXiDNSStep 4 — Download the Python script and its dependencies
Go to the working directory, download the script, and install the required Python libraries:
cd /root/scripts/py_vESXiDNS

curl -O https://raw.githubusercontent.com/danchiacchio/scripts/refs/heads/main/py_vESXiDNS/py_vESXiDNS.py

pip install pyvmomi paramiko
Step 5 — Run the script
Make the script executable and run it:
chmod 700 py_vESXiDNS.py

python py_vESXiDNS.py
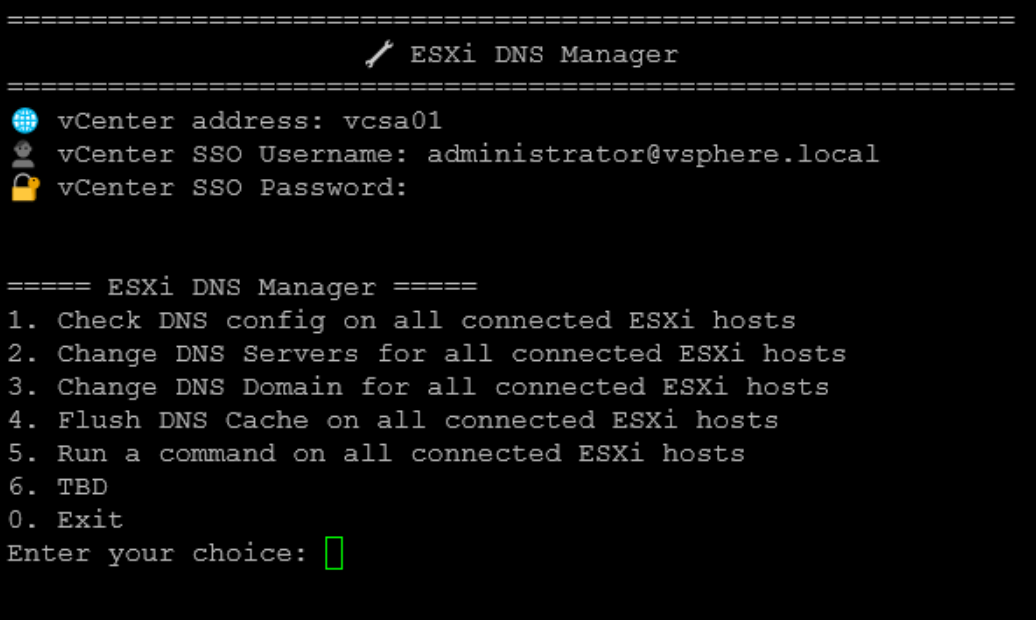
The script connects to vCenter, lists the ESXi hosts, and applies the new DNS settings. As we can see in the following picture, the script needs:
- The hostname, FQDN, or IP address of the vCenter Server.
- vCenter Server credentials (username and password).
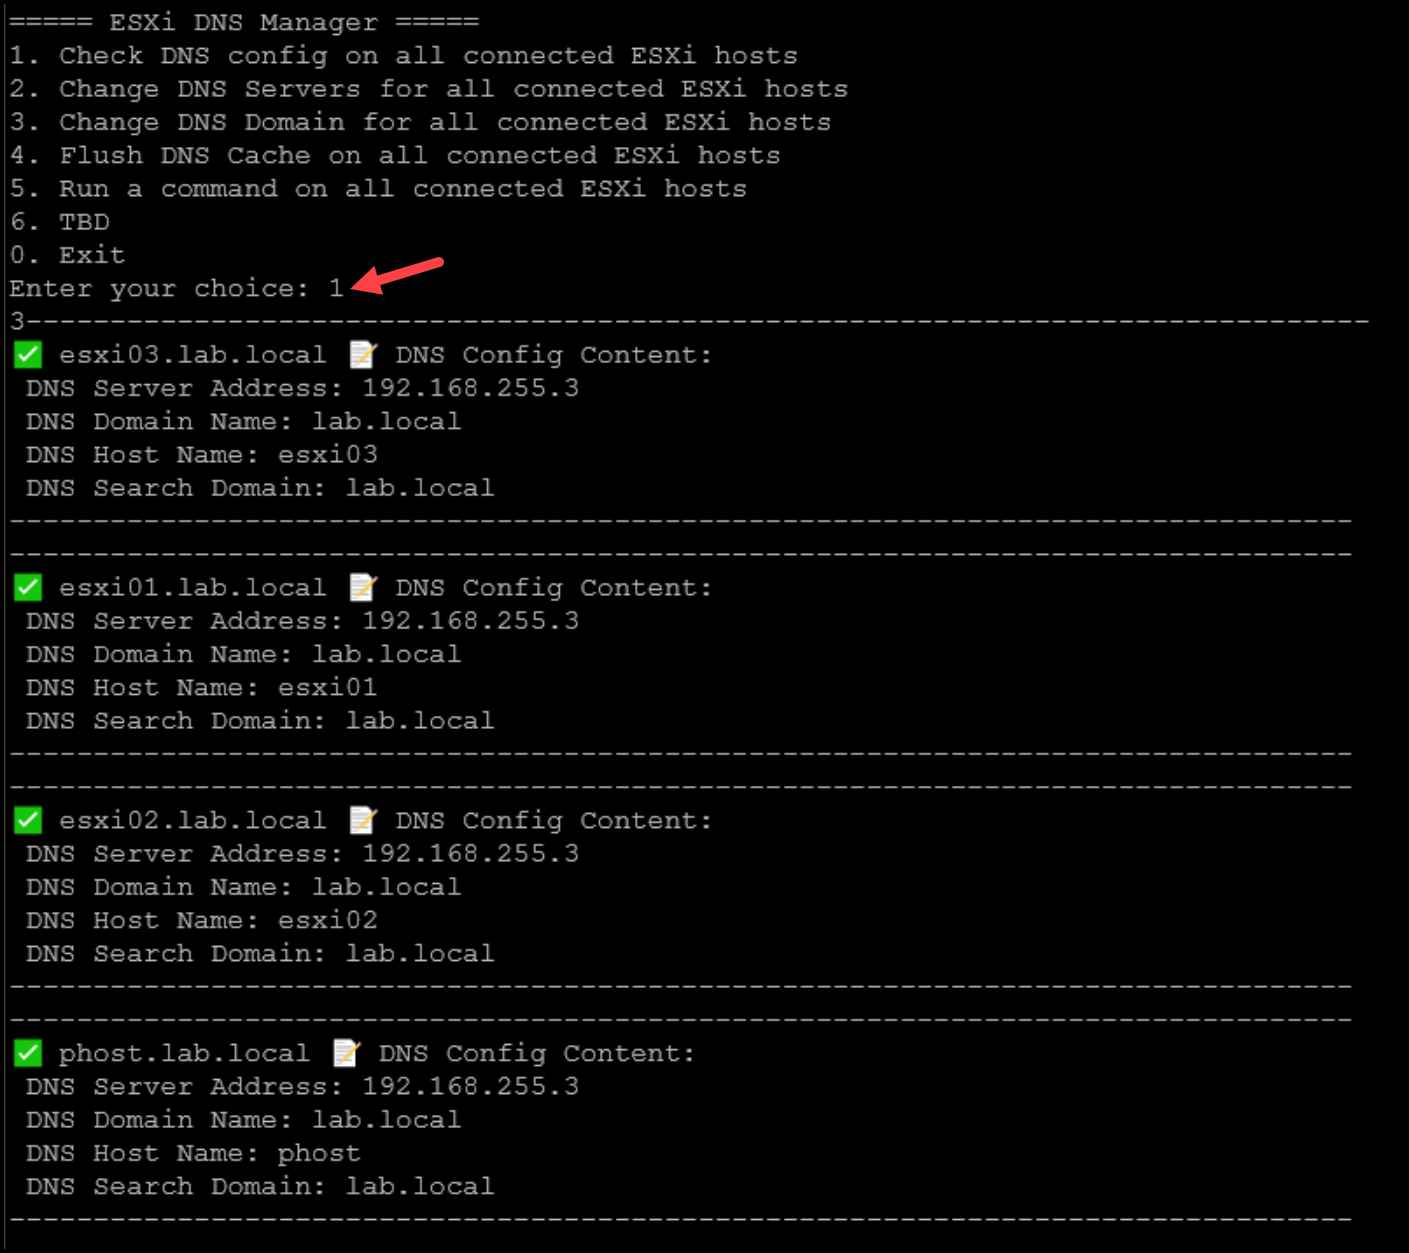
Check DNS config on all hosts
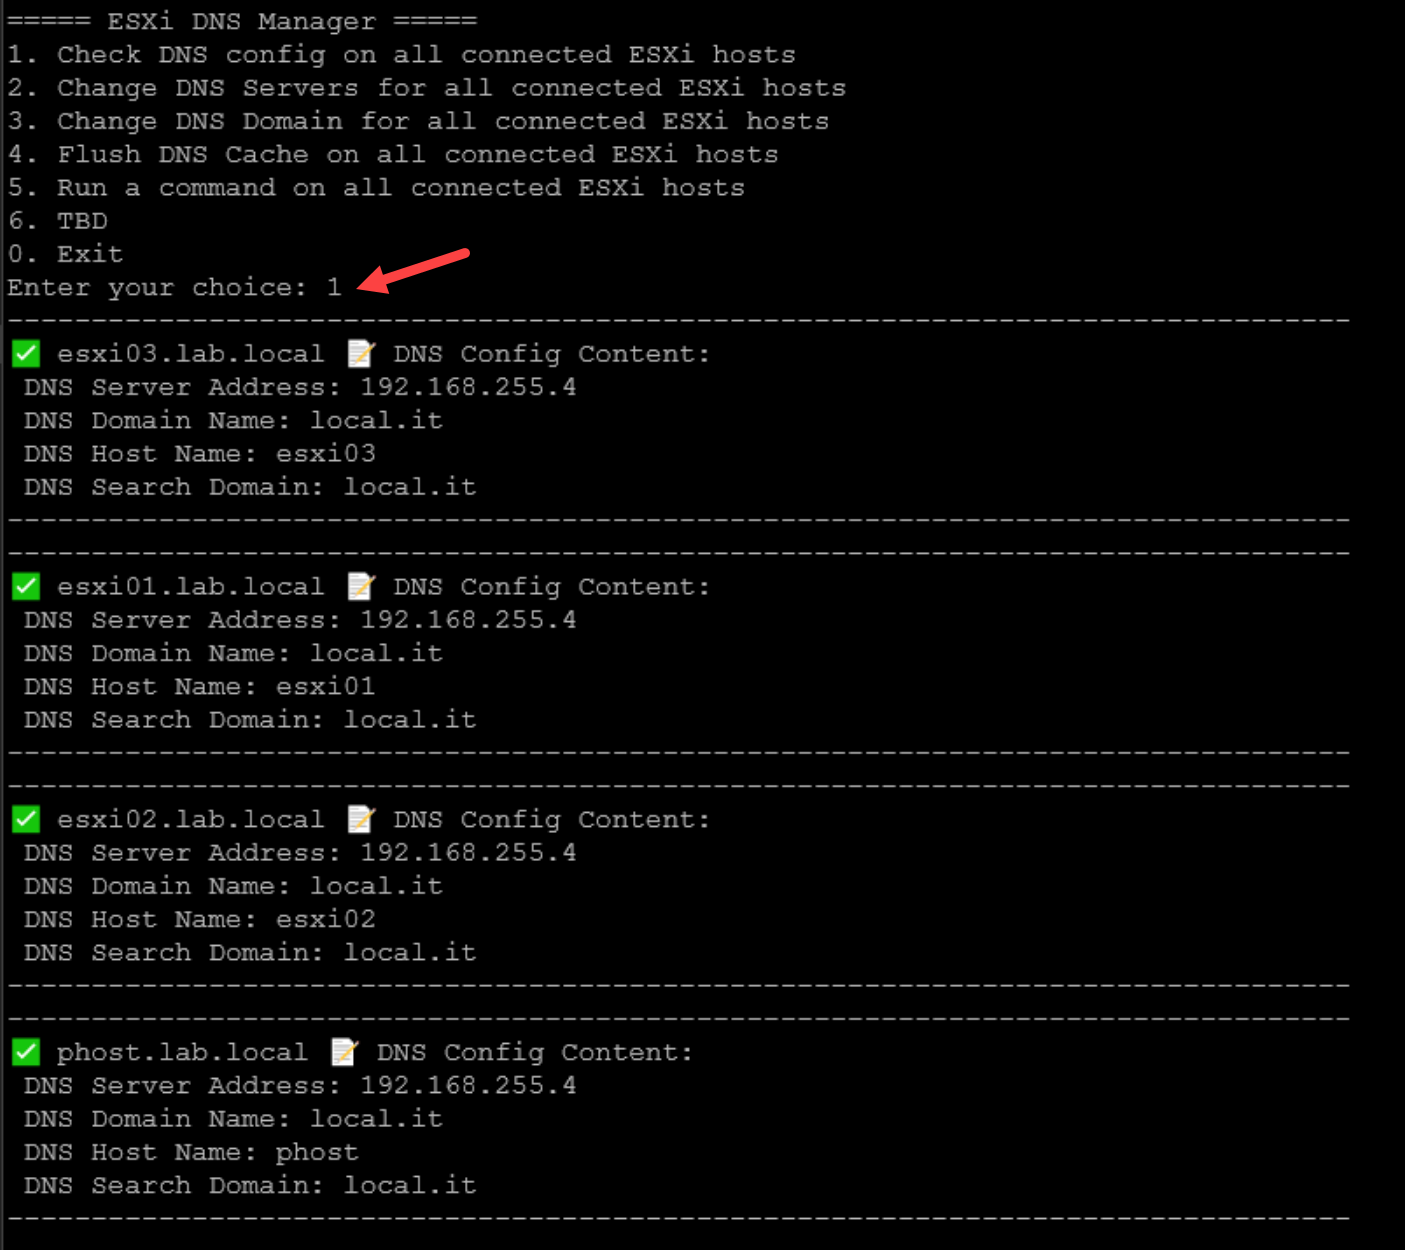
To check the current DNS settings on all ESXi hosts, select the option 1. The script will connect on each connected host and get the DNS configuration:
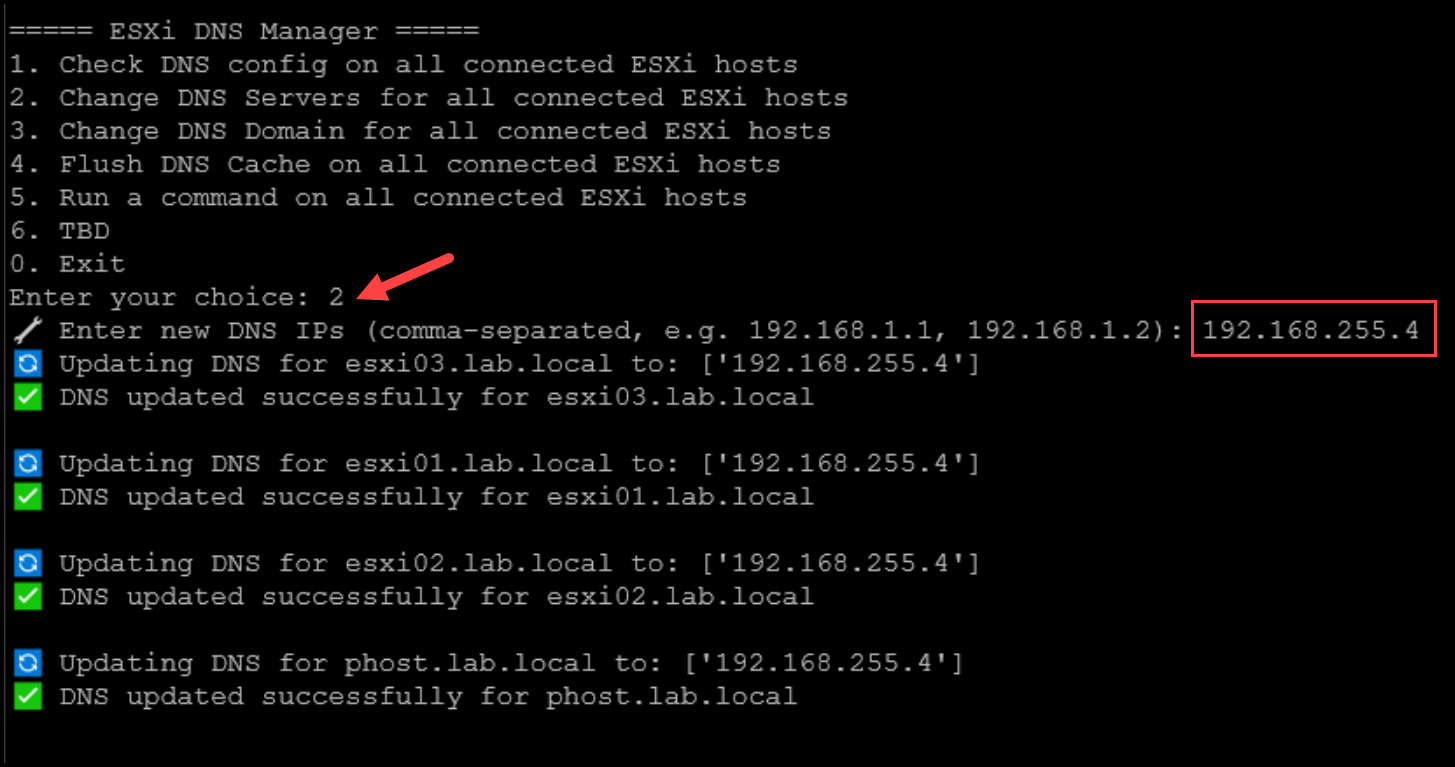
Change DNS server on all hosts
To change the DNS configuration, select the option 2. The script will ask to add the new DNS server address. If you have more than one address, use comma between each one:
Change DNS domain for all hosts
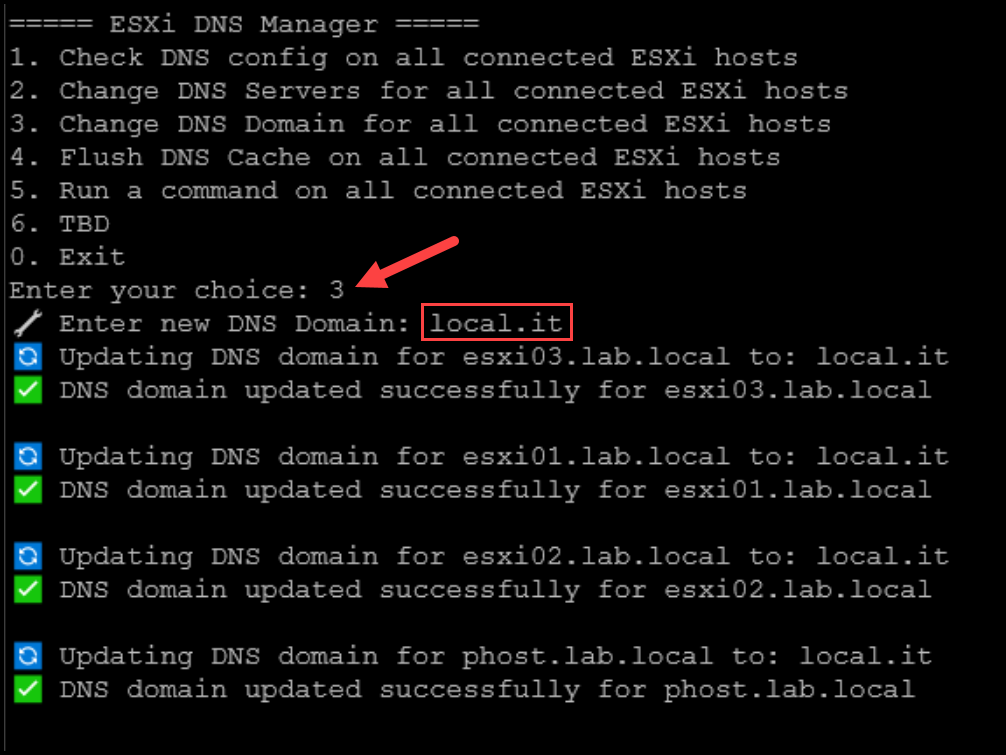
For changing DNS domain on all connected ESXi hosts, use the option 3. In this case, for instance, the new DNS domain will be “local.it”:
Rechecking the DNS config after changing the DNS Servers and DNS domain name:
Flush DNS cache on all hosts
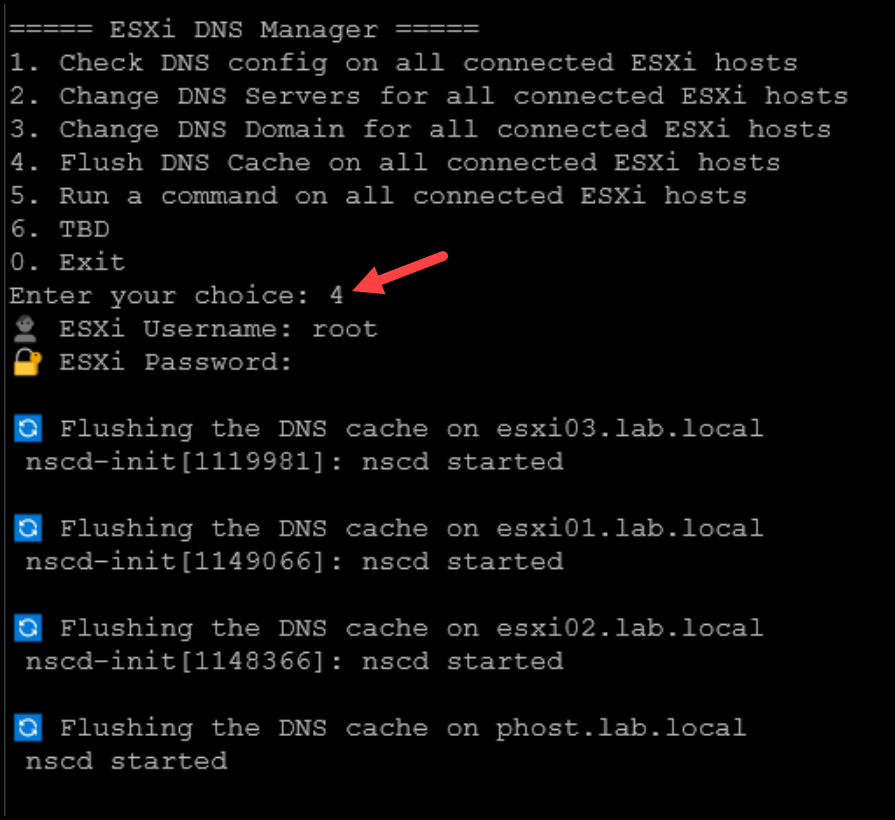
To flush the DNS cache on each host and validate if the new DNS configuration works fine, use the option 4:
Verifying the change
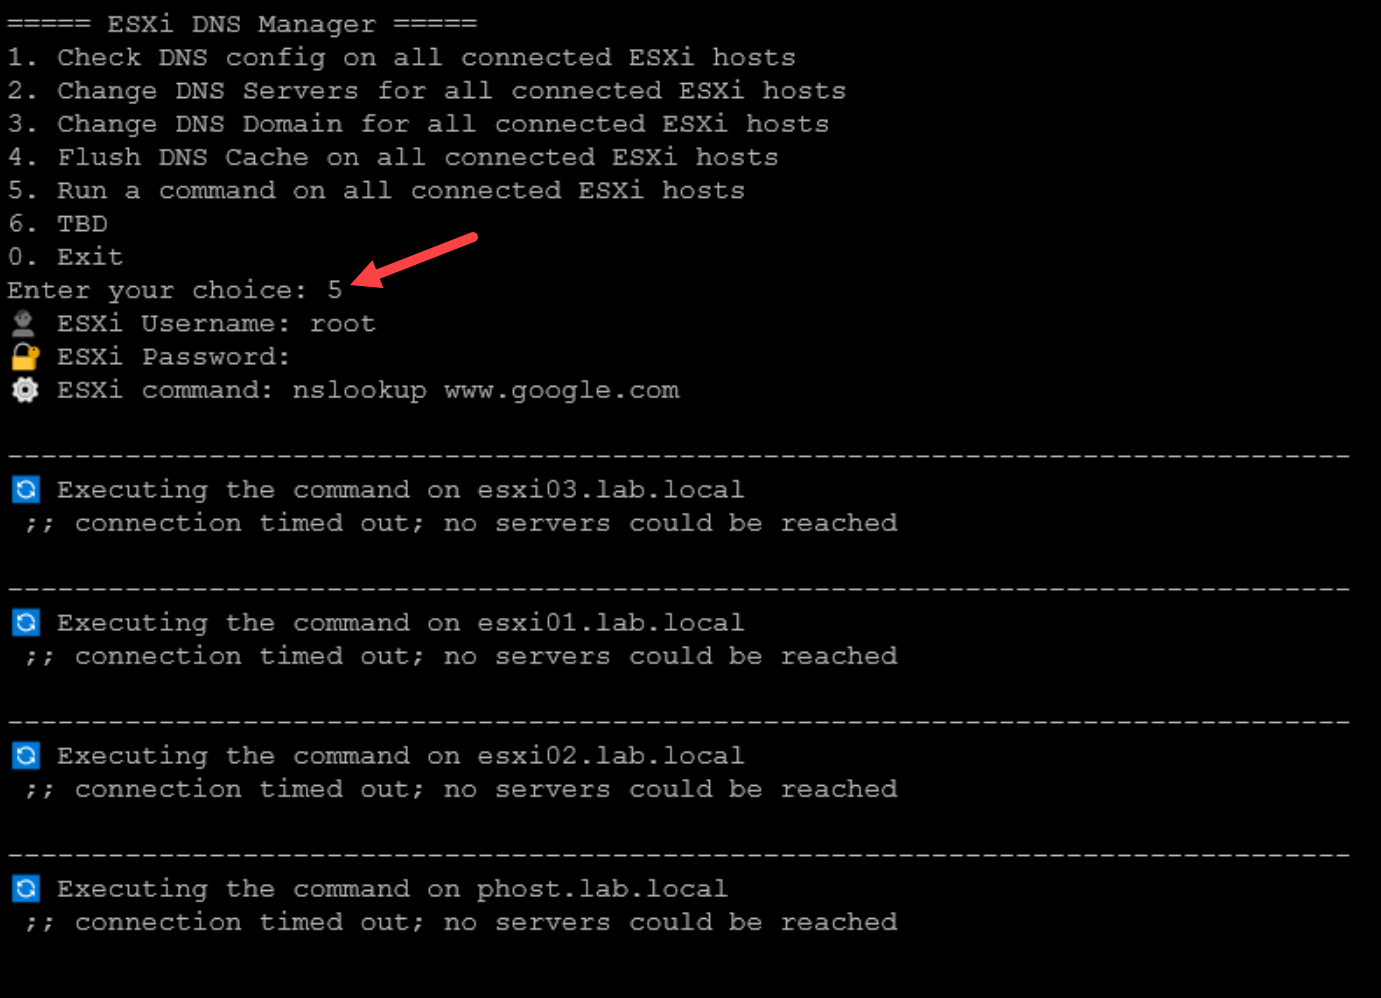
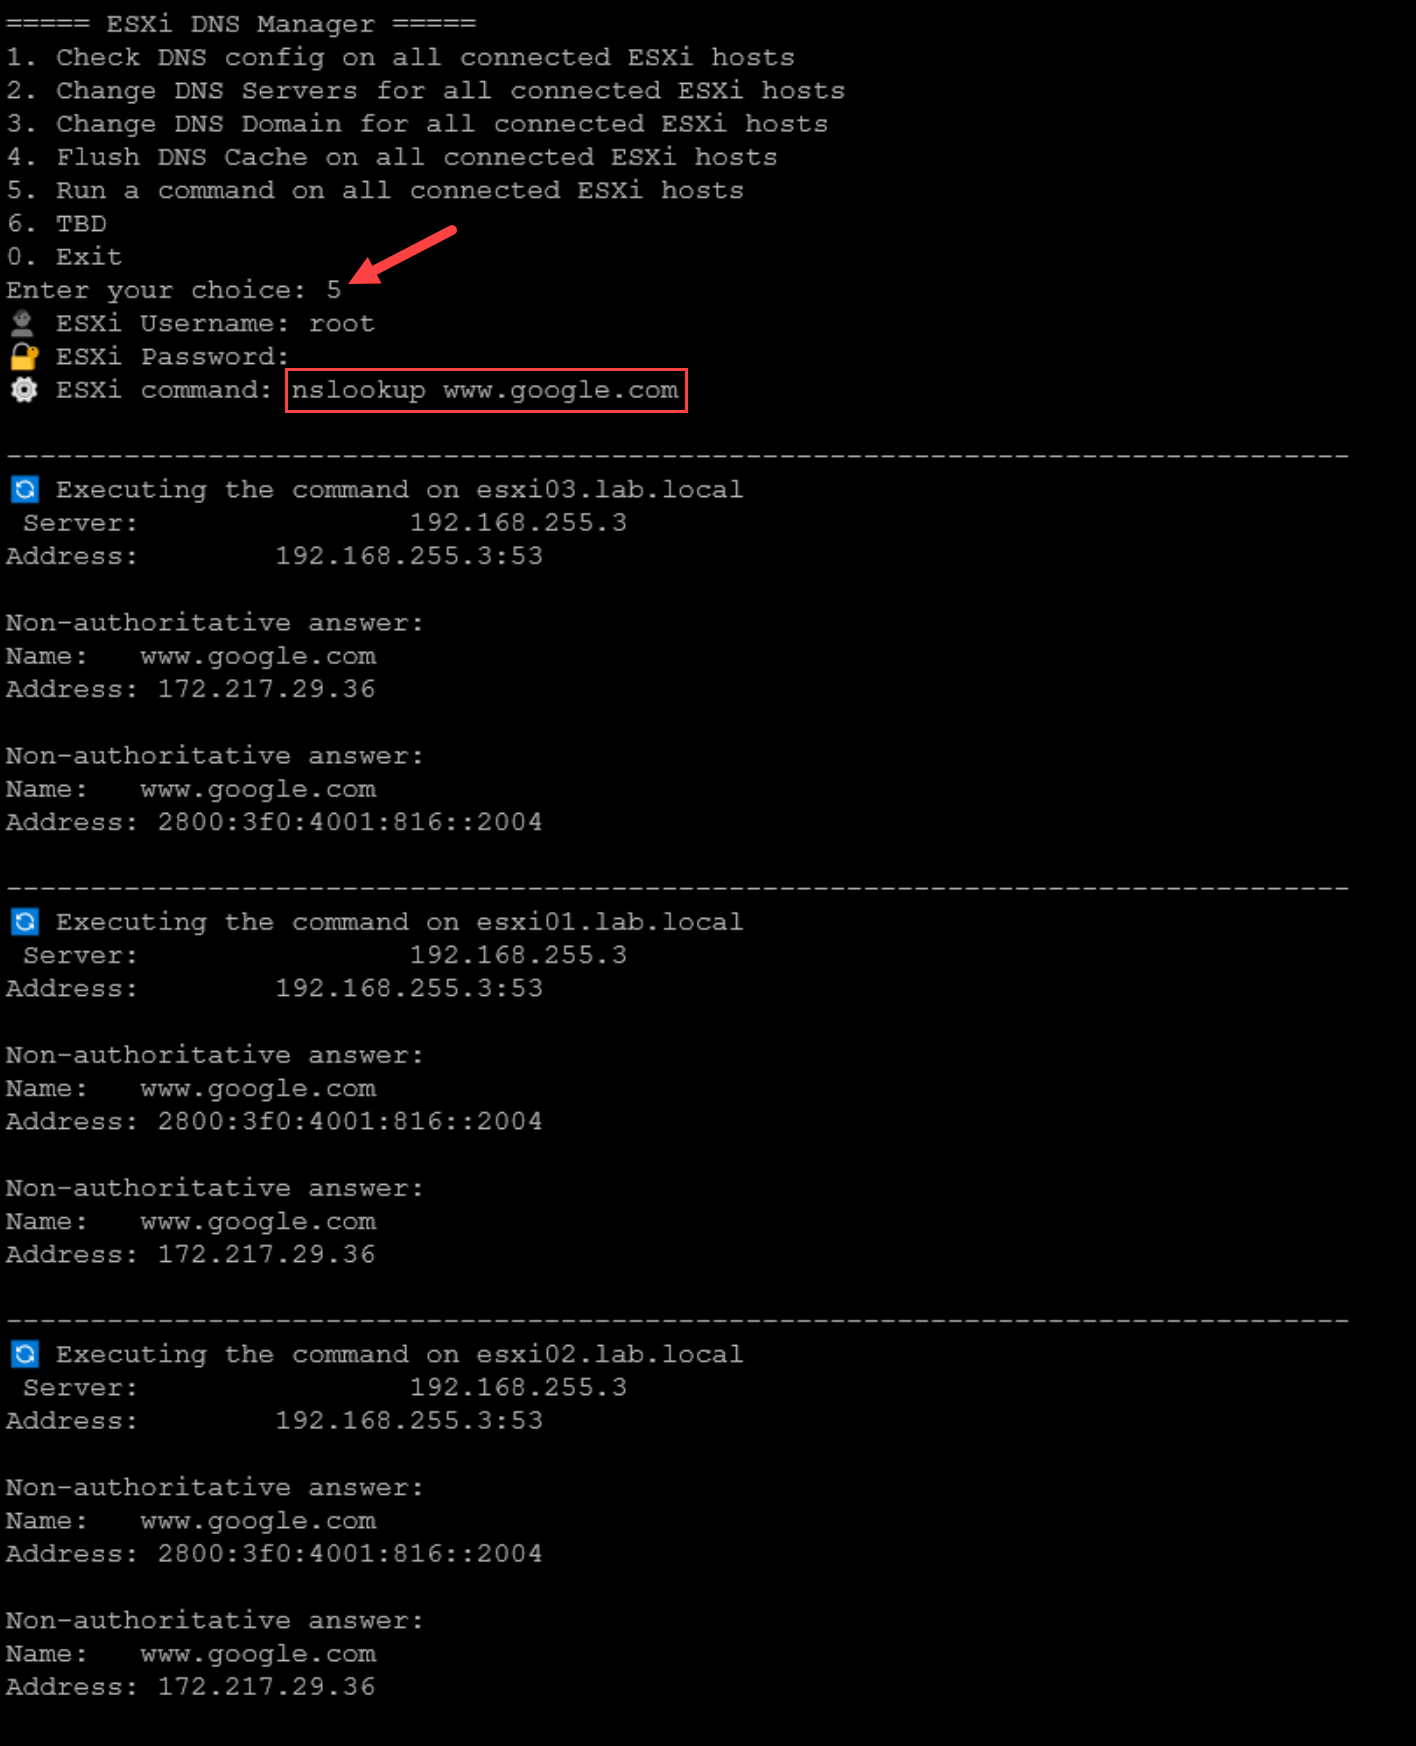
After changing the DNS servers and domain name, verify the result by running nslookup inside each ESXi host.
In the example below, the command failed because we used an unreachable DNS server:
After changing to a working DNS server, the lookup succeeded:
A note on production use
I tested this script several times in a lab environment and it worked as expected. However, be careful when running it in production — changing DNS settings across multiple hosts at once can cause connectivity issues if the new DNS server is wrong. Test in a lab first, and always verify with nslookup after.
