

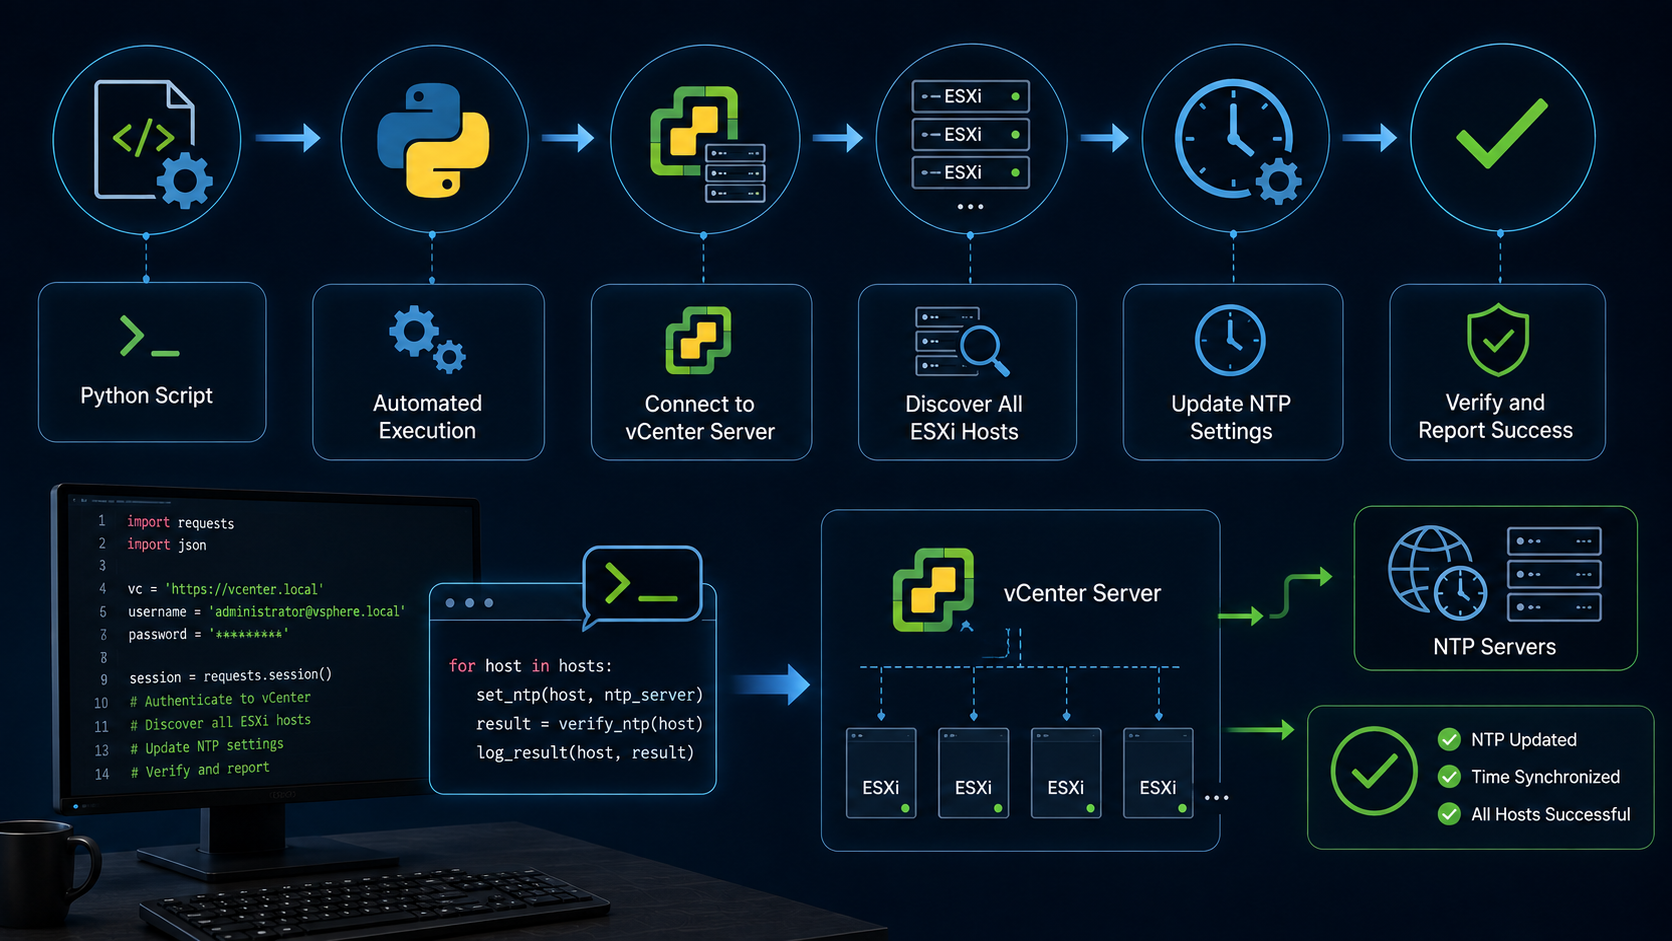
Changing NTP Settings on ESXi Hosts is an article that shows an automated approach to changing the NTP client configurations on all connected ESXi hosts under the same vCenter Server, using a Python script, similar to what we did for changing DNS settings on ESXi hosts.
Correct time synchronization is critical according to VMware’s documentation in a virtualized environment: ESXi hosts rely on accurate clocks for logs, certificates, and features such as vSphere HA. When several hosts need their NTP configuration updated, doing it manually through the vSphere Client is repetitive and error-prone. This script applies the change from a single Linux server, consistently and repeatably.
The approach
The idea is to use a Linux server (CentOS 9) as a “script server”. From this server, a Python script connects to vCenter and to each ESXi host to update the NTP client configuration.
The script uses two Python libraries:
- pyvmomi — the official VMware vSphere Python SDK, used to talk to the vCenter API.
- paramiko — a Python SSH library, used to connect directly to the ESXi hosts.
Step 1 — Install the Linux server
Install CentOS 9 without a GUI. We tested the procedure with CentOS 9, but feel free to use a different Linux distribution and adjust the script to run on it.
Step 2 — Install Python on the server
Access the server by SSH with root rights and install Python automatically:
curl -O https://raw.githubusercontent.com/danchiacchio/scripts/refs/heads/main/sh_PythonInstall/install-python.sh

chmod +x install-python.sh

./install-python.sh
Grab a coffee and wait for a while. The automated Python install takes a while to complete! ☕
Step 3 — Create a working directory
Create a directory for the script (you can choose any name):
mkdir -p /root/scripts/py_vESXiNTPdStep 4 — Download the script and its dependencies
Go to the directory, download the script, and install the libraries:
cd /root/scripts/py_vESXiNTPd

curl -O https://raw.githubusercontent.com/danchiacchio/scripts/refs/heads/main/py_vESXiNTPd/py_ESXiNTPd.py

pip install pyvmomi paramiko
Step 5 — Create the NTP client configuration file
Create the file that the script will apply to each host:
touch ntp_config.txtAdd the NTP configuration to it. This is an example for an ESXi host — adjust it to your environment:
restrict default nomodify notrap nopeer noquery
restrict 127.0.0.1
restrict -6 ::1
driftfile /etc/ntp.drift
logconfig +clockstatus +peerstatus +sysstatus +syncstatus
server 192.168.255.3
tos maxdist 30
A quick explanation of the lines:
restrict— access control for NTP:nomodify notrap nopeer noquerylimits what remote hosts can do.restrict 127.0.0.1andrestrict -6 ::1— allow the local host (IPv4 and IPv6) full access.driftfile— wherentpdstores the measured clock drift between restarts.logconfig— enables logging of clock, peer, system, and sync status changes.server 192.168.255.3— the NTP server the host will synchronize with.tos maxdist 30— sets a quality threshold (maximum distance) for time sources.
Step 6 — Run the script
Make it executable and run it:
chmod 700 py_ESXiNTPd.py

python3 py_ESXiNTPd.py
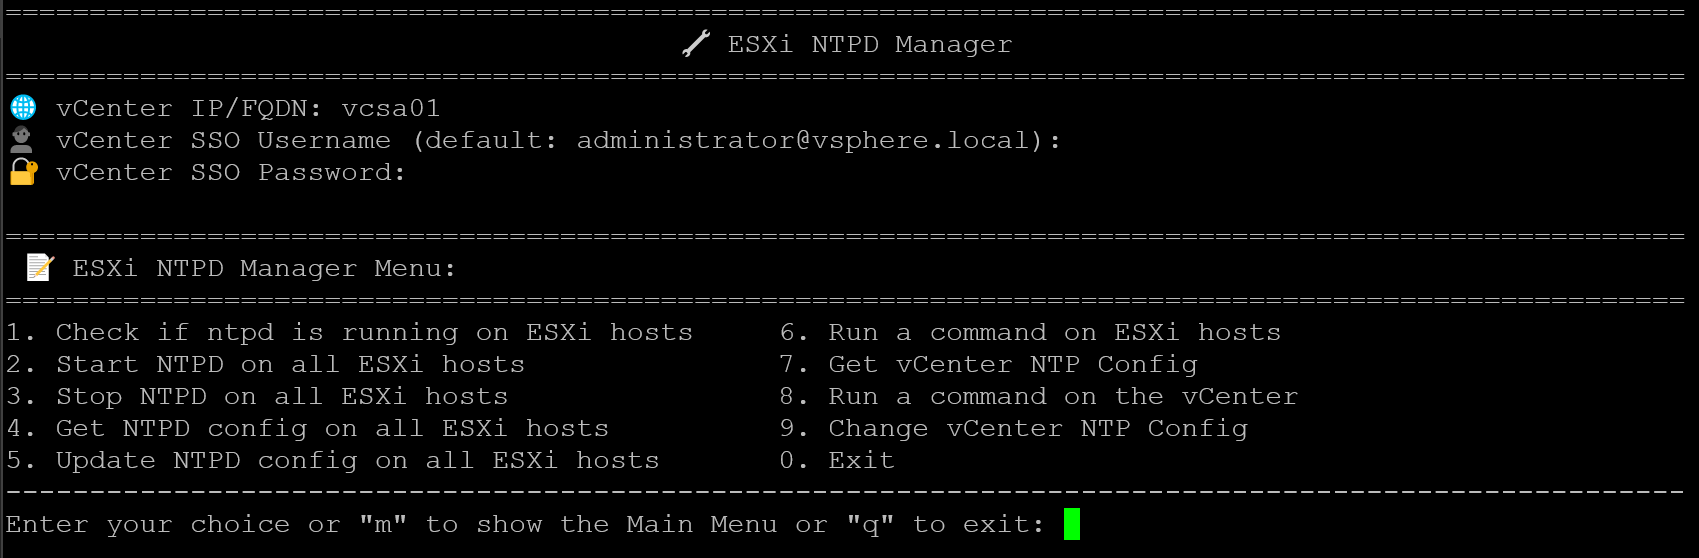
The script is a menu-based tool. After it runs, you can, for example, get the ntpd status for hosts in a specific cluster, or view the NTP configuration of a particular host. To update or change the NTP configuration, select option five and point it to the ntp_config.txt file you created earlier.
This is a base-menu script and is very user-friendly — explore the options to get familiar with them:
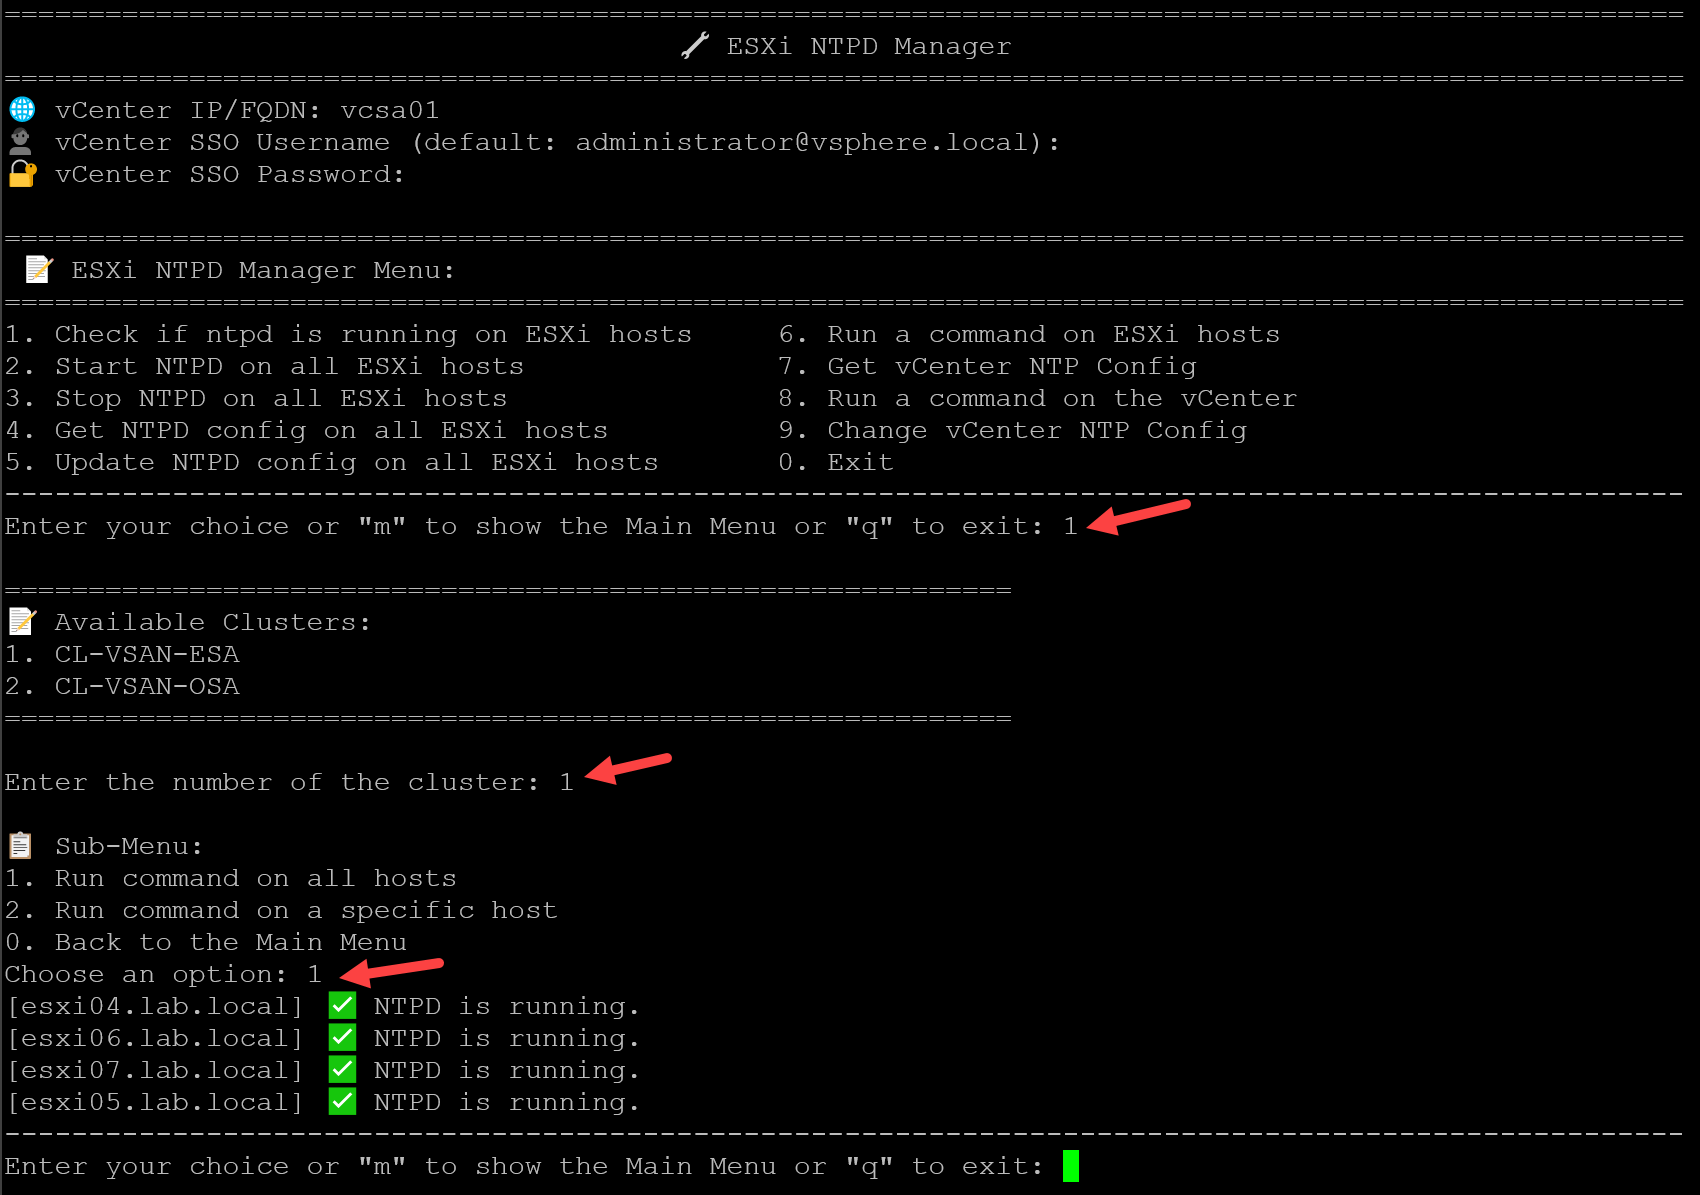
Check status of the NTP daemon
After running the script, for instance, we can get the ntpd status for hosts in a specific cluster:
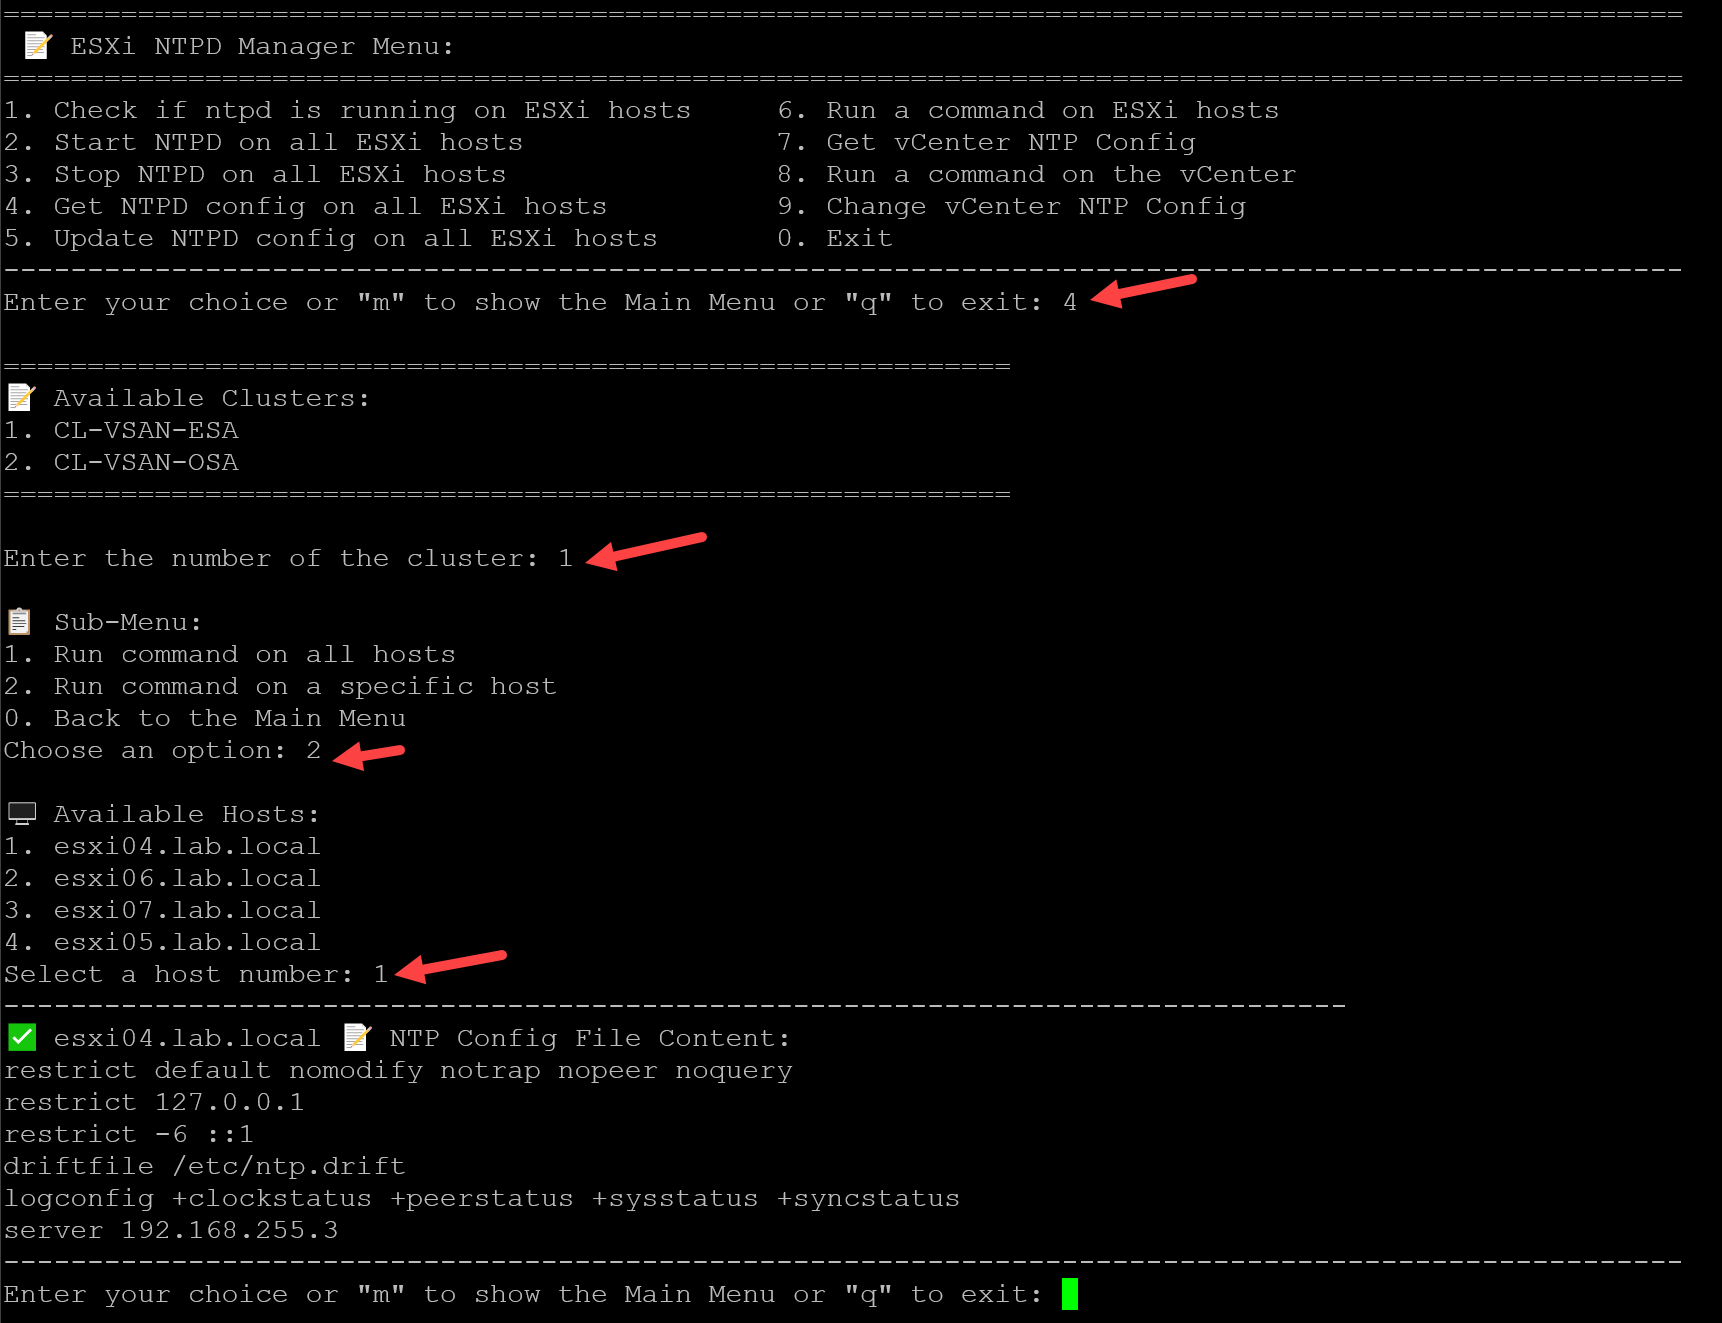
Get NTP configuration
To get the NTP configuration for a particular ESXi host:
A note on production use
I tested this script several times in a lab environment and it worked as expected. However, be careful when running it in production — applying the wrong NTP server across multiple hosts can cause time drift and related issues. Test in a lab first and verify the result after.
