


VM Replication with vSphere Replication and Site Recovery Manager shows a possible scenario for using vSphere Replication and Site Recovery Manager (SRM) to replicate and manage virtual machines.
Our scenario is based on a lab topology, as shown in the following picture:
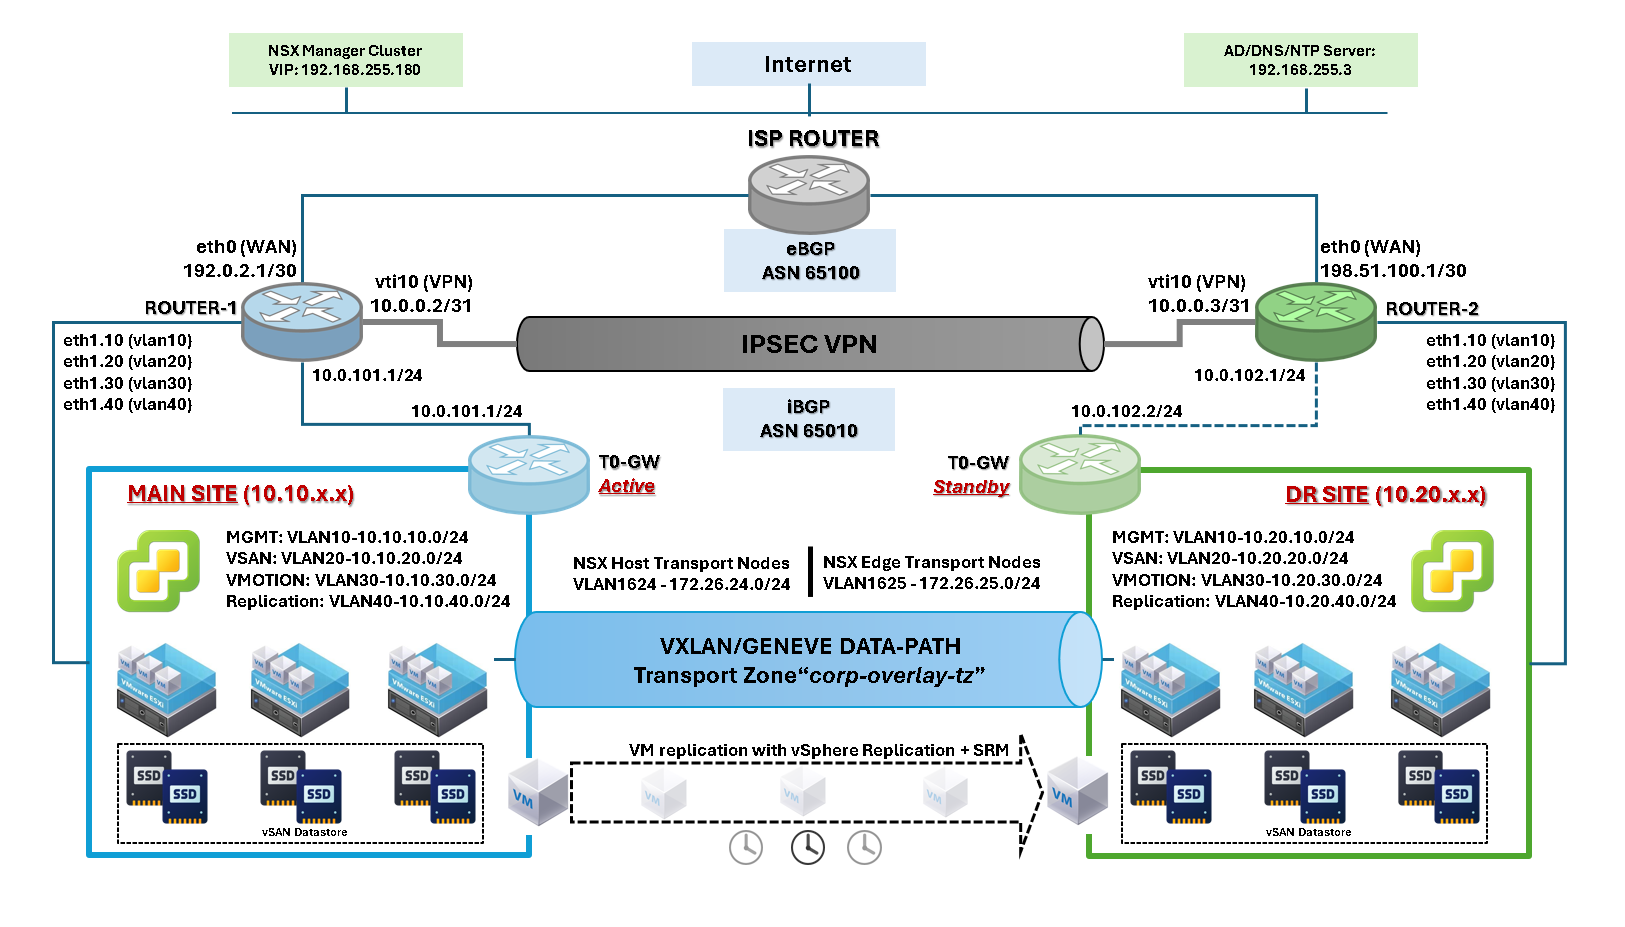
The “Main Site” is the active site, where all production virtual machines are hosted. The “DR Site” is the passive site and receives VM replicas from the active site.
There are many technologies and configurations on this topology, but we will focus on vSphere Replication (VR) and Site Recovery Manager (SRM).
What is vSphere Replication (VR)?
VMware vSphere Replication is a hypervisor-based replication solution that enables asynchronous replication of virtual machines (VMs) between sites. It operates at the VM level, replicating only changed blocks (CBT) to a target location, enabling efficient disaster recovery and data protection.
What is Site Recovery Manager (SRM)?
VMware Site Recovery Manager is a disaster recovery orchestration tool that automates the failover, failback, and testing of virtual machines (VMs) between protected and recovery sites. It integrates with vSphere Replication or supported storage-based replication to provide a consistent and automated recovery plan with minimal downtime.
In simple terms, vSphere Replication moves the data, and SRM ensures everything runs smoothly when you need to recover.
Basic Requirements to use vSphere Replication (VR)
We will describe some fundamental requirements to use the vSphere Replication, considering a scenario like we showed in the previous topology:
- vCenter Server at both sites (source and target).
- ESXi hosts (vSphere 6.5 or later recommended).
- vSphere Replication Appliance is deployed and registered with vCenter on each site.
- Network connectivity between sites (ports 31031, 44046, etc.).
- Supported VM hardware versions and operating systems.
- Compatible storage (doesn’t require identical storage arrays).
- Time synchronization (NTP) across all components.
- Use a stable and working DNS for all components.
- Generally, if you have ESXi licences, it is sufficient to run vSphere Replication (To use vSphere Replication, you need at least the vSphere Essentials Plus license or higher on your ESXi hosts.).
Basic Requirements to use Site Recovery Manager (SRM)
The same idea as before, we’ll show some fundamental details of using SRM:
- vCenter Server at both protected and recovery sites.
- SRM Server is installed at both sites and paired via SRM configuration.
- Supported replication solution:
- vSphere Replication, or
- Array-based replication with Storage Replication Adapter (SRA).
- Licenses for SRM and vSphere Replication (SRM needs separate licensing).
- Networking considerations:
- VM recovery networks must be pre-configured.
- IP customization or re-IP settings if needed.
- DNS, NTP, and routing are configured properly between sites.
- Recovery Plans and Protection Groups are configured in the SRM UI.
Site Recovery Plugin
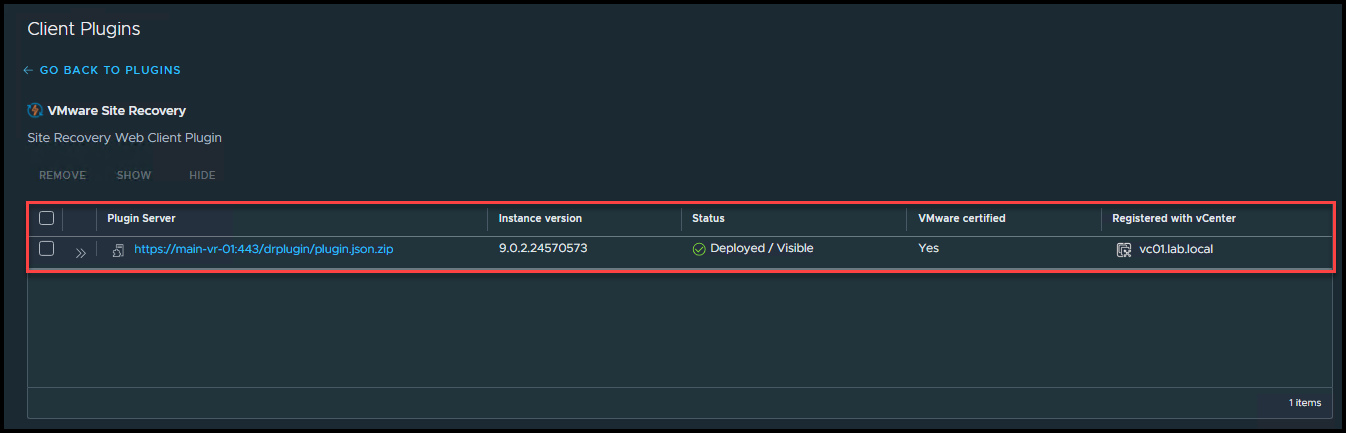
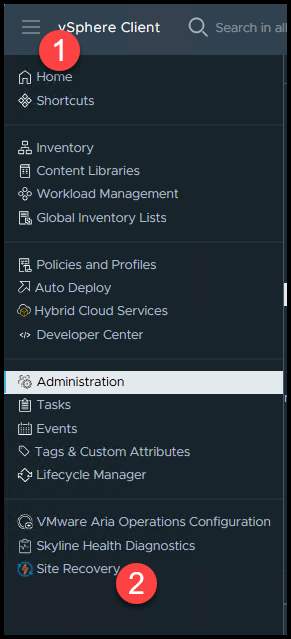
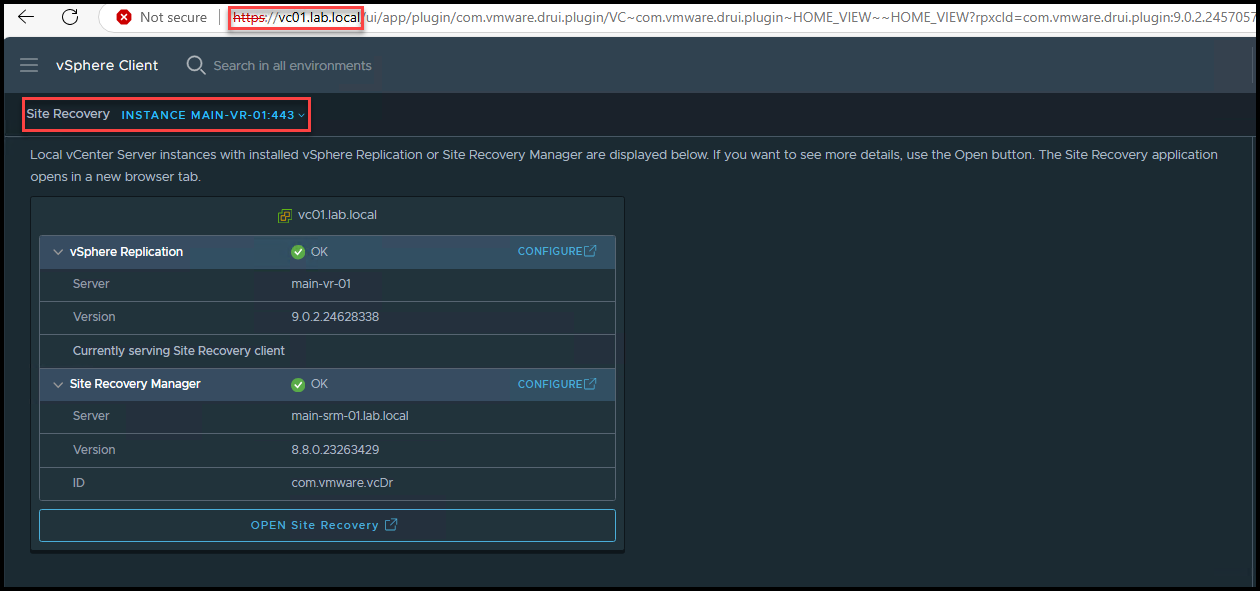
Once deployed and configured, the site recovery can be managed through the “Site Recovery” plugin, accessible on each vCenter Server:
Main Site:

The plugin is provided by the vSphere Replication Appliance (VRA):
DR Site:
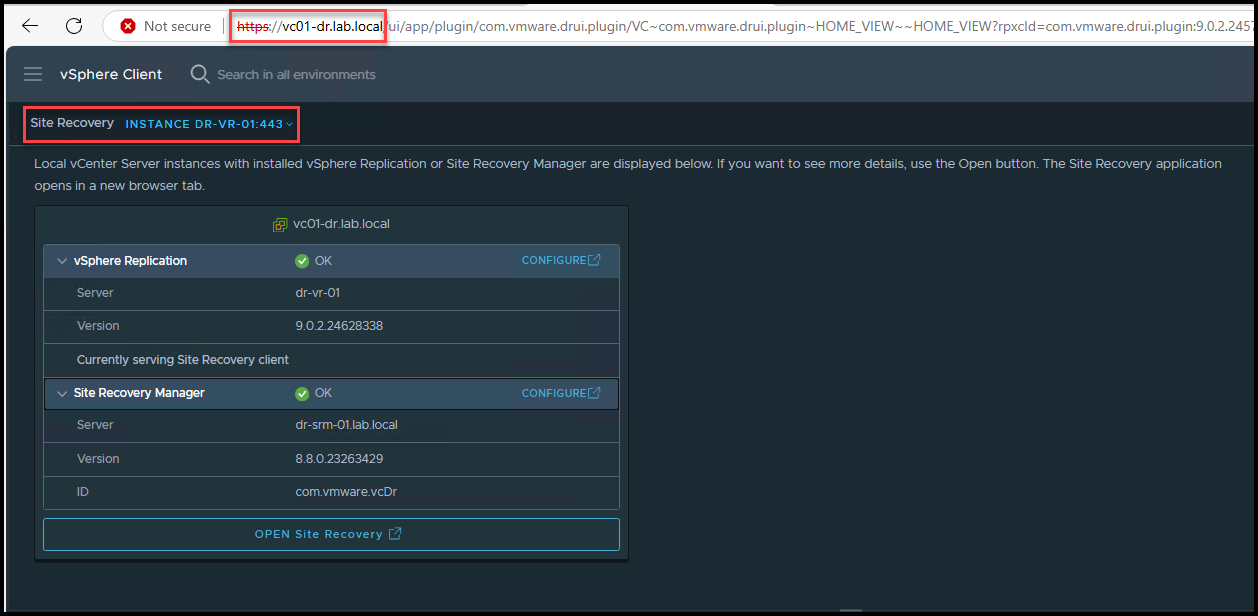
Managing Site Recovery
Under the Site Recovery page, click on “OPEN Site Recovery”:
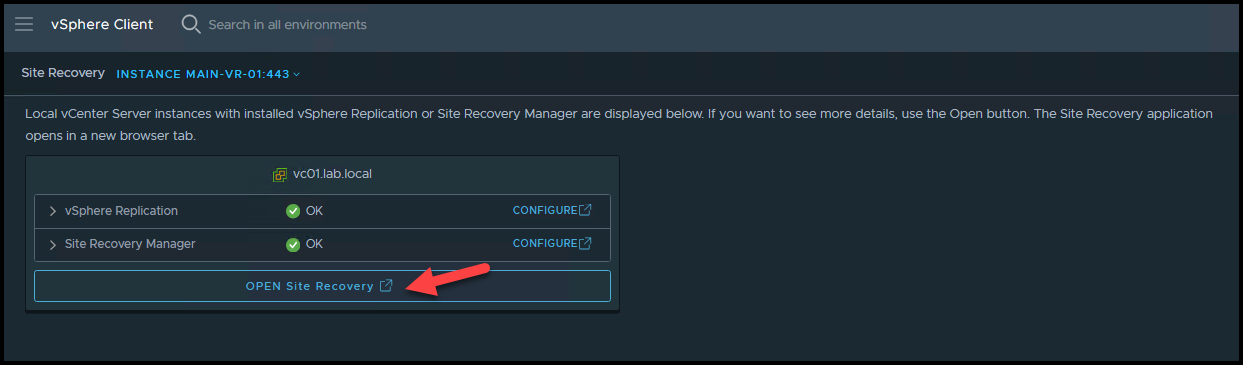
You’ll be automatically redirected to the vSphere Replication home page.
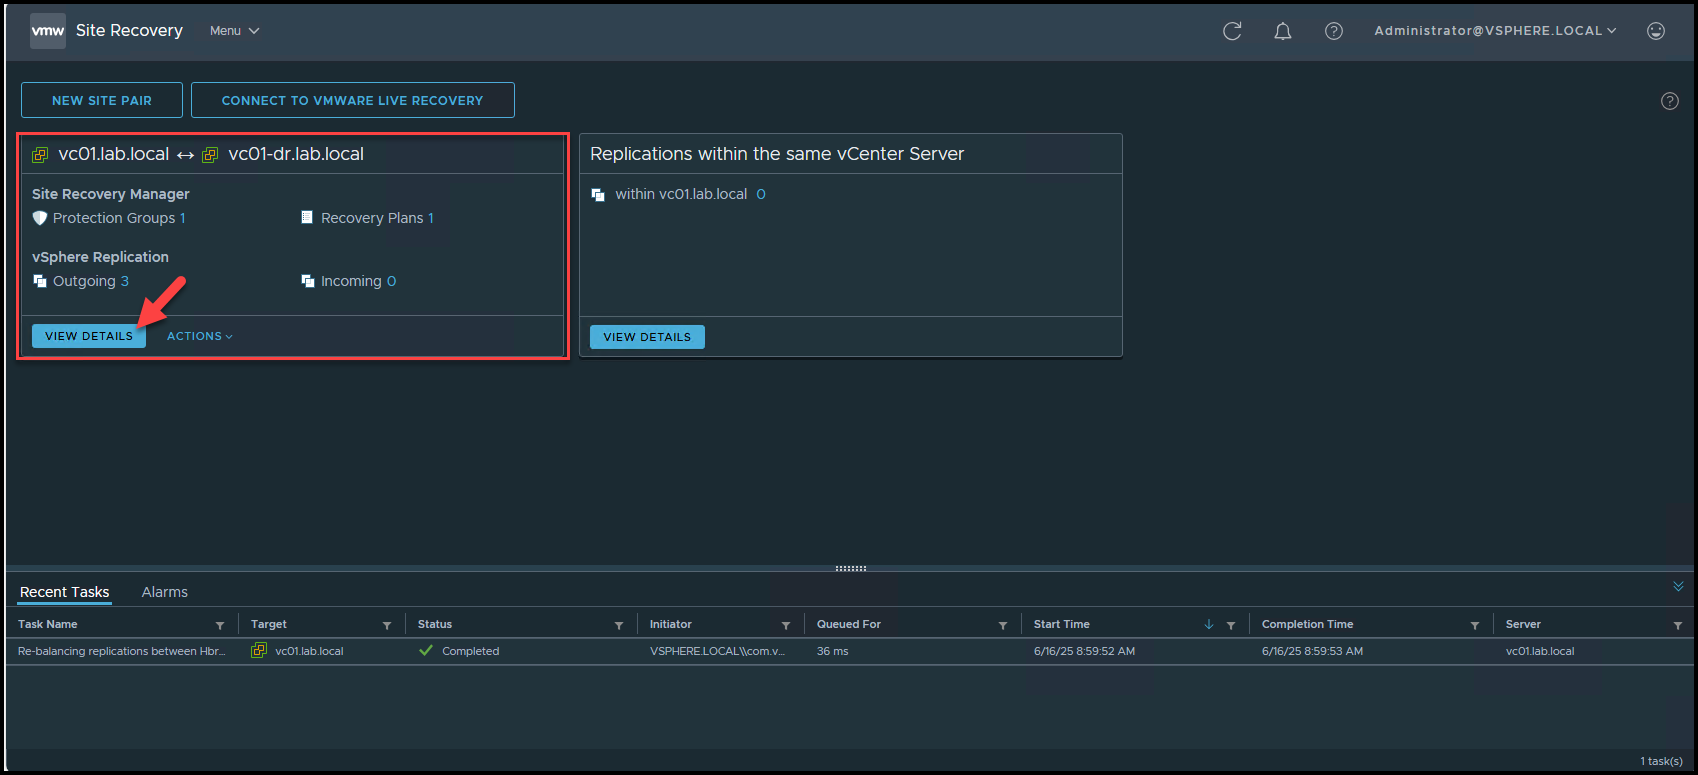
On this page, you can view the configurations and details of each one.
In this case, for instance, we can click on “View Details” under the configured site pair:
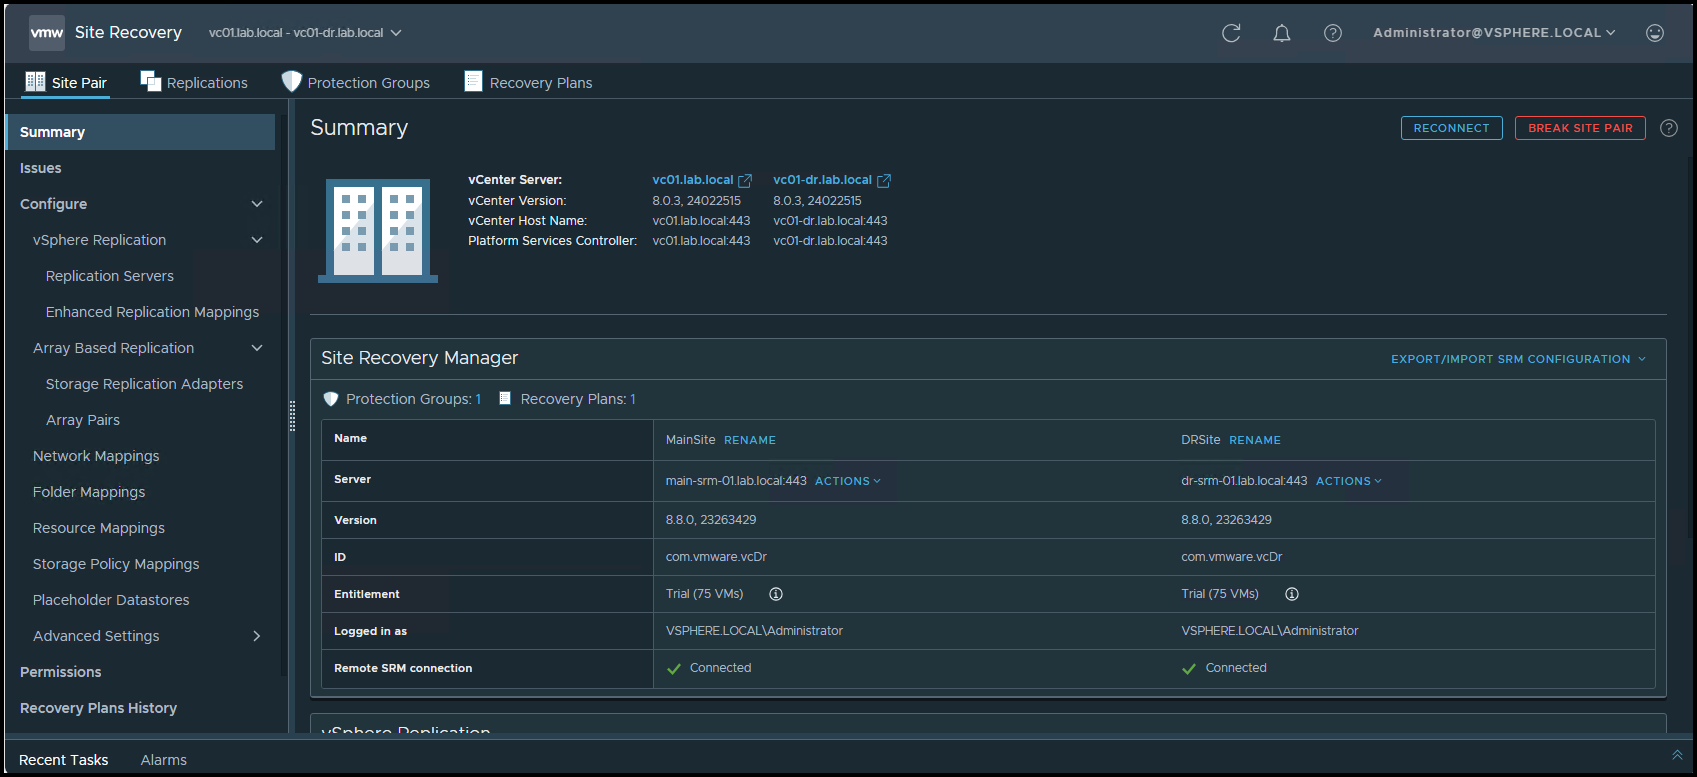
On this page, we can see the full details of the replication environment.
At the “Site Pair” tab, we can see details of the site pair, such as connection status, software versions, and other important information:
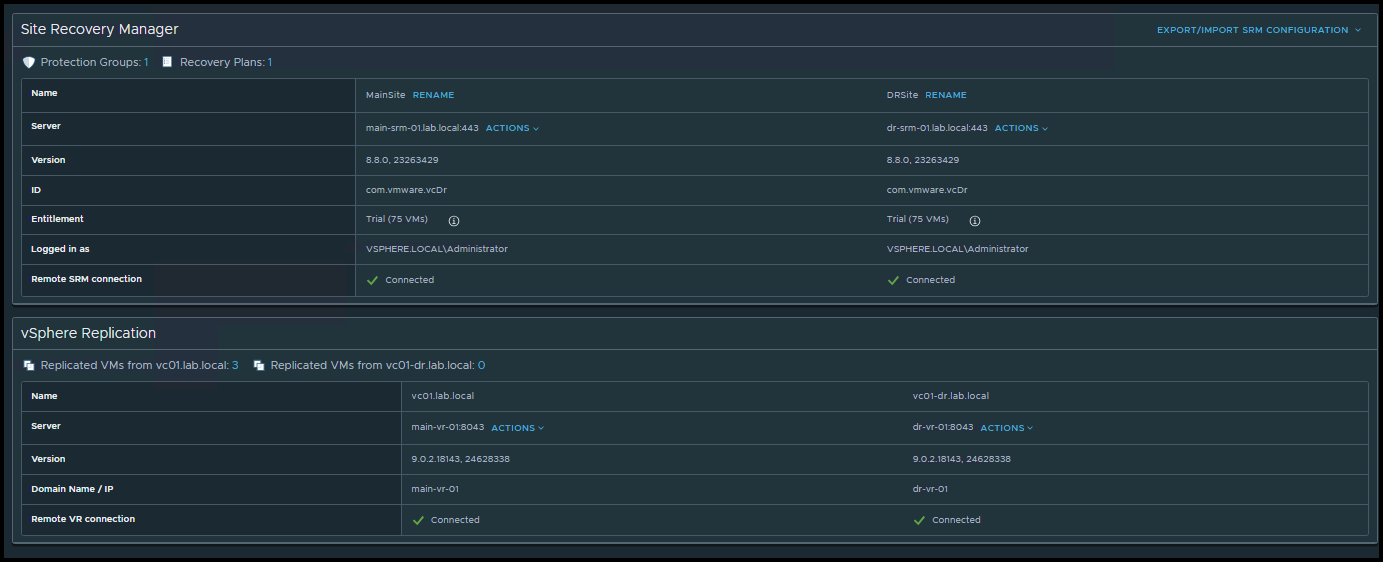
Under the “Replications” tab, as the name suggests, we can view the virtual machines configured to be replicated to the remote site.
Note: Since we are on the vSphere Replication management page at the “Main Site”, the replications under “Outgoing” refer to virtual machines that are replicated to the remote site.
On the other hand, replications on the “Incoming” mean virtual machines from the remote site to the local site:

Let’s explore a bit the replication of the virtual machine “WebSRV-01”:
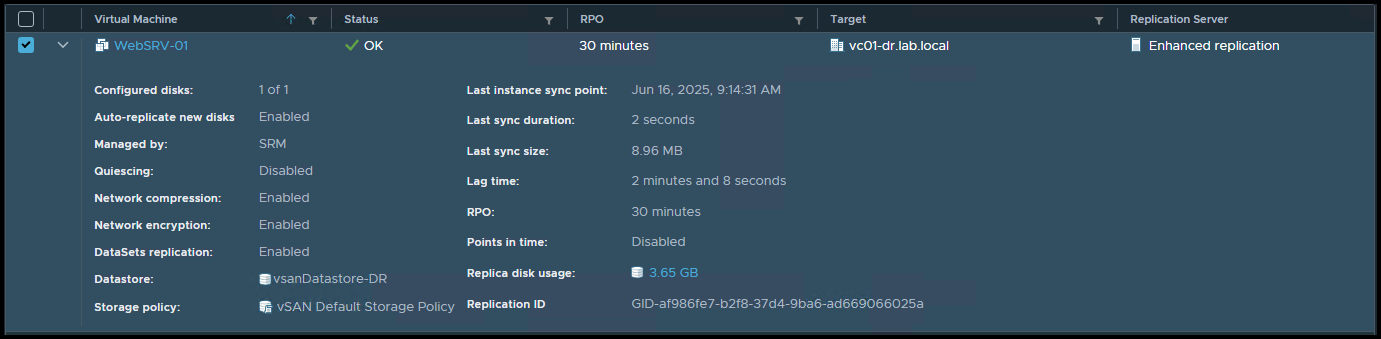
RPO is an acronym for Recovery Point Objective. RPO is the maximum acceptable amount of data loss (measured in time) that can occur in the event of a disaster.
For example, an RPO of 30 minutes means:
- You’re okay with potentially losing the last 30 minutes of data.
- vSphere Replication attempts to replicate VM changes every 30 minutes to meet this goal.
Lag time refers to the actual delay between when a change occurs on the source VM and when it’s replicated to the target site.
Imagine the following situation:
You’re using vSphere Replication to copy a VM from Site A to Site B.
You configured:
- RPO = 30 minutes → “I’m OK with losing up to 30 minutes of data.”
What is the Lag Time?
Let’s say:
- You make a change to the VM at 10:00 AM
- That change arrives at the recovery site at 10:05 AM
This means the lag time is 5 minutes — there’s a 5-minute delay between the data being created and successfully replicated.
Note: The Lag Time is an important indicator to check how the virtual machine replication is performing (a lag time higher than the RPO can indicate a significant problem with the replication process).
Under the “Protection Groups” section, as the name suggests, we can view groups of virtual machines that are protected.
In this case, for instance, we have one protection group named “PG-Web”:

Accessing the protection group and clicking on “Virtual Machines”, we can see all virtual machines inside this protection group:

Returning to the home page, under “Recovery Plans”, we can view configured recovery plans or create new ones:

Under a recovery plan, we can see what protection groups are associated with, and as a consequence, what virtual machines will be taken by the recovery plan:

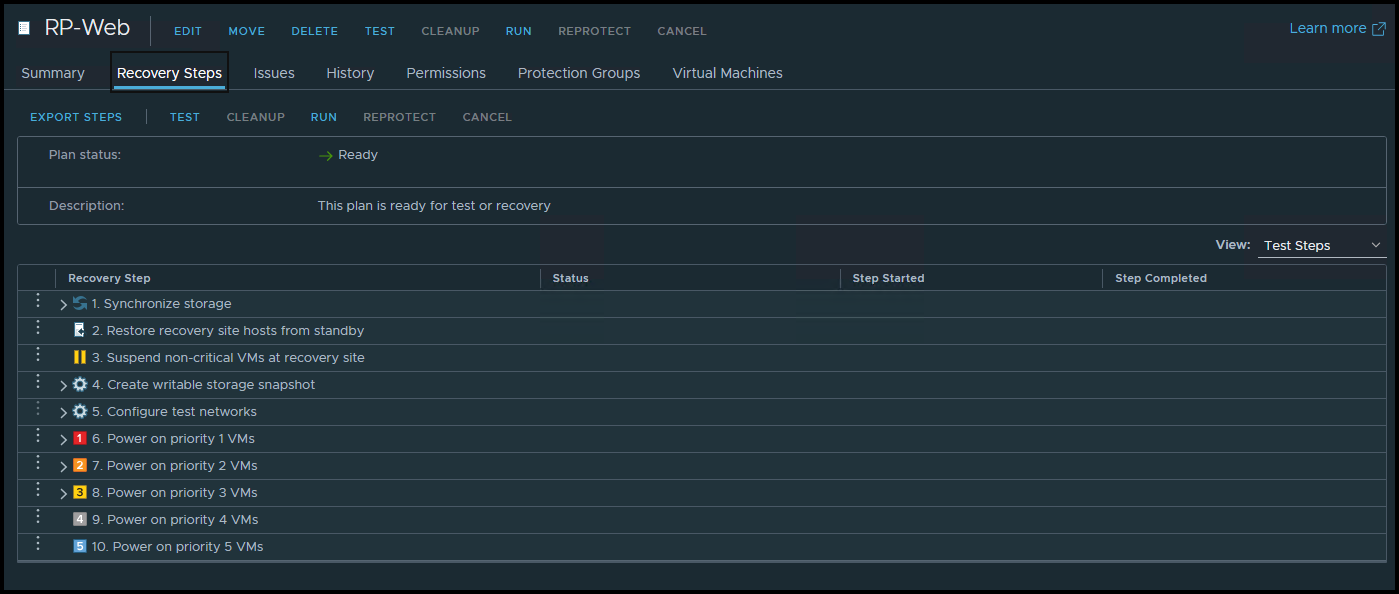
Under the “Recovery Steps” tab is where the magic happens 🙂
On this page, we can see all the recovery steps that will be executed and, of course, start the recovery plan.
The “Test” option will execute a test. It will power up the replicated virtual machines on the remote site to verify that they are functioning correctly. It’s crucial to note that a segregated network will be attached to these virtual machines (to avoid conflicting with the original ones).
The “Run” option will start the virtual machines’ failover to the remote site:
That’s it for now 😉
vSphere Replication with SRM is a powerful combination that provides a solid disaster recovery approach for companies with multiple sites.
If you have any questions, please don’t hesitate to contact me!
