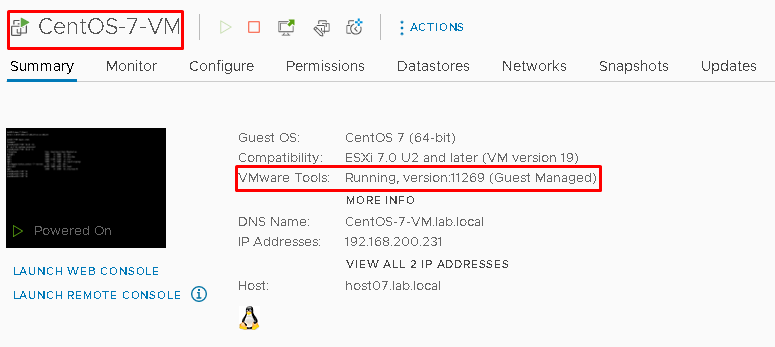
How to install CentOS 7 is a practical guide that explains how to deploy this stable Linux operating system step by step. CentOS has been widely used in server environments because of its reliability, compatibility, and enterprise-focused approach.
CentOS is a Linux distribution based on the Red Hat Enterprise Linux ecosystem and has been available in different variants, including CentOS Linux and CentOS Stream. Each version follows a different development model and can be selected according to the requirements of each environment.
In this tutorial, we will demonstrate how to install CentOS 7 in a virtual machine using VMware vSphere. The process covers the creation of the virtual machine, ISO attachment, operating system installation, and the main configurations required after deployment.
Here, is a short definition from https://www.centos.org/ about both variants of CentOS:
- CentOS Linux: Consistent, manageable platform that suits a wide variety of deployments. For some open-source communities, it is a solid, predictable base to build upon. To download it, please, access the below link:
https://www.centos.org/centos-linux/
- CentOS Stream: Continuously delivered distro that tracks just ahead of Red Hat Enterprise Linux (RHEL) development, positioned as a midstream between Fedora Linux and RHEL. For anyone interested in participating and collaborating in the RHEL ecosystem, CentOS Stream is your reliable platform for innovation. To download it, please, access the below link:
https://www.centos.org/centos-stream/
There are some differences between both CentOS “flavors”. On the below link it’s possible to see more detail about it:
https://www.centos.org/cl-vs-cs/
Creating the Virtual Machine
Our lab is based on vSphere 7. So, first, we will create the Virtual Machine.
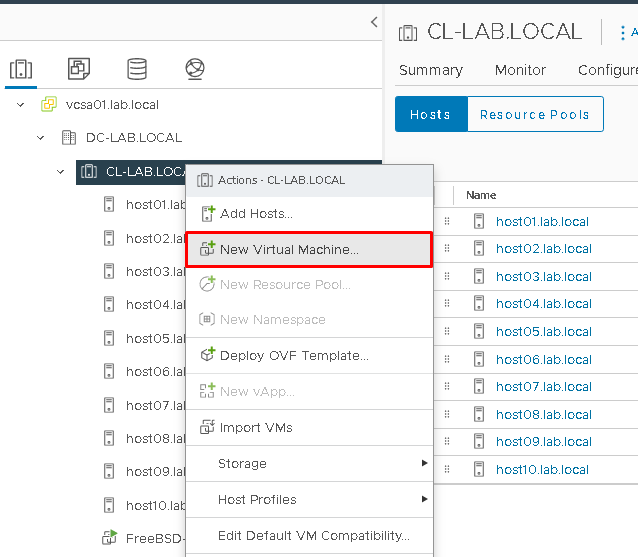
Right-click on the cluster name and then click on the “New Virtual Machine …”:
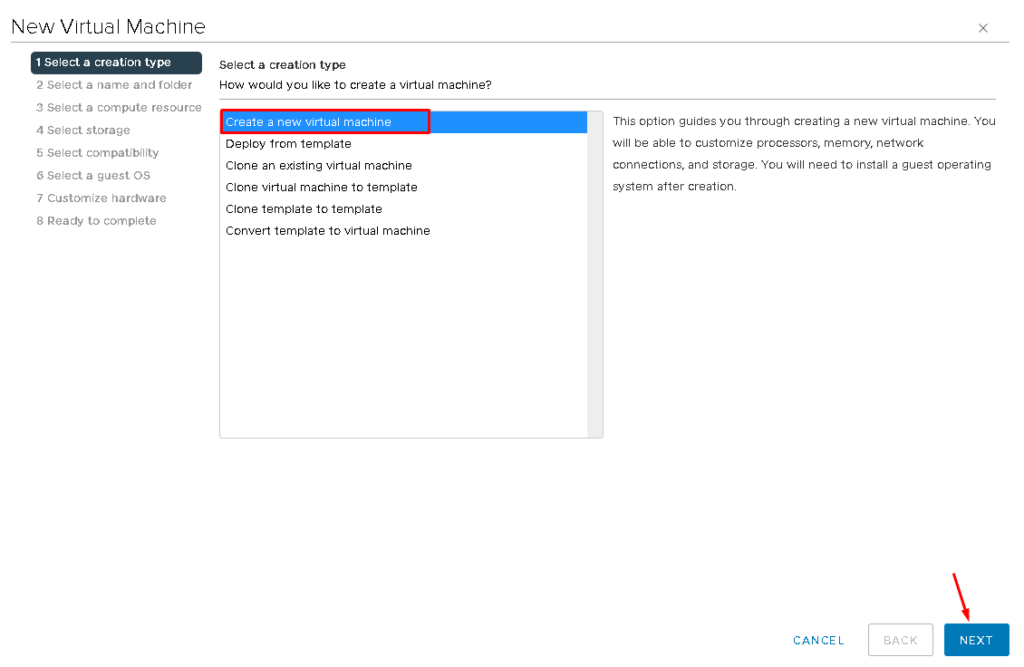
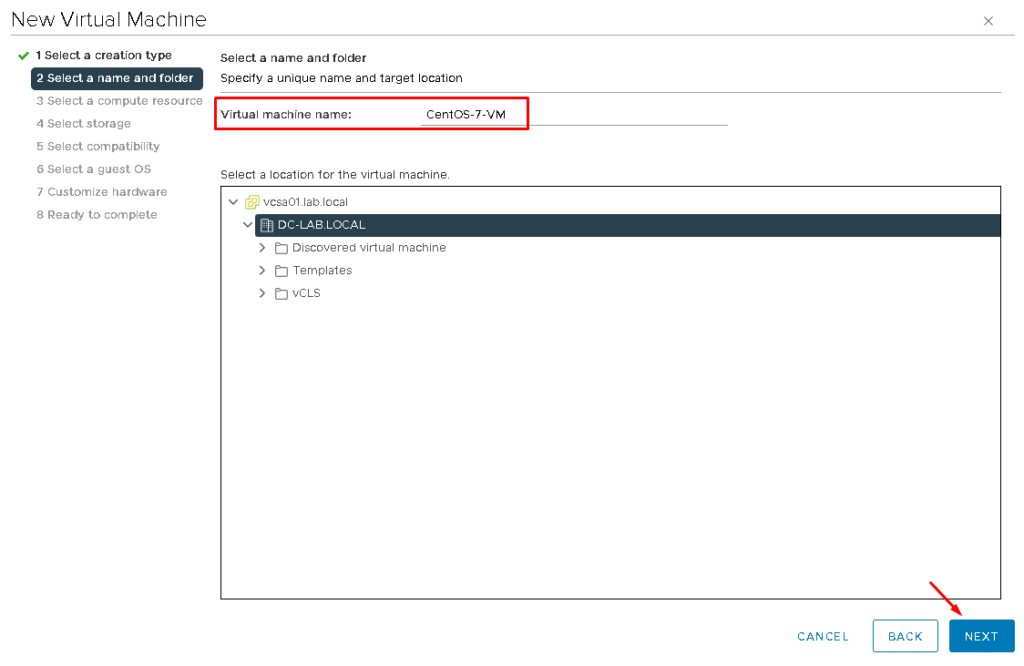
Type the Virtual Machine Name. In this example, the Virtual Machine Name is “CentOS-7-VM”:
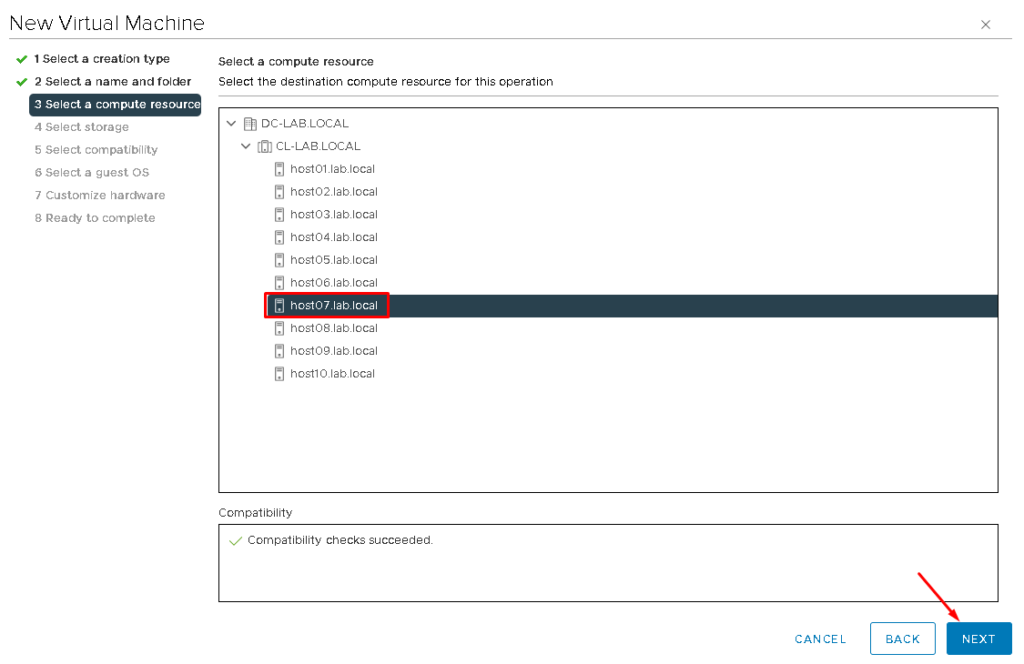
As DRS is disabled, it is not possible to select the cluster object. So, in this case, it’s necessary to select an ESXi host. We are selecting the ESXi “host07.lab.local”. Click on NEXT to continue:
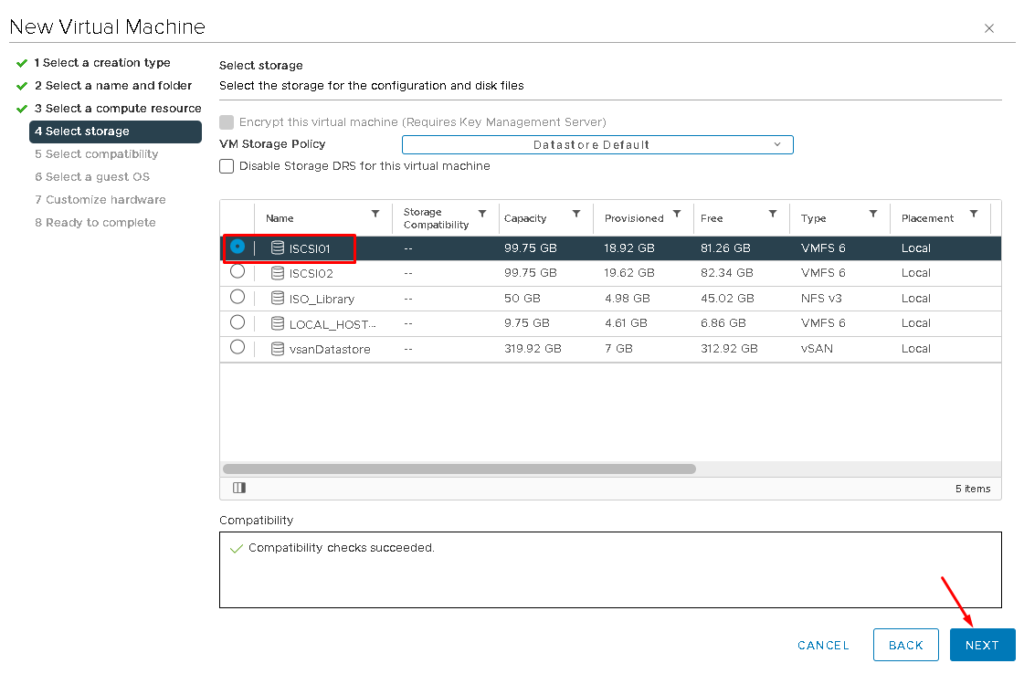
Select the datastore that will use to store this Virtual Machine. In our lab, we are selecting the datastore “ISCSI01”. Click on NEXT to continue:
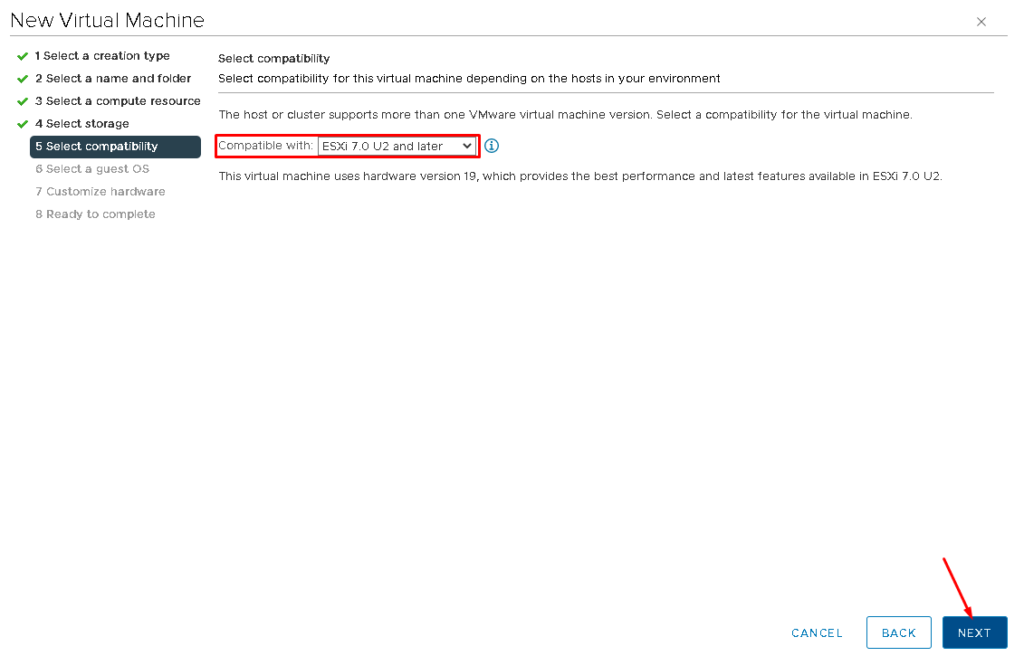
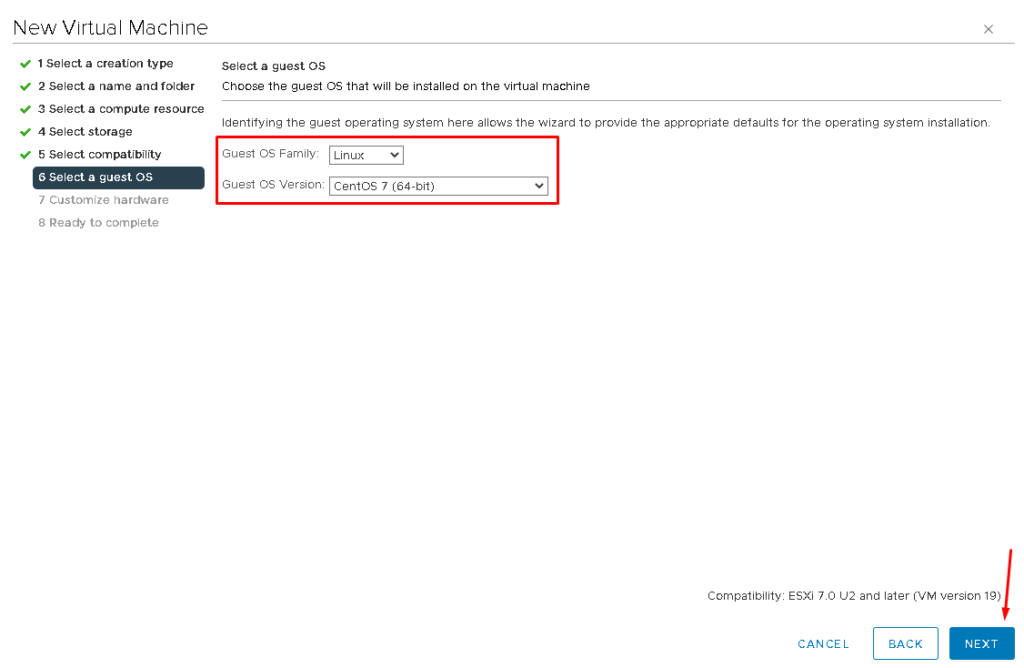
On Guest OS Family select Linux and on Guest OS Version select CentOS 7 (64-bit). After that, click on NEXT to continue:
Now, we need to select the CentOS 7 Installation Media (.ISO file). In our lab, we have an ISO Library. There is an NFS datastore that we are using to store all ISO files used to install some operational systems.
On “New CD/DVD Drive”, click on “Datastore ISO File”:
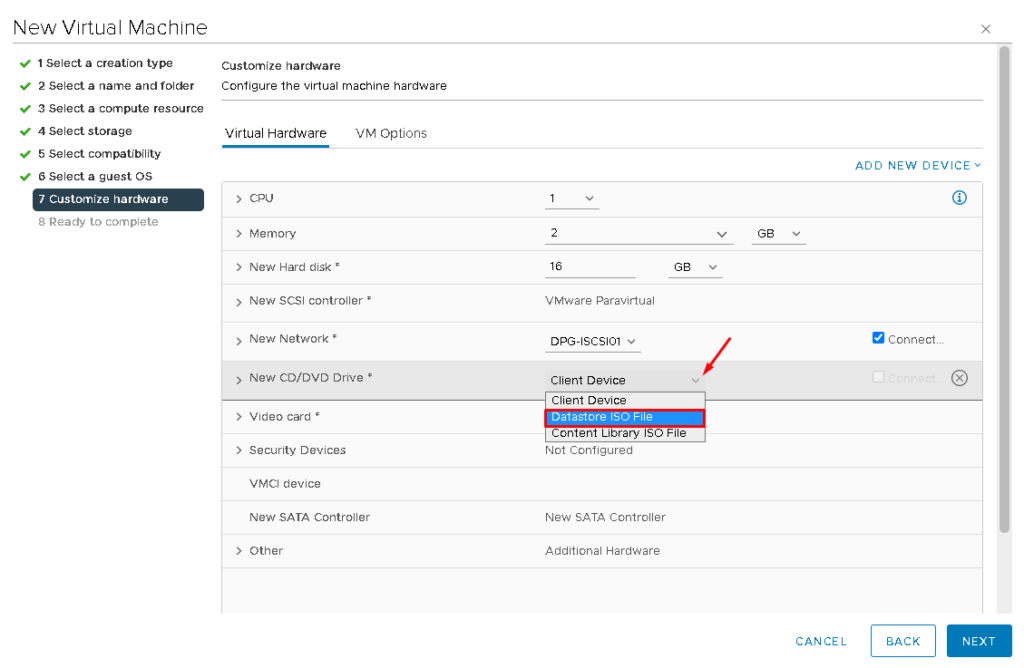
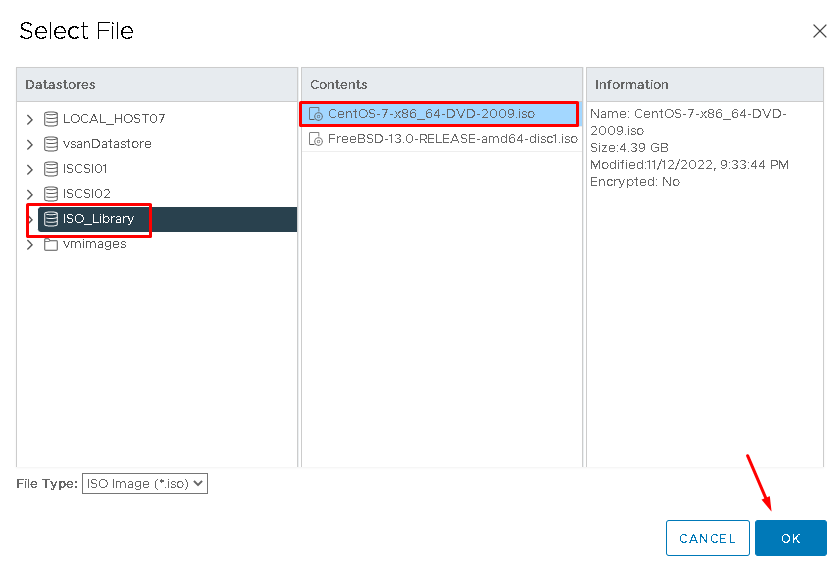
Select the datastore “ISO_Library” and then select the file “CentOS-7-x86_64-DVD-2009.iso” and click on OK:
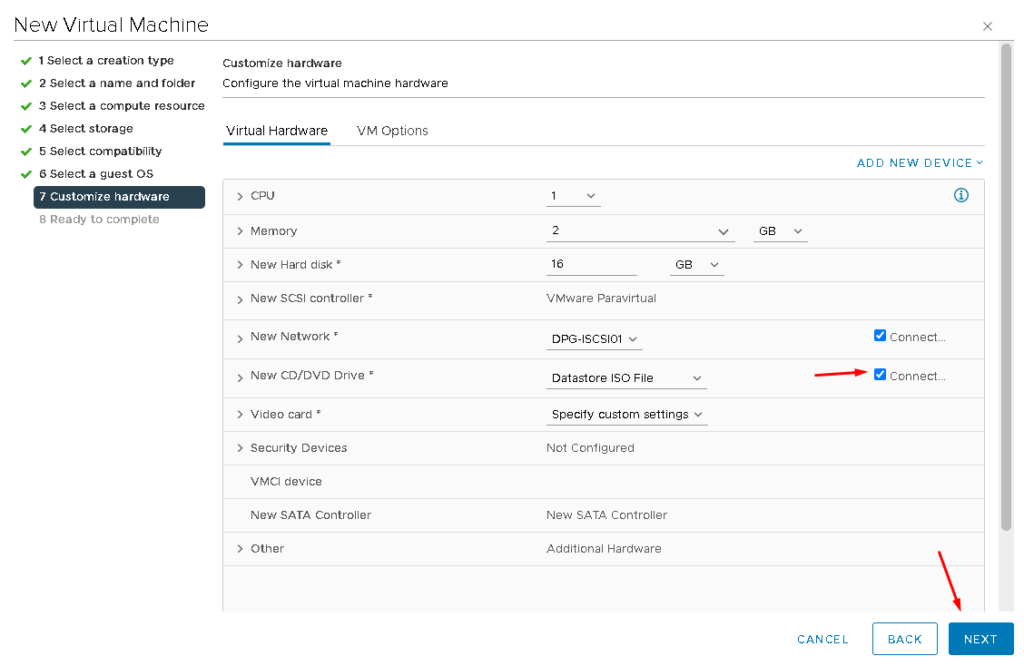
On “New CD/DVD Drive”, mark the box “Connect” to connect the CentOS Installation Media to the Virtual Machine and then click on NEXT to continue the process:
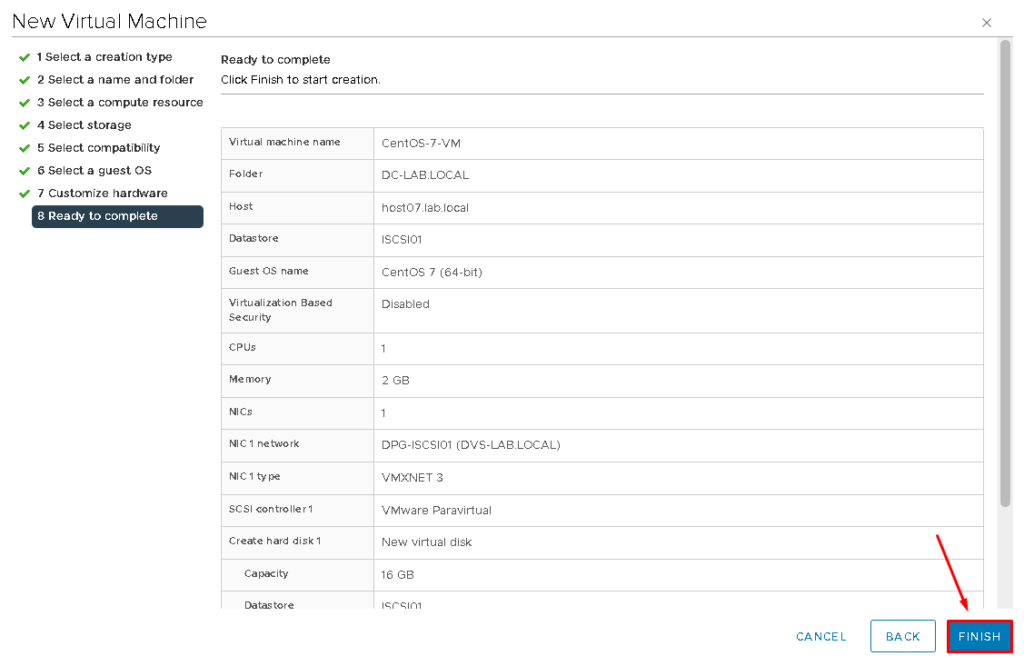
Click on FINISH to finish the Creation Virtual Machine Wizard:
Installing the CentOS
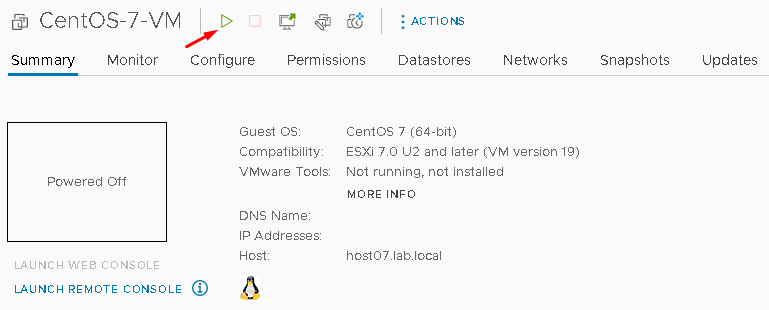
First, it’s necessary to powered-on the Virtual Machine. On the vSphere Client, select the Virtual Machine and then click on the “Power ON” button:
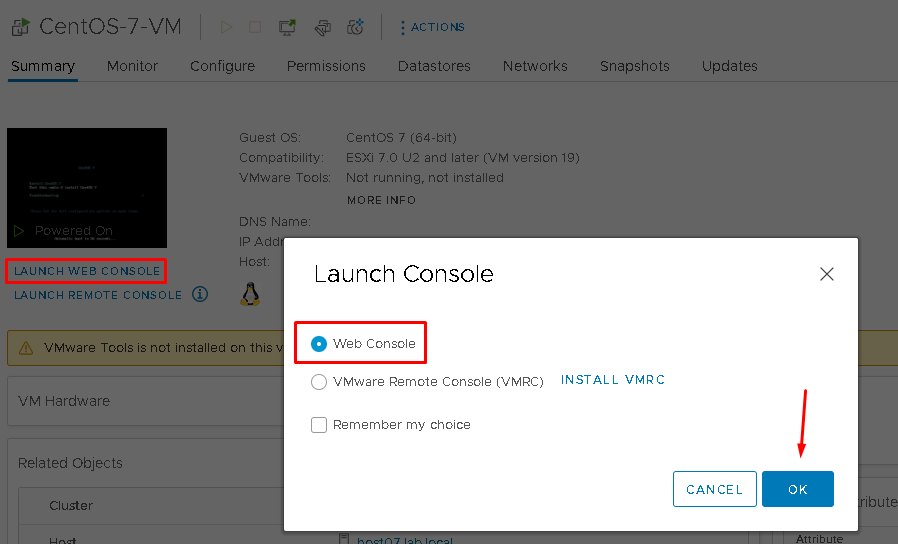
Click on “LAUNCH WEB CONSOLE” to access the Virtual Machine console. Then, click on “Web Console”:
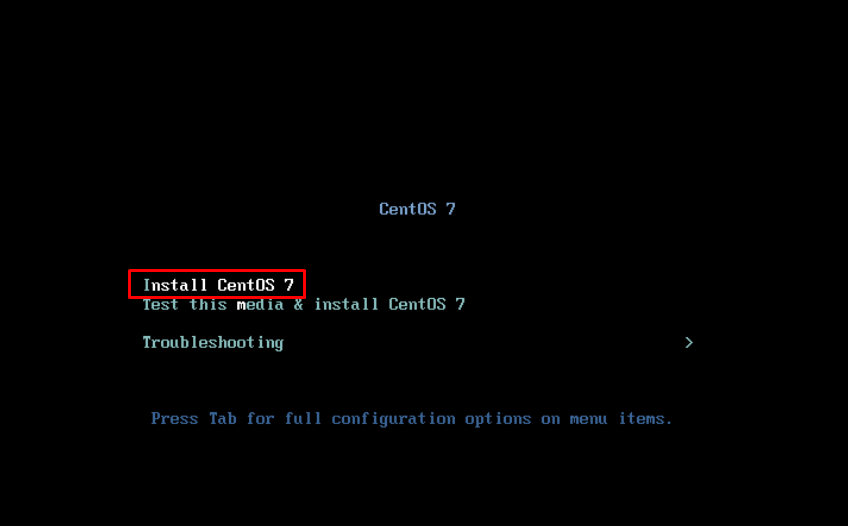
Select “Install CentOS 7” and then press ENTER to start the installation process:
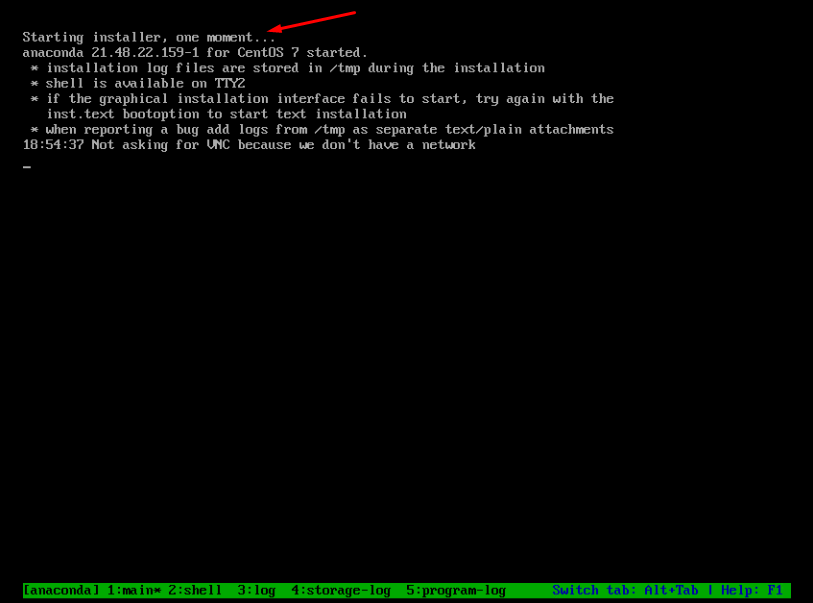
The installer is starting, please wait a few seconds:
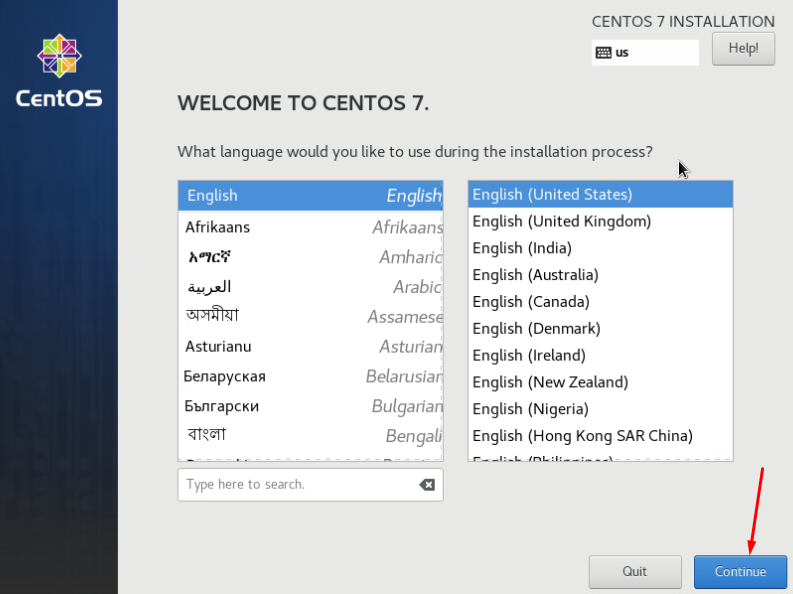
In this step, it’s possible to change the language that will be used during the installation process.
In this example, we are maintaining the English language for the installation process:
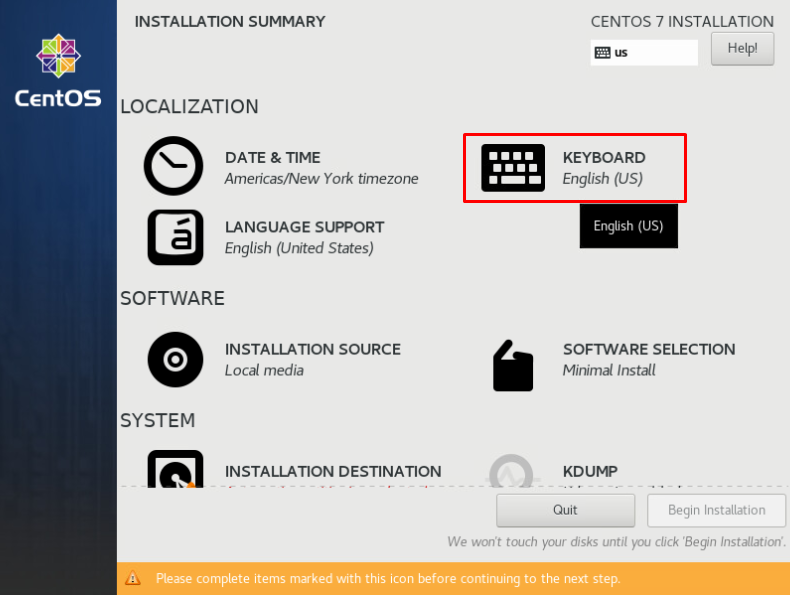
Select “KEYBOARD” and choose the keyboard map accordingly with your keyboard:
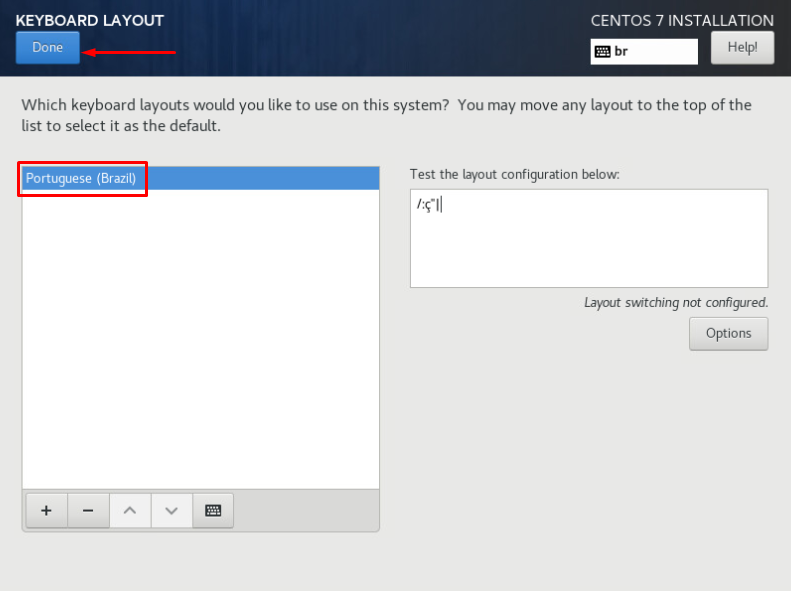
After selecting the keyboard map, you can test this keyboard map in the area “Test the layout configuration below”. It’s a good idea to test the layout before continuing the installation process:
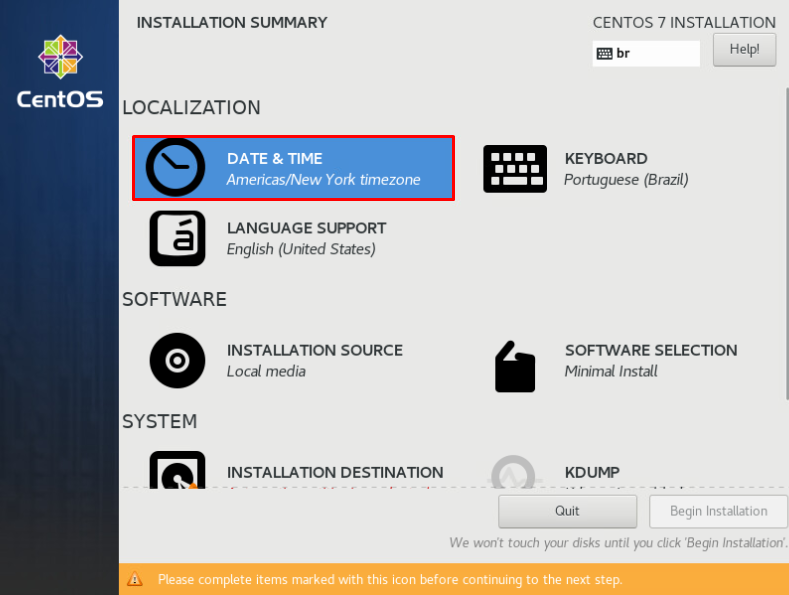
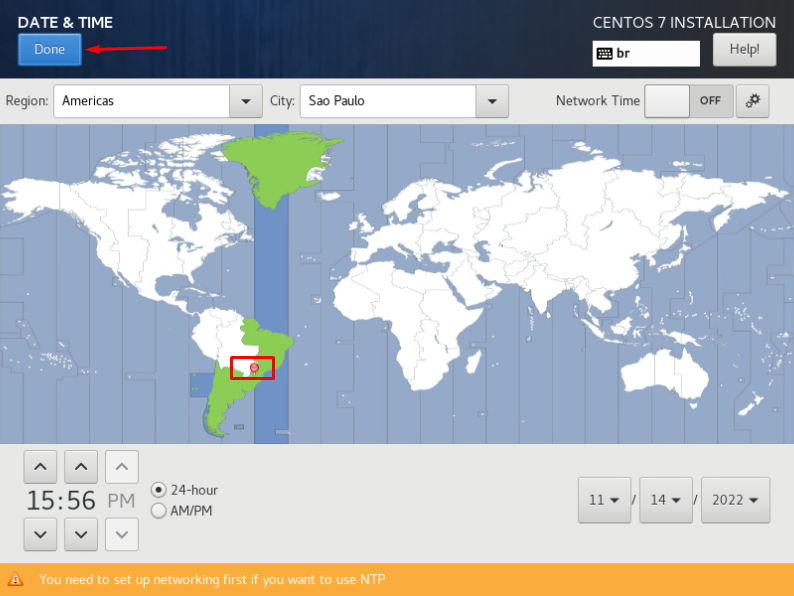
Select “DATE &TIME” to choose your preferences related to date and time:
In our lab, Region is Americas and City is Sao Paulo. Click on “Done” to continue:
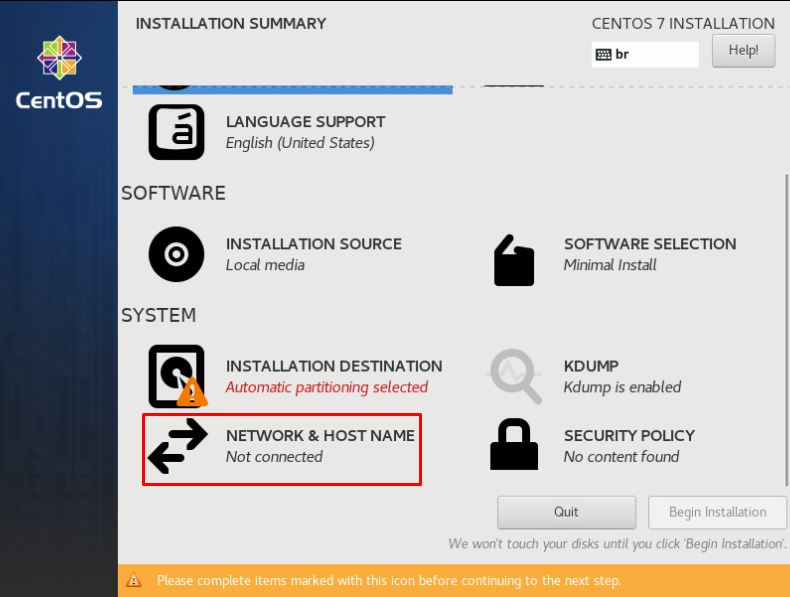
Select “NETWORK &HOST NAME” to configure networking details and set the hostname for this Virtual Machine:
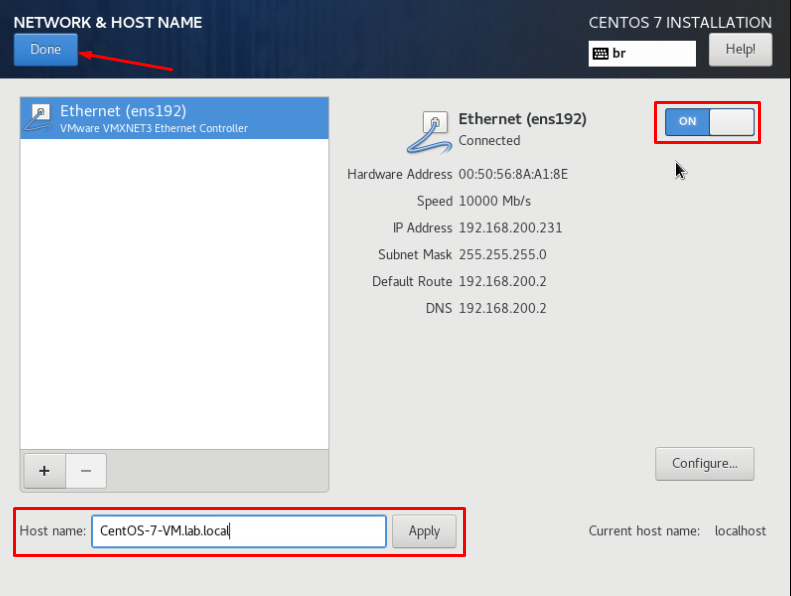
To activate the network interface, enable the KEY from OFF to ON.
Type the Virtual Machine hostname and click on “Apply”. After that, click on “Done” to continue the installation process:
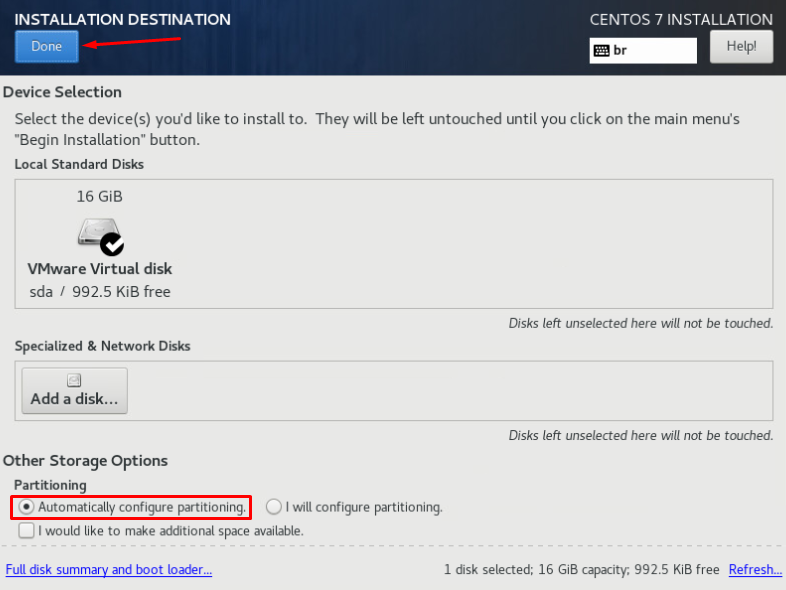
Select “INSTALLATION DESTINATION” to select the disk and partition details.
In this case, we have only one disk and we are selecting the automatic mode to create the disk partitions:
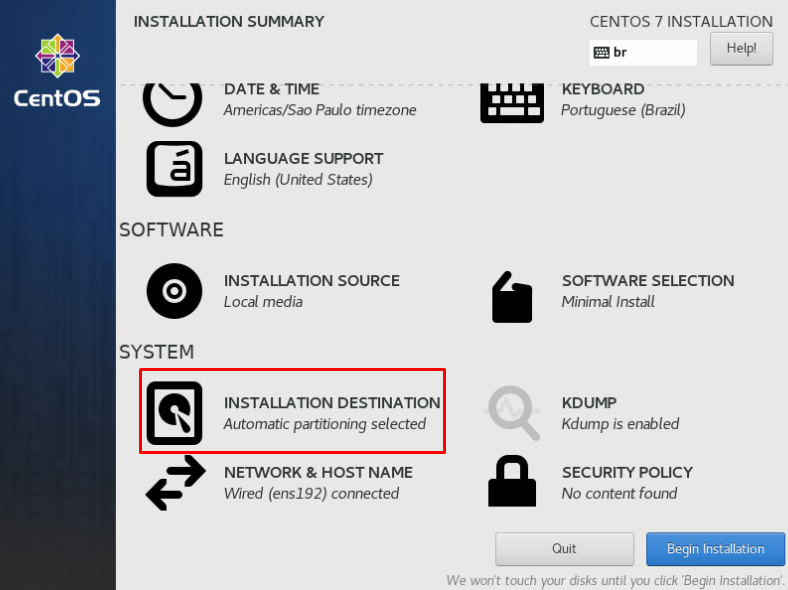
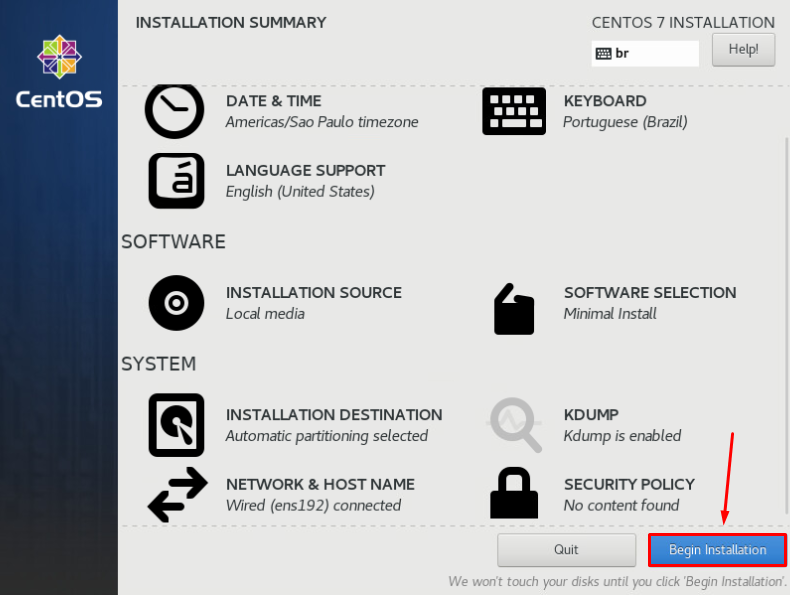
Click on “Begin Installation” to start the installation process:
During the installation process, it’s necessary to define the password for the root user account.
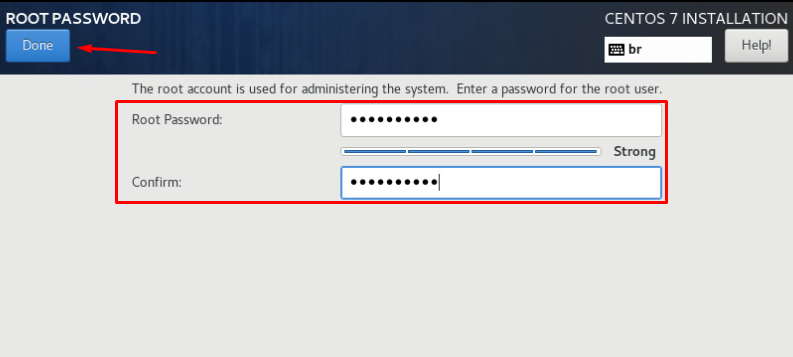
Select “ROOT PASSWORD” and type the root password. Pay attention because is necessary to repeat the root password to validate it:
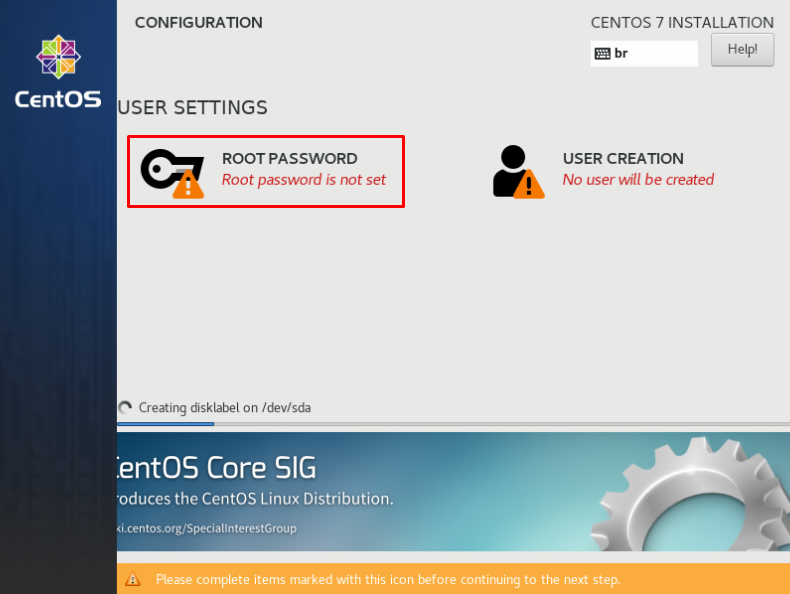
It is not necessary to create an additional user account at this moment. But, if you want, click on “USER CREATION” to do it. In this case, we will not do it now:
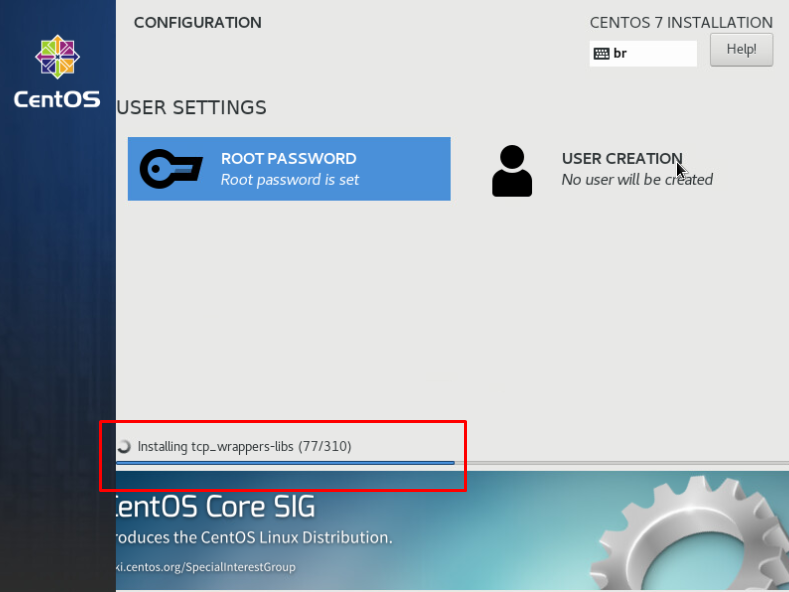
After a few minutes, the installation process will be finished.
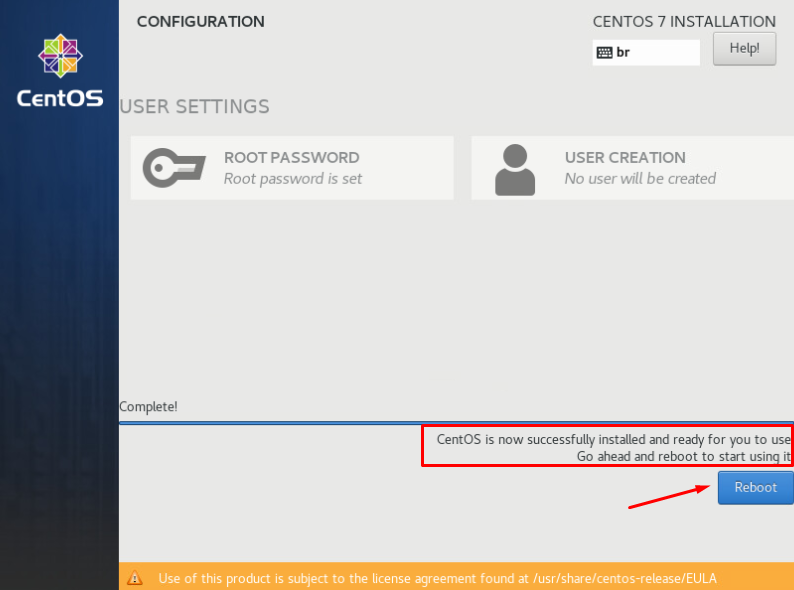
We will receive a message informing us about it, like the picture below. So, click on “Reboot” to reboot the Virtual Machine and boot it from the disk:
So, here, we logged in with success in our CentOS system:
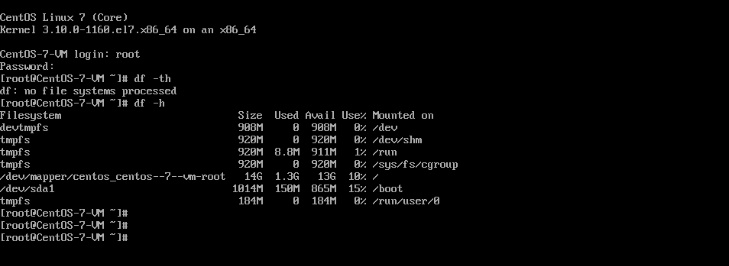
Note: By default, this version of CentOS has Open VM Tools installed: