Creating a Backup of vCenter Data is a way to create regular backups of the vCenter Data and, of course, create a possibility to recover the vCenter if necessary.
I rarely see this resource configured, but, it is an excellent way to get regular backups of the vCenter. This backup is like a “File-Based Backup” and, to restore, you need to deploy the vCenter Server. On STAGE 2, select the restore option and select this backup bundle.
We will create an NFS share and we will use this share to store all vCenter Server backups. In this lab, TrueNAS will provide the NFS share.
To get more details about the TrueNAS install process, you can check HERE.
To get more details about the vCenter Server install process, you can check HERE:
Creating a ZFS Dataset
Before Creating a Backup of vCenter Data, the first step is to create the ZFS Dataset. This is a logical structure necessary to create the NFS share. In this lab, our TrueNAS has a ZFS Pool called “CLUSTER-LAB.LOCAL”. So, select the ZFS Pool, click on the 3 dots, and select Add Dataset:

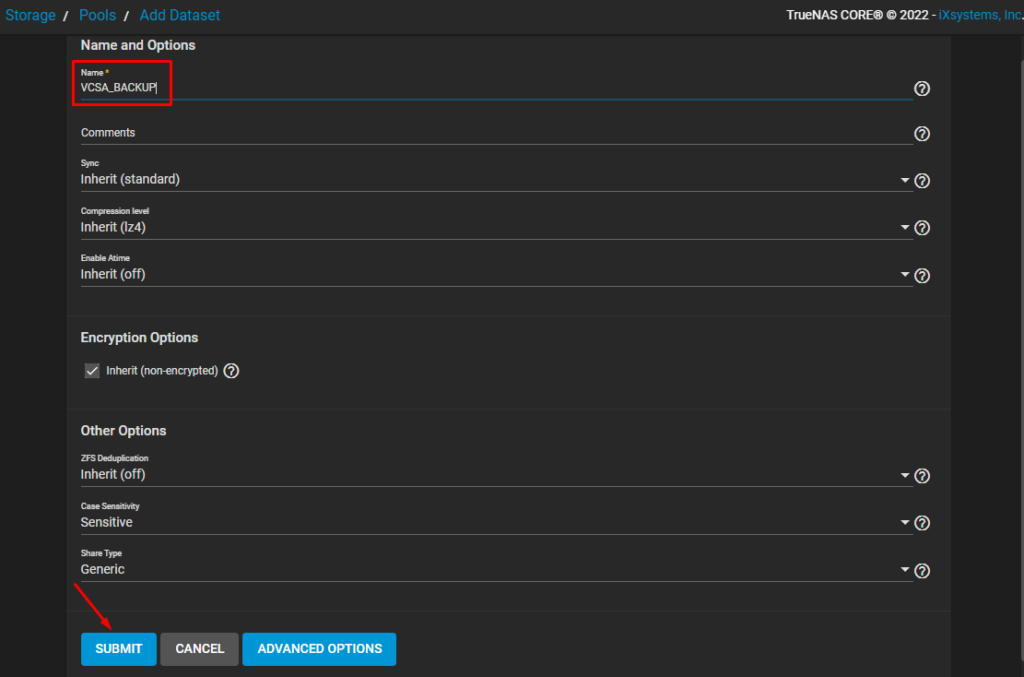
Type the name of the ZFS Dataset. For instance, our ZFS Dataset is “VCSA_BACKUP”. Click on “SUBMIT”:
Creating an NFS Share
The next step is to create the NFS share. So, go to the menu “Sharing –> Unix Shares (NFS) –> ADD” to add a new NFS share.
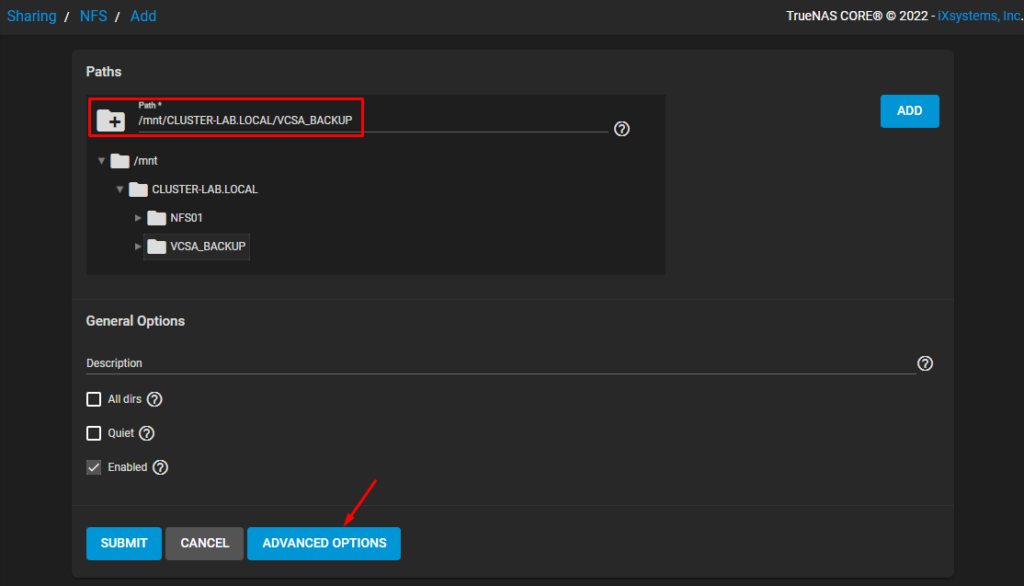
On Path, is necessary to put the complete path of the ZFS Dataset mount point. Click on ADVANCED OPTION to expand more options to configure this share:
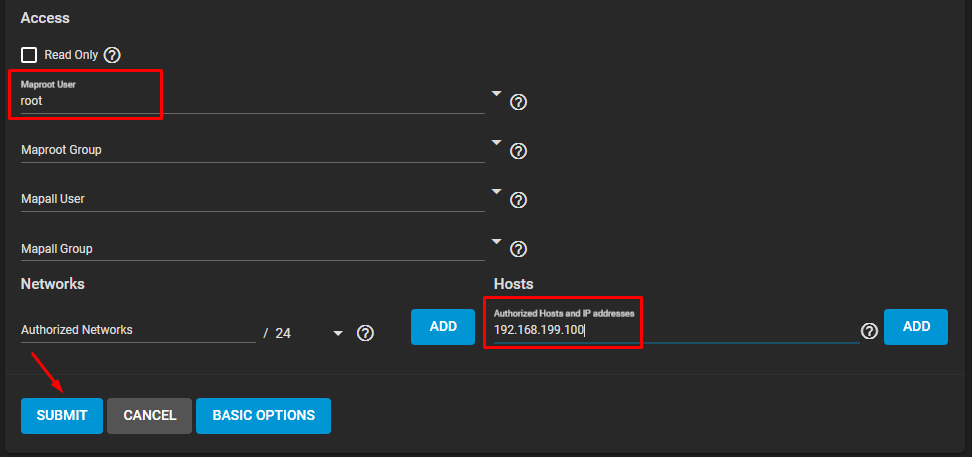
On “Maproot User” select the root username. This configuration will permit the share to be mounted with root privileges.
On “Authorized Hosts and IP addresses” type the IP address of the vCenter Server. In this lab, the management IP of the vCenter Server is 192.168.199.100.
Click on SUBMIT:
After that, is possible to see the share:

Configuring the Backup Schedule on the VAMI
Access the vCenter VAMI. In this lab, the address of the vCenter Server is:
https://vcenter7.lab.local:5480
Where:
5480 –> Logical port used by VAMI service
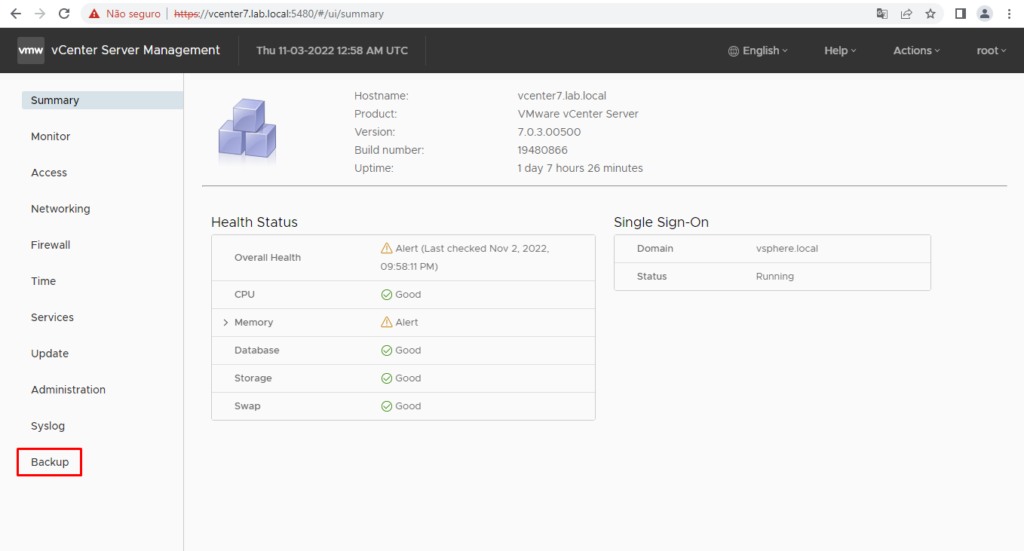
Select the menu Backup:
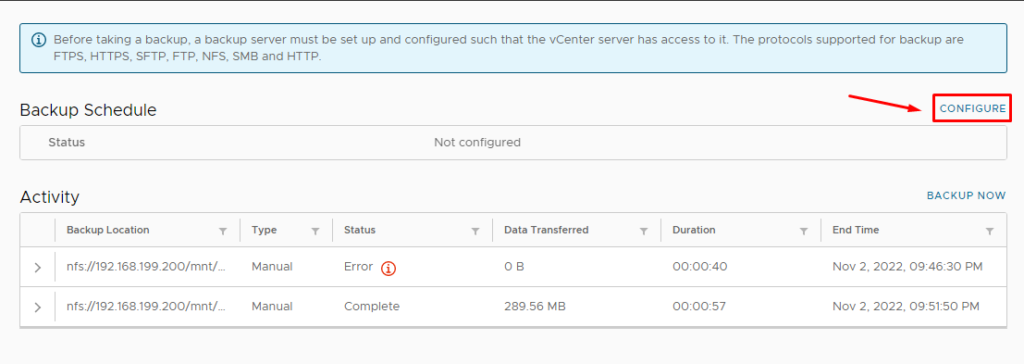
On Backup Schedule, select “CONFIGURE”:
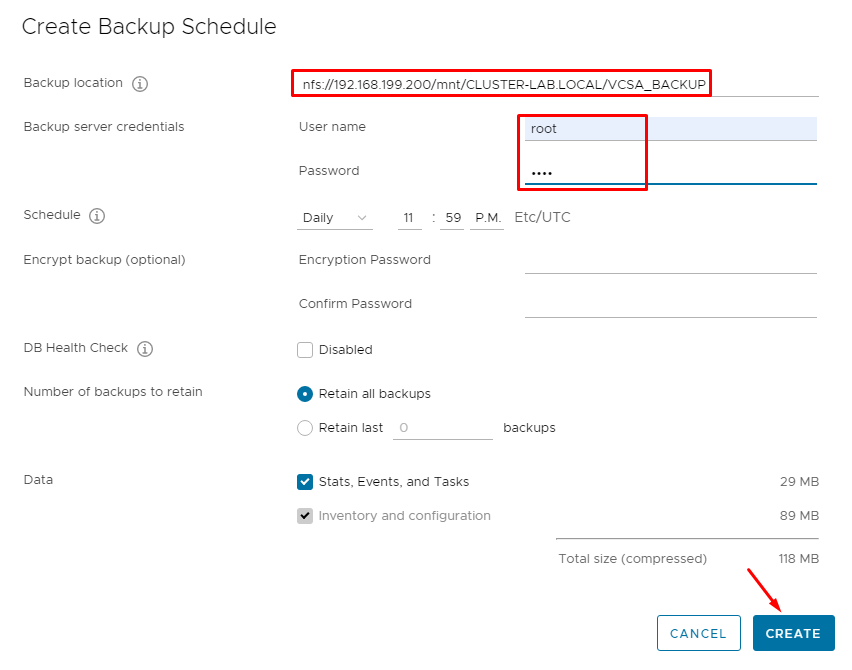
Here, we can configure the backup schedule. A lot of details are necessary, but we go explain them in a bit.
On the Backup location is need to put the location where the Backups will be stored. In this case, for instance, we are using the NFS protocol. The syntax of this protocol is:
nfs://IP_NFS_SERVER/PATH_SHARED
In our case, the backup location is:
nfs://192.168.199.200/mnt/CLUSTER-LAB.LOCAL/VCSA_BACKUP
When:
192.168.199.200 –> IP address of the NFS Server (TrueNAS)
/mnt/CLUSTER-LAB.LOCAL/VCSA_BACKUP –> Path for the NFS Share
On the Backup server credentials, put the user name “root” and put any data to the password (the password will not validate to mount the share in this case).
Customize the other options as necessary or personal preferences and click on CREATE:

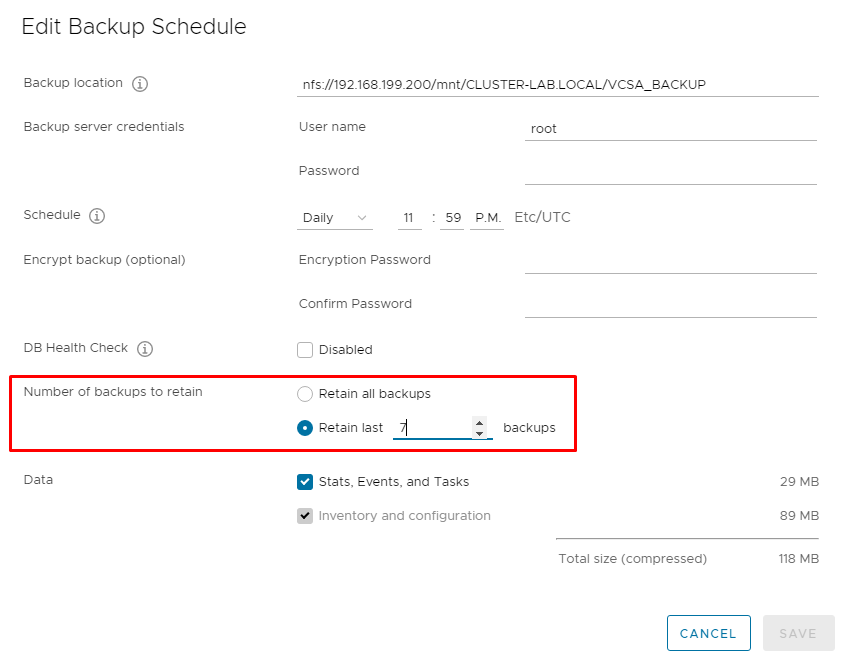
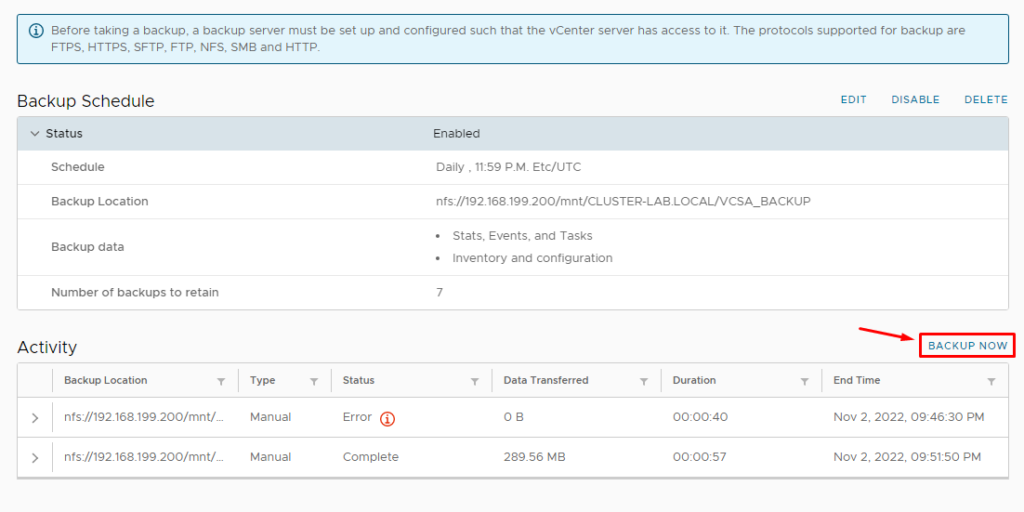
By default, all backups will be retained. But, if you prefer to maintain only 7 backups, for instance, you can change the option “Number of backups to retain” on the Backup Schedule, such as the picture below:
Performing a manual backup to test
It is possible to run the backup now, independent of the Backup Schedule.
On the Activity session, click on BACKUP NOW:
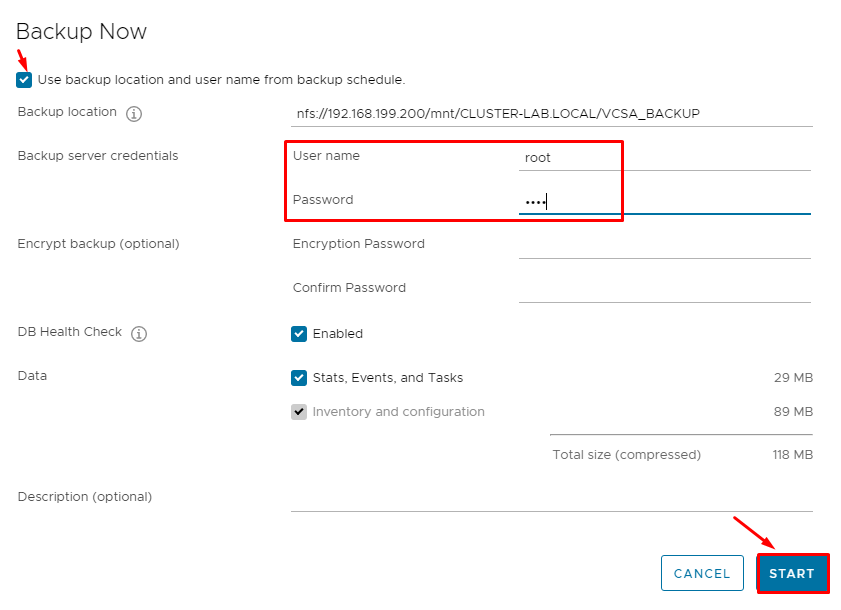
Mark the option to use the backup location present on the Backup Schedule, put the root username and any data on the password, and click on START:
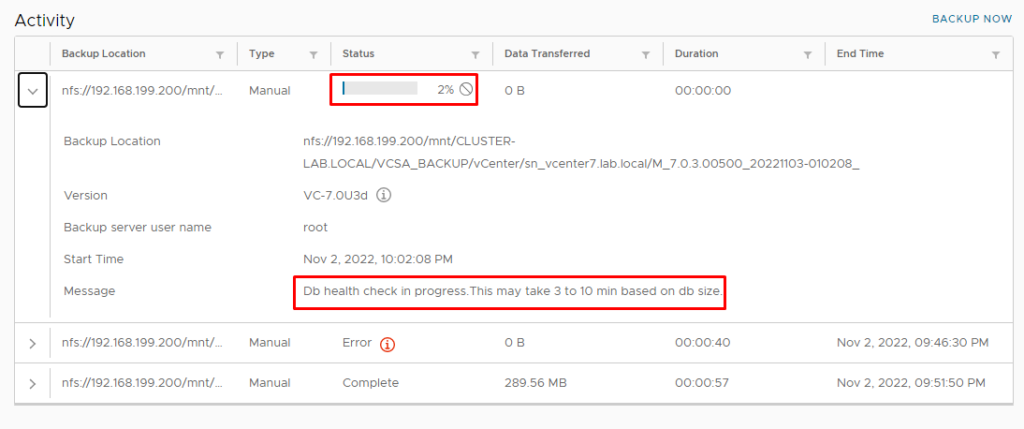
Due to the DB health process, the copy will not start until this step is finished:
Here we can see the data transfer in progress:

Here we can see that the process is finished:

Note: To restore this data, the new vCenter Server must be the same version and build.
Seeing the vCenter Backup on TrueNAS CLI
We can access the TrueNAS by SSH and see the vCenter Server backup inside the mount point of the ZFS Datastore.
The “df- Th” command shows all mount points. In this lab, the mount point “/mnt/CLUSTER-LAB.LOCAL/VCSA_BACKUP” is used to store the vCenter Server backups:

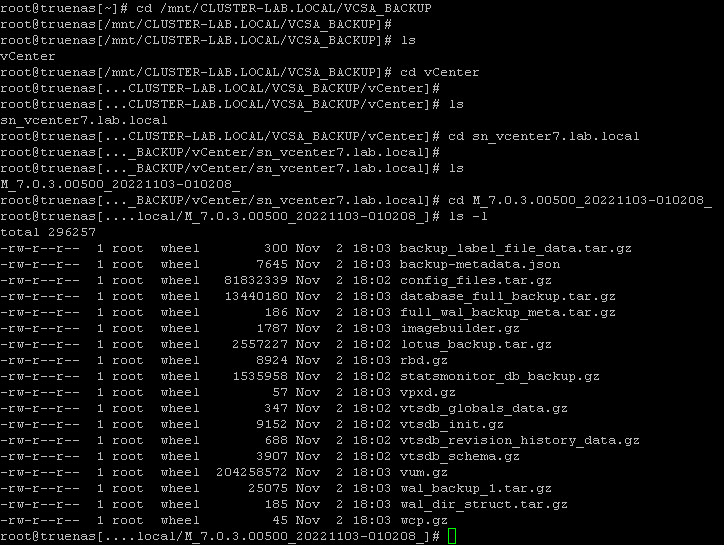
We can access this directory and see the vCenter Server backup files 🙂 :
Checking the Backup History
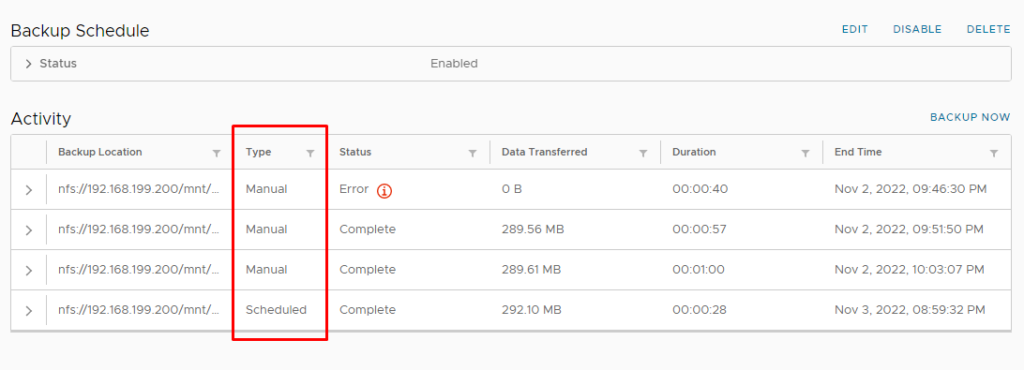
On the Activity session, it is possible to see what backup was performed by the administrator or was performed by schedule.
The column “Type” shows these details. In this case, for instance:
Manual = Backup performed by the administrator
Scheduled = Backup performed by the system (via schedule)
