

How to install vCenter 7 is a step-by-step guide that explains how to deploy the vCenter Server Appliance in a laboratory environment. This tutorial demonstrates the installation process using VMware Workstation, but the main concepts can also be applied to other virtualization platforms.
The vCenter Server Appliance provides the management interface for VMware vSphere environments, allowing administrators to manage ESXi hosts, clusters, virtual machines, and other infrastructure components from a centralized platform.
In this article, we will install vCenter 7 by deploying the appliance from an ISO file, configuring the required network settings, completing the initial setup through the VAMI interface, and accessing the vSphere Client for administration.
Mounting and deploying the vCenter Server Appliance
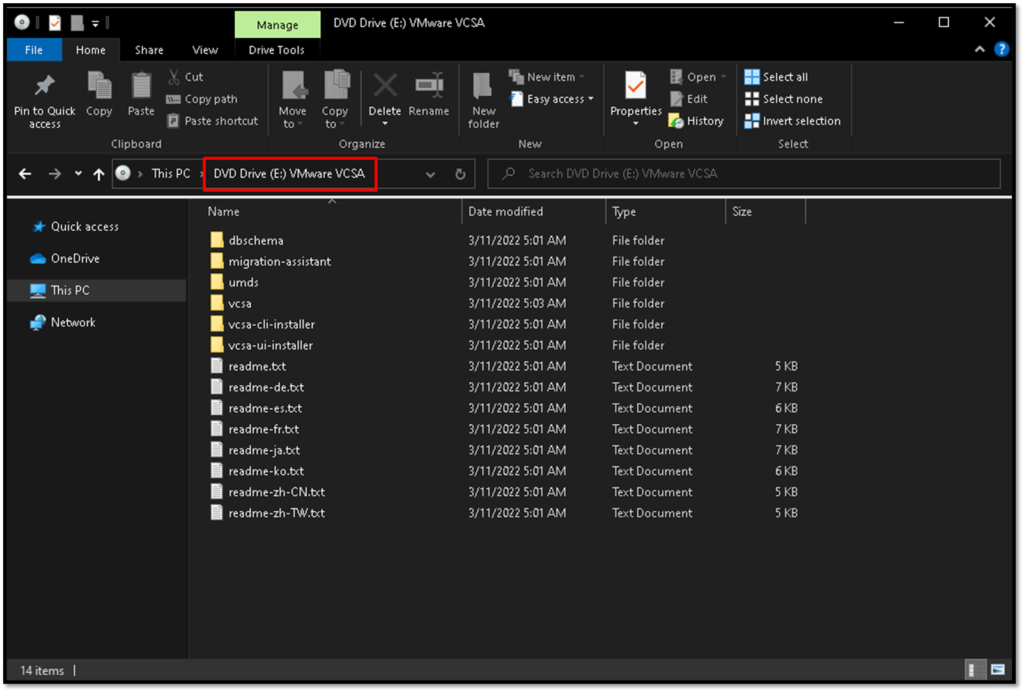
The first step is to mount the vCenter Server iso file on your computer. In this example, as I’m using Windows 10, I double-clicked on the iso file to mount that:
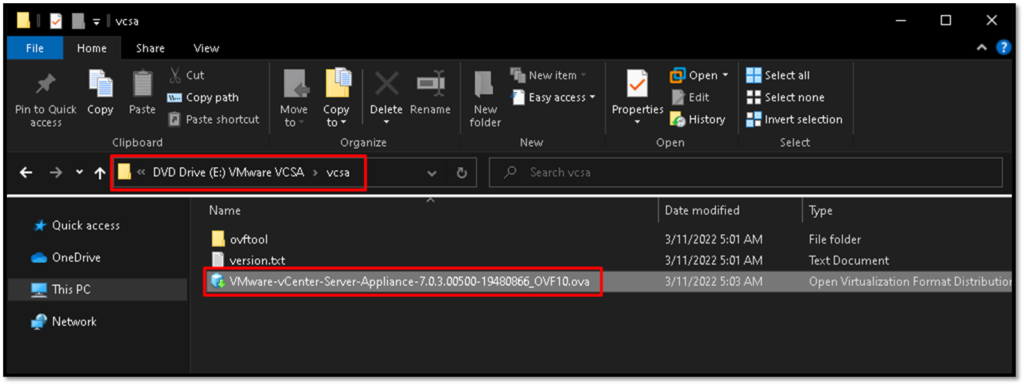
Under the “vcsa” directory we have the OVA file that we will use to deploy the vCenter Server Appliance on VMware Workstation:
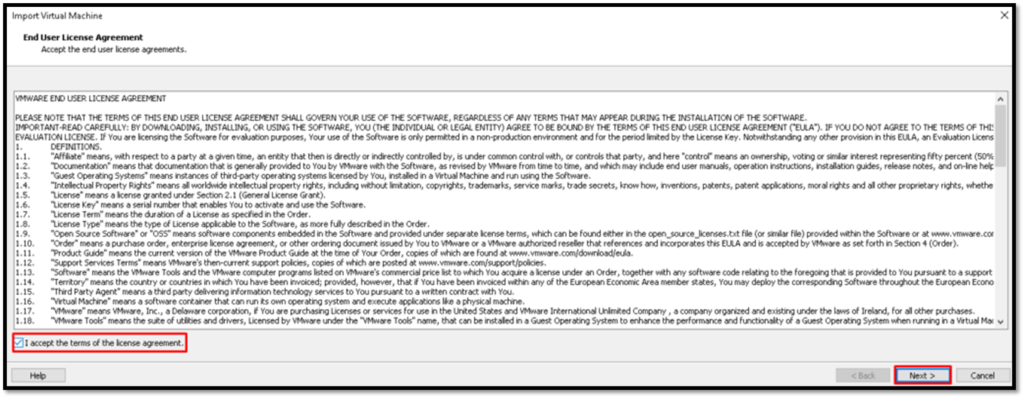
Double-click on the OVA file to start the deployment process. Accept the terms of the license agreement and click on Next:
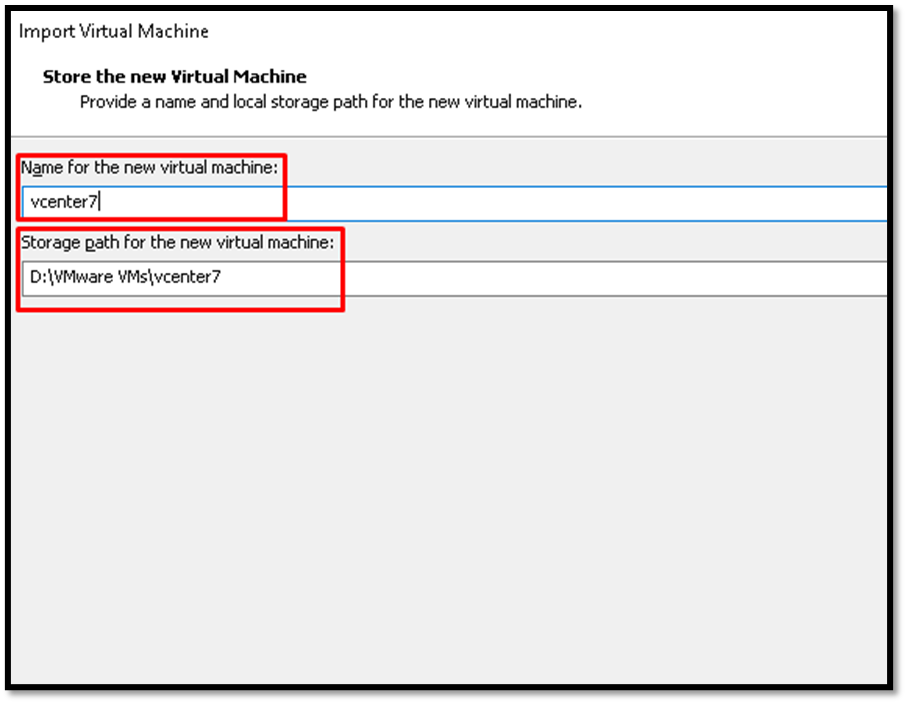
Type the Virtual Machine Name and the Location on your computer where the VM files will be storage:
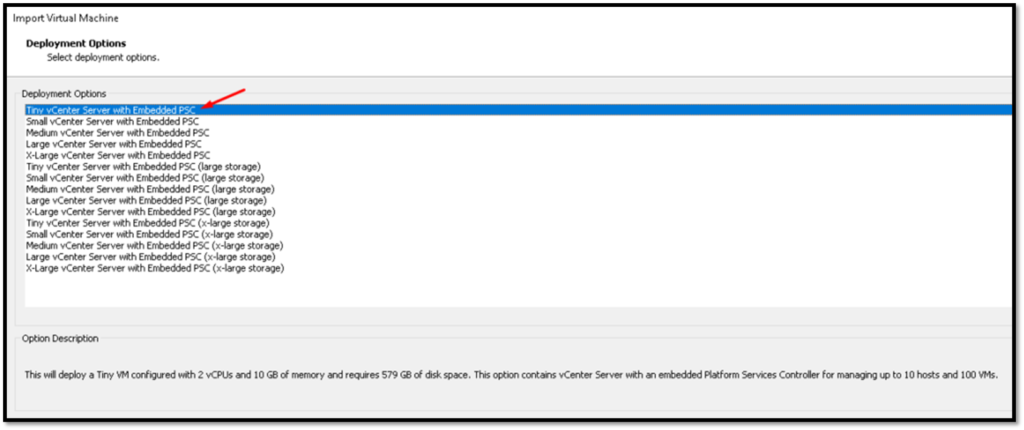
Select the vCenter Server size. There are several options for the deployment of the vCenter Server Appliance. In this example, we will use the first and small option called “Tiny vCenter Server with Embedded PSC”:
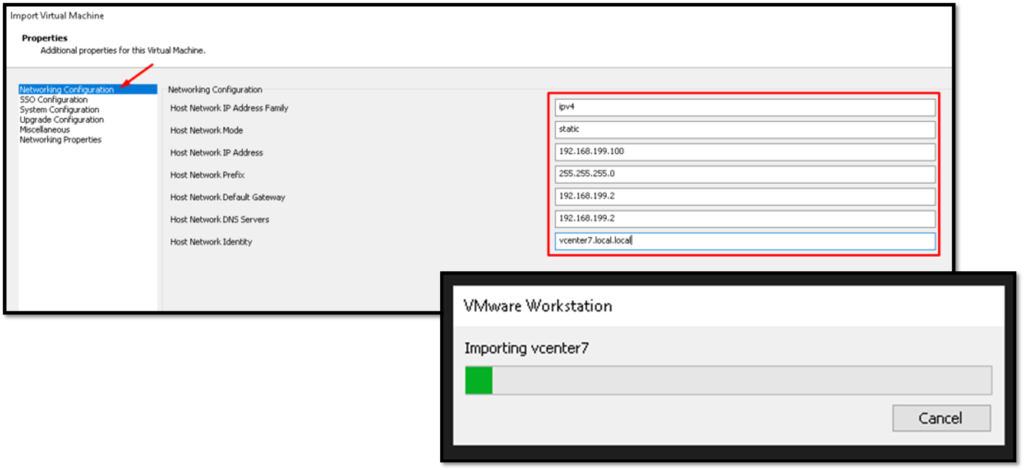
On the “Network Configuration” type all details about the vCenter Server Appliance, such as IP Address, Network Prefix, Default Gateway, DNS Servers, etc. After that, click on “Import” to start the deployment process of the vCenter Server Appliance.
Note: We MUST use a valid DNS Server here, however, the installation process will fail. On the DNS Server, is necessary to create an “A” register and a “PTR” register to the vCenter Server:
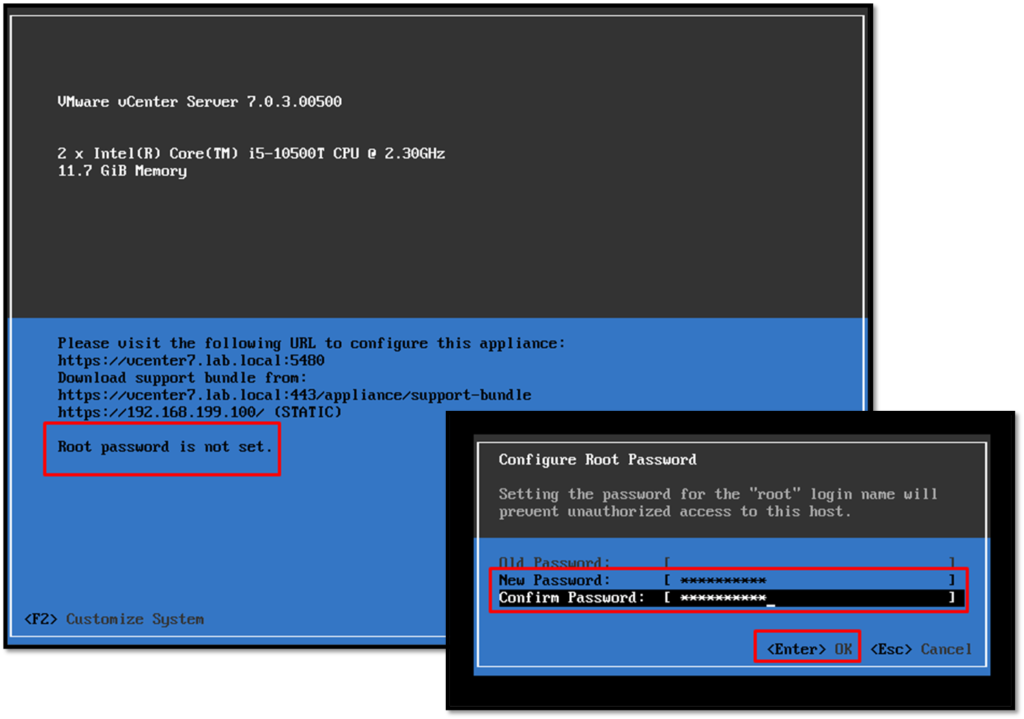
A few minutes later, we can see the vCenter Server console.
The root password is not set. So, is necessary to press “F2” to set up the root account password:
Access the vCenter Server VAMI (vCenter Appliance Management Interface)
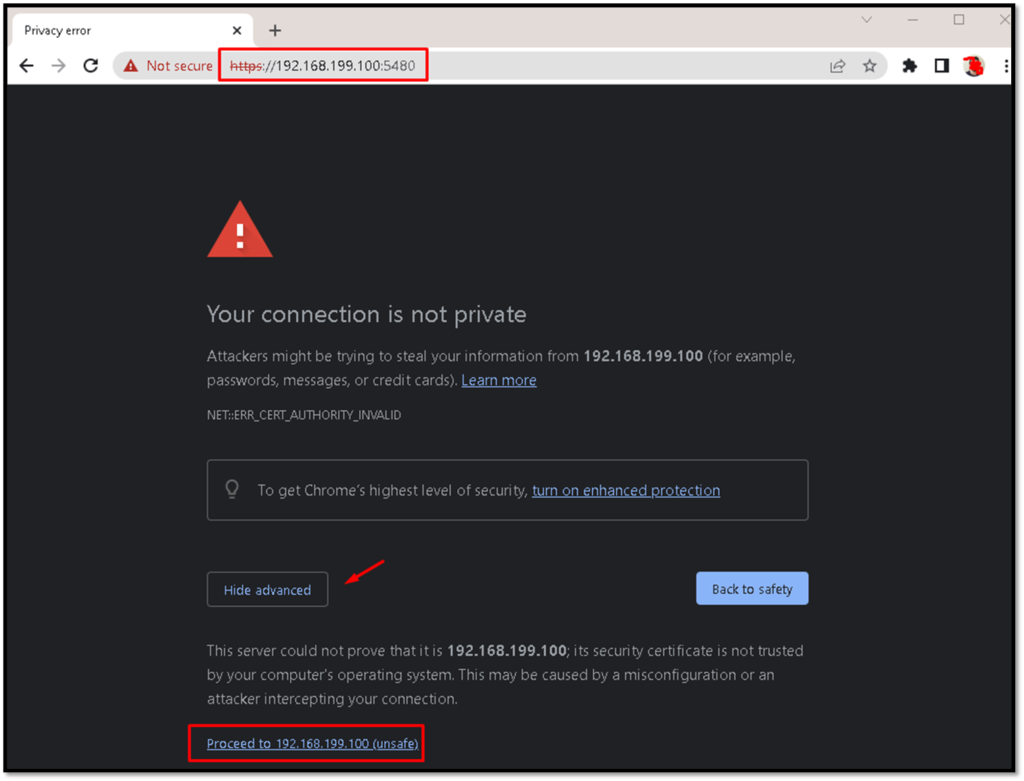
The next step is to open the VAMI (vCenter Appliance Management Interface). We can do it with https://IP_VCENTER:5480.
In this case, the vCenter IP Address is 192.168.199.100, so the address to access the VAMI is https://192.168.199.100:5480.
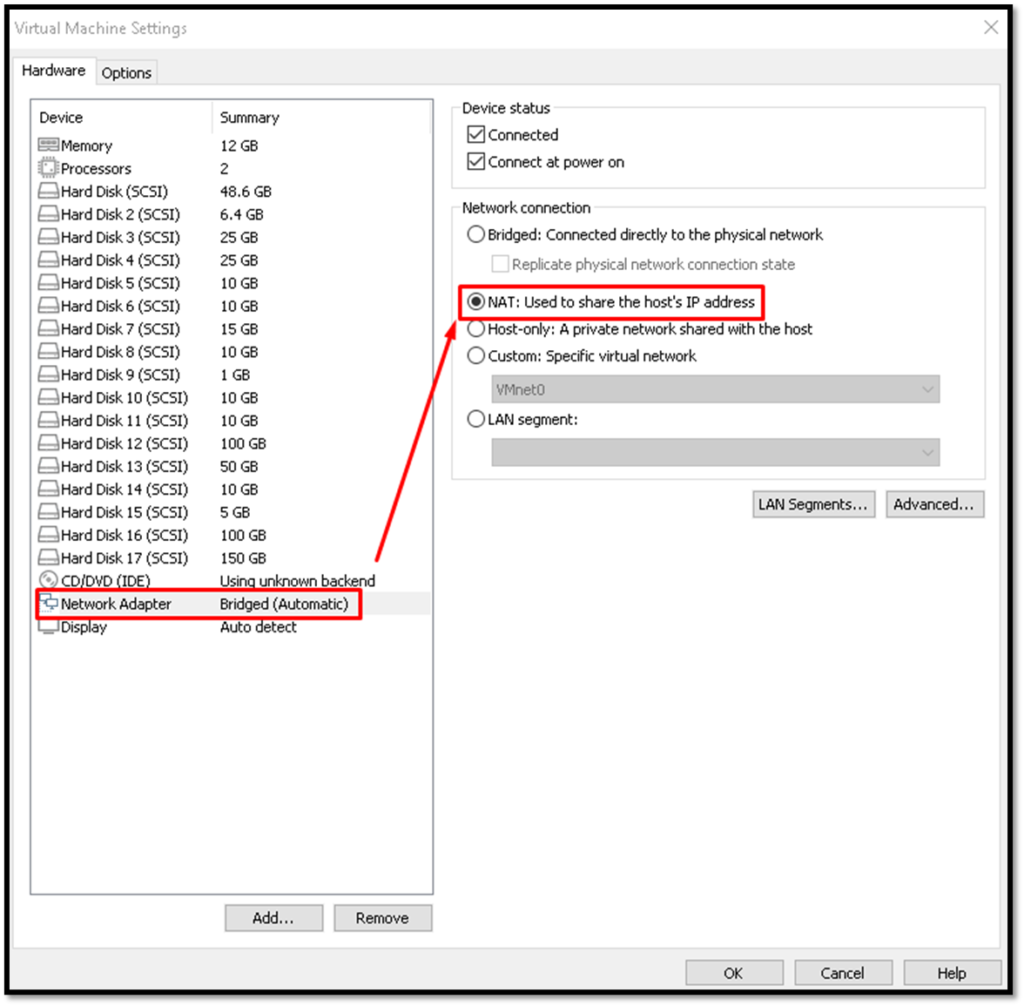
Before accessing the VAMI, we need to change the network mode from “Bridge” to “NAT” in the Virtual Machine settings on the VMware Workstation:
Accept the warning message related to the certificate alert to proceed with login:
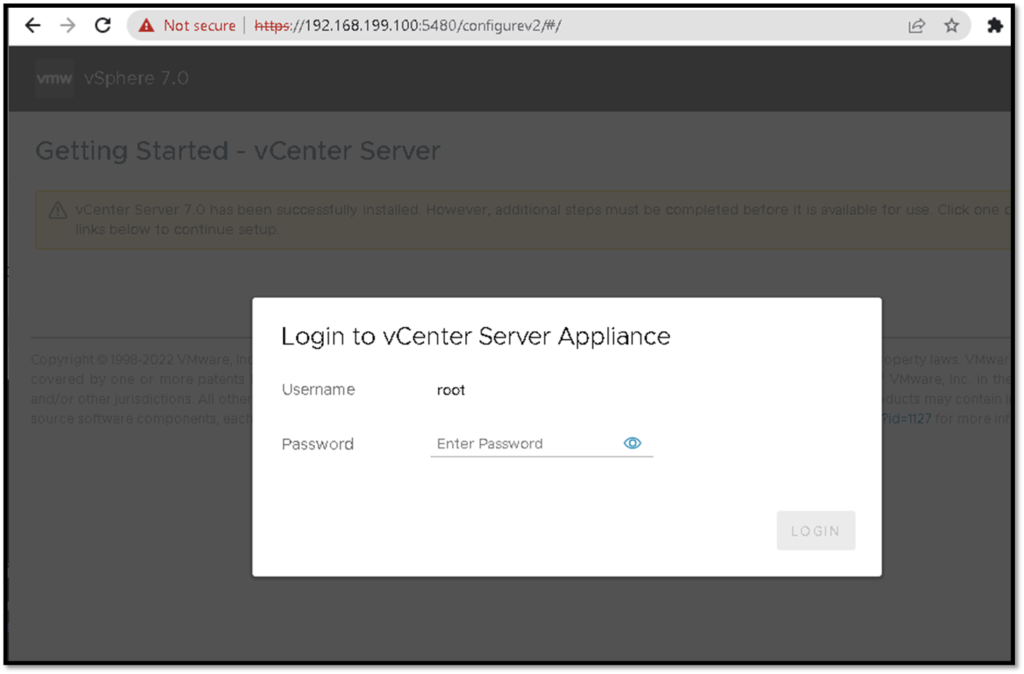
Put the root password defined before:
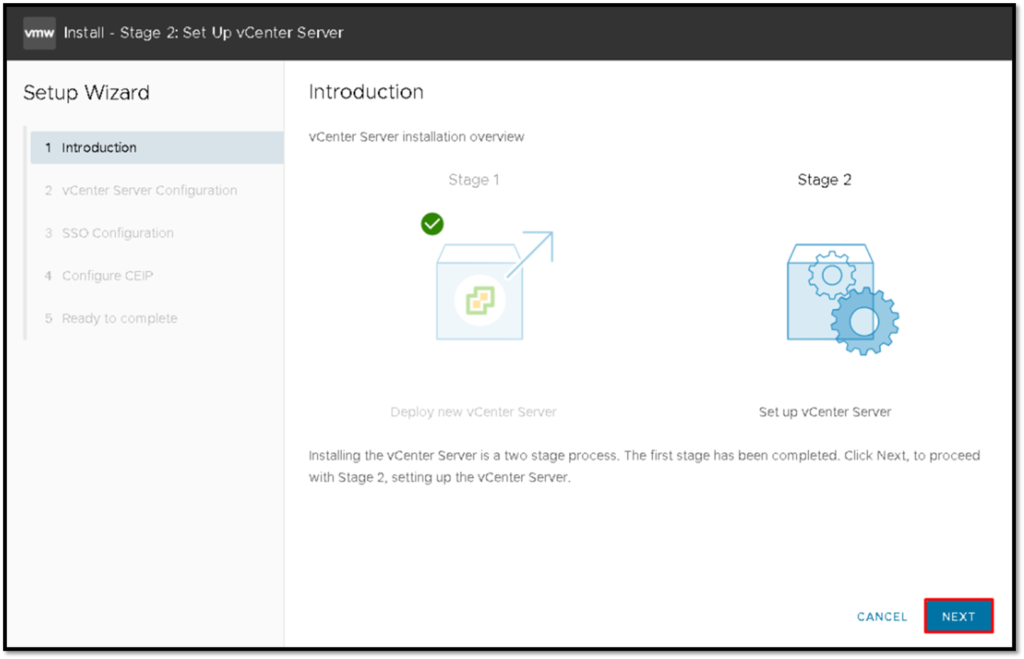
STAGE 1 of the vCenter Server installation has been finished. The second step is “Setup” the configuration, or STAGE 2 as known:
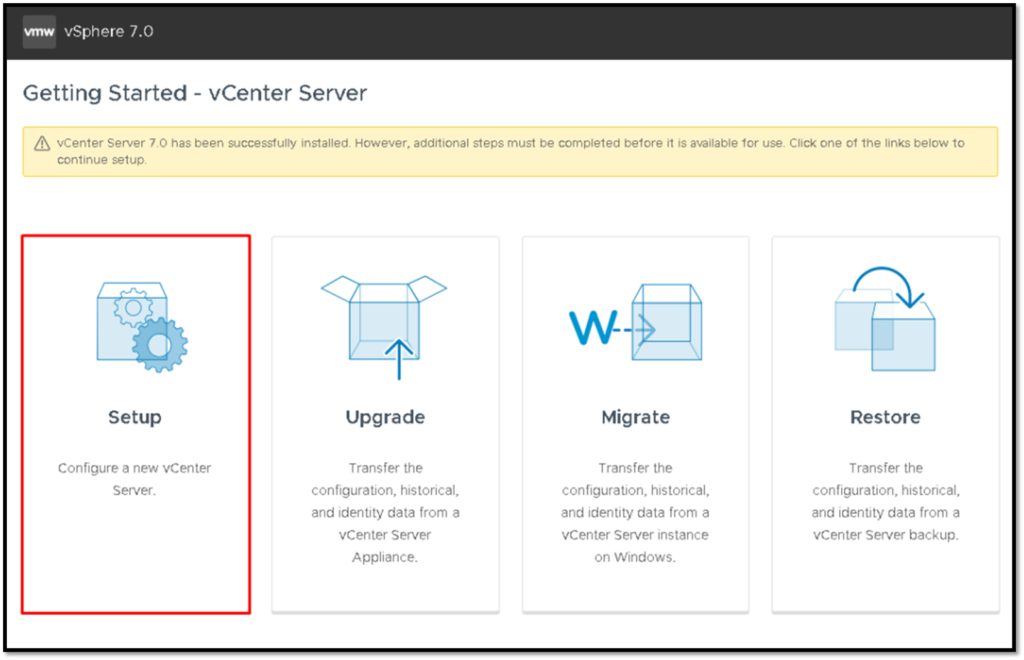
So, a Setup Wizard will be available to guide all configurations:
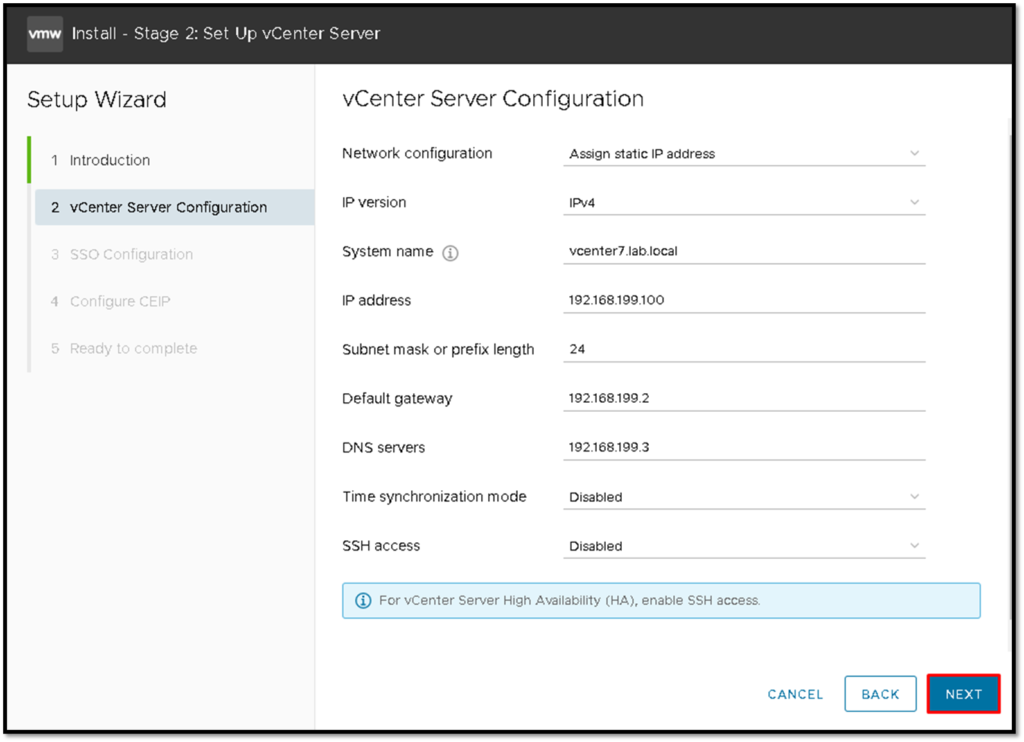
Review all configurations that we typed before:
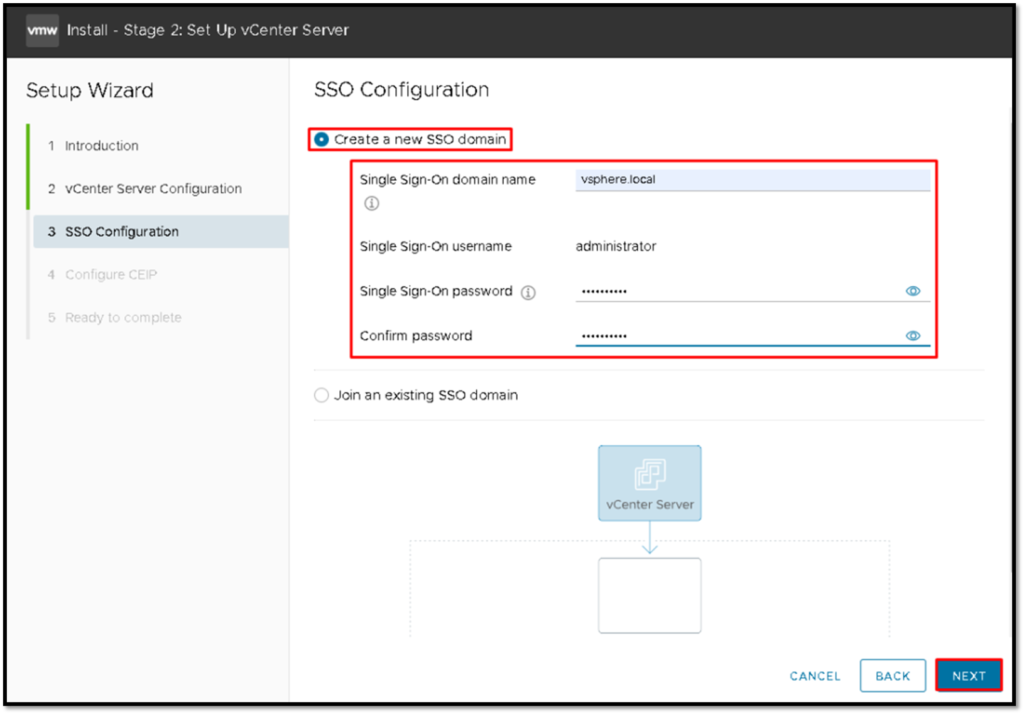
On SSO Configuration we can create a new SSO domain or Join this vCenter Server to an existing SSO domain. In this case, we will create a new SSO domain.
The “Single Sign-On domain name” is “vsphere.local”.
The “Single Sign-On username” is “administrator@vsphere.local“:
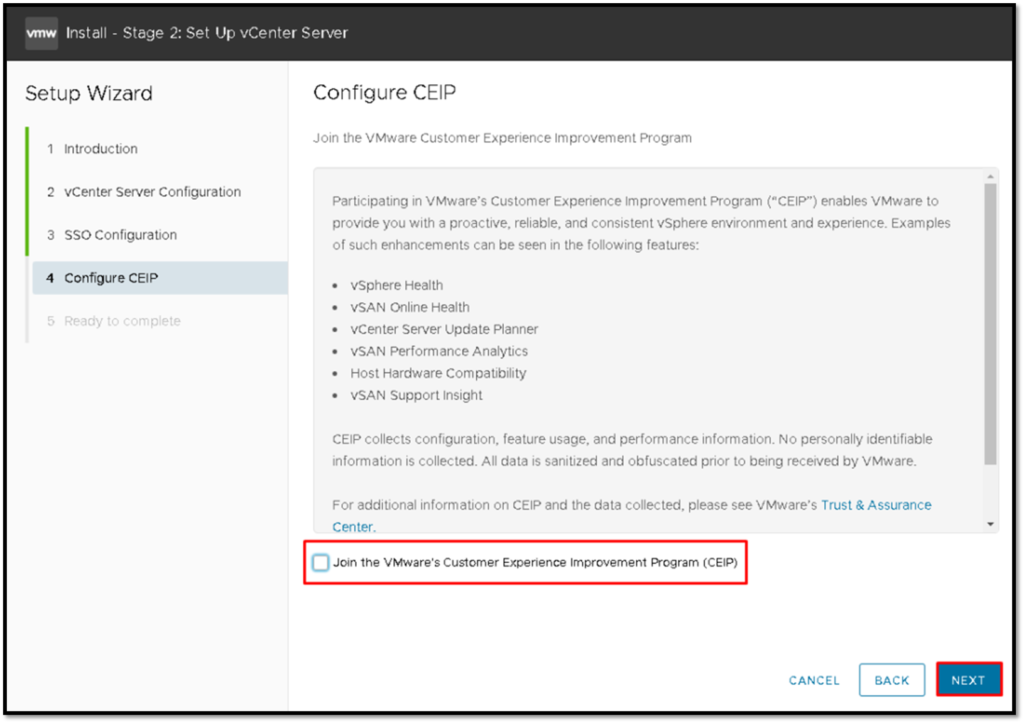
Enable or Disable CEIP (it’s optional):
The last step is a review of all configurations that we set up. Click on “Finish”:
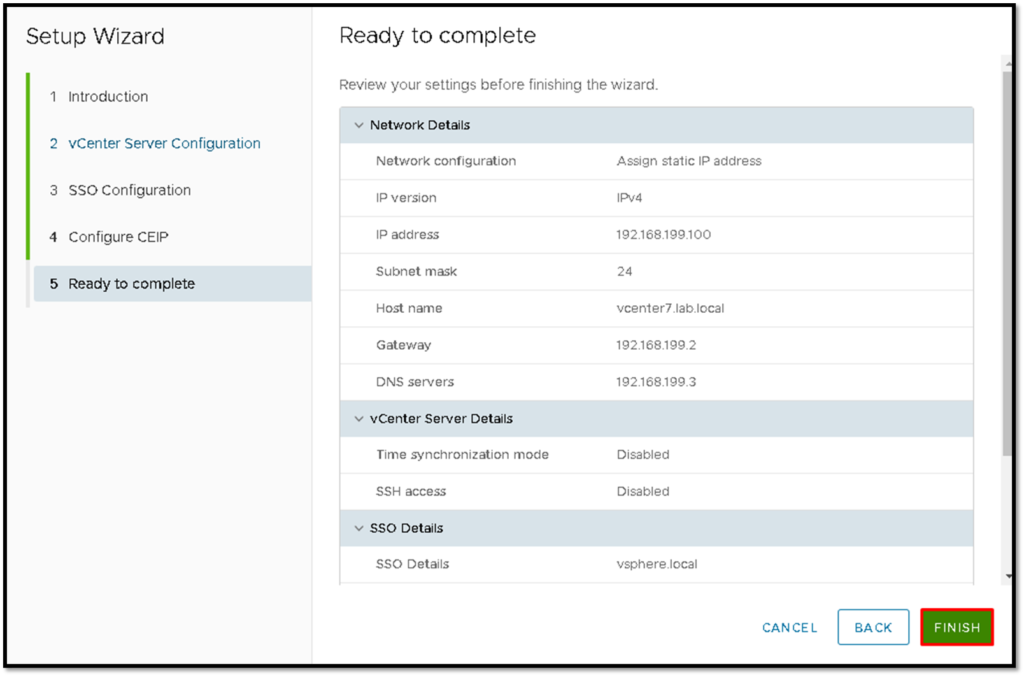
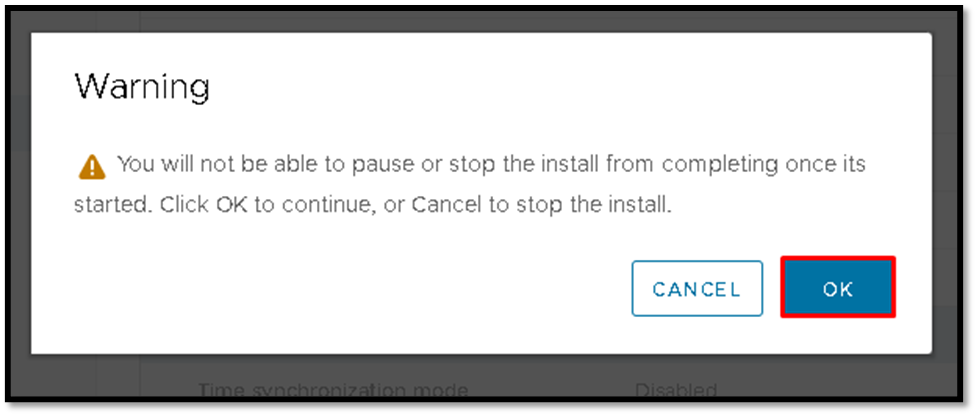
This stage can take several minutes to finish. So, don’t close this window and wait until the process is running:
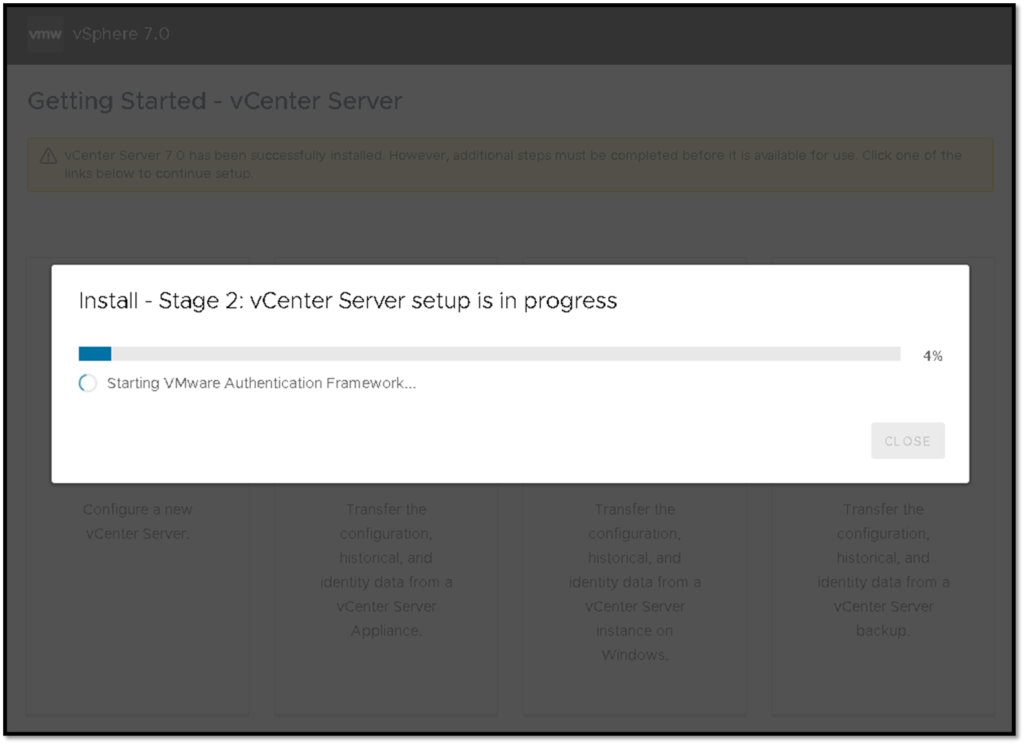
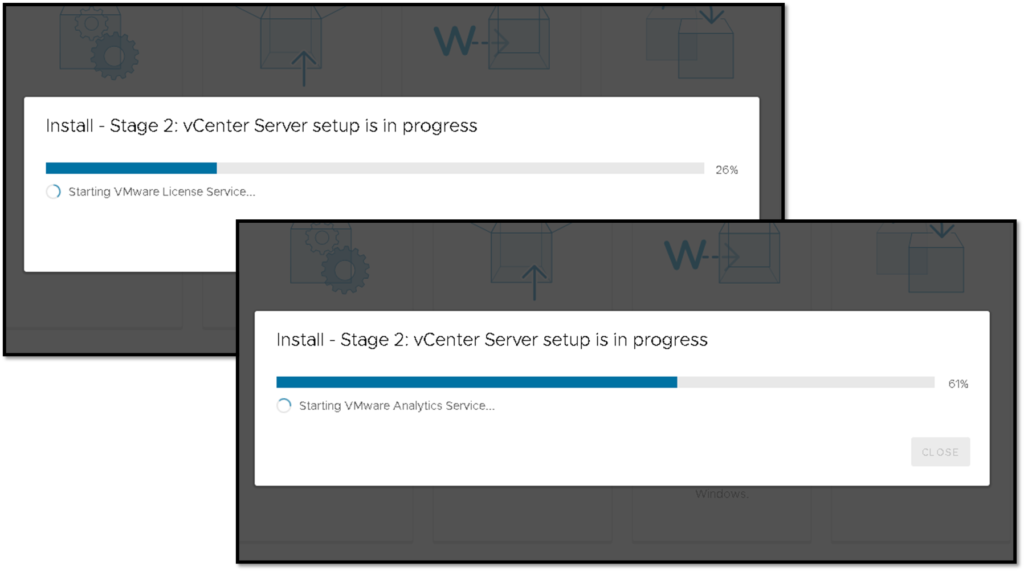
When STAGE 2 is finished, we can log in to VAMI:
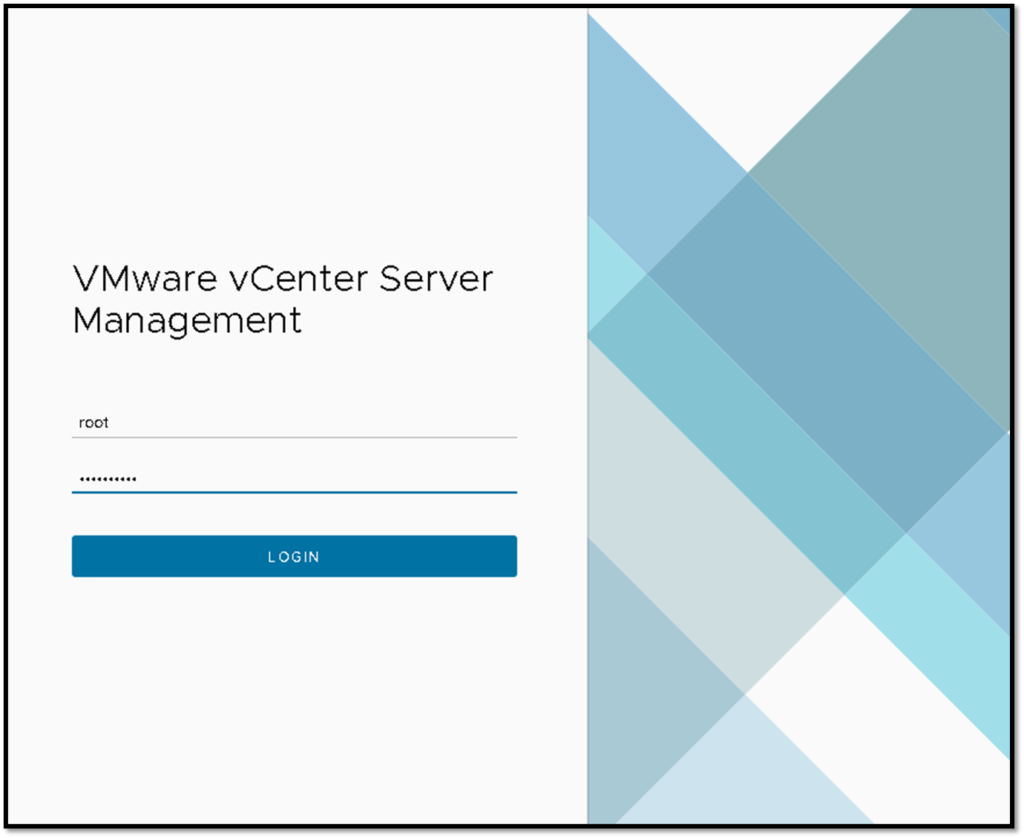
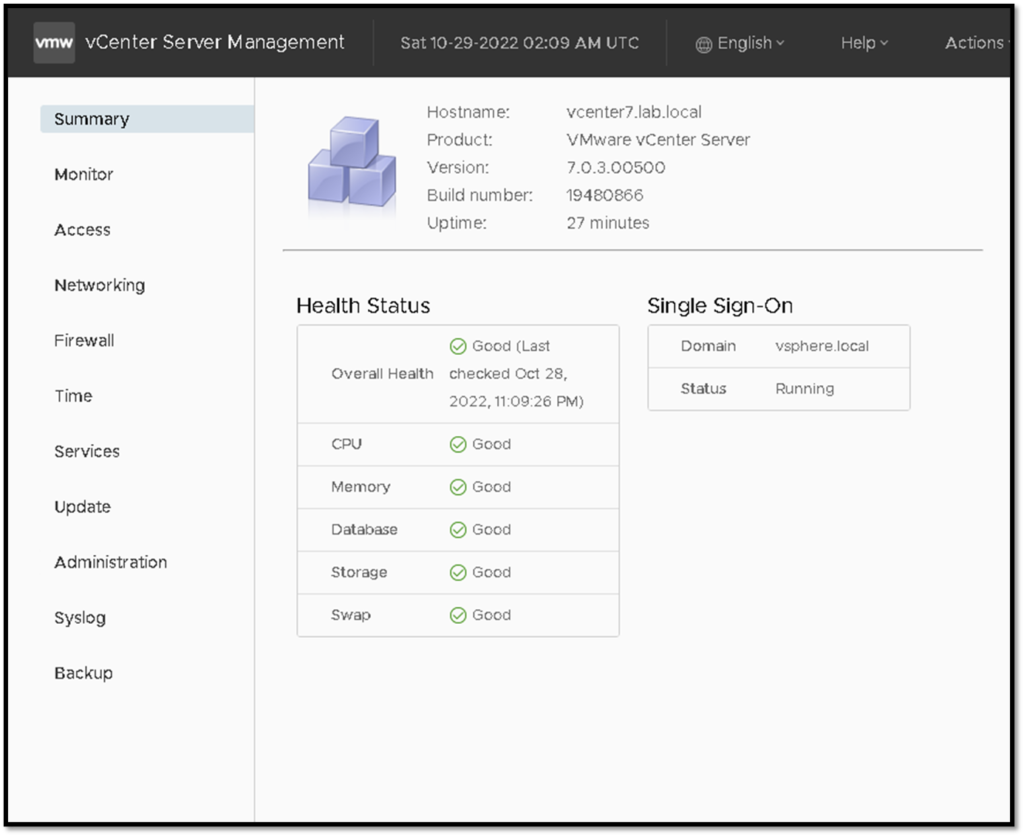
Access the vSphere Interface to manage the vCenter Server
To open the vSphere Client interface, we can use the IP address or the FQDN of the vCenter Server:
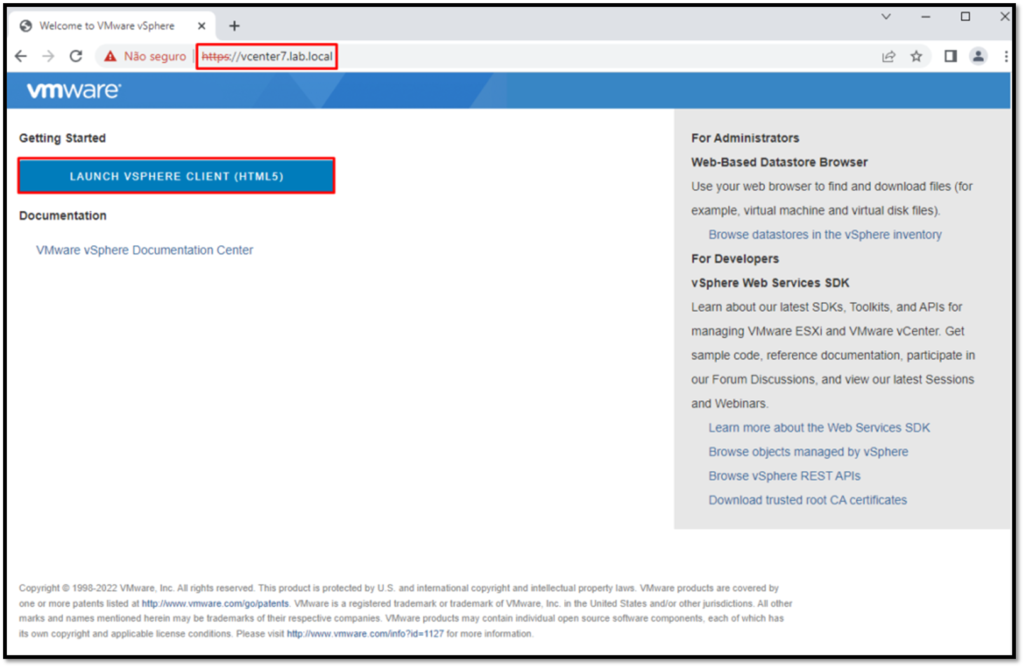
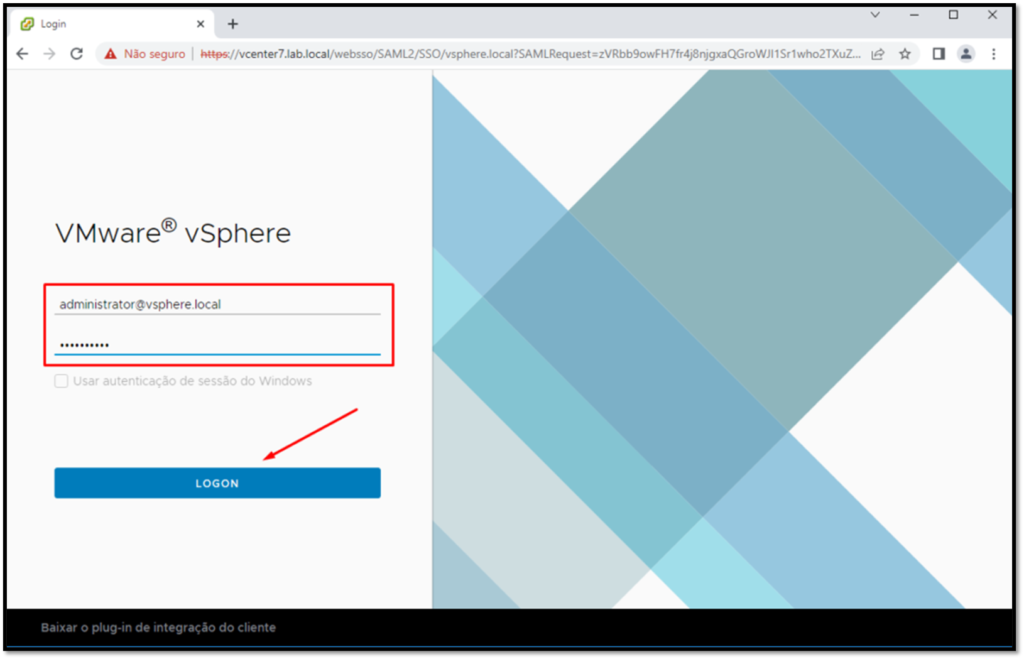
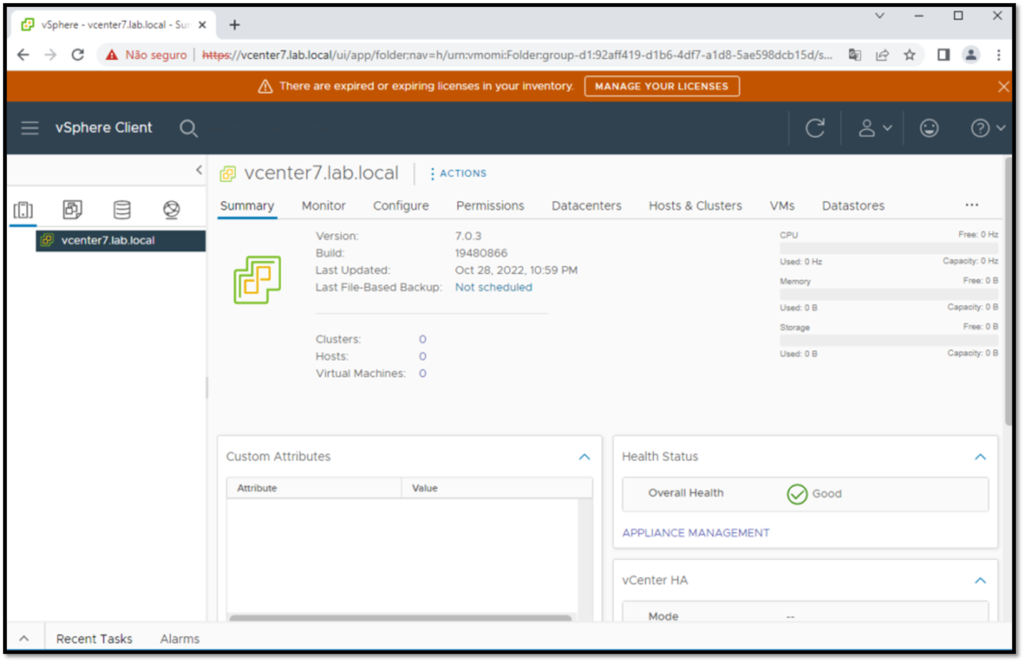
Here, we have the vSphere Client Interface 🙂
We can add ESXi hosts, create a Cluster, Distributed Switches and etc:
Note: To get more details about How to install vCenter 7, click on the link below:
https://docs.vmware.com/en/VMware-vSphere/7.0/vsphere-vcenter-server-70-installation-guide.pdf
