

Adding a disk to a PowerFlex Storage Data Server (SDS) increases the raw capacity available to a Storage Pool. The operation does not simply attach a disk to a Linux server: PowerFlex must identify the device, verify that it is eligible, and add it to the intended SDS and Storage Pool. This guide shows how to inspect candidate devices, add two disks with SCLI, and verify the result.
The example was tested in a nested lab running PowerFlex 4.5.2 on CentOS-based nodes. It is a lab walkthrough, not a production support statement. Dell’s public support matrix lists CentOS versions for PowerFlex 3.6, but does not list CentOS for the 4.5.2 combination shown here. Before using this workflow in production, verify the exact PowerFlex release, operating system, kernel, hardware, and SDS component in Dell’s current support matrix.
If you are new to PowerFlex, start with this overview of PowerFlex architecture and its core components, including the role of SDS nodes and storage pools.
For a related walkthrough of a nested PowerFlex 4.5.2 deployment, see the PowerFlex cluster deployment guide.
Currently, which disks are used on each SDS?
Before changing the cluster, confirm that the target SDS and Storage Pool are the intended ones and that the PowerFlex system is healthy enough for a capacity change. Record the PowerFlex release and the device’s size, model, serial number, and operating-system path. Use those identifiers together; a path such as /dev/sdn alone may be difficult to distinguish from another disk and can change when hardware or virtual hardware is rearranged.
A disk appearing in lsblk but not appearing in the PowerFlex device list is not, by itself, proof that the disk is unused or safe to add. Confirm that it is assigned to the correct SDS and does not contain data, a filesystem, partitions, an LVM physical volume, or another storage configuration that must be preserved. Stop if the ownership or contents are unclear. Do not use --force_device_takeover as a shortcut: Dell documents that this option destroys data on the selected device.
Adding an SDS device is a storage configuration change. Confirm that the candidate disk is the intended device before submitting the command, and follow the change-control and backup requirements for your environment.
1- First, query the devices already registered on the target SDS. Review the full output so that the device path, assigned Storage Pool, capacity, and state remain visible:
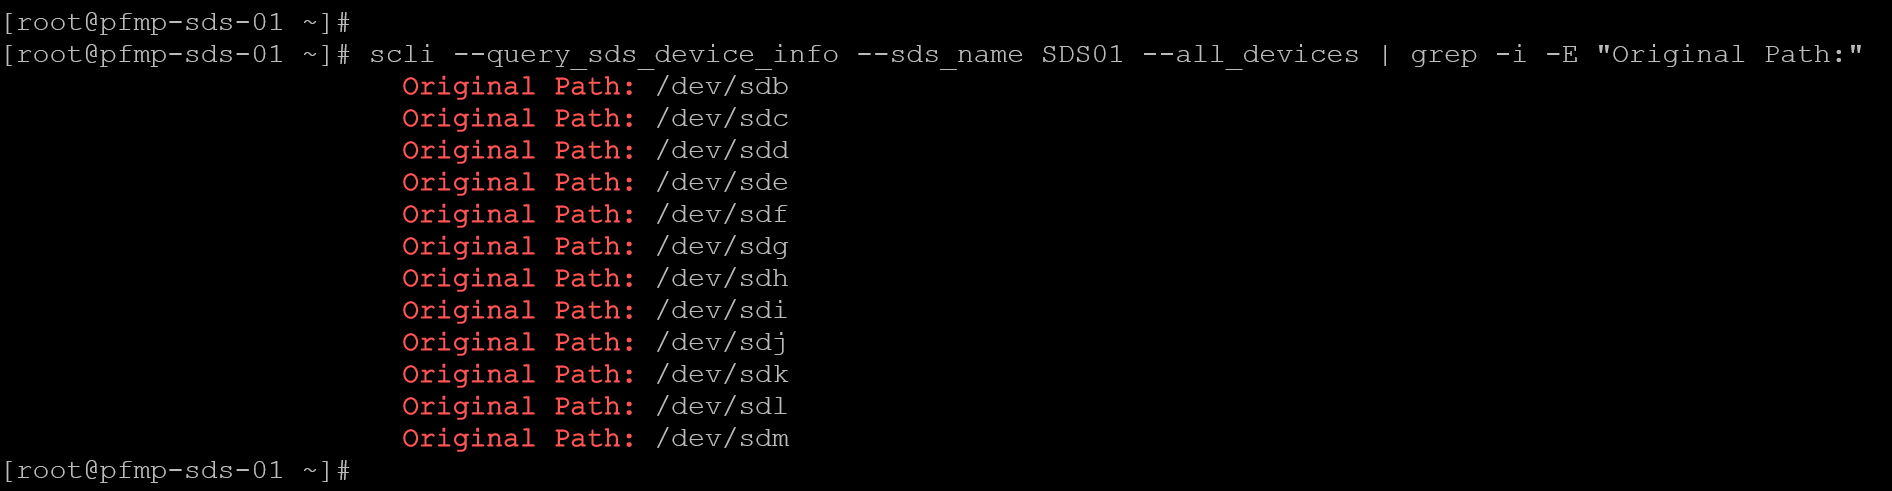
scli --query_sds_device_info --sds_name SDS01 --all_devices | grep -i -E "Original Path:"As we can see in the following picture, we have disks from /dev/sdb to /dev/sdm:
The following command can be executed to list all attached disks:
lsblk --pathAs we can see in the following picture, the disks /dev/sdn and /dev/sdo are attached to the system; however, they are not in use in the PowerFlex cluster:
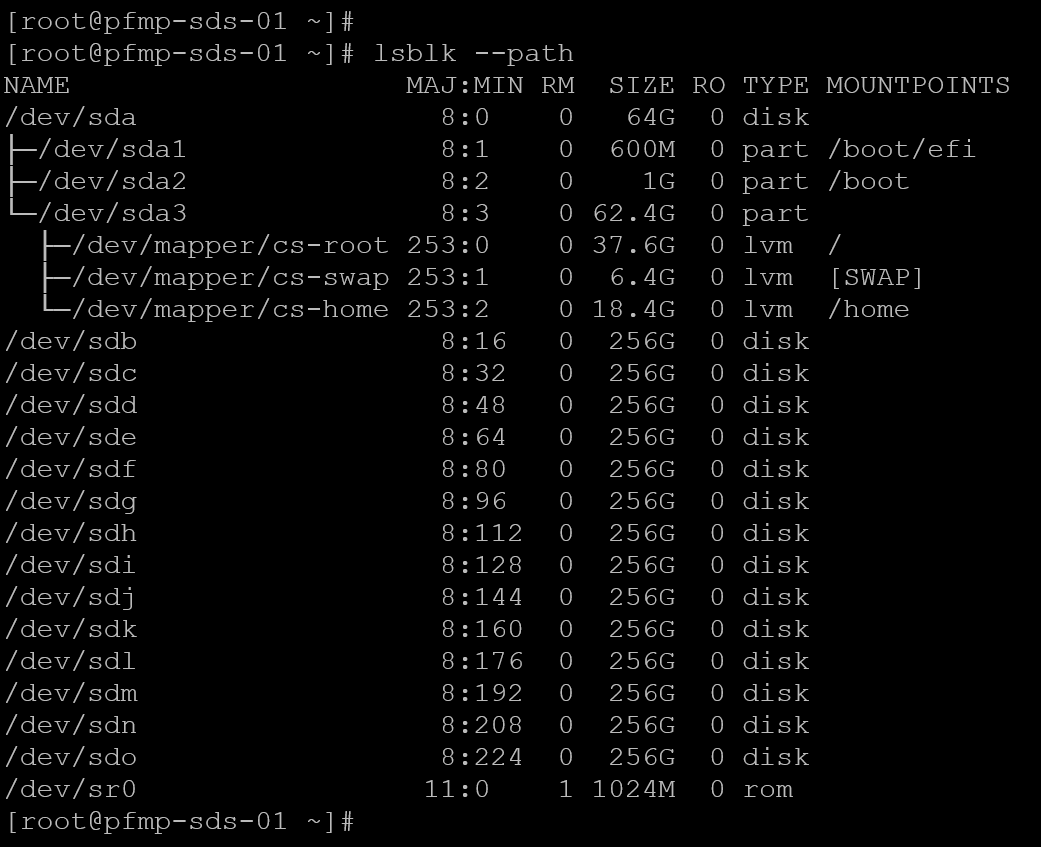
So, in this case, the disks /dev/sdn and /dev/sdo are available to add to the PowerFlex cluster!
2- Adding both disk devices:
scli --add_sds_device --sds_name SDS01 \
     --storage_pool_name SP01 \
     --device_path /dev/sdn \
     --device_name SDS01-sdn

scli --add_sds_device --sds_name SDS01 \
     --storage_pool_name SP01 \
     --device_path /dev/sdo \
     --device_name SDS01-sdo
Replace SDS01, SP01, each /dev/sdX path, and each device name with values verified in your own environment. Run each command only after confirming that the path belongs to the intended SDS and refers to the intended empty device. Do not copy /dev/sdn or /dev/sdo literally unless those are the verified paths on your host.
3-Afterward, both disks /dev/sdn and /dev/sdo are in use, as we can see in the following picture:
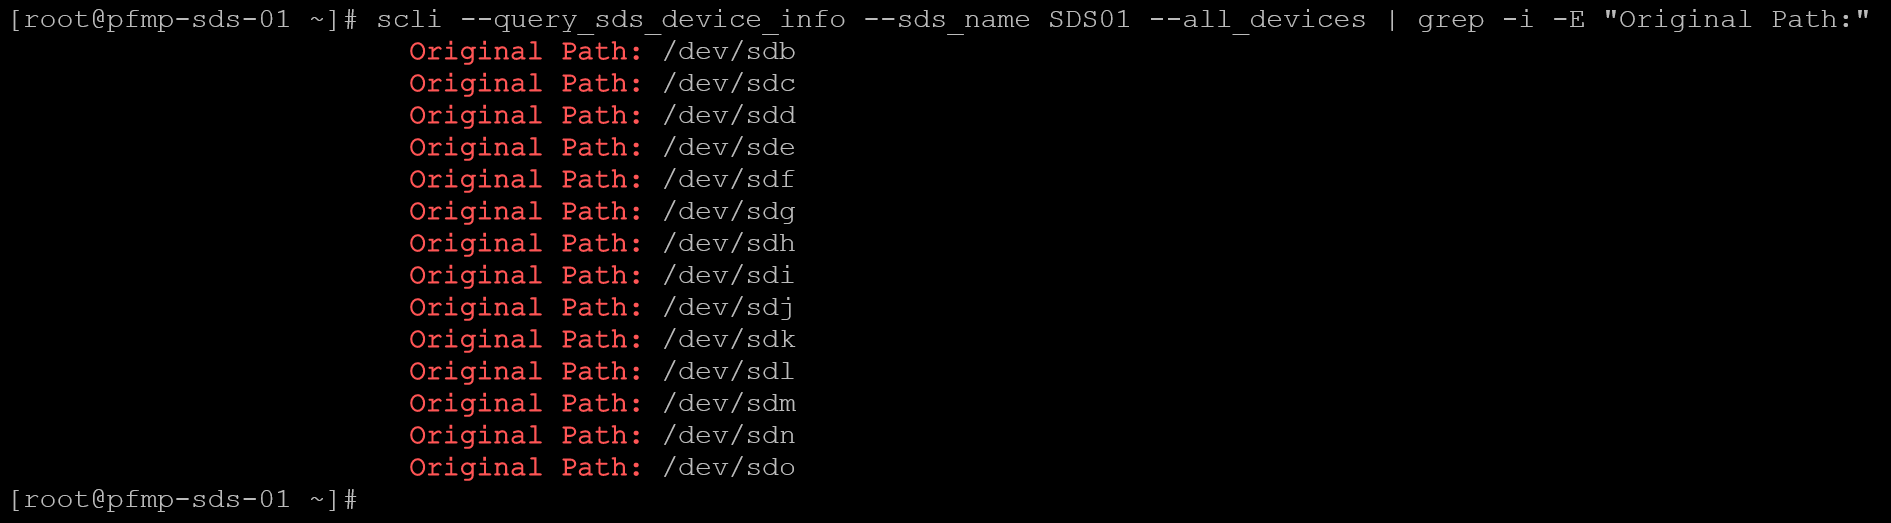
After the operation completes, query the SDS again and confirm that both devices appear under the intended SDS and Storage Pool. Check that their paths and capacities match the disks selected before the change and that PowerFlex reports a healthy device state. Also confirm in PowerFlex Manager that the expected capacity is available in the target Storage Pool. If a device is missing, unhealthy, assigned to the wrong pool, or reports an unexpected size, stop and investigate the SCLI output and system alerts before adding more devices.
scli --query_sds_device_info --sds_name SDS01 --all_devices4- Repeat the workflow only for SDS nodes that are intended to receive additional capacity. On each node, identify and verify its own device paths and device ownership before running SCLI. Disk names are local to a host; do not assume that /dev/sdn or /dev/sdo identifies the same physical or virtual disk on another SDS.
Closing Thoughts
Adding disks to an existing SDS can increase the capacity available to a PowerFlex Storage Pool, but the operation is destructive to data already present on the selected devices.
Verify each disk’s identity and eligibility before adding it, then confirm that PowerFlex reports the expected path, pool, capacity, and healthy device state.
This nested CentOS-based lab is useful for demonstrating the workflow; for production, use an operating system and configuration listed in Dell’s support matrix and follow the guidance for the specific PowerFlex release.
External References
- Dell — PowerFlex 4.5.x CLI Reference: `add_sds_device` Documents the command syntax and options for adding a storage device to an SDS. It explains that PowerFlex checks devices before adding them, runs performance tests by default, and that `–force_device_takeover` destroys data.
- Dell — PowerFlex 4.5.x Install and Upgrade Guide: Add Storage Devices Shows the SCLI workflow for adding storage devices and repeating the operation for the required PowerFlex storage nodes.
- Dell — PowerFlex 4.5.x Technical Overview: Configure Direct-Attached Storage Explains the raw-device recommendations, the device-clear check, data erasure when a device is added to an SDS, and restrictions involving filesystems, LVM, and multipath devices.
- Dell — PowerFlex CLI Reference: `query_sds_device_info` Documents how to query one SDS device or all devices on an SDS, including device paths, Storage Pool assignments, capacities, and device state.
- Dell — PowerFlex Operating-System Support Matrix Lists supported operating-system and PowerFlex component combinations. Check the current matrix for the exact release before using CentOS or another Linux distribution in a production environment.
