
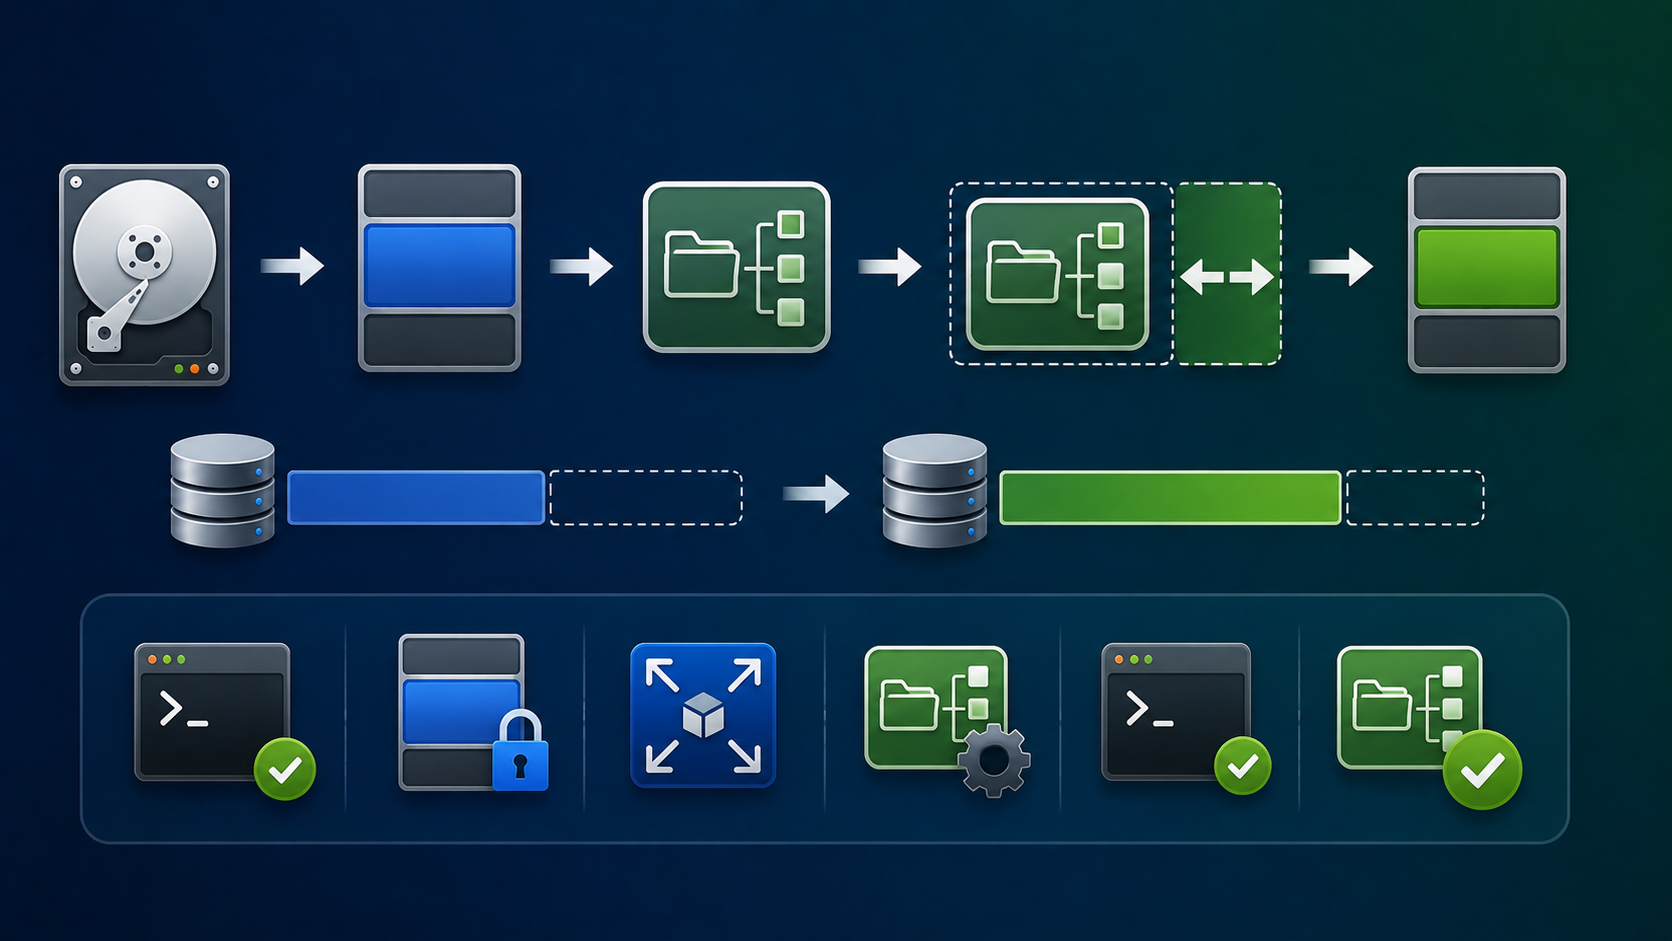
Resizing a filesystem on Red Hat Enterprise Linux 8 is usually straightforward, but the correct procedure depends on two important factors: the filesystem type and the storage layer underneath it.
An ext4 filesystem, for example, can be expanded while mounted and can also be reduced when unmounted. XFS behaves differently: it can be expanded online, but it cannot be shrunk.
There is another distinction that is just as important. The disk, partition or logical volume underneath a filesystem is not the same thing as the filesystem itself. Increasing or decreasing one layer does not necessarily resize the other.
In this guide, I will use a lab environment to demonstrate how filesystem resizing works on RHEL 8, including ext4 shrinking and expansion, XFS expansion, partition resizing, and common LVM scenarios.
Important: Filesystem and partition resizing can cause permanent data loss when performed incorrectly. Back up important data before changing storage structures, especially before shrinking a filesystem, partition, or logical volume. The examples in this guide were performed in a lab environment.
Understand the Storage Layers Before Resizing Anything
Before running a resize command, identify which layer actually needs to change.
A typical Linux storage stack may look like this:
Disk
└── Partition
    └── Filesystem
Or, when LVM is being used:
Disk
└── Partition
    └── Physical Volume
        └── Volume Group
            └── Logical Volume
                └── Filesystem
This distinction matters because resize2fs changes an ext4 filesystem, but it does not resize the partition that contains it.
Likewise, xfs_growfs expands an XFS filesystem, but only after additional capacity has already been made available by the underlying partition or logical volume.
A useful rule is:
- When growing storage: enlarge the underlying device first, then grow the filesystem.
- When shrinking storage: shrink the filesystem first, then reduce the underlying device.
⚠️ Reversing that order when shrinking can destroy filesystem data.
Identify the Current Storage Layout
Before making changes, inspect the block devices and filesystems:
lsblk -fYou can also check mounted filesystem sizes and types:
df -hTTo identify exactly which device backs a mount point:
findmnt /mount/pointIf LVM is involved, inspect the physical volumes, volume groups and logical volumes:
pvs
vgs
lvs
Do not continue until you know whether the filesystem is directly on a partition or inside an LVM logical volume.
Lab Example: Creating an ext4 Filesystem
For the examples in this article, assume that /dev/sdg is an additional 100 GB lab disk.
Verify the device first:
lsblk /dev/sdg
Make absolutely sure you have selected the correct disk. Creating a new partition table destroys existing partition information on that device.
Create a GPT partition table:
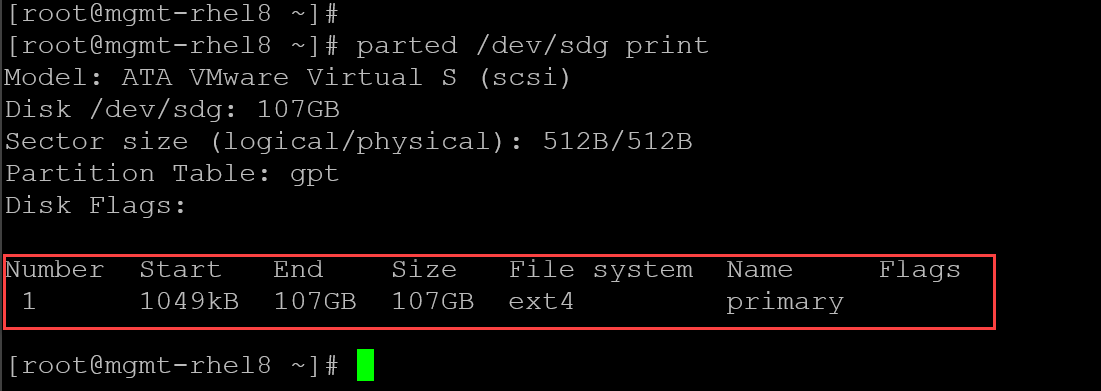
parted -s /dev/sdg mklabel gptCreate a partition using the available disk space:
parted -s /dev/sdg mkpart primary ext4 1MiB 100%Ask the kernel to reread the partition table:
partprobe /dev/sdgVerify the result:
parted /dev/sdg printThe new partition should now appear as /dev/sdg1:
Create the ext4 Filesystem
Create an ext4 filesystem on the partition:
mkfs.ext4 /dev/sdg1Verify it:
lsblk -f /dev/sdgYou can inspect filesystem details with:
dumpe2fs -h /dev/sdg1For example, to display the block count and block size:
dumpe2fs -h /dev/sdg1 | grep -E "Block count|Block size"
Remember that these values describe the filesystem. They should not be confused with the partition boundaries shown by parted.
Mount the Filesystem
Create a mount point:
mkdir -p /mnt/dir-ext4-SDG1Mount the filesystem:
mount /dev/sdg1 /mnt/dir-ext4-SDG1Verify the mount:
findmnt /mnt/dir-ext4-SDG1And check the filesystem capacity:
df -hT /mnt/dir-ext4-SDG1Configure a Persistent Mount Using UUID
For persistent mounts, using the filesystem UUID is preferable to relying solely on a device name such as /dev/sdg1.
Display the UUID:
lsblk -f /dev/sdg1You can also use:
blkid /dev/sdg1The output will contain a UUID similar to:
UUID="xxxxxxxx-xxxx-xxxx-xxxx-xxxxxxxxxxxx"Add an appropriate entry to /etc/fstab:
UUID=xxxxxxxx-xxxx-xxxx-xxxx-xxxxxxxxxxxx /mnt/dir-ext4-SDG1 ext4 defaults 0 2Replace the example UUID with the actual value from your system.
After modifying /etc/fstab, regenerate the systemd mount units:
systemctl daemon-reloadThen verify the configuration.
If the filesystem is already mounted, you can first unmount it:
umount /mnt/dir-ext4-SDG1Then test the /etc/fstab entry:
mount /mnt/dir-ext4-SDG1Verify:
findmnt /mnt/dir-ext4-SDG1Testing /etc/fstab before rebooting is important. A malformed entry can cause problems during the next system startup.
Create Some Test Data
For this lab, create a few test files:
dd if=/dev/zero of=/mnt/dir-ext4-SDG1/file1.dd bs=1M count=250 status=progress
dd if=/dev/zero of=/mnt/dir-ext4-SDG1/file2.dd bs=1M count=250 status=progress
dd if=/dev/zero of=/mnt/dir-ext4-SDG1/file3.dd bs=1M count=250 status=progress
Check filesystem utilization:
df -hT /mnt/dir-ext4-SDG1At this point, we have an ext4 filesystem with actual data that we can use for the resize examples.
Shrinking an ext4 Filesystem
Unlike XFS, ext4 supports shrinking.
However, shrinking an ext4 filesystem must be performed while the filesystem is unmounted.
The basic sequence is:
Unmount filesystem
        ↓
Check filesystem
        ↓
Shrink filesystem
        ↓
Optionally shrink partition or LV
        ↓
Mount and verify
Step 1: Check How Much Space Is Actually Used
Before choosing a new filesystem size, inspect its current usage:
df -hT /mnt/dir-ext4-SDG1Important:
- Never choose a target size smaller than the amount of data currently stored in the filesystem.
- Leave additional free space rather than trying to reduce the filesystem to its absolute theoretical minimum.
Step 2: Unmount the Filesystem
Unmount it:
umount /mnt/dir-ext4-SDG1Verify that it is no longer mounted:
findmnt /dev/sdg1If findmnt returns no active mount, continue.
Step 3: Check the ext4 Filesystem
Before reducing ext4, run a forced filesystem check:
e2fsck -f /dev/sdg1Resolve filesystem errors before continuing.
What Does resize2fs -P Actually Tell You?
You may encounter examples that use:
resize2fs -P /dev/sdg1This command reports an estimated minimum filesystem size in filesystem blocks.
For example:
Estimated minimum size of the filesystem: 634947Do not interpret that number as an exact or guaranteed safe target.
The value is an estimate, and reducing a production filesystem to its absolute minimum provides little operational margin.
It is normally better to select a clearly defined target size that remains comfortably above the amount of data in use.
Another common mistake is converting the block count to GiB using integer arithmetic and then treating the rounded-down result as the minimum safe filesystem size.
For example, with 634947 blocks and a 4096-byte block size:
634947 × 4096 = 2600742912 bytesThat is approximately 2.42 GiB, not 2 GiB.
For that reason, this guide will use a deliberate target size instead of shrinking directly to the estimated minimum.
Step 4: Shrink ext4 to a Defined Size
For example, to reduce the filesystem to 10 GiB:
resize2fs /dev/sdg1 10GAfter the operation completes successfully, run another filesystem check:
e2fsck -f /dev/sdg1At this point, the filesystem has been reduced. The partition has not.
That distinction is extremely important.
Verify the ext4 Filesystem Size
Mount it again:
mount /mnt/dir-ext4-SDG1Then check:
df -hT /mnt/dir-ext4-SDG1The filesystem should now report approximately the requested capacity.
However:
lsblkand:
parted /dev/sdg printwill still show that /dev/sdg1 occupies its original partition space.
This is expected.
resize2fs changes the ext4 filesystem. It does not modify the partition table.
Shrinking the Partition After Shrinking ext4
If your goal is simply to change the filesystem size for testing, you can stop there.
If your goal is to reclaim disk space for another partition, you must also reduce the partition.
This operation requires much more care: The filesystem must always be smaller than the partition that will contain it.
For example, if the ext4 filesystem was reduced to 10 GiB, you could choose a partition boundary that leaves additional space rather than trying to make the partition exactly 10 GiB.
First unmount the filesystem again:
umount /mnt/dir-ext4-SDG1Confirm the current partition layout:
parted /dev/sdg print freeStart parted:
parted /dev/sdgInside parted, inspect the layout:
(parted) printThen resize the partition to an appropriately calculated ending point.
For example:
(parted) resizepart 1 12GiBThen exit:
(parted) quitThe value supplied to resizepart is the new ending position of the partition on the disk, not simply an amount of space to remove.
That is why the existing partition start position and target filesystem size must be considered carefully.
Ask the kernel to reread the partition table:
partprobe /dev/sdgVerify the result:
parted /dev/sdg printThen run another filesystem check:
e2fsck -f /dev/sdg1Because the partition is now slightly larger than the 10 GiB filesystem, you can optionally expand ext4 to consume all remaining space inside the reduced partition:
resize2fs /dev/sdg1Mount and verify:
mount /mnt/dir-ext4-SDG1
df -hT /mnt/dir-ext4-SDG1
lsblk
Now both the partition and filesystem should reflect the reduced storage layout.
Expanding an ext4 Filesystem
Growing ext4 is generally easier than shrinking it.
An ext4 filesystem can be expanded while mounted.
The important rule is that the underlying partition or logical volume must already contain the additional capacity.
Scenario 1: The Partition Is Already Larger Than the Filesystem
Suppose the filesystem was reduced earlier but /dev/sdg1 still occupies the entire disk.
In that case, simply run:
resize2fs /dev/sdg1When no target size is specified, resize2fs expands the filesystem to use the available capacity of its underlying container.
Verify:
df -hT /mnt/dir-ext4-SDG1No unmount is required when growing ext4.
Scenario 2: The Disk Has More Space but the Partition Does Not
This commonly happens after increasing the size of a virtual disk.
For example, your hypervisor may now show a 150 GB disk, while the Linux partition still ends at 100 GB.
Check:
lsblkand:
parted /dev/sdg print freeThe filesystem cannot use the new space until the partition is expanded.
Start parted:
parted /dev/sdgThen expand partition 1:
(parted) resizepart 1 100%
(parted) quit
Ask the kernel to reread the partition table:
partprobe /dev/sdgVerify:
lsblk /dev/sdgOnce /dev/sdg1 reflects the larger size, grow ext4:
resize2fs /dev/sdg1Finally:
df -hT /mnt/dir-ext4-SDG1The filesystem should now use the additional capacity.
Resizing XFS on RHEL 8
XFS behaves differently from ext4. RHEL 8 uses XFS extensively, and one important limitation must always be remembered:
- XFS can be expanded, but it cannot be shrunk.
Do not use resize2fs with XFS. That utility is intended for ext-family filesystems.
The utility used to expand XFS is:
xfs_growfsIdentify an XFS Filesystem
Use:
df -hTor:
lsblk -fFor example:
/dev/sdb1 xfs ...Before growing XFS, the underlying partition or logical volume must already have additional available capacity.
Grow an XFS Filesystem
Unlike ext4 shrinking, XFS growth is performed while the filesystem is mounted.
Suppose the filesystem is mounted on:
/dataAfter expanding its underlying partition or logical volume, run:
xfs_growfs /dataNote that xfs_growfs normally receives the mount point, not the block device.
Verify the result:
df -hT /dataYou can also inspect XFS geometry with:
xfs_info /dataWithout specifying another size, xfs_growfs expands the filesystem to use the available capacity of its underlying device.
Can You Shrink XFS?
No.
RHEL 8 does not provide a supported utility for shrinking an XFS filesystem.
If an XFS filesystem must ultimately occupy a smaller device, the normal approach is to create a smaller filesystem elsewhere, migrate or restore the data, verify it, and then retire the original filesystem.
Do not attempt to reduce the partition or logical volume underneath an XFS filesystem expecting XFS to adapt automatically.
Reducing the underlying device while the XFS filesystem still expects the original capacity can result in data loss.
Resizing Filesystems on LVM
Many RHEL systems use LVM, so it is important to distinguish LVM operations from direct partition resizing.
Before changing anything, inspect the environment:
pvs
vgs
lvs
You can display filesystem information alongside the logical volumes with:
lsblk -fGrow a Logical Volume and Filesystem Together
Assume the volume group has sufficient free space.
Check:
vgsThen extend a logical volume by 10 GiB and resize the filesystem at the same time:
lvextend -L +10G --resizefs /dev/vgname/lvnameThe --resizefs option tells LVM to resize the filesystem together with the logical volume using the appropriate filesystem tool.
Verify:
lvs
df -hT
This method is often simpler than resizing the logical volume and filesystem separately.
Use All Remaining Free Space in the Volume Group
If appropriate for your environment:
lvextend -l +100%FREE --resizefs /dev/vgname/lvnameBefore using all remaining extents, consider whether other logical volumes might need free space later.
Shrinking an ext4 Filesystem on LVM
Shrinking logical volumes deserves special attention because reducing an LV before reducing its filesystem can destroy data.
First identify the filesystem:
df -hTConfirm that it is ext4.
⚠️ Important: Remember that this procedure must not be used for XFS.
Check the logical volume:
lvsIdentify its mount point:
findmnt /dev/vgname/lvnameUnmount it:
umount /mount/pointRun an ext4 check:
e2fsck -f /dev/vgname/lvnameRHEL provides the --resizefs option for reducing both the filesystem and the logical volume together.
For example:
lvreduce --size 20G --resizefs /dev/vgname/lvnameCarefully review the requested target size before confirming the operation.
Afterward, mount the filesystem again:
mount /mount/pointVerify both layers:
lvs
df -hT /mount/point
⚠️ Do not use lvreduce to reduce an LV containing XFS.
Common Problems When Resizing Filesystems
resize2fs: Bad magic number in super-block
This often means the target device is not an ext2/ext3/ext4 filesystem.
Check:
lsblk -for:
blkidIf the filesystem is XFS, use xfs_growfs for expansion instead.
resize2fs Says There Is Nothing to Do
If the filesystem already occupies all available space in the underlying partition or logical volume, there is nowhere for it to grow.
Compare:
lsblkwith:
df -hTIf the partition or LV has not been expanded, increase that layer first.
Cannot Unmount the Filesystem
If the filesystem is busy:
findmnt /mount/pointCheck which processes are using it:
fuser -vm /mount/pointStop or move the relevant processes before attempting to unmount the filesystem.
Do not force an unmount simply to continue a resize procedure without first understanding which applications are using the filesystem.
XFS Did Not Grow After Increasing the Virtual Disk
Increasing a virtual disk at the hypervisor layer does not automatically resize every layer inside Linux.
You may still need to expand:
Virtual disk
→ Partition or LVM physical volume
→ Logical volume, if used
→ XFS filesystem
Inspect each layer with:
lsblk
pvs
vgs
lvs
df -hT
This makes it much easier to identify where the additional capacity has stopped.
ext4 vs. XFS Resize Summary
| Operation | ext4 | XFS |
|---|---|---|
| Grow filesystem | Yes | Yes |
| Grow while mounted | Yes | Yes |
| Shrink filesystem | Yes | No |
| Shrink while mounted | No | Not supported |
| Resize utility | resize2fs | xfs_growfs |
| Filesystem check/repair utility | e2fsck | xfs_repair |
The most important difference is that XFS has no supported shrink operation.
Recommended Pre-Resize Checklist
Before resizing storage on a production RHEL system, verify the following:
- Confirm that a current backup or recovery mechanism exists.
- Identify the correct disk, partition, LV and filesystem.
- Check the filesystem type with
lsblk -fordf -hT. - Determine whether LVM is involved.
- Confirm how much space is actually used.
- For shrinking, stop applications and unmount the filesystem when required.
- Never shrink a partition or LV before shrinking a filesystem that supports reduction.
- Never attempt to shrink XFS.
- Verify all storage layers after the operation.
- Test persistent mounts before rebooting.
The extra verification takes only a few minutes and can prevent a storage resize from becoming a data-recovery incident.
Final Thoughts
Resizing filesystems on RHEL 8 is not simply a matter of running resize2fs or xfs_growfs.
The first step is understanding the storage stack.
For ext4, expansion can normally be performed online, while shrinking requires the filesystem to be unmounted and checked first. XFS supports online expansion but cannot be reduced.
The underlying storage layer matters just as much. A filesystem can only grow after its partition or logical volume provides additional space, and shrinking must happen in the opposite order: filesystem first, underlying container second.
For LVM environments, commands such as lvextend --resizefs and lvreduce --resizefs can coordinate the logical volume and filesystem operations, but the same filesystem limitations still apply.
Whenever possible, test the procedure in a lab before performing it on production storage, maintain a valid backup, and verify every layer before and after the resize operation.
External References
- Red Hat — Managing File Systems in RHEL 8 Official Red Hat documentation covering ext4 and XFS administration, filesystem resizing, filesystem tools, and supported resize operations.
- Red Hat — Partition Operations with parted Official guidance for creating and resizing disk partitions, including the required filesystem-first sequence when shrinking a partition.
- Red Hat — Persistently Mounting File Systems Official documentation for configuring persistent mounts in /etc/fstab using filesystem identifiers such as UUID.
- Red Hat — Resizing Logical Volumes Official RHEL 8 guidance for extending and reducing LVM logical volumes together with their filesystems.
