

This guide follows a PowerFlex volume from creation and mapping in PowerFlex Manager to a mounted ext4 filesystem on a Linux SDC. These are separate operations: mapping exposes a block device to the selected host, while partitioning, formatting, and mounting are performed inside Linux.
The example uses PowerFlex 4.5.2 and a CentOS-based SDC in a nested lab. Dell’s public operating-system support matrix lists CentOS versions for PowerFlex 3.6, but does not list CentOS for the 4.5.2 combination shown here. Treat this as a lab demonstration, not as evidence that the configuration is supported for production. Before deploying, verify the exact SDC version, Linux distribution, kernel, and component against Dell’s current support matrix.
Data-loss warning: creating a partition table or running
mkfs.ext4changes the contents of the selected block device. Confirm the PowerFlex volume ID and the device’s persistent Linux identifier before making either change. Never format a device merely because it appeared after a volume was mapped.
Adding a Volume
1- Access the SDC by SSH and check the current disks:
lsblk --path
2- Access the PowerFlex Manager UI –> Block –> Volumes –> Create Volume:
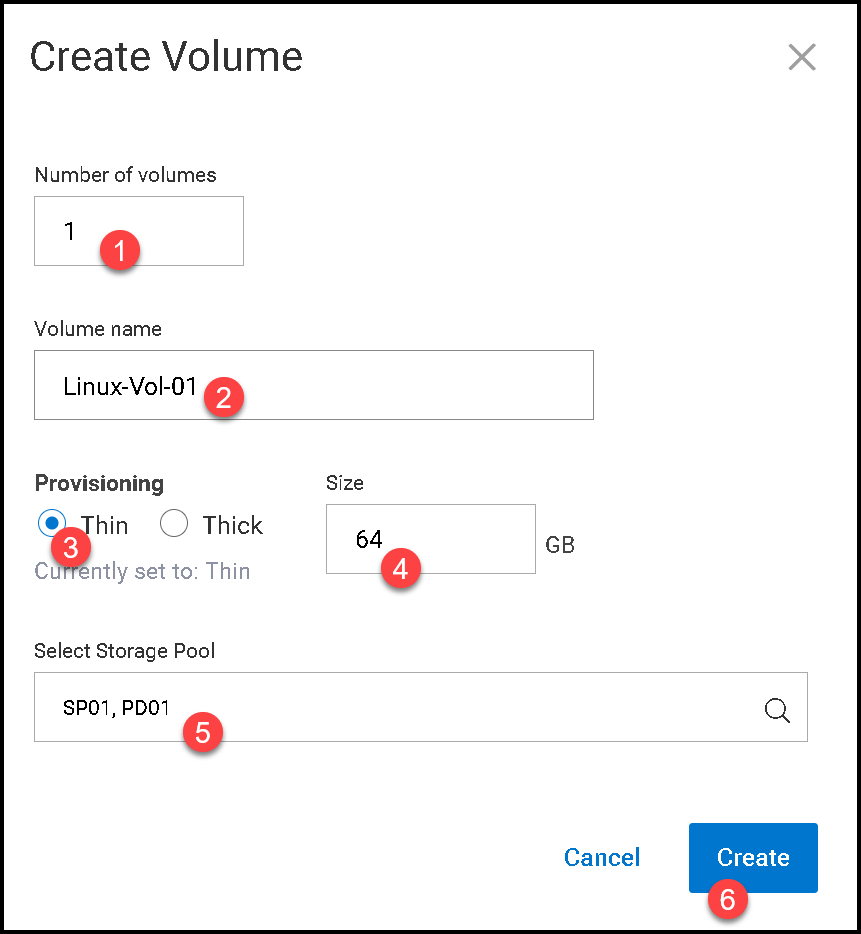
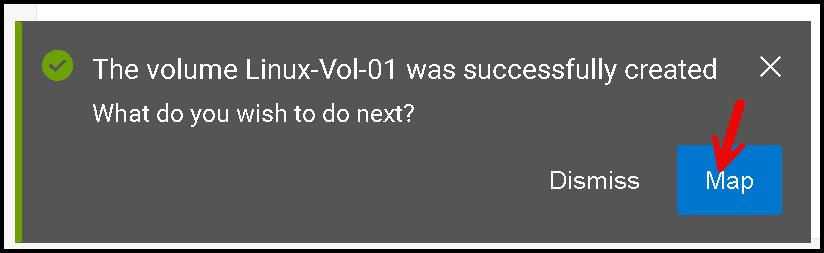
3- A pop-up to map this volume will appear as the volume has been created. Click “Map”:
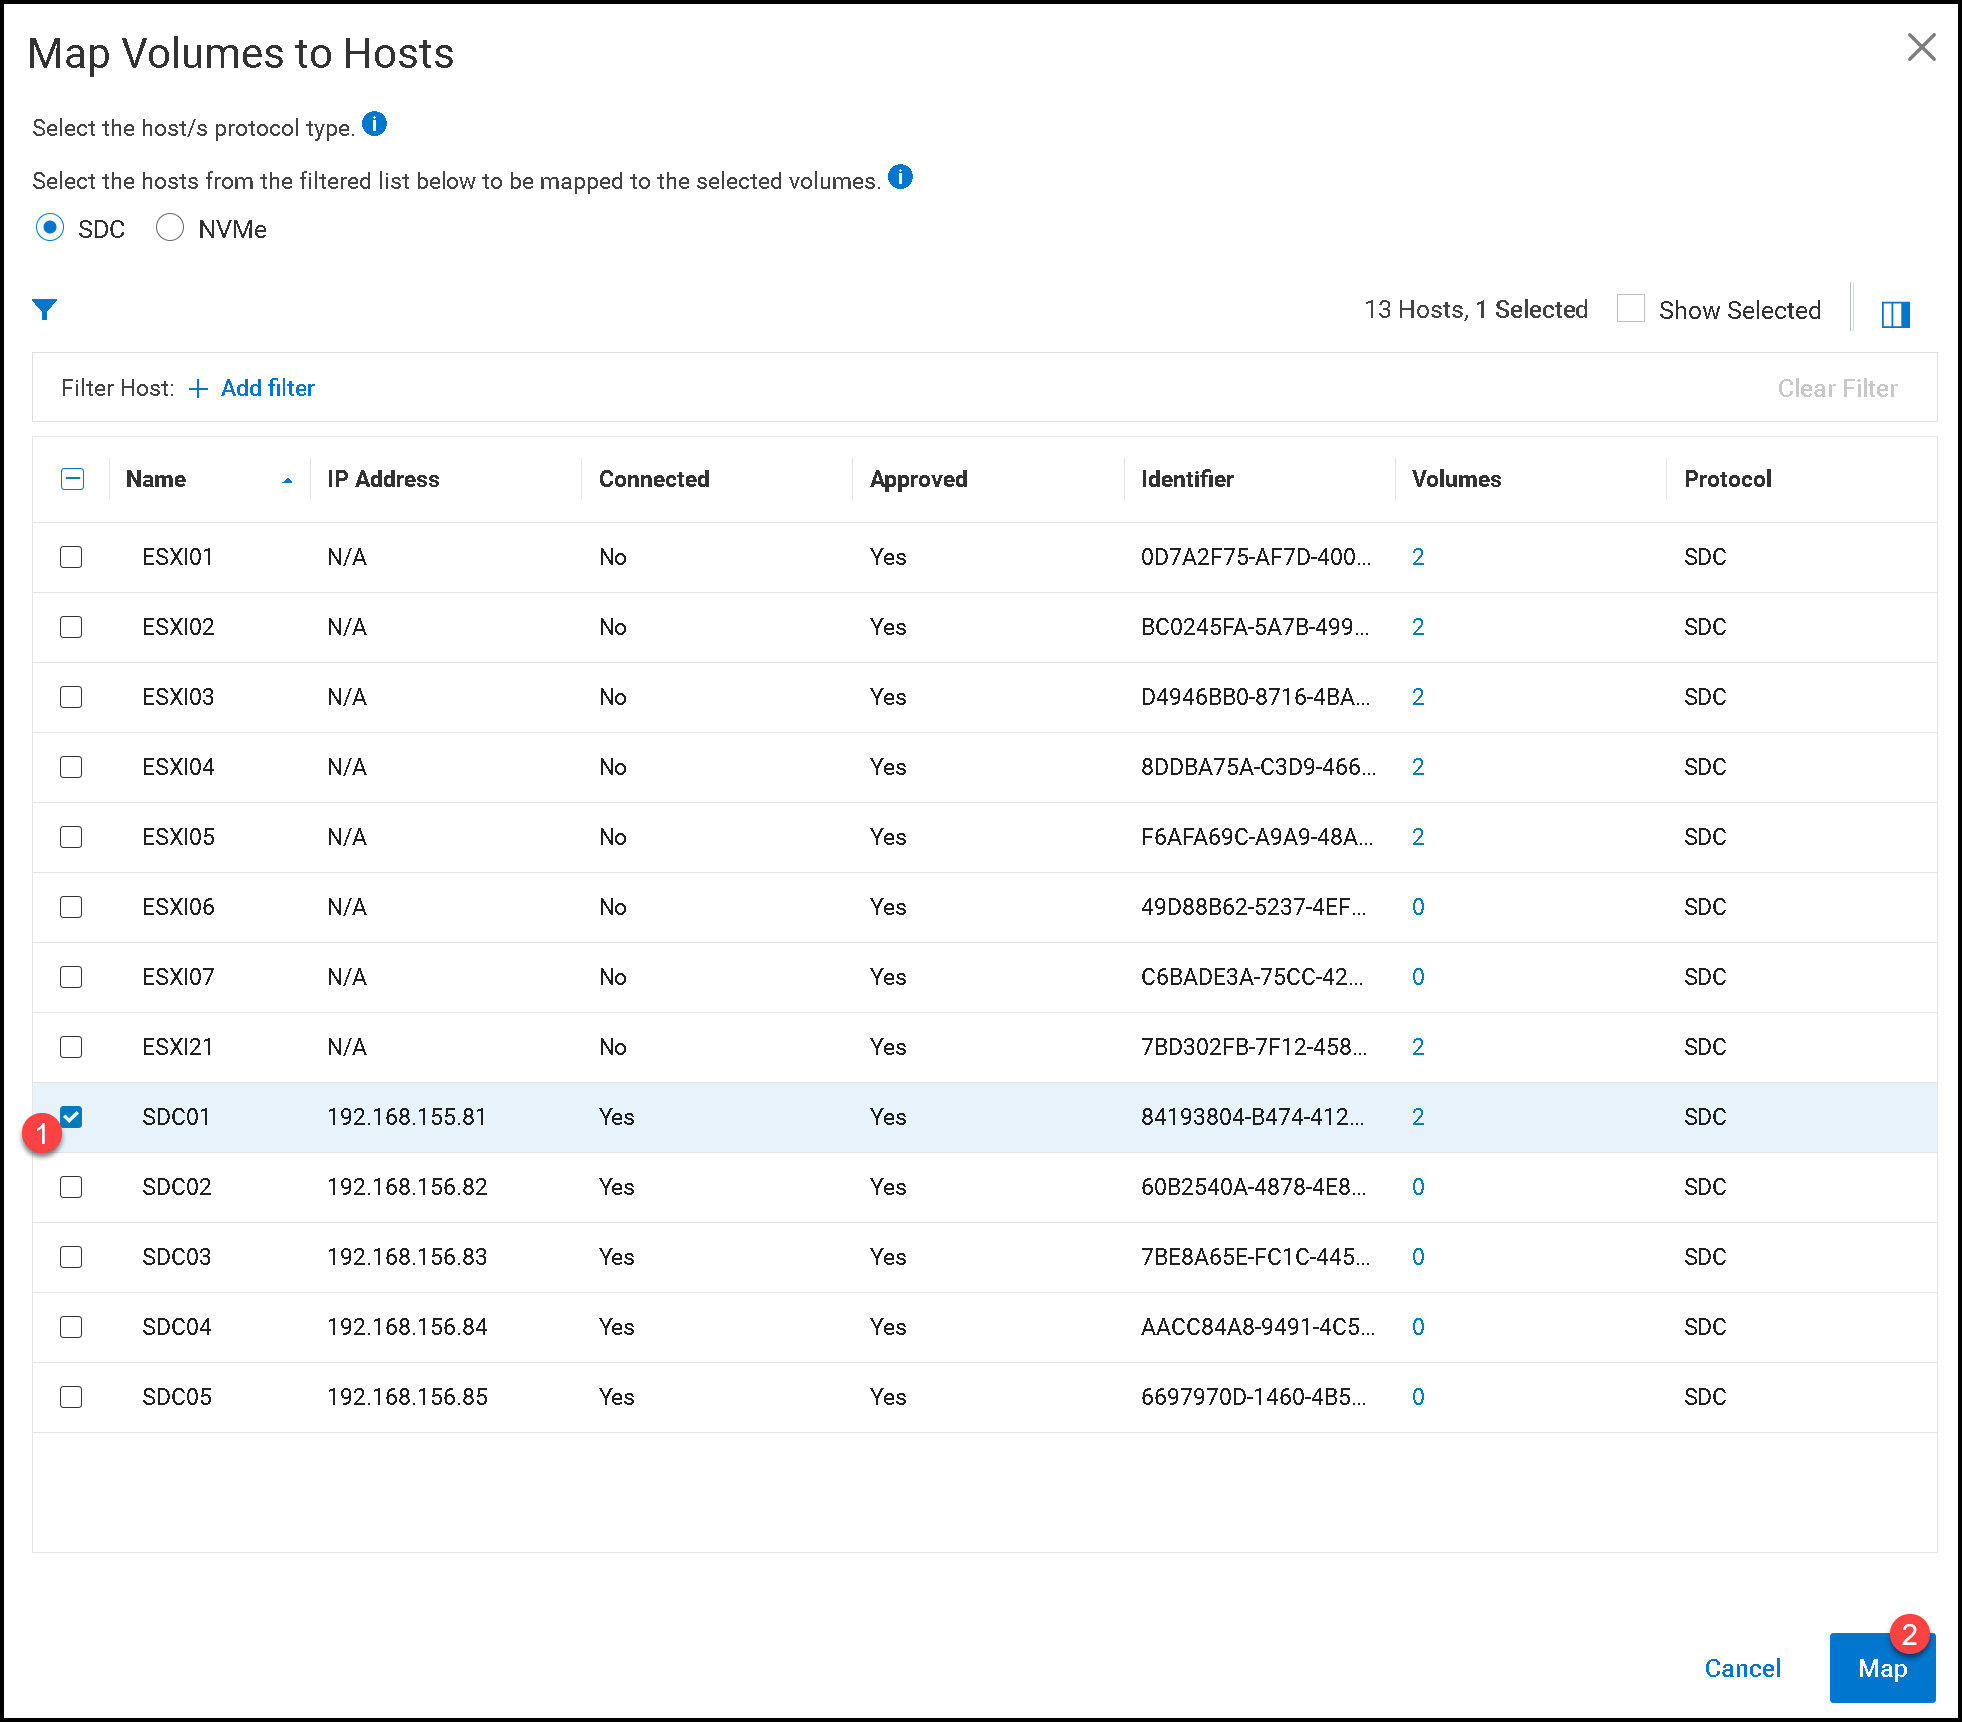
At the host list, select the desired SDC and click “Map”:
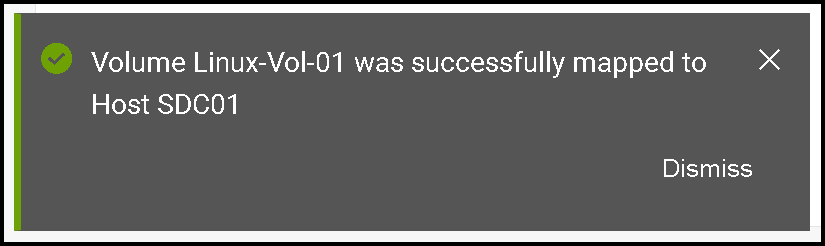
A new pop-up will appear indicating the success of this operation:
4- After the mapping operation succeeds, record the volume ID shown in PowerFlex Manager. On the Linux SDC, compare the block-device inventory before and after mapping. Do not rely on /dev/scinic as a permanent name: Dell notes that /dev/sciniX device names are not guaranteed to remain the same across reboots:
lsblk --pathAs we can see, a new disk device “/dev/scinic” was added. Look at the size; it is precisely the volume size added before:

Note: The “scini” is the module name by the SDC. The command “lsmod” shows that the “scini” module is loaded, as we can see in the following block command:
root@pfmp-sdc-01:~# lsmod | grep -i scini
scini                1662976  0
5- The following example creates one GPT partition, formats it as ext4, and mounts it at /mnt/linux-vol-01. It assumes that the mapped PowerFlex volume is new and contains no data that must be preserved. First set DEVICE to the exact persistent link identified in the previous step. The example stops short of running any command until that value has been replaced and checked:
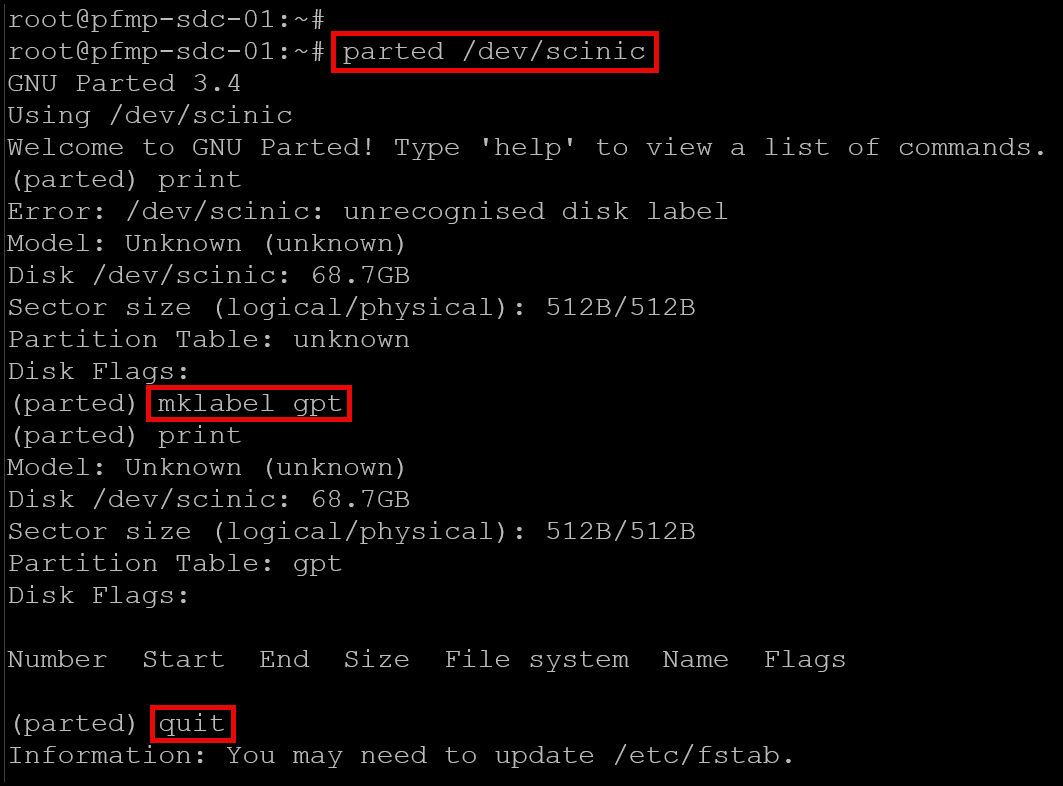
Confirm that the partition shown is the expected first partition on the selected volume and that it has no filesystem that needs to be retained. Creating the partition table and filesystem is destructive to existing data on the target:
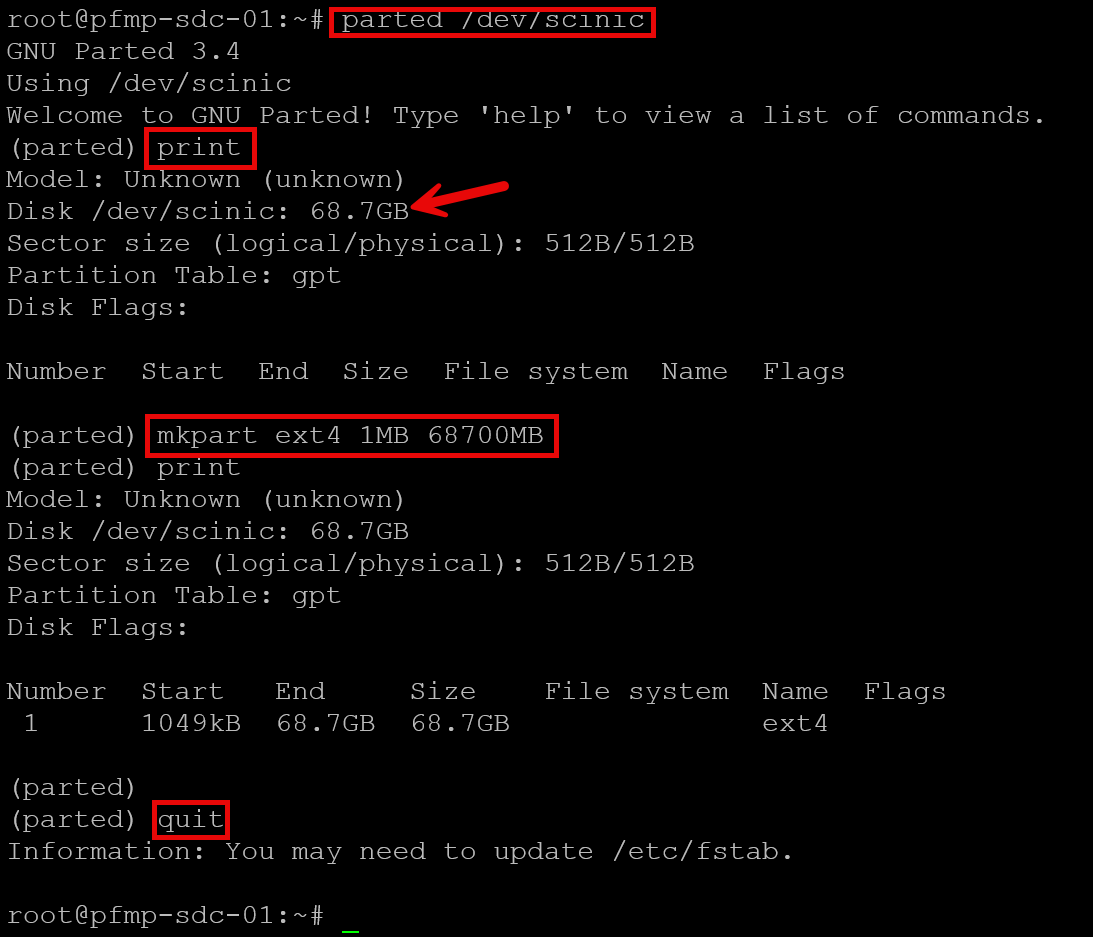
Later, use the “mkfs.ext4” to create the filesystem under this partition:
mkfs.ext4 /dev/scinic1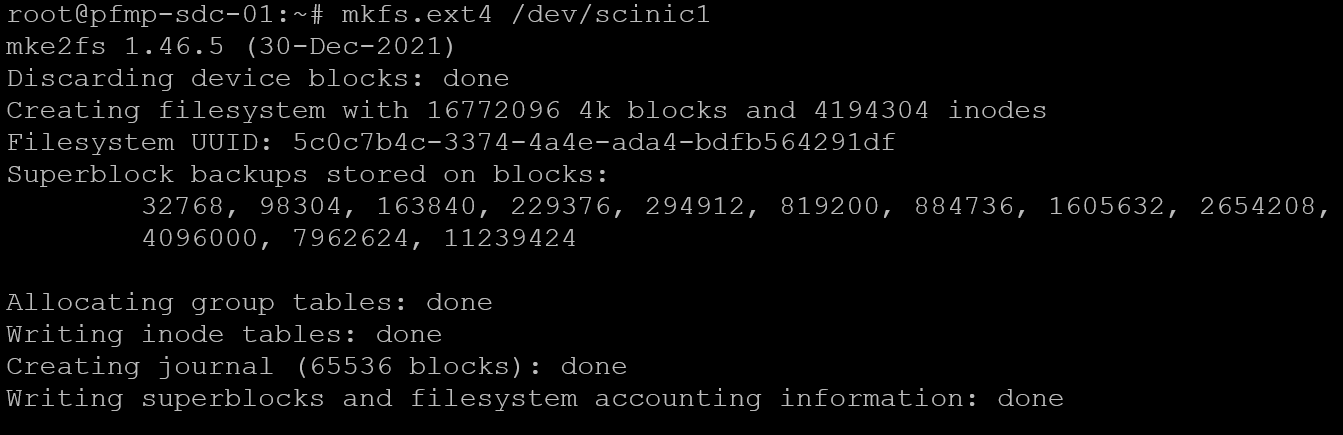
The last step is to mount the filesystem into a system directory.
We will create a directory “linux-vol-01” under “/mnt” and will mount the filesystem there:
# Creating the directory:
mkdir -p /mnt/linux-vol-01

# Mouting the filesystem into the created directory:
mount /dev/scinic1 /mnt/linux-vol-01/
Look that we can access the mount point, create files, etc:
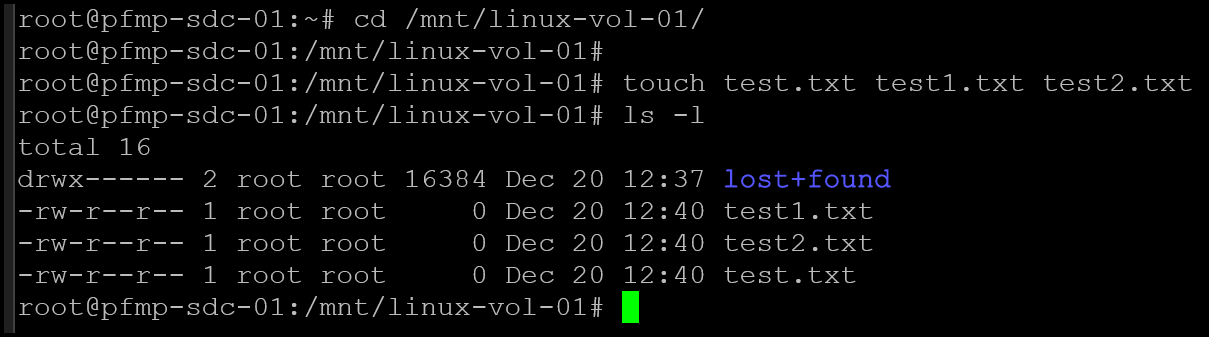
We can also use the “df” command to see details of this mount point:
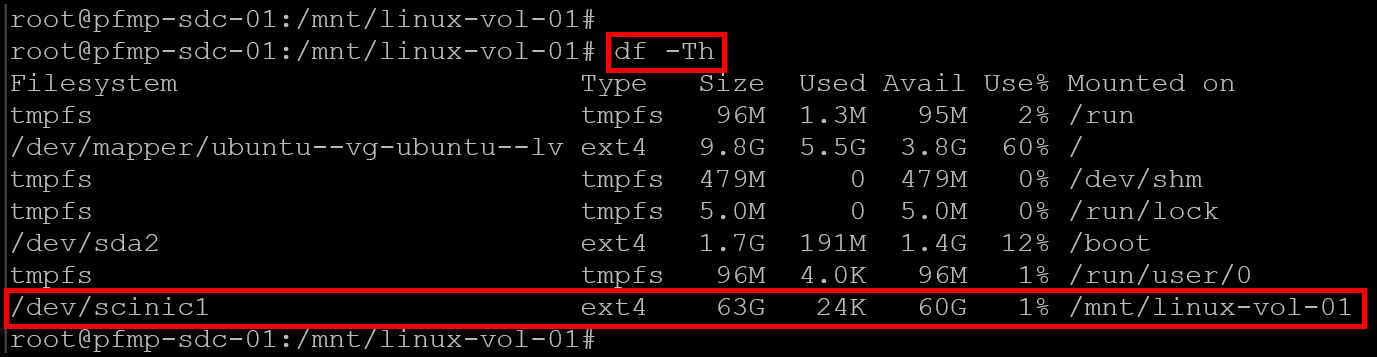
A manual mount does not make the filesystem persistent across reboots. To configure automatic mounting, use the filesystem UUID or Dell’s persistent PowerFlex device path in /etc/fstab; do not rely on a /dev/sciniX name staying unchanged. Follow the boot-order requirements for the scini service and test the entry with findmnt --verify and mount -a before rebooting. For the complete procedure, see Mounting a PowerFlex Volume on Linux’s SDC at Boot.
From Volume Mapping to a Persistent Filesystem
The workflow is complete when the PowerFlex volume is mapped to the intended SDC, identified through a persistent device link, partitioned and formatted only after verification, and mounted from the expected source. In this lab, the resulting ext4 filesystem is mounted at /mnt/linux-vol-01.
Before production use, validate the operating-system and kernel combination in Dell’s current support matrix, use a supported configuration, and test the persistent mount procedure during a maintenance window. Keep the volume ID, persistent device path, filesystem UUID, and mount point in the operational record so that future troubleshooting does not depend on a transient /dev/sciniX name.
External References
- Dell — PowerFlex 4.5.x Administration Guide: Add Volumes Documents how to create a PowerFlex volume, select its storage pool and provisioning type, set its size, and verify that volume creation succeeds.
- Dell — PowerFlex 4.5.x Administration Guide: Map Volumes Explains how mapping exposes a volume as a block device on a selected host, and recommends using persistent device names on Linux instead of relying on `/dev/sciniX` paths across reboots.
- Dell — PowerFlex 4.5.x Install and Upgrade Guide: Create Partitions and Mount Points Provides PowerFlex-specific Linux guidance for identifying mapped `/dev/sciniX` devices, creating partitions and filesystems, choosing persistent device paths, and configuring mounts.
- Red Hat — Getting Started with an ext4 File System Documents the `mkfs.ext4` command, mounting an ext4 filesystem, and checking mounted filesystems with `df -h`.
- Red Hat — Persistently Mounting File Systems Explains the `/etc/fstab` format and how to configure a filesystem to mount persistently using its UUID.
- Dell — PowerFlex Operating-System Support Matrix Lists supported operating-system and PowerFlex component combinations. Check the exact release and SDC configuration before using a Linux distribution such as CentOS in production.
