
NSX Manager maintains important management-plane configuration for an NSX-T Data Center environment, so a recoverable backup should be part of the operational plan. VMware snapshots are not a supported backup or rollback method for NSX Manager or Edge appliances. Use the built-in NSX backup workflow and send backups to a supported remote SFTP server instead.
This guide walks through configuring the SFTP destination, verifying its SSH fingerprint, running a manual backup, and enabling recurring backups in the NSX Manager interface. The lab uses TrueNAS as the SFTP destination.
Menu names, supported SFTP software, and schedule options can vary by NSX release, so confirm the exact NSX version and build and check its compatibility guidance before applying the steps. Keep the backup encryption passphrase in a secure location: it is required to restore a backup and cannot be recovered if lost.
Checking the backup configuration on NSX Manager
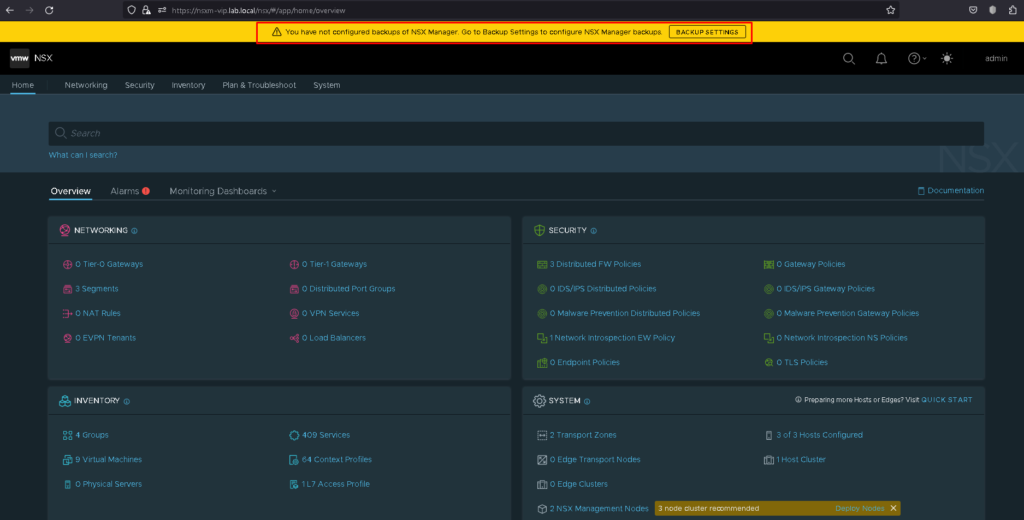
When we access the NSX Manager UI, we will receive a yellow alert informing us that we need to configure the Backup of the NSX Manager, as shown in the below picture:
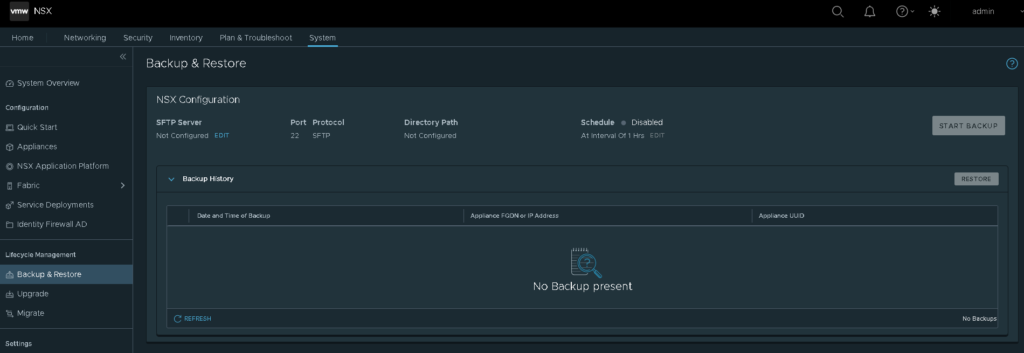
Accessing the menu System –> Backup & Restore, we can validate that the Backup is not configured yet:
Configure backup on NSX Manager
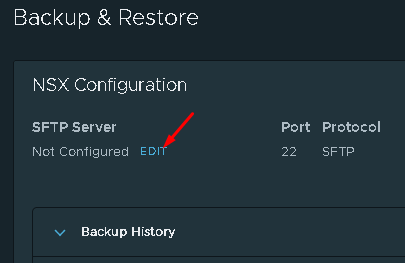
To configure the backup on NSX Manager, we need to click on EDIT:
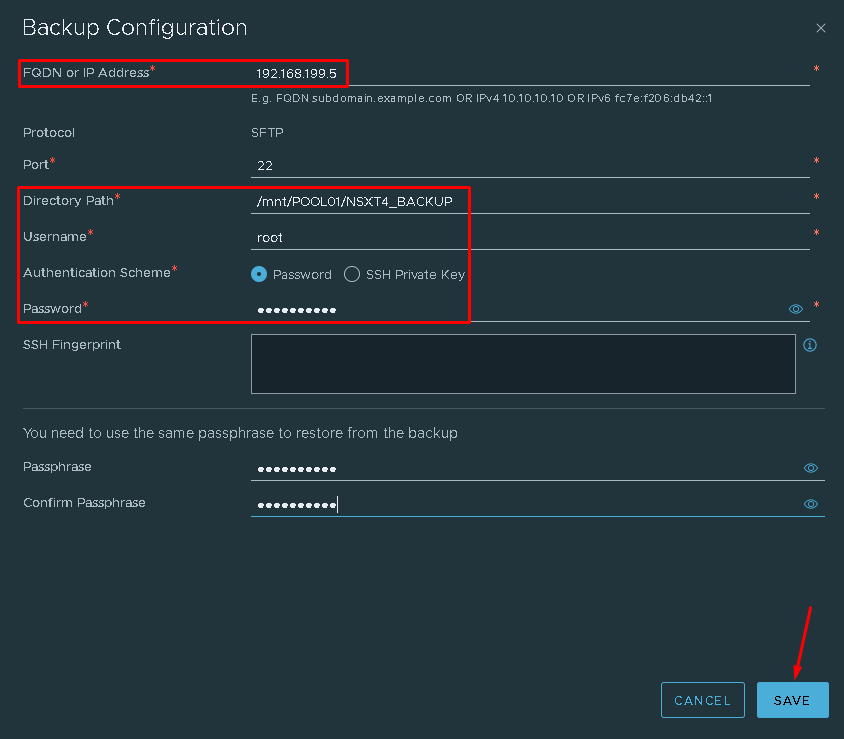
And after that, we need to provide the below details:
- FQDN or IP Address = Here we need to provide the FQDN or IP Address of the SFTP Server. In this case, 192.168.199.5 is the IP Address of our TrueNAS Server;
- Directory Path = Here we need to provide the path on the SFTP file system. This is the directory that stores the NSX Manager backup;
- Username = SFTP server username to access the SFTP server. This username should have permission to write on the directory path;
- Password = If the Authentication Scheme is a Password, we need to provide the user’s password here:
After clicking on SAVE, we need to add the Server’s Fingerprint. Click on ADD:
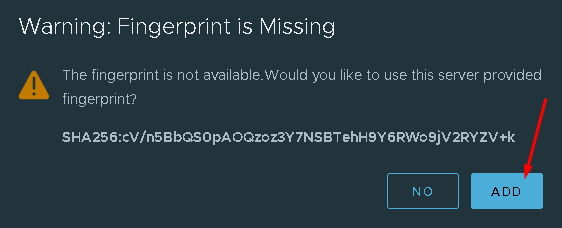
After that, we finished the process of the backup configuration!
Starting a manual backup of NSX Manager
To start a manual backup of the NSX Manager, we need to click on “START BACKUP”:
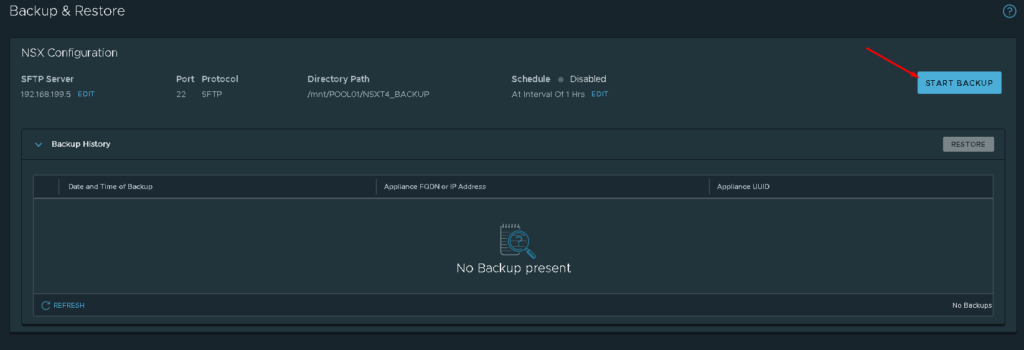
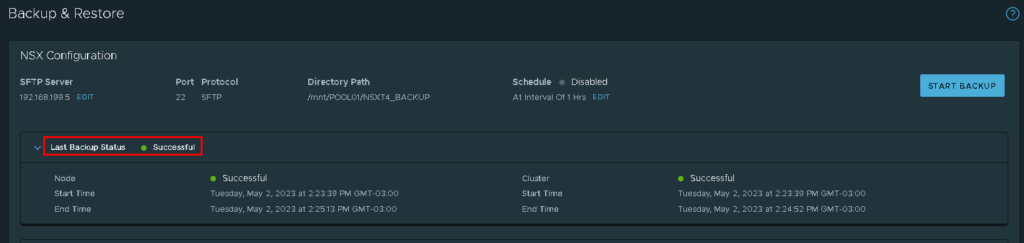
If all information is OK, the backup process will start:
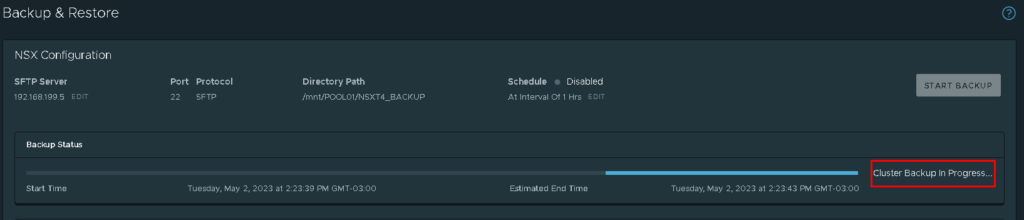
Wait some minutes while the backup process is running:
Enabling automatic backups of NSX Manager
To enable automatic backups of the NSX Manager, we need to click on EDIT next to the Schedule option, as shown in the below picture:

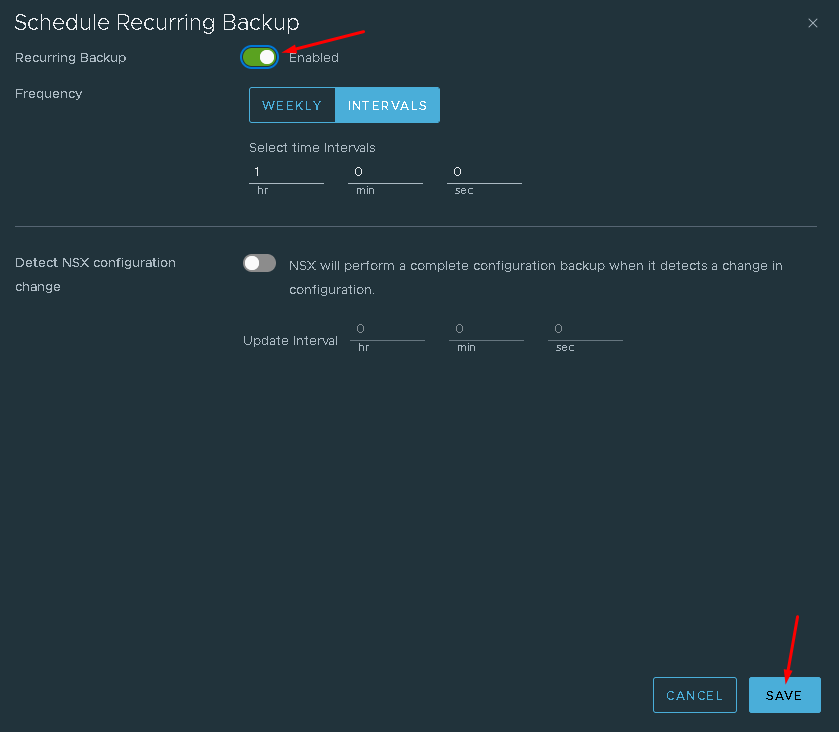
On Recurring Backup, slide the key to enable this option.
By default, an automatic backup will do every 1 hour. You can maintain the default option or you can customize it based on your environment needs.
After that, click on SAVE:
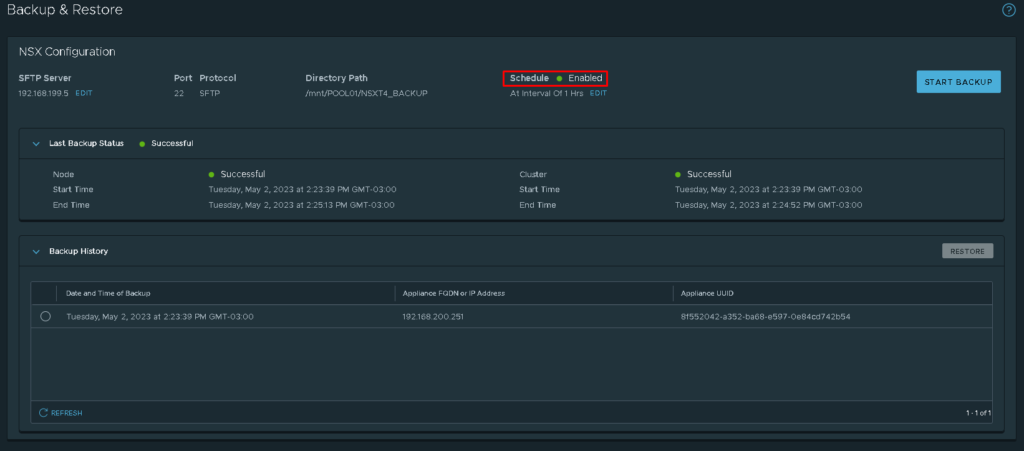
So, now we have the Automatic Backup enabled 🙂
Make Recovery Part of the Backup Plan
After saving the destination and schedule, run a manual backup and verify that NSX Manager reports success and that the backup files are present on the SFTP server. Protect the encryption passphrase, monitor scheduled runs, and retain backups according to your recovery requirements.
A backup is useful only if it can be restored, so document and periodically validate the recovery procedure for the matching NSX release. For the restore workflow, continue with How to Restore NSX Manager from Backup.
External References
- Broadcom — How to Configure and Manage VMware NSX Manager Backups Current Broadcom walkthrough for configuring an external SFTP destination, accepting its SSH fingerprint, running a manual backup, and setting a recurring schedule. It also highlights the recovery passphrase requirement.
- Broadcom TechDocs — Configure NSX Backups (NSX 4.2) Version-specific NSX 4.2 requirements for supported SFTP software, directory permissions, authentication, SSH fingerprints, and the passphrase needed during restore. Check the guide matching the release deployed in your environment.
- Broadcom — Virtual Machine Snapshots Are Not Supported for NSX Appliances Explains that vSphere snapshots of NSX Manager and Edge appliances are unsupported and can cause instability; directs administrators to the supported file-based backup and restore workflow.
- Broadcom — Troubleshooting NSX Backup and Restore Failures Lists supported-server and cipher considerations, required backup passphrase, restore version/build requirements, and logs useful when troubleshooting failed operations.
- TrueNAS Documentation — Configuring SFTP (CORE 13.0) Version-specific TrueNAS CORE 13.0 instructions for enabling SSH/SFTP access. Use the documentation for the exact TrueNAS edition and release in the lab, and apply least-privilege access controls to the backup account.
