
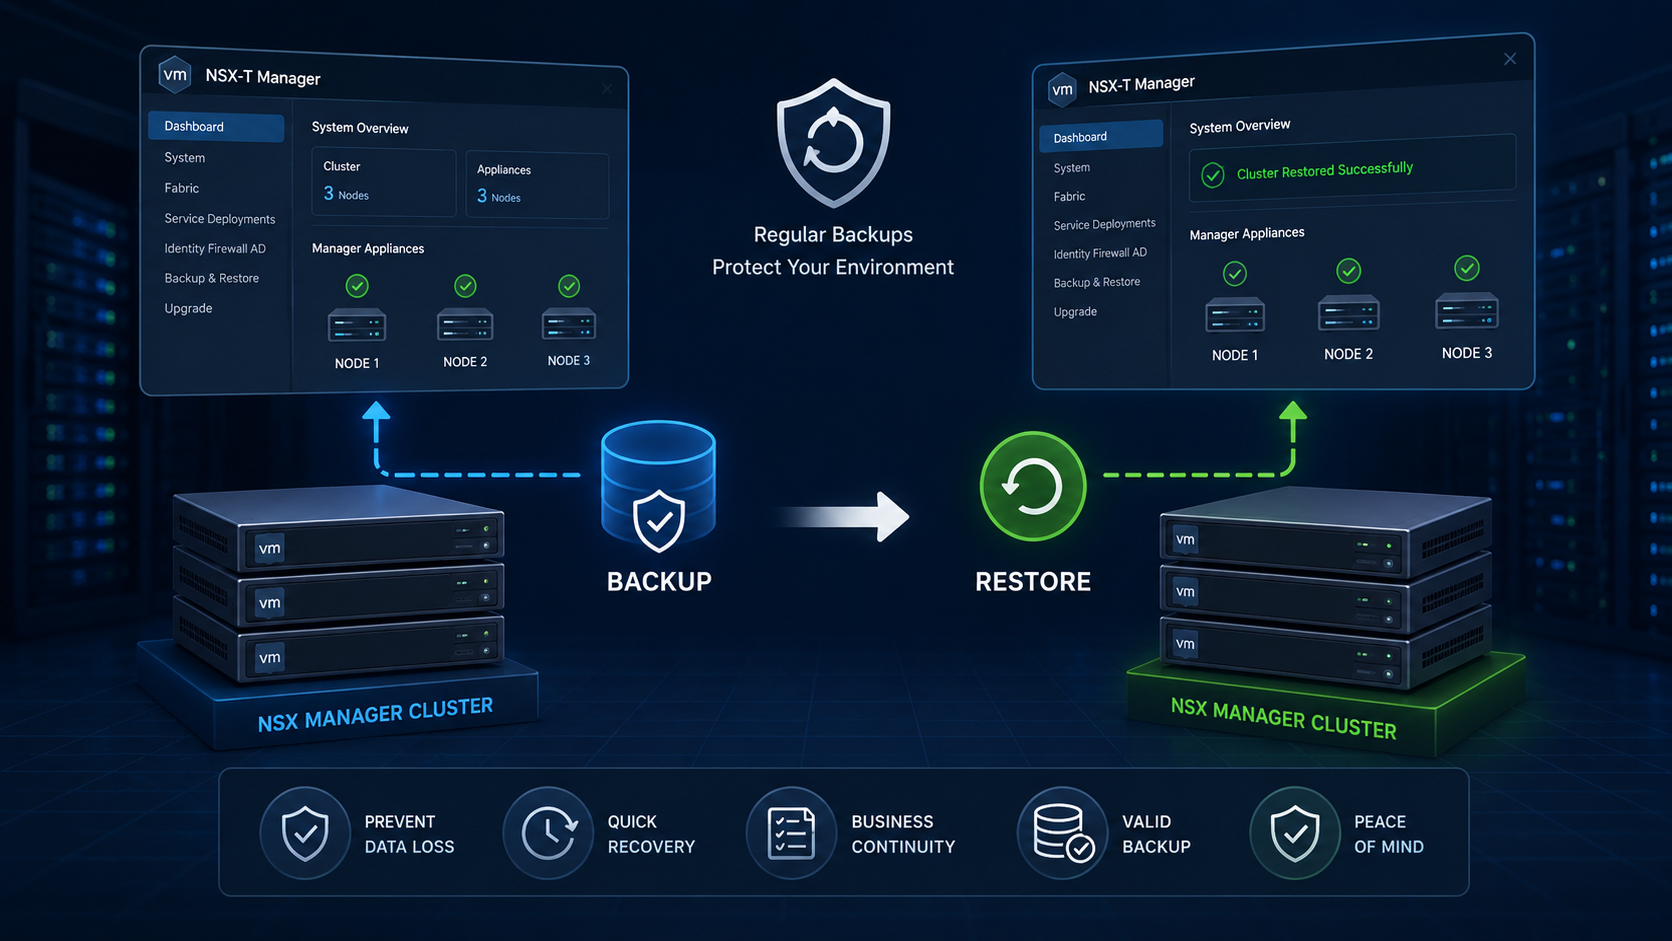
Recovering an NSX Manager cluster from a file-based backup requires more than deploying a replacement appliance. The restore point, NSX version and build, appliance identity, repository access, and backup passphrase all need to meet the requirements for that recovery. A mismatch can leave the Restore action unavailable or prevent the restore from completing.
This lab walkthrough covers recovery after all three NSX Manager appliances became unavailable while the Edge Transport Node VMs remained in the vSphere environment. It follows the restore workflow from deploying the first Manager through rebuilding the cluster, reconciling the surviving Edge nodes, and validating the recovered environment. Before reproducing the steps, add the exact NSX version and build used in the lab, and check the Broadcom procedure for that release. The backup restores NSX configuration and state; it does not include the Edge virtual-machine files. vSphere snapshots are not a supported backup or rollback method for NSX Manager or Edge appliances.
If you need to create or validate the backup repository first, follow Protect Your NSX Manager: Configure and Verify Backups Step by Step.
When I would need to use the NSX Manager Restore process?
So, having a valid backup is an important thing, mainly if you have a production environment. As we said before, to back up the NSX Manager cluster is necessary to use the built-in application backup. It is like a File-Based backup and you can back up all data and configuration of your NSX Manager cluster.
Failures happen and to recover your NSX Manager cluster properly, you need to have a valid NSX Manager backup. That’s it!
However, by the fact that we have 3 NSX Managers Appliances in the NSX Manager cluster (3 appliances are VMware’s recommendations), in case of disaster, this backup certainly would save your life 🙂
About Our Environment
We have an NSX Manager cluster composed of 3 appliances. We have backup configured normally. But, the hard disk that I am using to run all NSX Manager appliances crashed and I cannot start any NSX Manager anymore =/
Disclaimer: So, for a production environment, you NEVER should keep all NSX Manager appliances running on the same hardware/server/ESXi host. There is a good practice to separate all NSX Manager appliances (a good idea is creating a DRS rule to separate all appliances – to avoid running together on the same ESXi node).
So, how can we recover our NSX Manager cluster? What steps are necessary to do? We will discuss it later providing more details.
Pre-Restore Requirements
Before deploying the replacement NSX Manager, collect the information associated with the backup you intend to restore.
The replacement appliance must satisfy the restore requirements of that backup. In particular, verify the exact NSX version and build, the original Manager IP address or published FQDN, the IP stack configuration, appliance type, backup repository, repository credentials, and backup passphrase.
Also make sure the original NSX administrator and root credentials are available. During the restore, configuration and credentials from the backup can replace values configured when the new appliance was deployed.
To group all, keep in mind the following list:
- Exact NSX version and build number
- Original Manager IP/FQDN used by the backup
- IPv4/IPv6/dual-stack configuration
- Correct NSX Manager vs Global Manager appliance type
- Backup repository address and path
- Backup repository credentials
- Backup encryption passphrase
- Original admin and root credentials
- DNS resolution, when Published FQDN is used
Steps to recover NSX Manager from Backup
Step 1 – Deploy One Fresh NSX Manager Appliance
Start by deploying one new NSX Manager appliance using the NSX version and build required by the selected backup.
Do not deploy all three replacement Managers at this stage. The backup is restored to a single newly deployed Manager first. Once that restore reaches the appropriate stage, additional Manager nodes are deployed to rebuild the cluster.
Important: The identity of the new appliance must match the identity associated with the backup. Depending on whether Published FQDN was enabled, NSX validates the IP address or FQDN recorded in the backup. If these values do not match, the Restore button may remain unavailable.
Step 2 – NSX Built-In Backup Configuration
After deploying the first NSX Manager, configure the Backup built-in application.
We should point to the previous backup repository when we have the valid NSX Manager backups. Here, we are using a TrueNAS server as a backup repository for our NSX Manager cluster:
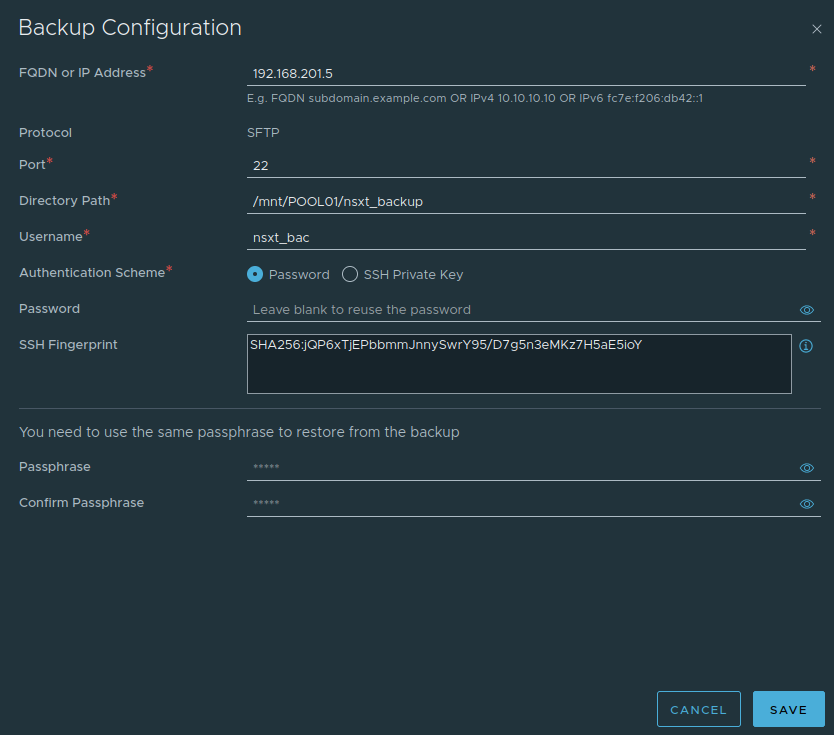
If you still need to configure or validate the backup repository, see “How to Configure Backup on the NSX Manager“ before continuing with the restore.
Step 3 – Checking all NSX Valid Backups
After that, we can see all valid backups and choose one to do the restore process.
Tip: Under Backup History, look to the column “Appliance FQDN or IP Address”. This is the FQDN or IP Address that is used to make backups. So, our new NSX Manager Appliance deployed on the first step here must have this configuration:
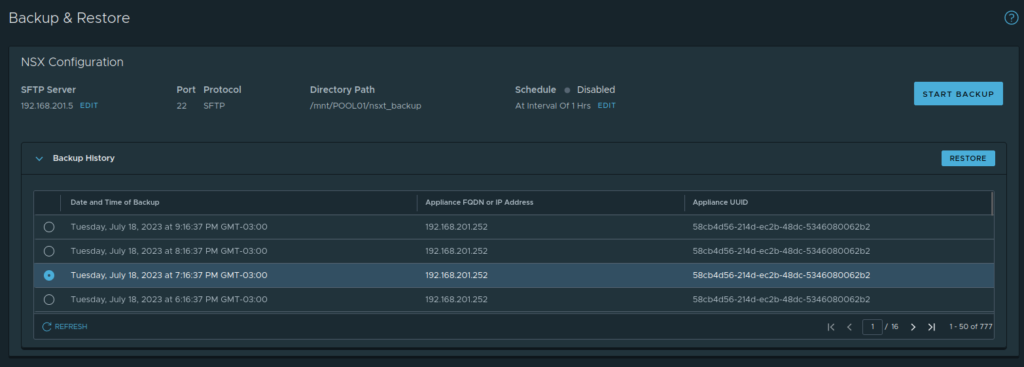
Important: Before clicking RESTORE, confirm that the selected backup belongs to the environment being recovered and that its timestamp represents the recovery point you actually want.
Check the NSX version/build, appliance identity, backup timestamp, and repository information before proceeding. Do not rename or reorganize individual backup files manually on the SFTP repository because NSX expects a specific backup directory structure.
Step 4 – Starting the Restore
Select the backup and click on RESTORE.
Please, be careful with that. Keep calm and read this page with attention. After that, click on CONTINUE:
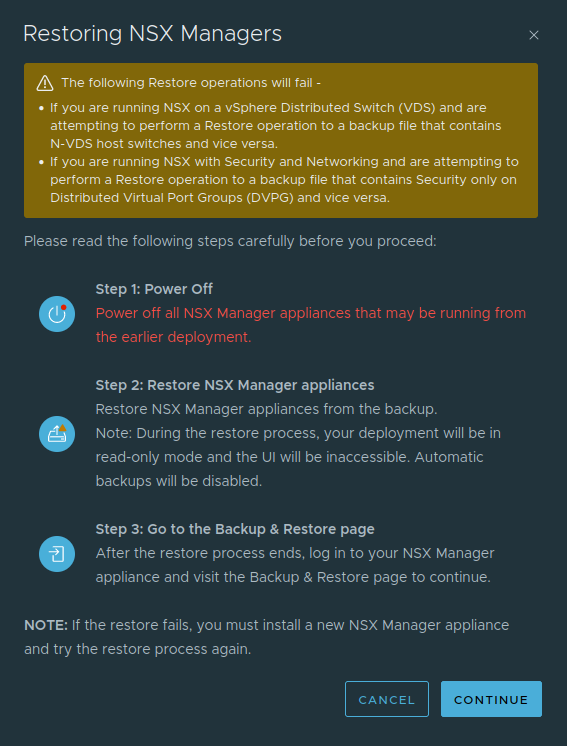
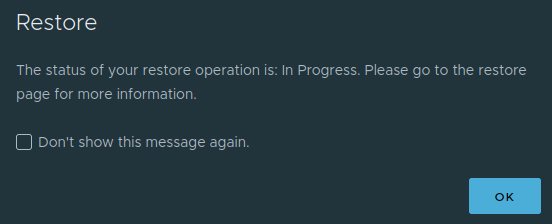
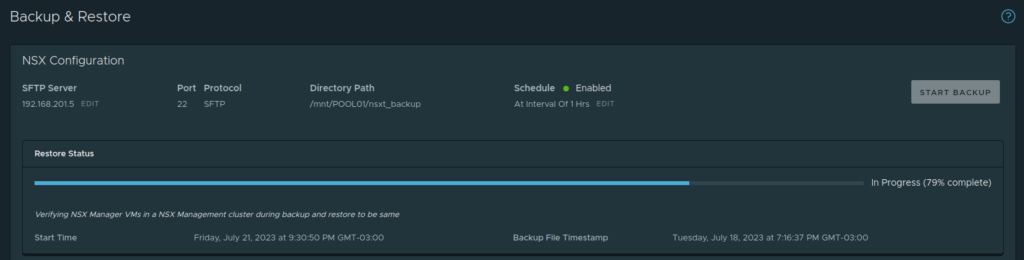
The recovery process has started:
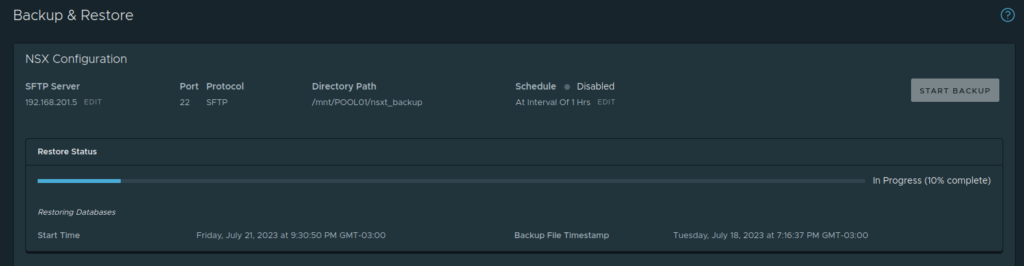
Step 5 – Waiting the Recovery Process
Do not interrupt the restore because the NSX Manager UI becomes unavailable.
During a restore operation, the Manager may reboot and the GUI may become inaccessible multiple times. This can be expected behavior while services and configuration are being recovered.
Do not manually reboot or power off the appliance unless the restore workflow explicitly reports a failure or the applicable Broadcom procedure instructs you to do so.
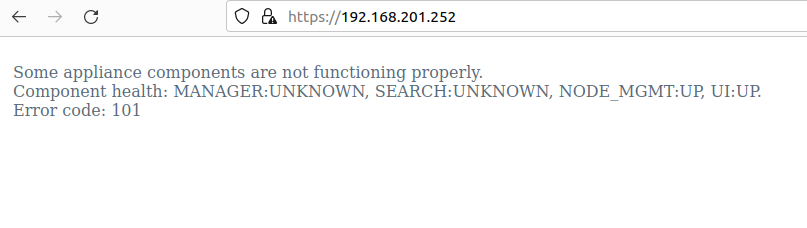
Accessing the NSX Manager by SSH, we can see that the Overall Status is DEGRADED (it is pretty normal because the recovery process still running):
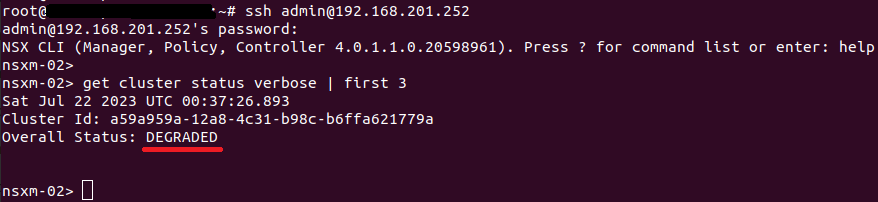
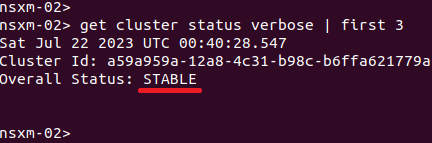
After some minutes, the Overall Status is STABLE and the GUI interface will probably be available:
Step 6 – Acess the NSX Manager through GUI
Credential note: After configuration from the backup is restored, the credentials from the original environment may become applicable again. Keep the original admin and root passwords available throughout the recovery process, together with the backup passphrase.
Access the Backup & Restore menu and click on “Show Details”:
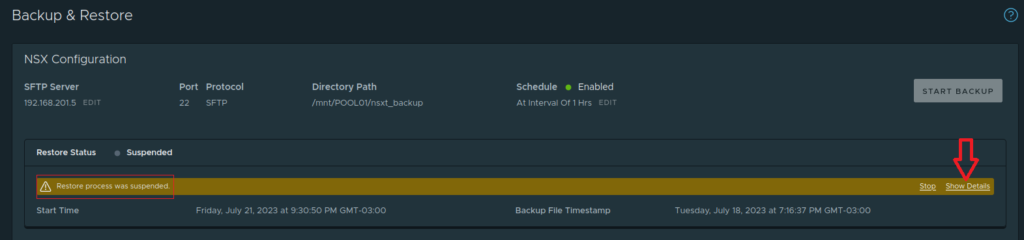
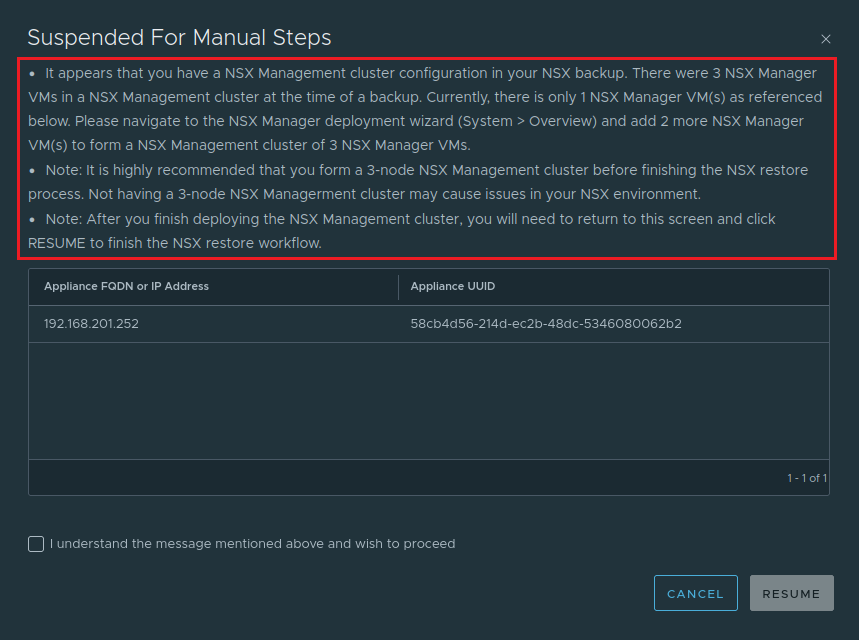
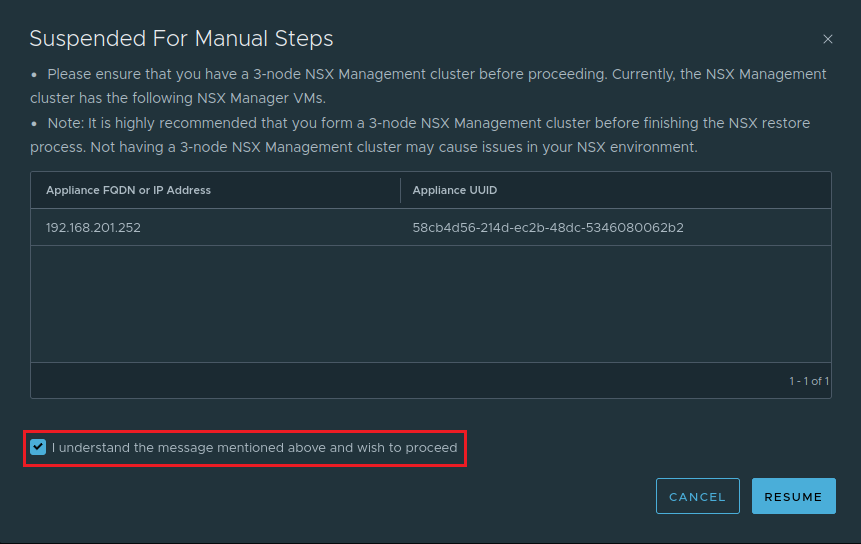
In our case, as we had an NSX Manager cluster, we received this warning message.
To follow the recovery process, we need to deploy more two NSX Manager Appliances to create an NSX Manager cluster again:
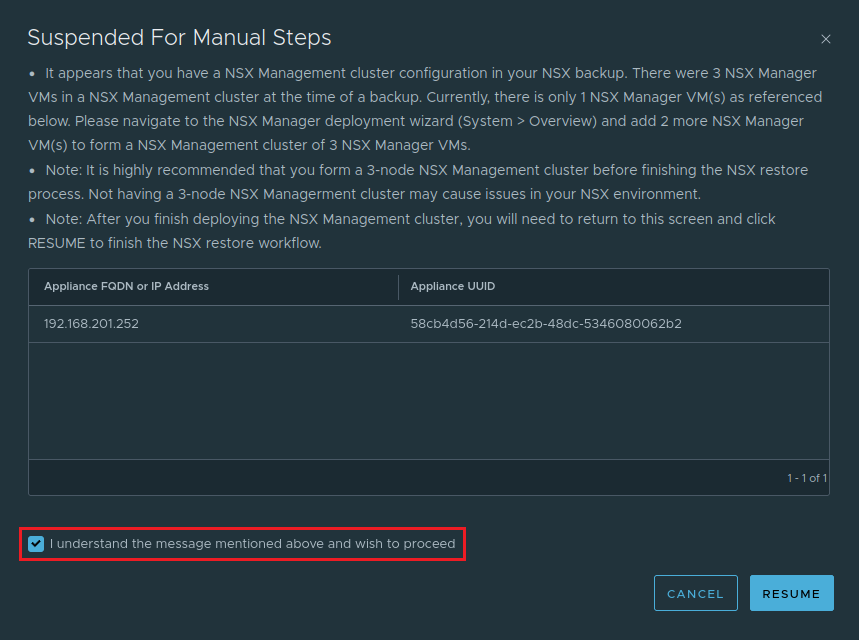
After doing that, mark the option “I understand the message mentioned and wish to proceed” and click on RESUME:
The recovery process will continue:
Note: If you do not create the NSX Manager cluster as requested, you will receive a new warning:
Step 7 – Discovering Transport Nodes
At this point, the recovery process failed to discover both Transport Nodes below (IPs 192.168.200.241 and 192.168.200.242).
In this case, both are Edge Transport Nodes. In my case, I just powered on both Edge Transport Nodes VMs, marked the option “I understand the message mentioned above and wish to proceed” and clicked on RESUME to continue the process:
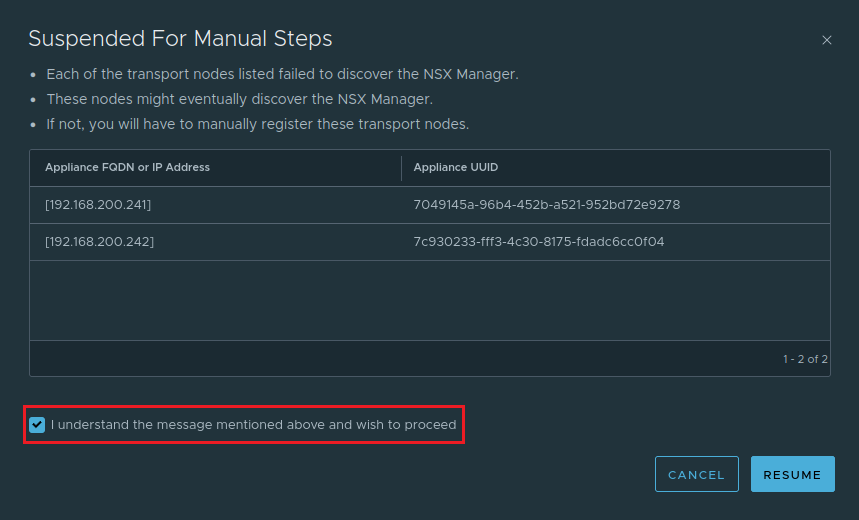
Note: In this lab, the Edge Transport Node virtual machines had not been lost. They only needed to be powered on so that the restored NSX Manager could rediscover and reconcile them.
This is not always the case. An NSX Manager backup protects NSX configuration and state; it does not contain the Edge appliance virtual machines themselves. If Edge VMs were also destroyed during the disaster, they must be redeployed or replaced as part of the recovery.
After some minutes, we can see all NSX Managers Appliances under the menu System –> Appliances:
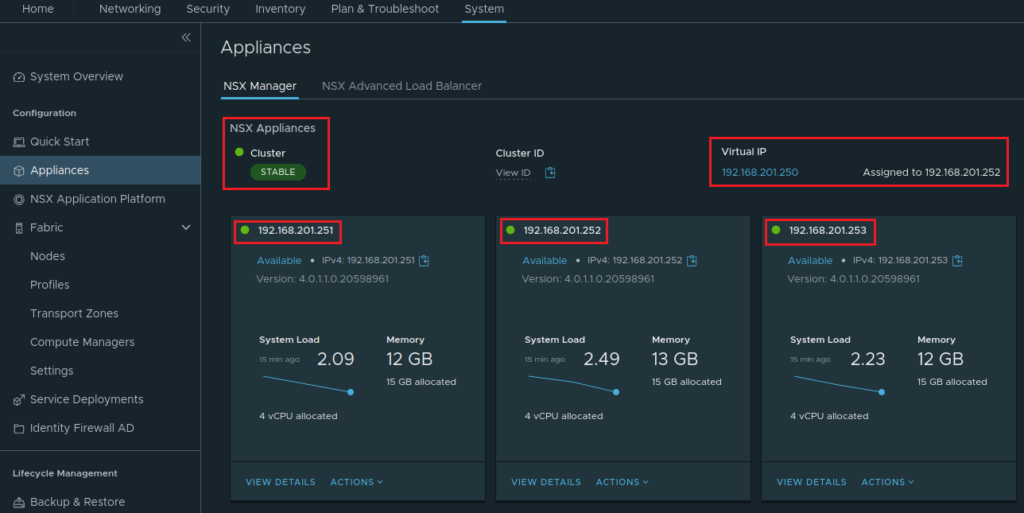
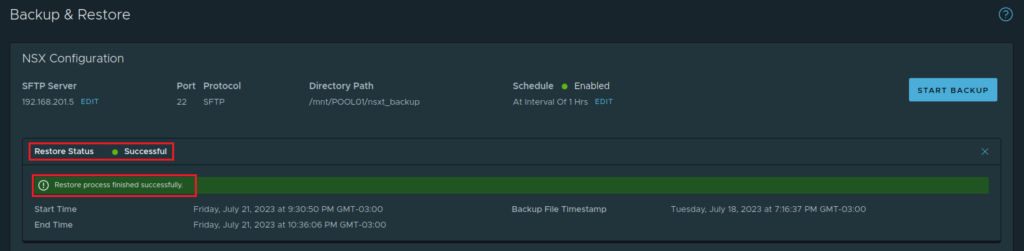
Finally, the recovery process was finished successfully:
Validate the Recovered NSX Environment
Do not treat the successful restore message alone as the end of the recovery. Validate the management plane and the dataplane before returning the environment to normal operation:
get cluster statusIf the Manager cluster is healthy but Host-to-Edge overlay connectivity is not, see “Troubleshooting NSX Overlay TEP Connectivity from ESXi and Edge Nodes“.
After the environment is stable and the recovered configuration has been validated, verify that the backup configuration is still working and run a fresh manual backup.
A successful restore proves that the previous recovery point was usable. A new backup establishes a fresh recovery point for the now-restored environment.
If the Restore Button Is Greyed Out
If the backup is visible but the Restore button cannot be selected, do not assume that the backup itself is damaged.
Verify the replacement appliance against the backup metadata. Common causes include an NSX version/build mismatch, IP/FQDN mismatch, Published FQDN differences, incompatible IPv4/IPv6 configuration, or deploying the wrong appliance type such as Global Manager instead of NSX Manager.
Turn the Restore into a Tested Recovery Plan
A successful restore message confirms that NSX recovered from the selected backup, but the recovery is not complete until the Manager cluster, transport nodes, and data-plane connectivity have been checked.
Record the recovered NSX version/build and the backup timestamp, verify that the restored configuration matches the intended recovery point, and run a fresh backup after validation. Keep the repository credentials and backup passphrase securely available, and test the recovery procedure periodically so the team is prepared to repeat it during an actual outage.
External References
- Broadcom TechDocs — Restore an NSX Manager Backup (NSX 4.2) Version-specific restore procedure covering the backup passphrase and server fingerprint, matching the original appliance identity, restoring one Manager first, rebuilding the remaining cluster nodes, and checking recovery completion. Consult the guide for the exact NSX release deployed in the environment.
- Broadcom — Troubleshooting NSX Backup and Restore Failures Lists backup and restore prerequisites, supported SFTP software and ciphers, version/build matching, credentials, passphrase requirements, relevant log files, and common failure conditions.
- Broadcom — NSX Restore Button Greyed Out and Not Actionable Explains why a restore point may not be valid for a newly deployed Manager and how to check the exact version, IP or FQDN, Published FQDN setting, and IPv4/IPv6 configuration.
- Broadcom — Restore Button Greyed Out on a Newly Deployed NSX Manager Describes a restore blocked because the replacement appliance type did not match the original deployment, and emphasizes checking whether the backup belongs to an NSX Manager or Global Manager.
- Broadcom — NSX Edges in Failed or Unknown State After NSX Restore Clarifies that NSX backup contains configuration and state, not Edge VM binaries; surviving Edge nodes can be re-registered, while lost nodes must be redeployed using the supported method.
- Broadcom — Virtual Machine Snapshots Are Not Supported for NSX Appliances Explains why vSphere snapshots of NSX Manager and Edge appliances are unsupported and directs administrators to the file-based backup and restore workflow.
- Broadcom — NSX Backup Restore Fails with a Bad Passphrase Documents the recovery steps after a restore attempt fails because the backup encryption passphrase is incorrect, including redeploying a fresh replacement appliance before retrying.
