

PowerFlex’s REST API lets administrators inspect storage resources and automate common operations using standard HTTP requests and JSON. This guide uses curl to query a PowerFlex 4.5.2 environment, create a volume, map it to a Storage Data Client (SDC), and remove it safely.
The examples were tested in a nested lab. REST calls can change or delete storage objects, so verify the target system, object name, and ID before running any POST that changes state. The volume-removal example is destructive: deleting a volume erases its data.
The examples use curl and jq. Use an account with only the permissions required for the task, keep passwords and tokens out of screenshots and logs, and use the API documentation matching the installed PowerFlex release.
Lab scope: This tutorial describes a nested PowerFlex 4.5.2 test environment. It is not a substitute for the product’s current compatibility matrix, change-control process, or production runbook.
Related PowerFlex guides
If you are new to the platform, start with the blog’s overview of PowerFlex architecture and key components. It introduces the core components referenced by the API examples below.
For command-line alternatives to REST calls, see PowerFlex SCLI Basics. SCLI and REST are different interfaces; use the syntax documented for the interface and release you are running.
If you are preparing a lab environment, the blog’s PowerFlex 4.5.2 cluster deployment guide provides related deployment context.
What is an API?
An application programming interface (API) defines how software systems exchange requests and responses. A REST API commonly uses HTTP methods such as GET to retrieve information and POST to create or change resources. Responses are often returned as JSON.
In this tutorial, GET examples read PowerFlex inventory. The volume-creation, mapping, and removal calls use POST and make changes to the cluster.
PowerFlex REST API Overview
Dell documentation describes three PowerFlex API families: the PowerFlex Block API, PowerFlex Manager API, and PowerFlex PowerAPI. In the 4.5.x documentation, the Block API provides operations for core block-storage resources; the PowerFlex Manager API supports lifecycle management; and PowerAPI is Dell’s newer standardized API model.
Dell says the Block API and PowerFlex Manager API are expected to be deprecated eventually and their functions incorporated into the PowerAPI model, but the cited documentation does not give a date or target release. Do not interpret this as a completed migration. The REST web service is hosted on the PowerFlex Management Platform (PFMP); for Block API requests, the PowerFlex Gateway communicates with the MDM and returns REST-formatted responses.
PowerFlex 4.x uses the PFMP authentication endpoint to obtain a bearer access token. The examples below use the Block API paths under /api; do not substitute /im/types paths, which belong to PowerFlex Manager API workflows.
First Things First: Acquiring the Authentication Token
Firstly, we need to acquire the authentication token. The following command can do it:
read -s -p "Enter Password: " PASSWORD &&
pfmp_token=$(curl -s -k --location --request POST 'https://pfmp.lab.local/rest/auth/login' \
    --header 'Accept: application/json' \
    --header 'Content-Type: application/json' \
    --data-raw "{
        \"username\": \"admin\",
        \"password\": \"$PASSWORD\"
    }" |jq -r '.access_token') && unset PASSWORD
Replace the “pfmp.lab.local” with your PowerFlex Manager FQDN.
Command explanation:
- The first command line uses “read” to ask yourself about the password of the username admin and stores it in a variable “PASSWORD”;
- The second command line calls the PowerFlex Manager cluster, asking for the authentication token. Look at the “data-raw” section. The “admin” username is used, and its password is a variable, created by the first command line;
- The “unset PASSWORD” removes the variable PASSWORD. This variable stores the admin password in a clear-text mode. So, for security reasons, we removed the authentication token after acquiring it;
- The authentication token is placed at the variable “pfmp_token”.
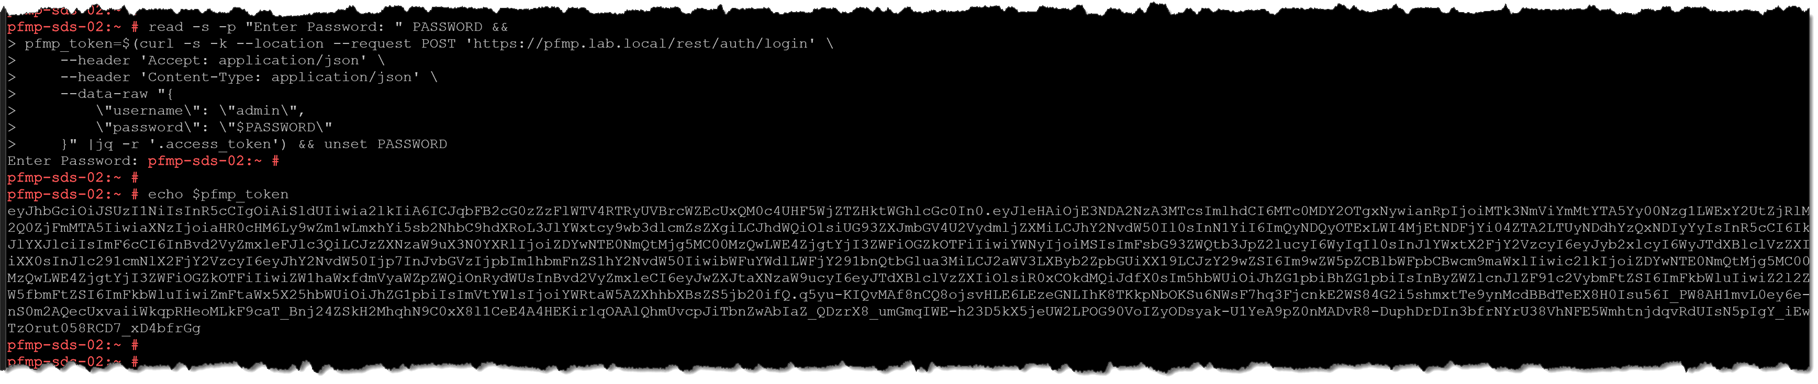
After acquiring the authentication token, we can perform API calls using it!
Important: An access token has an expiration date. The access token is valid only for 5 minutes. To continue accessing the system after the token expires, you can either update the token using standard OIDC refresh operation, or log in again to get a new access token.

If you try executing an API call and receiving an output like the following, it's probably because your authentication token expired:

pfmp-sds-02:~ # curl -s -k -H "Authorization: Bearer ${pfmp_token}" https://pfmp.lab.local/api/types/System/instances
<html>
<head><title>401 Authorization Required</title></head>
<body>
<center><h1>401 Authorization Required</h1></center>
<hr><center>nginx</center>
</body>
</html>
Query System and MDM information
The System collection returns a JSON array. This jq expression displays the PowerFlex version, installation ID, MDM cluster mode, primary MDM name, secondary MDM names, and tiebreaker names without assuming that the arrays are always populated:
curl --fail --silent --show-error \
  --header "Authorization: Bearer ${pfmp_token}" \
  --header 'Accept: application/json' \
  "https://pfmp.lab.local/api/types/System/instances" |
jq '.[] | {
  systemVersionName,
  installId,
  mdmCluster: {
    clusterMode: .mdmCluster.clusterMode,
    masterName: (.mdmCluster.master.name // null),
    slaveNames: [(.mdmCluster.slaves // [])[]? | .name],
    tieBreakerNames: [(.mdmCluster.tieBreakers // [])[]? | .name]
  }
}'
The properties master, slaves, and tieBreakers describe MDM cluster members. The returned arrays depend on the cluster mode; do not assume a fixed number of members when parsing the response.
Query SDC and SDS inventory
Use the Sdc endpoint to list SDC names, IP addresses, and MDM connection state:
curl --fail --silent --show-error \
  --header "Authorization: Bearer ${pfmp_token}" \
  --header 'Accept: application/json' \
  "https://pfmp.lab.local/api/types/Sdc/instances" |
jq '.[] | {name, sdcIp, mdmConnectionState}'
Use a separate request for SDS information. maintenanceType applies to SDS maintenance state; do not assume it is an SDC property:
curl --fail --silent --show-error \
  --header "Authorization: Bearer ${pfmp_token}" \
  --header 'Accept: application/json' \
  "https://pfmp.lab.local/api/types/Sds/instances" |
jq '.[] | {name, mdmConnectionState, maintenanceType}'
A response can contain null for fields that are not populated or are not applicable to a particular object. Interpret the values using the API schema and the state of the target system.
Query Protection Domains and Storage Pools
To list Protection Domains with their IDs and states:
curl --fail --silent --show-error \
  --header "Authorization: Bearer ${pfmp_token}" \
  --header 'Accept: application/json' \
  "https://pfmp.lab.local/api/types/ProtectionDomain/instances" |
jq '.[] | {id, name: (.name // .nName // null), protectionDomainState}'
To list Storage Pools and relevant layout and capacity-alert settings:
curl --fail --silent --show-error \
  --header "Authorization: Bearer ${pfmp_token}" \
  --header 'Accept: application/json' \
  "https://pfmp.lab.local/api/types/StoragePool/instances" |
jq '.[] | {
  id,
  name: (.name // .nName // null),
  dataLayout,
  sparePercentage,
  capacityAlertHighThreshold,
  capacityAlertCriticalThreshold
}'
These are different resource types. A Protection Domain’s state is not a Storage Pool property. A missing or null capacity field should not be interpreted as zero; check the object and versioned API schema.
Query existing volumes
List volume names, IDs, sizes, provisioning types, access limits, and mapped SDC details:
curl --fail --silent --show-error \
  --header "Authorization: Bearer ${pfmp_token}" \
  --header 'Accept: application/json' \
  "https://pfmp.lab.local/api/types/Volume/instances" |
jq '.[] | {
  name,
  id,
  sizeInKb,
  volumeType,
  accessModeLimit,
  mappedSdcInfo: [(.mappedSdcInfo // [])[]? | {sdcId, sdcName, sdcIp, accessMode}]
}'
The volume size returned in sizeInKb is in kilobytes. If the response contains no mapped SDCs, mappedSdcInfo may be empty or absent.
Create a volume
Before creating a volume, confirm that the target Storage Pool exists, has sufficient capacity, and is the intended pool. Check the Volume collection for an existing object with the proposed name. PowerFlex volume names must be unique; do not repeat a POST automatically if the client times out, because the first request may have succeeded even if its response was lost.
First, inspect the Storage Pool IDs and data layouts:
curl --fail --silent --show-error \
  --header "Authorization: Bearer ${pfmp_token}" \
  --header 'Accept: application/json' \
  "https://pfmp.lab.local/api/types/StoragePool/instances" |
jq '.[] | {id, name: (.name // .nName // null), dataLayout, sparePercentage}'
Then create the volume. The following example retains the volumeSizeInGb field used in the author’s 4.5.2 test. Check the schema for the exact installed API version before publishing or adapting this payload; examples for other API variants and clients may use a different size field, such as volumeSizeInKb. Do not mix fields from different schemas.
curl --fail --silent --show-error \
  --request POST \
  --header "Authorization: Bearer ${pfmp_token}" \
  --header 'Accept: application/json' \
  --header 'Content-Type: application/json' \
  --data '{
    "name": "Test_Volume_01",
    "compressionMethod": "None",
    "storagePoolId": "b0a820d300000000",
    "volumeType": "ThinProvisioned",
    "volumeSizeInGb": "32"
  }' \
  "https://pfmp.lab.local/api/types/Volume/instances"
Replace the example Storage Pool ID with the ID confirmed in your own environment. compressionMethod: None is relevant to fine-granularity pools; verify the dataLayout first and follow the API schema and pool behavior for medium-granularity storage.
After the POST returns, query the collection and confirm the new volume’s name, ID, size, type, and Storage Pool. Do not infer success from the HTTP request alone:
curl --fail --silent --show-error \
  --header "Authorization: Bearer ${pfmp_token}" \
  --header 'Accept: application/json' \
  "https://pfmp.lab.local/api/types/Volume/instances" |
jq '.[] | select(.name == "Test_Volume_01") | {name, id, storagePoolId, sizeInKb, volumeType, compressionMethod}'
A newly created volume is not available to an SDC until it is mapped to that SDC.
Map the volume to an SDC
First, find the SDC ID and verify the SDC name and IP address. Do not copy an ID from a different cluster or an unrelated screenshot:
curl --fail --silent --show-error \
  --header "Authorization: Bearer ${pfmp_token}" \
  --header 'Accept: application/json' \
  "https://pfmp.lab.local/api/types/Sdc/instances" |
jq '.[] | {name, id, sdcIp, mdmConnectionState}'
For the PowerFlex SDC/Gen1 mapping operation, use addMappedSdc and the sdcId field. The addMappedHost action is a different host/Gen2 operation and should not be combined with an SDC ID:
VOLUME_ID="REPLACE_WITH_THE_VERIFIED_VOLUME_ID"
SDC_ID="REPLACE_WITH_THE_VERIFIED_SDC_ID"

curl --fail --silent --show-error \
  --request POST \
  --header "Authorization: Bearer ${pfmp_token}" \
  --header 'Accept: application/json' \
  --header 'Content-Type: application/json' \
  --data "$(jq -n \
    --arg sdcId "$SDC_ID" \
    '{sdcId: $sdcId, accessMode: "ReadWrite", allowMultipleMappings: false, volumeClass: "defaultclass"}')" \
  "https://pfmp.lab.local/api/instances/Volume::${VOLUME_ID}/action/addMappedSdc"
Use ReadWrite only when the intended host and workload require write access. Do not grant simultaneous write access to multiple independent hosts unless the application, cluster, and filesystem are designed and configured for shared access; otherwise, data corruption may result. allowMultipleMappings should be enabled only when additional mappings are intentional and supported.
Verify the resulting mapping by querying the volume:
curl --fail --silent --show-error \
  --header "Authorization: Bearer ${pfmp_token}" \
  --header 'Accept: application/json' \
  "https://pfmp.lab.local/api/types/Volume/instances" |
jq --arg volumeId "$VOLUME_ID" '
  .[] | select(.id == $volumeId) |
  {name, id, mappedSdcInfo: [(.mappedSdcInfo // [])[]? | {sdcId, sdcName, sdcIp, accessMode}]}
'
The returned mappedSdcInfo should identify the SDC you selected and the intended access mode. On the SDC, use the operating system’s storage tools to rescan and prepare the newly presented block device before using it.
Unmap and remove a volume
Warning: Removing a PowerFlex volume erases its data. Confirm the target name and ID and ensure that the data is no longer needed before continuing.
Before removal:
- Stop applications using the volume and unmount or otherwise release it from the host according to the operating system and application procedure.
- Unmap the volume from every SDC or host that has it mapped, using PowerFlex Manager or the supported API/CLI operation.
- Confirm that all mappings have been removed. If the volume belongs to a snapshot policy or a V-Tree, handle those relationships according to the applicable Dell procedure before deletion.
- Query the volume by name and copy its exact ID from the current cluster. Confirm the name, ID, and mapping state a second time.
The original draft shows 0c1da31900000008 during mapping but uses the different ID 0c1da31800000008 in the removal call. These are not interchangeable. In the example below, set VOLUME_ID to the ID returned by your own query for the exact volume you intend to delete.
curl --fail --silent --show-error \
  --header "Authorization: Bearer ${pfmp_token}" \
  --header 'Accept: application/json' \
  "https://pfmp.lab.local/api/types/Volume/instances" |
jq '.[] | {name, id, mappedSdcInfo: [(.mappedSdcInfo // [])[]? | {sdcId, sdcName, accessMode}]}'

VOLUME_ID="REPLACE_WITH_THE_VERIFIED_VOLUME_ID"
After confirming that the selected volume is unmapped and safe to delete, submit the removal request. ONLY_ME means remove the specified volume only; it does not force deletion or bypass remaining mappings and prerequisites:
curl --fail --silent --show-error \
  --request POST \
  --header "Authorization: Bearer ${pfmp_token}" \
  --header 'Accept: application/json' \
  --header 'Content-Type: application/json' \
  --data '{"removeMode":"ONLY_ME"}' \
  "https://pfmp.lab.local/api/instances/Volume::${VOLUME_ID}/action/removeVolume"
Verify that the specific ID no longer appears in the active volume collection:
curl --fail --silent --show-error \
  --header "Authorization: Bearer ${pfmp_token}" \
  --header 'Accept: application/json' \
  "https://pfmp.lab.local/api/types/Volume/instances" |
jq --arg volumeId "$VOLUME_ID" '[.[] | select(.id == $volumeId)] | length'
A result of 0 means the ID was not returned in that collection. If the removal request fails because a mapping remains, do not repeat it blindly; identify and remove the residual mapping through the supported management interface, then recheck the volume.
Operational takeaways
PowerFlex REST calls are useful for repeatable inventory checks and storage automation, but the exact endpoint and payload must match the installed API version and resource type. Use GET calls to confirm the cluster, pool, volume, and SDC IDs before changing state. For volume creation and mapping, verify the resulting object before moving to the next step. For deletion, unmap every host, confirm the exact volume ID, and remember that the data is erased.
Keep credentials and bearer tokens out of source control, screenshots, and logs; validate TLS certificates; and use a dedicated account with only the permissions needed for the task. For production automation, test the workflow in a non-production environment and follow your organization’s change-management process.
External References
- Dell Technologies Developer — PowerFlex API 4.5.2 Versioned Dell Developer Portal entry for PowerFlex API 4.5.2-Manager_v4-5-2. Use the matching release documentation to confirm operation paths and request schemas.
- Dell PowerFlex 4.5.x Administration Guide — Run Script on Host Shows the PFMP login endpoint, bearer-token use, default access-token and refresh-token validity, and examples of PowerFlex Manager API requests.
- Dell Technologies InfoHub — PowerFlex API Operations Describes the PowerFlex Block API, PowerFlex Manager API, PowerAPI, REST service hosting, and Dell’s stated future direction for the API families.
- Dell Support — Performing PowerFlex API Calls from PFMP 4.x Demonstrates 4.x PFMP authentication and a bearer-token request to the PowerFlex Block API SDC collection.
- Dell PowerFlex Python SDK — Gen1 Volume Operations Official Dell SDK source for Gen1 volume operations, including volume creation fields and the SDC mapping action `addMappedSdc` with `sdcId`.
- Dell PowerFlex Python SDK — Gen2 Volume Operations Official Dell SDK source for Gen2 host mapping, which uses `addMappedHost` and host identifiers such as `hostId`, distinguishing it from SDC mapping.
- Dell Technologies InfoHub — Provision a Volume PowerFlex REST API use case for volume provisioning; compare its example with the schema and version selected in the Dell Developer Portal.
- Dell PowerFlex 4.5.x Administration Guide — Add Volumes Lists volume-creation prerequisites, supported naming rules, provisioning options, and the volume size unit in the management interface.
- Dell PowerFlex 4.5.x Administration Guide — Map Volumes Explains mapping volumes to hosts and the relationship between a PowerFlex volume and its SDC/host mappings.
- Dell PowerFlex 4.5.x Administration Guide — Unmap Volumes Documents the management-interface workflow for unmapping a volume from a host and verifying that the operation succeeded.
- Dell PowerFlex 4.5.x Administration Guide — Delete Volumes Warns that deleting a volume erases its data and instructs administrators to verify the selected object and operation.
- curl — Verifying TLS Certificates Official curl documentation explaining certificate verification and how to trust a private certificate authority without disabling TLS verification.
