
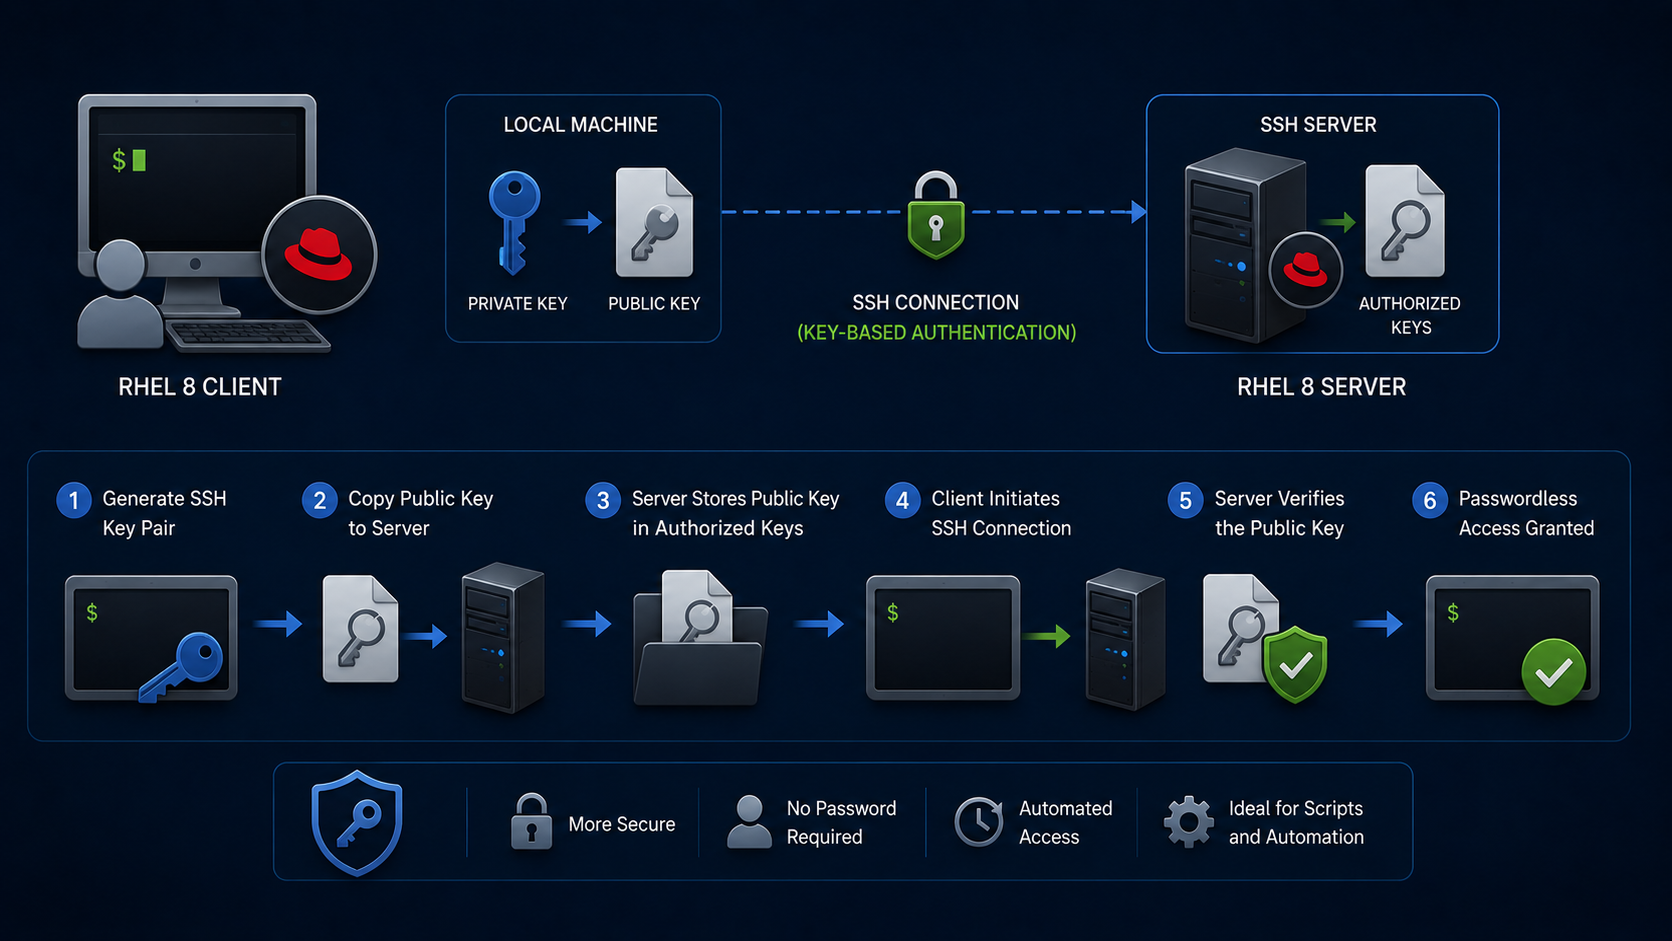
SSH public-key authentication lets a user connect to a remote RHEL 8 server without sending the account password for each login. The client proves access using a private key, while the server checks the matching public key stored for the target account. The private key stays on the client and must never be copied to the server or shared.
In this lab, we generate an RSA key pair, install its public key on a remote host with ssh-copy-id, and test the connection. The procedure uses root to match the original example, but for routine administration – especially automation – use a named account with only the necessary sudo permissions. A key can also have a passphrase; in that case, ssh-agent can keep the unlocked key available during a session so SSH does not prompt for the passphrase on every connection.
SSH key-based authentication is also useful when managing multiple Linux systems with Ansible. In Creating Your First Ansible Playbook: A Practical Lab Guide, the control node connects to managed hosts over SSH, and the lab uses key-based authentication for repeatable remote administration.
First and foremost: What is SSH?
SSH (Secure Shell) is a protocol which provides secure communications between two systems using a client-server architecture and allows users to log in to server host systems remotely. Unlike other remote communication protocols, such as FTP or Telnet, SSH encrypts the login session, which prevents intruders from collecting unencrypted passwords from the connection.
Passwordless Authentication… How does it work?
Generally, to access a remote server using SSH, you must provide the username and its password. However, we can log in without entering a password by generating an SSH key pair on a local system and copying the generated public key to the SSH server. Each user who wants to create a key must run this procedure.
For example:
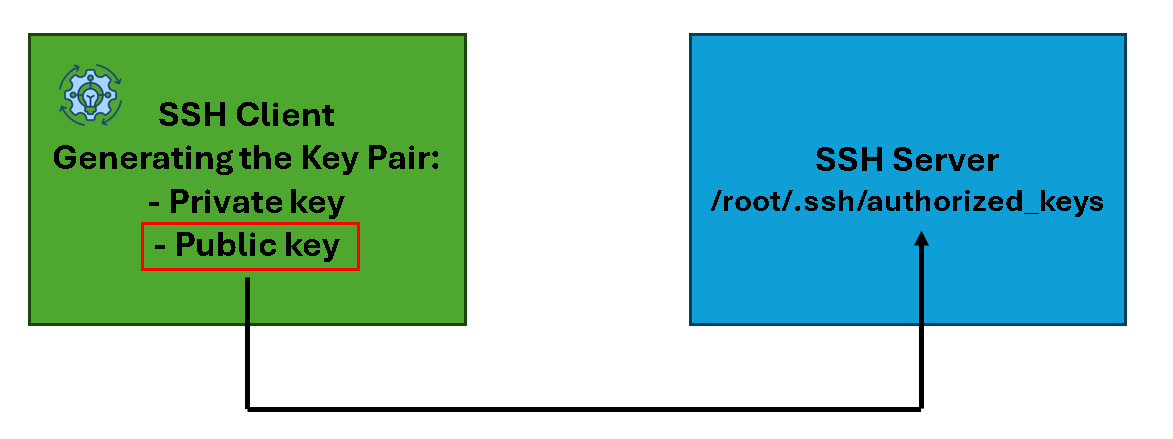
- Considering that we have an SSH client (an SSH client can be any device that can run SSH and connect to other devices through SSH).
- On the SSH client, we generate the SSH key pair (the SSH key pair creates a private and a public key).
- The private key must be kept safe on the local system.
- The public key must be sent to the remote SSH device that you want to connect to without entering the password.
- After generating the keys, the SSH client copies its public key to the SSH server.
- The SSH server stores the SSH client’s public key in the “authorized_keys”. Afterward, the SSH client can connect to the SSH server without entering the password:
Procedure
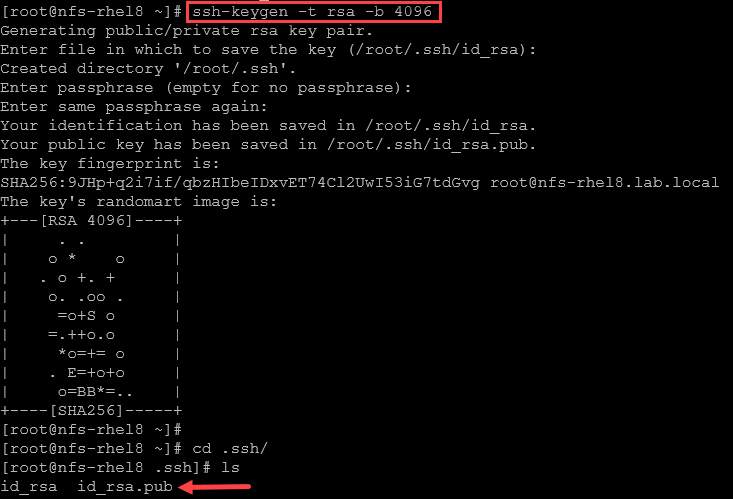
1- Generate the key pair. In this case, for instance, we’re generating an RSA key pair:
ssh-keygen -t rsa -b 4096- Press Enter to accept the default location (
~/.ssh/id_rsa). - Optionally set a passphrase for added security – in this case, we will not set up a passphrase.
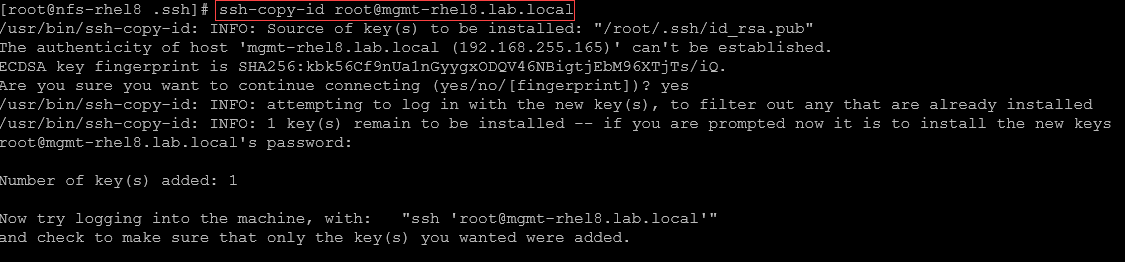
2- Copy the public key to a remote machine:
ssh-copy-id root@mgmt-rhel8.lab.localThe command “ssh-copy-id” will copy the public key to the remote SSH device; in this case, the remote SSH device is “mgmt-rhel8.lab.local”:
3- From the SSH client, access the remote SSH device:
ssh root@mgmt-rhel8.lab.localLook, we’re accessing the remote SSH device, without entering the password:
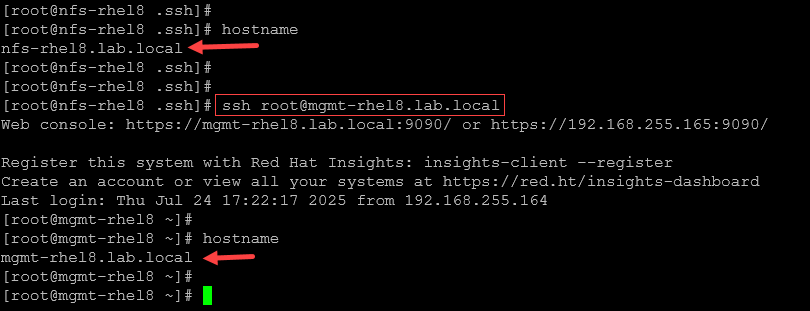
Note: Since we generated the SSH key pair for the root username, the passwordless method will only work for the root username. If you need access with another user, you must generate the key pair for this user and copy its public key to the remote SSH device!
From the SSH client, if we switch from the root user to a normal user (thor) and try to access the remote device through SSH without entering the password, look what happens:
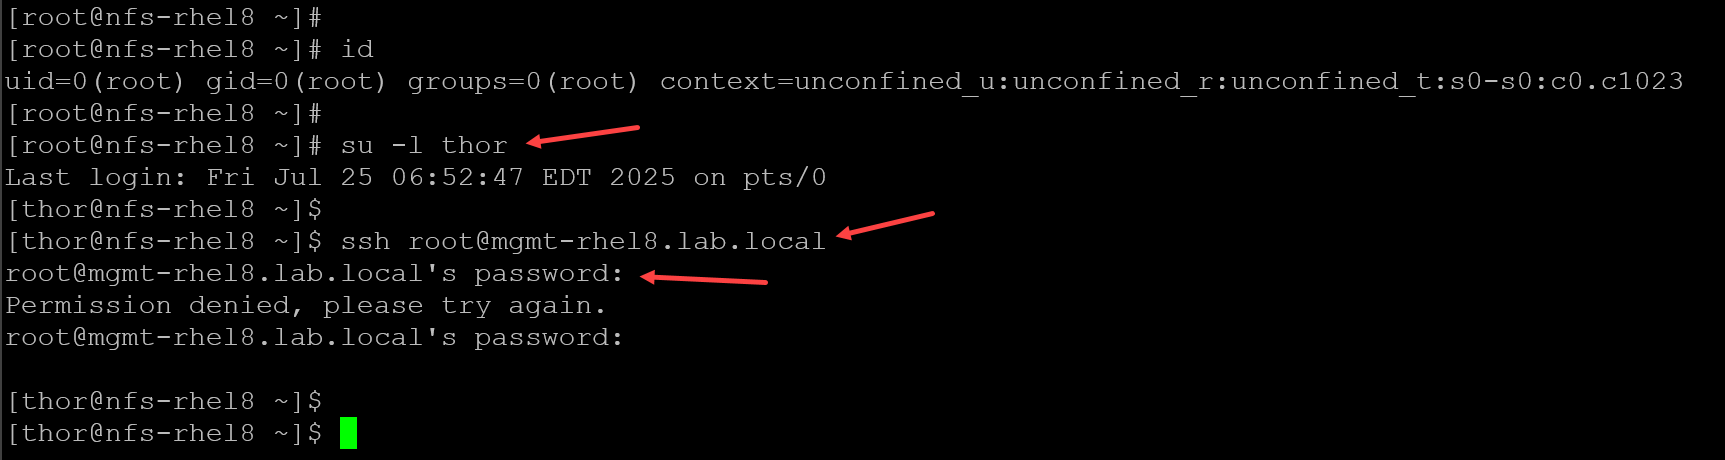
As we can see, we’ve used the command “su -l thor” to switch to the user “thor”. After that, we’ve tried to access the remote SSH device, but the attempt asked for the user’s password. So, again, each user must have their key pair to make this work!
At the remote SSH device (SSH server), we can see the “authorized_keys” content file to familiarize ourselves with its structure:

As we can see, since the key pair generated before was with RSA, the public key for our SSH client starts with “ssh-rsa” and ends with the username and SSH client authorized to access, in our case, “root@nfs-rhel8.lab.local”.
Protect the Key, Not Just the Connection
SSH key authentication removes the need to send an account password for every connection, but it does not make the private key safe by itself. Keep that key on the client, protect it with a passphrase where appropriate, and use ssh-agent when you need convenient access during a session.
Prefer a named administrative account over direct root login, and verify key-based access before changing server authentication settings. These practices make the setup more secure and easier to use in day-to-day administration and automation.
External References
- Red Hat — Using Secure Communications Between Two Systems with OpenSSH (RHEL 8 ) Official RHEL 8 documentation for generating SSH key pairs, copying a public key to a remote server, verifying key-based login, using ssh-agent, and the Ed25519 limitation in FIPS mode.
- OpenSSH Manual Pages — ssh-keygen Reference for creating and managing SSH authentication keys, supported key types, key files, comments, and private-key passphrases.
- OpenSSH Manual Pages — ssh-copy-id Explains how ssh-copy-id uses an SSH connection to add the selected public key to the remote account’s authorized_keys file. Initial use commonly requires a way to authenticate to the remote account.
- OpenSSH Manual Pages — ssh-agent Describes the agent that holds private keys for public-key authentication during a session, allowing users to avoid repeatedly entering a key passphrase while keeping the private key on the client.
