
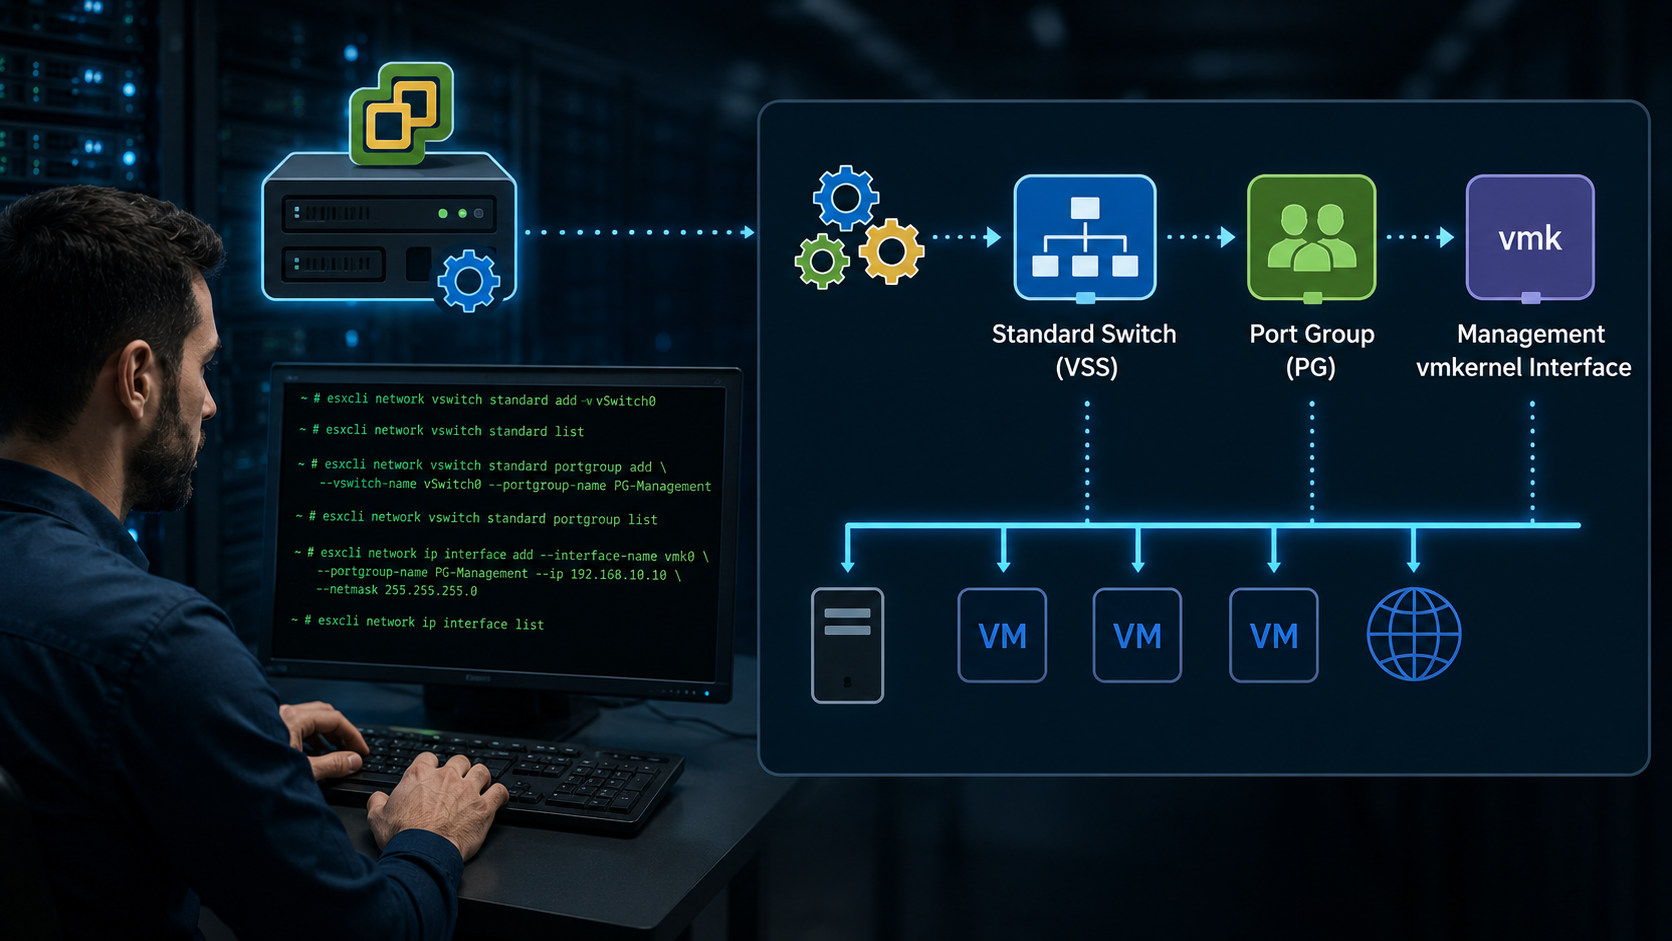
Configuring the ESXi management network from the command line can be useful when the host has lost network connectivity and the vSphere Host Client or SSH is no longer available.
In this lab, the ESXi host does not have a working VMkernel interface for management traffic. I therefore accessed the host through the DCUI and ESXi Shell and rebuilt the management network using esxcli.
The workflow creates a vSphere Standard Switch, adds the required port groups and physical uplink, creates a Management VMkernel adapter, assigns its IP configuration and default gateway, and validates connectivity with vmkping.
Important: Changing the Management VMkernel, physical uplinks, VLAN, or default route can immediately disconnect an ESXi host. When working on a remotely managed host, make sure out-of-band console access such as iDRAC, iLO, or another hardware management interface is available before changing the network configuration.
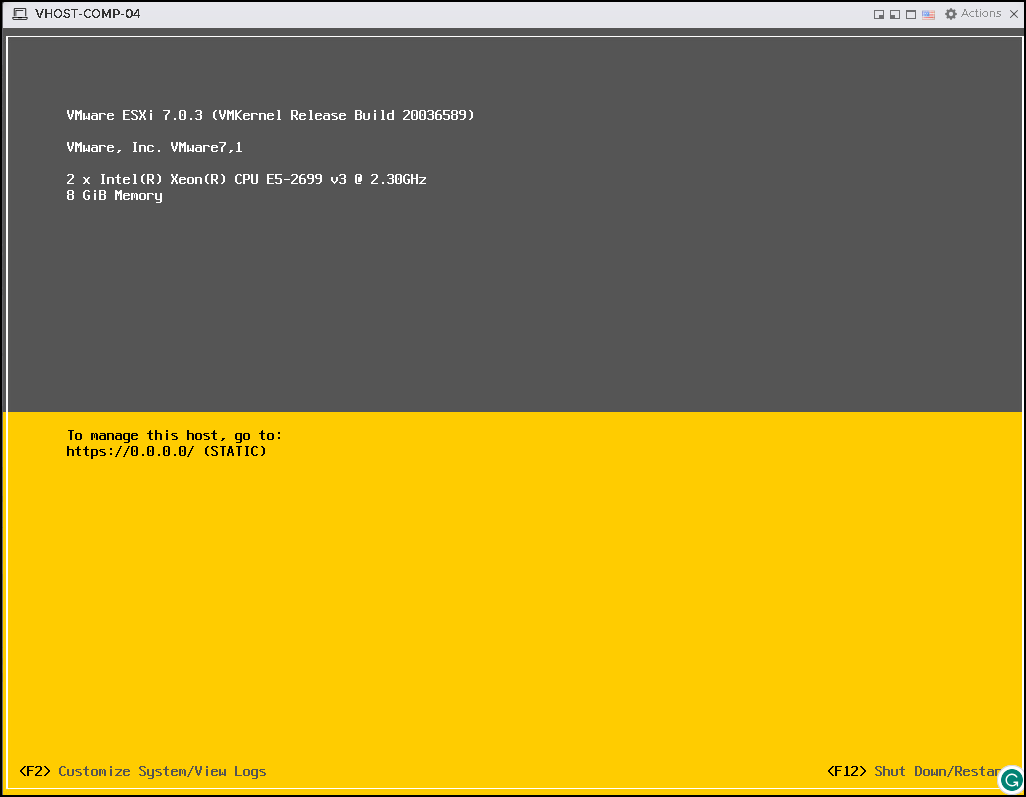
In this scenario, the ESXi host does not have a working Management VMkernel interface, so the Host Client and SSH are unavailable. I accessed the host through the local console using the Direct Console User Interface (DCUI).
From the main DCUI screen, press F2, authenticate with the root account, and open:
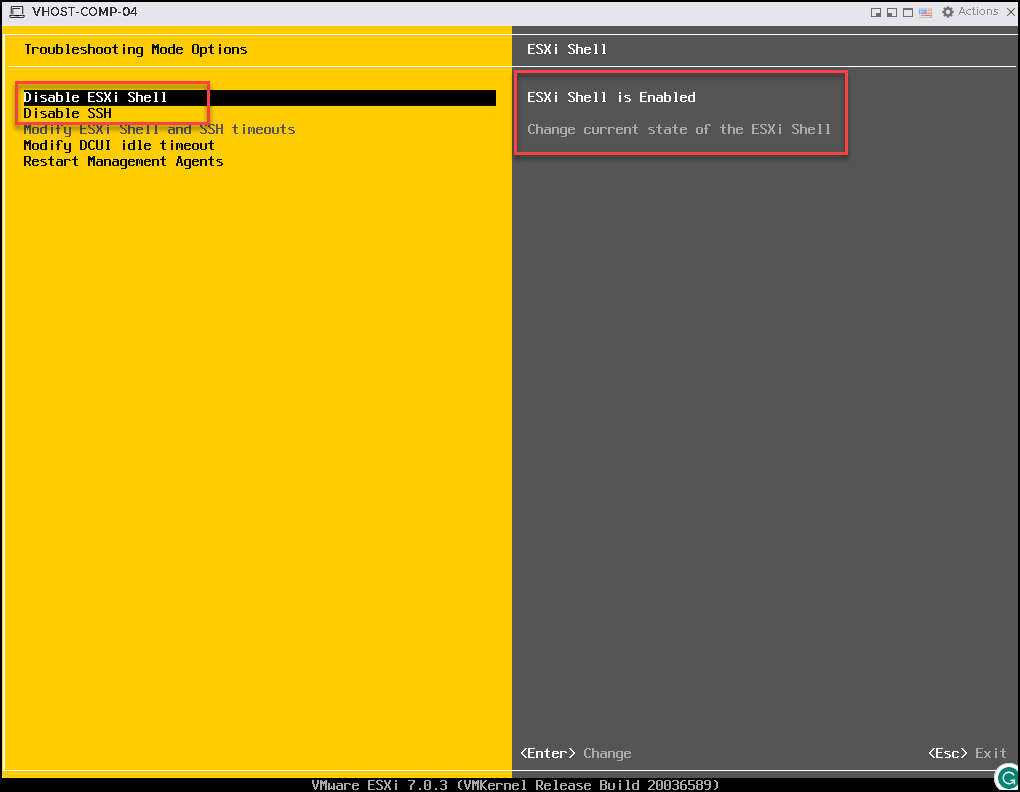
Troubleshooting Options → Enable ESXi Shell:
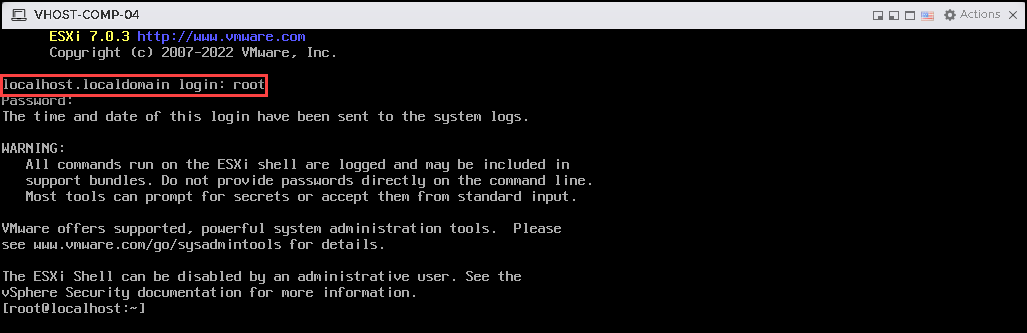
Return to the main DCUI screen and press:
Alt + F1
to switch to the ESXi Shell.
To return to the DCUI later, use:
Alt + F2
Creating a vSphere Standard Switch (VSS)
First and foremost, we can check if any standard switch exists here:
esxcli network vswitch standard listCreating a standard switch “vSwitch0”:
esxcli network vswitch standard add --vswitch-name=vSwitch0Creating a vSphere Port Group (PG)
So, now we can create the port group. If you want, you can list all available port groups using the following command:
esxcli network vswitch standard portgroup listCreating both port groups called “Management Network” and “VM Network”:
esxcli network vswitch standard portgroup add --portgroup-name="Management Network" --vswitch-name="vSwitch0"

esxcli network vswitch standard portgroup add --portgroup-name="VM Network" --vswitch-name="vSwitch0"
If necessary, you can set up a VLAN ID for each port group.
To set up the VLAN ID 10 for the port group “VM Network”, for instance, the command is:
esxcli network vswitch standard portgroup set -p "VM Network" -v 10Note: If the physical switch port is configured as a VLAN trunk and the ESXi Management Network uses a tagged VLAN, configure the corresponding VLAN ID on the Management port group as well:
esxcli network vswitch standard portgroup set \
  --portgroup-name="Management Network" \
  --vlan-id=<MANAGEMENT_VLAN_ID>
If the upstream switch port presents the management network as an untagged/access VLAN, the ESXi port group normally uses VLAN ID 0
Creating VMKernel Interface and Associating it to a Port Group
The next step here is to create the VMKernel interface and associate it with a specific port group.
Creating the VMkernel interface “vmk0” and associating it to the port group “Management Network”:
esxcli network ip interface add --interface-name=vmk0 --portgroup-name="Management Network"Specifying the IP address configuration for the vmk0 interface. In this case, for instance, the IP address configuration is:
- IP address: 192.168.255.124
- Network Mask: 255.255.255.0
esxcli network ip interface ipv4 set --interface-name=vmk0 --ipv4=192.168.255.124 --netmask=255.255.255.0 --type=static

esxcli network ip interface tag add \
  --interface-name=vmk0 \
  --tagname=Management

esxcli network ip interface tag get \
  --interface-name=vmk0
Assigning a Default Gateway
Check the routing table before adding the route. If a default route already exists on the TCP/IP stack, do not blindly add another one. Verify whether the existing gateway is correct and adjust the configuration according to the network design:
esxcli network ip route ipv4 listThe last step is to define the default gateway. We can do that with the following command.
In our example, the default gateway IP address is “192.168.255.1”:
esxcli network ip route ipv4 add --gateway=192.168.255.1 --network=defaultAssigning Uplink Interface to the Standard Switch
At this moment, our VMKernel interface is configured, but our standard switch does not have any uplink interface.
The first step here is to check all physical interfaces available (vmnic0):
esxcli network nic listIn our case, for instance, we have only one interface available:
[root@localhost:~] esxcli network nic list
Name    PCI Device    Driver    Admin Status  Link Status  Speed  Duplex  MAC Address         MTU  Description
------  ------------  --------  ------------  -----------  -----  ------  -----------------  ----  -----------
vmnic0  0000:0b:00.0  nvmxnet3  Up            Up           10000  Full    00:0c:29:94:9a:28  1500  VMware Inc. vmxnet3 Virtual Ethernet Controller
Assigning the vmnic0 to the standard switch “vSwitch0“:
esxcli network vswitch standard uplink add --uplink-name=vmnic0 --vswitch-name=vSwitch0Do not move an uplink from another vSwitch or vDS without first understanding which networks depend on it. Removing the wrong physical adapter can interrupt management traffic, storage traffic, vMotion, NSX, or virtual-machine connectivity.
Important: If the Management VMkernel is currently attached to a vSphere Distributed Switch and the host has lost connectivity to vCenter Server, see “Recover ESXi Management Network When the Host Is Disconnected from a vDS“ for a recovery workflow that moves management traffic temporarily to a Standard vSwitch.
After that, our switch has one uplink, as we can see in the following command:
[root@localhost:~] esxcli network vswitch standard list
vSwitch0
   Name: vSwitch0
   Class: cswitch
   Num Ports: 1590
   Used Ports: 4
   Configured Ports: 128
   MTU: 1500
   CDP Status: listen
   Beacon Enabled: false
   Beacon Interval: 1
   Beacon Threshold: 3
   Beacon Required By:
   Uplinks: vmnic0
   Portgroups: VM Network, Management Network
Testing the Network Connectivity
If our configuration is fine, we should be able to reach the network devices. We can test the network communication from the ESXi host to the default gateway.
In our case, the default gateway is 192.168.255.1:
vmkping 192.168.255.1In our case, the communication is working fine:
[root@localhost:~] vmkping 192.168.255.1
PING 192.168.255.1 (192.168.255.1): 56 data bytes
64 bytes from 192.168.255.1: icmp_seq=0 ttl=128 time=0.936 ms
64 bytes from 192.168.255.1: icmp_seq=1 ttl=128 time=1.175 ms
64 bytes from 192.168.255.1: icmp_seq=2 ttl=128 time=0.502 ms

--- 192.168.255.1 ping statistics ---
3 packets transmitted, 3 packets received, 0% packet loss
round-trip min/avg/max = 0.502/0.871/1.175 ms
Validate the Management Network
First verify the VMkernel interface:
esxcli network ip interface listConfirm its IPv4 configuration:
esxcli network ip interface ipv4 get \
  --interface-name=vmk0
Confirm the Management tag:
esxcli network ip interface tag get \
  --interface-name=vmk0
Check the physical NIC:
esxcli network nic listCheck the route:
esxcli network ip route ipv4 listThen test the default gateway:
vmkping -I vmk0 192.168.255.1If vCenter is reachable through another subnet, test it as well:
vmkping -I vmk0 <vcenter-ip-address>A successful gateway test confirms that the Management VMkernel can communicate through the local network. Testing the vCenter IP additionally validates Layer 3 reachability toward the management server.
Disable ESXi Shell After the Recovery
Once management connectivity is restored and command-line access is no longer required, return to the DCUI with:
Alt + F2Open:
Troubleshooting Options → Disable ESXi Shell
Leaving troubleshooting services enabled unnecessarily increases the management attack surface. Follow your organization’s ESXi hardening policy for Shell and SSH access.
What This Recovery Procedure Accomplishes
Rebuilding the ESXi management network from the command line is useful when the host cannot be reached through the Host Client, SSH, or vCenter Server.
In this lab, the complete connectivity path was rebuilt from the ESXi Shell: a Standard vSwitch was created, a physical uplink and Management port group were configured, a new VMkernel interface received its IP configuration and Management tag, and the default route was restored.
The final vmkping test confirms that the Management VMkernel can communicate through the configured network path. Once connectivity is restored, verify access through the Host Client or vCenter Server and disable the ESXi Shell if it is no longer required.
External References
- Configuring Standard vSwitch or Distributed Switch Networking from the ESXi CLI Broadcom command reference for viewing and configuring Standard vSwitches, physical uplinks, port groups, VMkernel adapters, IP settings, and VMkernel service tags directly from the ESXi command line.
- Recover ESXi Host Connectivity When Management Networking Is Unavailable Broadcom recovery workflow covering VMkernel recreation, management IP configuration, MTU settings, physical networking, and restoration of ESXi management connectivity.
-
ESXi Host Loses Management Network Connectivity
Broadcom example showing how to rebuild a Standard vSwitch,
Management port group, physical uplink, VMkernel interface,
default route, and validate the result with
vmkping. - Direct Console User Interface Access Using ALT+F Keys Broadcom reference for enabling ESXi Shell from the DCUI and switching between the local shell and Direct Console User Interface using the ALT function-key combinations.
- ESXi Host Not Responding Due to Management Network Connectivity Broadcom troubleshooting guidance for validating the physical vmnic associated with the ESXi management network when a host loses connectivity.
