
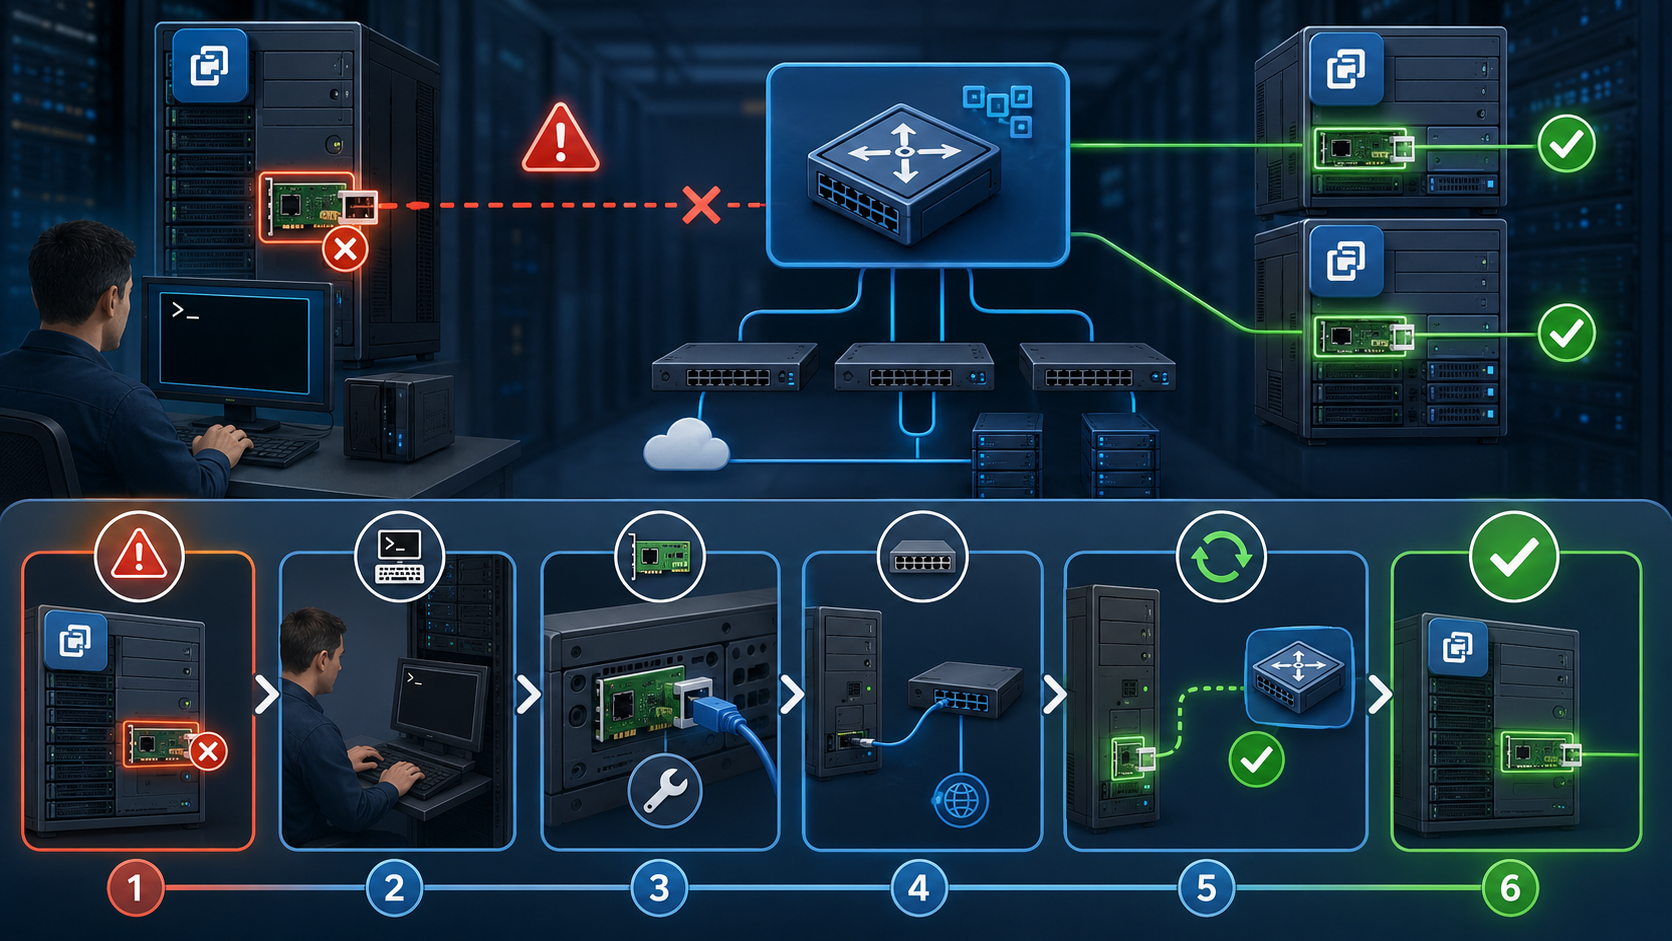
Recover ESXi Host Network shows all the necessary steps to recover an ESXi management network when connected to a vSphere Distributed Switch (VDS).
First things first: Describing the Scenario
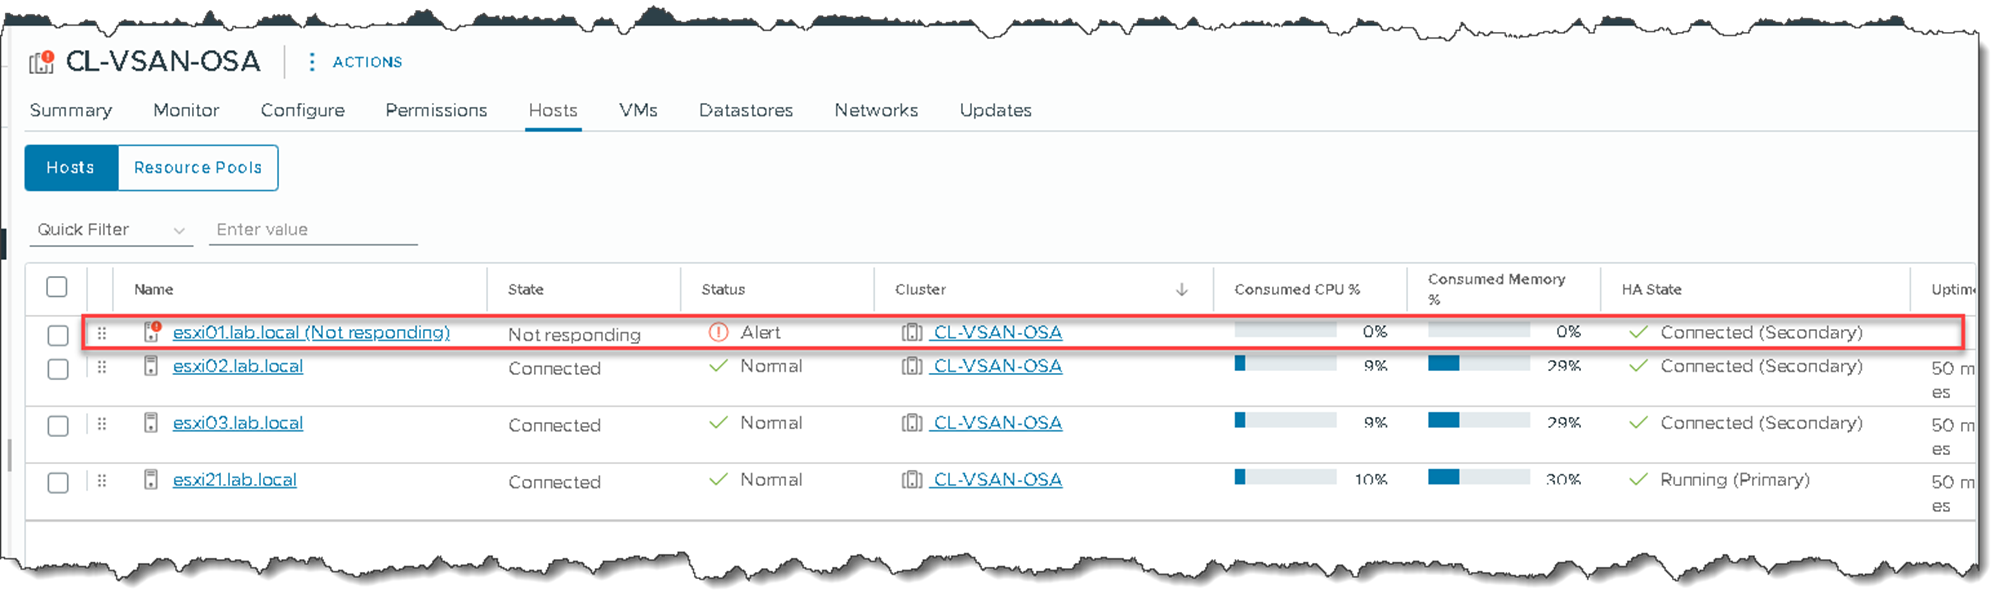
So, in this example, we have a four-node vSAN cluster, and the first ESXi host, for some reason (wrong configuration such as VLAN tagging, etc), is with “not responding” status, as we can see:
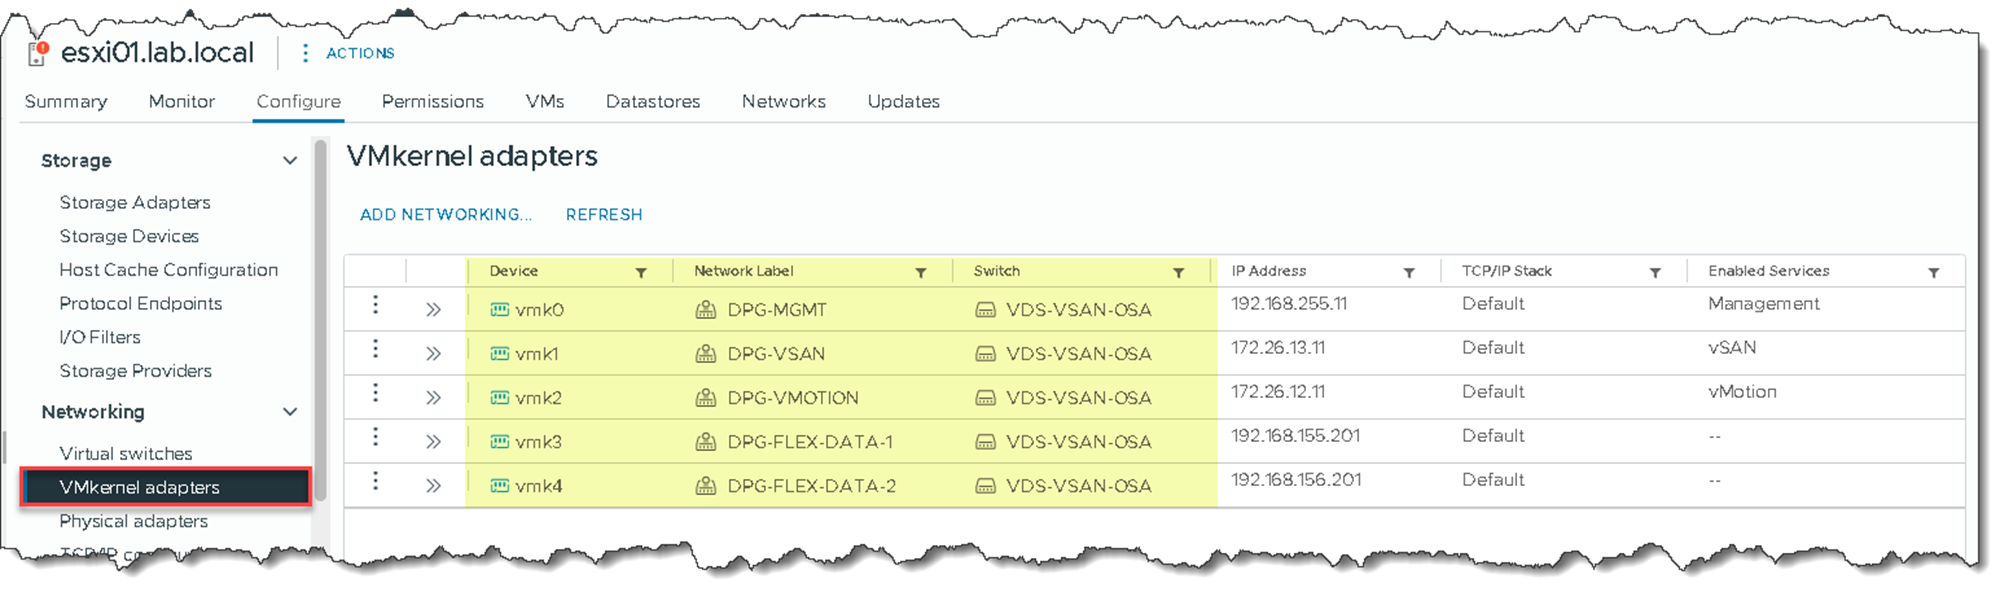
All nodes are using a vSphere Distributed Switch (VDS), and all VMkernels adapters communicate through Port Groups attached to this VDS:
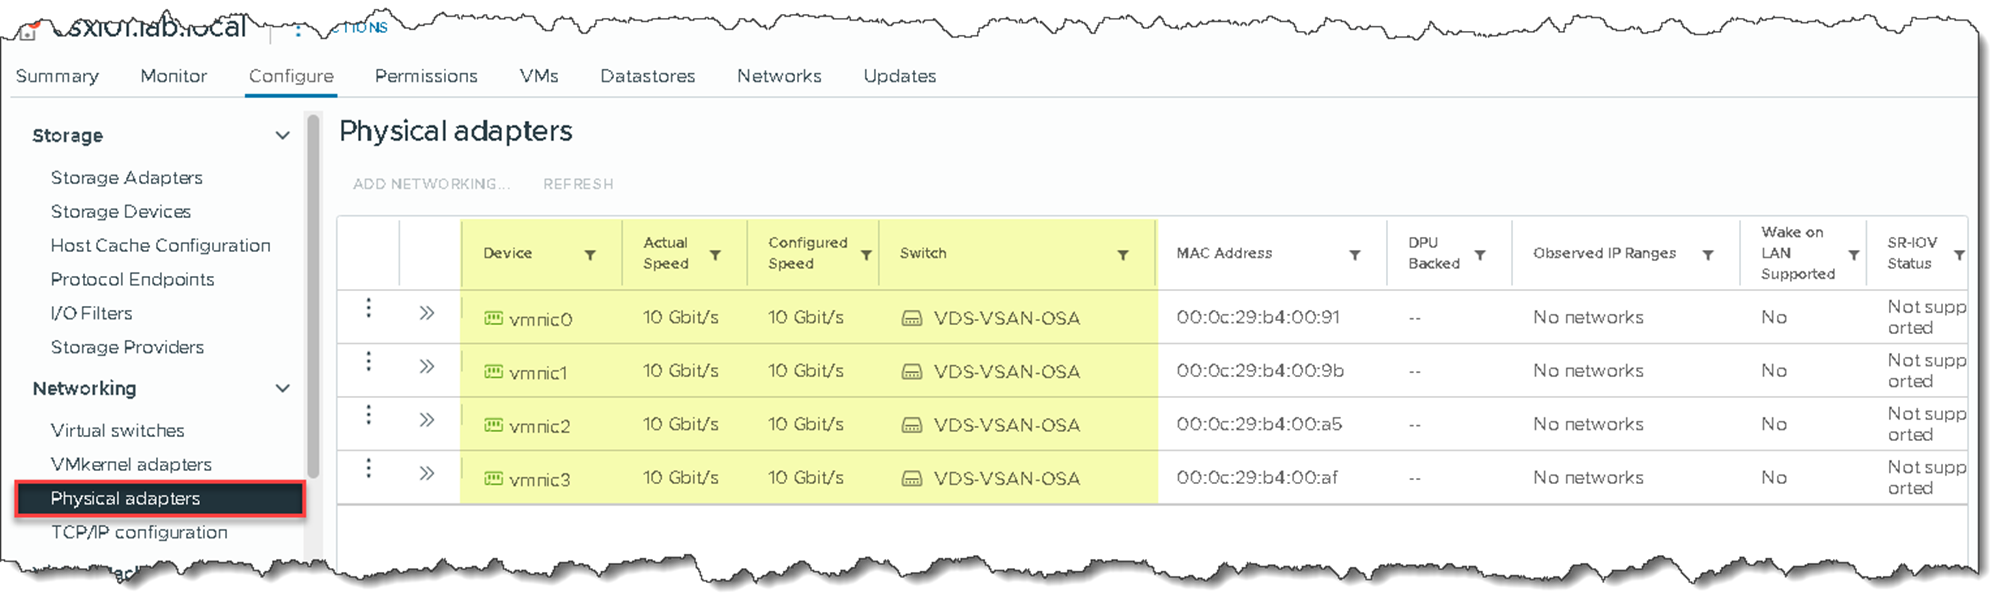
Each ESXi host has four physical adapters:
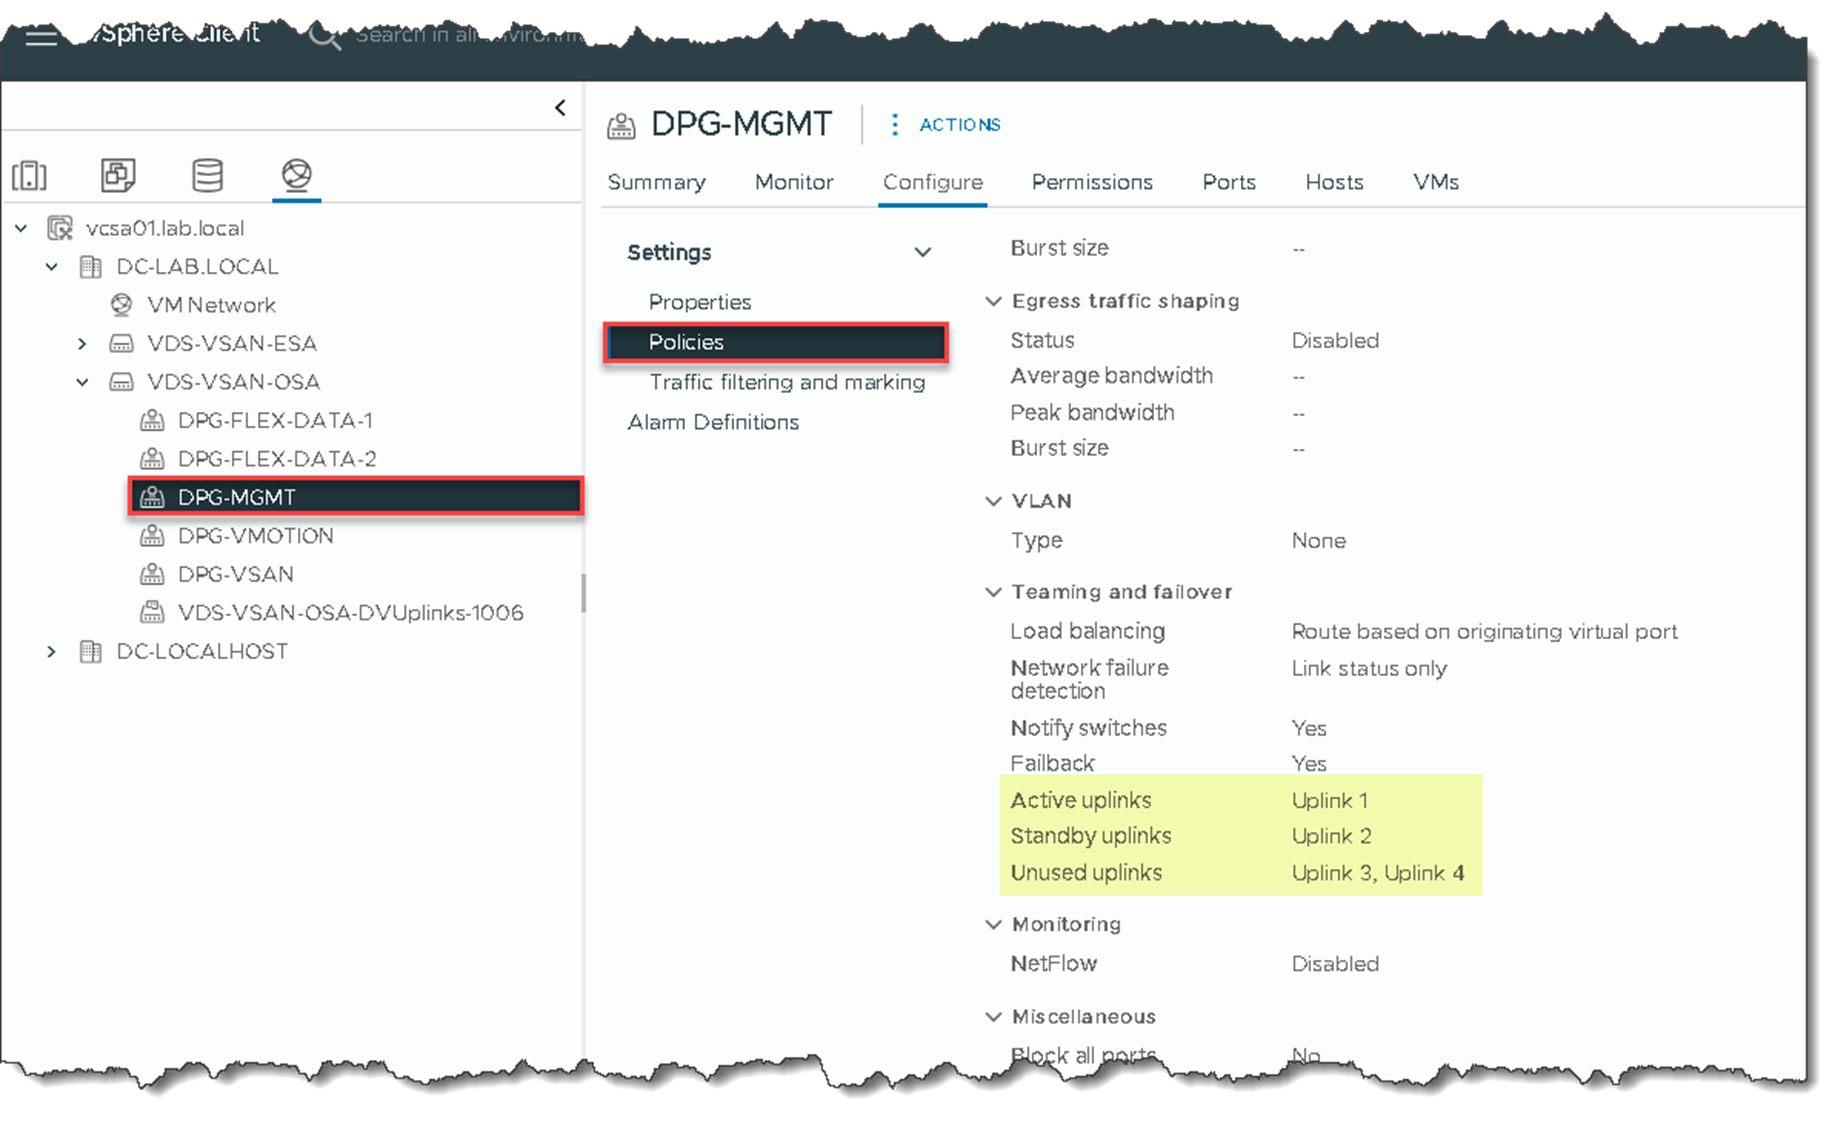
Each Port group uses two physical adapters: one Active and another Standby:
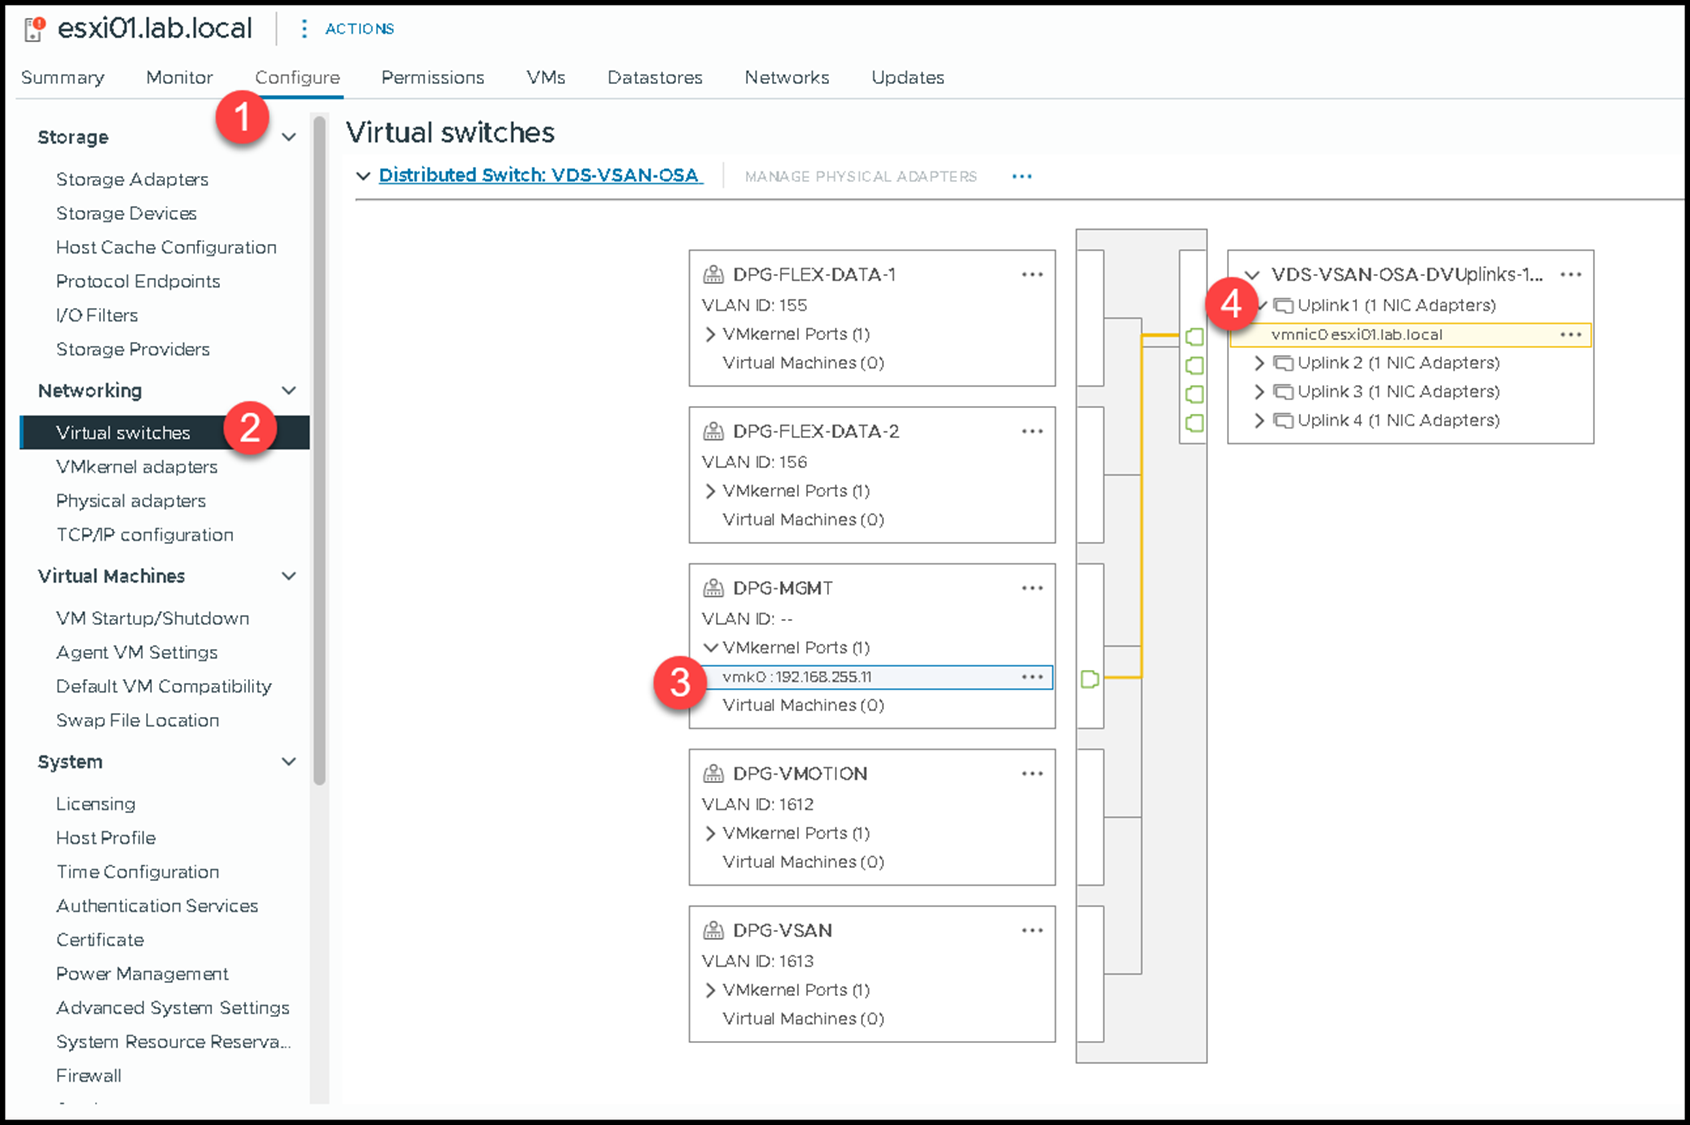
To check out what physical interface is using the “Uplink 1” – In this example, the “Uplink 1” is mapped to “vmnic0”:
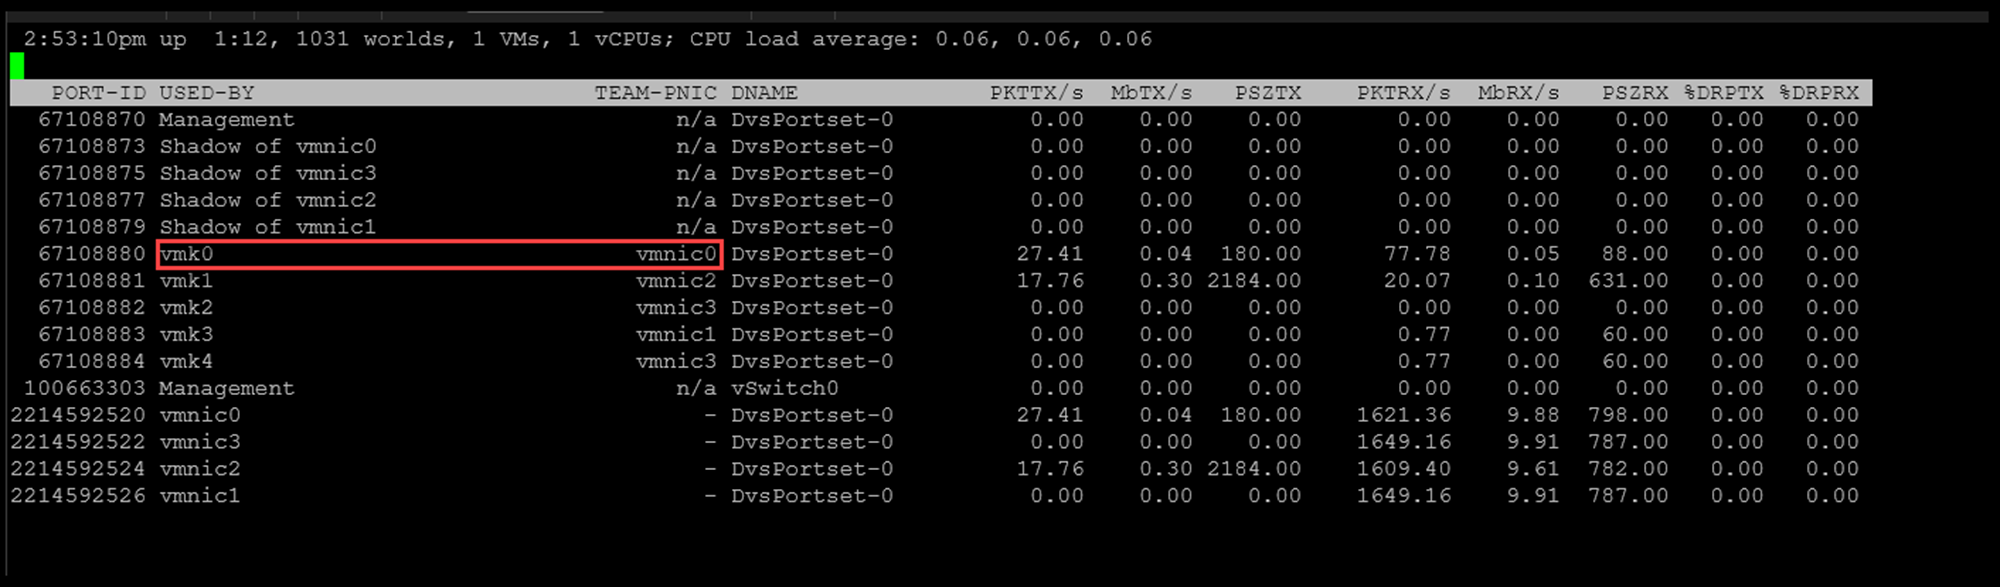
We can access a working node by SSH, executing the “esxtop” command, and typing the “n” to see network details. As we can see, the VMkernel “vmk0” is using the physical network adapter “vmnic0”:
With a vSphere Distributed Switch, the switch configuration is centrally managed through vCenter Server and distributed to the participating ESXi hosts. Each host maintains a local proxy representation of the distributed switch, which allows the dataplane to continue forwarding traffic even when vCenter is temporarily unavailable.
However, losing the management network can make it difficult to correct a vDS configuration remotely, which is why direct console or out-of-band access becomes critical during recovery.
Accessing the Console of the Unavailable Host
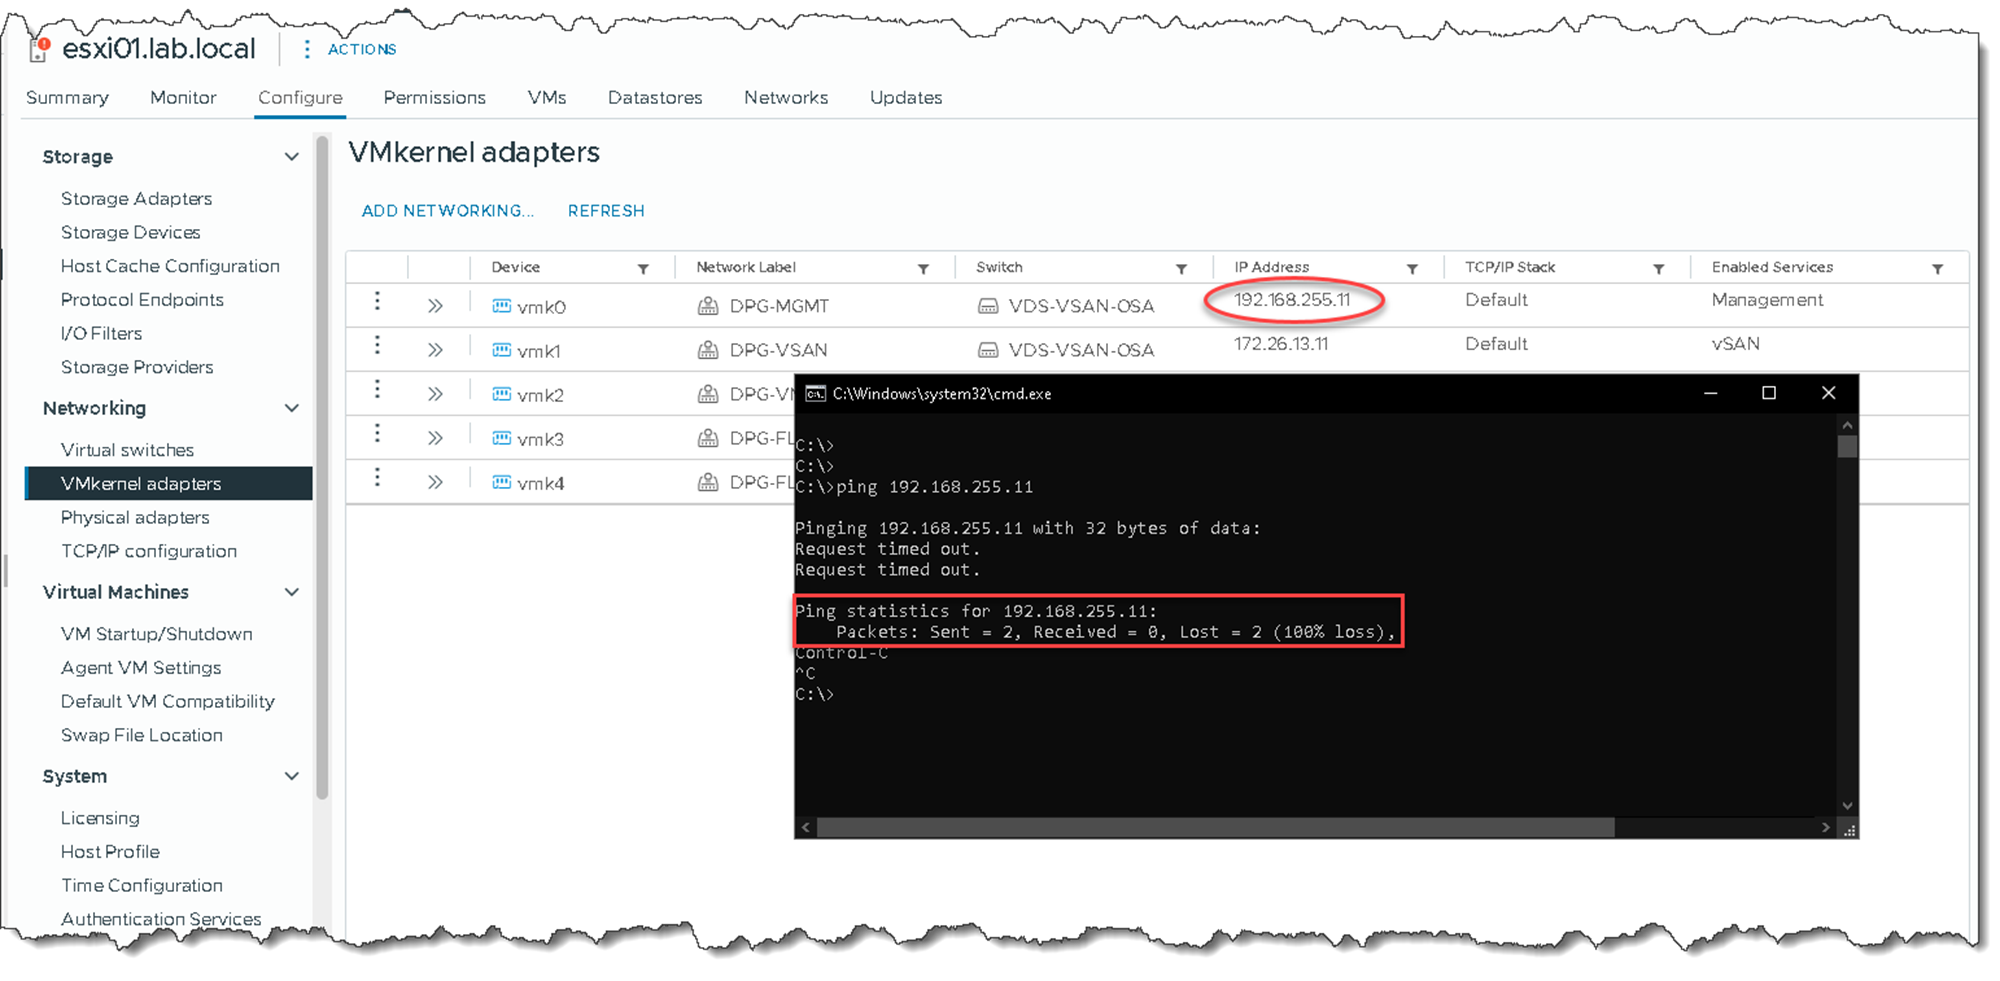
As I said before, the first ESXi host was not responding from the vCenter Server perspective for some reason, and we need to fix it ASAP (from the network perspective, the ESXi host is unavailable as well):
So, in this example, we can access the unavailable ESXi host through its physical console:
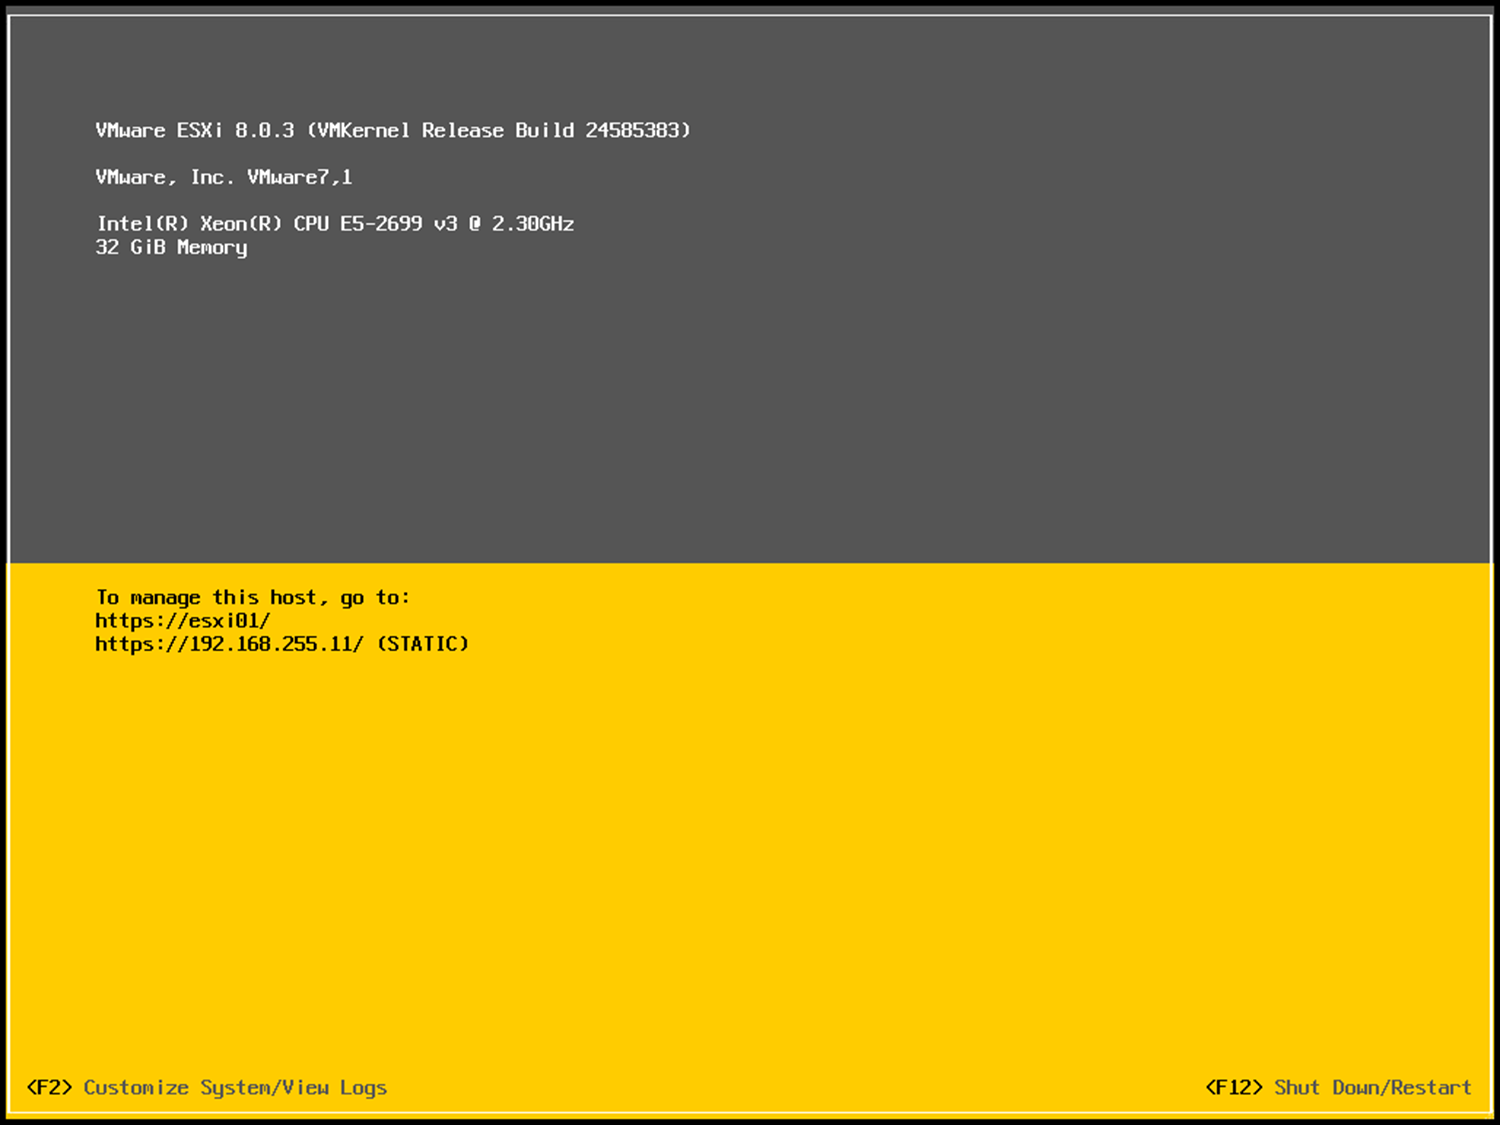
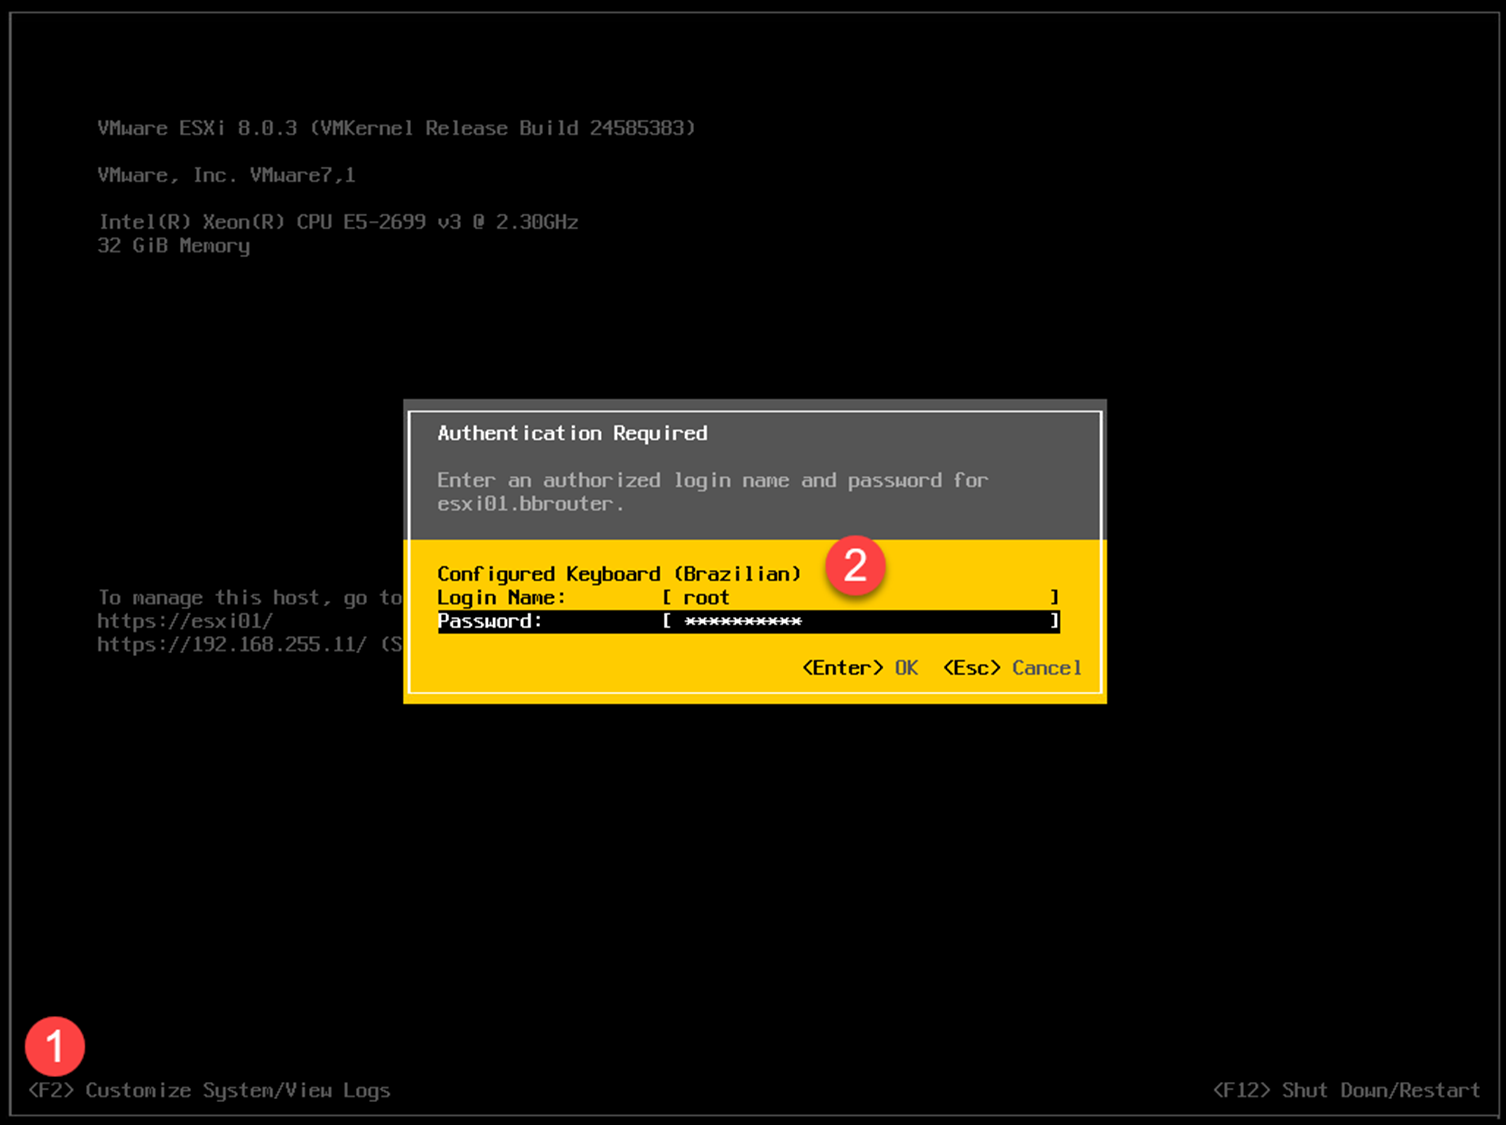
Hit “F2” to enable the ESXi Shell:
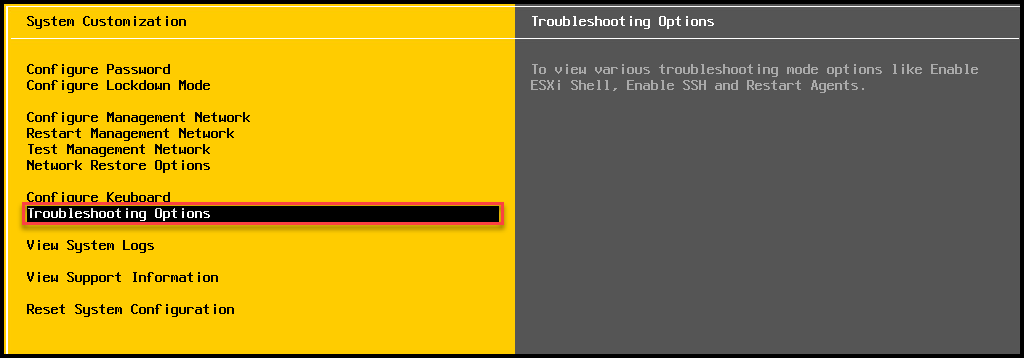
Go to “Troubleshooting Options”:
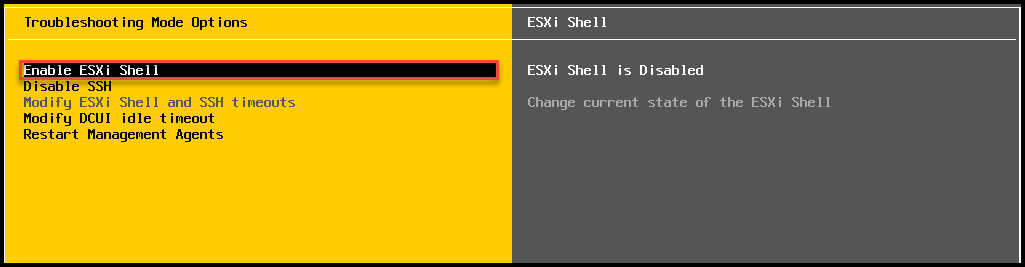
Look that ESXi Shell is not enable. Hit “Enter” under it to enable:
Afterward, hit “Alt” + “F1” to access the ESXi Shell:
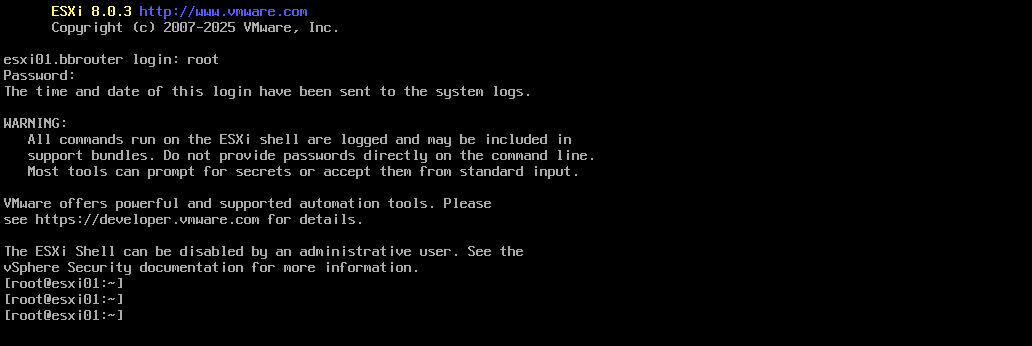
Before Changing the Network Configuration
The recovery procedure below modifies the management VMkernel interface and temporarily removes a physical NIC from the vSphere Distributed Switch.
Before continuing, record the existing network configuration and confirm that you have direct console or out-of-band access such as iDRAC, iLO, IPMI, or KVM.
At minimum, record:
- Management VMkernel interface and IP address
- Subnet mask and default gateway
- Management VLAN ID
- Management VMkernel MTU
- vDS name
- Distributed port group name
- dvPort IDs
- Physical uplink mapping
- Teaming/failover policy
- Any LACP/LAG configuration
Also verify that removing the selected physical NIC from the vDS will not unintentionally isolate vSAN, vMotion, storage, or virtual-machine traffic.
esxcfg-vswitch -l
esxcfg-vmknic -l
esxcli network nic list
esxcli network ip route ipv4 list
esxcli network ip interface tag get -i vmk0
Steps to Recover the Host Management Network
1. Get the “DVPort ID” used by the management VMkernel:
esxcfg-vswitch -lAs we can see, the vmk0 uses the “DVPort ID” 1 – This number can differ in your environment:
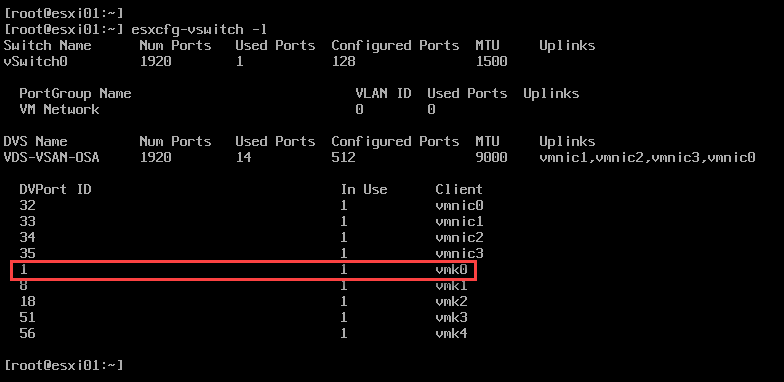
2. Get the Teaming Policy configuration applied for this VMkernel:
net-dvs -l | grep -A20 -B1 -i "port 1:"Change the “port 1” with your “DVPort ID” value!
In this example, this DVPort ID has “Uplink 1” as Active and “Uplink 2” as Standby:
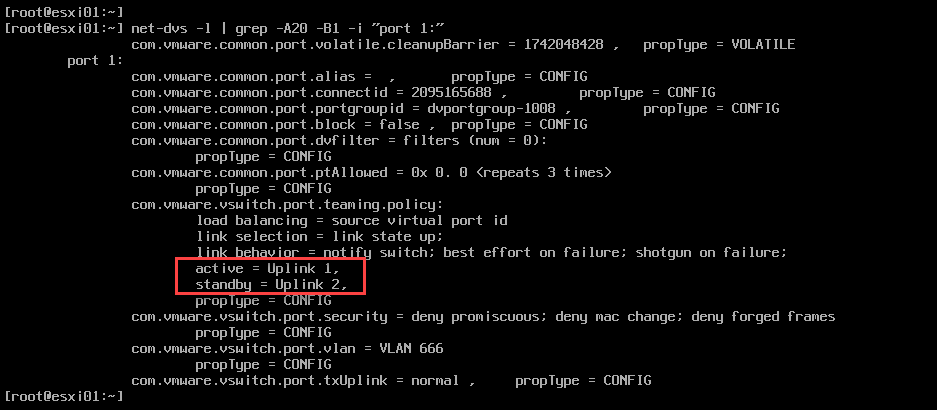
We have seen that “Uplink 1” is mapped to “vmnic 0”. However, you can access a working node by SSH and execute the following command to map each uplink to its vmnic:
esxcfg-vswitch -l | grep -i vmnic[0-9] | sed 1d | awk -F' ' '{print $1"-"$3}' | while read line; do net-dvs -l | grep -A1 -i "port ${line%%-*}" | \
awk -v line="$line" 'BEGIN{split(line,a,"-")} /alias/{print a[1], a[2], $3$4}'; done
Important: If the selected uplink is part of an LACP/LAG configuration, do not move it directly to a Standard Switch without first validating the physical switch configuration. A NIC removed from an LACP-backed vDS may require the corresponding physical switch port to be removed from the LAG and configured appropriately before it can carry traffic through a vSS.
3. Before creating a vSphere Standard Switch (VSS), we must remove the physical interface vmnic0 from the vSphere Distributed Switch (DVS). To get the vmnic0 DVPort ID:
esxcfg-vswitch -lIn this example, the vmnic0 has the DVPort ID 32:
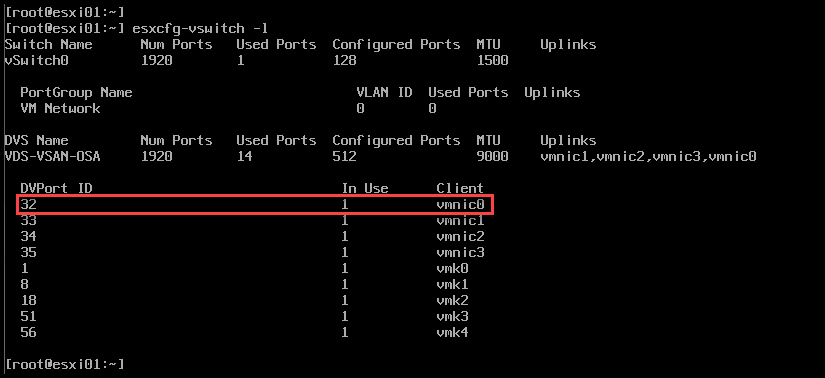
Removing the vmnic0 from VDS:
esxcfg-vswitch -Q vmnic0 -V 32 VDS-VSAN-OSAExplaining the command:
-Q vmnic0 = physical interface to be removed from VDS
-V 32 = DVPort ID for vmnic0
VDS-VSAN-OSA = VDS name
4. Create a vSphere Standard Switch (VSS):
esxcli network vswitch standard add --vswitch-name=Temp-VSS5. Create a Port Group into the previously created vSphere Standard Switch (VSS):
esxcli network vswitch standard portgroup add --portgroup-name=Temp-MGMT --vswitch-name=Temp-VSS6. Add a physical network interface (vmnic0) to the previously created vSphere Standard Switch (VSS):
esxcli network vswitch standard uplink add --uplink-name=vmnic0 --vswitch-name=Temp-VSS7. Remove the vmk0 that was using into VDS and create a new one using the new standard switch:
esxcli network ip interface remove --interface-name=vmk08. Create a new VMkernel interface and associate it with the previously created Port Group:
esxcli network ip interface add --interface-name=vmk0 --portgroup-name="Temp-MGMT"

esxcli network ip interface tag get --interface-name=vmk0

esxcli network ip interface tag add \
  --interface-name=vmk0 \
--tagname=ManagementNote: In many environments, the newly created VMkernel will automatically receive the Management tag when no other management interface exists. I still verify it explicitly during recovery.
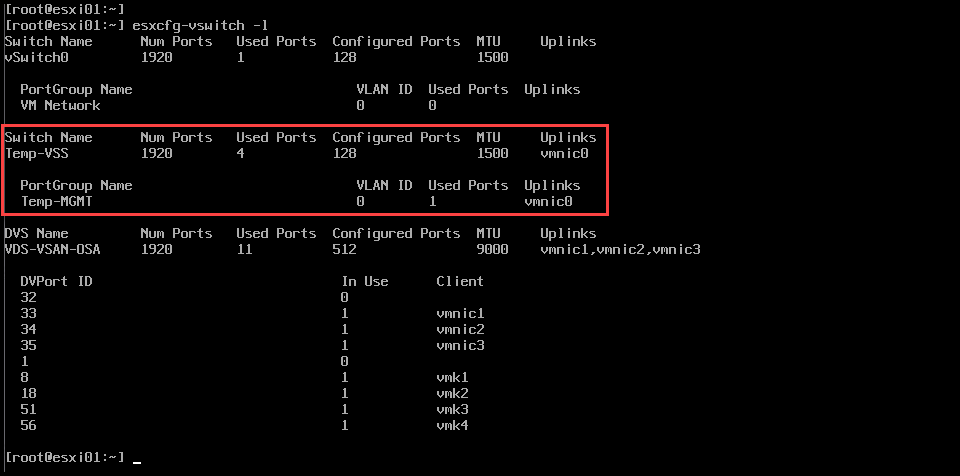
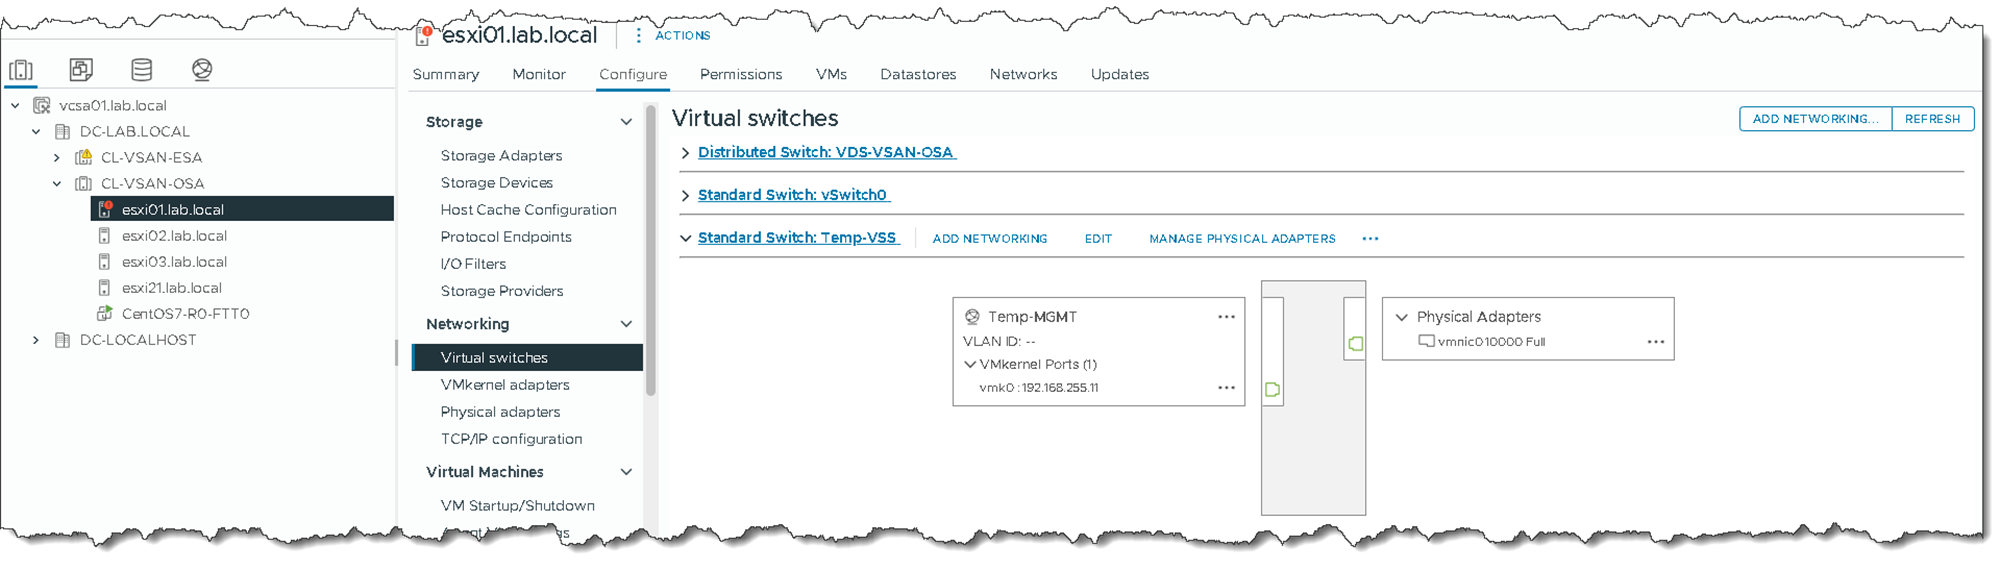
At this point, we have a vSphere Standard Switch (Temp-VSS) with one uplink (vmnic0), and with one Port Group (Temp-MGMT):
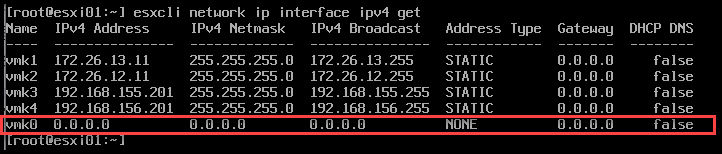
The vmk0 interface was created, but it does not have any IP address:
9. Set up a static IP address on the vmk0:
esxcli network ip interface ipv4 set --interface-name=vmk0 --ipv4=192.168.255.11 --netmask=255.255.255.0 --type=static10. Verify or restore the default gateway:
esxcli network ip route ipv4 list

# If empty, create the default route:
esxcli network ip route ipv4 add --gateway=192.168.255.1 --network=default
Note: If you need to specify a VLAN ID under the new Port Group, you can use the following – In this example, the Port Group name is “Temp-MGMT” and the VLAN ID is 10:
esxcli network vswitch standard portgroup set -p "Temp-MGMT" -v 10Validate Management Connectivity
First verify the physical NIC:
esxcli network nic listCheck the VMkernel:
esxcli network ip interface listConfirm the IP configuration:
esxcli network ip interface ipv4 getCheck routing:
esxcli network ip route ipv4 listThen test the local gateway specifically through the management VMkernel:
vmkping -I vmk0 192.168.255.1If DNS is involved, also validate name resolution before assuming that the complete management path is healthy.
Then verify that:
- the ESXi Host Client is reachable;
- vCenter can communicate with the host;
- the host returns to
Connected; - no unexpected vSAN/vMotion/storage alarms were introduced.
A Broadcom recovery workflow also recommends validating the gateway from the specific management VMkernel before considering connectivity restored.
After executing all these steps, the first ESXi host went back to the vCenter Server, and we can manage it through vCenter usually:
Notes:
- If the host is reachable but you still suspect physical NIC or datapath packet loss, see “How to Troubleshoot Packet Drops on an ESXi Host“.
- If management connectivity is present but the host continues transitioning to Not Responding in vCenter, see “vCenter ESXi Heartbeat Timeout: Troubleshooting and Temporary Workaround“.
Migrating the Management VMkernel from VSS to VDS
Before migrating vmk0 back to the distributed port group, confirm that the vDS already has at least one functional physical uplink capable of carrying the management VLAN.
Moving the Management VMkernel to a vDS that has no working path to the physical network can disconnect the host again and trigger a network rollback.
We can migrate the management VMkernel from VSS to VDS following the steps below:
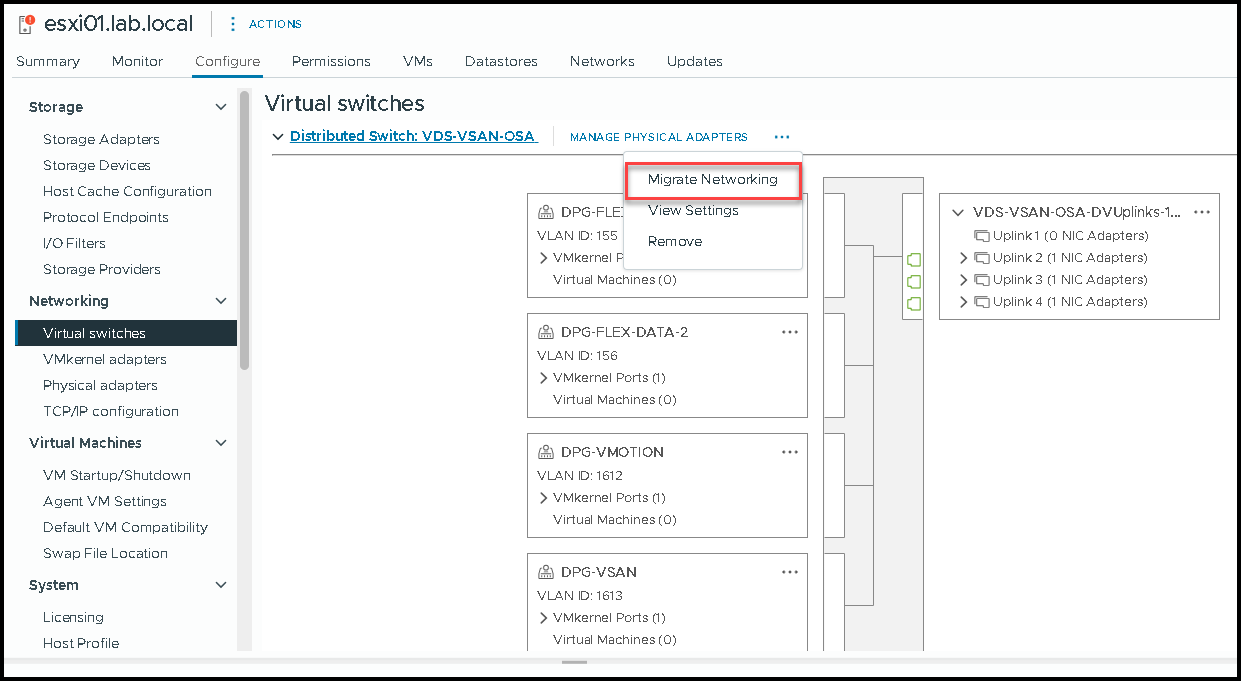
Select the ESXi host –> Configure –> Networking –> Virtual Switches –> Expand the VDS –> Click on the three dots –> Migrate Networking:
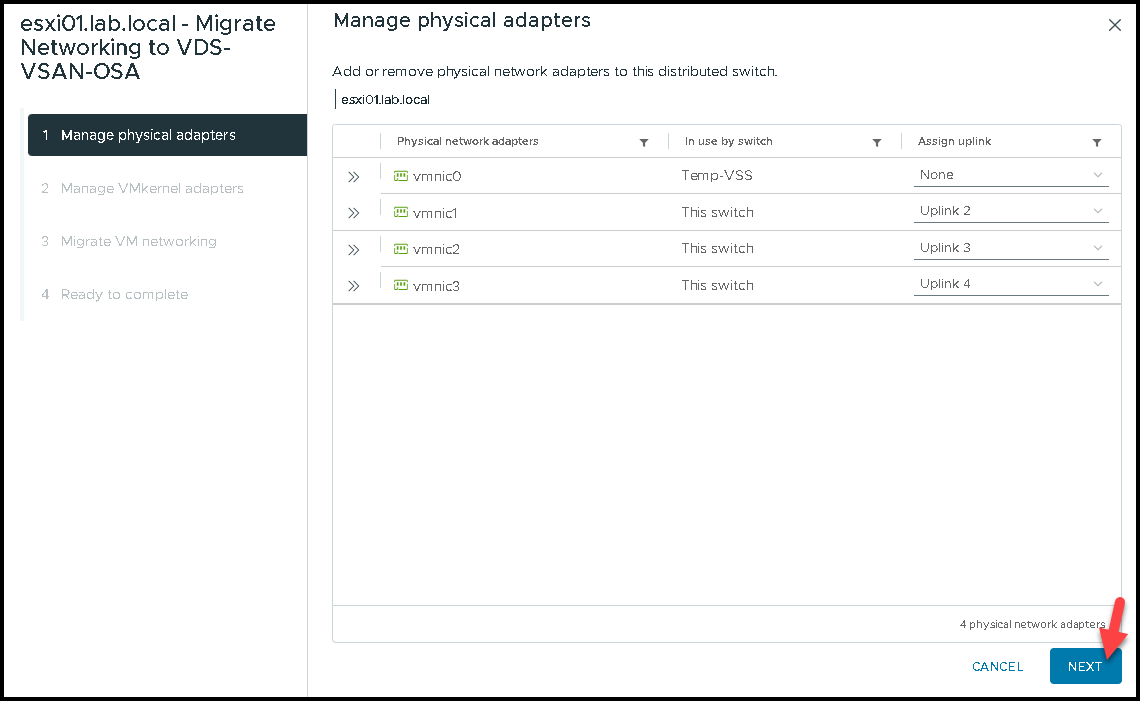
Under the “Manage VMkernel adapters” page, we can see the vmk0 using the VSS “Temp-VSS” and the Port Group “Temp-MGMT”:
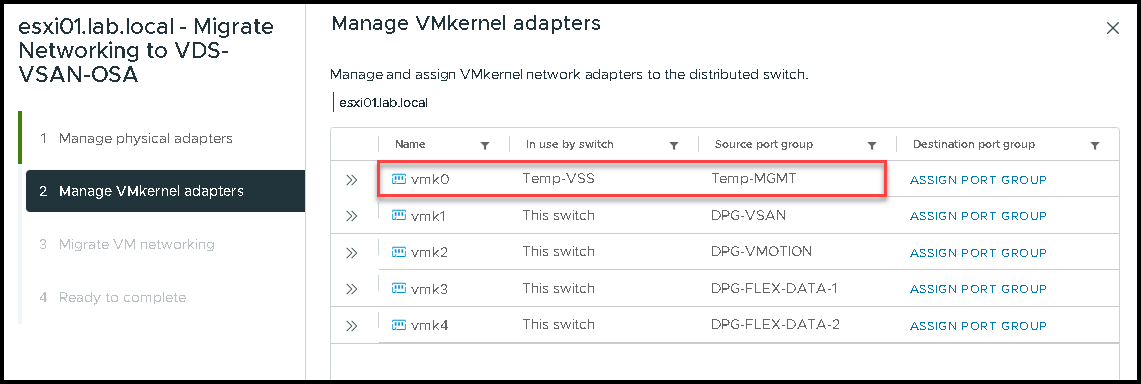
Click on “ASSIGN PORT GROUP”:

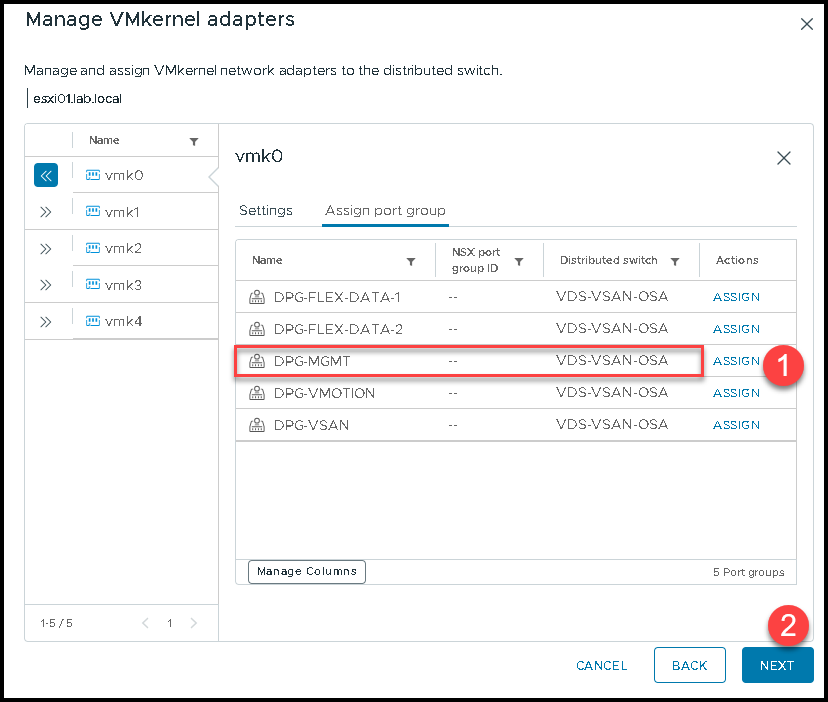
Under the “Assign port group” tab, we can see all VDS Port Groups. In our example, the “DPG-MGMT” is a VDS Port Group used for management traffic. Click “ASSIGN” and then click “NEXT”:
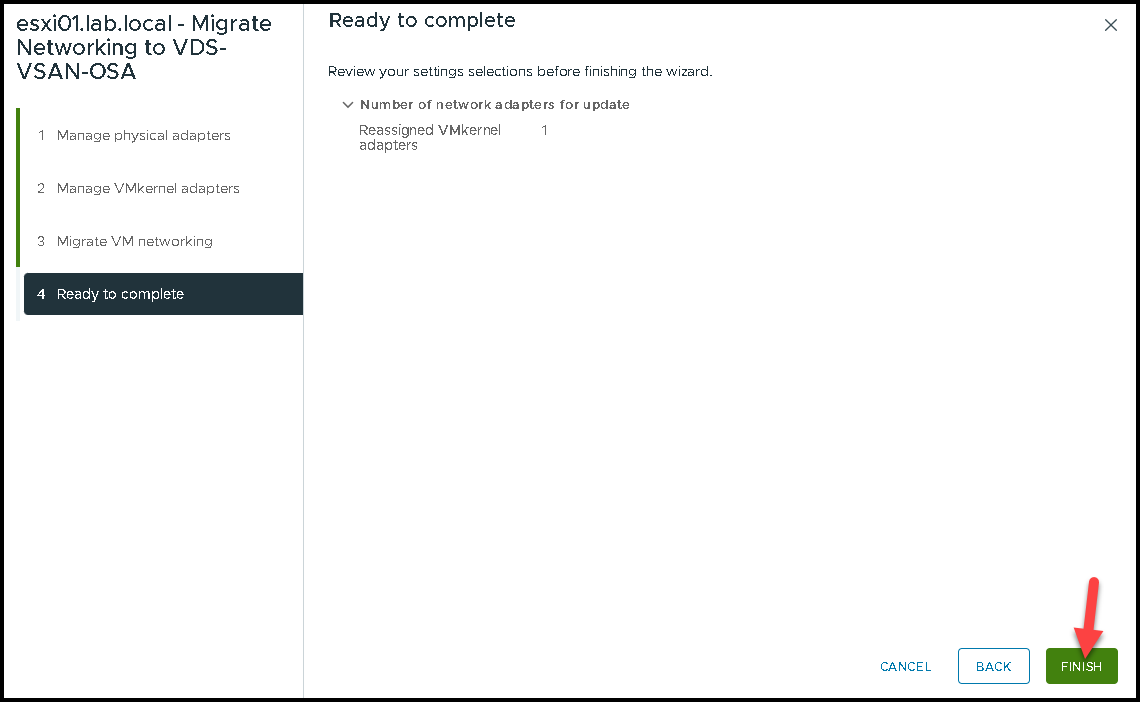
Keep all other values unchanged. Next, finish:

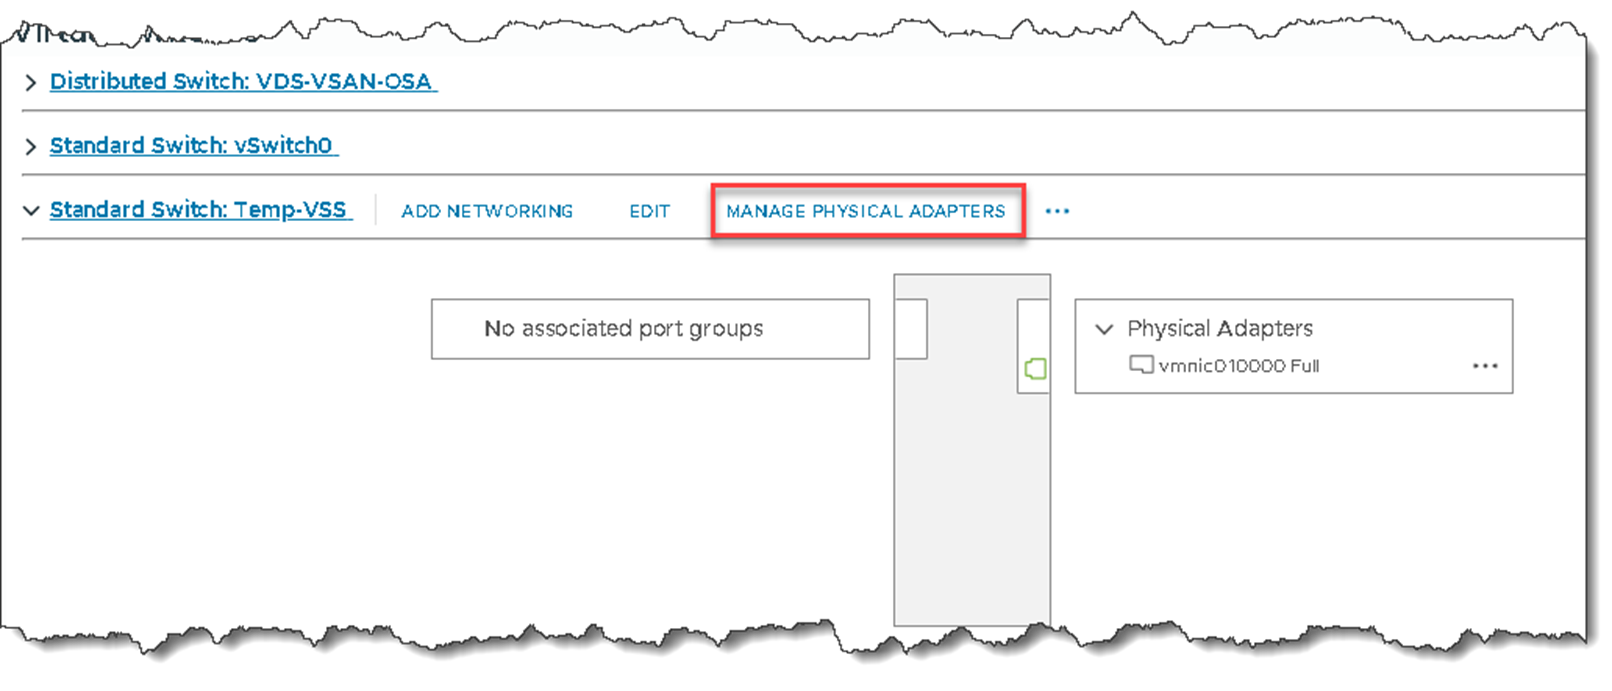
The next step is to remove the physical network adapter (vmnic0) to the VSS “Temp-VSS”. Under this switch, click “MANAGE PHYSICAL ADAPTERS”:
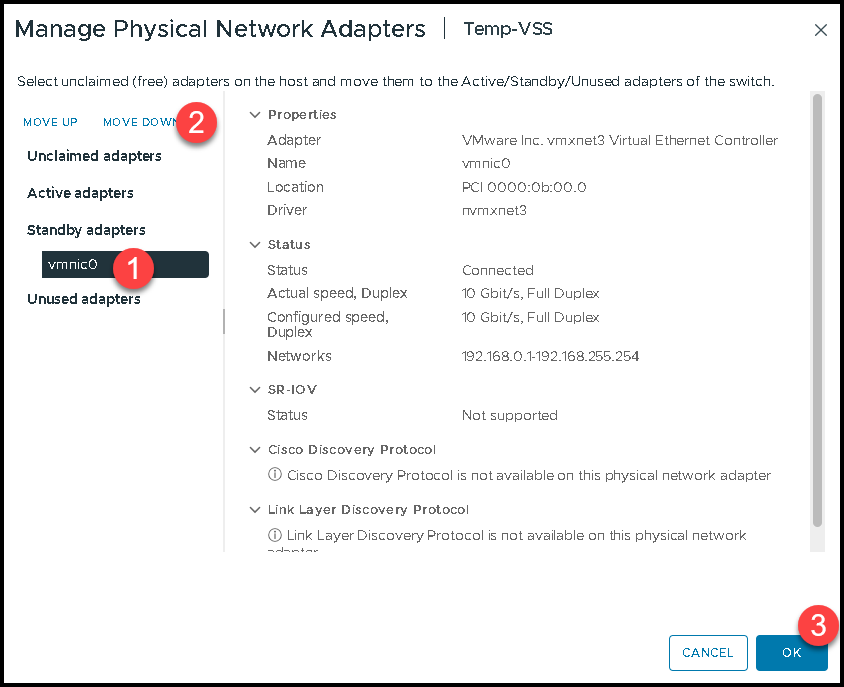
Select the vmnic0 and move it down to the “Unused adapters”:
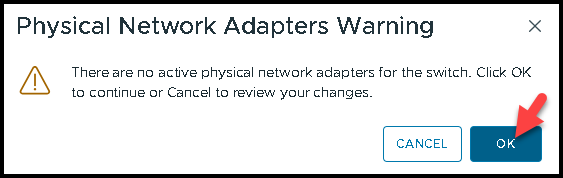
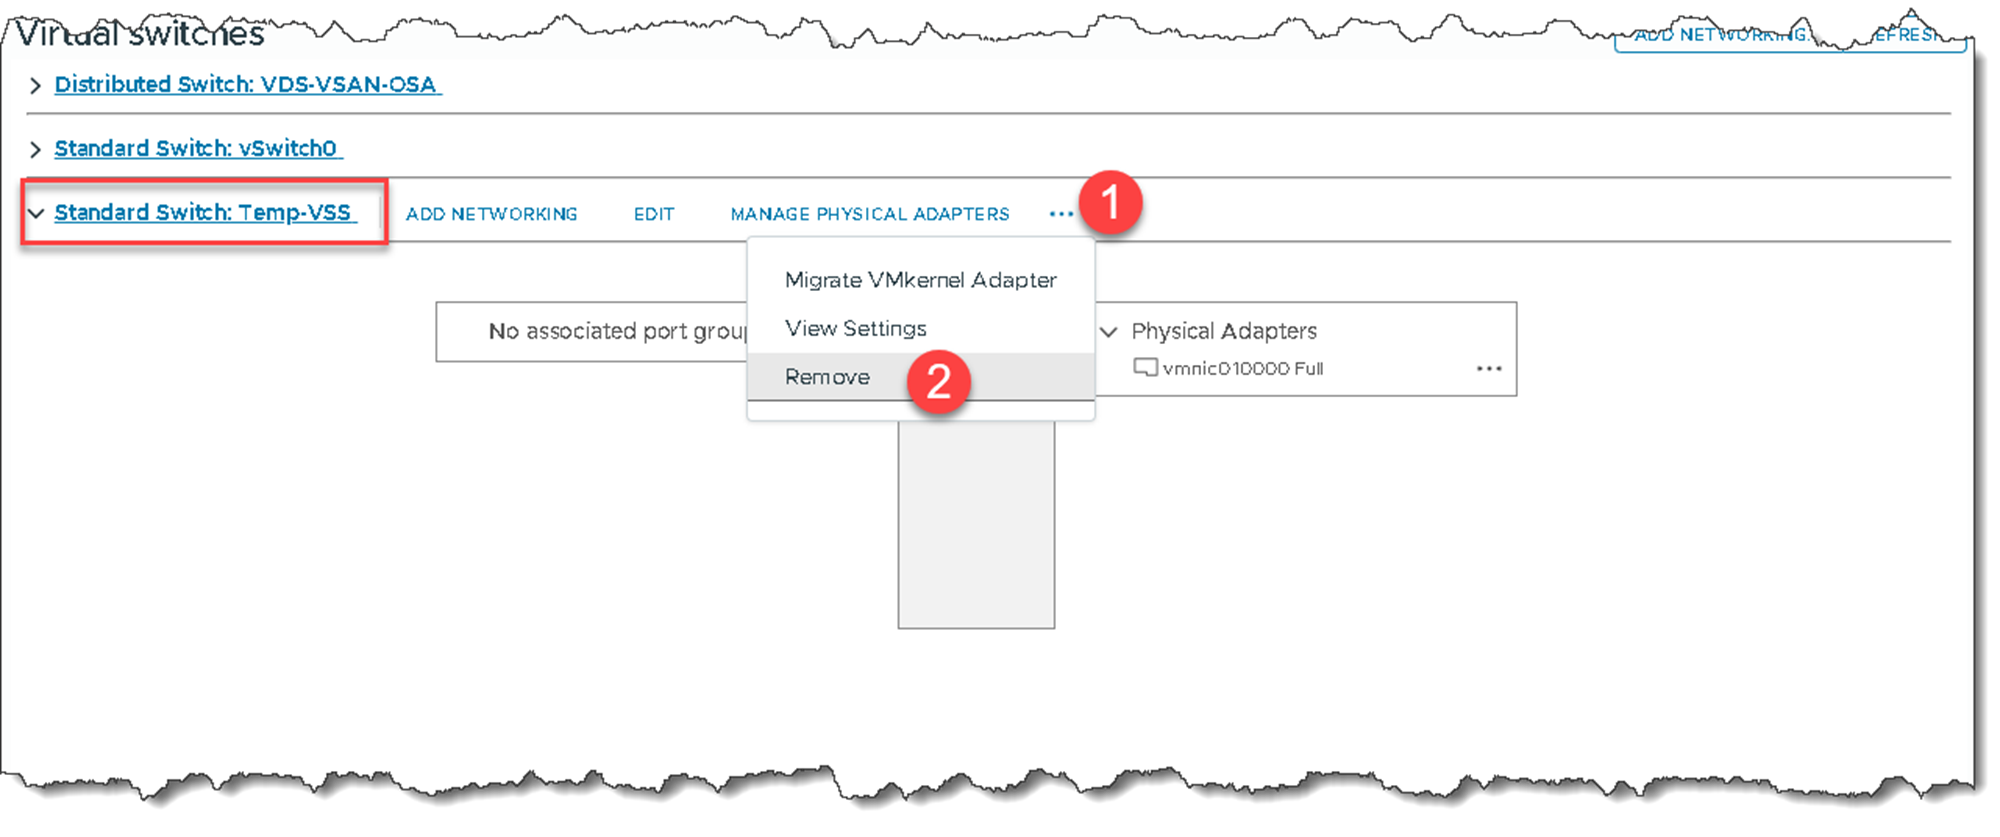
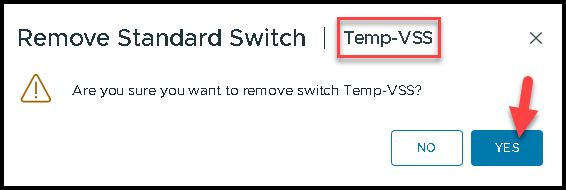
Now, we can go ahead and remove the VSS:
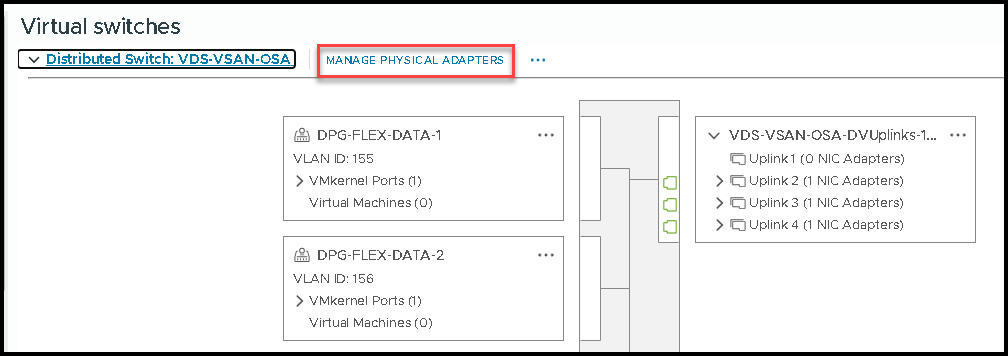
Under the VDS, click on “MANAGE PHYSICAL ADAPTERS”:
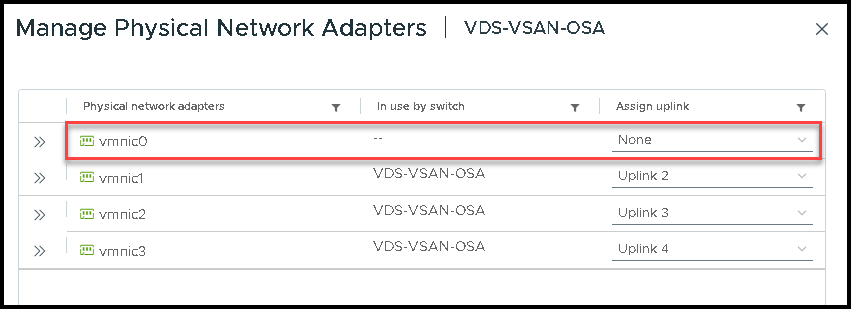
Look at the vmnic0, which is not assigned to any uplink:
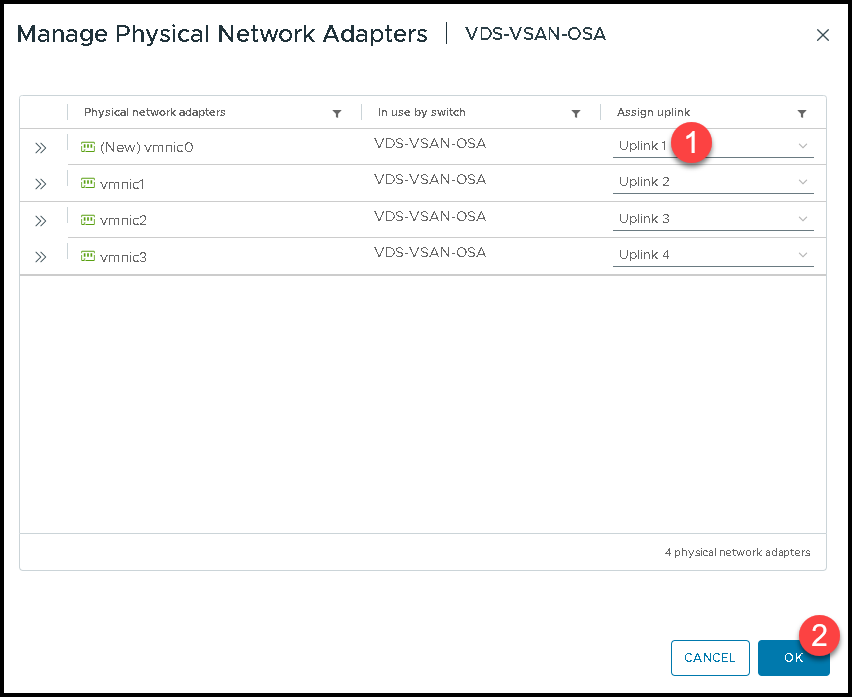
Assign the vmnic0 to the uplink 1 to complete all the steps:
What This Recovery Procedure Accomplishes
Recovering an ESXi management network from a vDS failure is primarily about creating a temporary, known-good path back to the host.
In this lab, I isolated one physical uplink from the distributed switch, created a temporary Standard Switch, rebuilt the Management VMkernel interface, restored IP and VLAN connectivity, and verified that the host could communicate with vCenter again.
Once management access was stable, I migrated the VMkernel back to the original distributed port group and restored the uplink configuration incrementally.
The important part of this workflow is not simply creating a temporary vSS. It is maintaining at least one valid network path during every transition and validating the physical VLAN, uplink, VMkernel, routing, and vDS configuration before removing the recovery network.
External References
- Recover ESXi Host Connectivity When Management Is on a Distributed Switch Broadcom troubleshooting guidance for recovering an ESXi host whose management VMkernel interface is connected to a vSphere Distributed Switch and network access has been lost.
- Migrating ESXi Host Networking from a Distributed Switch to a Standard Switch via CLI Official procedure for moving physical uplinks and VMkernel networking from a vDS to a temporary vSS using ESXi command-line tools.
-
Configuring Standard and Distributed Switch Networking from the ESXi Command Line
Broadcom reference for
esxcfg-vswitch, VMkernel interfaces, routes, management tags, MTU settings, and command-line network recovery. - Host Restored to Factory Network Settings Broadcom documentation describing the impact of the DCUI Restore Network Settings option, including removal of existing vSwitches, port groups, and VMkernel interfaces.
- Recovering from vSphere Network Configuration Errors Using the DCUI Official guidance for network rollback and the vDS recovery options available through the ESXi Direct Console User Interface.
- Best Practices for Migrating ESXi Hosts Between vSS and vDS Broadcom recommendations for preserving management connectivity while moving VMkernel interfaces and physical uplinks between Standard and Distributed Switches.
- Management Network Migration from an LACP-backed vDS to vSS Broadcom guidance for environments using LACP or LAG, where moving a physical uplink to a Standard Switch also requires validating or changing the physical switch configuration.
