
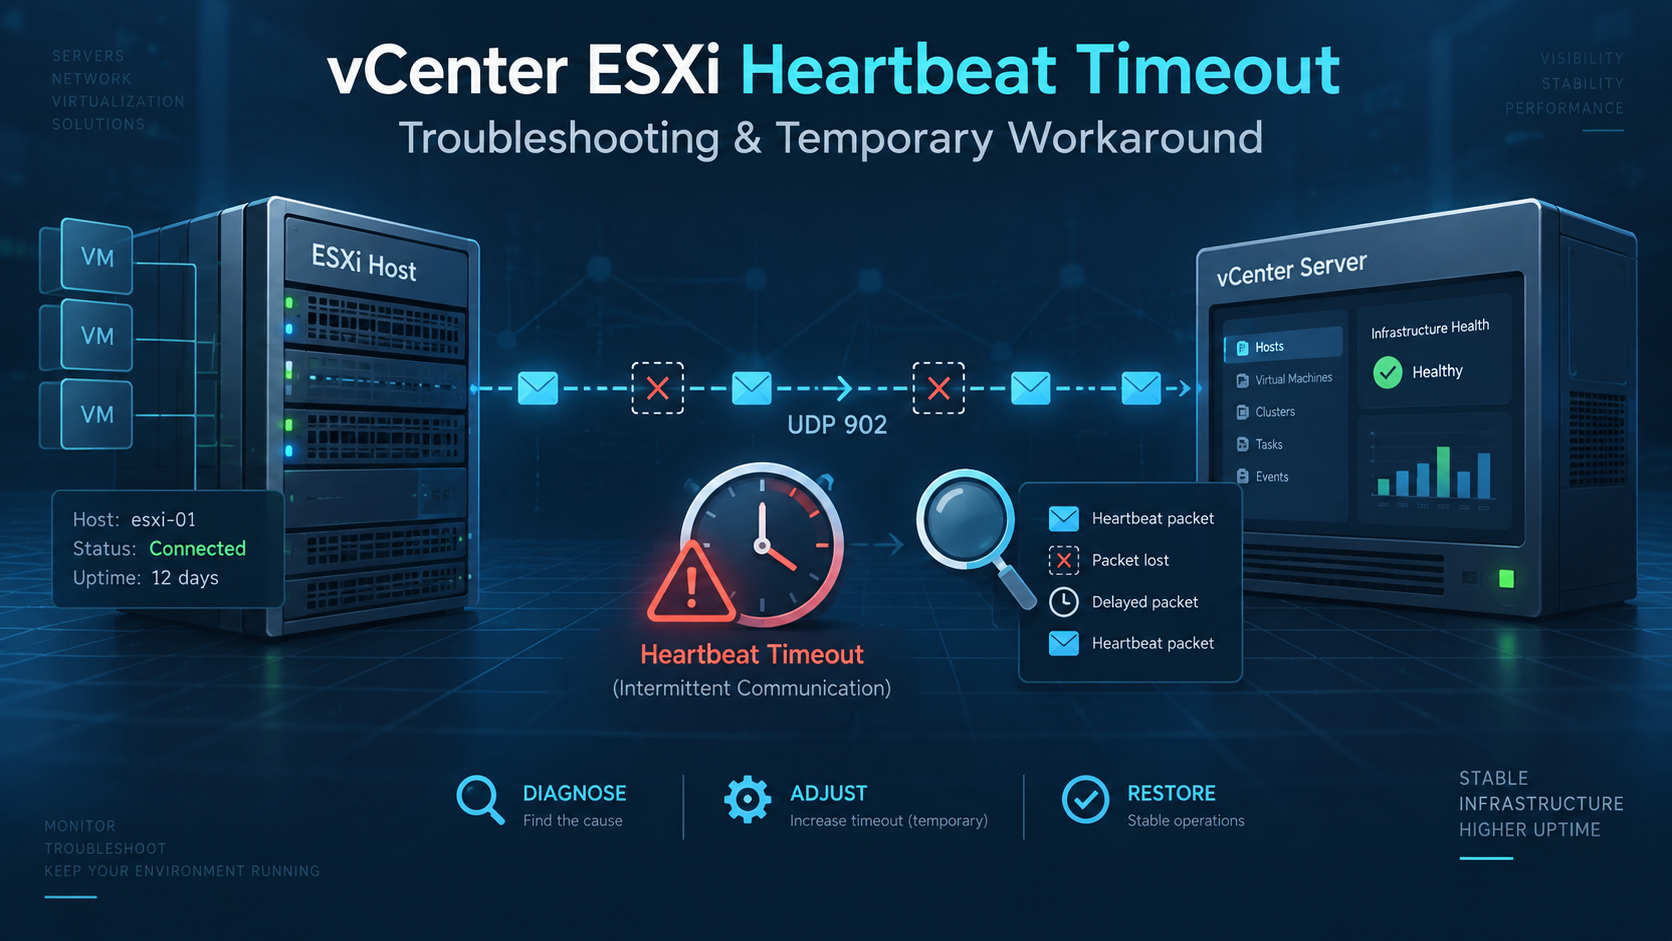
vCenter Server continuously monitors communication with the ESXi hosts that it manages.
As part of this communication, the vpxa agent running on an ESXi host sends heartbeat packets to vCenter Server over UDP port 902.
Under normal conditions, these heartbeat packets are transmitted approximately every 10 seconds.
If vCenter Server does not receive a heartbeat within its configured timeout window, the ESXi host can transition to a Not Responding state in the vSphere Client.
Current Broadcom guidance describes the default timeout window as approximately 60 seconds, meaning that multiple consecutive heartbeat messages must be missed before the host is marked as unavailable.
The important point is that a host appearing as Not Responding does not automatically mean that ESXi has failed.
The virtual machines may continue running normally while communication between the ESXi management network and vCenter Server is interrupted.
Common Causes of Missed Heartbeats
Heartbeat loss can occur for several reasons, including:
- Packet loss on the management network
- Network congestion
- Firewall or ACL rules blocking UDP 902
- Routing problems
- Incorrect vCenter managed IP configuration
- Physical NIC or switch problems
- Duplicate IP addresses
- Temporary vCenter processing delays
- Problems with the
vpxaagent on the ESXi host
Broadcom specifically documents UDP 902 loss as a common cause of hosts repeatedly moving between Connected and Not Responding states.
For that reason, increasing the timeout should not be the first troubleshooting step.
Verify the Heartbeat Before Changing the Timeout
Before modifying vCenter, first determine whether the ESXi host is actually sending its heartbeat packets.
In my lab, I captured the management traffic and could see heartbeat packets being transmitted every approximately 10 seconds:
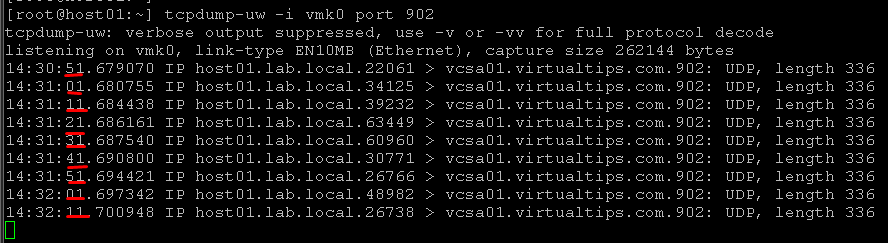
If you want to investigate the communication in detail, see my article:
Debugging vCenter and ESXi Heartbeat
That guide shows how to capture heartbeat traffic on both the ESXi host and the vCenter Server and determine whether the packets are being sent and received.
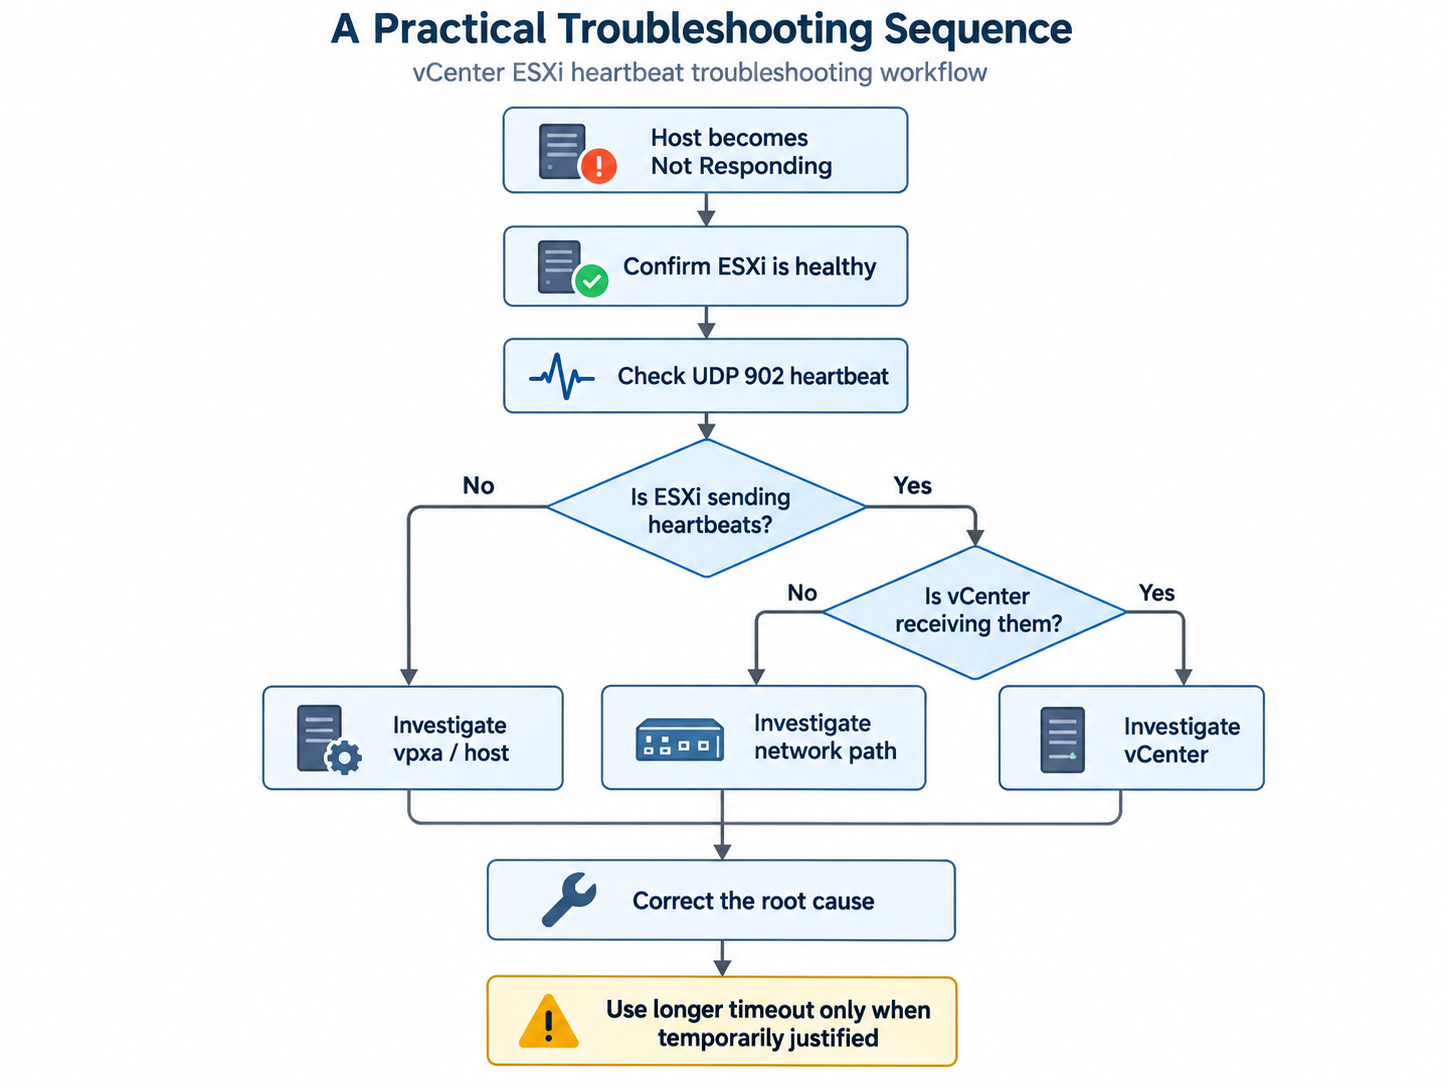
A useful troubleshooting workflow is:
ESXi sends UDP 902?
        ↓
       Yes
        ↓
Does vCenter receive it?
     ↓              ↓
    Yes             No
     ↓              ↓
Investigate      Network /
vCenter          firewall /
processing       packet loss
Broadcom recommends this same basic approach: if packets leave the ESXi host but do not reach vCenter, investigate the network path; if they are reaching vCenter but the host still disconnects, investigate vCenter itself.
When Increasing the Heartbeat Timeout Can Help
Increasing the heartbeat timeout can be useful as a temporary workaround when the environment is experiencing brief communication delays and you want to reduce unnecessary host state changes while the actual problem is being investigated.
For example, changing the timeout from:
60 secondsto:
120 secondsgives vCenter more time to receive a heartbeat before marking the host as Not Responding.
However, this does not:
- change the heartbeat interval;
- repair packet loss;
- open UDP 902 through a firewall;
- fix routing;
- resolve NIC drops;
- correct network congestion.
It only increases the amount of time vCenter waits.
Broadcom explicitly recommends treating this change as a temporary measure while the underlying communication problem is investigated.
Configure the vCenter Heartbeat Timeout
Open the vSphere Client.
Select the vCenter Server object and navigate to:
Configure
   ↓
Advanced Settings
   ↓
Edit Settings
Search for:
config.vpxd.heartbeat.notRespondingTimeoutIf the setting does not already exist, add it.
For a 120-second timeout:
Key:
config.vpxd.heartbeat.notRespondingTimeout

Value:
120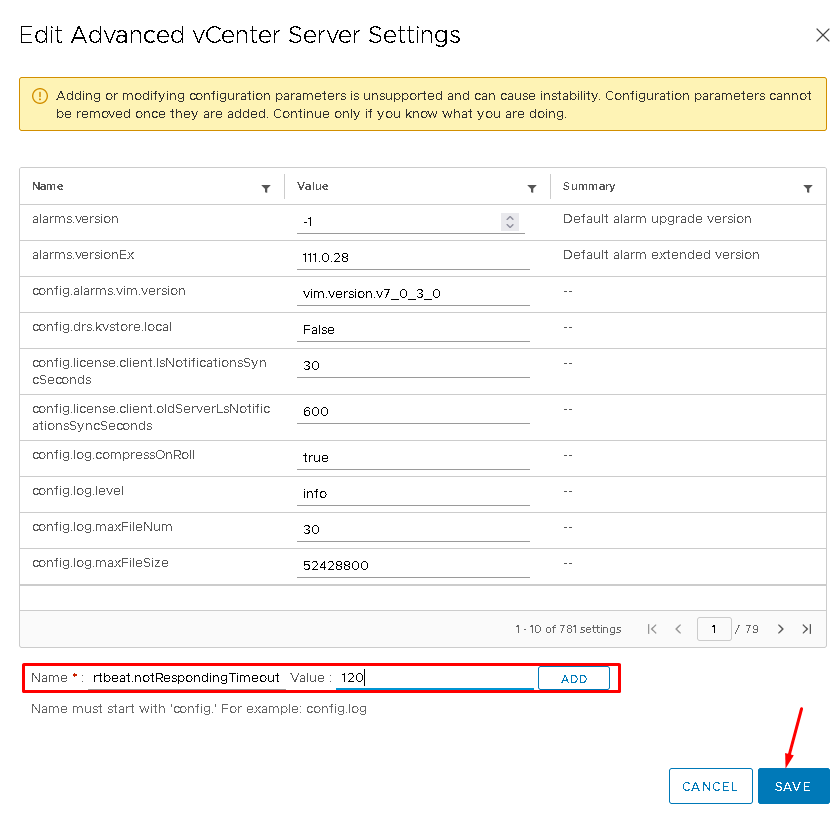
Restart the vpxd Service
The vpxd service must be restarted for the setting to take effect. Connect to the vCenter Server Appliance through SSH.
Stop the vmware-vpxd service:
service-control --stop vmware-vpxdThen:
service-control --start vmware-vpxdOr:
service-control --restart vmware-vpxdImportant: Restarting vpxd Affects vCenter Management
Restarting vmware-vpxd temporarily interrupts vCenter management operations.
During the restart, operations such as:
- vSphere Client access
- inventory operations
- vMotion initiated through vCenter
- scheduled vCenter tasks
- other management workflows
may be temporarily unavailable until the service returns.
It does not mean that running virtual machines on the ESXi hosts are powered off. Broadcom similarly warns that restarting vpxd temporarily halts vCenter-related operations.
Important: For production environments, schedule this change appropriately.
Verify the New Behavior
After vmware-vpxd starts again, confirm its state:
service-control --status vmware-vpxdThen monitor the affected ESXi host in the vSphere Client.
Also verify the heartbeat traffic again:
- On the ESXi side, you can capture outgoing UDP 902 traffic.
- On vCenter, verify that packets from the affected host are arriving.
The objective is not merely to confirm that the host remains Connected longer.
You still want to answer:
Why were the heartbeats delayed or lost in the first place?
If the problem continues, increasing the timeout further is usually not a substitute for identifying the network or service problem.
Example 1: Heartbeats Leave ESXi but Do Not Reach vCenter
Suppose the ESXi capture shows:
Heartbeat 1 → sent
Heartbeat 2 → sent
Heartbeat 3 → sent
Heartbeat 4 → sent
but the corresponding packets do not appear in a vCenter packet capture.
The failure domain is then somewhere between:
ESXi Management VMkernel
        ↓
Physical NIC
        ↓
Physical Network
        ↓
Firewall / Routing
        ↓
vCenter Server
In that situation, investigate the network rather than continuing to increase the vCenter timeout.
For lower-level ESXi packet-drop investigation, see: “How to Troubleshoot Packet Drops on an ESXi Host“.
Broadcom has documented real environments in which ESXi transmitted the heartbeat normally but the physical underlay dropped the packets before they reached vCenter.
Example 2: Heartbeats Are Not Leaving ESXi
If no heartbeat leaves the ESXi host, the problem is different.
Check:
vpxadaemon- host management configuration
- the configured vCenter address
- local ESXi networking
- logs related to management communication
Broadcom has also documented cases where an incorrect heartbeat port configuration caused vpxa to use the wrong UDP port instead of 902.
This is another reason not to assume that a larger timeout will solve every host-disconnection problem.
Reverting the Workaround
Once the underlying problem has been fixed, I would not leave an unnecessarily large heartbeat timeout indefinitely. Document the original setting before changing it.
If the advanced setting already existed, restore its previous value.
If you added the custom timeout specifically as a temporary workaround, return the environment to the normal supported configuration after the root cause has been corrected and validated.
The goal is to fix:
heartbeat lossrather than simply making vCenter tolerate heartbeat loss for longer.
A Practical Troubleshooting Sequence
What This Adjustment Actually Changes
Increasing config.vpxd.heartbeat.notRespondingTimeout changes only how long vCenter waits before declaring an ESXi host unresponsive.
It does not change the normal heartbeat transmission interval from the host, and it does not repair the communication path.
That distinction is important.
The setting can be useful while investigating intermittent network conditions, but the long-term solution should always be to determine why the heartbeat packets are being delayed, dropped, or not generated.
External References
-
ESXi Host Disconnects Intermittently from vCenter Server
Broadcom guidance covering ESXi heartbeat communication with vCenter,
the default heartbeat timeout behavior, UDP port 902, packet-loss
troubleshooting, and the
config.vpxd.heartbeat.notRespondingTimeoutworkaround. - ESXi Host Disconnects from vCenter Server Due to UDP 902 Heartbeat Issues Official troubleshooting reference for ESXi hosts that transition to a disconnected or Not Responding state because heartbeat traffic between ESXi and vCenter is interrupted.
- Verify ESXi Host Heartbeat to vCenter Using Packet Capture Broadcom procedure for capturing and validating ESXi heartbeat traffic, helping determine whether UDP 902 packets are leaving the host and reaching vCenter Server.
- ESXi Host Intermittently Transitions to Not Responding Due to UDP 902 Packet Loss Real-world troubleshooting case showing how packet loss in the physical network can interrupt ESXi heartbeat communication even when the host itself remains operational.
- ESXi Hosts Entering Not Responding State Due to Heartbeat Port Configuration Broadcom reference for cases where ESXi management communication uses an unexpected heartbeat port, resulting in intermittent connectivity with vCenter Server.
