

Building a Slurm cluster in a lab is one of the best ways to understand how the controller, compute nodes, authentication, accounting, storage, and user environment work together.
In this guide, I will document the Slurm environment I built using virtual machines running on a physical VMware ESXi host.
This is not intended to be a production reference architecture. The goal is to create a functional environment where I can test Slurm administration, job submission, troubleshooting, accounting, and automation.
The lab includes redundant Slurm controllers, dedicated accounting with slurmdbd, shared user home directories, login nodes, and multiple compute nodes.
Lab Environment
- The original lab was built with:
- Slurm accounting
- VMware ESXi as the virtualization platform
- Red Hat Enterprise Linux 8.10 virtual machines
- Two Slurm controllers
- One SlurmDBD/MariaDB server
- One NFS server
- Two login nodes
- Fifteen compute nodes
- MUNGE authentication
- Shared
/home
Lab Topology
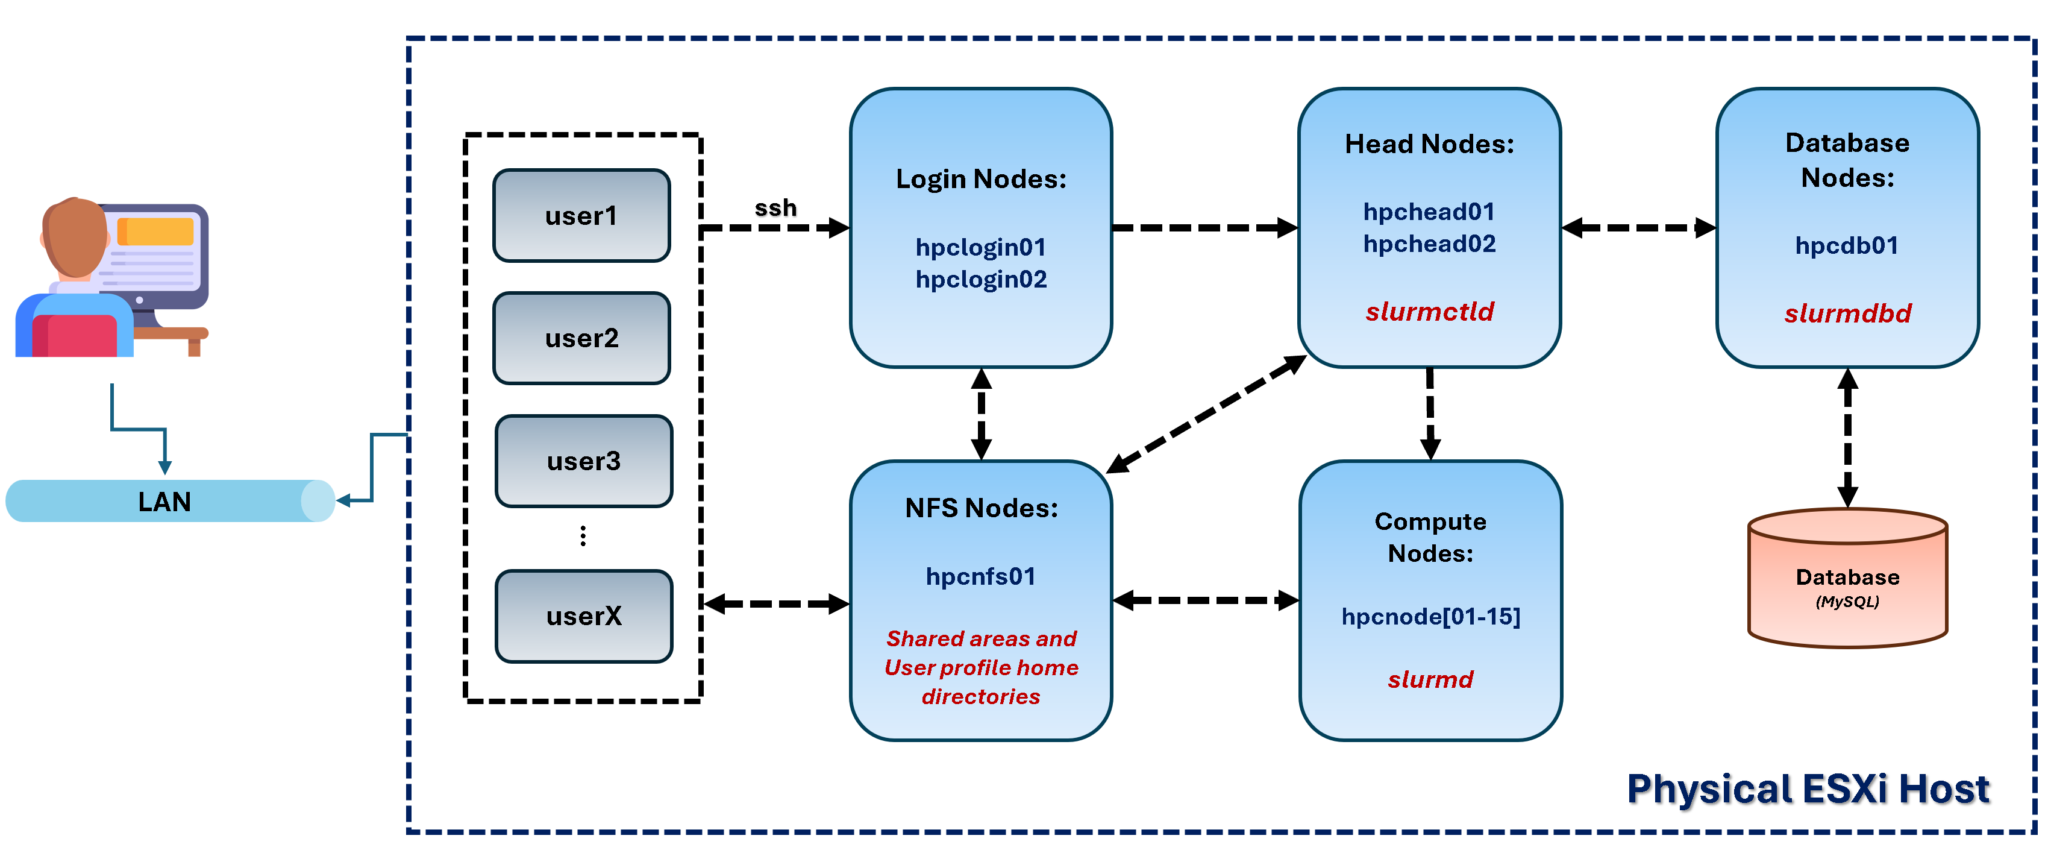
The topology used in this environment looks like this:
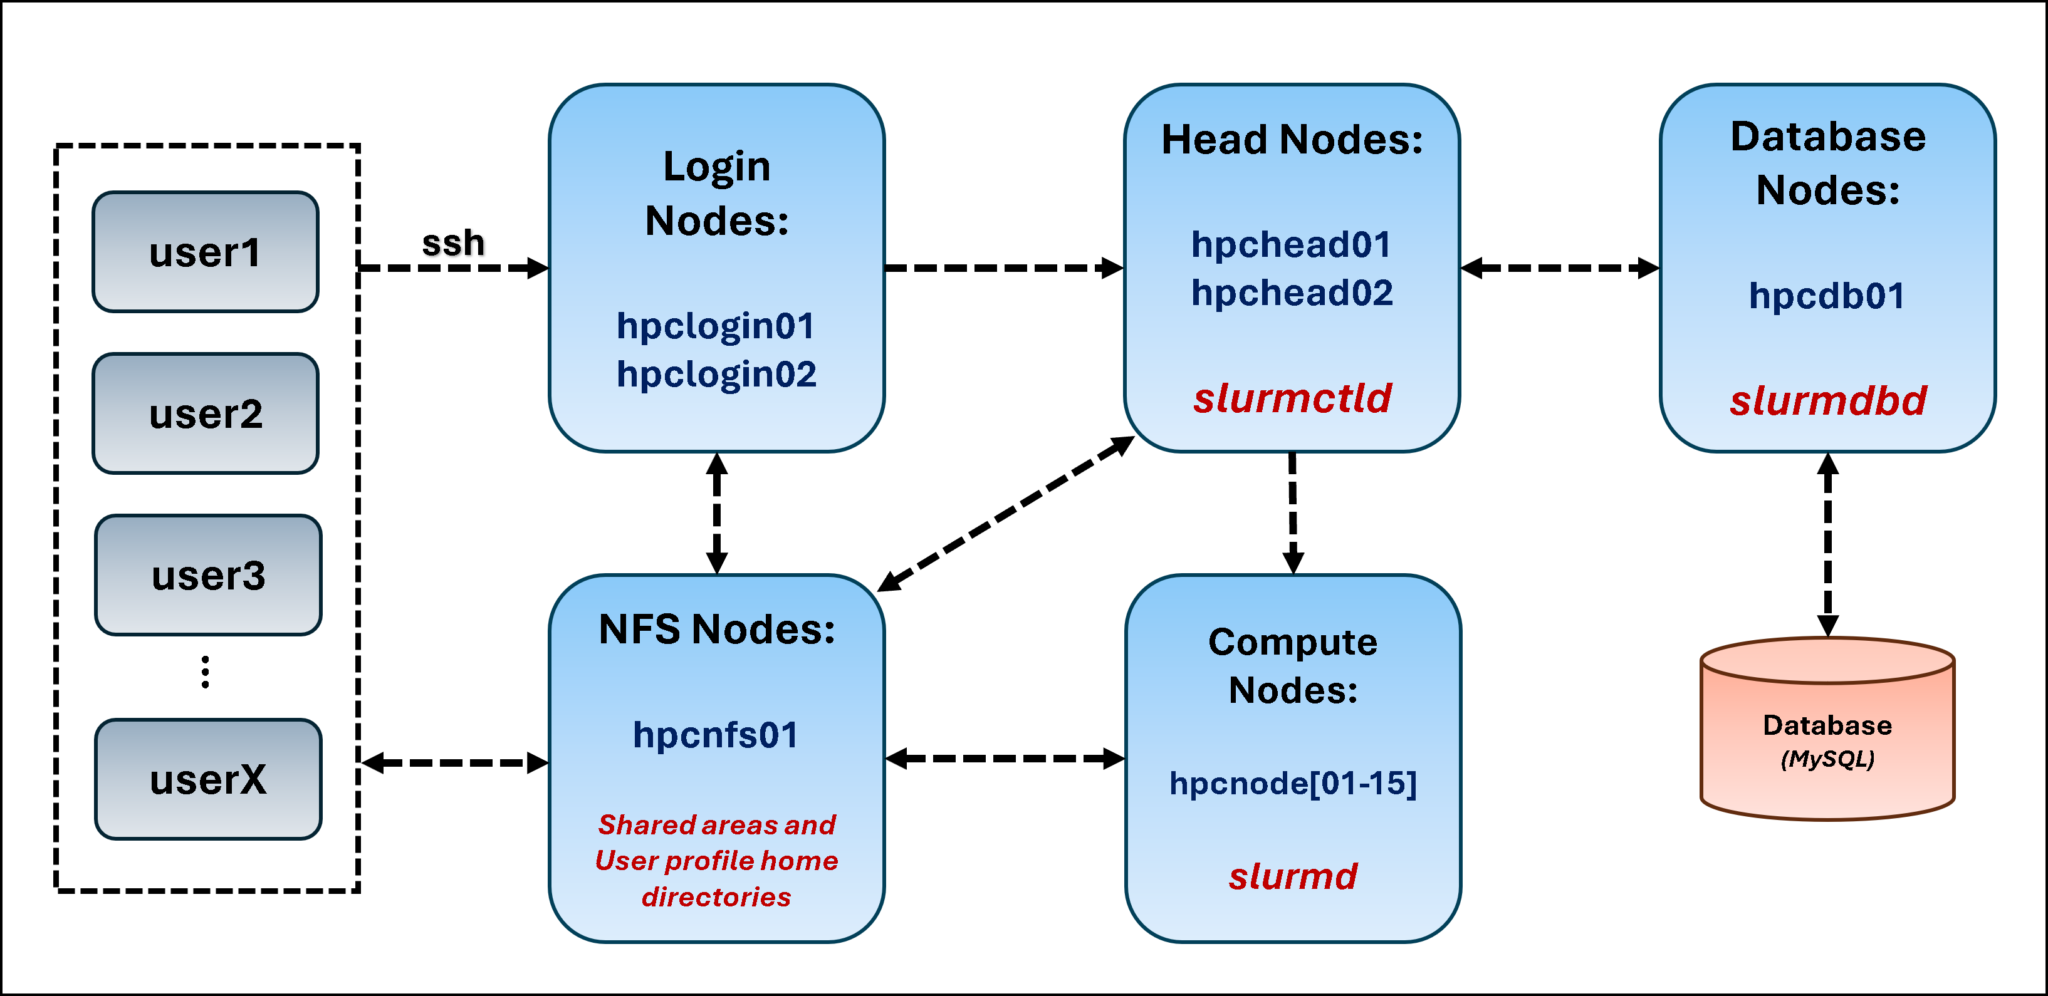
The main roles are:
- Login nodes provide the entry point for users. Users connect by SSH, prepare jobs, submit them, and inspect their status.
- Controller nodes run the
slurmctlddaemon. The controller receives job requests, tracks compute-node state, schedules resources, and manages the job queue.
- Compute nodes run
slurmdand execute the workloads allocated by the controller.
- SlurmDBD provides the accounting interface between Slurm and the MariaDB database. It stores accounting information such as associations, users, accounts, and job records.
- NFS provides shared storage for user home directories. In this lab it is also used to demonstrate a shared controller state directory.
SchedMD recommends running slurmdbd separately from the controller when practical and describes login nodes as submit hosts rather than compute resources.
Important Lab vs Production Considerations
There are several design decisions in this guide that are appropriate for learning but should not automatically be copied into production.
The most important is the controller state directory.
When multiple SlurmctldHost entries are configured, every controller must have read/write access to the same StateSaveLocation. However, SchedMD specifically recommends a low-latency shared filesystem and does not recommend NFS for production controller state because filesystem latency or failure directly affects Slurm controller availability.
I use NFS in this lab because it is simple and makes the shared-state concept easy to demonstrate.
For production, design this part according to SchedMD’s current HA recommendations.
Prerequisites Before Installing Slurm
Before configuring any Slurm daemon, verify:
- DNS or hostname resolution between all nodes
- Network connectivity
- Time synchronization
- Consistent user and group IDs
- SSH administrative access
- Required repositories/packages
- Firewall connectivity
Time synchronization is particularly important when MUNGE is used. Large clock differences can cause credentials to be rejected as expired.
If you want to automate consistent time configuration, see my guide: “Manage Chrony NTP Configuration with Ansible: Practical Playbook“.
Keep UIDs and GIDs Consistent
Slurm expects a uniform user and group namespace across the cluster. This includes the service account used by Slurm and the user accounts that submit jobs.
For a lab, you can choose a fixed UID/GID for the slurm account.
For example:
groupadd -g 64030 slurm

useradd \
  -r \
  -u 64030 \
  -g slurm \
  -M \
  -s /sbin/nologin \
  slurm
The exact number 64030 is only an example.
The important requirement is that the Slurm account resolves to the same UID/GID wherever it is required.
Before creating it manually, check whether your package already created the account:
getent passwd slurm
getent group slurm
A Note About Slurm Packages
The original version of this lab installed Slurm from distribution/EPEL packages. That is convenient for a lab.
However, SchedMD states that third-party Linux distribution packages are not maintained or recommended by SchedMD itself. For production deployments, building the official RPM or DEB packages from a supported Slurm release is the preferred approach.
The package names below therefore reflect this lab environment, not a universal Slurm installation method.
Setting Up the SlurmDBD Server
The accounting node in my lab is:
hpcdb01It runs:
- MariaDB
slurmdbd- MUNGE
Install MariaDB and SlurmDBD
Install the required packages for the lab:
dnf install -y https://dl.fedoraproject.org/pub/epel/epel-release-latest-8.noarch.rpm
dnf repolist | grep epel
subscription-manager repos --enable codeready-builder-for-rhel-8-x86_64-rpms
dnf install -y mariadb-server
dnf install -y munge
dnf install -y slurm slurm-slurmdbd
Enable MariaDB:
systemctl enable --now mariadbThen perform the initial database configuration:
mysql_secure_installationCreate the Slurm Accounting Database
Access MariaDB:
mysql -u root -pCreate the database:
CREATE DATABASE slurm_acct_db;Because MariaDB runs on the same host as slurmdbd in this lab, I restrict the database account to localhost rather than using %:
CREATE USER 'slurm'@'localhost'
IDENTIFIED BY 'CHANGE_THIS_PASSWORD';

GRANT ALL PRIVILEGES
ON slurm_acct_db.*
TO 'slurm'@'localhost';

FLUSH PRIVILEGES;
Using:
'slurm'@'%'would allow authentication from any host permitted by the surrounding network/security configuration and is unnecessary for this topology.
Verify:
SHOW DATABASES;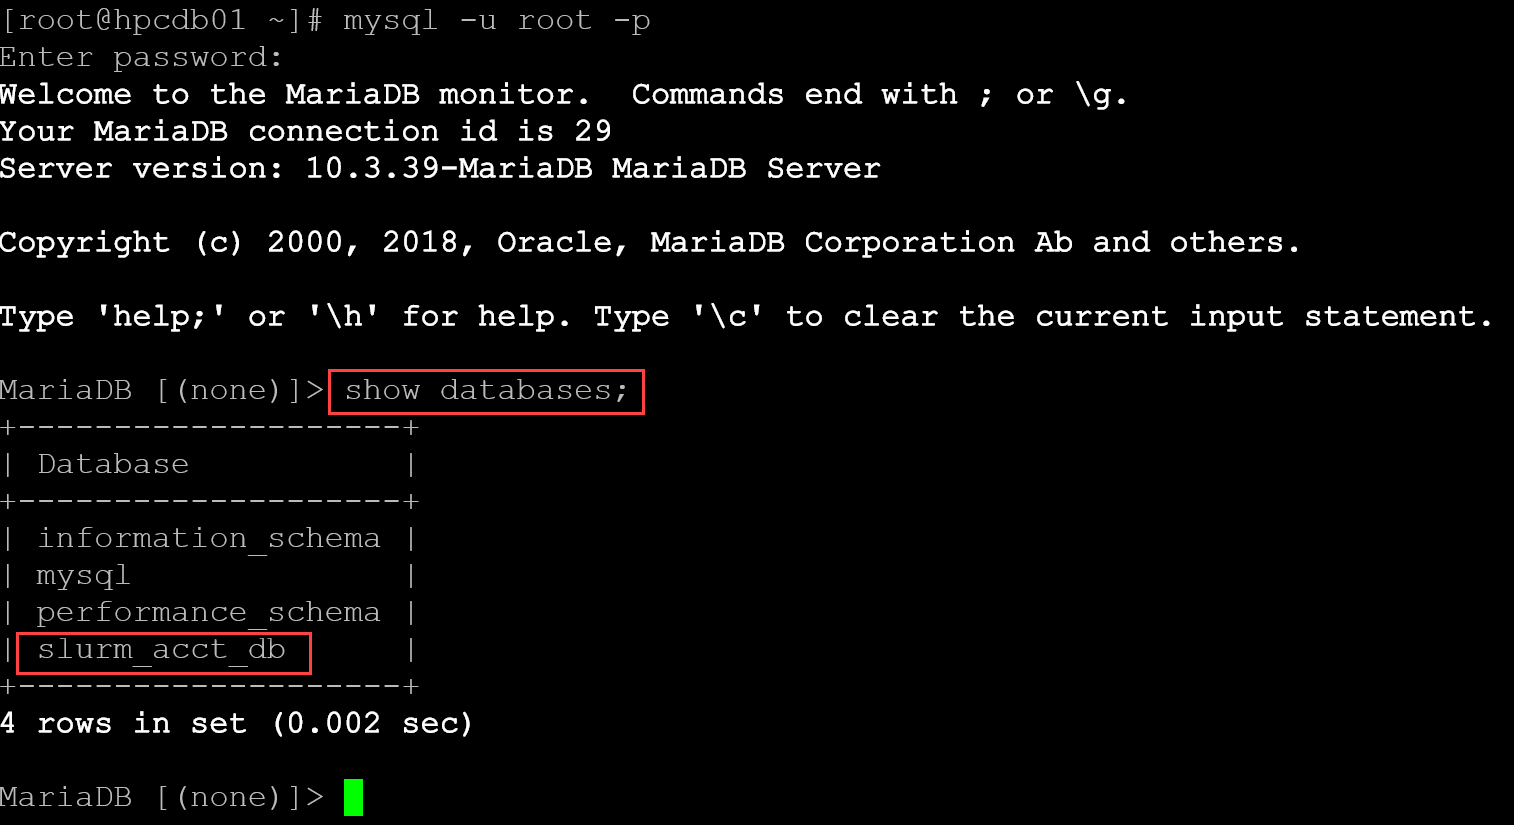
You can also test the application account:
mysql -u slurm -p slurm_acct_db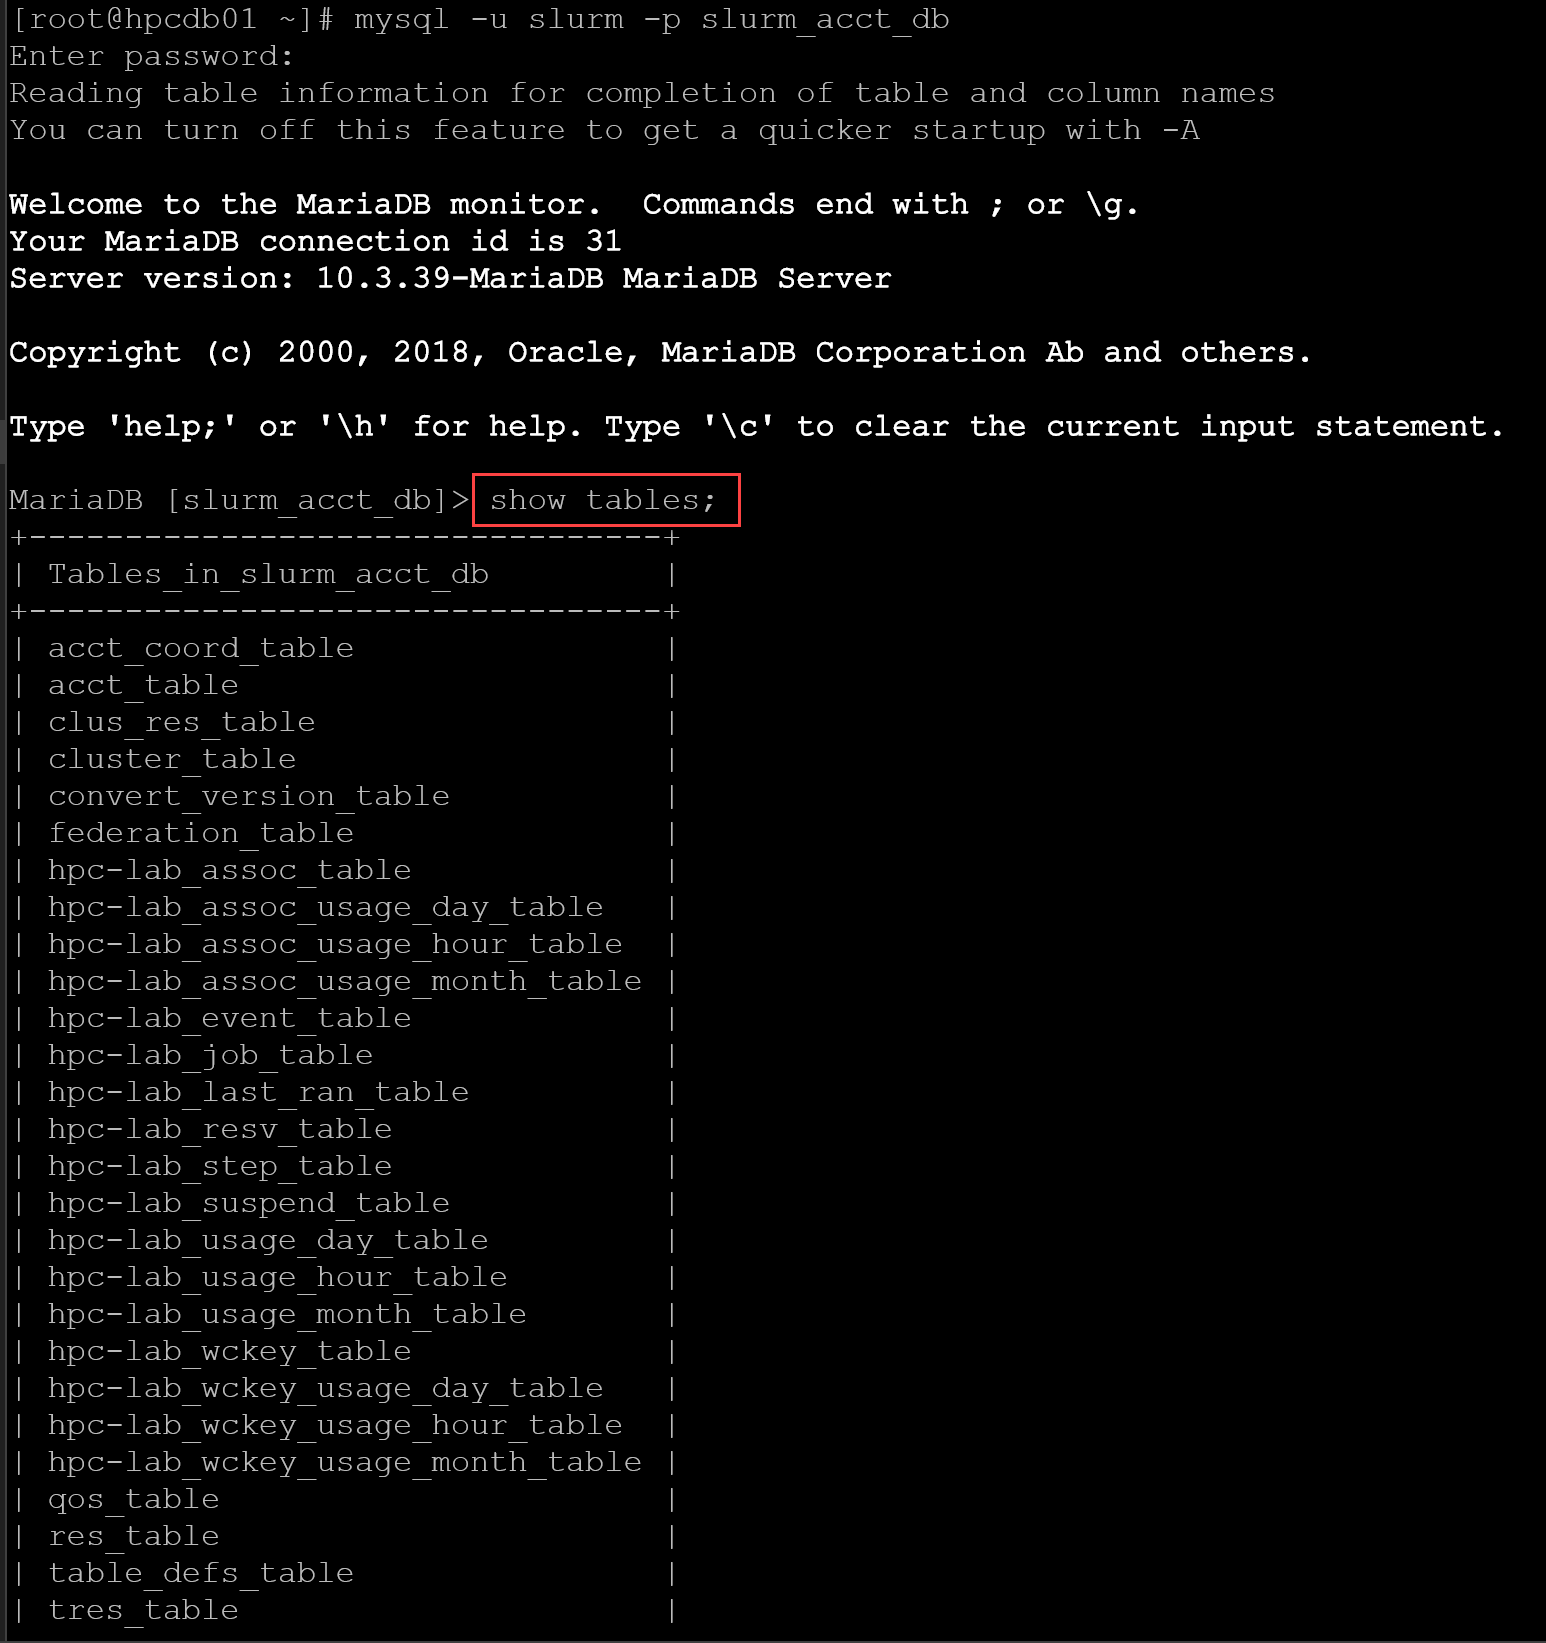
Configure slurmdbd.conf
Create or edit:
/etc/slurm/slurmdbd.confUse:
AuthType=auth/munge

DbdHost=hpcdb01
DbdPort=6819

SlurmUser=slurm

StorageType=accounting_storage/mysql
StorageHost=localhost
StorageUser=slurm
StoragePass=CHANGE_THIS_PASSWORD
StorageLoc=slurm_acct_db

LogFile=/var/log/slurmdbd.log
PidFile=/run/slurmdbd.pid
Protect the file because it contains the database password:
chown slurm:slurm /etc/slurm/slurmdbd.conf
chmod 600 /etc/slurm/slurmdbd.conf
Create the log file if required by your package:
touch /var/log/slurmdbd.log
chown slurm:slurm /var/log/slurmdbd.log
Configure MUNGE
Generate one MUNGE key for the cluster.
/usr/sbin/create-munge-keyConfirm its permissions:
chown munge:munge /etc/munge/munge.key
chmod 400 /etc/munge/munge.key
Start MUNGE:
systemctl enable --now munge
systemctl status munge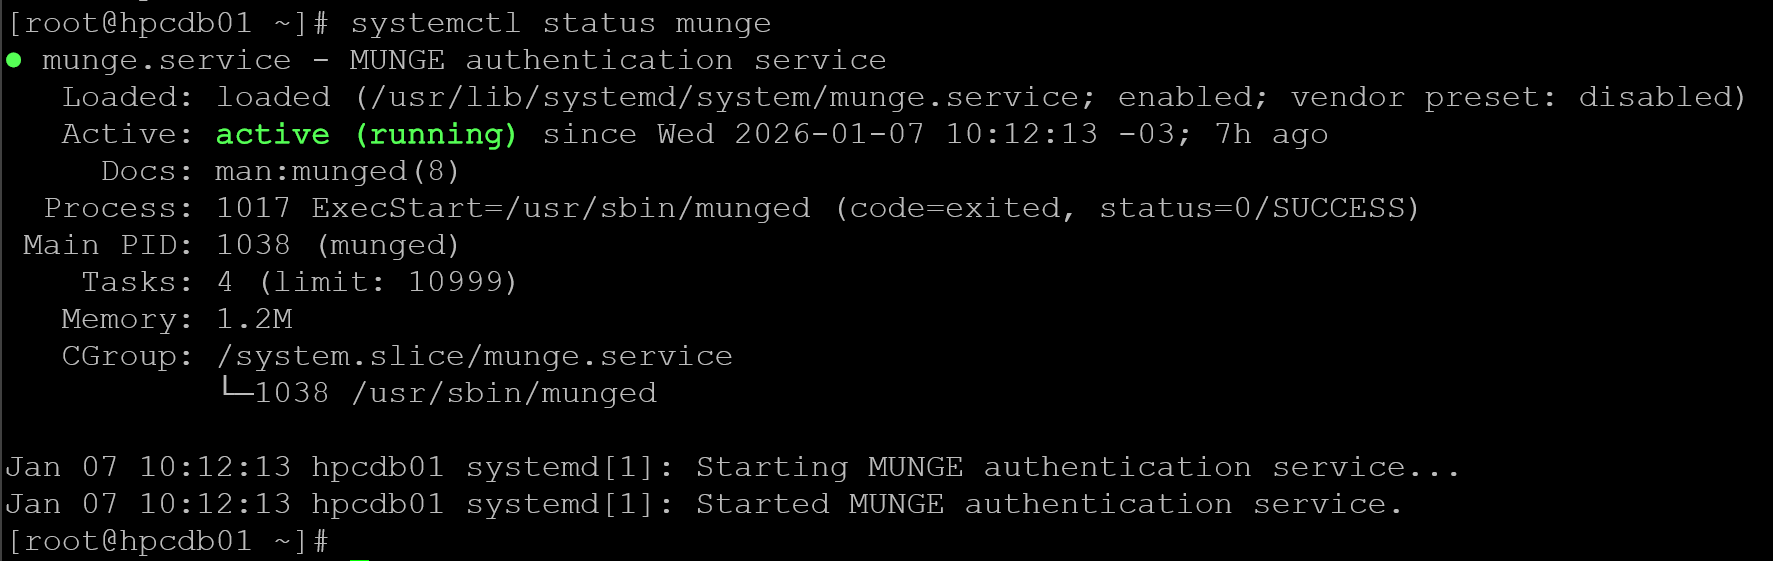
Test locally:
munge -n | unmunge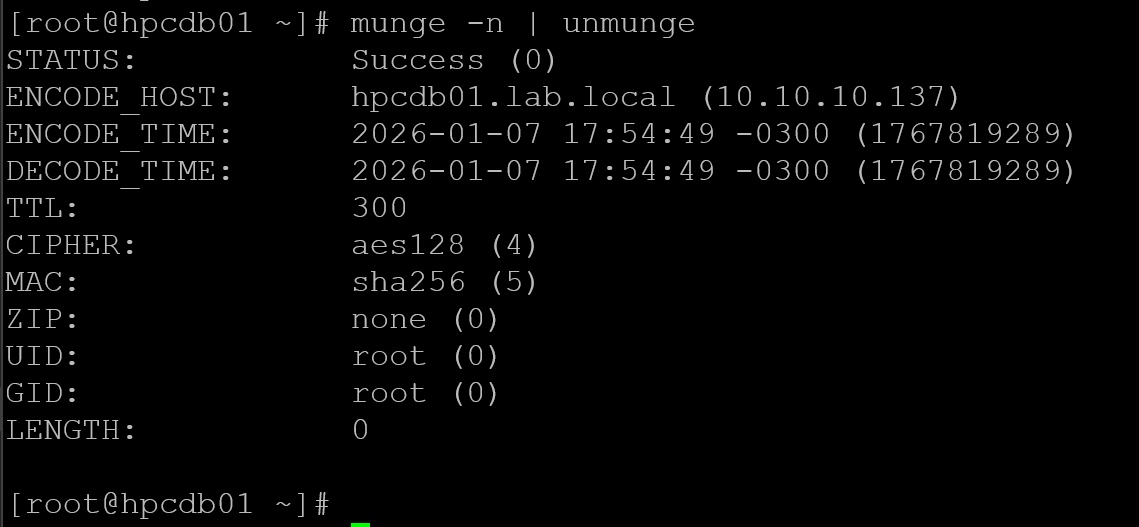
Note: The same key must later be securely distributed to the controllers, compute nodes, and submit/login nodes. SchedMD requires the shared MUNGE key on all components participating in authenticated Slurm communication.
Start SlurmDBD
Now start:
systemctl enable --now slurmdbdVerify:
systemctl status slurmdbd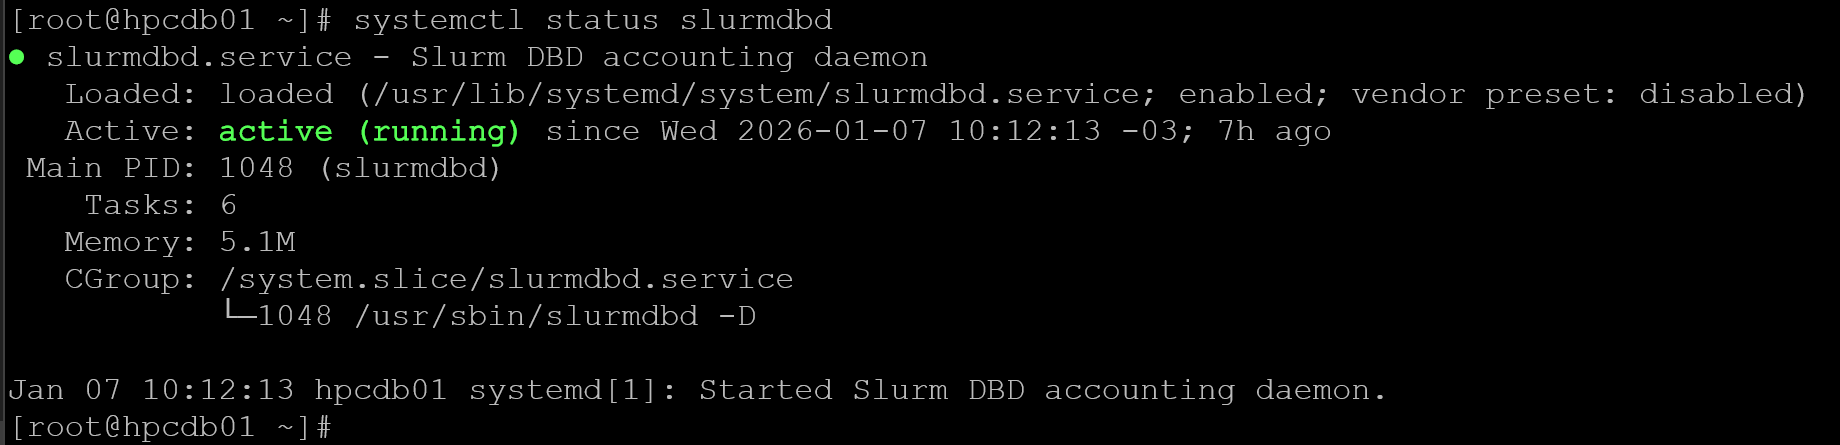
and:
ss -lntp | grep 6819
The default SlurmDBD port is TCP 6819. UDP 6819 does not need to be opened for normal SlurmDBD communication.
If firewalld is active:
firewall-cmd --permanent --add-port=6819/tcp
firewall-cmd --reload
Setting Up the NFS Server
Let’s set up the NFS server. First, create the Slurm user:
useradd -r -M -s /sbin/nologin slurm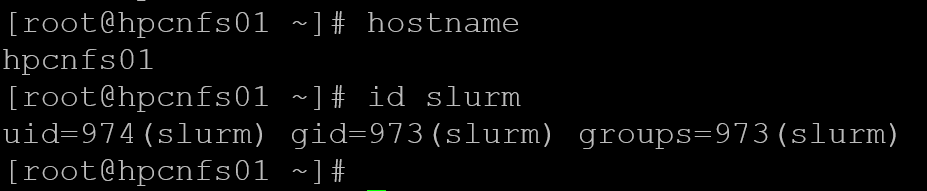
Install the NFS package, create the state dir, and adjust its permissions. To recap, the state dir will be used by head nodes:
dnf install -y nfs-utils
mkdir -p /srv/slurm/state
chown slurm:slurm /srv/slurm/state
Afterward, add the NFS share in the /etc/exports – Basically, this file is used to specify what directories will be shared through NFS:
echo "/srv/slurm/state hpchead01(rw,sync,no_root_squash) hpchead02(rw,sync,no_root_squash)" > /etc/exportsLook that both head nodes (hpchead01 and hpchead02) have read and write access to this NFS share. After editing this file, we need to export the NFS shares by using the following command:
exportfs -raEnabling the services:
systemctl enable --now nfs-server rpcbind
systemctl status nfs-server
systemctl status rpcbind
And allowing NFS on the firewall, if used:
firewall-cmd --permanent --add-service=nfs
firewall-cmd --permanent --add-service=mountd
firewall-cmd --permanent --add-service=rpc-bind
firewall-cmd --reload
We can use the “showmount” command to inspect what NFS shares are being exported:
showmount -e hpcnfs01 | grep -i state
Setting Up the Head Nodes (Controllers)
As we showed you, we have two head nodes in our lab (hpchead01 and hpchead02). So, the configurations must be done on each one.
Let’s get started. In the following commands, we’re doing:
- Installing the NFS package.
- Creating the Slurm user.
- Creating the directory /var/spool/slurmctld and adjusting its permissions.
- Mounting the NFS state share on the created directory /var/spool/slurmctld.
dnf install -y nfs-utils
useradd -r -M -s /sbin/nologin slurm
mkdir -p /var/spool/slurmctld
chown -R slurm:slurm /var/spool/slurmctld
chmod 755 /var/spool/slurmctld
mount hpcnfs01:/srv/slurm/state /var/spool/slurmctld
At this point, we must be able to see the NFS state share mounted:

To persist this mounting through reboots, edit the /etc/fstab configuration file and add the following entry:
hpcnfs01:/srv/slurm/state /var/spool/slurmctld nfs defaults,_netdev 0 0Install munge:
dnf install -y mungeGo to the database node (in our case, hpcdb01), and copy the munge key to the head nodes. The following commands must be executed while logged into the database nodes:
scp /etc/munge/munge.key hpchead01:/etc/munge/
scp /etc/munge/munge.key hpchead02:/etc/munge/
Afterward, go back to the head nodes to adjust munge key permissions and start the service:
chown munge:munge /etc/munge/munge.key
chmod 400 /etc/munge/munge.key
systemctl enable --now munge
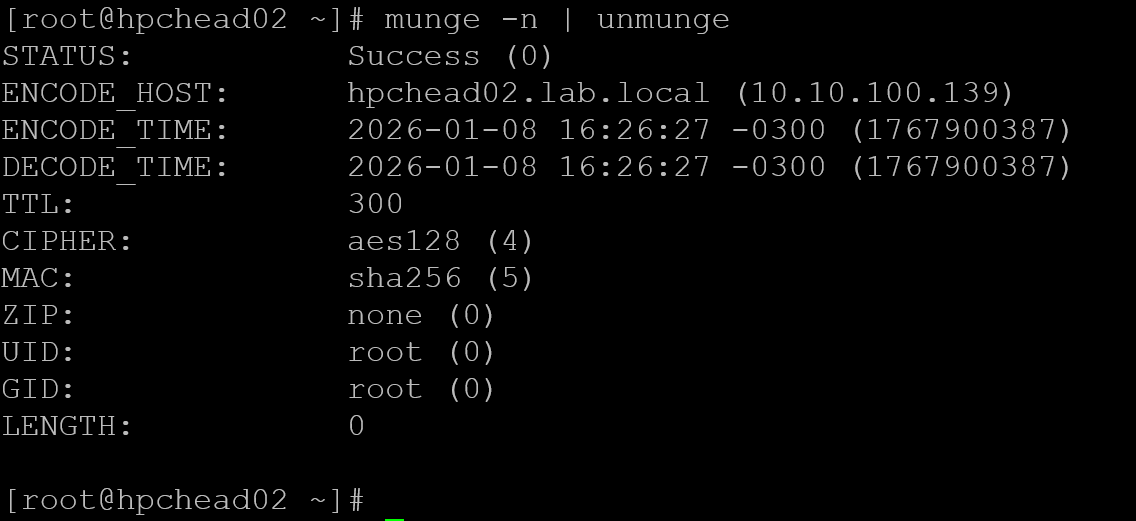
munge -n | unmunge
Munge test on hpchead01:
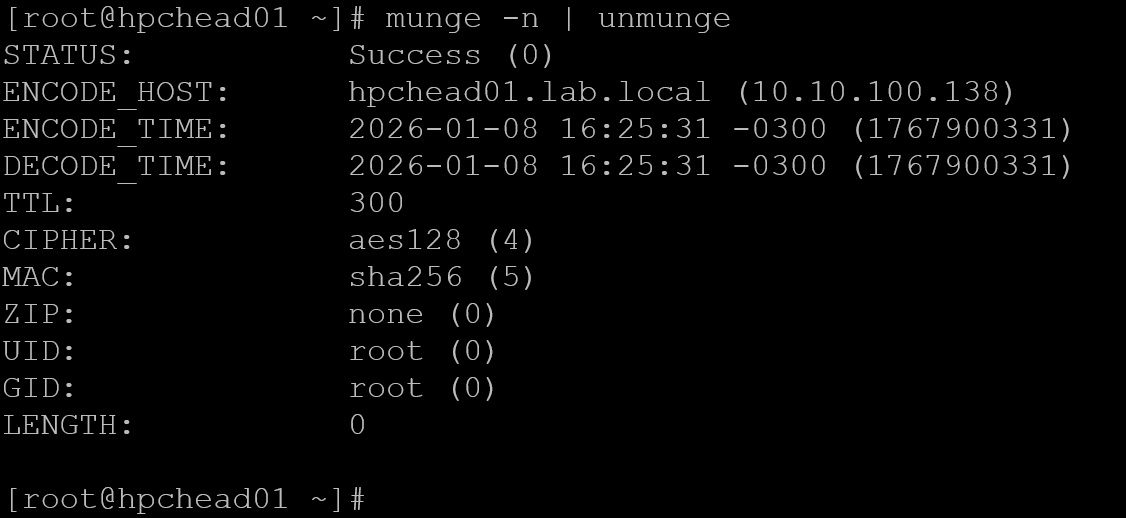
Munge test on hpchead02:
Install Slurm packages and enable the slurmctld daemon:
dnf install -y https://dl.fedoraproject.org/pub/epel/epel-release-latest-8.noarch.rpm
dnf repolist | grep epel
subscription-manager repos --enable codeready-builder-for-rhel-8-x86_64-rpms
dnf install -y slurm slurm-slurmctld
systemctl enable --now slurmctld
systemctl status slurmctld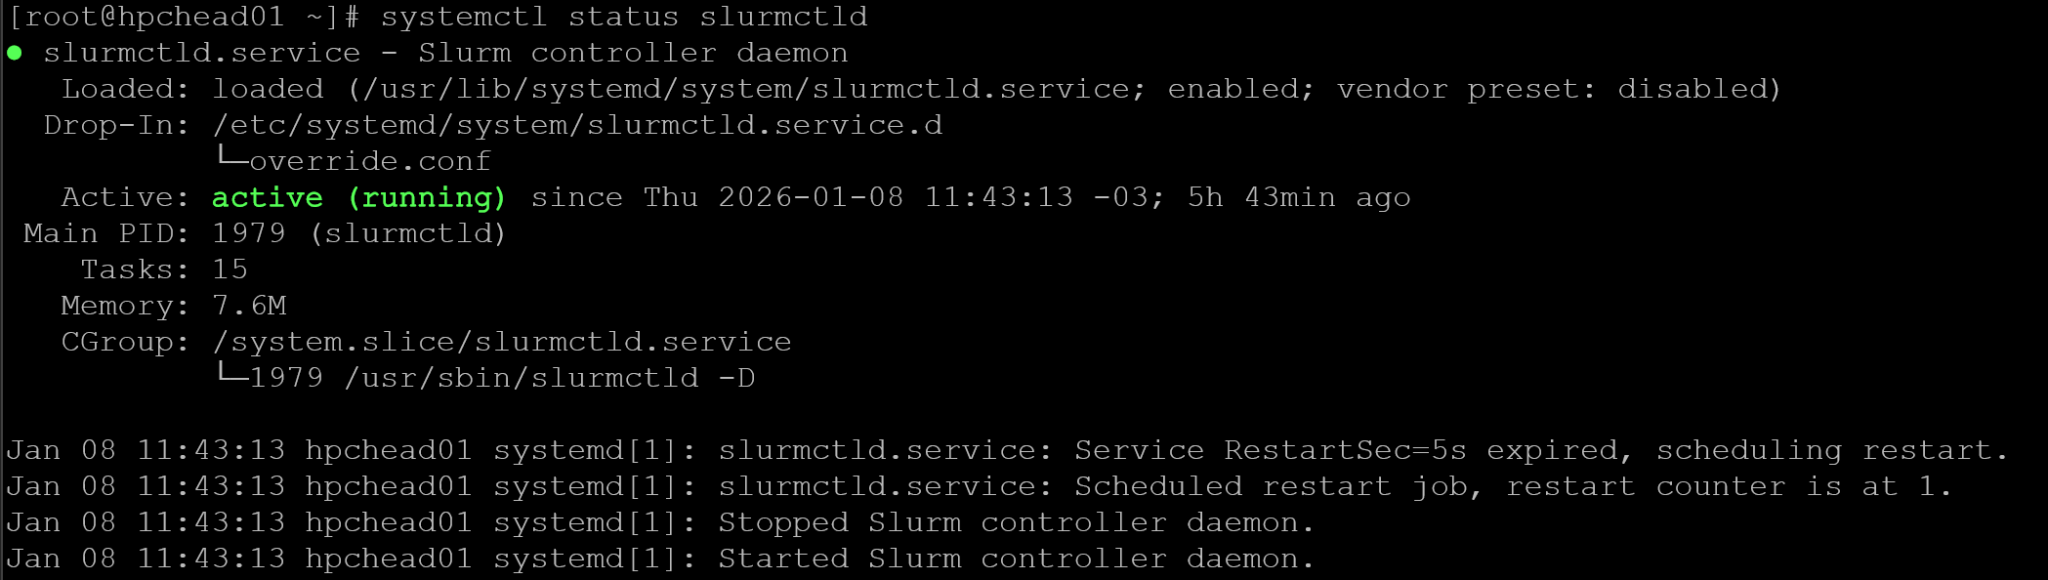
Allow firewall ports (if firewall is enabled):
firewall-cmd --permanent --add-port=6817-6818/tcp
firewall-cmd --permanent --add-port=48000-48005/tcp
firewall-cmd --permanent --add-port=48000-48005/udp
firewall-cmd --permanent --add-port=32768-60999/tcp
firewall-cmd --reload
Setting Up the Compute Nodes
To execute the same command on multiple hosts, I’ve installed “pdsh” on my personal machine to help me set up the Slurm cluster. To remember, my Slurm cluster is based on virtual machines running on a physical ESXi server. So, to access this virtual environment, I use a physical machine to administer it:
Installing “pdsh”:
dnf install pdsh pdsh-rcmd-sshTo execute the “uptime” command on all hosts using one command line using pdsh:
pdsh -R ssh -w hpcnode[01-15] "uptime"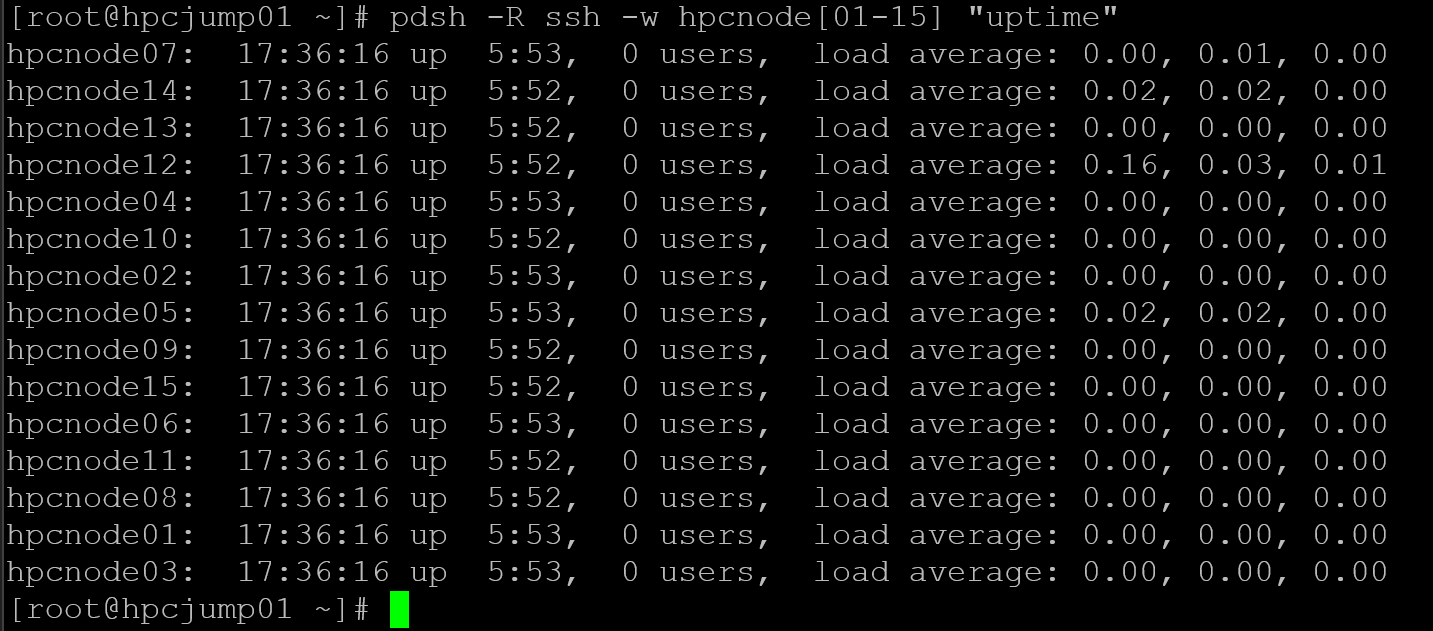
Note: “pdsh” is optional. But I use it to help me and automate some things (feel free to use it or not)!
So, let’s prepare our compute nodes. The following commands install Slurm on all compute nodes and start the Slurm daemon. I highly recommend executing one command at a time, starting with the “#1” command, then wait for it to finish, then move on to “#2”, and wait for it to finish….
#1
pdsh -R ssh -w hpcnode[01-15] 'subscription-manager repos --enable codeready-builder-for-rhel-8-x86_64-rpms'

#2
pdsh -R ssh -w hpcnode[01-15] 'dnf install -y https://dl.fedoraproject.org/pub/epel/epel-release-latest-8.noarch.rpm'

#3
pdsh -R ssh -w hpcnode[01-15] 'dnf install -y slurm slurm-slurmd'

#4
pdsh -R ssh -w hpcnode[01-15] 'systemctl enable --now slurmd'

#5
pdsh -R ssh -w hpcnode[01-15] 'systemctl status slurmd'
Allow the slurmd dameon on firewall, if enabled:
#1
pdsh -R ssh -w hpcnode[01-15] 'firewall-cmd --permanent --add-port=6818/tcp'

#2
pdsh -R ssh -w hpcnode[01-15] 'firewall-cmd --reload'
Install munge:
pdsh -R ssh -w hpcnode[01-15] 'dnf install -y munge munge-libs'Now, we need to copy the munge key to all compute nodes. In my case, I’ve copied the munge.key file from the database node to my physical computer and sent it to all compute nodes using a “for” loop. You can do the same or not (you can use your own way to copy the munge.key to all compute nodes):
for i in {01..15}; do scp munge.key root@hpcnode$i:/etc/munge/munge.key; doneThe next commands will adjust munge.key permissions and start the munge daemon on all compute nodes (remember to execute one command at a time to avoid problems):
#1
pdsh -R ssh -w hpcnode[01-15] 'chown munge:munge /etc/munge/munge.key'

#2
pdsh -R ssh -w hpcnode[01-15] 'chmod 400 /etc/munge/munge.key'

#3
pdsh -R ssh -w hpcnode[01-15] 'systemctl enable --now munge'

#4
pdsh -R ssh -w hpcnode[01-15] 'systemctl restart munge'

#5
pdsh -R ssh -w hpcnode[01-15] 'systemctl status munge'
Now, let’s create the slurm.conf. In my case, I created the slurm.conf configuration file on hpchead01, copy it to my physical machine, and then send it to all other nodes in the Slurm cluster. Again, you don’t need to do the same; you need to ensure that all nodes in the Slurm cluster have the same slurm.conf file (that’s a must).
The following is our slurm.conf file:
ClusterName=hpc-lab

# Controllers (ORDER MATTERS)
SlurmctldHost=hpchead01
SlurmctldHost=hpchead02

SlurmUser=slurm
AuthType=auth/munge

StateSaveLocation=/var/spool/slurmctld
SlurmdSpoolDir=/var/spool/slurmd

SlurmctldPort=6817
SlurmdPort=6818

AccountingStorageType=accounting_storage/slurmdbd
AccountingStorageHost=hpcdb01

RebootProgram="/usr/sbin/reboot"

# Nodes
# CPUs= is the number of CPUs of each compute node
# RealMemory= is the amount of RAM memory of each compute node
# In this lab, all compute nodes have the same CPU and memory configurations
NodeName=hpcnode[01-15] CPUs=1 RealMemory=1536 State=UNKNOWN

# Partitions
PartitionName=cpu Nodes=hpcnode[01-15] Default=YES MaxTime=INFINITE State=UP
From my physical machine, copying the slurm.conf to all Head and Compute nodes:
for i in {01..02}; do scp slurm.conf root@hpchead$i:/etc/slurm/; done

for i in {01..15}; do scp slurm.conf root@hpcnode$i:/etc/slurm/; done
Creating the Slurm user and adjusting the slurm.conf permissions:
#1
pdsh -R ssh -w hpcnode[01-15] 'useradd -r -M -s /sbin/nologin slurm'

#2
pdsh -R ssh -w hpcnode[01-15] 'chmod 644 /etc/slurm/slurm.conf'

#3
pdsh -R ssh -w hpcnode[01-15] 'chown slurm:slurm /etc/slurm/slurm.conf'
Restart the slurmd daemon and check its status:
#1
pdsh -R ssh -w hpcnode[01-15] 'systemctl restart slurmd'

#2
pdsh -R ssh -w hpcnode[01-15] 'systemctl status slurmd'Note: If the slurmd daemon is not running, go to each head node and check the slurmctld daemon. Ensure that the slurmctld daemon is running on both head nodes:
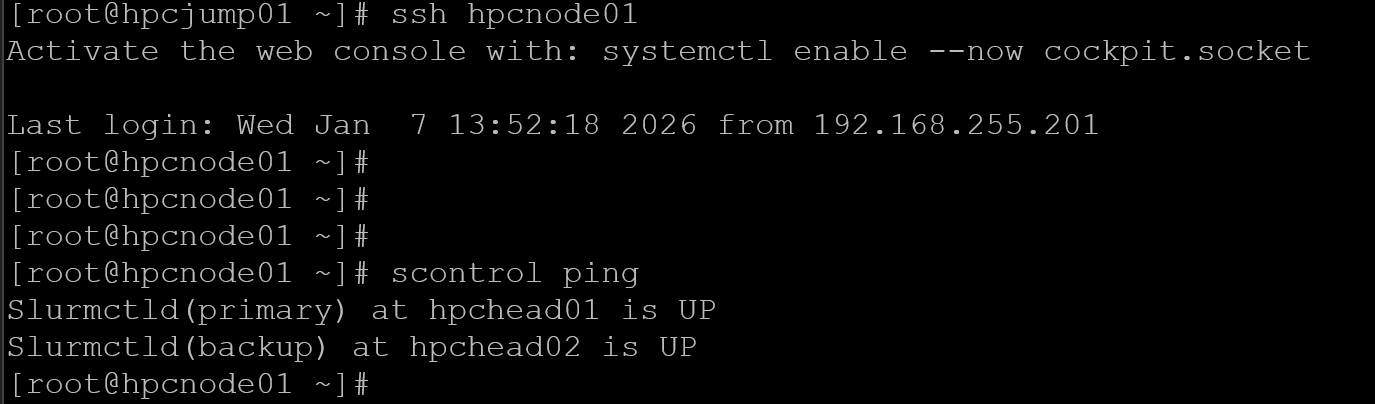
systemctl status slurmctldThe “scontrol ping” must show both controllers up:
scontrol ping
If you need to restart the slurmctld daemon on both head nodes, and it is now running, restart the slurmd daemon on all compute nodes. Afterward, you must be able to execute the same command from a compute node, for example:
Setting Up the Login Nodes
Since we have two login nodes, we need to execute the steps on both:
dnf install -y https://dl.fedoraproject.org/pub/epel/epel-release-latest-8.noarch.rpm
subscription-manager repos --enable codeready-builder-for-rhel-8-x86_64-rpms
dnf install -y slurm
useradd -r -M -s /sbin/nologin slurm
dnf install -y munge
scp hpchead01:/etc/munge/munge.key /etc/munge/
chown munge:munge /etc/munge/munge.key
chmod 400 /etc/munge/munge.key
systemctl enable --now munge
munge -n | unmunge
scp hpchead01:/etc/slurm/slurm.conf /etc/slurm/
chown slurm:slurm /etc/slurm/slurm.conf
chmod 644 /etc/slurm/slurm.conf
Allow firewall ports, if enabled:
firewall-cmd --permanent --add-port=6817/tcp
firewall-cmd --permanent --add-port=6818/tcp
firewall-cmd --permanent --add-port=6819/tcp
firewall-cmd --permanent --add-port=48000-48005/tcp
firewall-cmd --permanent --add-port=48000-48005/udp
firewall-cmd --permanent --add-port=32768-60999/tcp
firewall-cmd --reload
Creating the Users
In our lab, we have a central repository for users’ home directories. It is our NFS server.
On the NFS server, create the directory to store the users’ home directories:
mkdir -p /srv/nfs/home
chown root:root /srv/nfs
chmod 755 /srv/nfs
And adjust the /etc/exports file, adding the following entry:
/srv/nfs/home hpcjump01(rw,sync,no_root_squash) hpchead01(rw,sync,no_root_squash) hpchead02(rw,sync,no_root_squash) hpclogin01(rw,sync,no_root_squash) hpclogin02(rw,sync,no_root_squash) hpcnode*(rw,sync,no_root_squash)Note: Look that all nodes in the Slurm cluster have permission to mount this NFS share!
Apply the NFS exports:
exportfs -ravNow, we’re creating some users (from user01 to user15) and configuring their home directories to be on /srv/nfs/home (the previous directory we created and shared via NFS). Look at how we’re specifying the user ID (UID) for each user:
for i in {01..15}; do useradd -m -u 100$i -d /srv/nfs/home/user$i -s /bin/bash user$i; done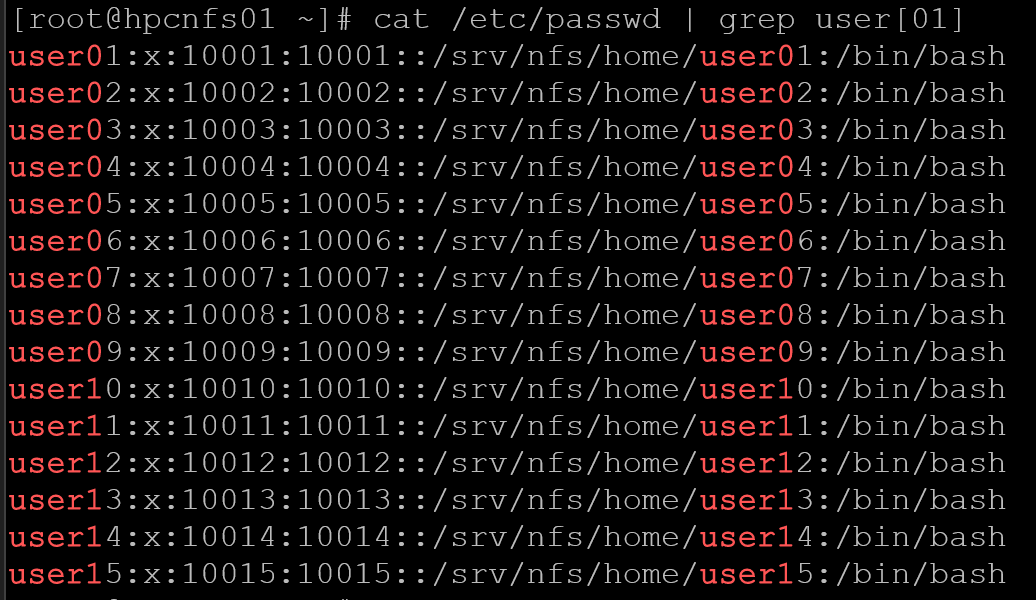
The next commands install NFS on all compute and login nodes and configure them to mount the home directory from the NFS server. Additionally, we mount the share on the head nodes:
#1
pdsh -R ssh -w hpcnode[01-15] 'dnf install -y nfs-utils'

#2
pdsh -R ssh -w hpclogin[01-02] 'dnf install -y nfs-utils'

#3
pdsh -R ssh -w hpclogin[01-02],hpchead[01-02],hpcnode[01-15] mount -t nfs hpcnfs01:/srv/nfs/home /home

#4
pdsh -R ssh -w hpclogin[01-02],hpchead[01-02],hpcnode[01-15] 'echo "hpcnfs01:/srv/nfs/home  /home  nfs  defaults,_netdev  0  0" >> /etc/fstab'

#5
pdsh -R ssh -w hpclogin[01-02],hpchead[01-02],hpcnode[01-15] umount /home

#6
pdsh -R ssh -w hpclogin[01-02],hpchead[01-02],hpcnode[01-15] mount -a

#7
pdsh -R ssh -w hpclogin[01-02],hpchead[01-02],hpcnode[01-15] df /home
Access the head nodes, login nodes, and compute nodes to create the users using the same UserID (UID).
Execute it locally on each node:
for i in {01..15}; do useradd -m -u 100$i -s /bin/bash user$i; doneOr, execute with “pdsh”:
# for compute nodes:
pdsh -R ssh -w hpcnode[01-15] \
'for i in {01..15}; do useradd -m -u 100$i -s /bin/bash user$i; done'

# for head nodes:
pdsh -R ssh -w hpchead[01-02] \
'for i in {01..15}; do useradd -m -u 100$i -s /bin/bash user$i; done'

# for login nodes:
pdsh -R ssh -w hpclogin[01-02] \
'for i in {01..15}; do useradd -m -u 100$i -s /bin/bash user$i; done'
Now the head nodes, login nodes, and compute nodes all use home directories centrally on the NFS server.
Validate the Cluster Before Submitting Jobs
Before running the first workload, I check the cluster in layers.
Check the Controllers
scontrol pingCheck the Nodes
sinfo -N -lInspect a Compute Node
scontrol show node hpcnode01Check Accounting
sacctmgr show clusterand:
sacctmgr show associationsTest MUNGE Between Hosts
A local munge -n | unmunge proves the local service works.
For a stronger test, encode on one host and decode on another to verify that the key and clocks are consistent.
Testing a Job Submission
The following commands do:
- Create an account named “users”.
- Create a user named “user01′ and associate it with the account “users”.
- Show details of user01.
sacctmgr add account users Description="Default users" Organization="HPC"
sacctmgr add user user01 Account=users
sacctmgr show user user01
sacctmgr show users withassoc user01
To test a job submission:
1. Access the login node.
2. Change to a user shell – in this case, for instance, we’re changing to user01’s shell:
su – user01
3. Execute a Slurm command to submit a job to the cluster – in this example, “srun” is a command to submit jobs to the cluster. The command “hostname” will be executed on one compute node through the Slurm cluster:
srun hostname
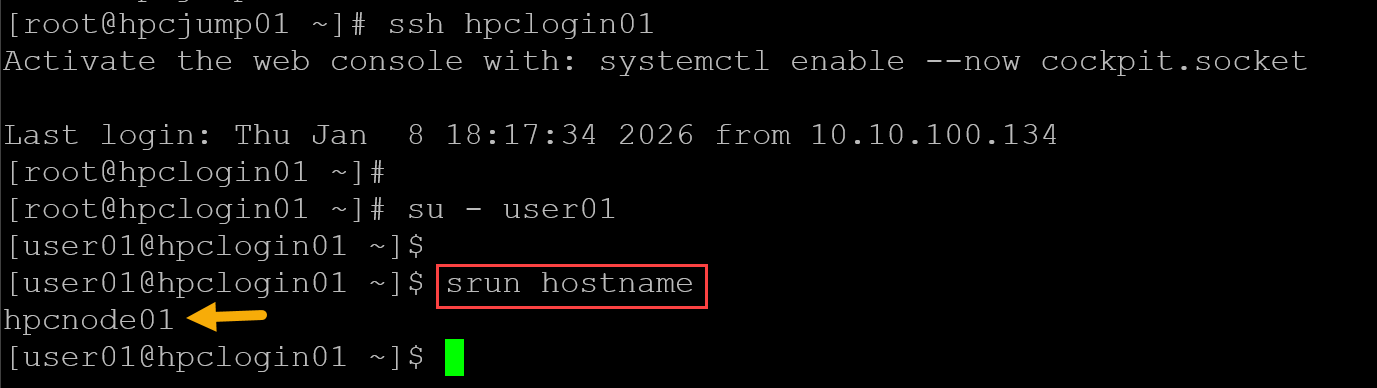
As we can see, the command “srun hostname” is a Slurm command and was executed using the first Compute Node. For more details about job submission, check “Slurm Job Submission: Practical Guide to srun, sbatch, and salloc“.
Where to Go Next
Once the cluster is working, useful next exercises include:
- submit batch and interactive jobs;
- investigate
PENDINGreason codes (see “Why Is My Slurm Job Pending? How to Decode Every Common Reason“); - intentionally drain a compute node (see “Slurm Node Is DRAINED: How to Find the Exact Reason“);
- test controller failover;
- stop
slurmdbdand observe what continues working (see “SlurmDBD Is Down: What Continues Working and What Does Not“); - introduce resource limits;
- configure cgroup-based resource enforcement;
- test job accounting;
- automate configuration with Ansible.
This lab becomes significantly more useful when it is treated as a troubleshooting environment rather than simply an installation exercise.
External References
- Slurm Quick Start Administrator Guide Official SchedMD guidance covering Slurm installation, controller and compute-node roles, authentication, high availability, configuration, and daemon startup.
- Slurm Authentication Plugins Official documentation for MUNGE and Slurm authentication, including shared keys and authentication requirements between cluster nodes.
- slurm.conf Documentation Complete reference for controller, compute-node, partition, accounting, networking, and scheduling configuration parameters.
-
Slurm Network Configuration Guide
Official reference for communication paths and ports
used by
slurmctld,slurmd,slurmdbd, login nodes, andsrun. - Slurm Accounting and Resource Limits SchedMD guidance for configuring SlurmDBD, database-backed accounting, clusters, accounts, users, and accounting associations.
- sacctmgr Documentation Official command reference for creating and managing Slurm clusters, accounts, users, and associations.
-
Configless Slurm
Official documentation for distributing Slurm
configuration from the controller instead of manually
maintaining
slurm.confon every node.
