
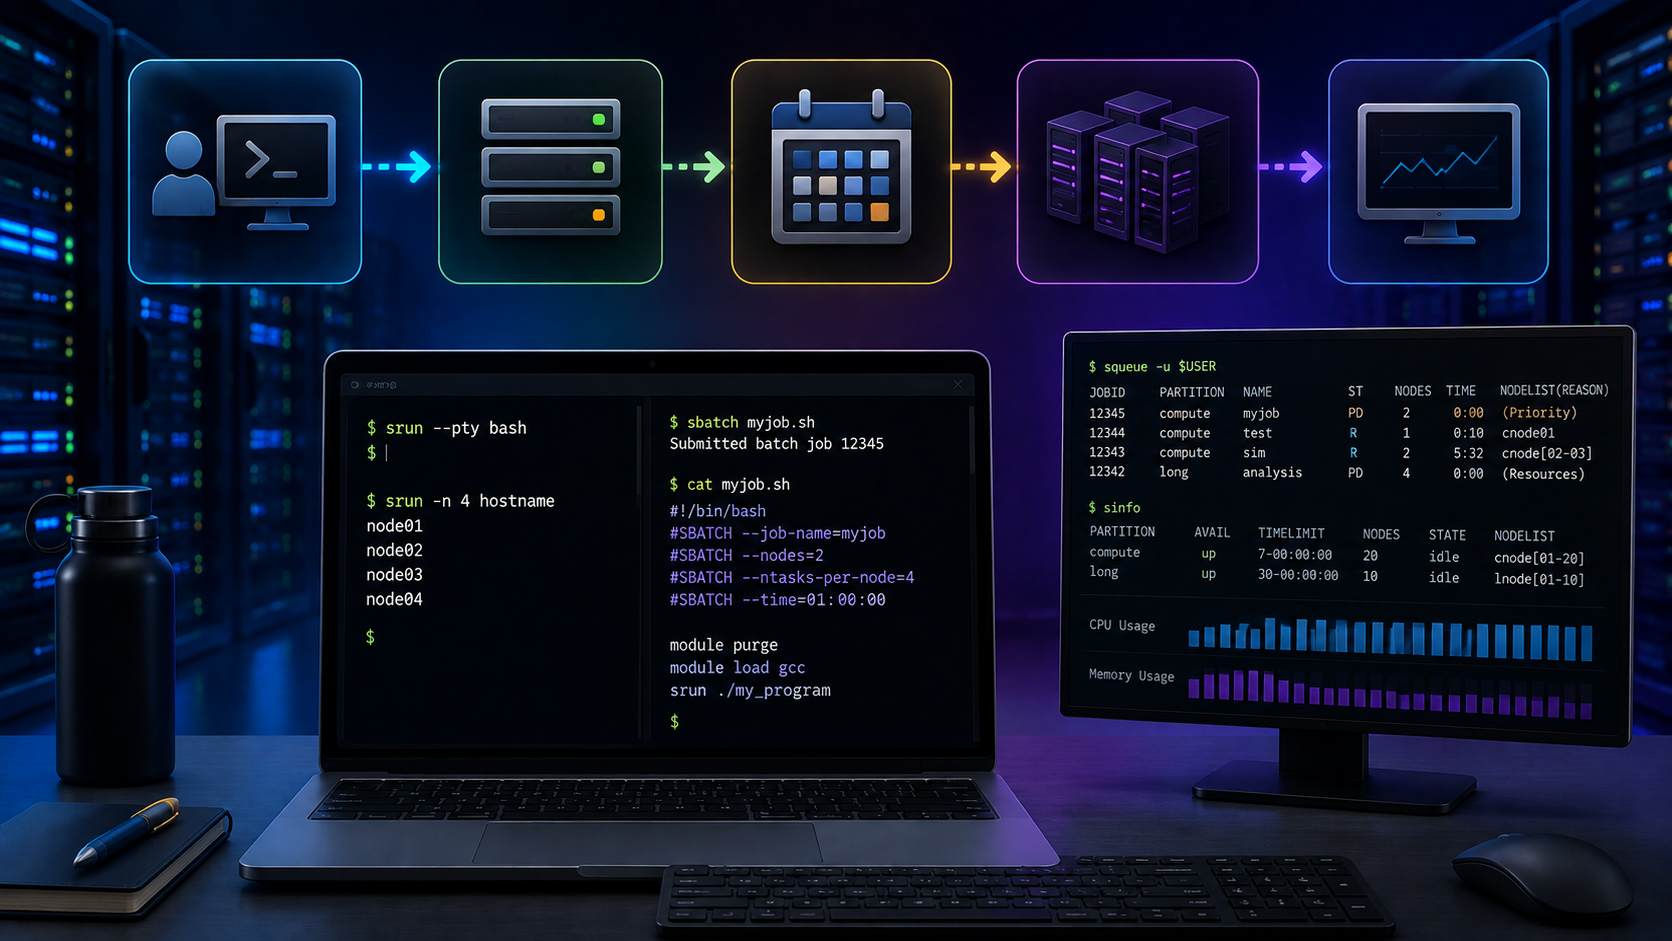
Slurm job submission is a fundamental task for users working with High Performance Computing (HPC) clusters. In this guide, I will demonstrate the basic commands used to submit jobs, including srun for interactive execution and sbatch for batch processing.
When working with a Slurm-managed cluster, users do not usually execute workloads directly on compute nodes. Instead, they request resources from the scheduler, which allocates nodes, CPUs, and execution time according to the job requirements.
This article provides practical examples of job submission in a Slurm environment, showing how to run commands interactively, submit scripts, inspect the queue, and understand the main differences between srun and sbatch.
To build a small environment for testing these commands, see “Setting Up a Slurm Cluster in a Lab Environment“.
Running Commands and Job Steps with srun
The srun command launches tasks or job steps on resources managed by Slurm. When it is executed outside an existing allocation, srun can request the required resources first and then launch the command. If the resources are not immediately available, the command may wait in the scheduler until the request can be satisfied.
1- Run a simple command:
srun -N1 -n1 hostname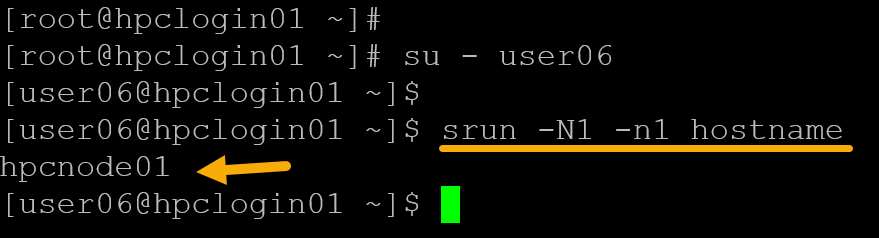
In this case, for instance:
-N, --nodes=<minnodes>[-maxnodes]|<size_string> = Request that a minimum of minnodes nodes be allocated to this job. A maximum node count may also be specified with maxnodes. If only one number is specified, this is used as both the minimum and maximum node count. So, in this case, "-N1" means "I need one node".

-n, --ntasks=<number> = Specify the number of tasks to run. Request that srun allocate resources for ntasks tasks. The default is 1 task per node, but note that the ---cpus-per-task option overrides this default. This option applies to job and step allocations.

hostname = In this case, for instance, "hostname" is the command to be executed by the job.
The command’s output is “hpcnode01“, indicating that “hostname” was executed on the first compute node, “hpcnode01”.
Important: Look at the command prompt – we’re on a login node, and the job was submitted using it.
2- Execute the same command, but using different options with “srun”:
srun -N1 -n2 hostname
Look at the srun error:
srun: error: Unable to allocate resources: Requested node configuration is not availableAs we learned before, the “-n” option specifies the number of tasks to run. The default is one task per node, which explains the error we’re seeing.
In this lab, each compute node provides only one CPU to Slurm. Requesting two tasks on a single node therefore cannot be satisfied with the current resource configuration. This behavior depends on the cluster’s CPU topology, SelectType configuration, and oversubscription policy, so a system with more CPUs per node could satisfy the same request.
Another example:
srun -N32 -n16 bash -c "hostname"Here we requested 32 nodes but only 16 tasks. Since there are fewer tasks than requested nodes, Slurm reduces the number of nodes used to 16. This matches the documented behavior of srun when the requested node count exceeds the task count:
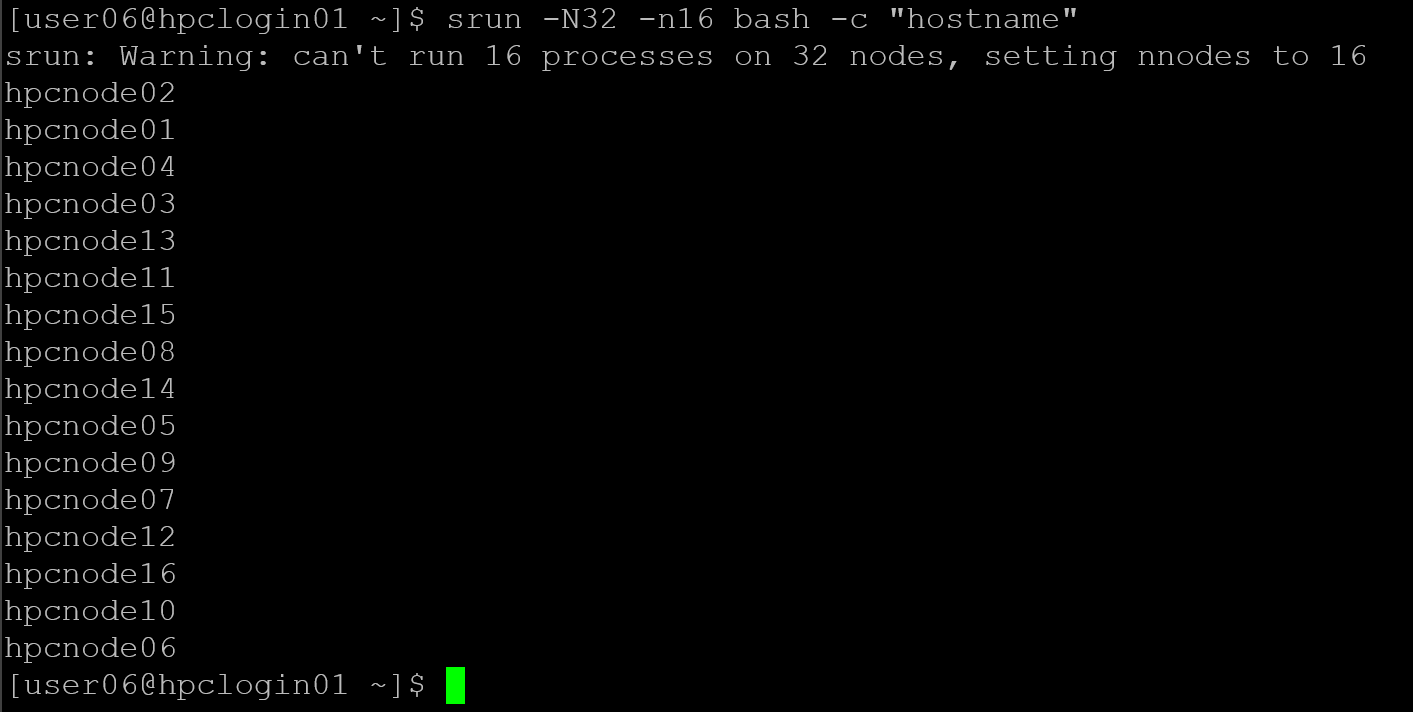
Another one, if we request a number of nodes that our partition does not have, we’ll have the following error:

In this example, the 50-node request remains PENDING with the reason PartitionConfig, indicating that the request cannot currently be satisfied under the partition configuration or limits:

PD means “Pending”. Under “Nodelist (Reason)”, we can confirm the reason for this job state!
If you want to learn more, check “Why Is My Slurm Job Pending? How to Decode Every Common Reason“.
3- Interactive shell on a compute node:
Another interesting use of “srun” is to acquire an interactive shell from a compute node:
srun --pty -N1 -n1 bash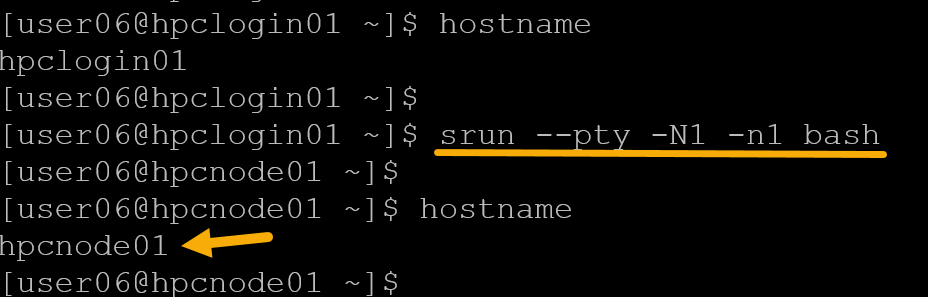
As we can see in the previous picture, we’re on the login node, execute “srun”, and then we get the compute node 01 shell (we’re literally on the compute node 01 shell).
The “squeue” command, for instance, can show the job details:

To finish the job, just type “exit” on the compute node command line:
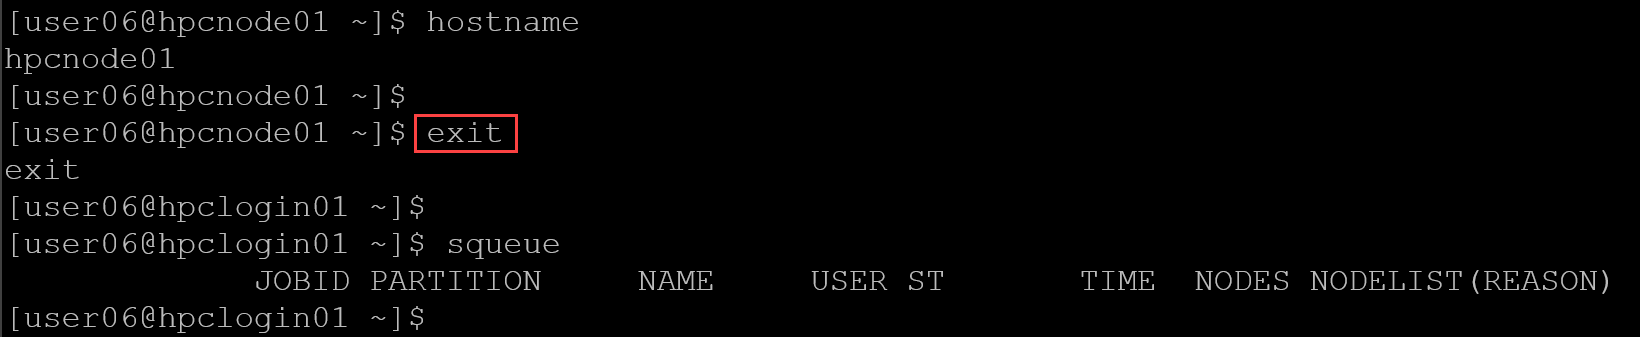
Note: Look at that after exiting, the job was finished!
sbatch – Batch Submission (Scripted Jobs)
With “sbatch”, we write a script, Slurm schedules it, and runs it when resources are free.
1- Simple batch script:
Create the file “test.sbatch” with the following content:
#!/bin/bash
#SBATCH --job-name=testjob
#SBATCH --nodes=1
#SBATCH --ntasks=1
#SBATCH --time=00:01:00
#SBATCH --output=test_%j.out

hostname
date
sleep 10
Important:
- Resource requests and job options can be defined using
#SBATCHdirectives inside the script or supplied through command-line options. In practice, keeping the main resource requirements inside the script makes the job easier to reproduce and review. - Slurm reads the script.
- Parses all lines starting with “#SBATCH”.
- Uses them to define:
- Resources (nodes, tasks, time);
- Job name;
- Output files;
- Account, partition, QOS, etc.
Without them, Slurm will use defaults, which is dangerous in HPC:
- Wrong partition;
- Too little time;
- Too many CPUs;
- Job killed;
- Accounting errors.
#SBATCH --job-name=
#SBATCH --account=
#SBATCH --partition=
#SBATCH --nodes=
#SBATCH --ntasks=
#SBATCH --time=
#SBATCH --output=
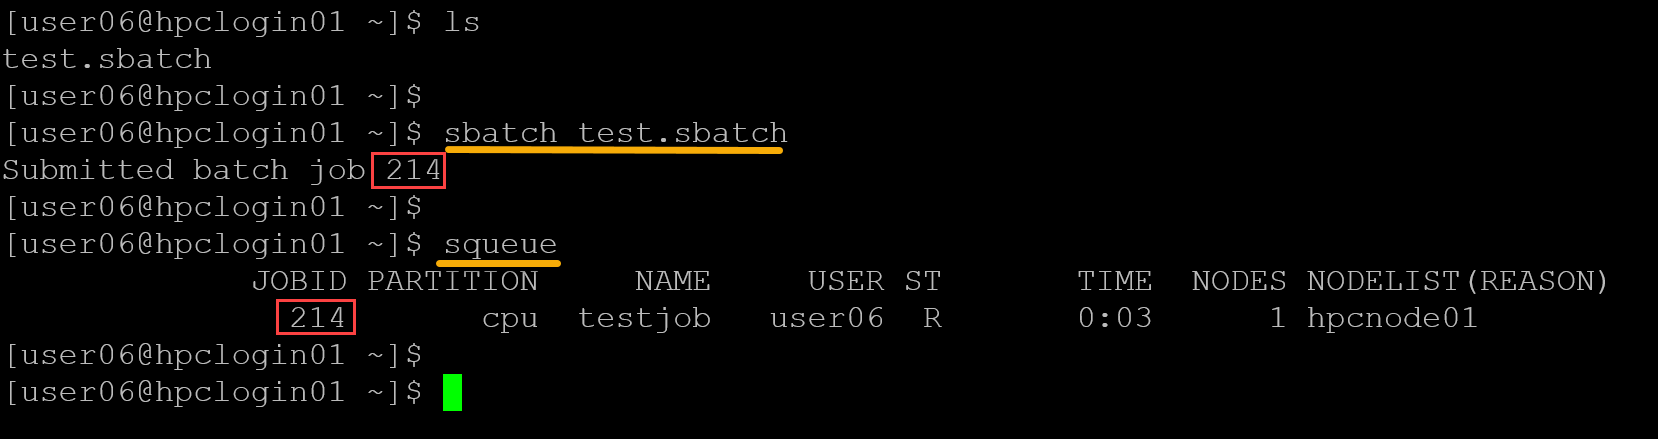
Submit the job:
sbatch test.sbatchNote: If Slurm rejects the job because of its account or partition association, see “Slurm Invalid Account Error: How to Fix It“.
Check the job:
squeueAs we can confirm in the following picture, the job was submitted using “sbatch”, and the job ID 214 was generated for this job. For each submitted job, Slurm is responsible for generating a unique job ID:
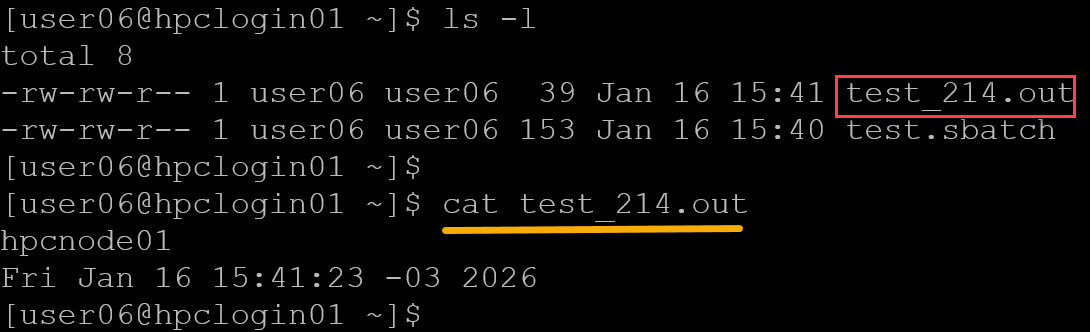
The batch script has the entry “#SBATCH –output=test_%j.out”. With that, a file is generated containing the batch script output:
2- Parallel batch job:
Create the file “parallel.batch” with the following content:
#!/bin/bash
#SBATCH --job-name=parallel
#SBATCH --nodes=4
#SBATCH --ntasks=4
#SBATCH --time=00:05:00
#SBATCH --output=parallel_%j.out

srun hostname
Submit the job:
sbatch parallel.batchAnd check the queue:
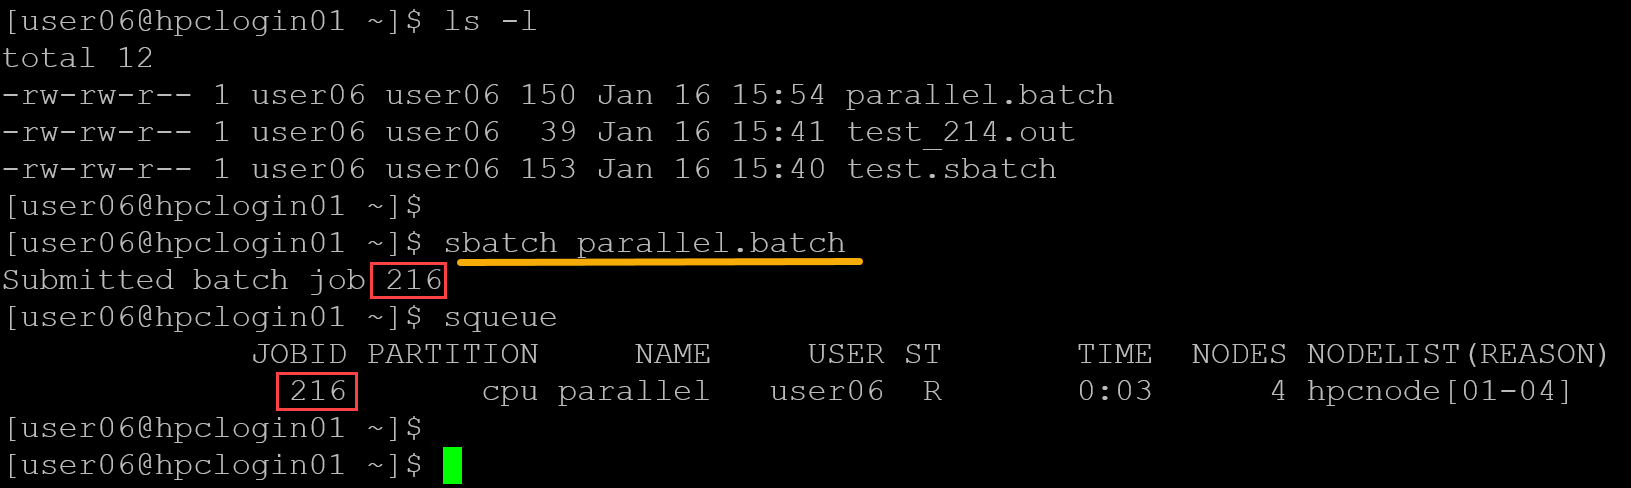
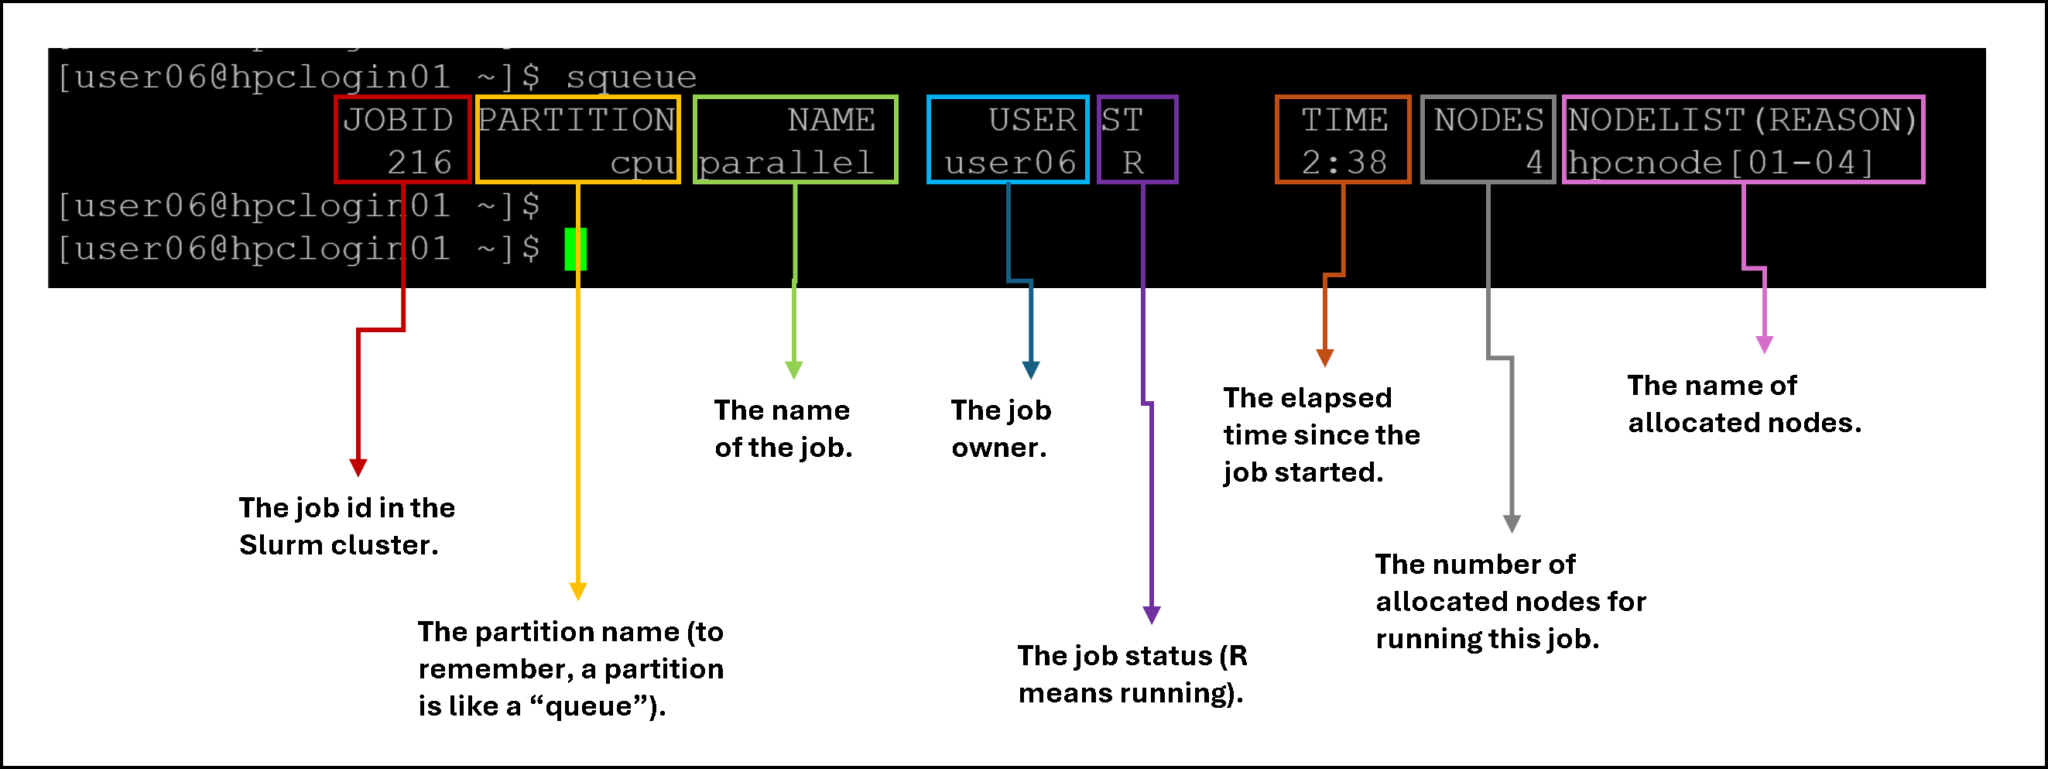
Lab observation: In this particular execution, Job 216 unexpectedly remained active until it reached its five-minute time limit and was terminated by Slurm. The --time directive defines a maximum runtime; it does not force a job to remain active for that duration. A script containing only srun hostname would normally complete as soon as its tasks finish. If this behavior is reproducible, the job and step state should be investigated separately.
squeueThe “squeue” command provides valuable details. Let’s dig into them:
Afterward, we can check the output file for our parallel job:
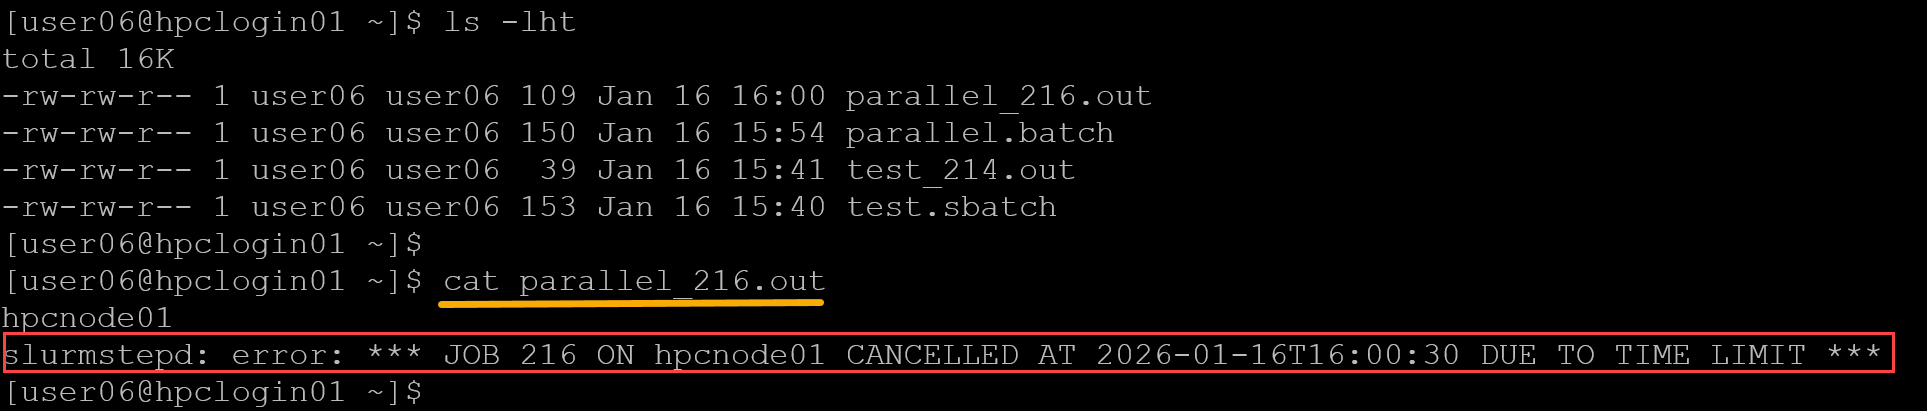
Look at the message:
slurmstepd: error: *** JOB 216 ON hpcnode01 CANCELLED AT 2026-01-16T16:00:30 DUE TO TIME LIMIT ***It is expected to see this because we configured the job’s runtime (#SBATCH –time=00:05:00). Slurm sees it and executes the job for this amount of time!
Key Differences Between srun and sbatch
| Feature | srun | sbatch |
|---|---|---|
| Primary purpose | Launch tasks/job steps | Submit a batch script |
| Terminal | Usually attached | Detached |
| Resource allocation | Can create or use an existing allocation | Creates a job allocation for the batch script |
| If resources unavailable | Can wait until resources are available | Job remains queued |
| Typical use | Interactive work, testing, parallel task launch | Repeatable and production batch workloads |
| Returns immediately after submission | No, normally waits for execution | Yes, after Slurm accepts the script and assigns a Job ID |
What is “salloc”?
In a basic way, the “salloc” is a command used to allocate resources and obtain an interactive resource allocation that can be used by subsequent srun commands.
We can think of:
- srun → run a step
- salloc → reserve resources
- sbatch → submit batch job
Let’s provide you with an example:
1- Reserve two compute nodes for 10 minutes:
salloc -N2 -n2 -t 10:00The message “salloc: Granted job allocation 218” confirms the allocation of resources. In this case, 218 is the job id assigned for this allocation:

Now, all “srun” commands will execute using the allocated nodes (in this case, hpcnode01 and hpcnode02). For example:
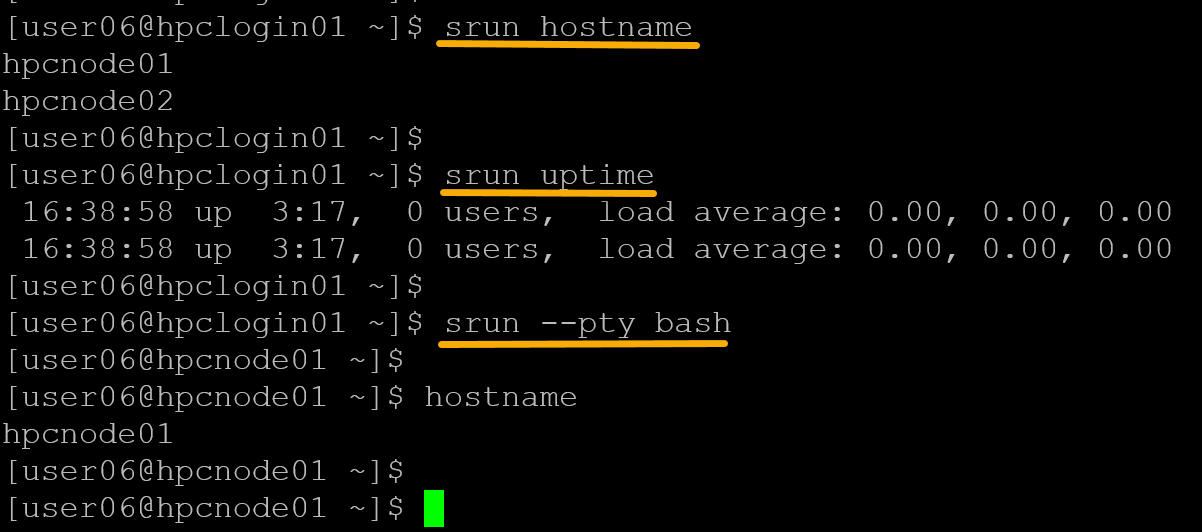
To terminate the allocation, type “exit”:
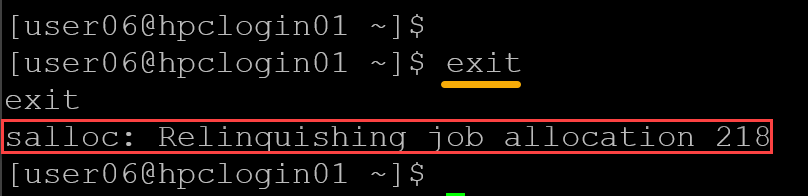
To Wrap This Up: srun vs sbatch vs salloc
| Command | Does what | Typical usage |
|---|---|---|
| srun | Runs one job step | Quick test, one command |
| salloc | Reserves nodes interactively | Debug session, development |
| sbatch | Submits job script | Production workloads |
Choosing between srun, sbatch, and salloc becomes easier once you separate resource allocation from task execution. sbatch is normally the right choice for repeatable batch workloads, salloc is useful when you need an interactive allocation, and srun launches tasks either inside an existing allocation or by requesting resources when necessary.
More importantly, always inspect the job state and scheduler reason instead of assuming that a submitted job should start immediately. Slurm exposes this information directly through tools such as squeue, making job submission and troubleshooting part of the same workflow.
For additional day-to-day Slurm commands, see “Essential Slurm Administration Commands Every HPC Administrator Should Know“.
External References
-
Slurm srun Documentation
Official SchedMD reference for launching tasks and job steps, requesting resources, and using interactive execution with
srun. -
Slurm sbatch Documentation
Official reference for submitting batch scripts, using
#SBATCHdirectives, resource requests, output files, and job time limits. - Slurm salloc Documentation Official documentation for obtaining interactive Slurm resource allocations and running commands inside them.
- Slurm squeue Documentation Reference for inspecting queued and running jobs, job states, allocated nodes, and pending reasons.
-
Slurm Job Reason Codes
Official reference for pending reasons including
Resources,Priority,PartitionConfig, and other scheduler conditions. -
Slurm Job State Codes
Official definitions for job states such as
PENDING,RUNNING,COMPLETED, andTIMEOUT. - Slurm Quick Start User Guide SchedMD overview of common user commands and the basic workflow for submitting and monitoring jobs.
