


High disk partition usage Linux systems can quickly become a critical issue, whether you are managing a production server, a virtual machine, or an HPC login node. When I investigate storage problems, I start by identifying which filesystem is full before narrowing the search to the directories and files responsible for the excessive disk usage.
Over the years, I have found that Linux provides all the built-in tools needed to diagnose disk space problems without installing additional software. By combining commands such as df, du, find, and lsof, it is possible to identify storage bottlenecks efficiently and reduce the time required to restore normal system operation.
In this guide, I demonstrate the commands and investigation workflow I use to troubleshoot high disk partition usage in Linux, from verifying filesystem utilization and locating large files to detecting deleted files that remain open and continue consuming disk space.
Understanding the Difference Between Filesystem Usage and Directory Size
Before diving into troubleshooting, it is important to distinguish two concepts.
A filesystem (partition) may appear full according to the operating system, while individual directories may not seem large enough to explain the reported usage.
Several factors can contribute to this situation:
- Large files hidden deep inside directory trees;
- Deleted files still opened by running processes;
- Reserved filesystem blocks;
- Snapshots (depending on the filesystem);
- Mount points masking directories.
Because of these possibilities, investigation should follow a logical sequence rather than relying on a single command.
High Disk Partition Usage Investigation
Step 1: Verify Filesystem Usage with “df”
The first command to execute is:
df -hExample output:
Filesystem      Size  Used Avail Use% Mounted on
/dev/sda2        80G   74G  2.5G  97% /
/dev/sdb1       500G  220G  255G  47% /data
Important columns include:
- Size – total filesystem size
- Used – allocated space
- Avail – remaining free space
- Use% – percentage utilized
- Mounted on – mount point
If inode exhaustion is suspected instead of storage exhaustion, check inode usage:
df -ihA filesystem with 100% inode usage cannot create new files even if free disk space still exists.
Step 2: Identify the Largest Top-Level Directories
Once the affected filesystem is known, inspect its largest directories using the “du” command.
For the root filesystem:
du -xh --max-depth=1 / | sort -hrExample:
22G /var
14G /usr
7.3G /home
3.8G /opt
Options explained:
-xkeeps the scan inside the current filesystem-hprints human-readable sizes--max-depth=1summarizes only first-level directories
This command immediately narrows the investigation.
Step 3: Continue Drilling Down
Suppose /var is consuming most of the storage.
Continue recursively:
du -xh --max-depth=1 /var | sort -hrExample:
18G /var/log
2.5G /var/lib
1.2G /var/cache
Then inspect further:
du -xh --max-depth=1 /var/log | sort -hrRepeat the process until the exact location of excessive usage is identified.
This iterative approach is significantly faster than scanning the entire filesystem repeatedly.
Step 4: Locate Individual Large Files
After identifying the problematic directory, locate unusually large files.
For example:
find /var -type f -size +500M -exec ls -lh {} \;This searches for files larger than 500 MB.
To search for files larger than 2 GB:
find / -xdev -type f -size +2GUsing -xdev prevents crossing into other mounted filesystems (like nfs filesystems).
This command is especially useful for finding:
- oversized log files;
- database dumps;
- forgotten backups;
- virtual machine images;
- core dumps.
Step 5: Sort the Largest Files
Sometimes hundreds of large files exist.
This command lists the ten largest:
find / -xdev -type f -exec du -h {} + | sort -hr | head -10Example:
14G /var/log/messages
8.2G /backup/full.tar
6.1G /home/user/database.sql
This provides immediate visibility into the biggest consumers.
Step 6: Check for Deleted Files Still Open
One of the most overlooked causes of full filesystems is deleted files that remain opened by running processes. Even after deletion, Linux does not reclaim the space until the process closes the file.
Detect these files with:
lsof | grep deletedExample:
java 2548 root 15w REG 8,1 4.2G /var/log/app.log (deleted)In this case, restarting the application or stopping the process releases the disk space immediately.
This situation is common with:
- Java applications;
- Web servers;
- Databases;
- Long-running services.
Step 7: Inspect Log Growth
Log files are often responsible for sudden disk usage increases.
List log sizes:
du -sh /var/log/*Check recently modified files:
find /var/log -type f -mtime -1If logs are growing unexpectedly, inspect them:
tail -100 /var/log/messagesor
tail -100 /var/log/syslogDepending on the distribution.
If log rotation is not functioning correctly, verify:
logrotate -d /etc/logrotate.confThe debug mode simulates rotation without making changes.
Step 8: Examine User Home Directories
On multi-user systems, home directories frequently become the primary storage consumers.
Identify the largest users:
du -sh /home/*If one account appears unusually large:
du -xh --max-depth=2 /home/username | sort -hrTypical findings include:
- downloaded datasets;
- ISO images;
- virtual environments;
- cache directories;
- archived projects.
Step 9: Investigate Package Cache
Package managers often retain downloaded packages.
On Debian-based systems:
du -sh /var/cache/aptClean unused packages:
sudo apt cleanOn RHEL-based systems:
sudo dnf clean allor
sudo yum clean allAlthough cache cleanup rarely solves major storage issues, it is a quick win when every gigabyte matters.
Step 10: Verify Mount Points
A surprisingly common mistake occurs when a filesystem fails to mount.
Suppose /backup should be a dedicated filesystem. If it is not mounted, files written there are actually stored on the root partition.
Verify mounts:
mountor
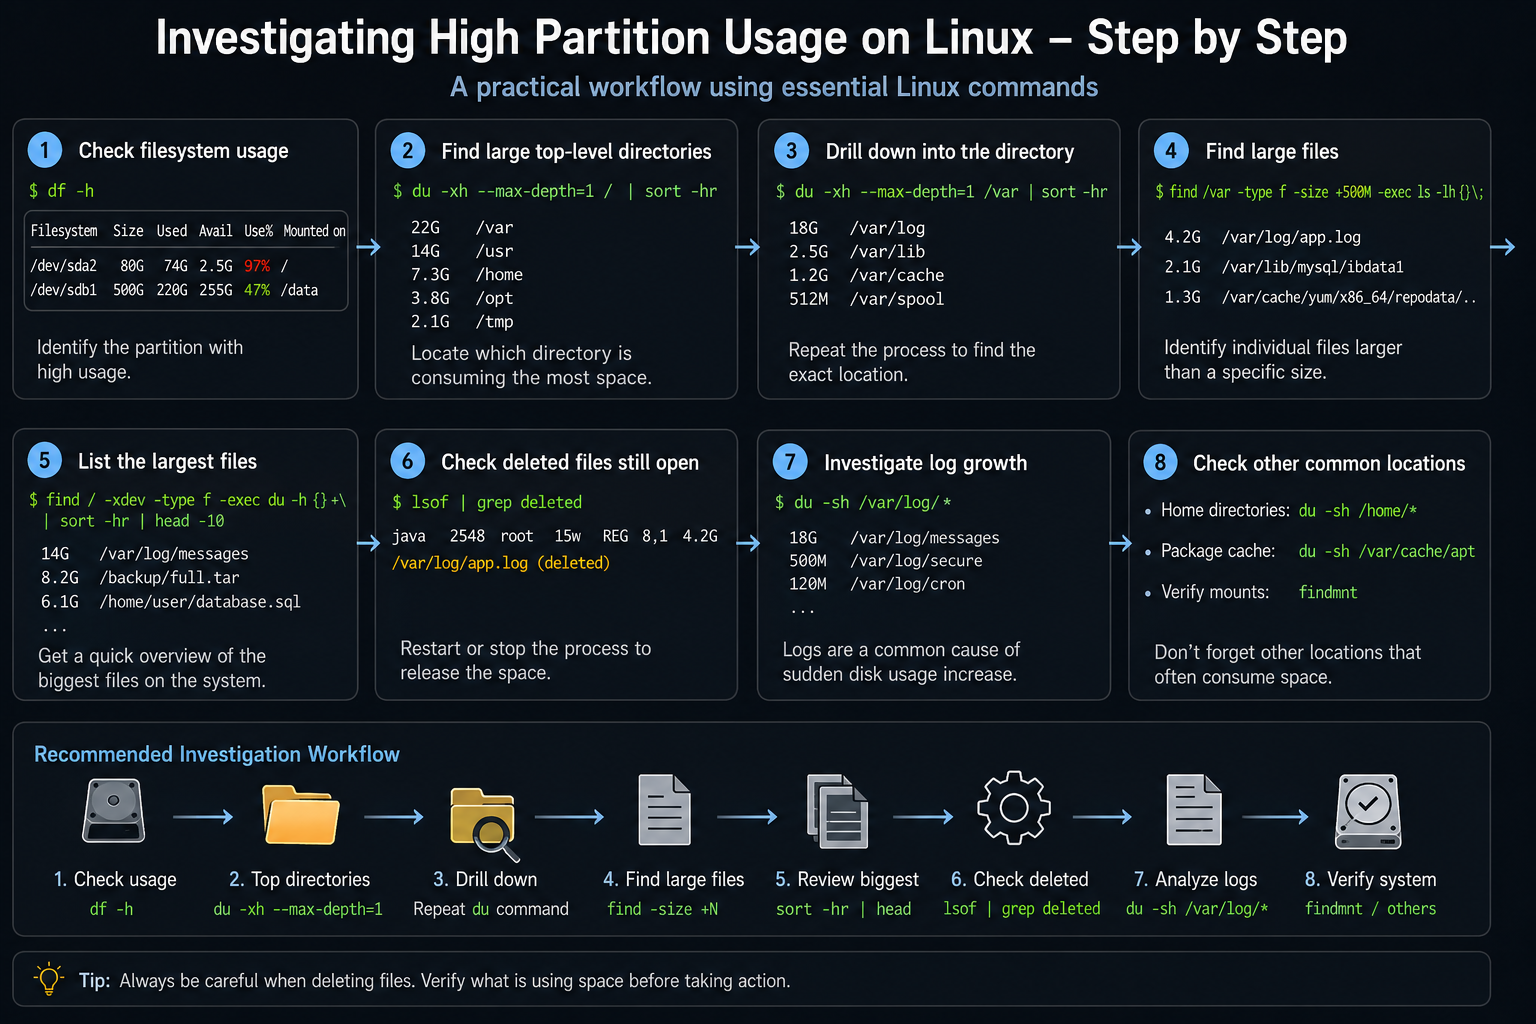
findmntAlways confirm the expected filesystem is mounted before deleting data. The following picture shows the complete suggested workflow:
Useful One-Liners
Show the largest directories
du -xh --max-depth=1 / | sort -hrFind files larger than 1 GB
find / -xdev -type f -size +1GDisplay the ten largest files
find / -xdev -type f -exec du -h {} + | sort -hr | headCheck filesystem usage
df -hCheck inode usage
df -ihFind deleted files still consuming space
lsof | grep deletedA Practical Investigation Workflow
When investigating a filesystem that suddenly reaches 100% usage, following a consistent workflow helps avoid overlooking common causes.
- Run
df -hto identify the affected filesystem. - Use
du -xh --max-depth=1to locate the largest directories. - Continue drilling down until the largest subdirectory is identified.
- Search for oversized files with
find. - Check for deleted files held open using
lsof. - Review log growth and log rotation.
- Verify mount points are correctly mounted.
- Inspect package caches and user home directories if necessary.
Following these steps usually leads to the root cause within a few minutes, even on systems with large storage volumes.
Final Thoughts
Disk usage problems are inevitable in long-running Linux environments, but diagnosing them does not require complex tools. A solid understanding of core utilities such as df, du, find, lsof, and findmnt is often enough to pinpoint the source of excessive partition usage quickly.
Rather than relying on guesswork or deleting files indiscriminately, administrators should adopt a structured investigation process that starts with filesystem-level information and progressively narrows the search. This approach minimizes risk, reduces troubleshooting time, and ensures corrective actions are based on accurate observations. Whether you manage a single server or a large fleet of Linux systems, mastering these commands is an essential part of effective system administration.
