
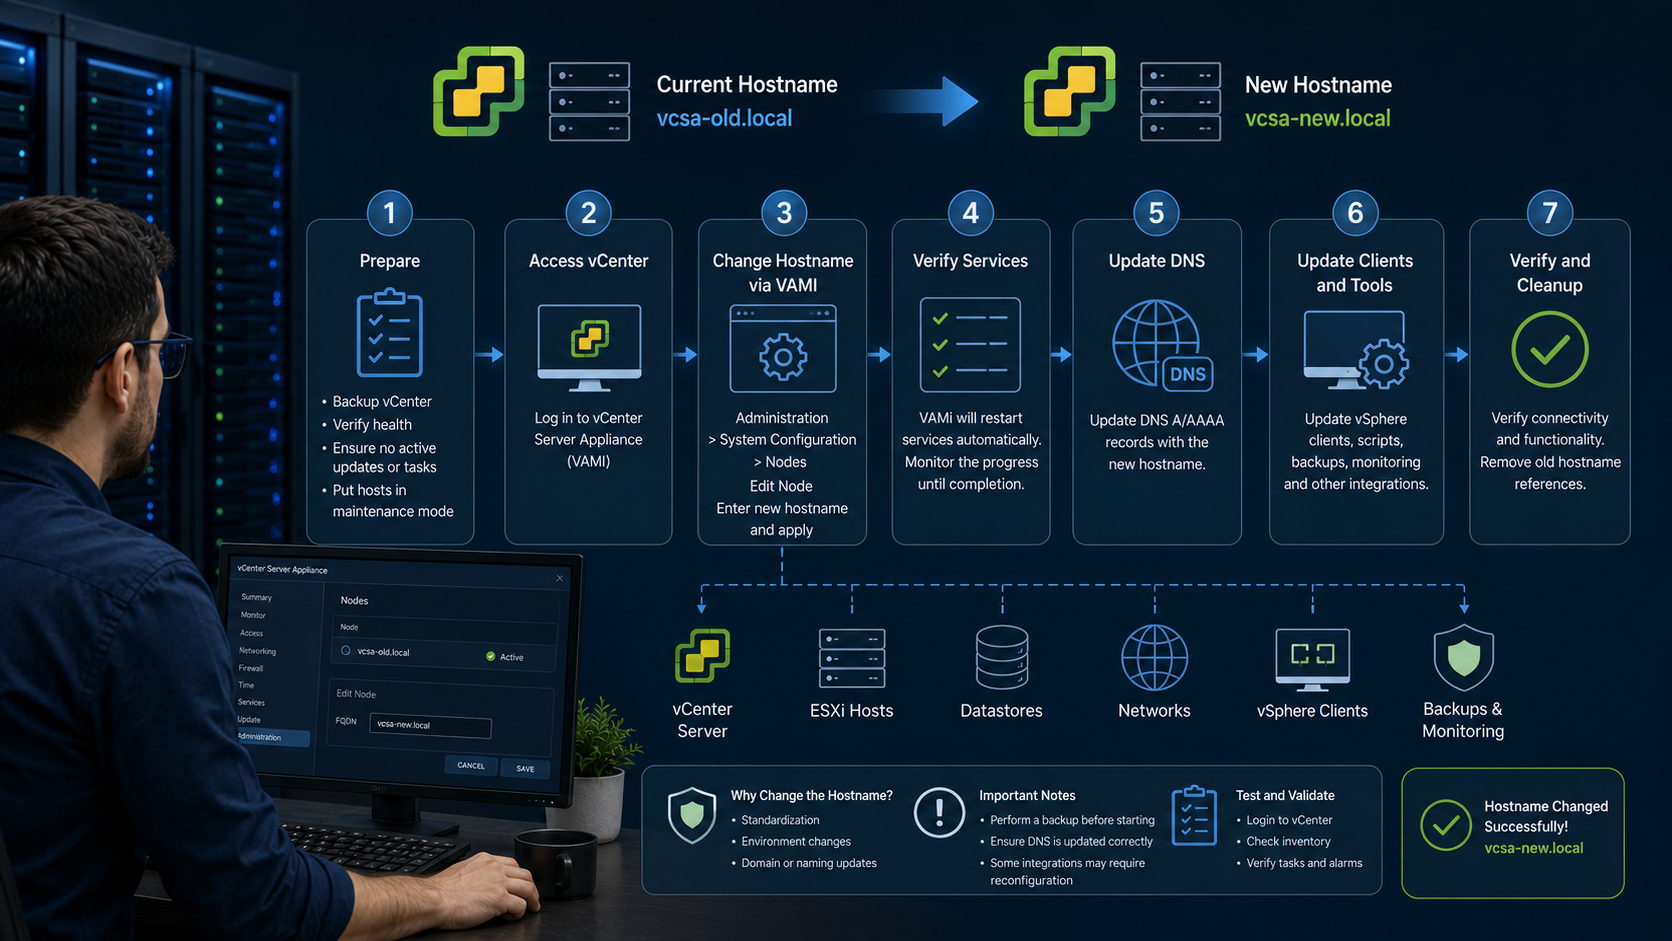
Changing the Fully Qualified Domain Name of a vCenter Server is more than changing the Linux hostname of the appliance.
The vCenter FQDN is associated with its Primary Network Identifier (PNID) and is used by several internal services, certificates, identity components, and external integrations.
In this lab, I changed the vCenter Server FQDN from:
vcsa01.lab.localto:
vcsa.lab.localusing the supported vCenter Server Appliance Management Interface (VAMI) workflow.
I also validated DNS, certificates, ESXi connectivity, vCenter services, and the environment with the VCF Diagnostic Tool for vSphere (VDT) after the change.
Important: All steps in this article were performed in a lab environment. A vCenter FQDN change should be scheduled during a maintenance window and protected by a current backup and recovery plan.
During my test, vCenter management services were unavailable for approximately 15–20 minutes while the appliance updated its identity and restarted the required services.
Lab Environment
The lab contains one vCenter Server managing two vSAN clusters:
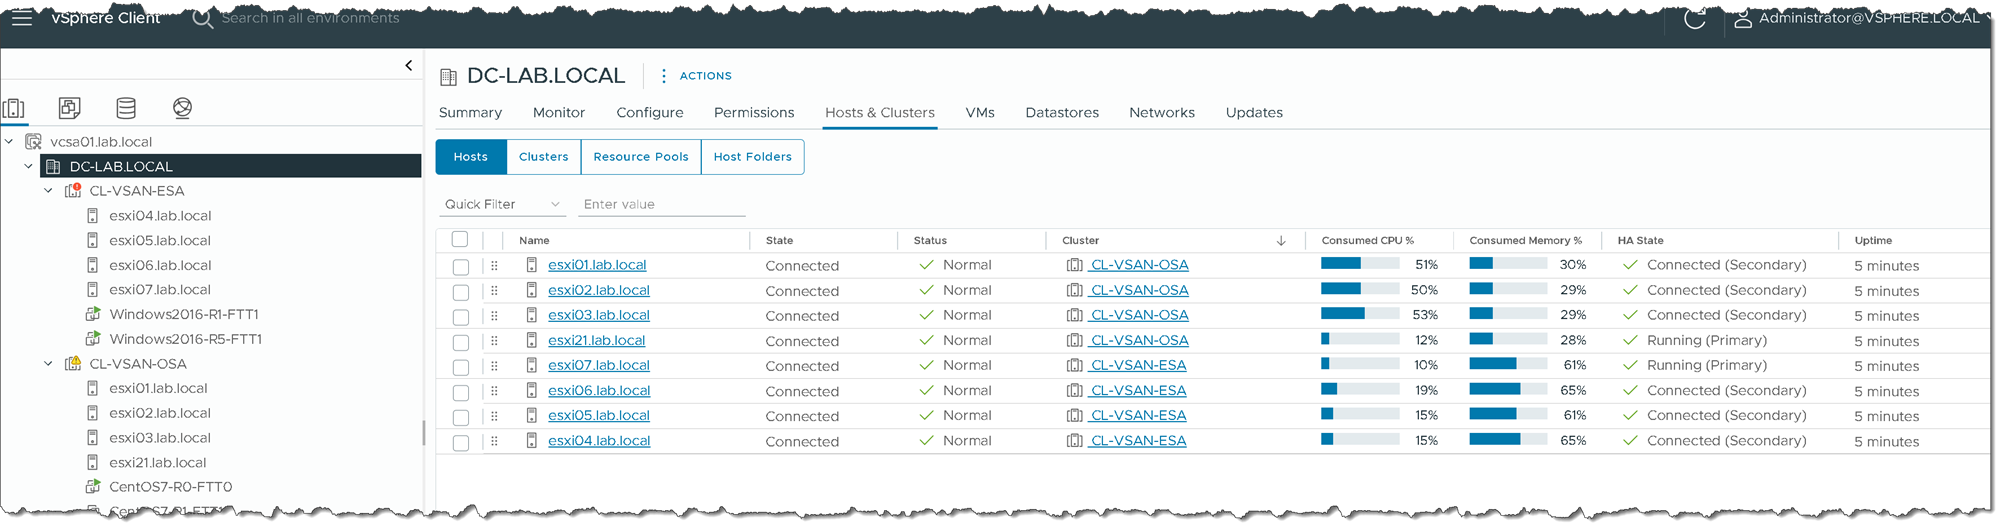
The versions used during this lab were:
vCenter Server:
8.0.3 build 24022515

ESXi hosts - CL-VSAN-ESA:
8.0.3 build 24585383

ESXi hosts - CL-VSAN-OSA:
8.0.3 build 24585383
Before the change, the vCenter Server used:
vcsa01.lab.localThe objective was to change its identity to:
vcsa.lab.localwhile keeping the same IP address.
Understand the PNID Before Making the Change
The vCenter Primary Network Identifier (PNID) is the network identity used by several internal vCenter components.
When vCenter Server is originally deployed using an FQDN as its System Name, that FQDN normally becomes the PNID.
You can check the current PNID directly from the appliance:
/usr/lib/vmware-vmafd/bin/vmafd-cli \
  get-pnid \
  --server-name localhost
Before the change, my environment returned the original vCenter FQDN.
Changing the vCenter FQDN is therefore not equivalent to running the Linux hostname command.
The supported VAMI workflow updates the vCenter identity and the internal registrations associated with the new name. Broadcom warns that changing PNID manually without following the supported workflow can break vCenter services.
Pre-Change Checklist
Before modifying the vCenter identity, verify the following items.
Create a Current Backup
I strongly recommend creating a current vCenter file-based backup before starting:
- If you need the complete procedure, see “Configure vCenter File-Based Backups to NFS: Practical Lab Guide“.
- It is equally important to understand the recovery procedure before performing the change. See “Restoring vCenter Server from a File-Based Backup: Practical Lab Walkthrough“.
If the vCenter participates in Enhanced Linked Mode, all members of the SSO replication domain must be protected according to the applicable recovery procedure. Broadcom also requires VCHA to be removed before an FQDN change and identifies external integrations and Active Directory membership as items that may require additional work.
Review External Integrations
Check whether the vCenter is registered with other products such as:
- NSX
- backup applications
- monitoring platforms
- Site Recovery Manager
- automation platforms
- VCF Operations
- third-party plugins
Some integrations may need to be updated or re-registered after the FQDN changes.
My lab was intentionally simple and did not contain most of these external integrations.
Review the Certificate Configuration
Determine whether the vCenter uses:
- VMCA-managed certificates; or
- custom CA-signed certificates.
If custom certificates are used, plan to replace or regenerate the affected certificates after the FQDN change so that the new identity is represented correctly. Broadcom specifically lists custom certificates as requiring additional action after an FQDN change.
Prepare Forward and Reverse DNS
This is one of the most important prerequisites.
The new vCenter identity should have:
A record:
vcsa.lab.local → <vcenter-ip>

PTR record:
<vcenter-ip> → vcsa.lab.local
Do not rely only on a CNAME for the new vCenter identity. Broadcom requires valid forward and reverse DNS resolution for the new FQDN.
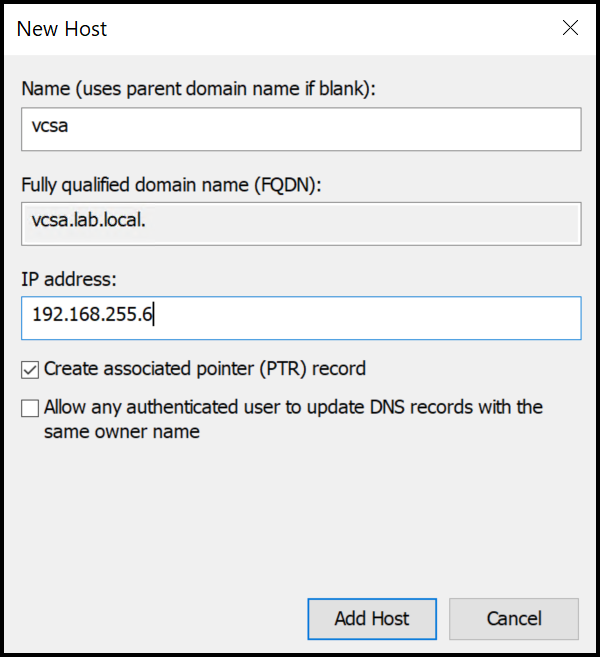
In my lab, I created the new direct DNS record for:
vcsa.lab.localpointing to the existing vCenter Server IP address.
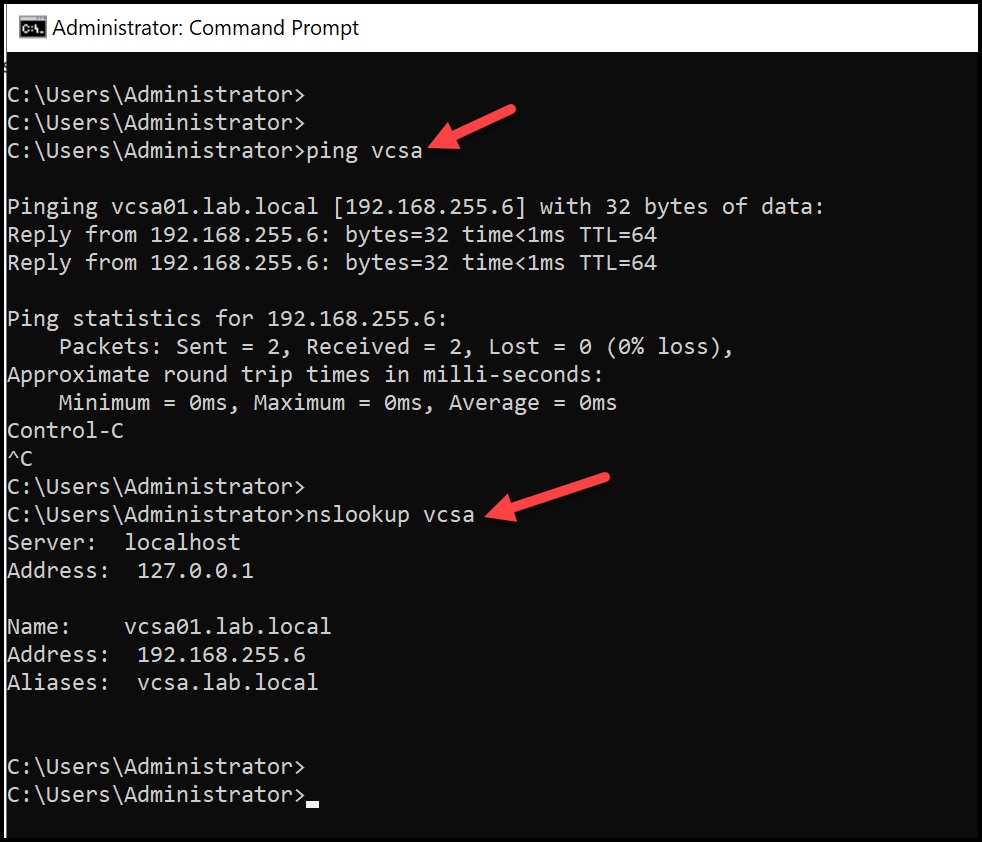
Before continuing, validate forward resolution:
nslookup vcsa.lab.localThen validate reverse resolution:
nslookup <vcenter-ip-address>The first query should return the vCenter IP address.
The reverse lookup should return:
vcsa.lab.localIf these tests do not return the expected values, fix DNS before starting the FQDN change.
Change the vCenter FQDN Through VAMI
Access the vCenter Server Appliance Management Interface:
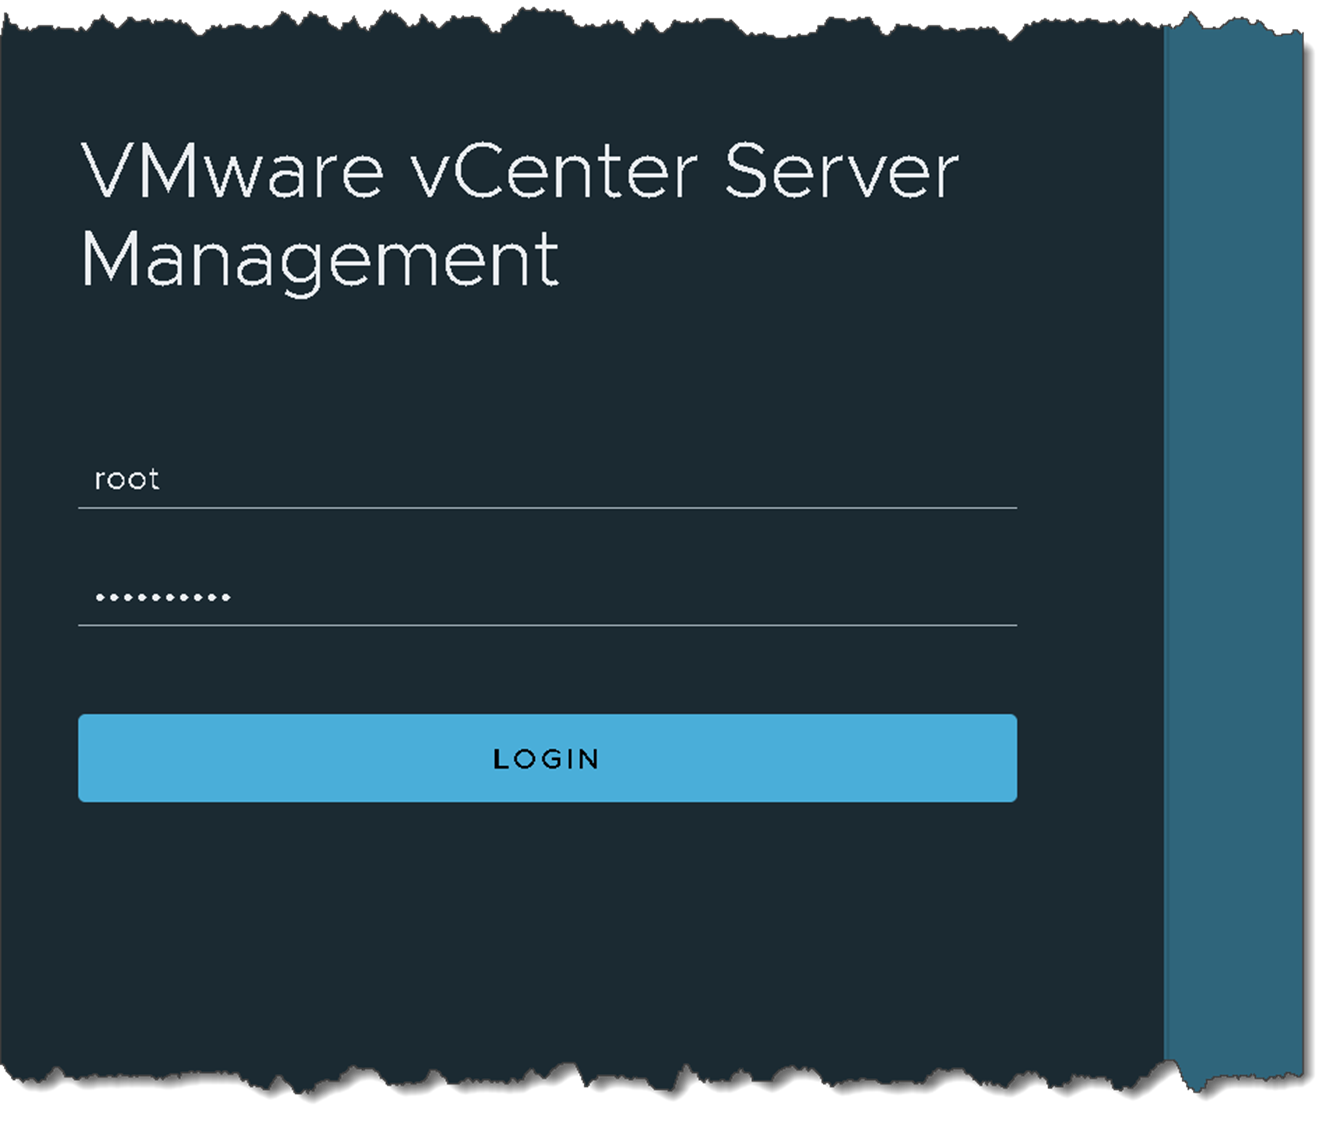
https://vcsa01.lab.local:5480Log in using the appliance root credentials:
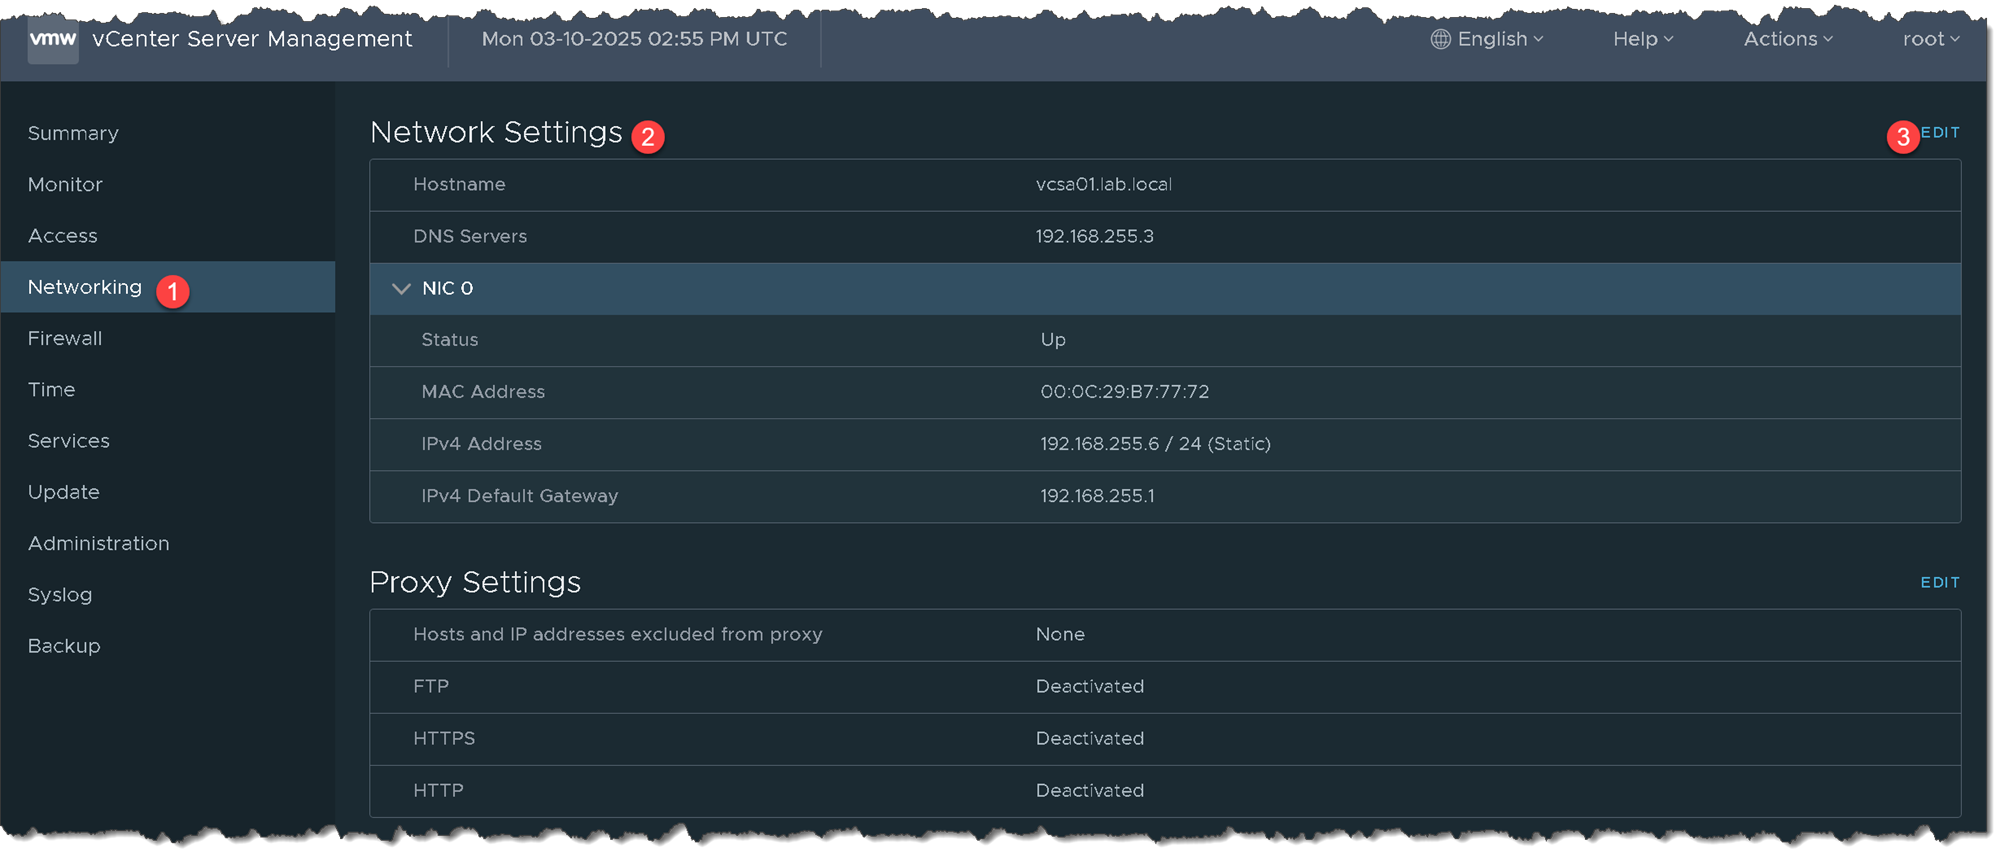
Go to “Networking” –>Click on “Edit” under the “Network Settings”:
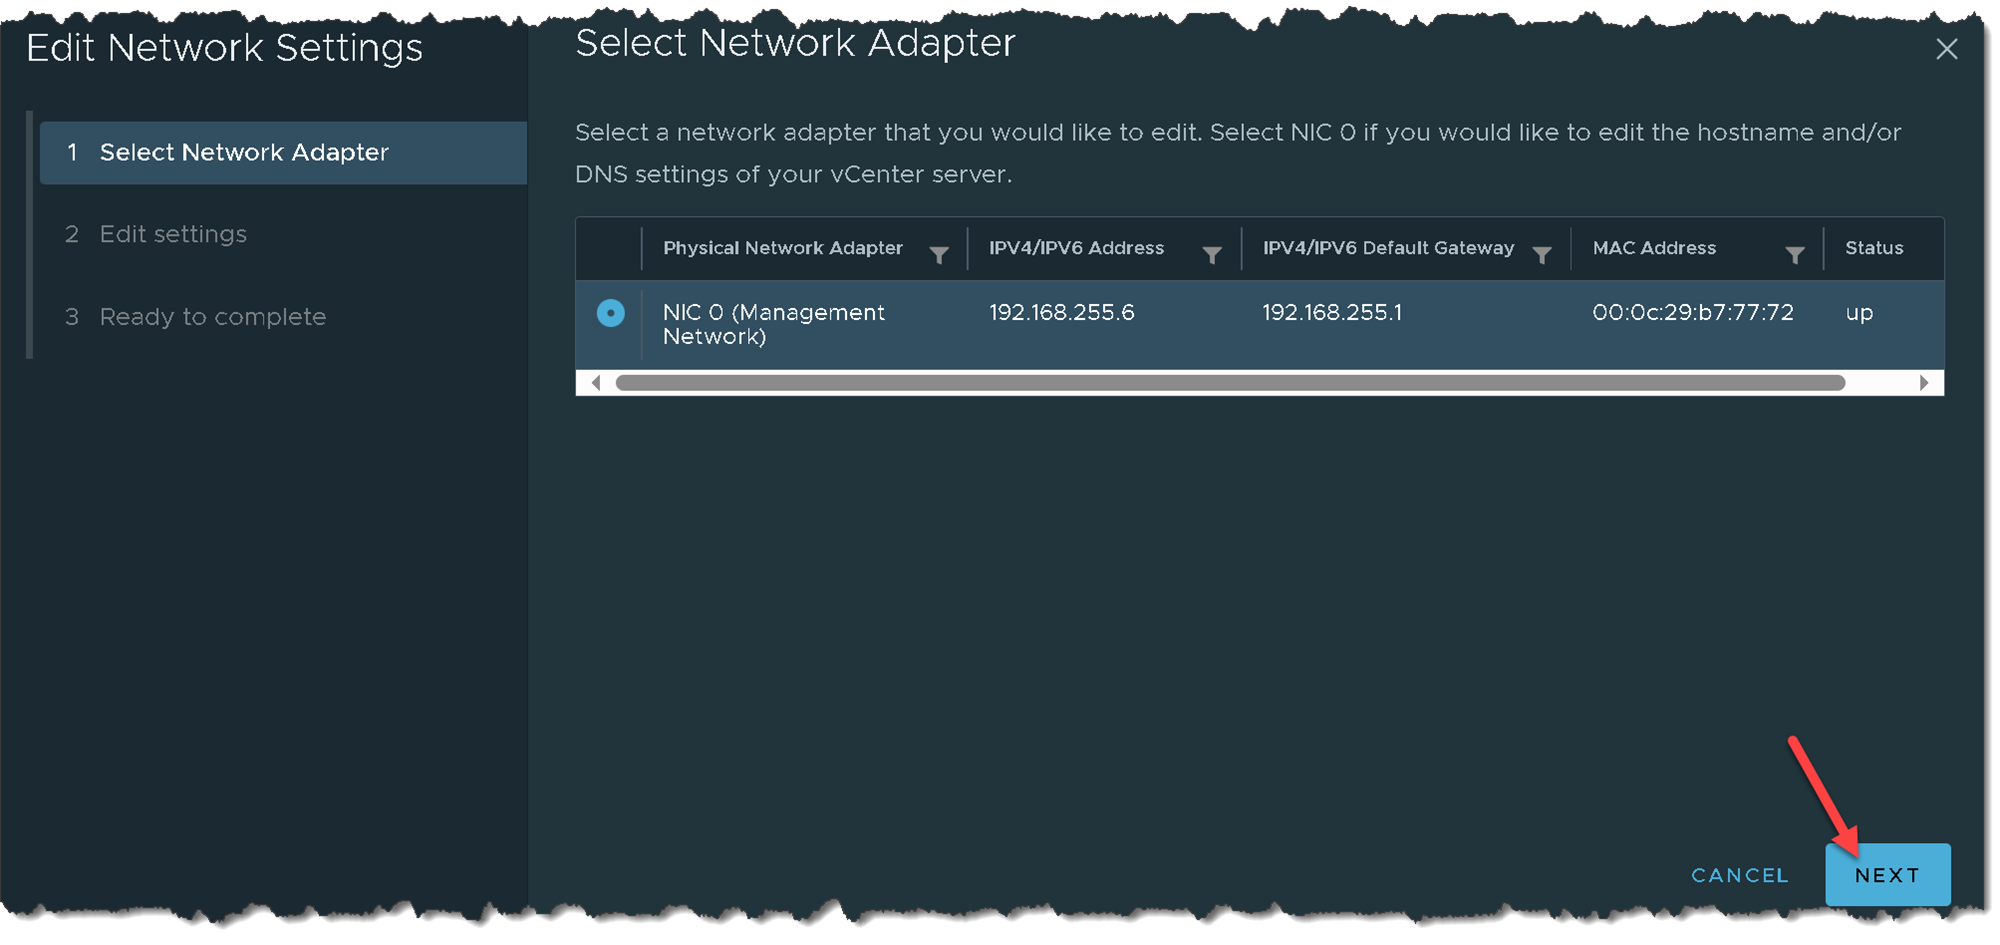
Select the management interface used by the appliance:
Expand:
Hostname and DNSChange:
vcsa01.lab.localto:
vcsa.lab.local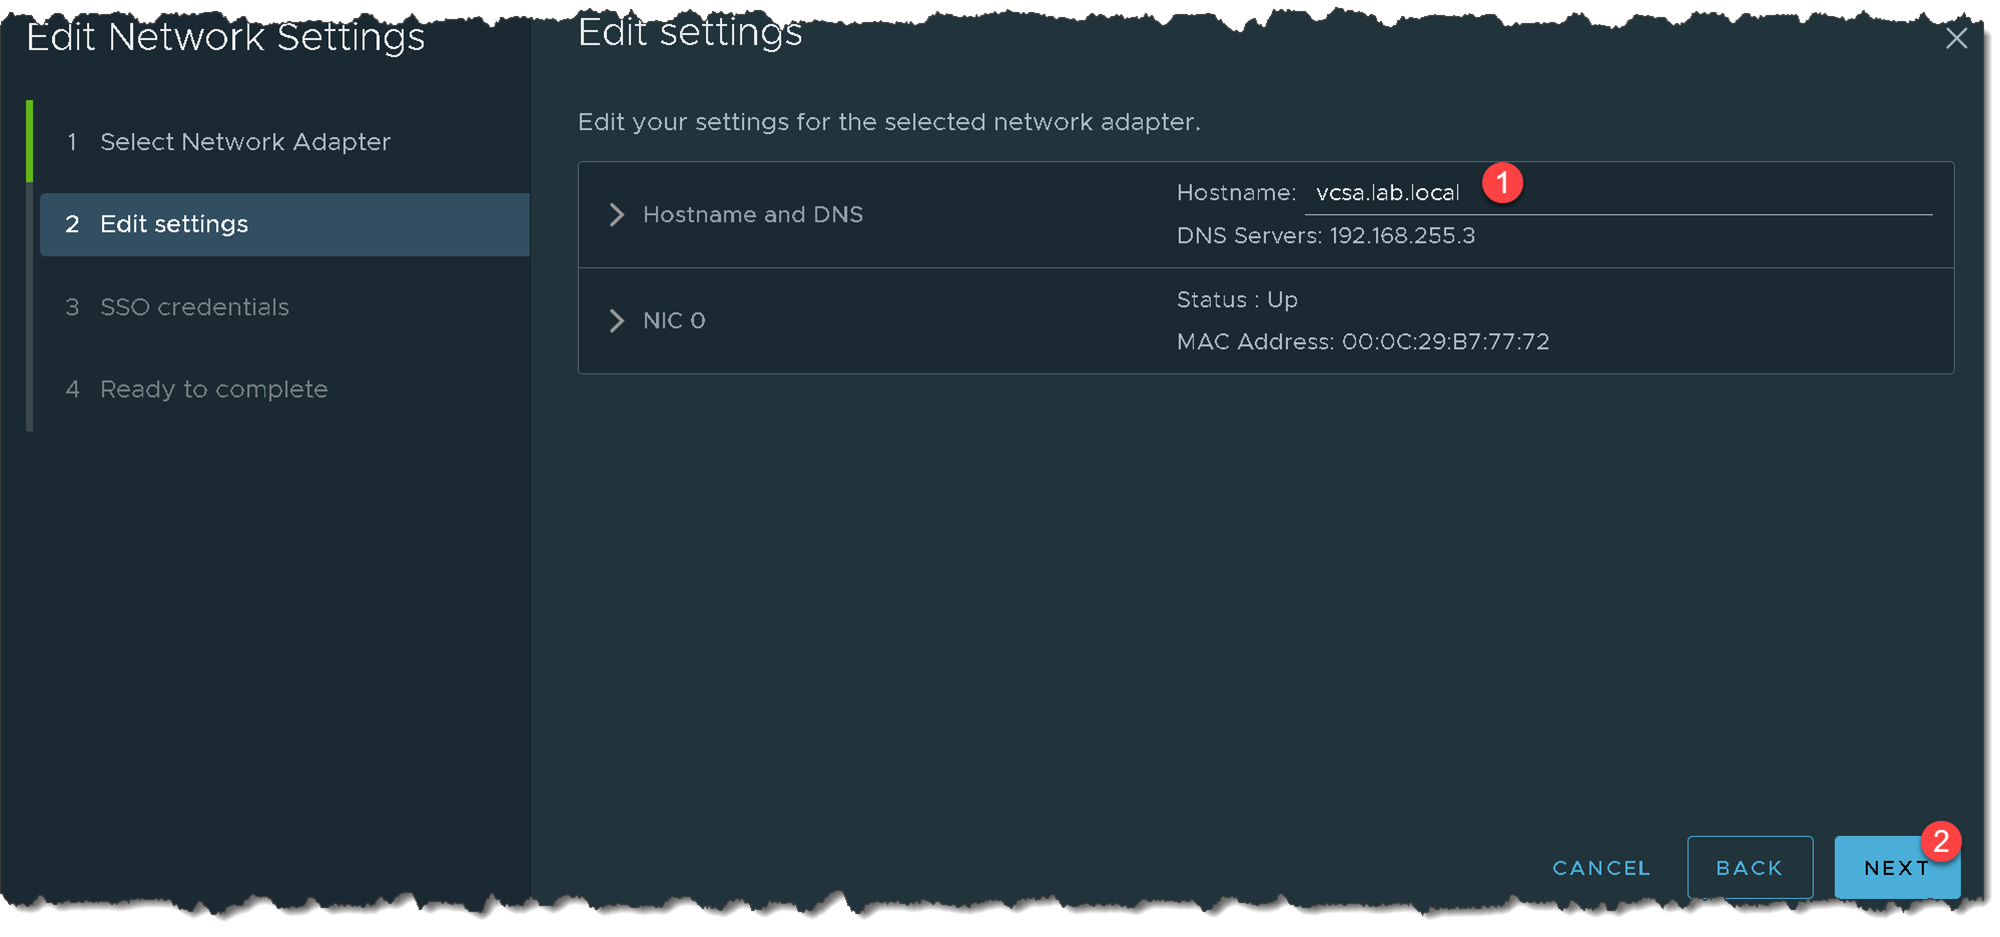
Authenticate with the SSO Administrator
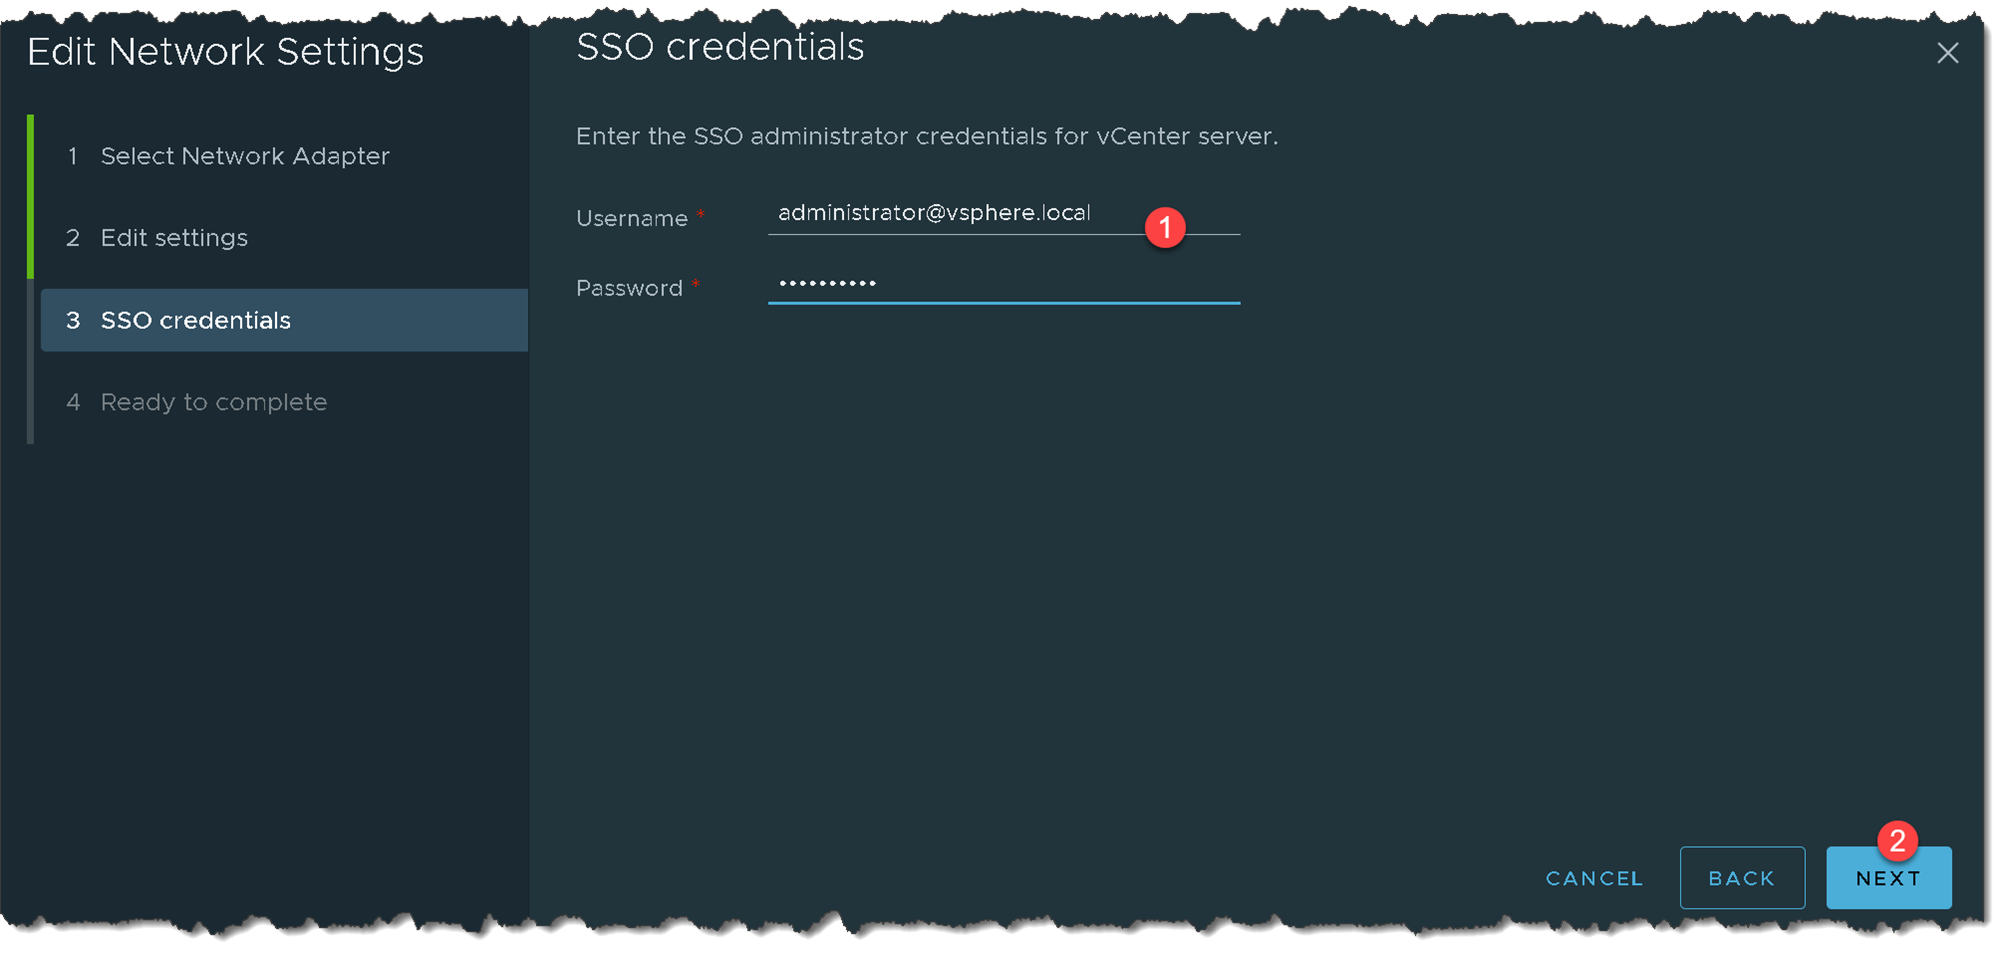
The wizard now requests the vCenter SSO administrator credentials. Provide the appropriate SSO administrator account and continue.
The VAMI workflow uses these credentials because changing the PNID requires updates to vCenter internal registrations, not only to the underlying operating system:
Review the Next Steps Carefully
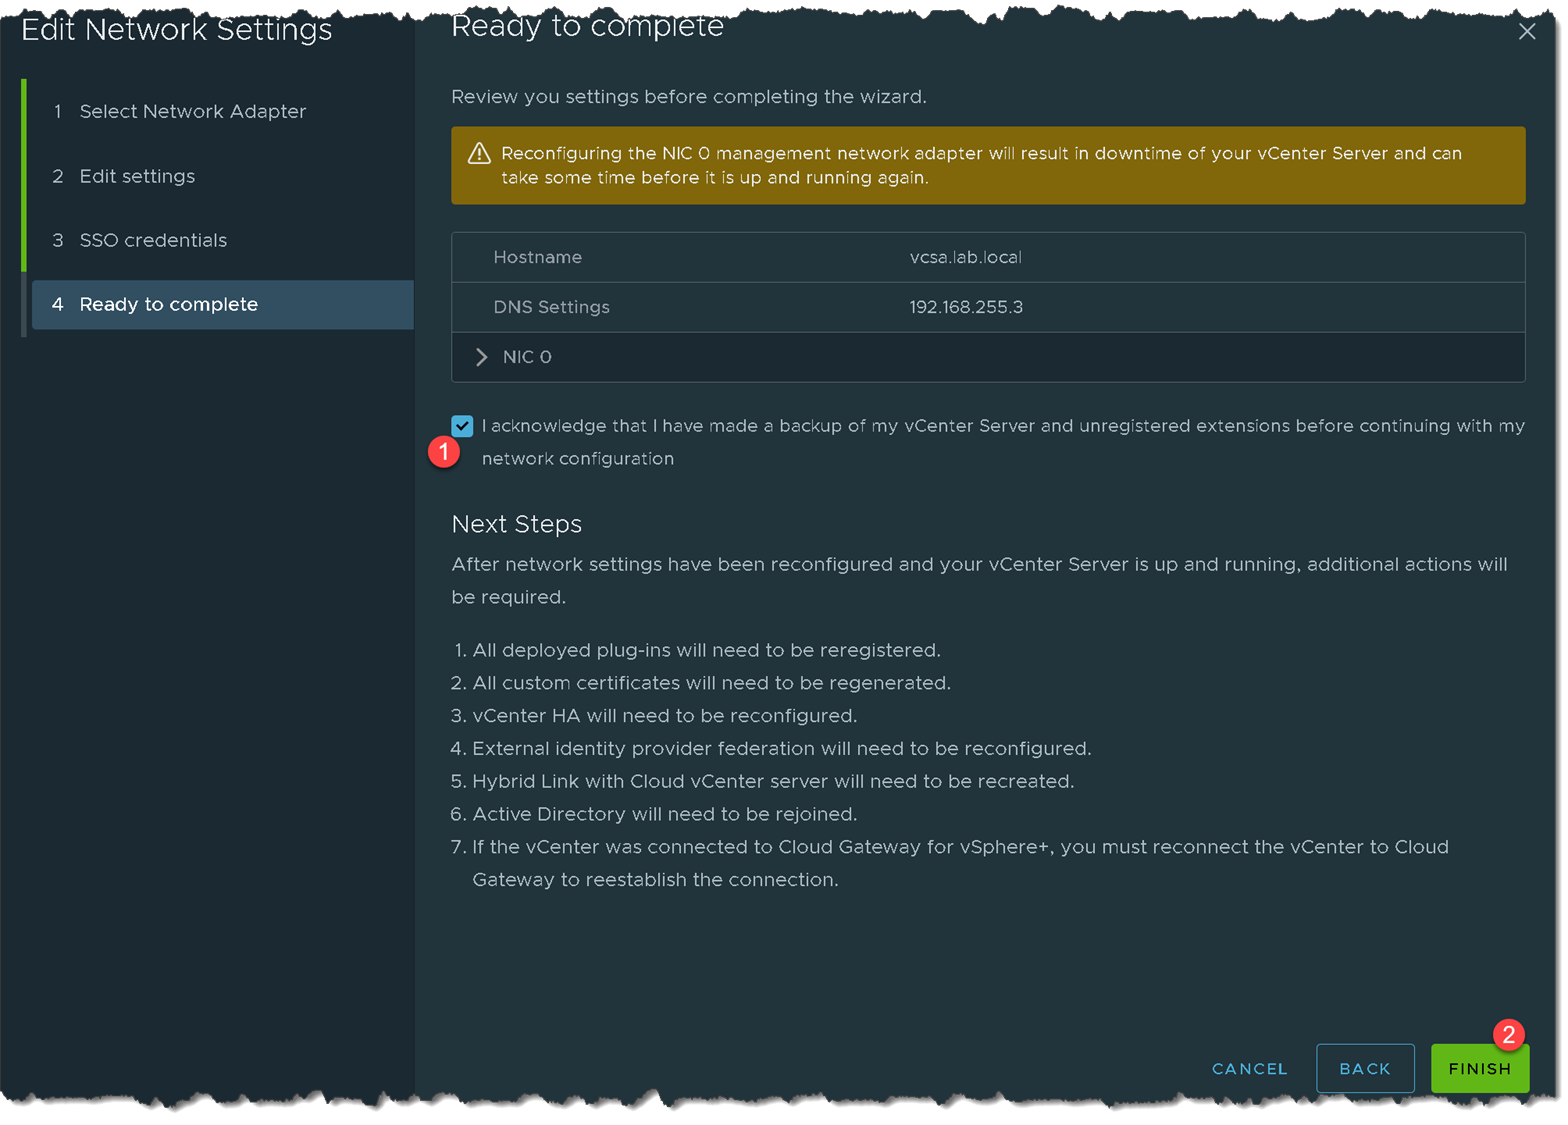
Before committing the change, VAMI displays a summary and a list of additional actions that may apply to the environment.
I recommend saving this information before clicking FINISH.
The exact post-change tasks depend on the environment and may include certificates, identity integrations, external products, or other components.
Confirm that you have a backup and then start the update.
Wait for the vCenter Network Update
vCenter now updates the appliance network identity and restarts the required management services.
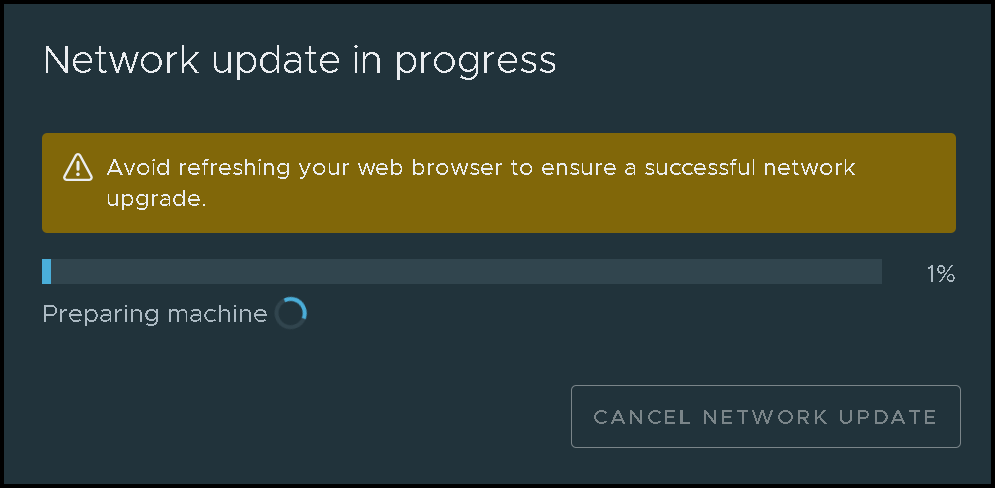
Do not reboot or interrupt the appliance simply because the UI becomes temporarily unavailable.
During my lab, the process took several minutes.
When the identity change completes, the browser automatically redirects from the old FQDN to:
https://vcsa.lab.local:5480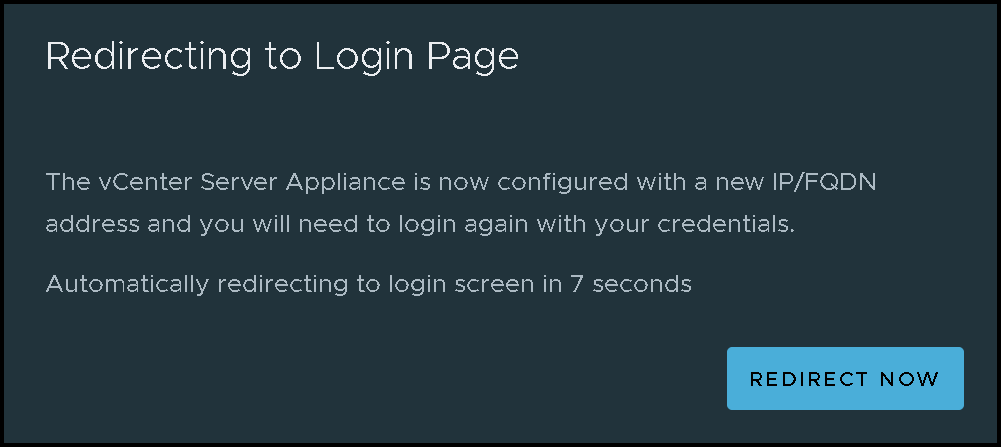
At first, the new FQDN may already respond while the remaining vCenter services are still starting.
Wait a few minutes and retry the vSphere Client.
Verify Access Through the New FQDN
After the services returned, I accessed the environment through:
https://vcsa.lab.local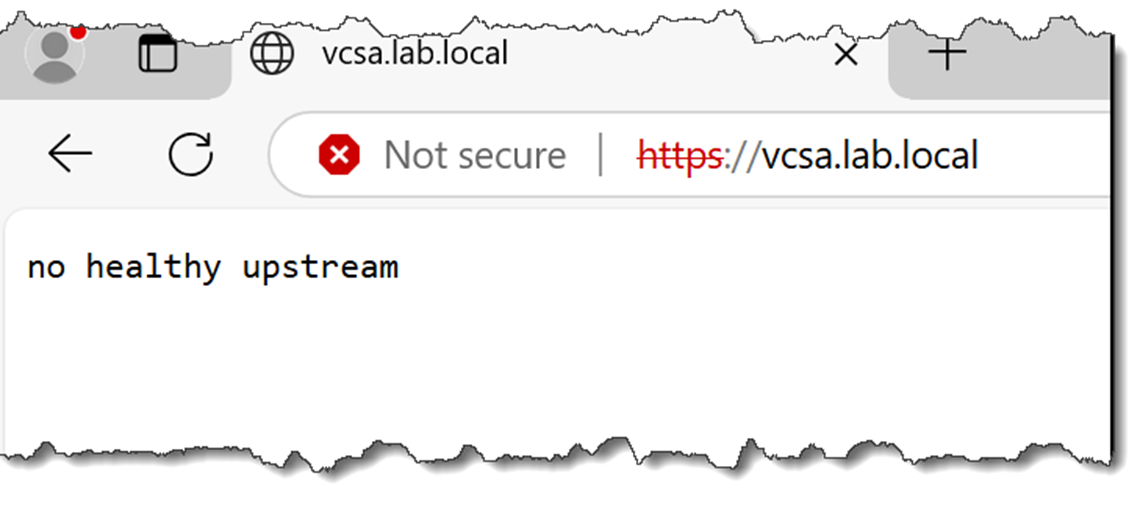
After some minutes, here we go:
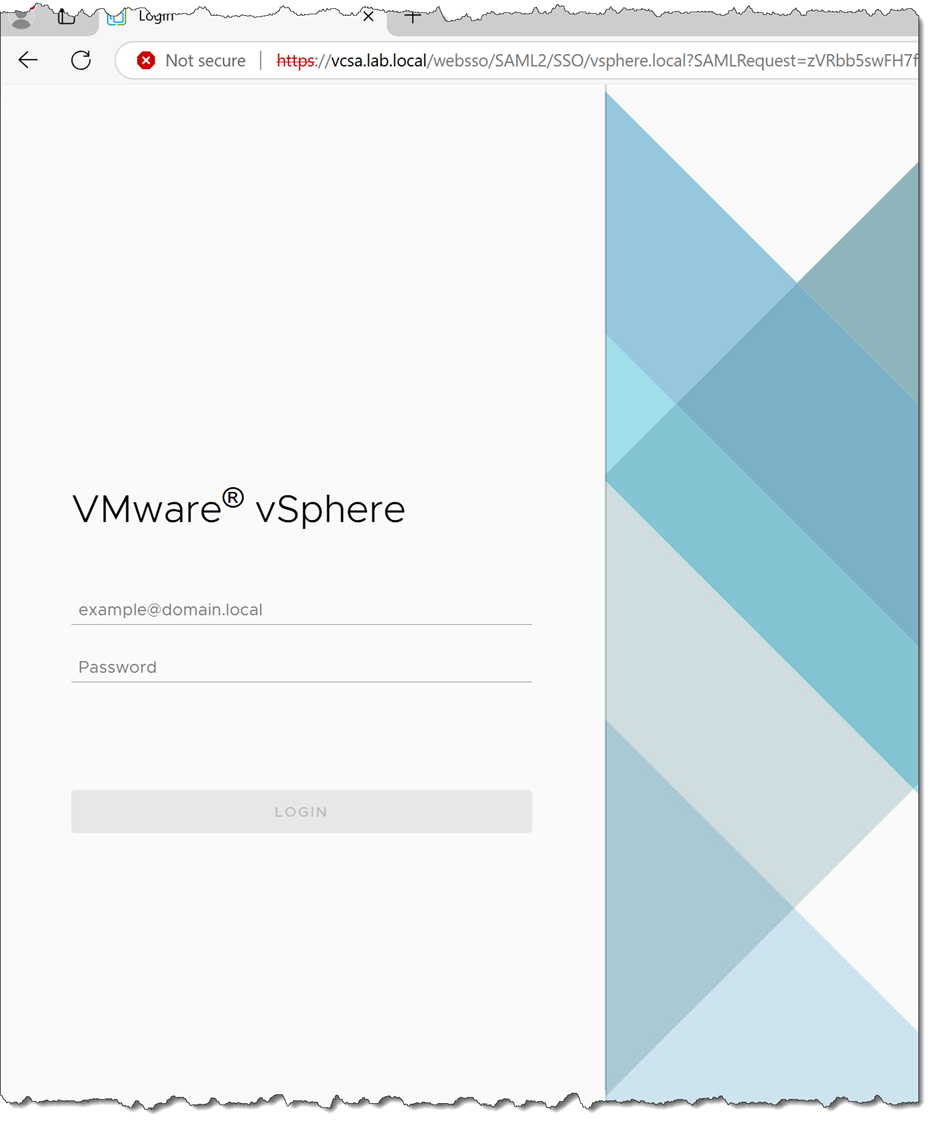
The ESXi hosts also returned normally in the inventory:
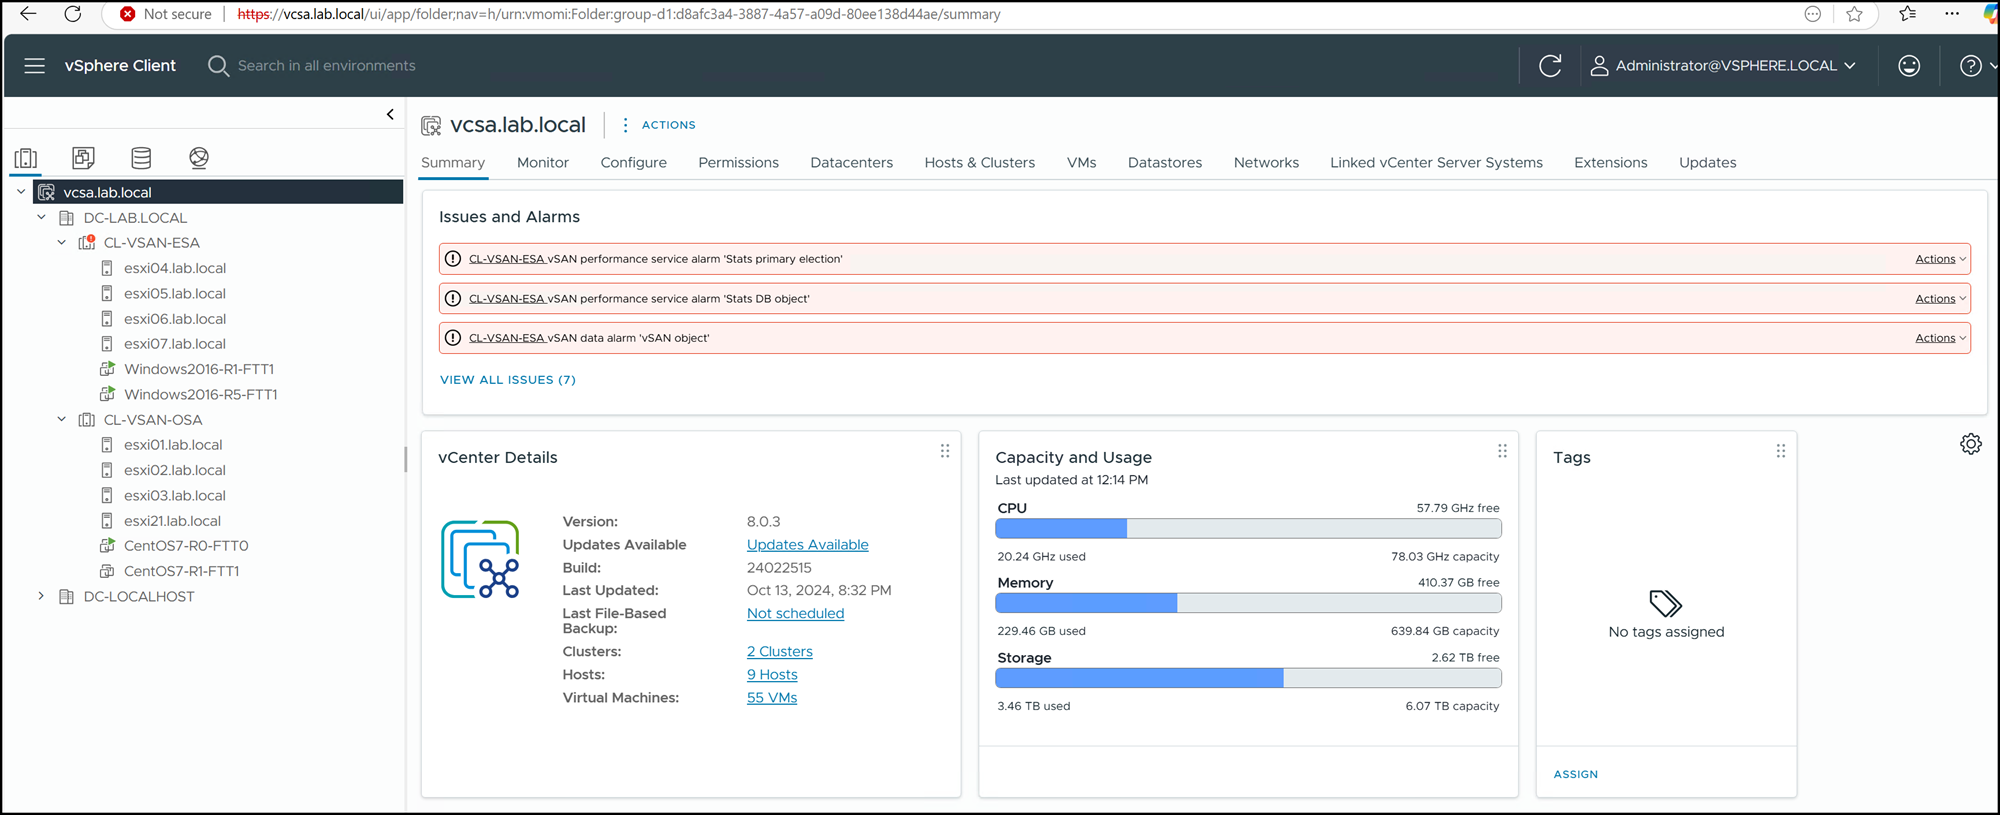
At this point, the vCenter management plane was operational again, but I did not consider the maintenance complete yet.
The next step was to validate certificates and the internal vCenter configuration.
Validate the New PNID
Connect to the VCSA through SSH and run:
hostname -fThen:
/usr/lib/vmware-vmafd/bin/vmafd-cli \
  get-pnid \
  --server-name localhost
In this lab, both should reflect:
vcsa.lab.localThis confirms that the appliance hostname and the vCenter PNID are aligned with the new identity.
Renewing the ESXi Host’s Certificate
This process does not renew the ESXi host’s certificate. So, the next step is to renew each host certificate.
As we can see in the following picture, the host certificate issuer is the old vCenter Server FQDN:
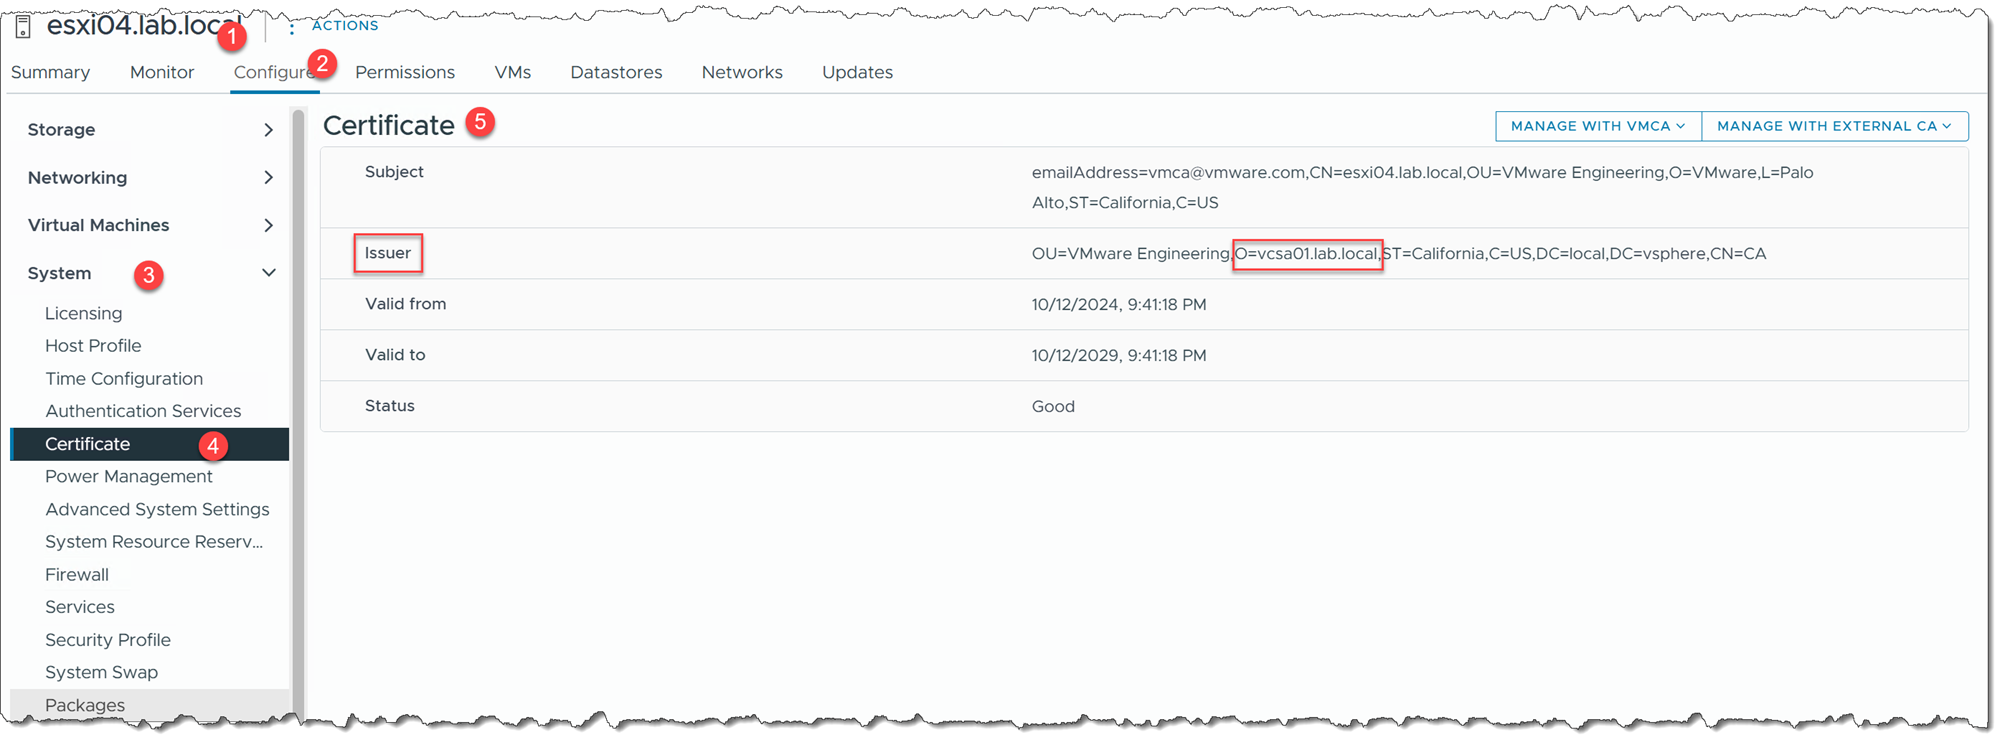
To renew the certificate:
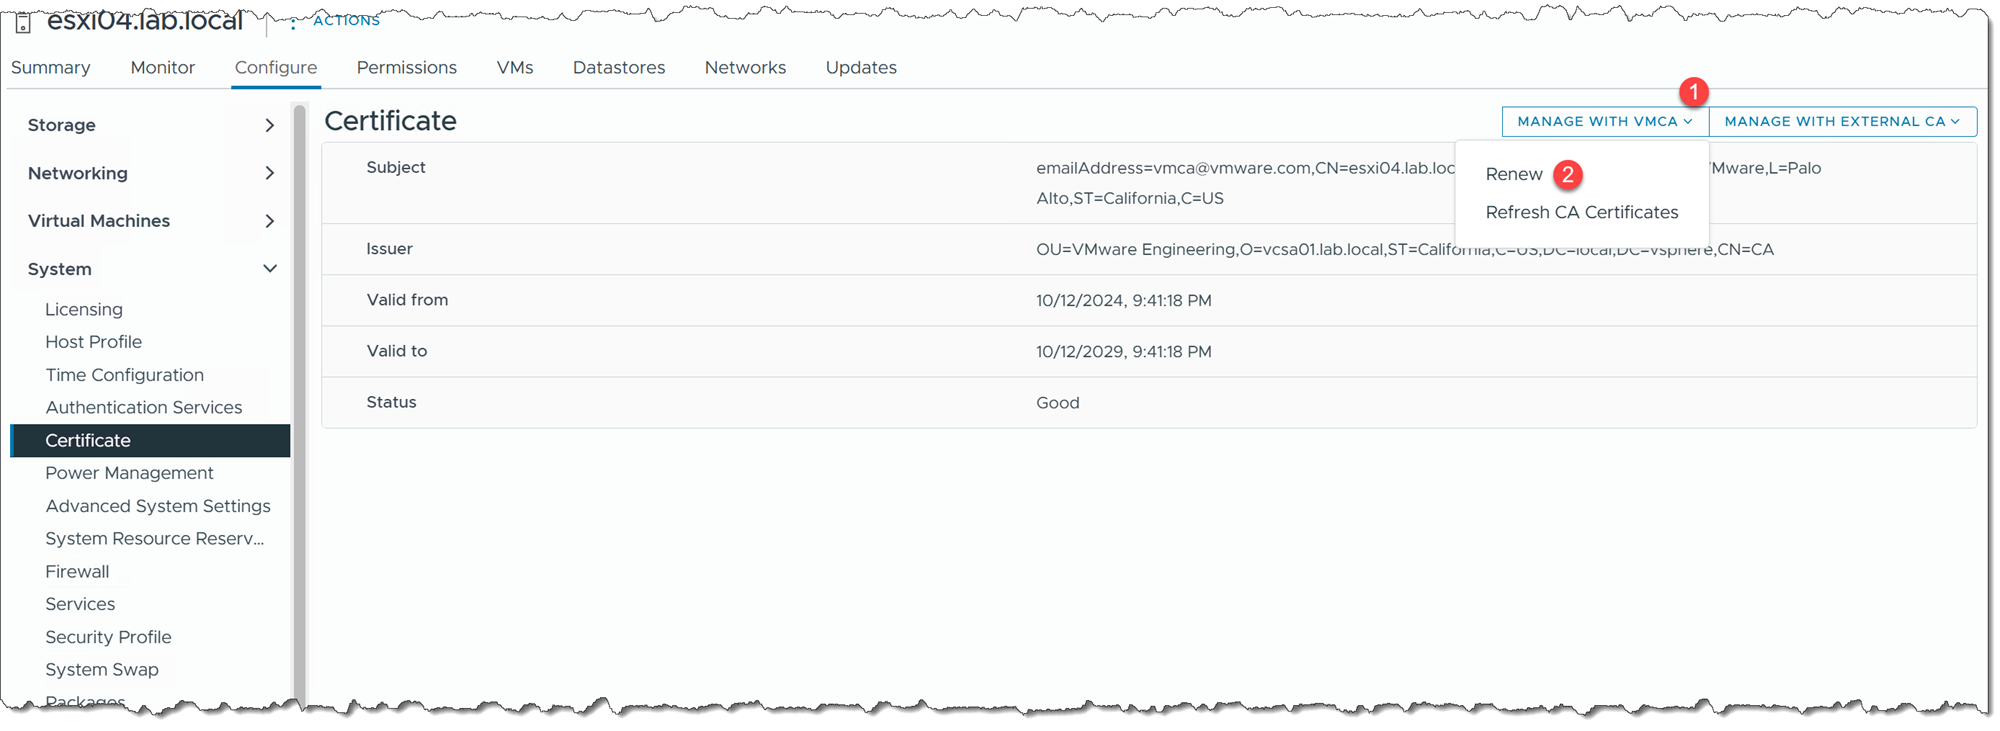
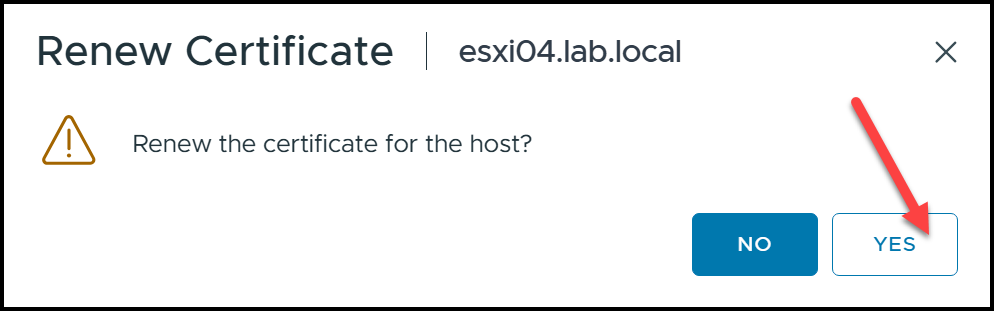
We can follow this process through the vCenter Server “Recent Tasks”:

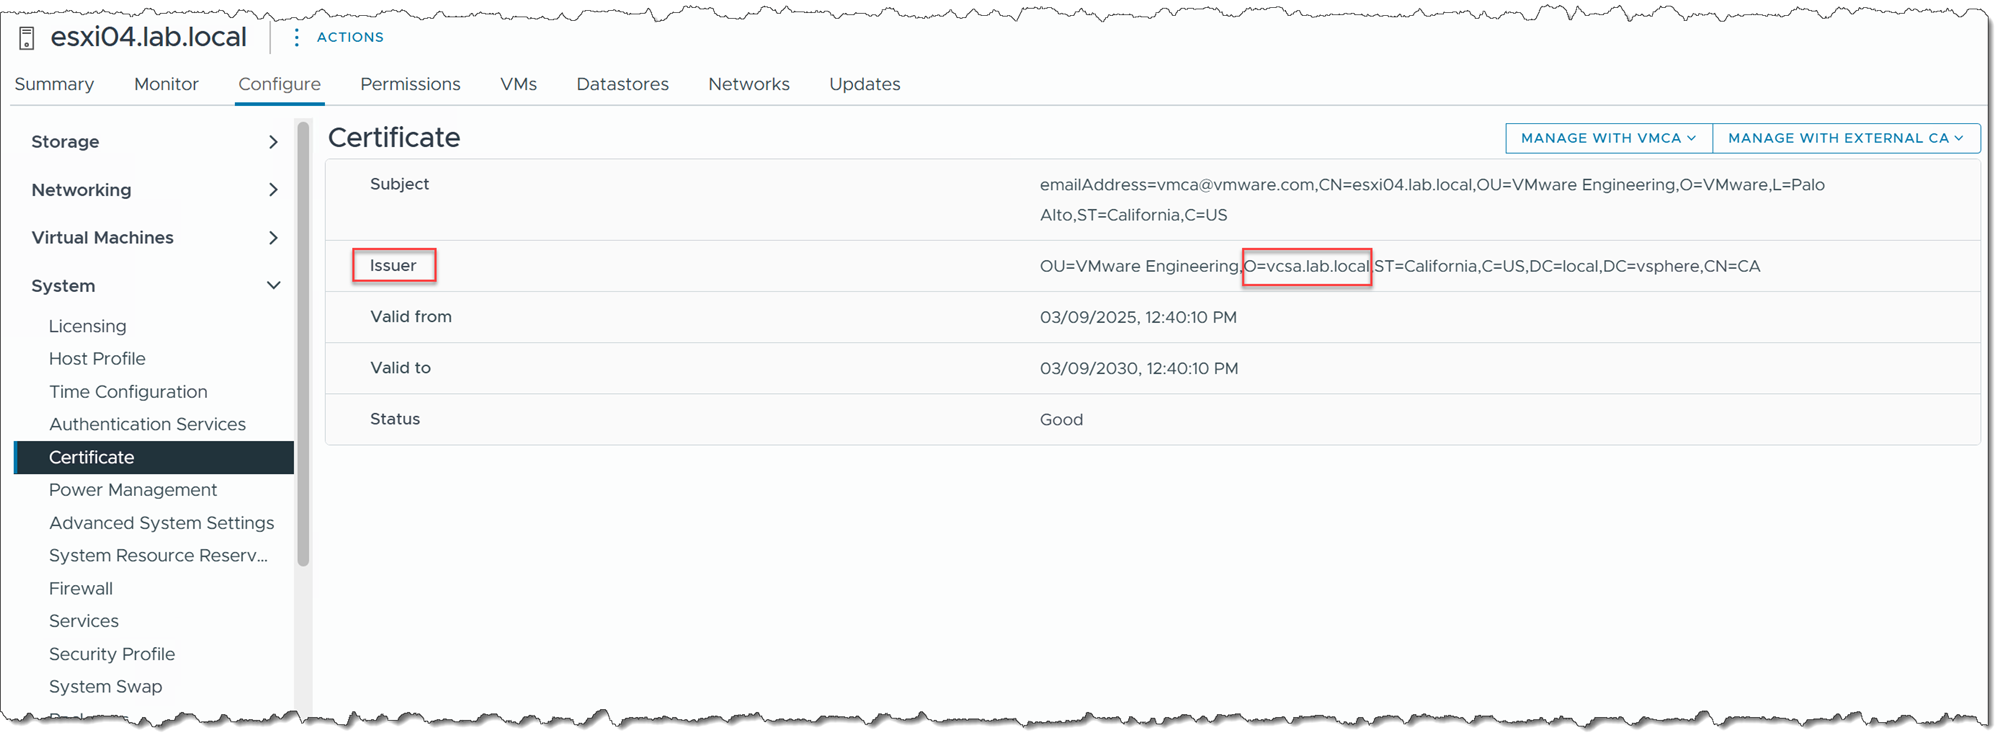
Afterward, the new FQDN will appear in the Issuer field, as we can see in the following picture:
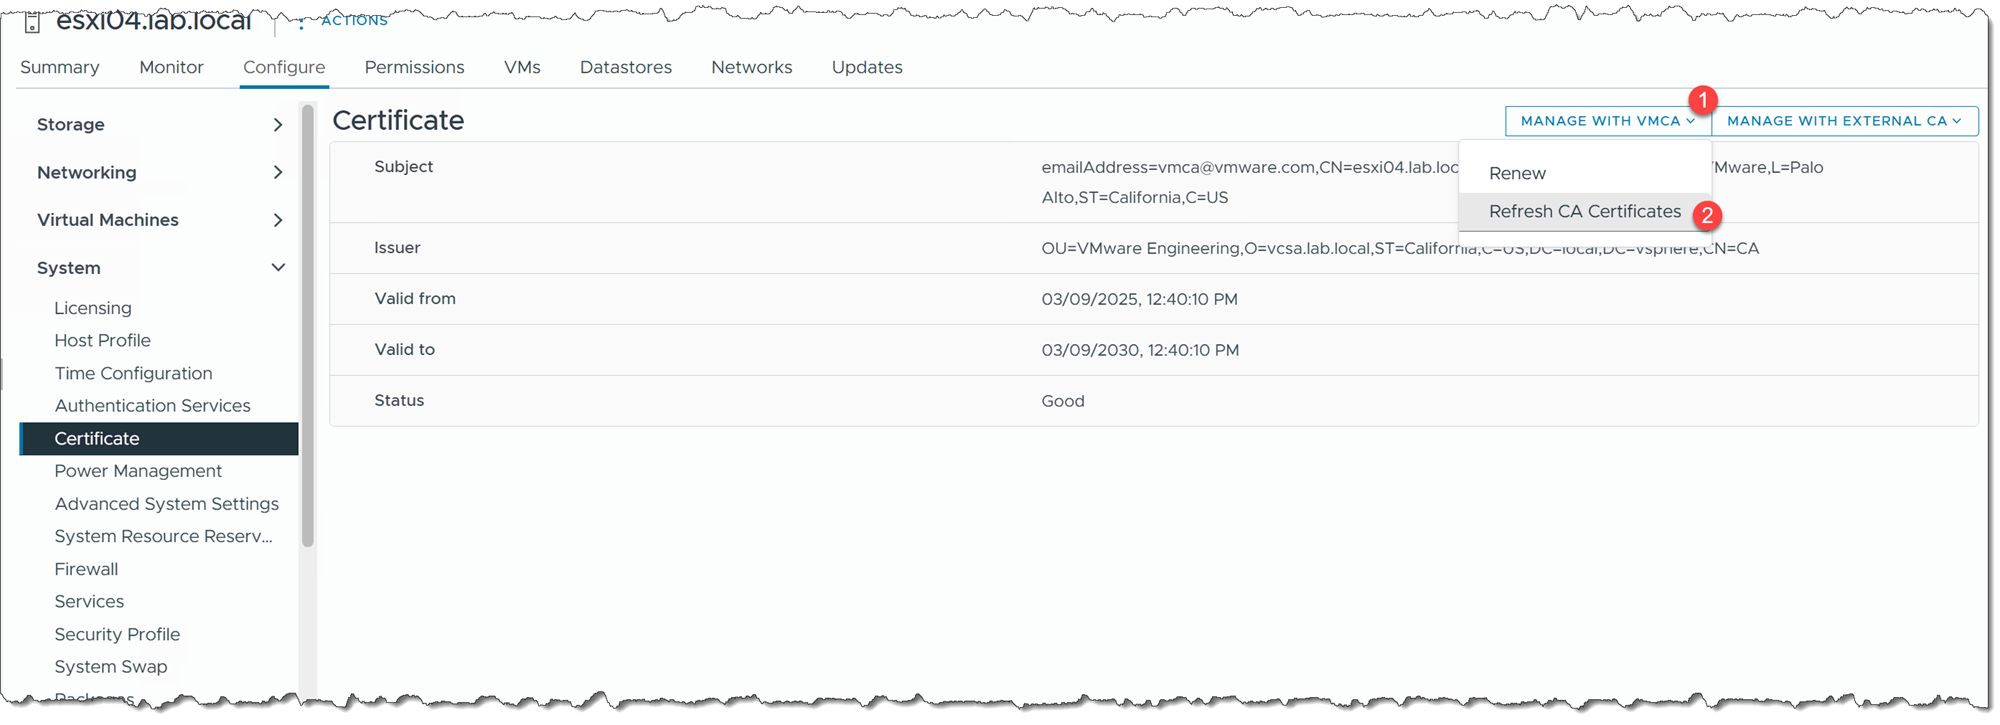
Additionally, click on “Refresh CA Certificates” to copy the CA certificate to the local ESXi host:
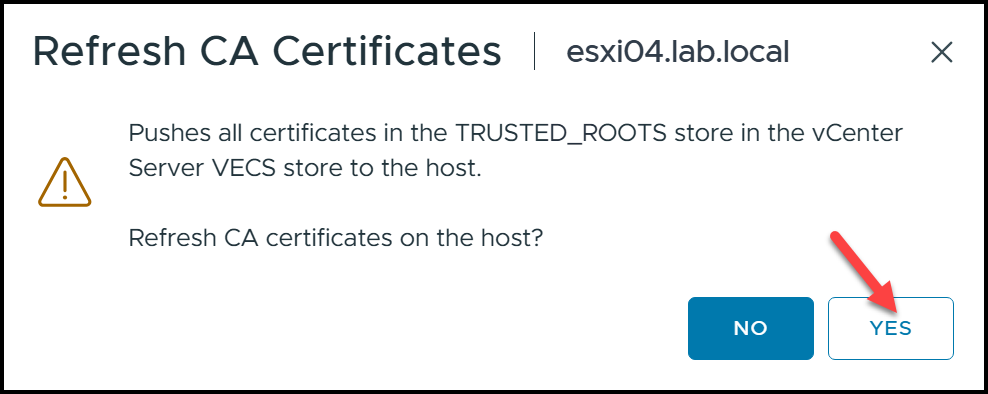
Do the same steps for all ESXi hosts, one at a time!
Renew vs Refresh CA Certificates
These two operations are not identical:
- Renew generates and installs a new ESXi host certificate signed by VMCA.
- Refresh CA Certificates updates the VMCA trusted CA certificates installed on the host.
A successful Renew also performs the CA refresh implicitly, so a separate Refresh CA Certificates operation is normally unnecessary for the same VMCA-managed host unless a specific recovery procedure requires it.
If your ESXi hosts use custom certificates instead of VMCA-managed certificates, do not automatically follow this workflow. Validate the certificate-management mode first.
Run the VCF Diagnostic Tool for vSphere
After changing the vCenter identity, I strongly recommend running the VCF Diagnostic Tool for vSphere (VDT).
VDT is a read-only diagnostic tool that performs checks covering areas such as:
- DNS
- SSO
- certificates
- VMdir
- vPostgres
- vCenter services
- NTP
- Active Directory
- identity sources
- disk usage
Broadcom recommends using the latest stable version available from the VDT article rather than relying on a permanently fixed package version.
Download the latest stable package and copy it to the VCSA.
Extract it:
unzip vdt-<version>.zipEnter the extracted directory:
cd vdt-<version>/Run:
python vdt.pyDo not keep the old article commands tied specifically to:
vdt-2.0.8-09_18_2024because the diagnostic tool continues to receive updates.
What VDT Found in My Lab
This is where the lab became particularly useful.
My first VDT execution found two problems.
The first was:
DNS CHECK FAILEDThe second was:
IDENTITY SOURCE CHECK FAILEDThese were not reasons to roll back the entire FQDN change.
Instead, they identified configuration that still needed to be corrected.
Why My First DNS Attempt Failed
During my original lab attempt, I initially created:
vcsa.lab.localas a CNAME pointing to the old vCenter DNS name.
VDT later exposed the problem.
I removed that design and created a direct A record for the new vCenter FQDN together with the appropriate reverse DNS configuration.
That lesson is why the updated procedure in this article now prepares the correct A/PTR records before the FQDN change.
Do not reuse the two old screenshots showing creation of the CNAME.
Instead, the correct A record was already shown earlier in this updated procedure.
After correcting DNS, confirm again:
nslookup vcsa.lab.localand:
nslookup <vcenter-ip-address>Fix the Identity Source Only If VDT Detects the Problem
The second issue was specific to my lab.
VDT reported that the built-in identity source still contained the old vCenter identity in the:
vmwSTSConnectionStringsattribute.
The value still referenced:
ldap://vcsa01.lab.local:389instead of the expected local value.
Broadcom documents this specific condition and provides the fix_sts_attrs.py remediation procedure. The script makes permanent changes and must only be used after the condition has been confirmed and the required rollback protection has been created.
I followed that procedure.
Running:
python fix_sts_attrs.pyproduced output similar to the following in my environment:
[WARNING] Detected that the connection string
(ldap://vcsa01.lab.local:389) is incorrect.

Setting to ldap://localhost:389

[DONE] Connection string is now:
ldap://localhost:389
Important: fix_sts_attrs.py is not a normal mandatory step of every vCenter FQDN change. Run it only when the corresponding identity-source problem has actually been identified and when following the applicable Broadcom procedure.
After the repair, restart the vCenter services as directed by the remediation procedure:
service-control --stop --all && service-control --start --allWait for the services to return before continuing.
Run VDT Again
After correcting DNS and the stale identity-source value, I ran VDT again:
- The DNS check now passed.
- The Identity Source check also passed.
This second run is important.
A troubleshooting tool is most useful when it is used not only to identify a problem, but also to confirm that the remediation actually corrected it.
Final Validation
Before considering the maintenance complete, I validated the environment again.
Confirm the FQDN
hostname -fExpected:
vcsa.lab.localConfirm the PNID
/usr/lib/vmware-vmafd/bin/vmafd-cli \
  get-pnid \
  --server-name localhost
Expected:
vcsa.lab.localConfirm Forward DNS
nslookup vcsa.lab.localConfirm Reverse DNS
nslookup <vcenter-ip-address>Check vCenter Services
service-control --status --allThen I verified through the vSphere Client that:
- the ESXi hosts remained connected;
- both vSAN clusters were visible and healthy;
- inventory objects were present;
- the vCenter was accessed only through the new FQDN;
- host certificates were in the expected state;
- no new FQDN-related VDT failures remained;
- external integrations, where applicable, were updated;
- the backup configuration was still functional.
A successful login alone is not enough to validate a vCenter identity change.
External References
- Update or Change vCenter Server Appliance Hostname/FQDN/PNID Broadcom procedure for changing the vCenter Server Appliance hostname and Primary Network Identifier through VAMI, including SSO authentication and the appliance network update workflow.
- vCenter Services Fail to Start After Changing the FQDN Broadcom guidance covering forward and reverse DNS requirements, backups, Enhanced Linked Mode, VCHA, external integrations, Active Directory, and custom certificates when changing a vCenter FQDN.
- Understanding the vCenter Primary Network Identifier Broadcom reference explaining PNID behavior, how to verify the current PNID, and why it should not be changed manually outside the supported workflow.
- VCF Diagnostic Tool for vSphere Official download and documentation for VDT, the read-only diagnostic tool used to validate DNS, SSO, certificates, identity sources, services, time synchronization, and other vCenter components.
-
Repair an Incorrect STS Identity Source Connection String
Broadcom remediation procedure for an incorrect
vmwSTSConnectionStringsvalue, including thefix_sts_attrs.pyscript used when the condition has been positively identified. - Difference Between Renew and Refresh CA Certificates for ESXi Broadcom explanation of VMCA-managed ESXi host certificate renewal and the difference between issuing a new host certificate and refreshing the trusted CA certificates.
