


Configuring network interfaces on RHEL 8 is an essential task for Linux administrators who need to manage connectivity in enterprise environments. Red Hat Enterprise Linux provides powerful tools such as nmcli and nmtui to create, modify, and troubleshoot network configurations.
The NetworkManager service is responsible for dynamically managing network devices and connections on RHEL systems. Through command-line and interactive interfaces, administrators can configure wired, wireless, virtual, and advanced networking setups without manually editing configuration files.
In this article, we will explore how to use nmcli and nmtui to configure network interfaces on RHEL 8, including DHCP configuration, static IPv4 settings, connection management, and basic network verification procedures.
First and foremost: What is NetworkManager?
NetworkManager is the dynamic network control and configuration daemon used by many Linux distributions (including Red Hat Enterprise Linux) to automatically detect network devices and keep connections active when they become available. It provides a unified D-Bus API for third-party applications and supports wired, wireless, VPN, modem-based, and virtual network setups without requiring manual edits to traditional ifcfg scripts.
This daemon runs as a background service named “NetworkManager.service” and offers multiple front-ends for managing connections:
- nmcli: a full-featured command-line tool ideal for scripting and automation.
- nmtui: a curses-based, text-user-interface for interactive configuration.
- GUI applets (e.g., nm-connection-editor or nm-applet) for desktop environments.
Tool Overview
nmcli
- This is the native CLI for the NetworkManager.
- This tool is ideal for automation, scripts, or when the X11 interface (graphical) isn’t available.
- Basic syntax:
- nmcli [object] [command] [options]
nmtui
- Interactive tool, text-based UI.
- Friendly interface when compared with the nmcli tool.
- Launched simply with: nmtui.
Warning: If you’re accessing a remote operating system through SSH, be careful with the network interface changes – you can lose operating system access!
Hands-On with nmcli
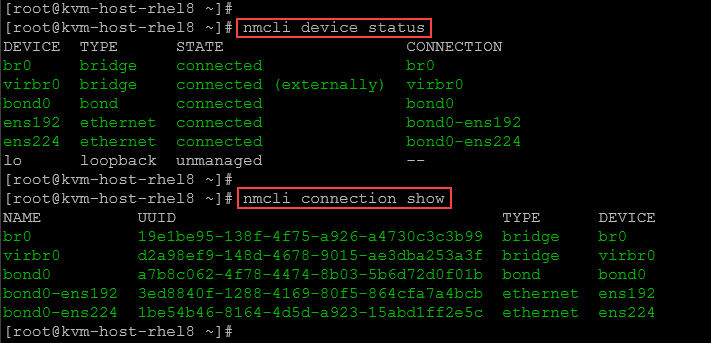
1- List devices and connections:
# Show device status (interfaces, state, type)
nmcli device status

# List configured connections
nmcli connection show
Notes:
- A device can be a physical interface, a bridge, a bond, etc.
- A connection is a configuration that uses a physical interface, a bridge, a bond, etc.
Example:
To check details of a specific device:
nmcli device show ens224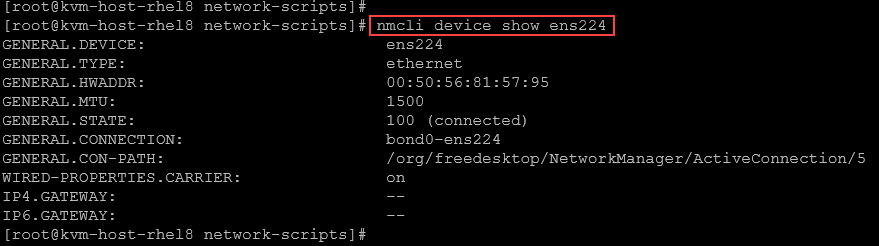
2- Configure DHCP on the interface ens224:
# Create a new DHCP connection named “myconn”
nmcli connection add \
  con-name myconn ifname ens224 type ethernet \
  autoconnect yes ipv4.method auto

# Bring it up immediately
nmcli connection up myconn
Example:
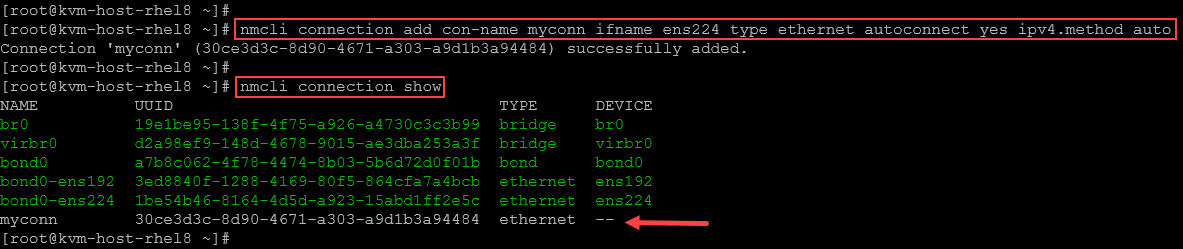
To activate the connection:

In this case, for instance, since we’ve an active DHCP server, the network interface ens224 acquired an IP address:
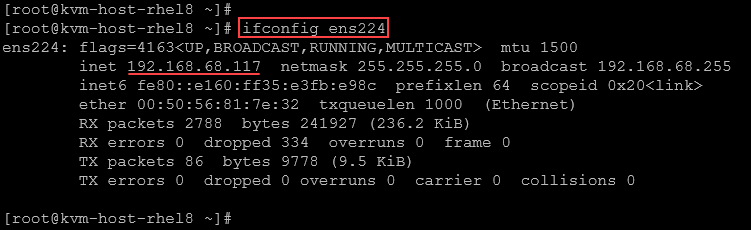
To deactivate the connection:

To see specific connections’ details:
# Replace myconn to your connection name:
nmcli connection show myconn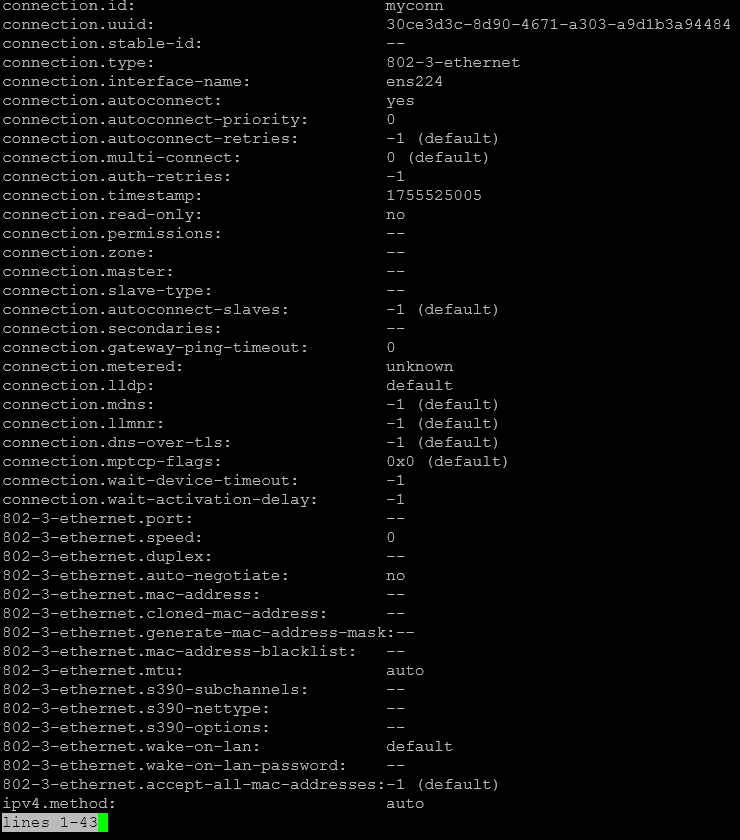
3- Configure Static IPv4 on the interface ens224:
# Create static connection
nmcli connection add \
  con-name static-myconn ifname ens224 type ethernet \
  ipv4.addresses 192.168.10.50/24 ipv4.gateway 192.168.10.1 \
  ipv4.dns "8.8.8.8 8.8.4.4" ipv4.method manual \
  autoconnect yes
In this case, the connection name is “static-myconn”:

Checking the connections:
nmcli connection showTo remember, after creating a connection, its status is “down”. To turn it up, we need to:
# Replace static-myconn to your connection name:
nmcli connection up static-myconn
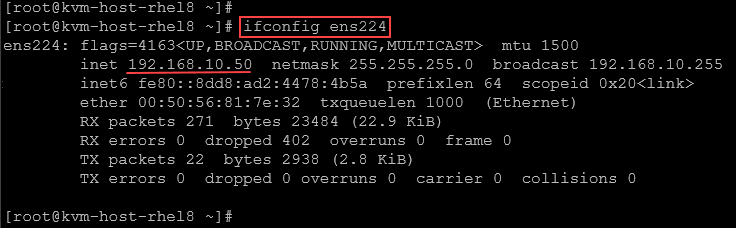
Inspecting the interface ens224, we can confirm that the configurations were applied successfully:
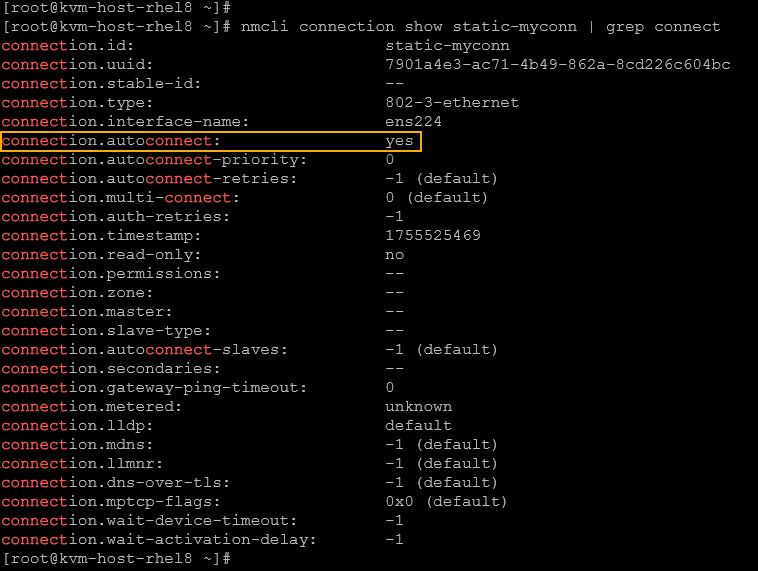
We can also confirm if the connection will be automatically turned on after rebooting the system:
nmcli connection show static-myconn | grep connectIn this case, the configuration “connection. autoconnect: yes” means that the interface will automatically turn on during the system boot:
If you want to change this behavior (not load the connection during the system boot):
nmcli connection modify static-myconn connection.autoconnect no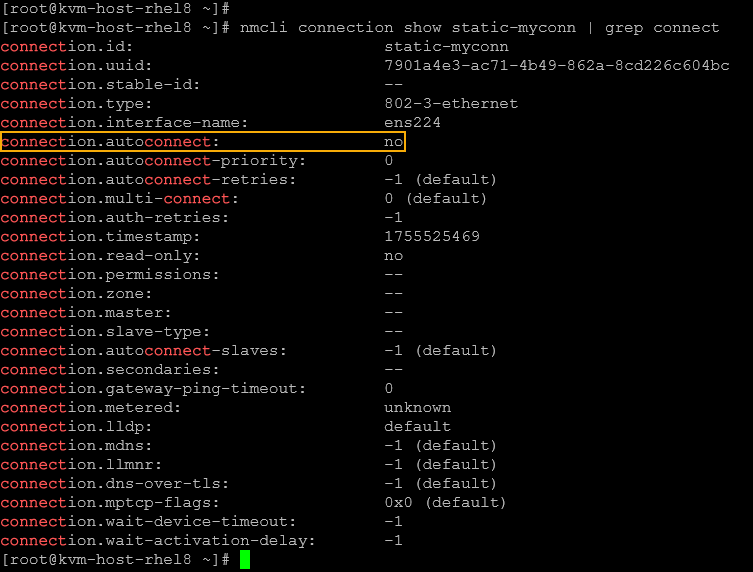
4- Modify an Existing Connection:
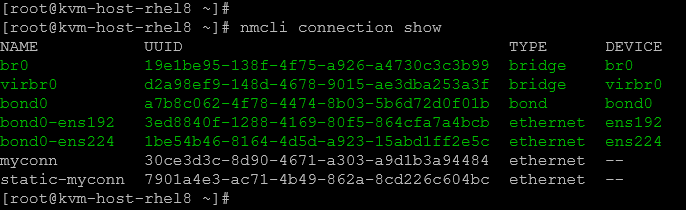
First, remember to inspect all connections:
nmcli connection showNote: We can identify what connections are up or down based on the output colors. In our case, for instance, we’re on Red Hat Enterprise Linux 8. The “up” connections are in green – I’m not sure if the same behavior will occur in other Linux distributions:
Let’s change the DNS servers for the “static-myconn” connection. First, inspect what DNS servers are configured on this connection:
nmcli connection show static-myconn | grep -i dns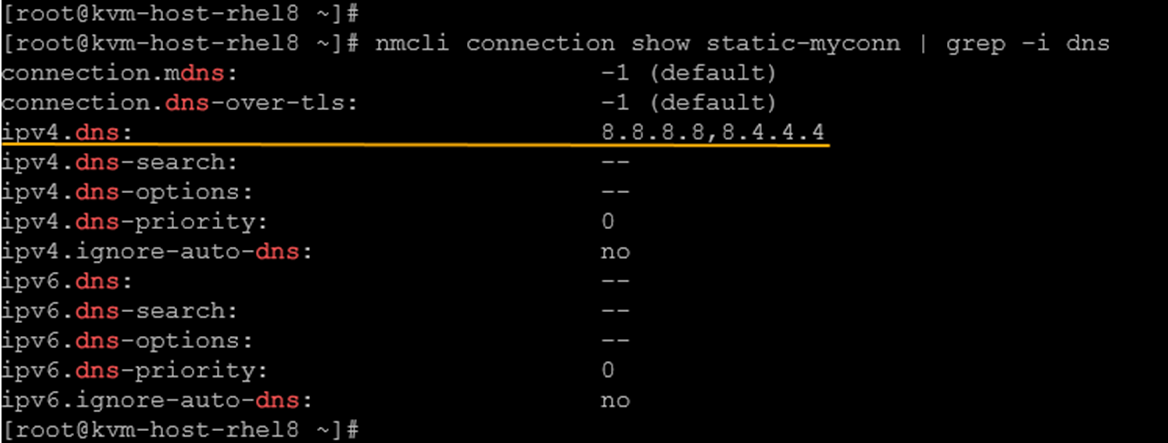
Now, let’s make the change to DNS servers 1.1.1.1 and 1.0.0.1:
nmcli connection modify static-myconn ipv4.dns "1.1.1.1 1.0.0.1"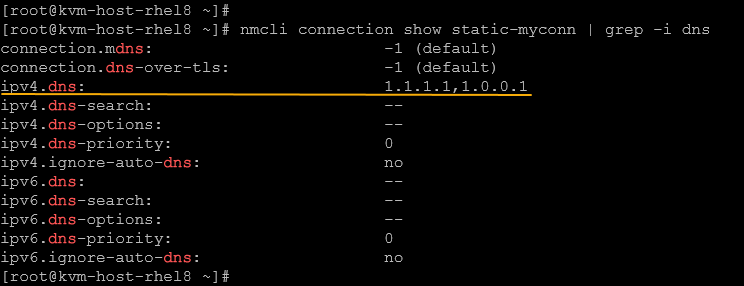
To apply the changes:
nmcli connection up static-myconnNote: All connection configurations are saved in files under /etc/sysconfig/network-scripts:
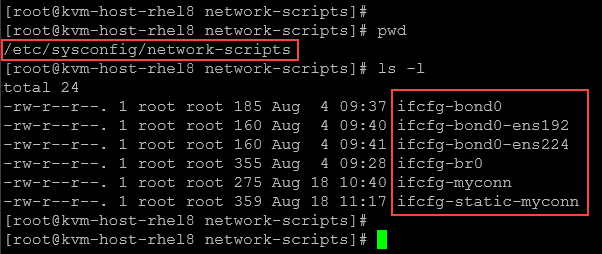
We can read these files and check the connection configurations. For example:
cat ifcfg-static-myconn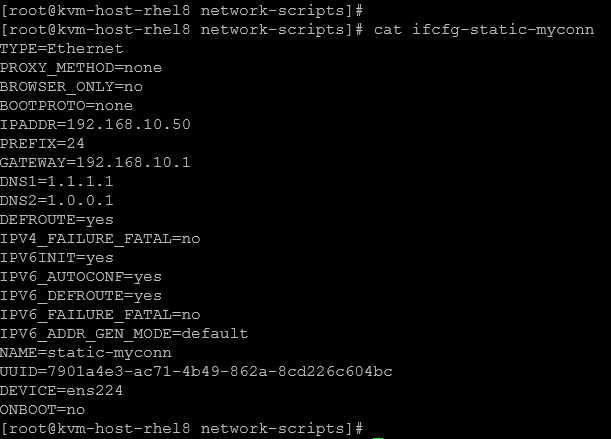
We can change all configurations directly in the connection configuration file. However, for the new configurations to take place, we need to restart the NetworkManager service:
systemctl restart NetworkManager5-Delete Existing Connections:
To delete existing connections, bring the connection down and then delete it:
# Putting the connections down:
nmcli connection down myconn
nmcli connection down static-myconn

# Deleting the connections:
nmcli connection delete myconn
nmcli connection delete static-myconn
Hands-On with nmtui
1- Launch the tool:
nmtui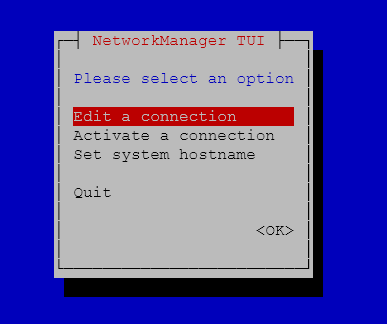
It’s straightforward to use the “nmtui”. Just select the option and follow the instructions.
2- Edit or Create a connection:
- Select Edit a connection → Enter.
- Use arrow keys to highlight an interface (e.g., eth0) → Edit.
- Toggle Automatically connect and pick IPv4 CONFIGURATION:
- Choose Automatic (DHCP) or Manual.
- If manual, fill in Address, Prefix, and Gateway.
- Tab to OK, then Back to return.
3- Activate/Deactivate:
- From the main menu, select Activate a connection.
- Highlight your modified connection → Deactivate or Activate.
4- Save and Exit:
- Choose Quit at any time.
- Verify with
nmcli device statusorip addr show.
Verification and Basic Troubleshooting
1- To check the overall manager status:
nmcli general status2- To check details of a specific device:
nmcli device show eth0 # change eth0 to your device3- We can use the traditional tools to inspect IP address details and perform some tests (like ping):
ip addr show
ip route show
ping 8.8.8.8
4- To check “NetworkManager” logs:
journalctl -u NetworkManager -eThat’s it for now 🙂
