

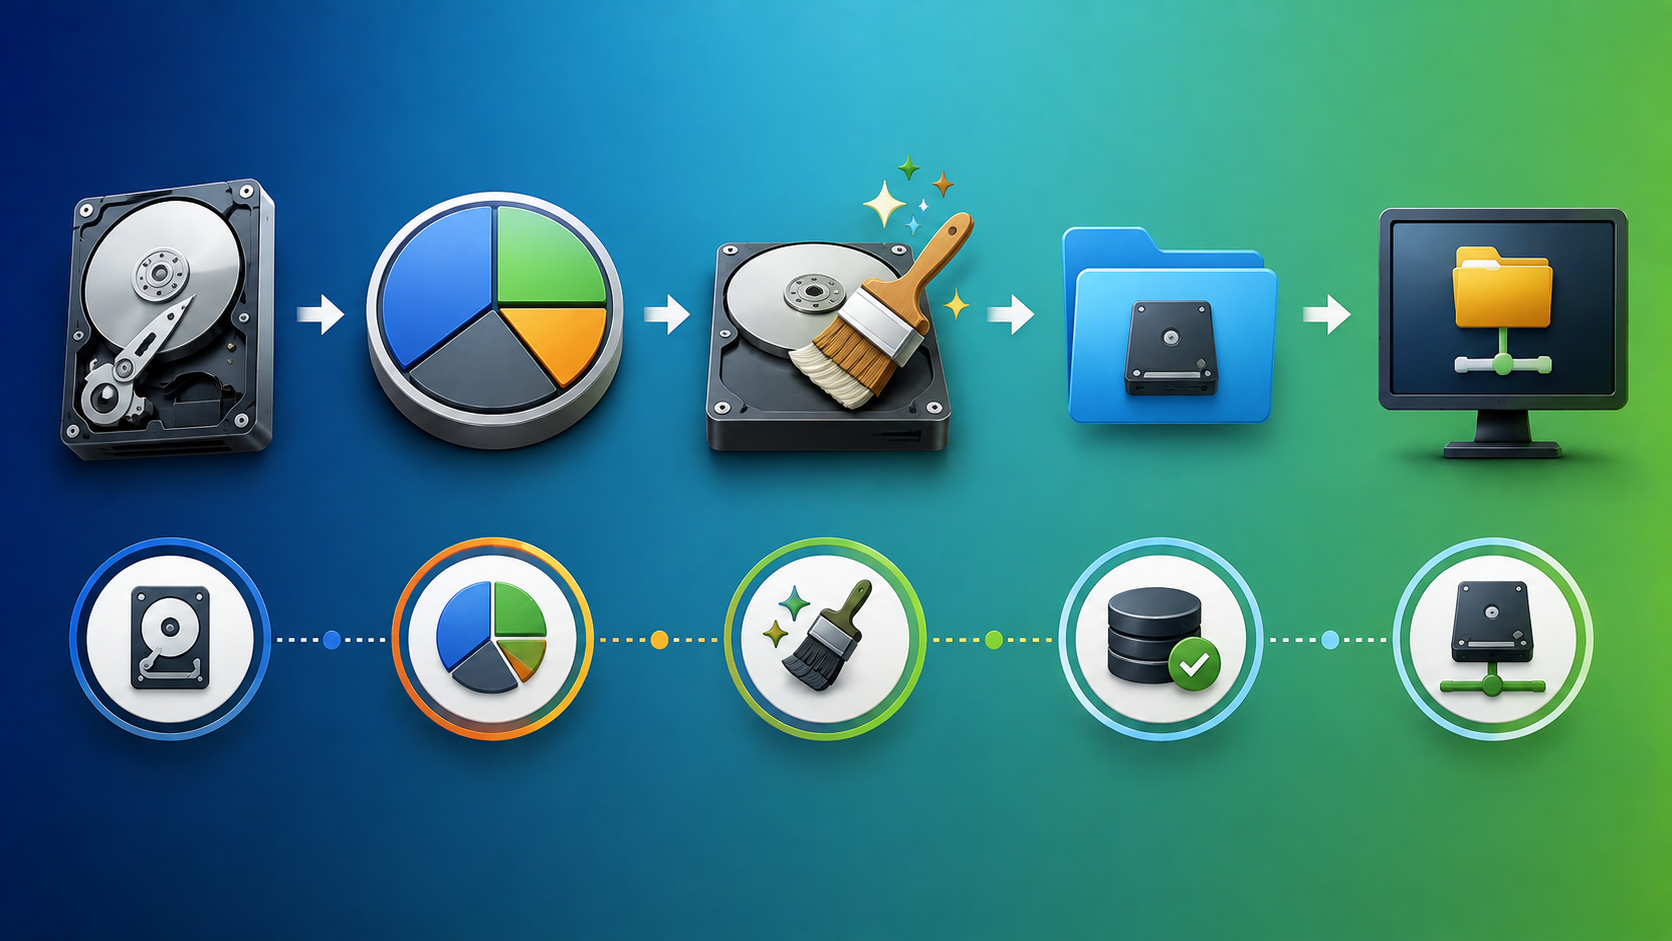
Creating Disk Partitions and Filesystems on RHEL 8 shows all the necessary steps to create a disk partition, a filesystem, and mount it to allow the administrator to use it.
Before moving forward, we’ve written an article about the partition table schemes MBR and GPT. We highly recommend that you check it out before taking any further action. Click here to access this article!
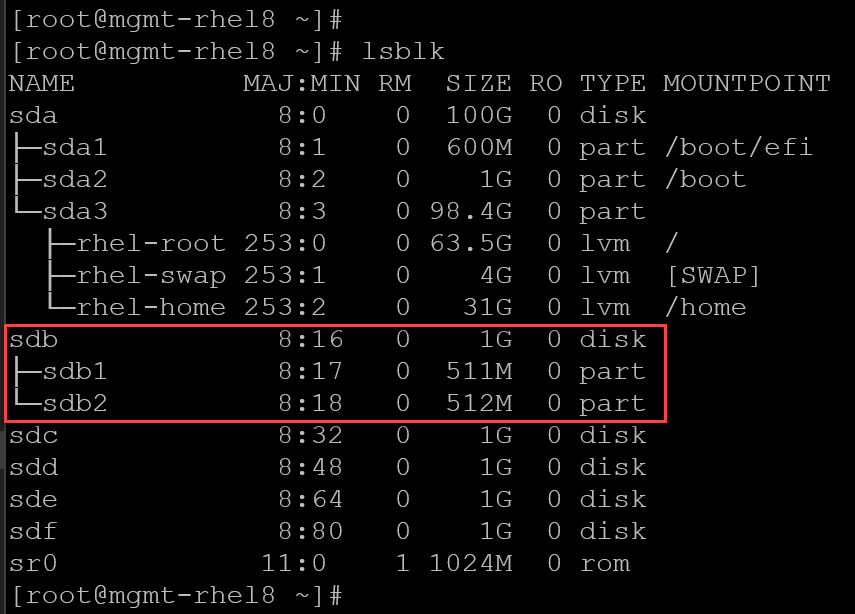
So, in our virtual machine with Red Hat Linux Enterprise 8, we’ve four block devices with their partition tables, as shown in the following picture:

For our first example, let’s focus on the “/dev/sdb” with an MBR (DOS) partition table.
Using parted in non-interactively mode
The “parted” program can be used interactively or non-interactively. In the first example, we will use “parted” non-interactively:
1- Create an MBR (msdos) partition table (label) on /dev/sdb:
parted -s /dev/sdb mklabel msdos
2- Create a primary partition from 1 MiB to 512 MiB, using the ext4 filesystem:
parted -s /dev/sdb mkpart primary ext4 1MiB 512MiB3- Create a second primary partition using the rest of the disk:
parted -s /dev/sdb mkpart primary ext4 512MiB 100%4- We can use the following command to see the partition details:
parted /dev/sdb print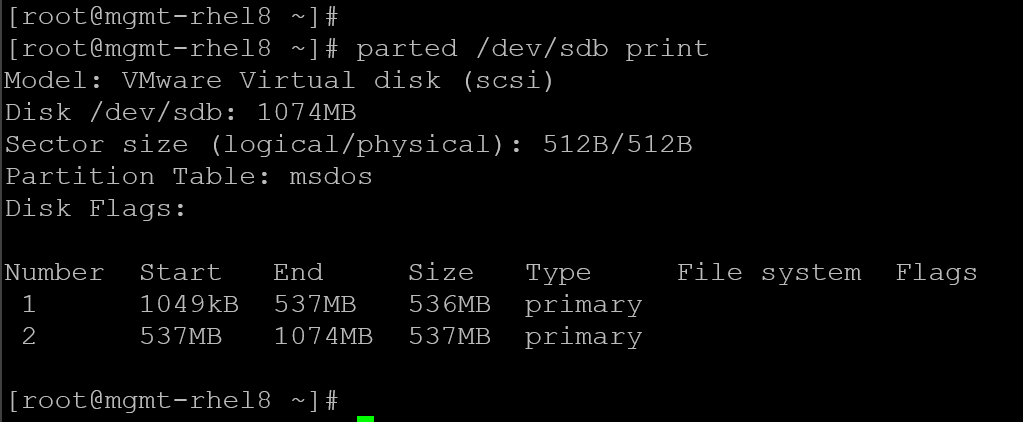
Note: The command “lsblk” also provides a view of the disk and their partitions:
5- The next step is to create the filesystem on top of each partition (sdb1 and sdb2) – in this example, we’re creating the ext4 filesystem on top of both disk partitions:
mkfs.ext4 /dev/sdb1
mkfs.ext4 /dev/sdb2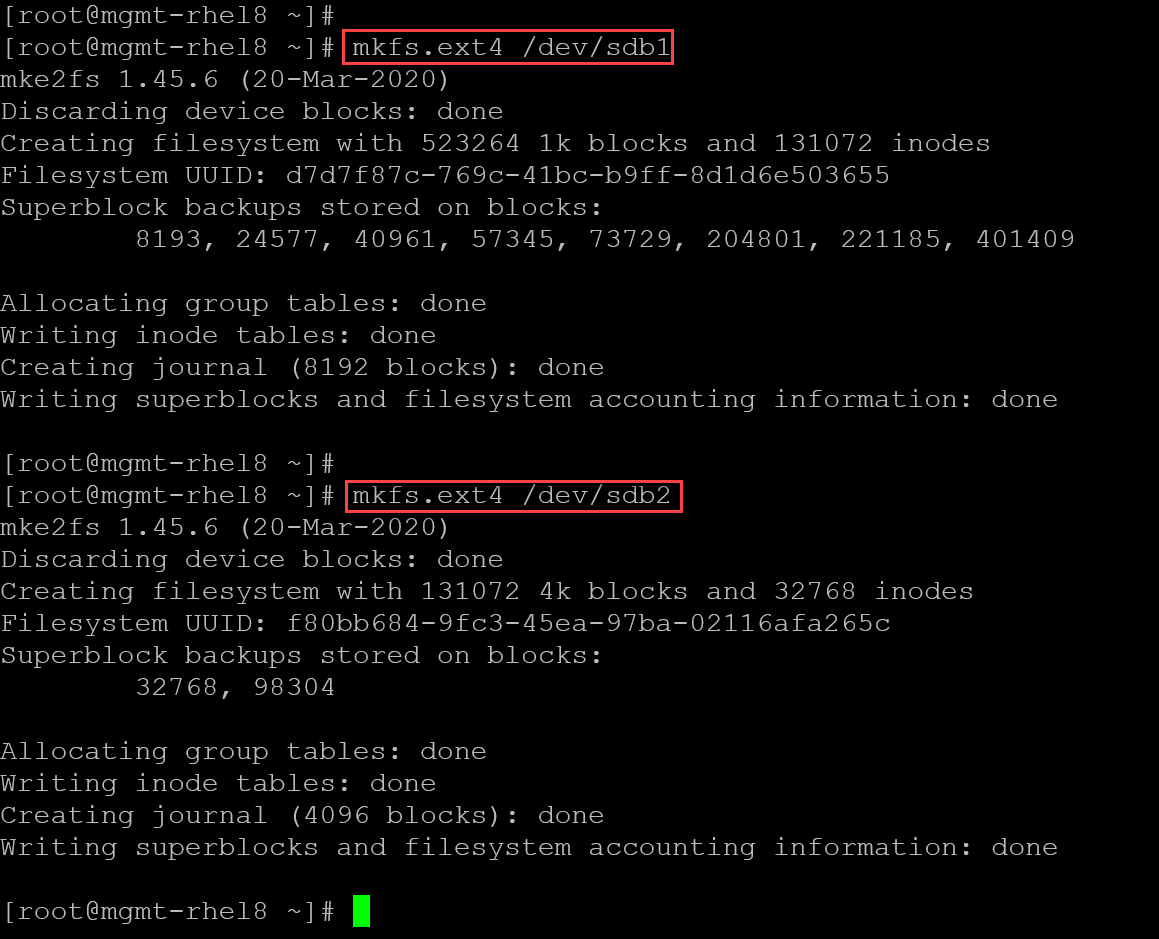
6- After creating the filesystem on the disk partition, we need to mount it.
To do that, first we need to create directories for mounting the disk partitions.
First, let’s create two directories under the /mnt:
# Directory for mounting the /dev/sdb1:
mkdir dir-ext4-sdb1

# Directory for mounting the /dev/sdb2:
mkdir dir-ext4-sdb2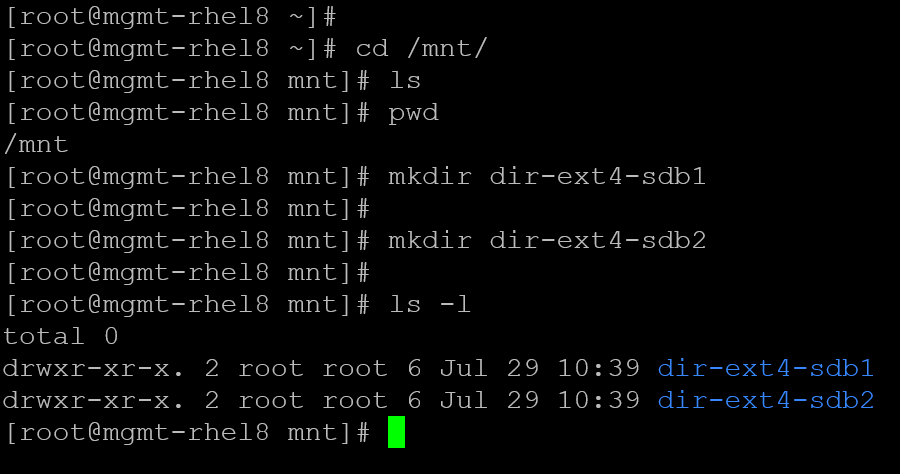
7- And now, let’s mount each disk partition:
# Mounting the disk partition /dev/sdb1 on /mnt/dir-ext4-sdb1:
mount -t ext4 /dev/sdb1 /mnt/dir-ext4-sdb1

# Mounting the disk partition /dev/sdb2 on /mnt/dir-ext4-sdb2:
mount -t ext4 /dev/sdb2 /mnt/dir-ext4-sdb2
We can run the “lsblk” command to confirm it:
lsblk -fi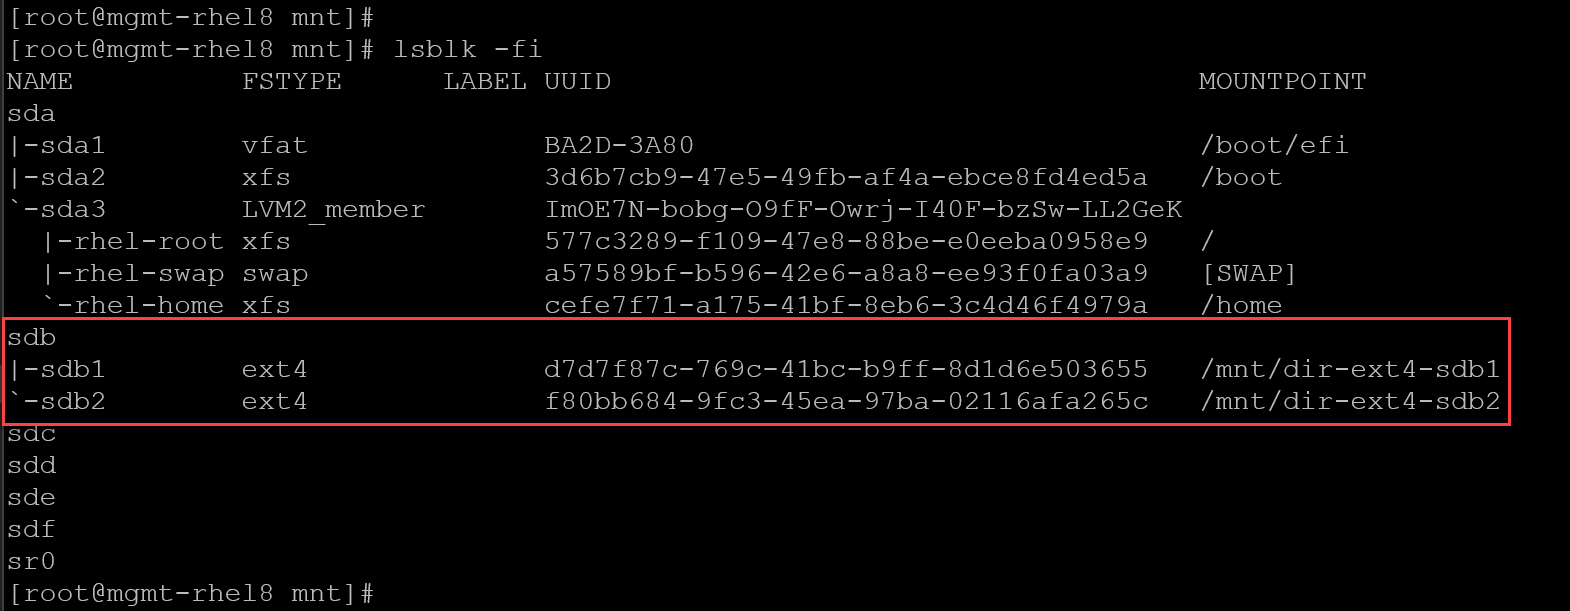
8- Test creation files and directories in each mount point:
# Creating empty files into /mnt/dir-ext4-sdb1:
touch /mnt/dir-ext4-sdb1/test-file1
touch /mnt/dir-ext4-sdb1/test-file2

# Creating empty files into /mnt/dir-ext4-sdb2:
touch /mnt/dir-ext4-sdb2/test-file1
touch /mnt/dir-ext4-sdb2/test-file2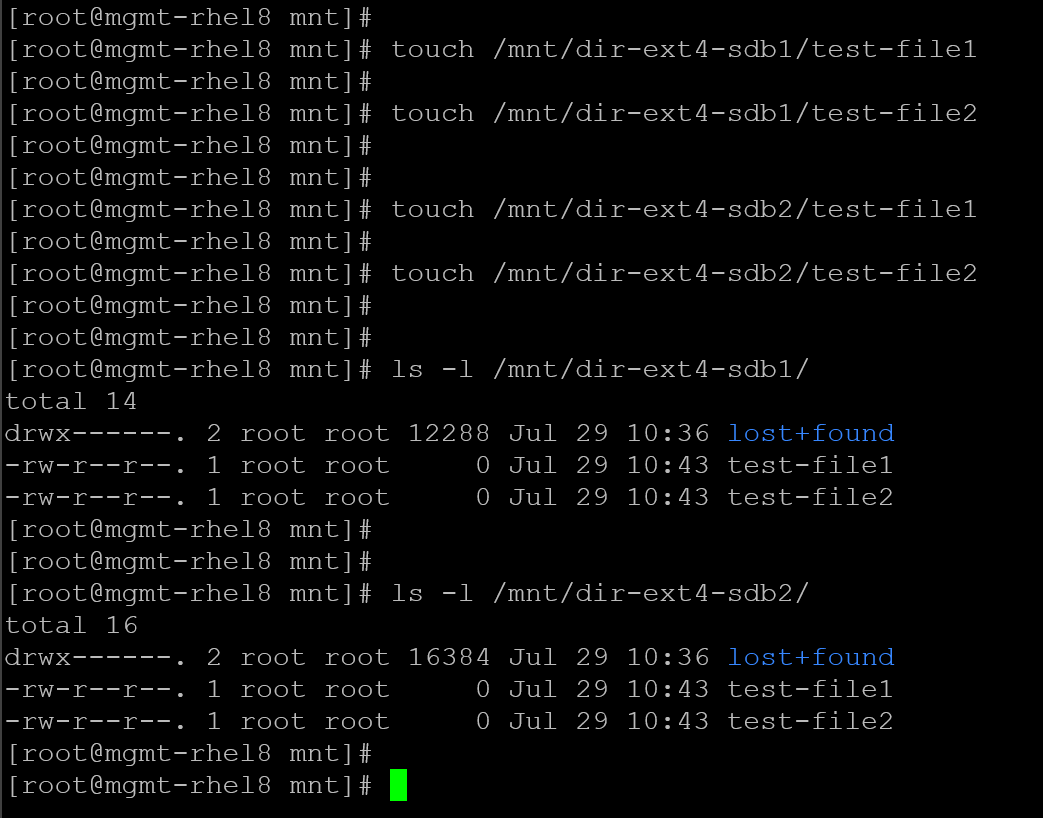
As we can see, the empty files have been created successfully on each mount point.
9- If we reboot the system, by default, both mount points will not be mounted automatically during the system boot. To mount them automatically, we need to edit the /etc/fstab and add the necessary entries. So, let’s do that:
Edit the configuration file /etc/fstab and add the following entries at the end of the file:
/dev/sdb1       /mnt/dir-ext4-sdb1      ext4    defauls 0       0
/dev/sdb2       /mnt/dir-ext4-sdb2      ext4    default 0       0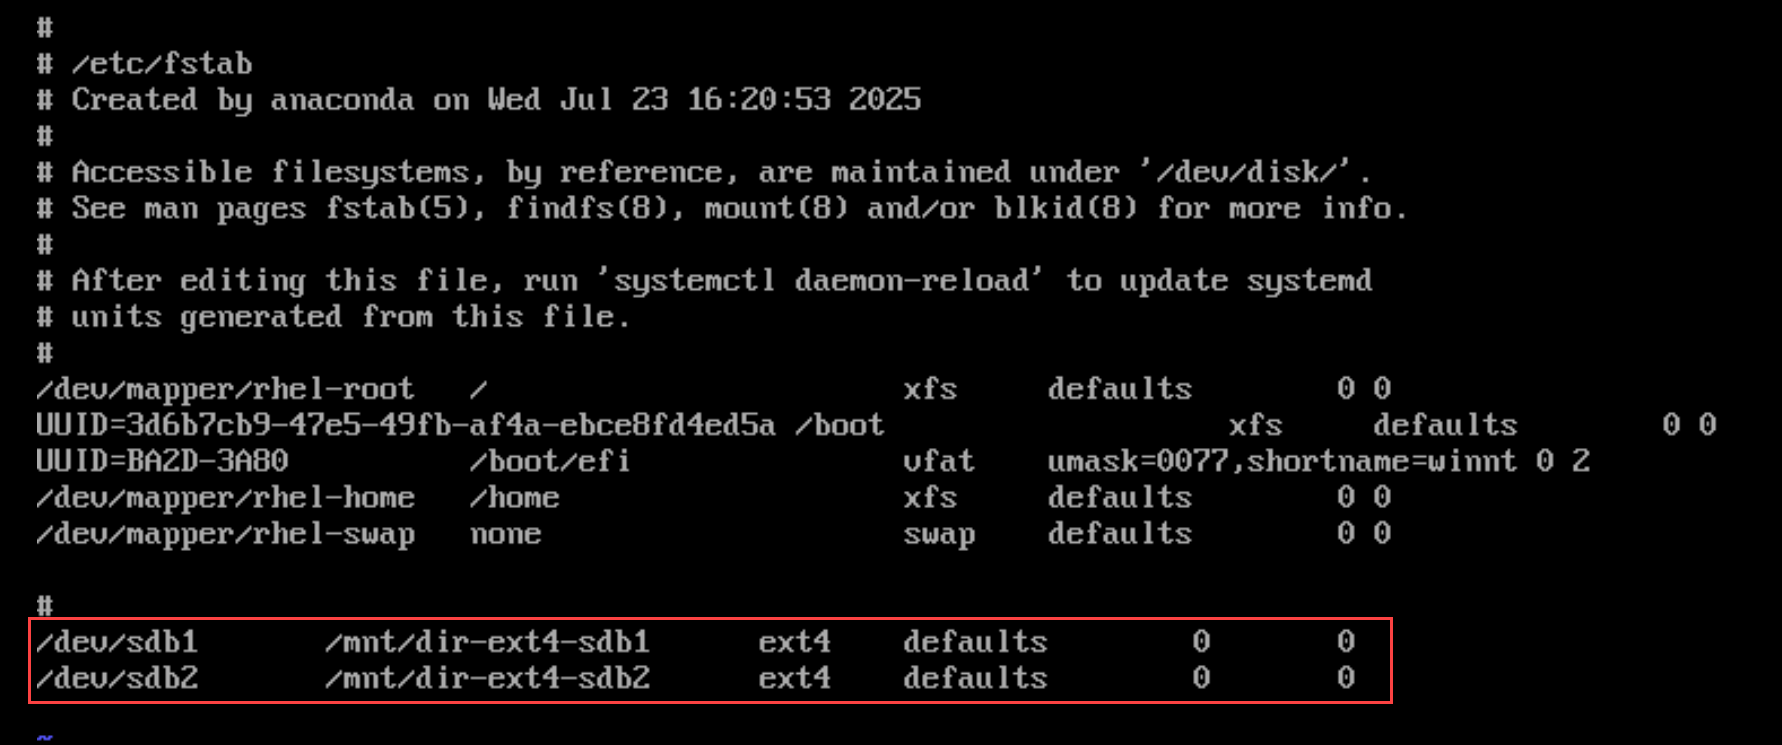
Save the file and execute:
mount -aThe “mount -a” mounts all filesystems (of the given types) mentioned in fstab (except for those whose line contains the noauto keyword). If you do not receive any errors after executing the mount command, it looks like everything is fine. You can go ahead and reboot the system to confirm that both disk partitions will be mounted automatically in the system boot.
Note: Check the added entries carefully in/etc/fstab before rebooting the system. If there is something wrong (syntax error, for example), the system will not boot (the system will enter emergency mode)!
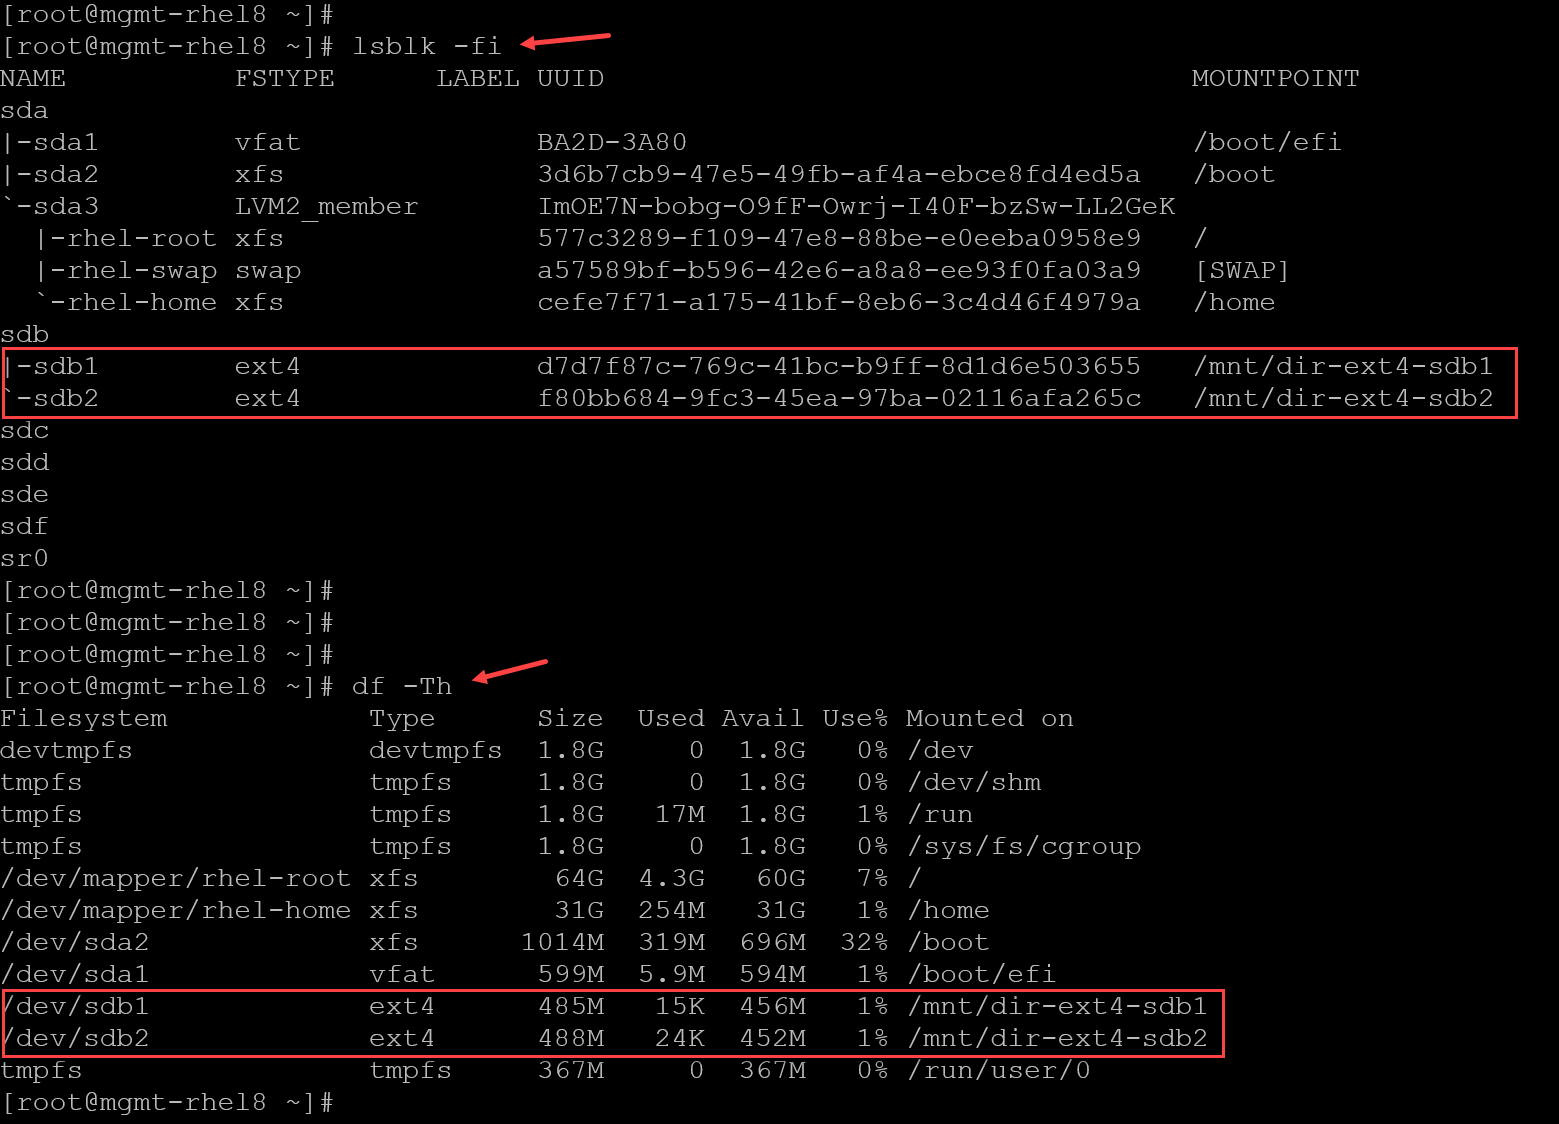
After rebooting the system, we can confirm that both disk partitions were mounted successfully:
Using parted in interactive mode
Let’s provide another example of creating disk partitions using the command parted in interactive mode. Note that we’ll use the block device /dev/sdc:
1- Launch parted in interactive mode to type commands one by one. This is great for manual experimentation:
parted /dev/sdc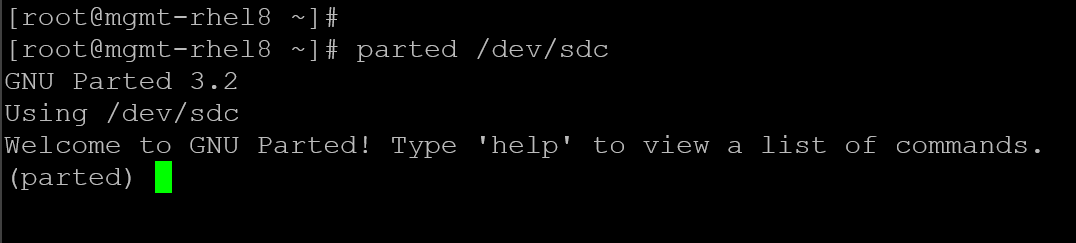
2- Initialize the disk with an empty GPT table:
mklabel gpt
3- Create the first partition with 128 MiB:
unit MiB
mkpart Partition1 ext4 1 128
4- Create the second partition with the remaining space:
mkpart Partition2 ext4 128 100%5- Print the partition table to see all the created partitions:
print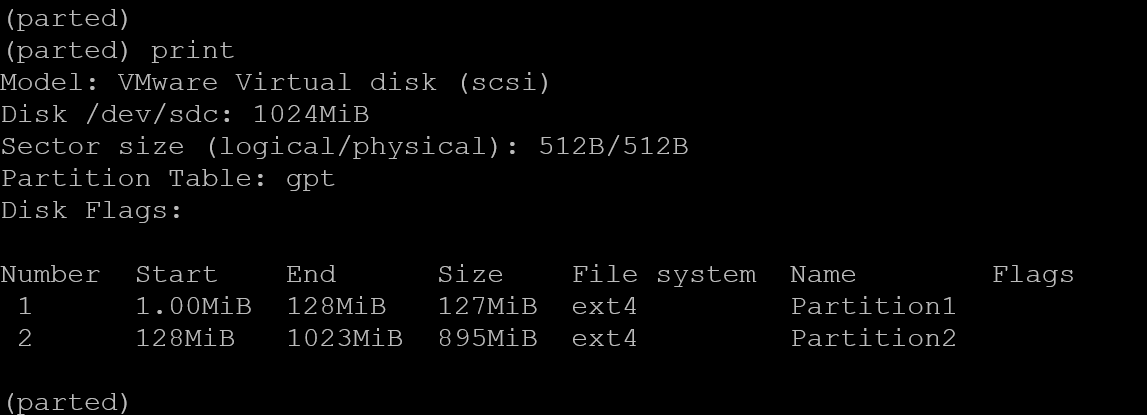
6- Enter “quit” to exit:

We can execute the following command to confirm the disk partitions:
parted /dev/sdc print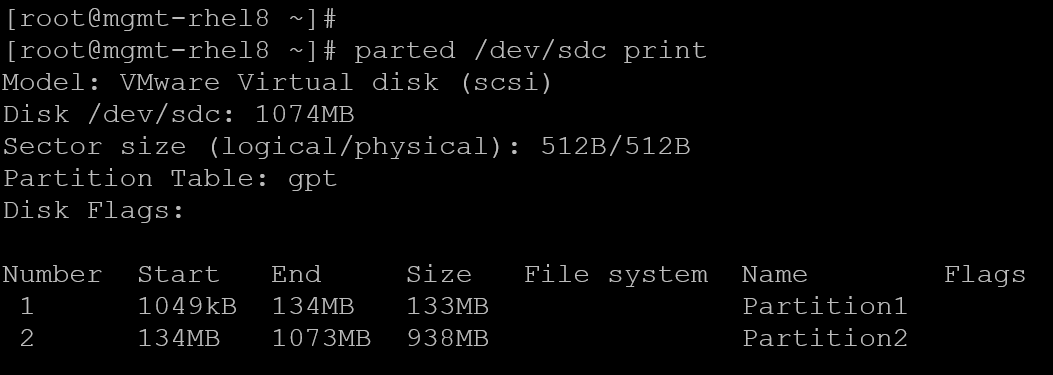
7- Create the directories under /mnt to mount the new disk partitions:
# Creating the dir to mount the sdc1:
mkdir dir-ext4-SDC1

# Creating the dir to mount the sdc2:
mkdir dir-ext4-SDC2
8- Create the filesystem ext4 on both disk partitions:
mkfs.ext4 /dev/sdc1
mkfs.ext4 /dev/sdc2
9- Edit the configuration file /etc/fstab to mount the new disk partitions automatically on the system boot:
/dev/sdc1       /mnt/dir-ext4-SDC1      ext4    defaults        0       0
/dev/sdc2       /mnt/dir-ext4-SDC2      ext4    defaults        0       0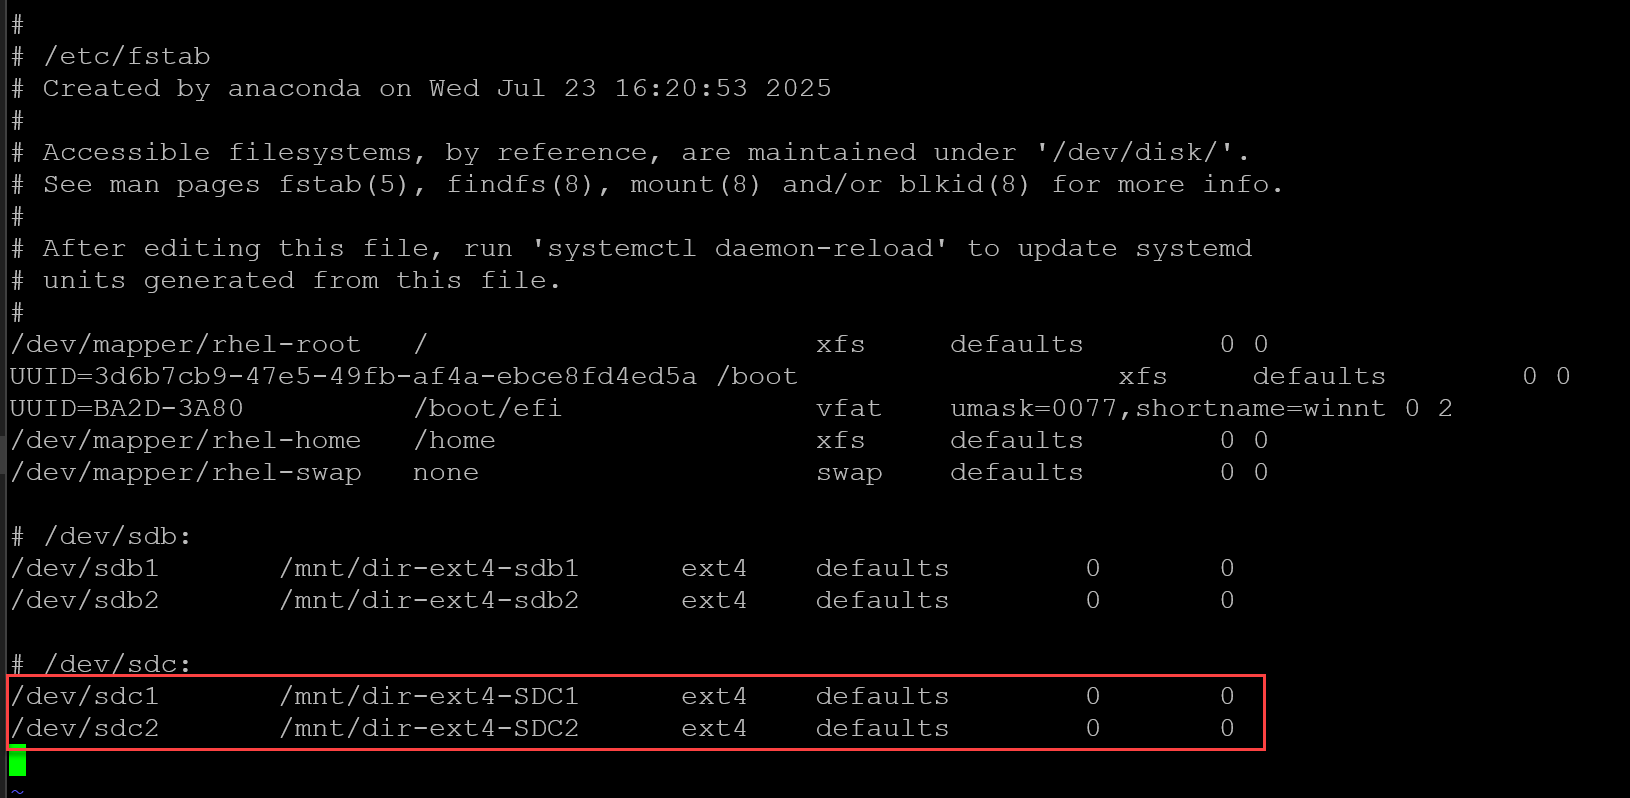
10- Execute the mount command to check if everything is okay in the /etc/fstab:
mount -a
Note: If you receive a message like that, follow the recommendation and run the command:
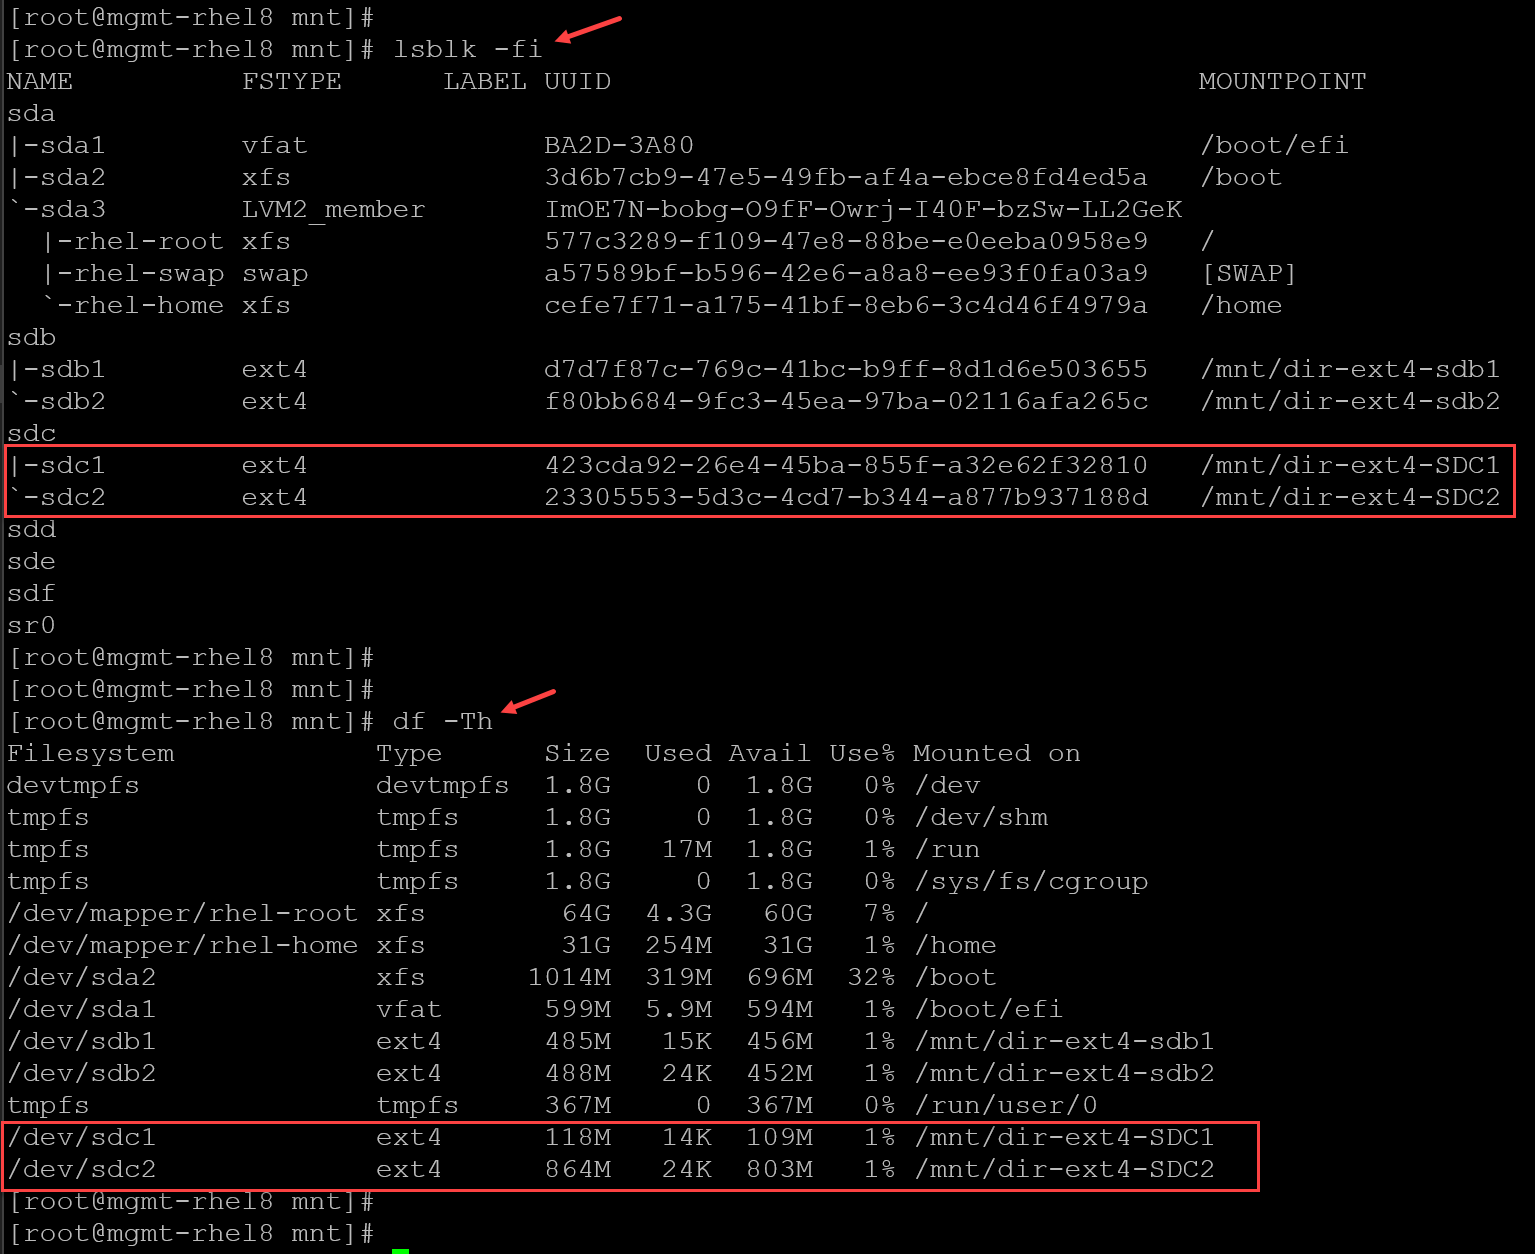
systemctl daemon-reloadNow, check if the disk partitions were mounted successfully:
Using fdisk
We can also use “fdisk” to create a disk partition. For this example, let’s consider using the block device /dev/sdd:
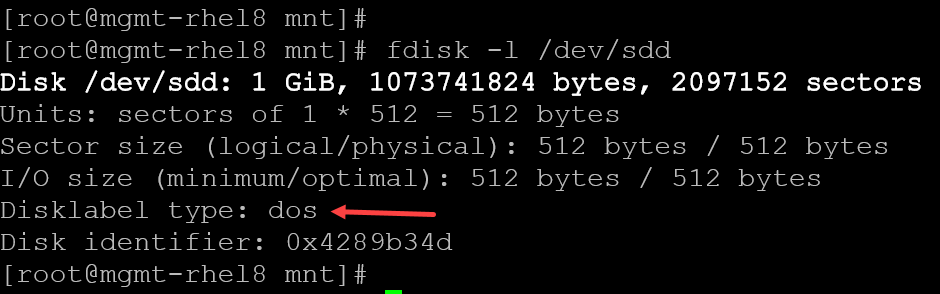
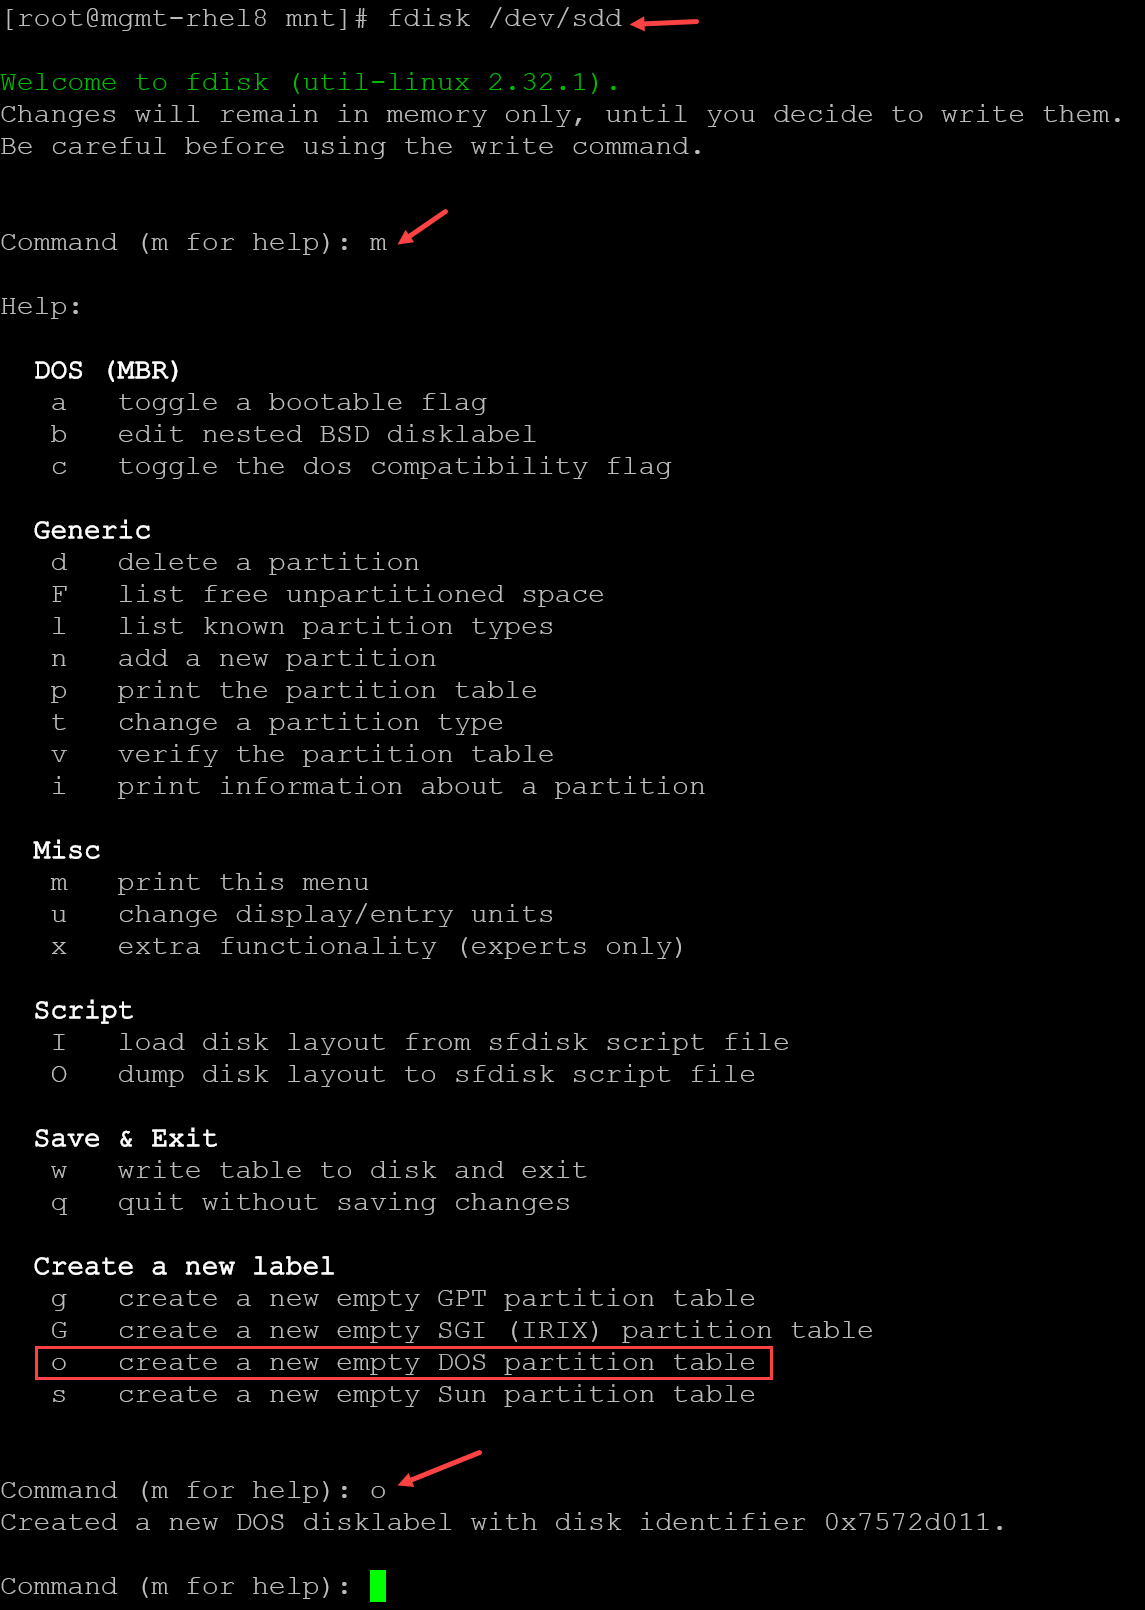
1- Let’s run the fdisk and create an empty MBR/DOS partition table:
fdisk /dev/sddPress “m” to see the menu and press “o” to create an empty MBR/DOS partition table:
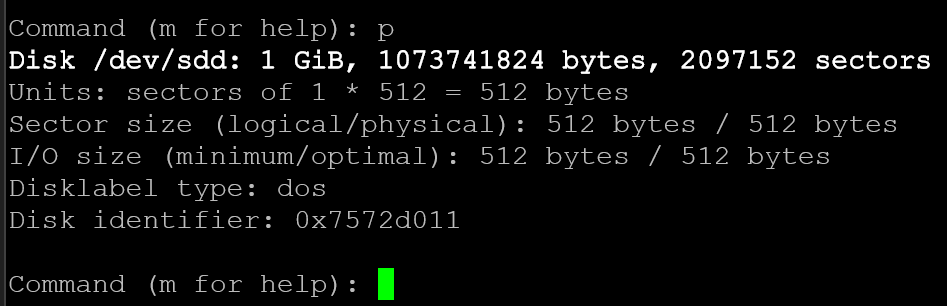
2- To print the partition table, press “p”. Since we created an empty partition table, it’s expected to see no partitions here:
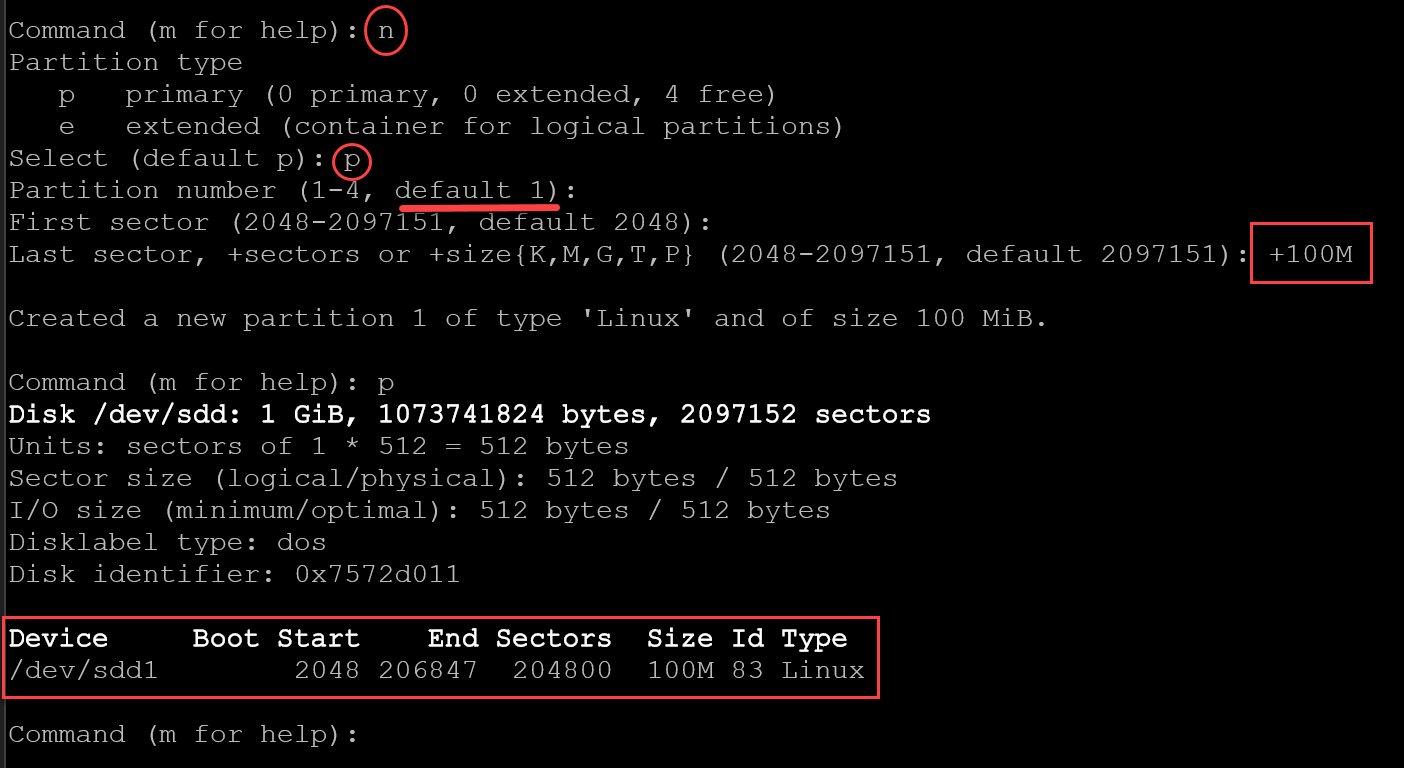
3- To create a partition, press “n” and follow the wizard. In this case, for instance, let’s create a primary partition with 100MB in size. To remember, an MBR partition table allows us to create a maximum of four primary partitions:
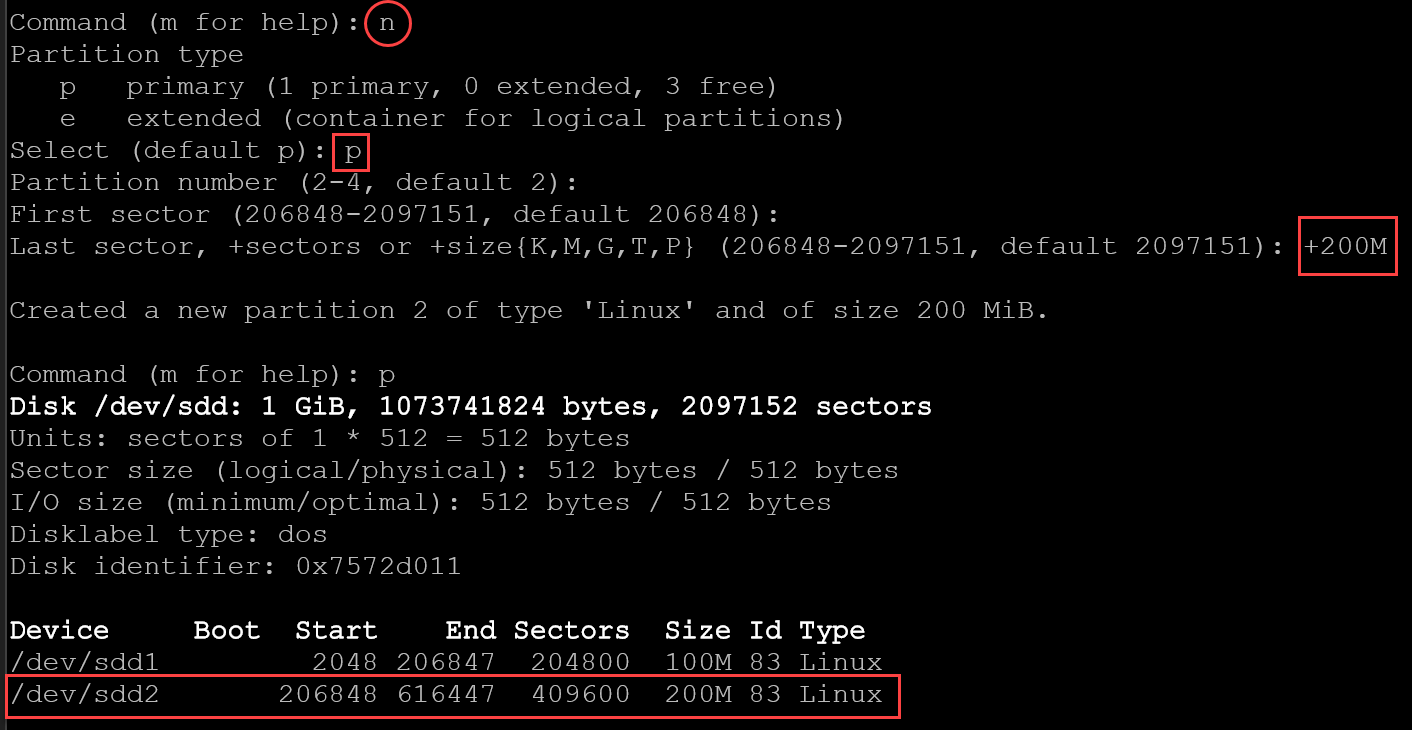
4- To create another primary partition with 200MB:
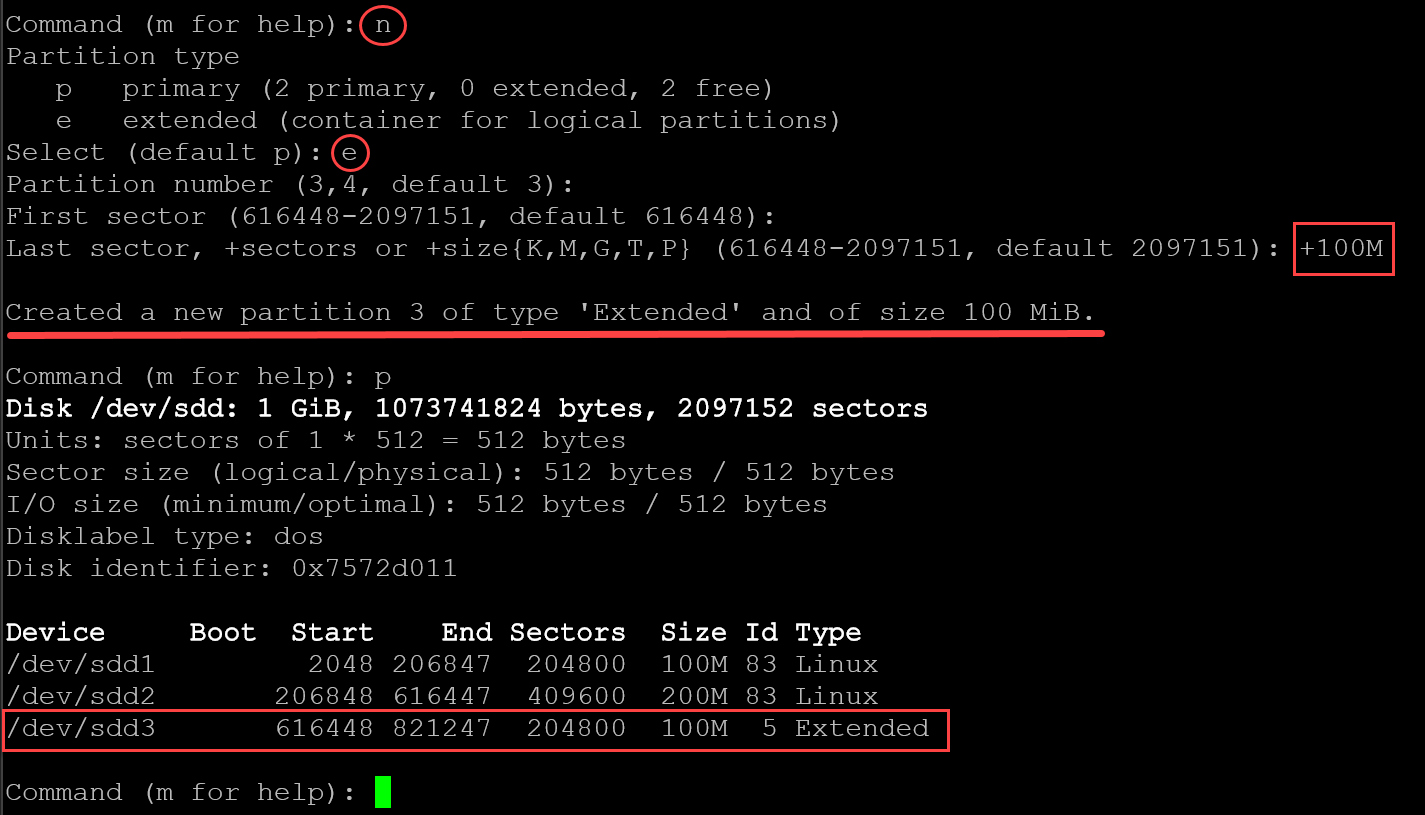
5- If you need more than four partitions using an MBR partition table, you need to create an extended partition, and under the extended partition, create more logical partitions:
After creating the extended partition, we can create the logical partitions. In this case, for instance, we’re creating a logical partition with 20MB:
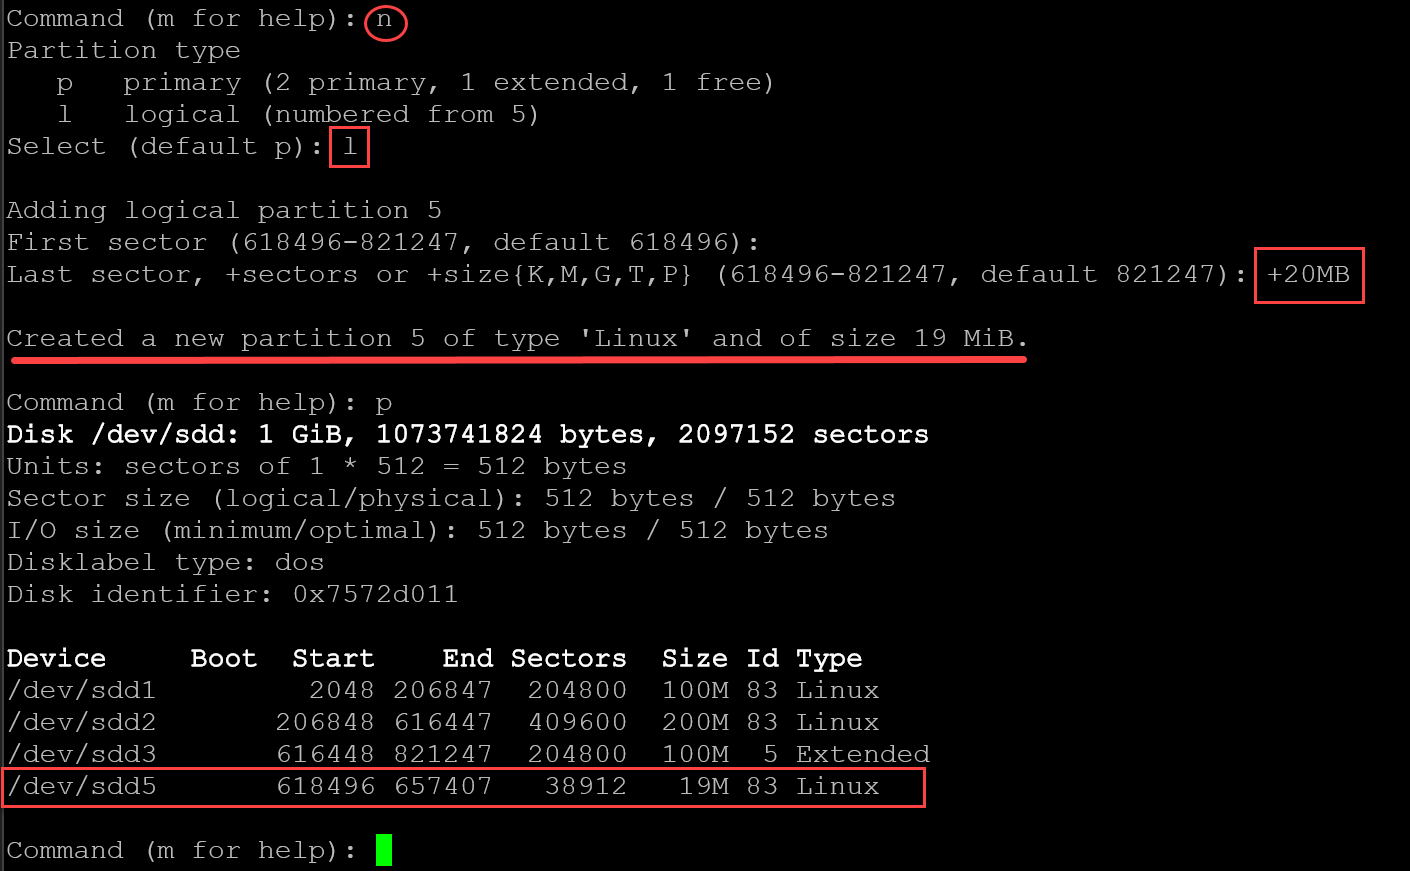
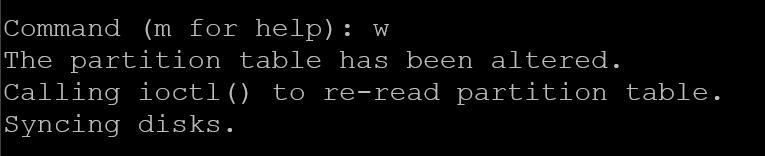
After creating all the necessary partitions, press “w” to write and exit the fdisk:
6- We can execute the “lsblk” to see details of all block devices:
lsblk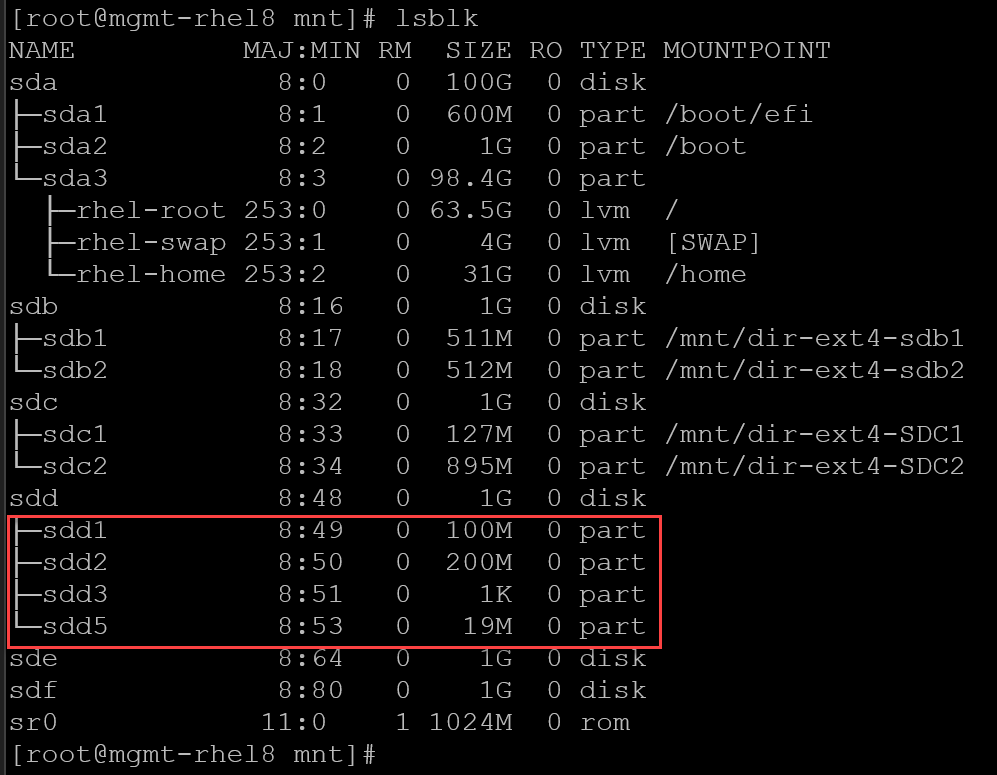
7- Create the filesystem on each disk partition. Let’s use the XFS filesystem:
# Creating the XFS filesystem on sdd1:
mkfs.xfs /dev/sdd1

# Creating the XFS filesystem on sdd2:
mkfs.xfs /dev/sdd2

# Creating the XFS filesystem on sdd5:
mkfs.xfs /dev/sdd5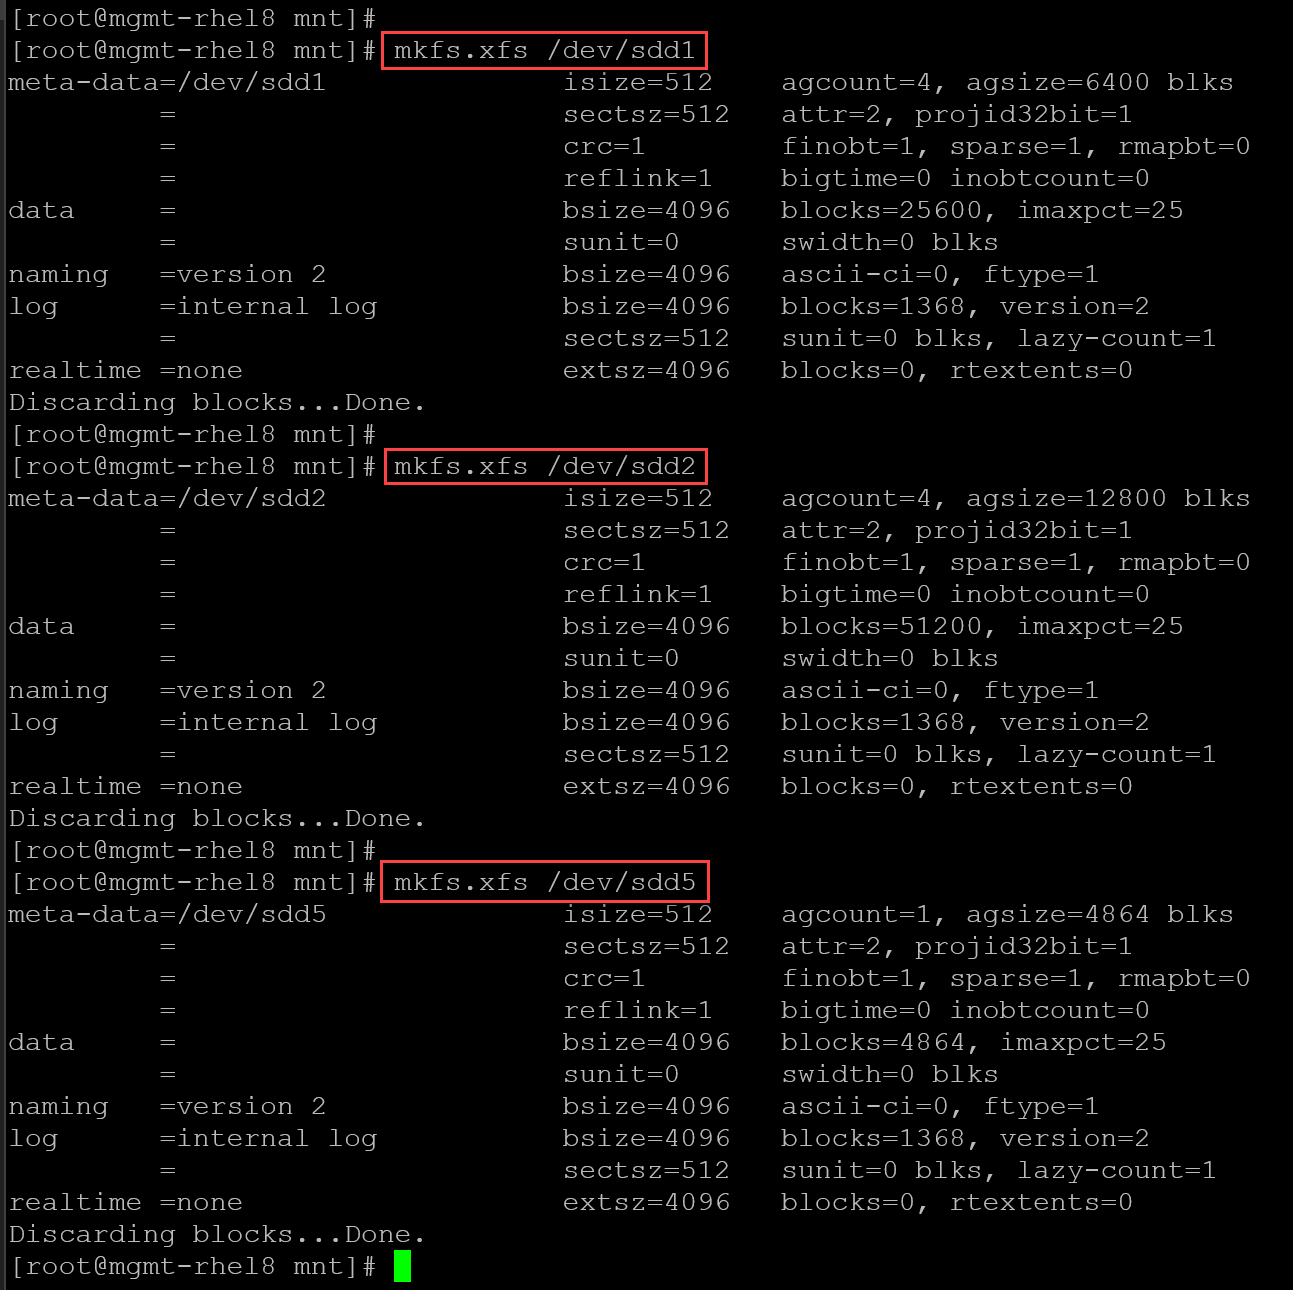
8- The last suggested step is to create local directories to mount all disk partitions and configure the /etc/fstab to mount all partitions on the system boot:
# Dir to mount the sdd1 - primary partition:
mkdir dir-xfs-SDD1

# Dir to mount the sdd2 - primary partition:
mkdir dir-xfs-SDD2

# Dir to mount the sdd5 - logical partition:
mkdir dir-xfs-SDD5
Add the following entries on the /etc/fstab:
/dev/sdd1       /mnt/dir-xfs-SDD1       xfs     defaults        0       0
/dev/sdd2       /mnt/dir-xfs-SDD2       xfs     defaults        0       0
/dev/sdd5       /mnt/dir-xfs-SDD5       xfs     defaults        0       0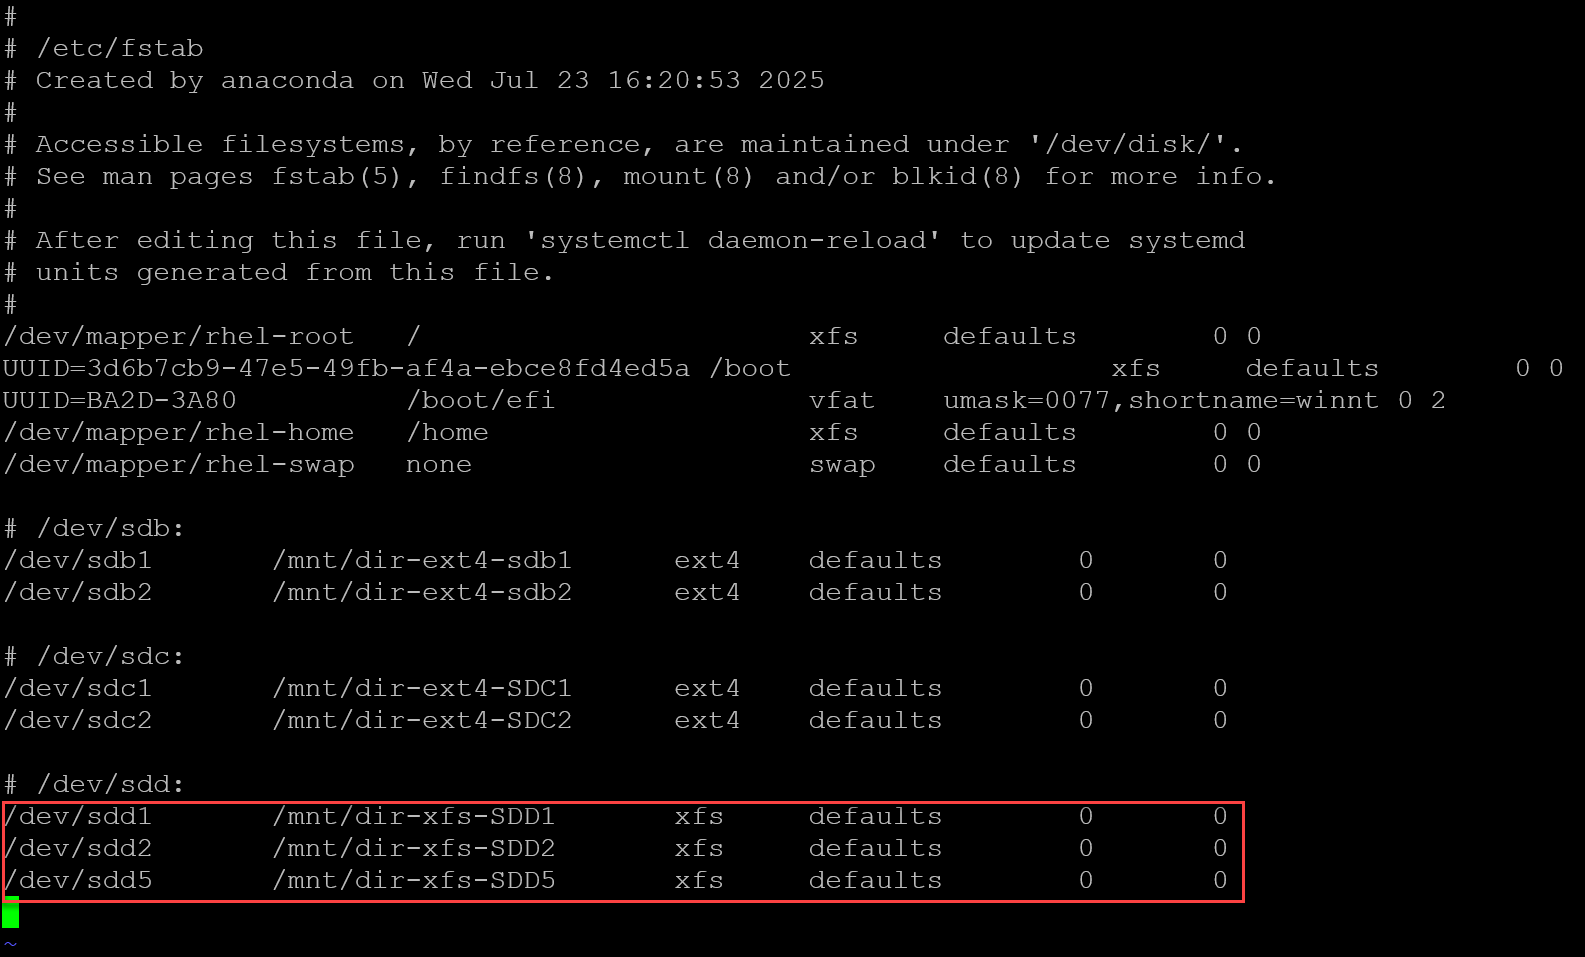
9- Test the entries on /etc/fstab by executing:
mount -a
systemctl daemon-reload
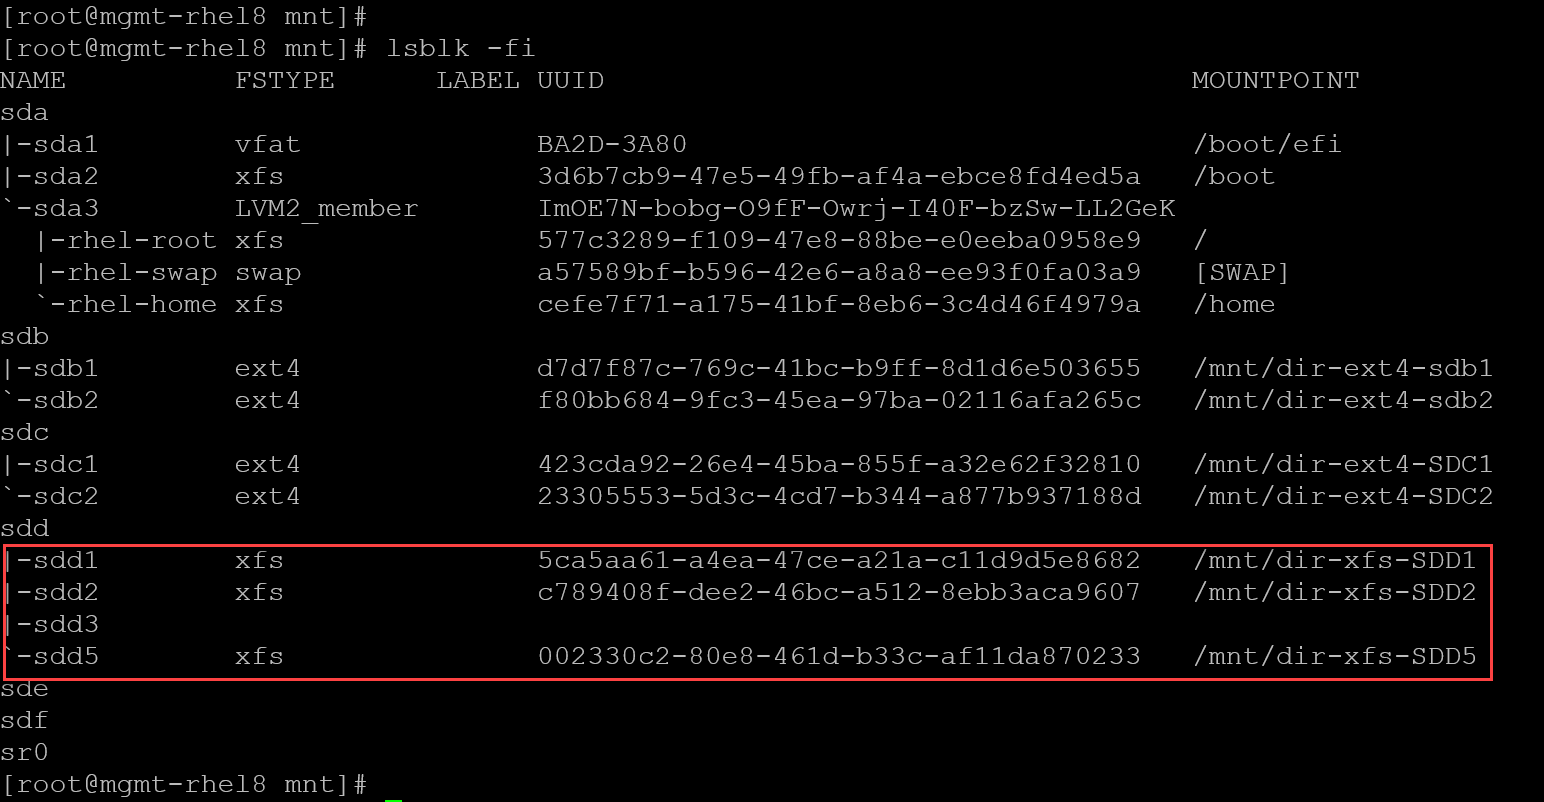
As we can see, all disk partitions on the block device sdd have been mounted successfully:
Using gdisk
GPT fdisk (aka gdisk) is a text-mode menu-driven program for the creation and manipulation of partition tables. It will automatically convert an old-style Master Boot Record (MBR) partition table or BSD disklabel stored without an MBR carrier partition to the newer Globally Unique Identifier (GUID) Partition Table (GPT) format, or will load a GUID partition table.
Let’s use the “gdisk” to create disk partitions on the block device sde.
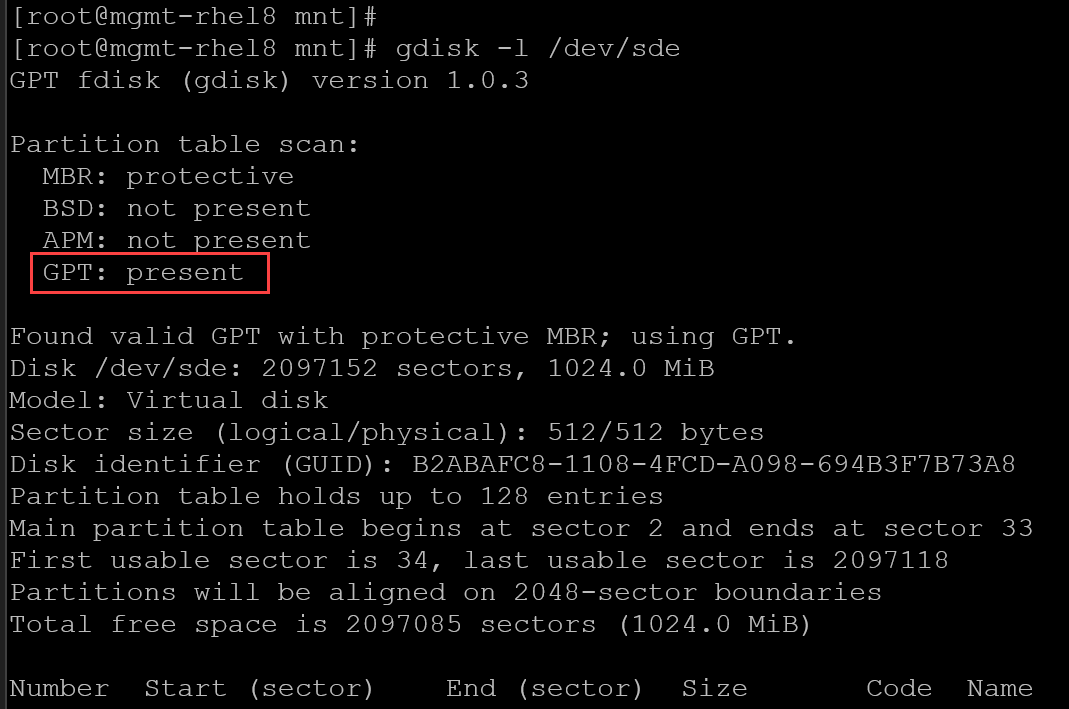
1- We can start by using a command to check the block device:
gdisk -l /dev/sdeAs we can see, we have a valid GPT partition table with no partitions:
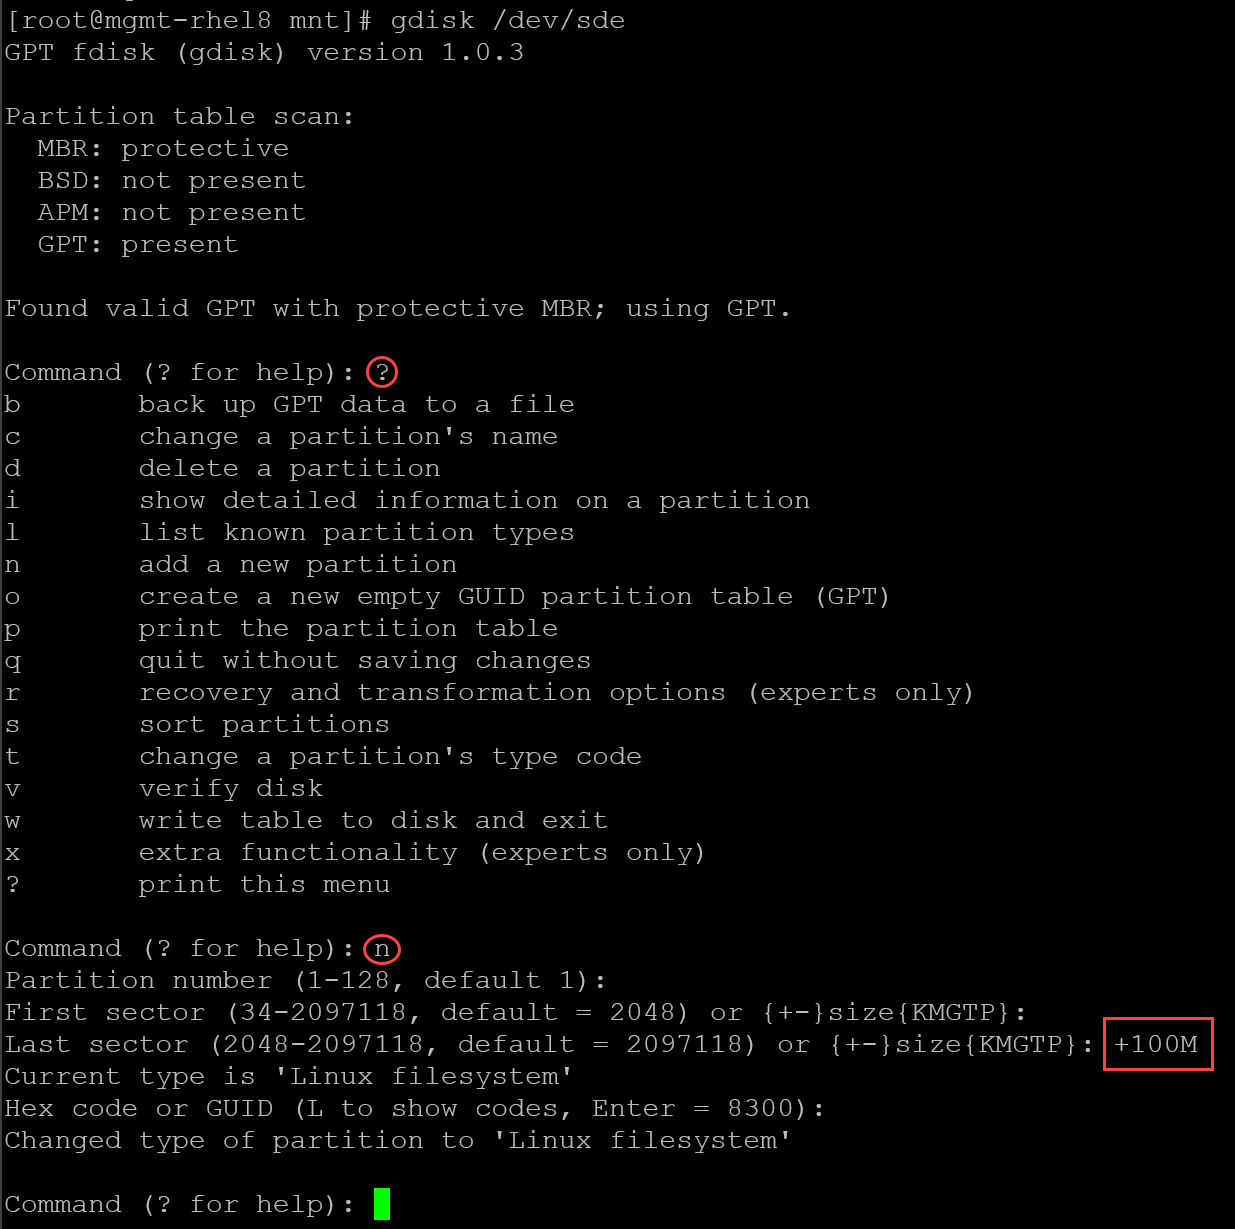
2- The “gdisk” is a menu-driven program. So, let’s execute it:
gdisk /dev/sdePress “?” to see the menu.
Press “n” to create a new partition.
In this case, we’re creating a 100MB partition:
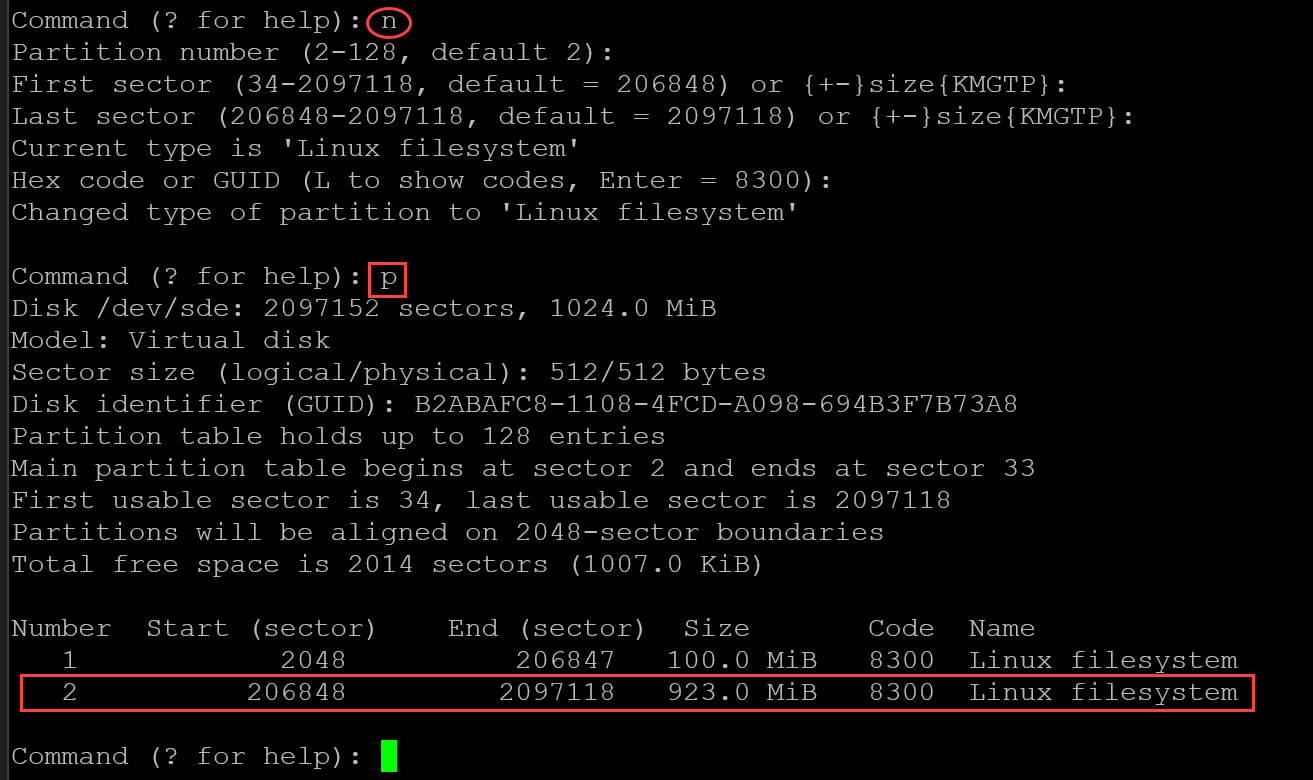
3- Let’s create one more partition with the remaining space:
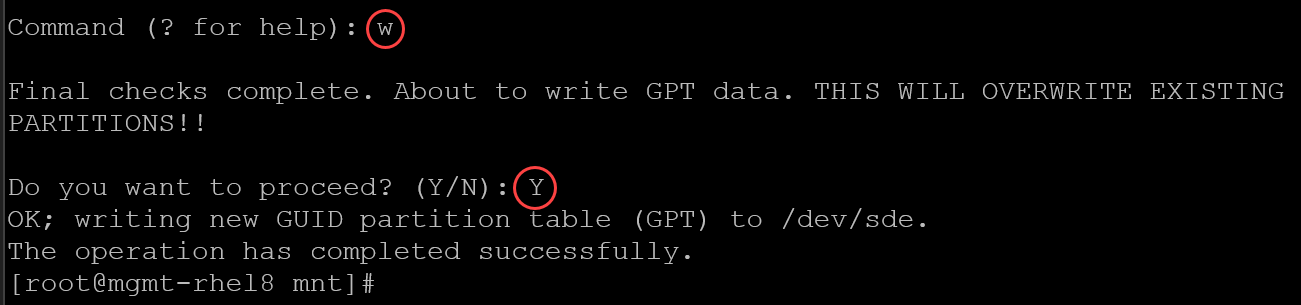
4- Press “w” to write all changes on disk and exit:
5- Create the filesystem over each disk partition. Let’s use the XFS filesystem:
mkfs.xfs /dev/sde1
mkfs.xfs /dev/sde2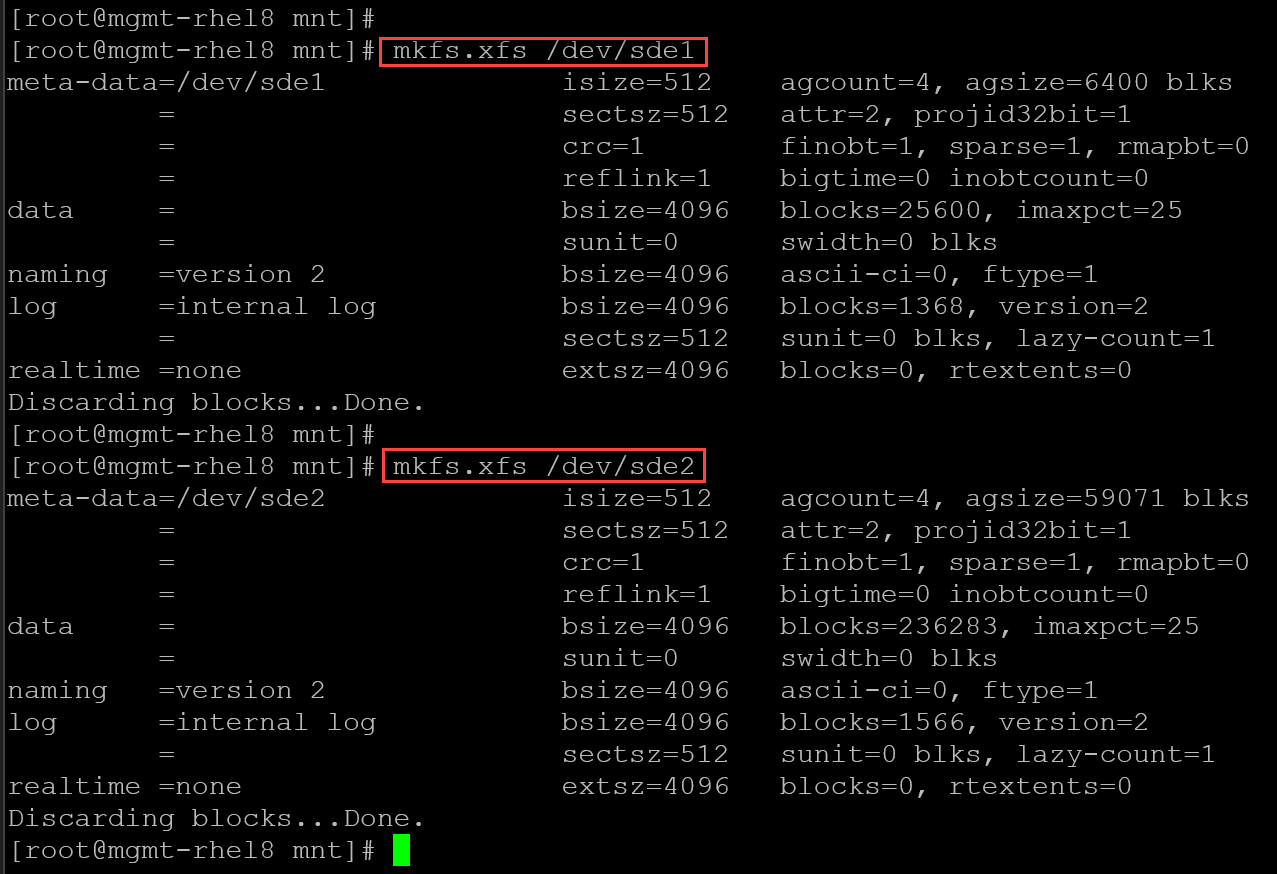
6- As usual, we need local directories to mount each disk partition. So, let’s create local directories for mounting each one:
mkdir dir-xfs-SDE1
mkdir dir-xfs-SDE2
7- And add the entries on the configuration file /etc/fstab:
/dev/sde1       /mnt/dir-xfs-SDE1       xfs     defaults        0       0
/dev/sde2       /mnt/dir-xfs-SDE2       xfs     defaults        0       0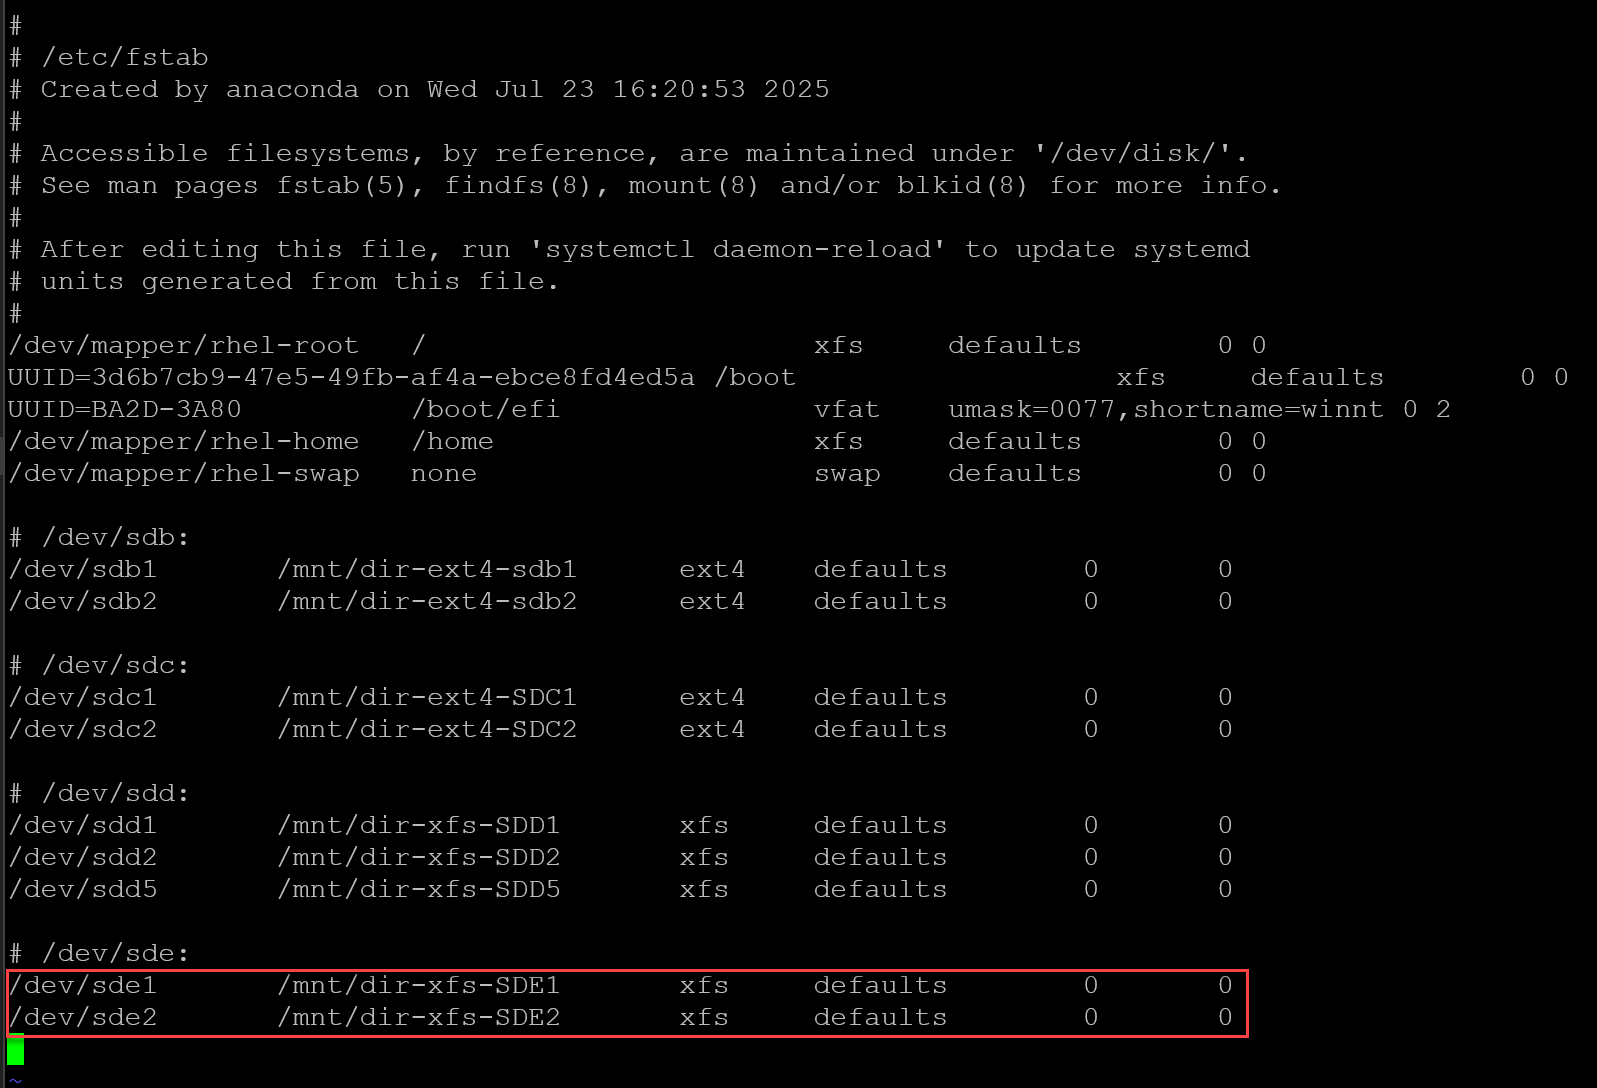
8- Execute the mount command to validate if everything is fine in the /etc/fstab:
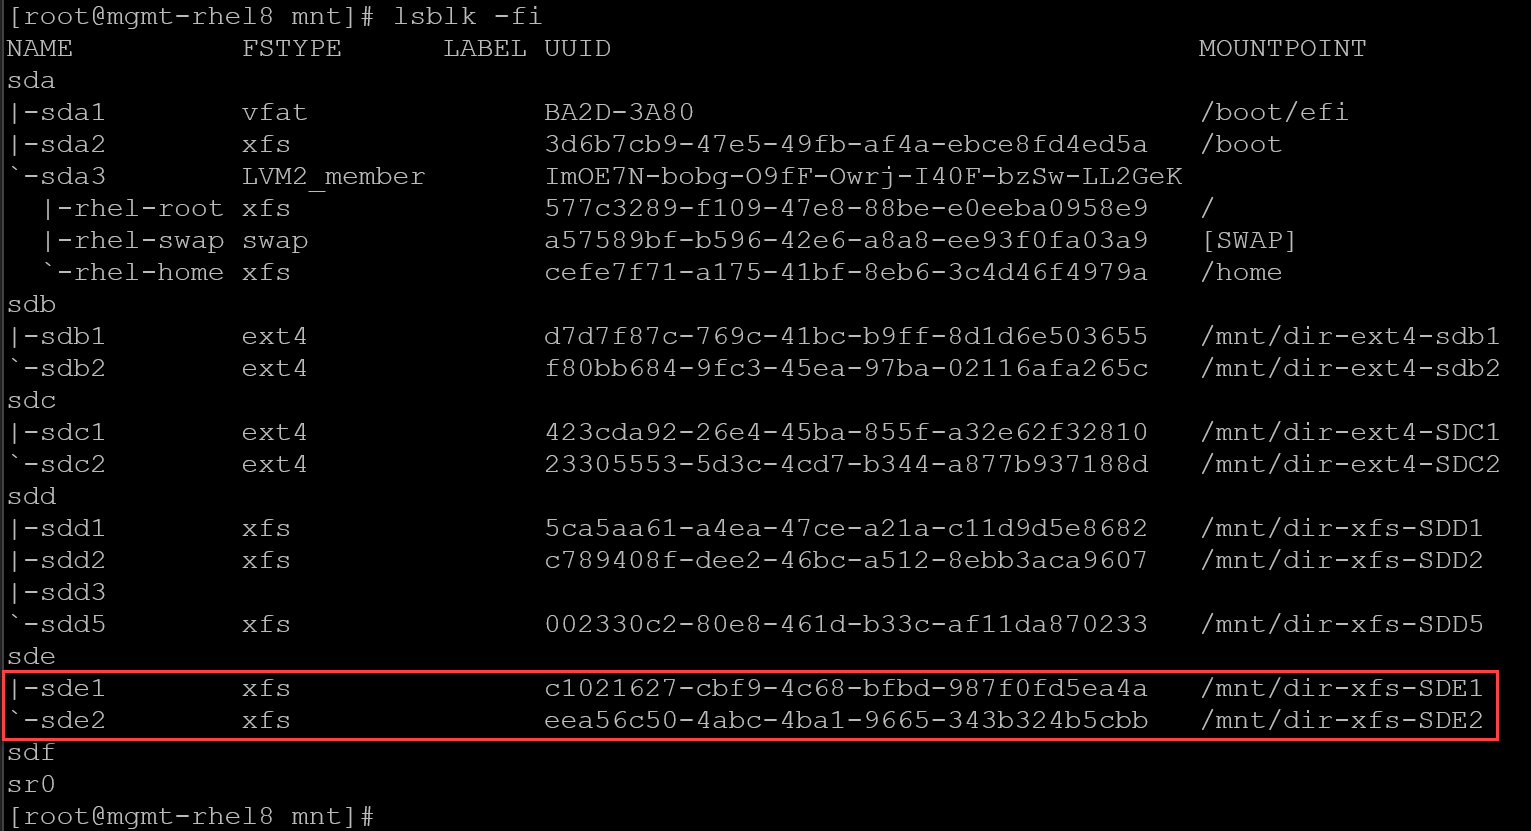
mount -aAs we can confirm in the following picture, both partitions have been mounted successfully:
That’s it for now 🙂
