

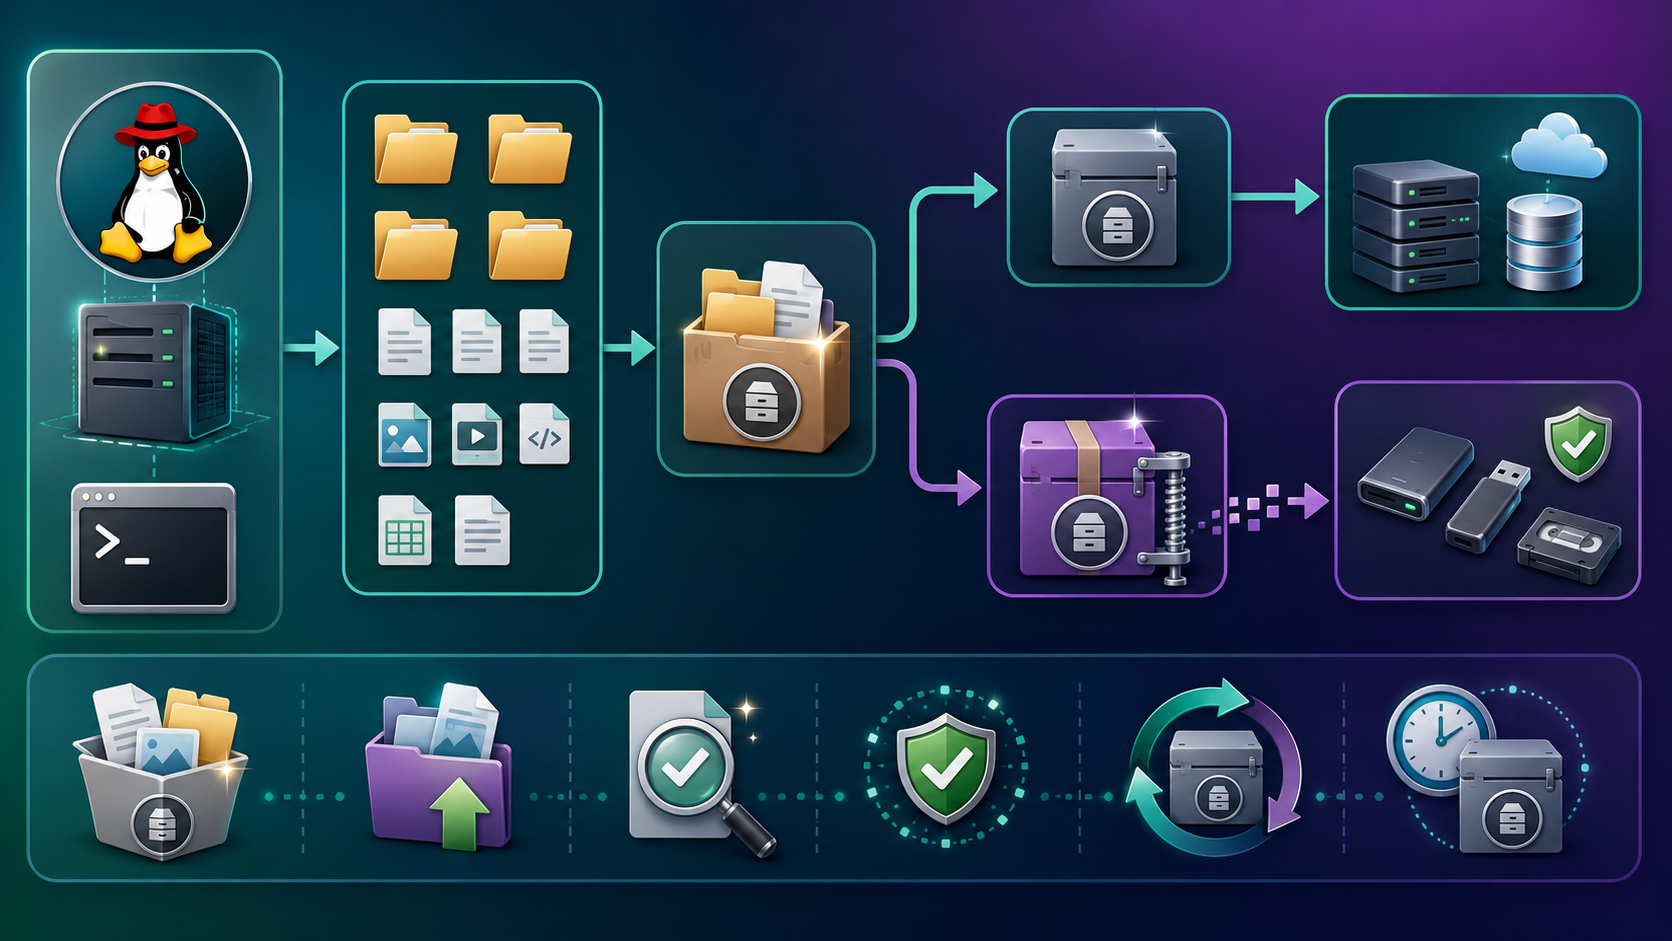
Using “tar” on RHEL 8 shows how to use the “tar” command to perform backups and archives, with or without compression, and provides a lot of examples of usage. All the practical examples are shown using Red Hat Enterprise Linux; however, they work on any Linux flavor.
First and foremost: What is “tar”?
The command “tar” stands for “tape archive”.
Originally used to back up data to tapes, but now commonly used for:
- Bundling many files/directories into a single archive file.
- Often combined with compression (gzip, bzip2, xz) to reduce size.
A “.tar” file is just an archive, with no compression by default.
A “.tar.gz” or “tgz” is a tar archive compressed with gzip.
A “.tar.bz2”, “tbz”, or “tbz2” is a tar archive compressed with bzip2.
Basic Command Structure and Common Options
The “tar” basic command structure is:
tar [options] [archive-file] [files...]Where:[options] tell tar what to do (create, extract, list, etc.).[archive-file] is the .tar or .tar.gz file – is the name of the tar file.[files...] are the files or directories you want to archive/extract.
The “tar” common options are:
| Option | Meaning |
|---|---|
c | Create an archive |
x | Extract from an archive |
t | List archive contents |
f | File name is given next |
v | Verbose — show files being processed |
z | Use gzip compression/decompression |
j | Use bzip2 compression/decompression |
J | Use xz compression/decompression |
C dir | Change to directory before processing |
| r | Append directories or files to an existing archive |
Creating Archives
To create archives without compression. For example:
tar -cf /tmp/backup-etc.tar -C /etc .Where:
– c = Create a new tar file
– f /tmp/backup = Output file name
-C /etc = Change to directory /etc before processing
. = Considering all contents inside the current directory

To create archives with GZIP compression:
tar -czf /tmp/backup-etc.tar.gz -C /etc .Where:
-z = GZIP compression
.tar.gz = is the common extension when using GZIP compression

To create archives with BZIP2 compression:
tar -cjf /tmp/backup-etc.tar.bz2 -C /etc .Where:
-j = BZIP2 compression
.tar.bz2 = is the common extension when using BZIP2 compression

Note: Just a curiosity, based on our simple test, the BZIP compression is more space-saving than GZIP compression:
Tar file + GZIP to the entire /etc = 8.4 MB:

Tar file + BZIP2 to the entire /etc = 6.6 MB:

Listing Contents on Archive Files
The “tar” option to list contents into a file “.tar” is “-t”:
If you have a “tar” archive file and want to list its content:
# Listing content of the ".tar" file:
tar -tf backup-etc.tar

# Listing content of the "tar.gz" file:
tar -tzf backup-etc.tar.gz

# Listing content of the "tar.bz2" file:
tar -tjf backup-etc.tar.bz2
If you need to see additional details such as permissions, user owner, group owner, etc, you can use the verbose option (-v). For example:
tar -tvf backup-etc.tar

tar -tvzf backup-etc.tar.gz

tar -tvjf backup-etc.tar.bz2
Extracting Archives
The “tar” option to extract the content of a “.tar” file is “-x”:
tar -xf /tmp/backup-etc.tarTo extract a “.tar” file to a specific directory:
tar -xf /tmp/backup-etc.tar -C /tmp/extractedTo extract a “tar.gz” file (compressed with GZIP):
tar -xzf /tmp/backup-etc.tar.gz -C /tmp/extractedTo extract a “tar.bz2” file (compressed with BZIP2):
tar -xjf /tmp/backup-etc.tar.bz2 -C /tmp/extractedQuick Reference Table
| Action | gzip (.tar.gz) | bzip2 (.tar.bz2) |
|---|---|---|
| Create | tar -czf file.tar.gz files... | tar -cjf file.tar.bz2 files... |
| List | tar -tzf file.tar.gz | tar -tjf file.tar.bz2 |
| Extract | tar -xzf file.tar.gz | tar -xjf file.tar.bz2 |
Practical Examples
1- Back up the /etc directory into a compressed archive. Do it twice using GZIP and BZIP2. Save the archive file in the /tmp directory:
# Compressing using GZIP:
tar -czvf /tmp/backup-etc.tar.gz -C /etc .

# Compressing using BZIP2:
tar -cjvf /tmp/backup-etc.tar.bz2 -C /etc .
2- Extract a single file:
Extract the file “passwd” from the GZIP file /tmp/backup-etc.tar.gz:
tar -tzf backup-etc.tar.gz | grep -i passwd
tar -xzf backup-etc.tar.gz ./passwd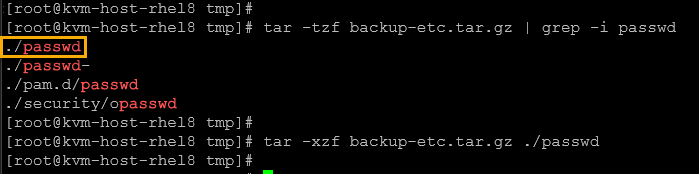
Extract the file “hosts” from the BZIP2 file /tmp/backup-etc.tar.bz2:
tar -tjf backup-etc.tar.bz2 | grep -i hosts
tar -xjf backup-etc.tar.bz2 ./hosts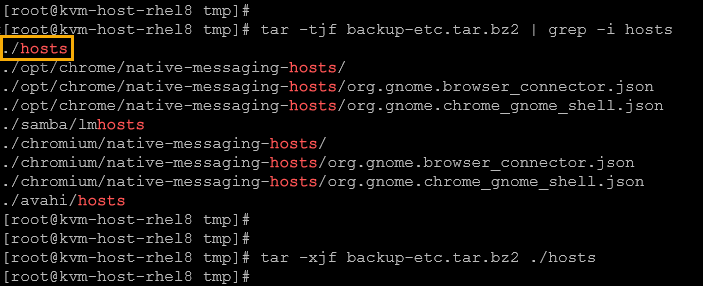
3- Add files (append) into existing “tar” files:
- We can append files to uncompressed “.tar” files directly.
- We cannot append directly to compressed archives (.tar.gz or .tar.bz2) – we must decompress them first, append, and then recompress.
Note: tar archives store files sequentially, but once they’re compressed, the data is in a single continuous compressed stream.
Appending directly would corrupt that stream, so you must decompress, modify, and recompress.
3.1- Append to an uncompressed “.tar”.
Add/append the file “added-tar.txt” to the archive “backup-etc.tar”:
tar -rf backup-etc.tar added-tar.txt

# to confirm if the file was added:
tar -tf backup-etc.tar | grep -i added-tar.txt
3.2- Append the file “added-gzip.txt” to the archive “backup-etc.tar.gz”:
# Decompress:
gunzip backup-etc.tar.gz

# Append the file:
tar -rf backup-etc.tar added-gzip.txt

# Recompress:
gzip backup-etc.tar

# To confirm if the file was added/appended:
tar -tzf backup-etc.tar.gz | grep -i added-gzip.txt
3.3- Append the file “added-bzip2.txt” to the archive “backup-etc.tar.bz2”:
# Decompress:
bunzip2 backup-etc.tar.bz2

# Append:
tar -rf backup-etc.tar added-bzip2.txt

# Recompress:
bzip2 backup-etc.tar

# Confirm:
tar -tf backup-etc.tar.bz2 | grep -i added-bzip2.txt
That’s it for now 🙂
