

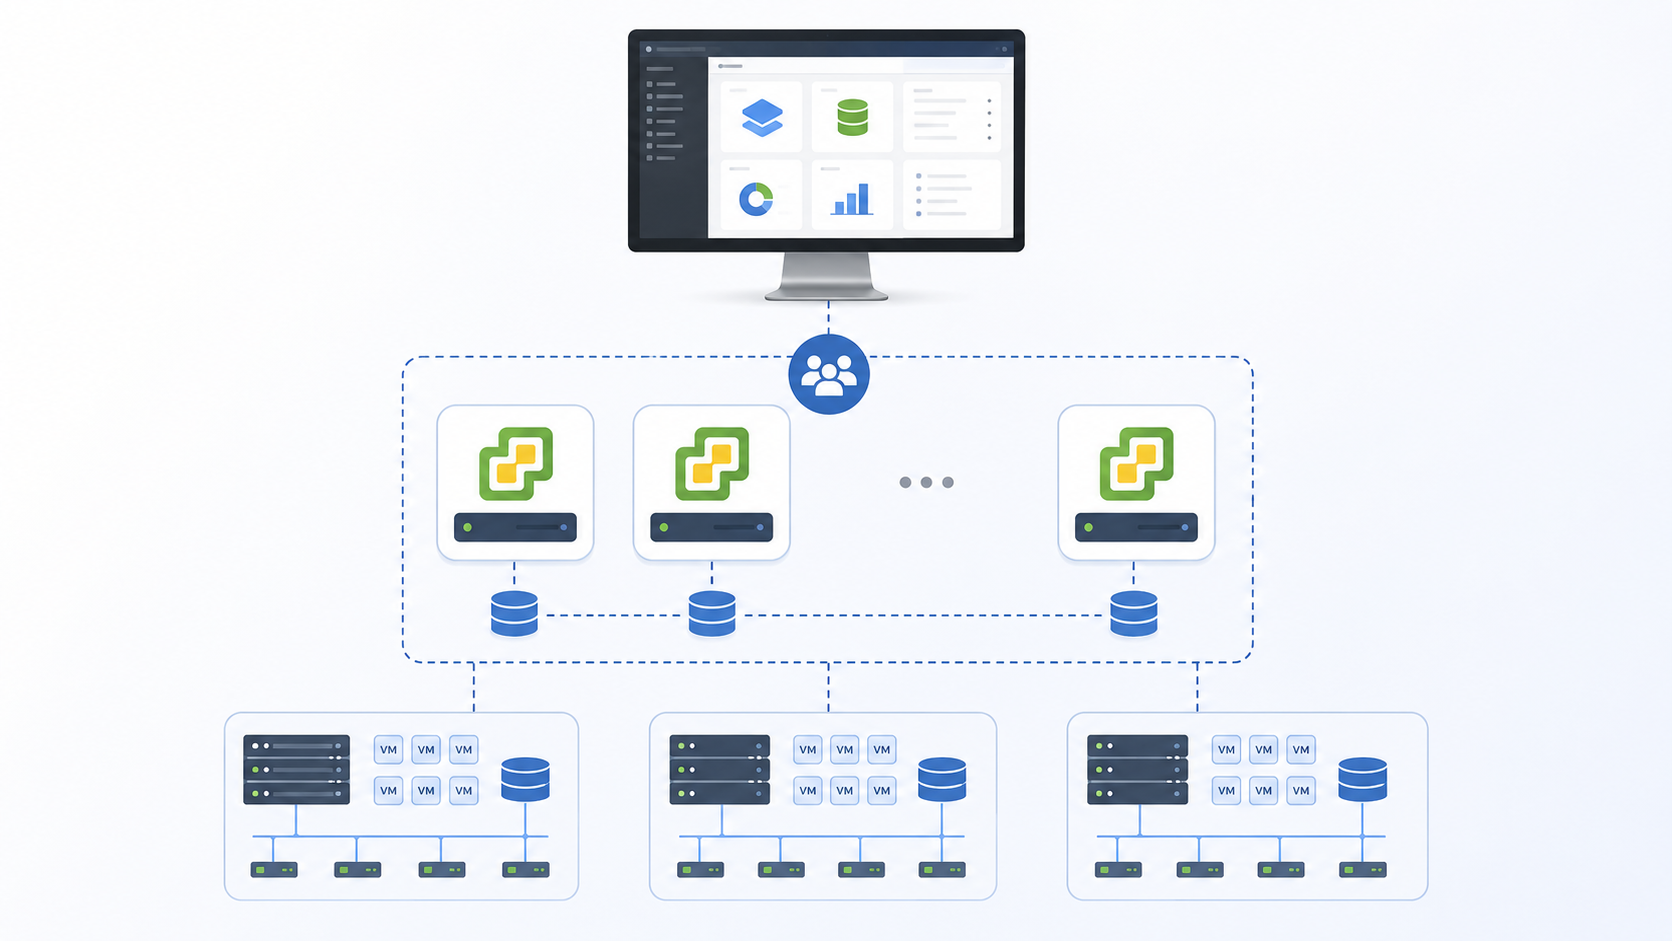
Creating a vCenter Enhanced Linked Mode Group is an article that shows how to group two or more vCenter Server instances to work as a group, having a single point-of-glass for managing all inventories for all vCenter Server instances.
First and Foremost, What is the vCenter Enhanced Linked Mode?
Simply put, vCenter Enhanced Linked Mode (ELM) is an act to group two or more vCenter Server instances to work together in the same SSO domain. We can access anyone in this group to see and manage inventories for all vCenter instances.
A maximum of 15 vCenter Server appliance deployments with vCenter Server Enhanced Linked Mode in a single vSphere Single Sign-On domain is supported.
We have two ways to create a vCenter Enhanced Linked Mode Group:
- You can create a vCenter Enhanced Linked Mode group during the deployment of the vCenter Server Appliance.
- You can also join a vCenter Enhanced Linked Mode group by moving, or repointing, a vCenter Server from one vSphere domain to another existing domain.
To know more details about that, I would recommend checking the below link:
Additionally, I highly recommend you to read the below article:
https://kb.vmware.com/s/article/85662
When we are using Enhanced-Linked Mode, we need to know some details about the administration and maintenance of it. This article shows several important details, mainly related to the need to take offline snapshots of the vCenter Servers before doing some maintenance activity!
About Our Lab Environment
Just to provide an example, our lab environment has two vCenter Server Appliances already configured on Enhanced Linked Mode. Both are on the same SSO domain “vsphere.local” and both replicate the SSO domain database (inventory, etc.). We can see that in the picture below:
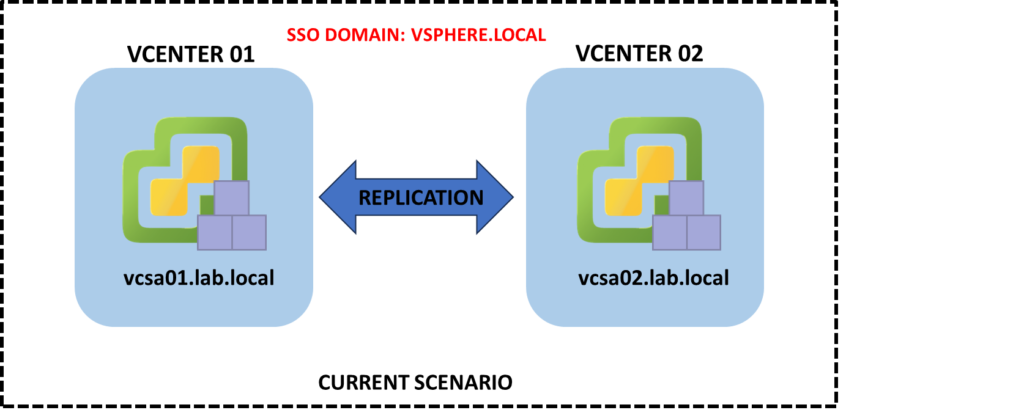
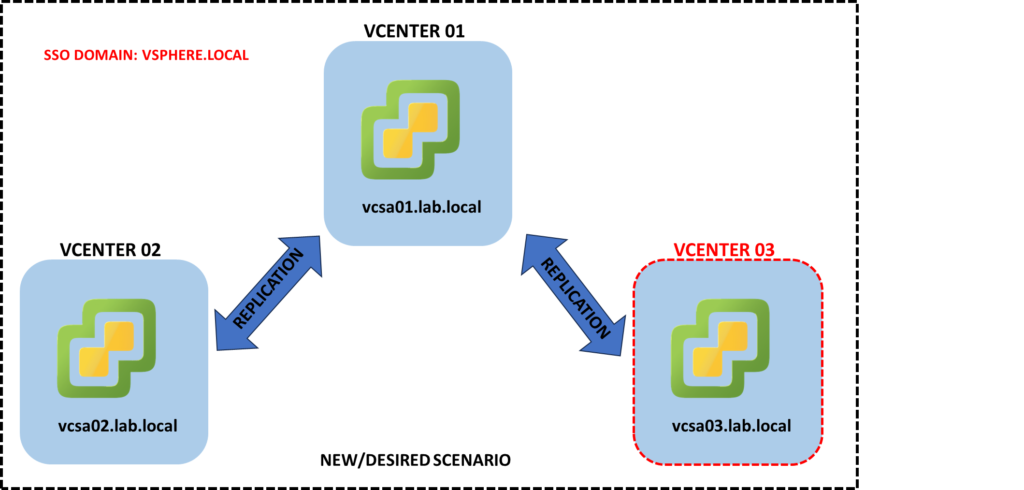
Our goal here is to deploy the new vCenter Server Appliance and to join in on our current SSO domain “vsphere.local”. We will do that during the vCenter Server deployment step. The FQDN for this new vCenter is vcsa03.lab.local.
In the picture below we can see the new/desired scenario:
What are the prerequisites to achieve the goal?
Based on my research and test, for this process to work as expected, we need to make some tasks before:
- Creating the DNS entries (A and PTR) for the new vCenter Server.
- If the vCenters are running on different subnets filtering by a network firewall, open the necessary ports for it to work as expected (check https://ports.esp.vmware.com/home/vSphere to get more details about what protocol and ports are necessary).
- Configuring the new vCenter Server to get the time settings for the same source as the current vCenter Server (for example, if you are using an NTP Server, configure the same NTP Server on the new vCenter Server).
Deploying the vCenter Server and Joining it on the existing SSO domain
Firstly, we are deploying the vCenter Server from scratch.
We have written an article that explains all the necessary steps to install the vCenter Server. So, feel free to access this article to check more details if necessary:
https://dpcvirtualtips.com/how-to-install-vcenter-7-in-lab-environment/
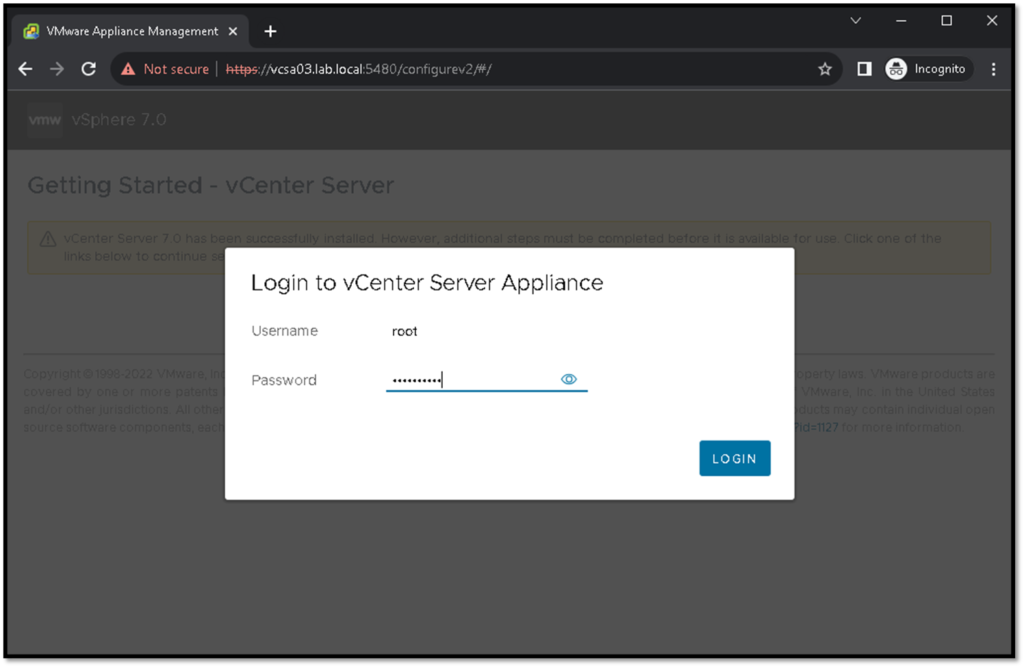
Access the vCenter VAMI and type the root username and password:
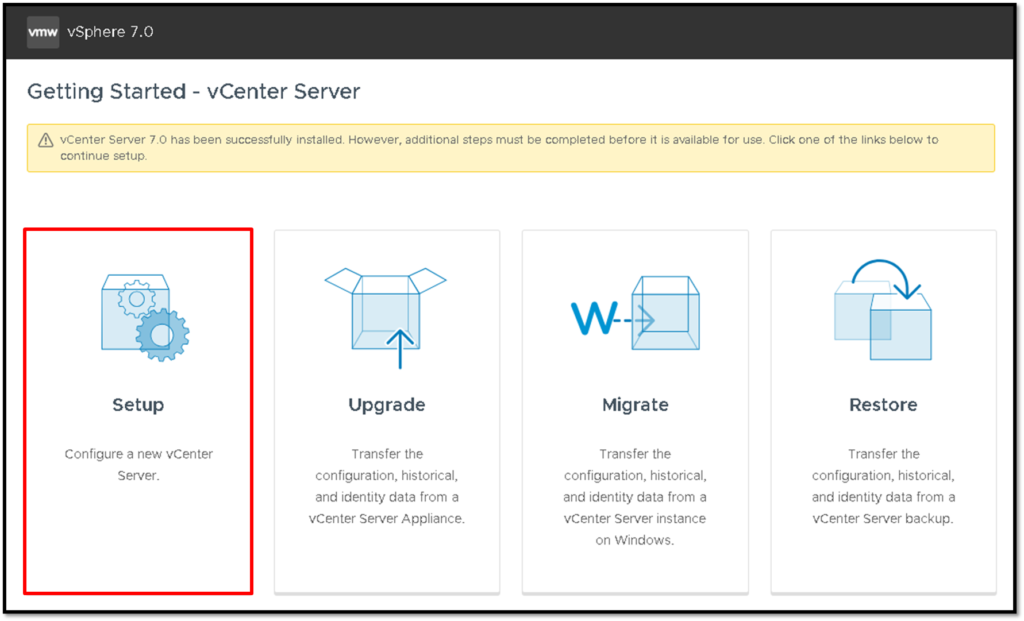
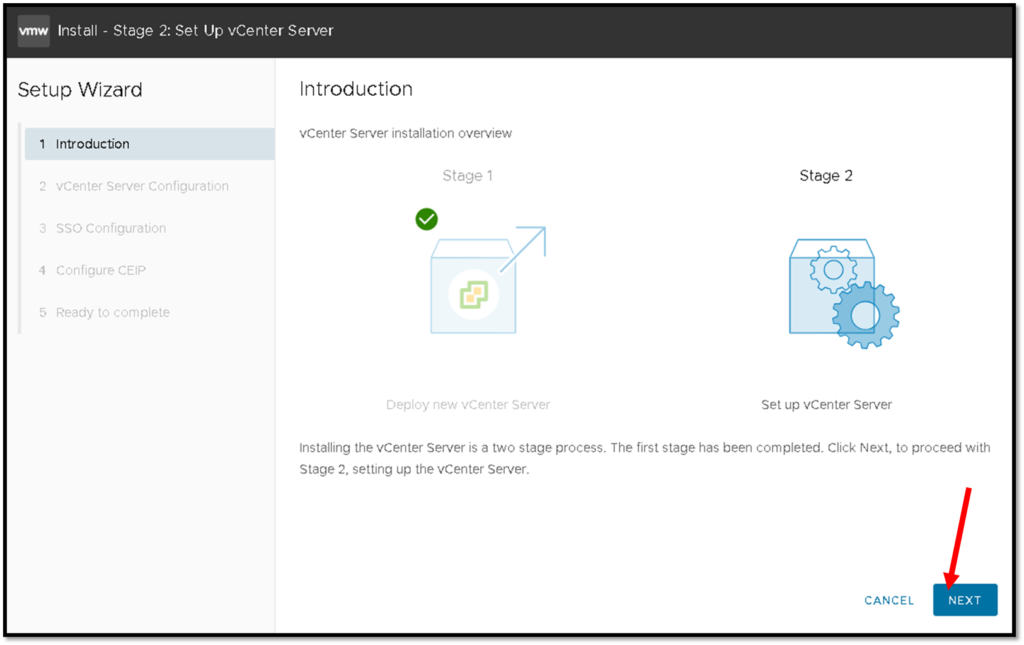
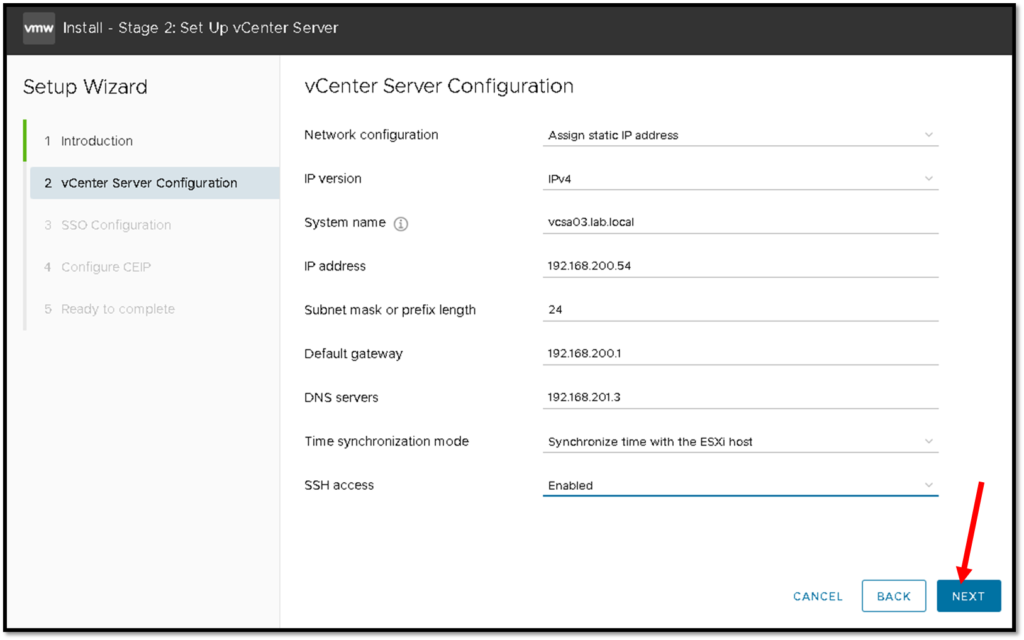
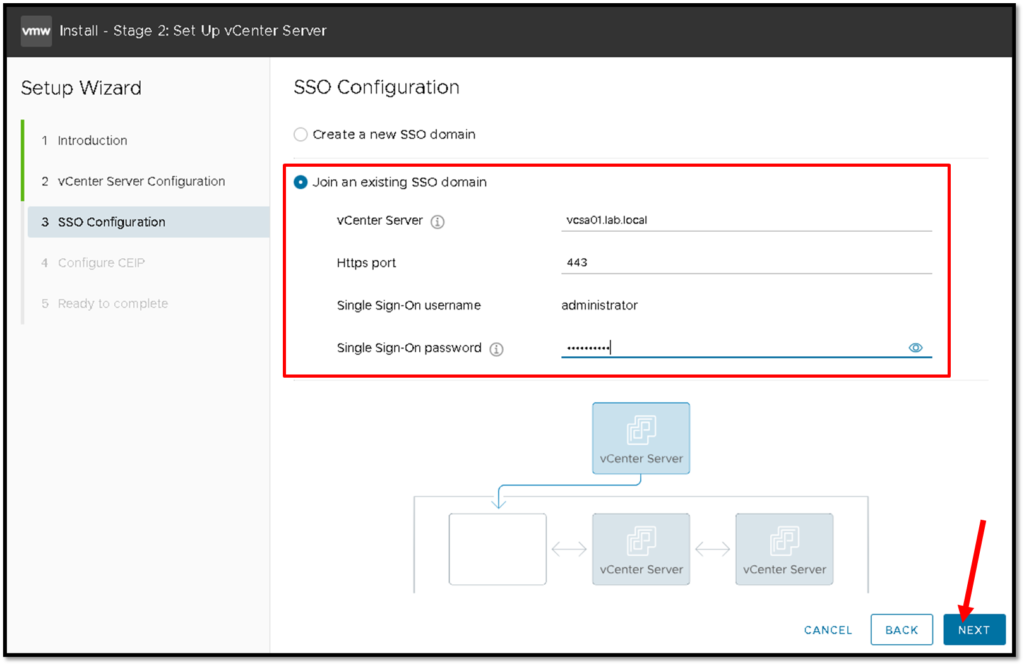
Under the SSO Configuration page, we need to select “Join an existing SSO domain”.
vCenter Server –> We need to type the current vCenter Server. In this example, the FQDN of the current vCenter Server is vcsa01.lab.local
Https port –> 443
Single Sign-On username –> administrator (we cannot change it)
Single Sign-On password –> Type the password of the user administrator
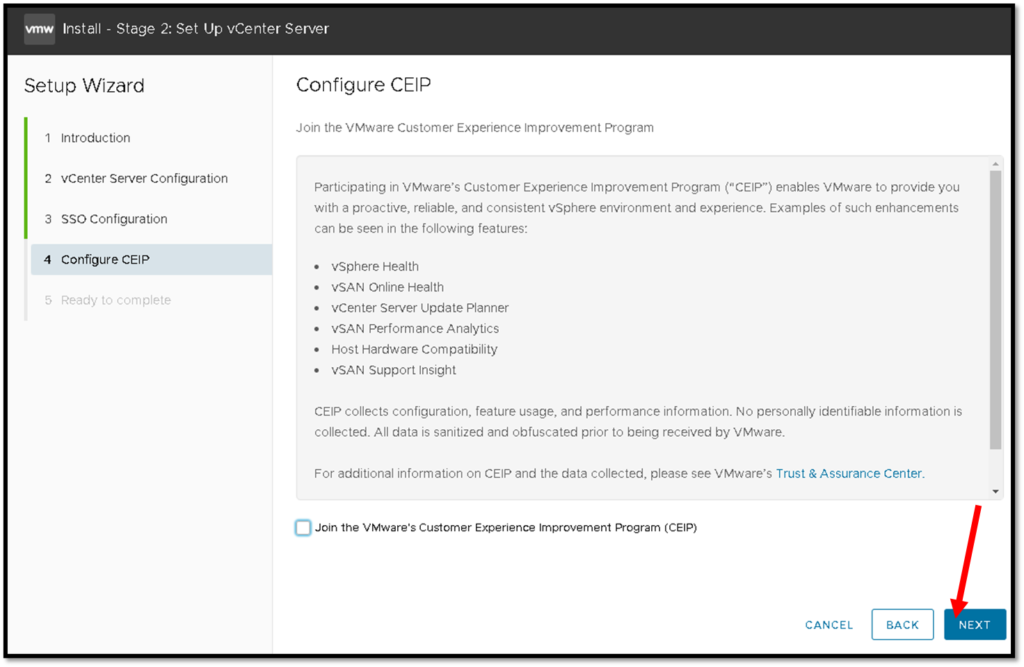
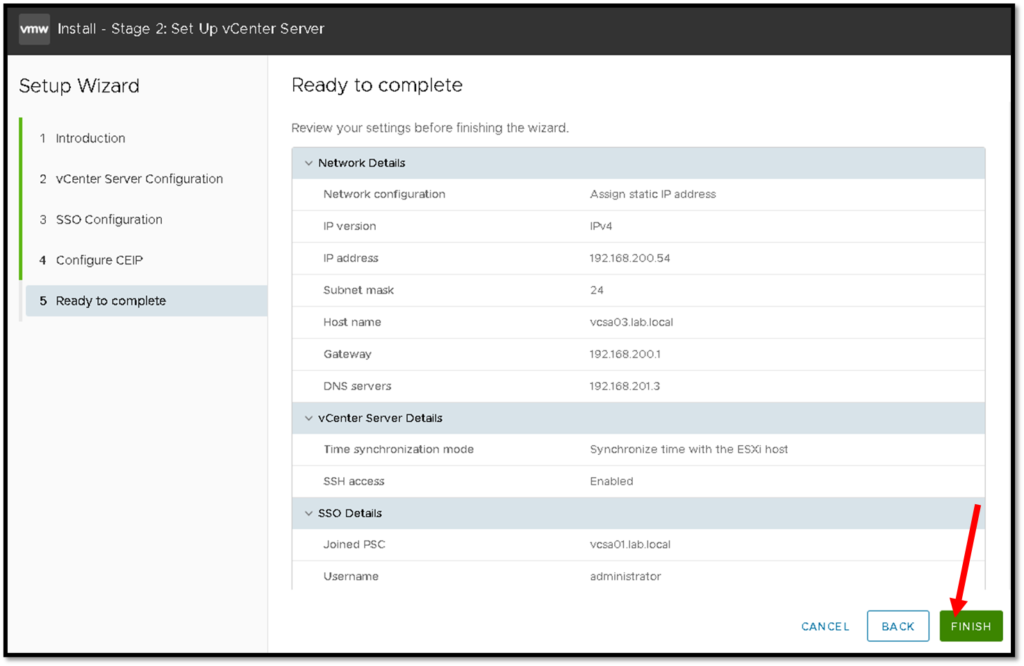
Click on OK to start the process:
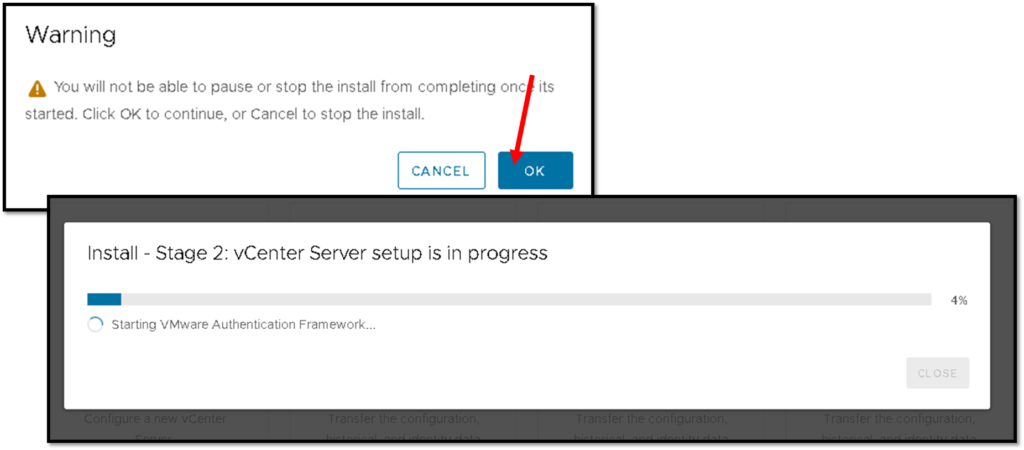
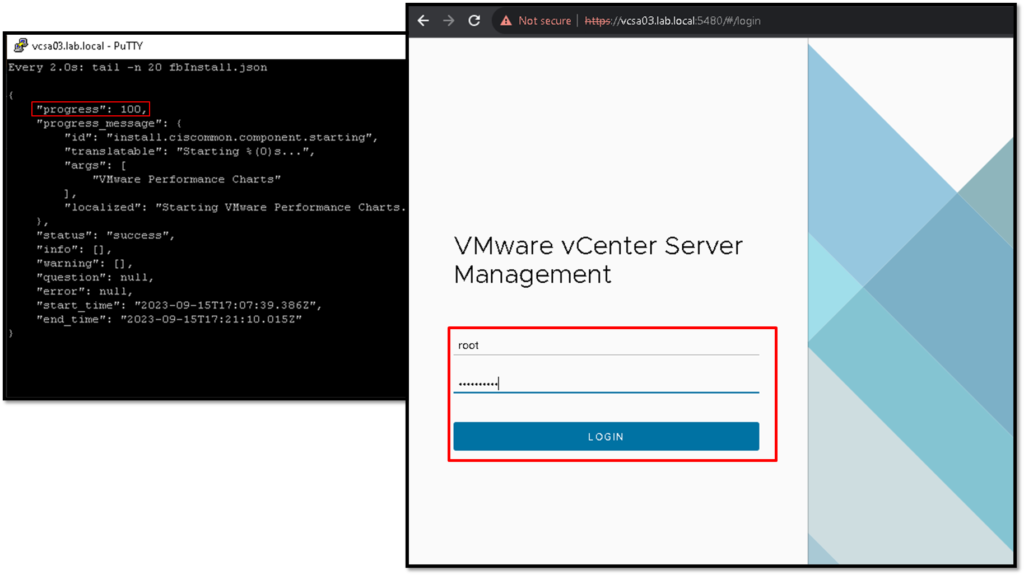
To follow the deployment process, we can open an SSH session to the vCenter Server and monitor the file “fbInstall.json” stored in the directory /var/log/firstboot:
cd /var/log/firstboot

watch tail -n 20 fbInstall.log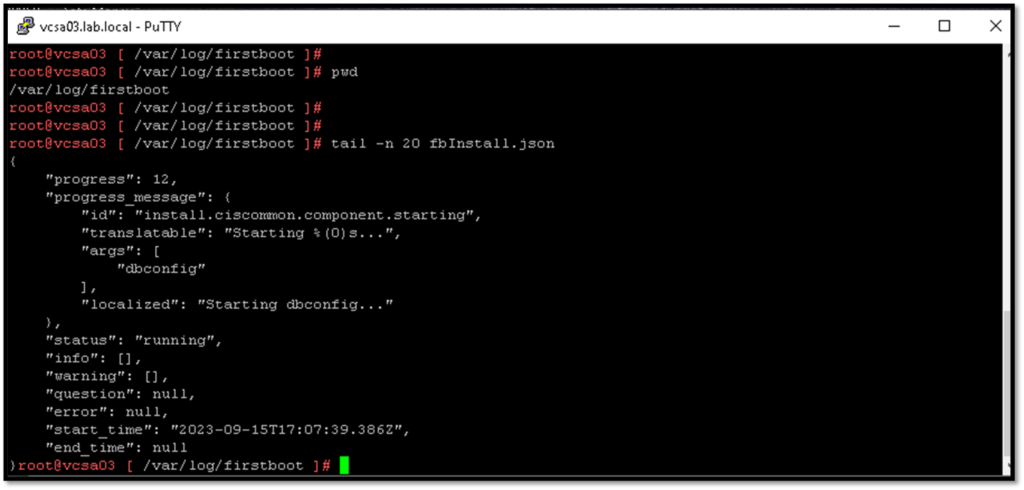

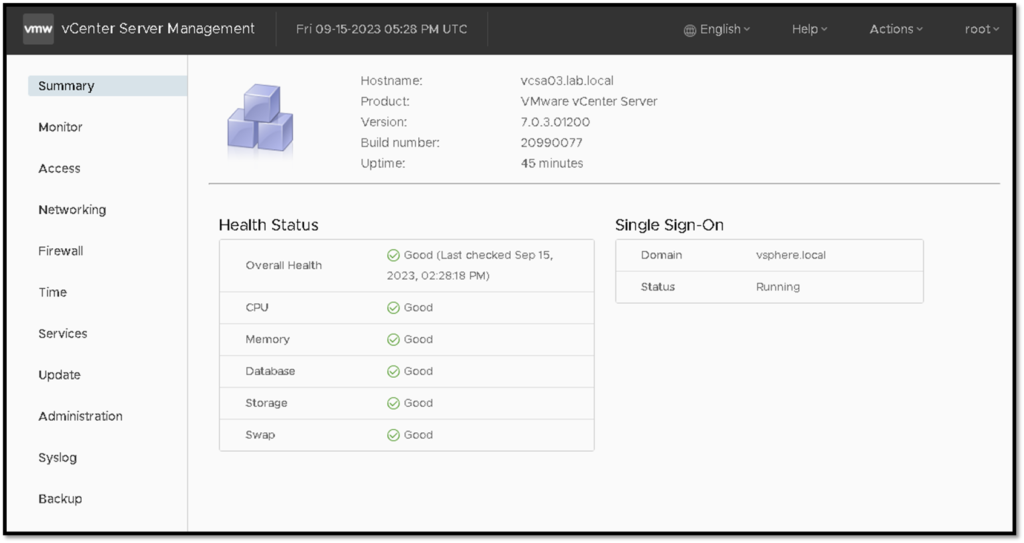
After some minutes, the progress will be finished. We can access the VAMI with the root password:
Accessing the vSphere Client to check the new vCenter Server
For example, we are accessing the new vCenter Server:
https://vcsa03.lab.local/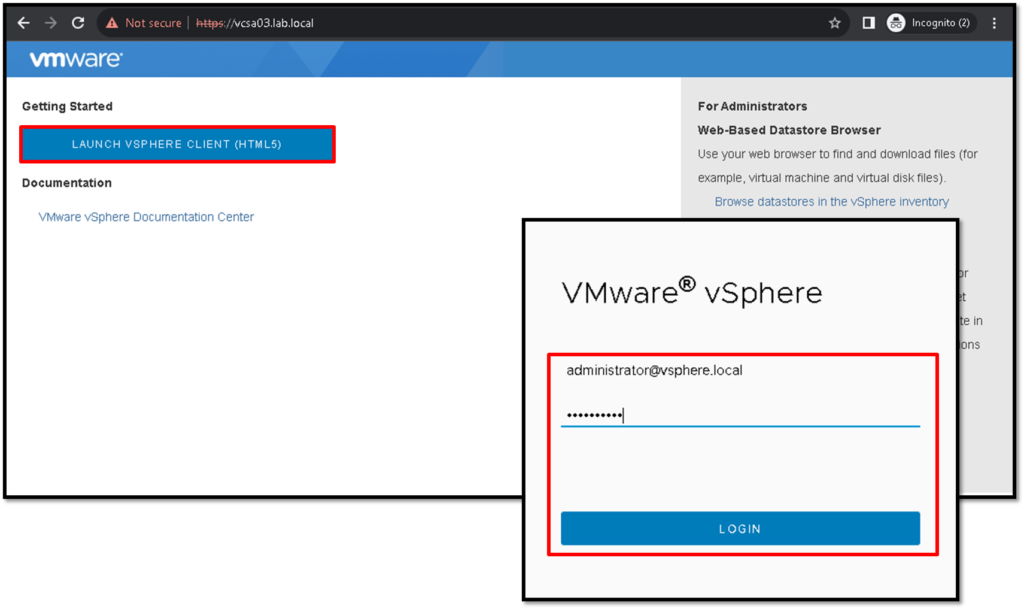
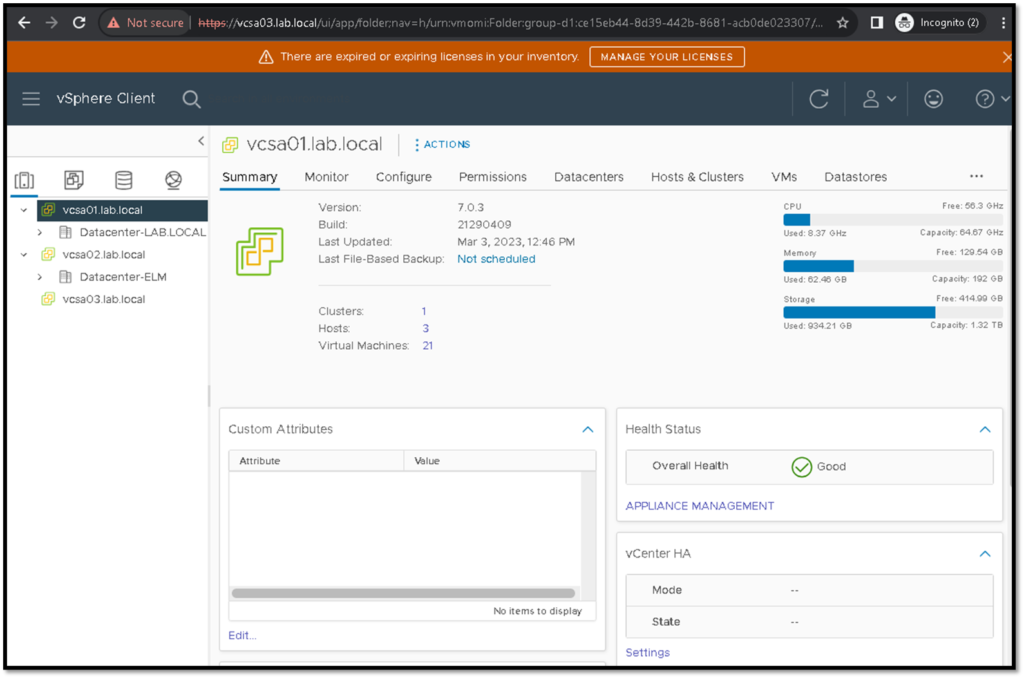
So, after opening the vSphere Client, access the Menu –> Administration –> Deployment –> System Configuration. On this page, we can see the new vCenter Server:
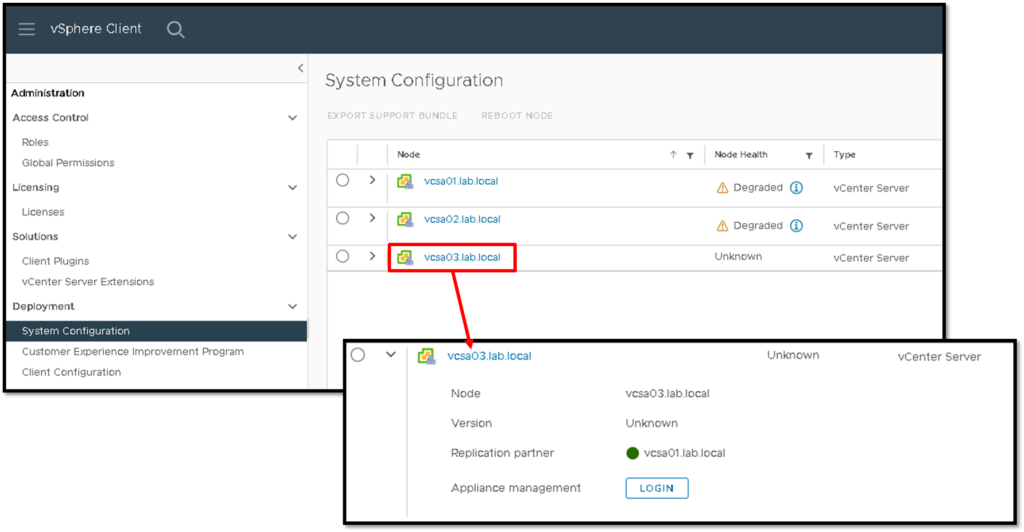
And we can see all vCenter Server instances and their inventories through this new vCenter Server.
This behavior is expected and confirms that our configuration worked fine 🙂
Checking Servers and Replication by CLI
After accessing the new vCenter Server by SSH, we can check the Servers, Replication Partners, and Status (we can use these commands on every vCenter Server present on this SSO domain):
Show Servers:
/usr/lib/vmware-vmdir/bin/vdcrepadmin -f showservers -h localhost -u administrator

Example:

root@vcsa03 [ ~ ]# /usr/lib/vmware-vmdir/bin/vdcrepadmin -f showservers -h localhost -u administrator
password:
cn=vcsa01.lab.local,cn=Servers,cn=Default-First Site,cn=Sites,cn=Configuration,dc=vsphere,dc=local
cn=vcsa02.lab.local,cn=Servers,cn=Default-First-Site,cn=Sites,cn=Configuration,dc=vsphere,dc=local
cn=vcsa03.lab.local,cn=Servers,cn=Default-First-Site,cn=Sites,cn=Configuration,dc=vsphere,dc=local
Show Replication Partners:
/usr/lib/vmware-vmdir/bin/vdcrepadmin -f showpartners -h localhost -u administrator

Example:

root@vcsa03 [ ~ ]# /usr/lib/vmware-vmdir/bin/vdcrepadmin -f showpartners -h localhost -u administrator
password:
ldap://vcsa01.lab.local
And also Show Replication Partner Status:
/usr/lib/vmware-vmdir/bin/vdcrepadmin -f showpartnerstatus -h localhost -u administrator

Example:

root@vcsa03 [ ~ ]# /usr/lib/vmware-vmdir/bin/vdcrepadmin -f showpartnerstatus -h localhost -u administrator
password:
Partner: vcsa01.lab.local
Host available:   Yes
Status available: Yes
My last change number:             14290
Partner has seen my change number: 14290
Partner is 0 changes behind.