

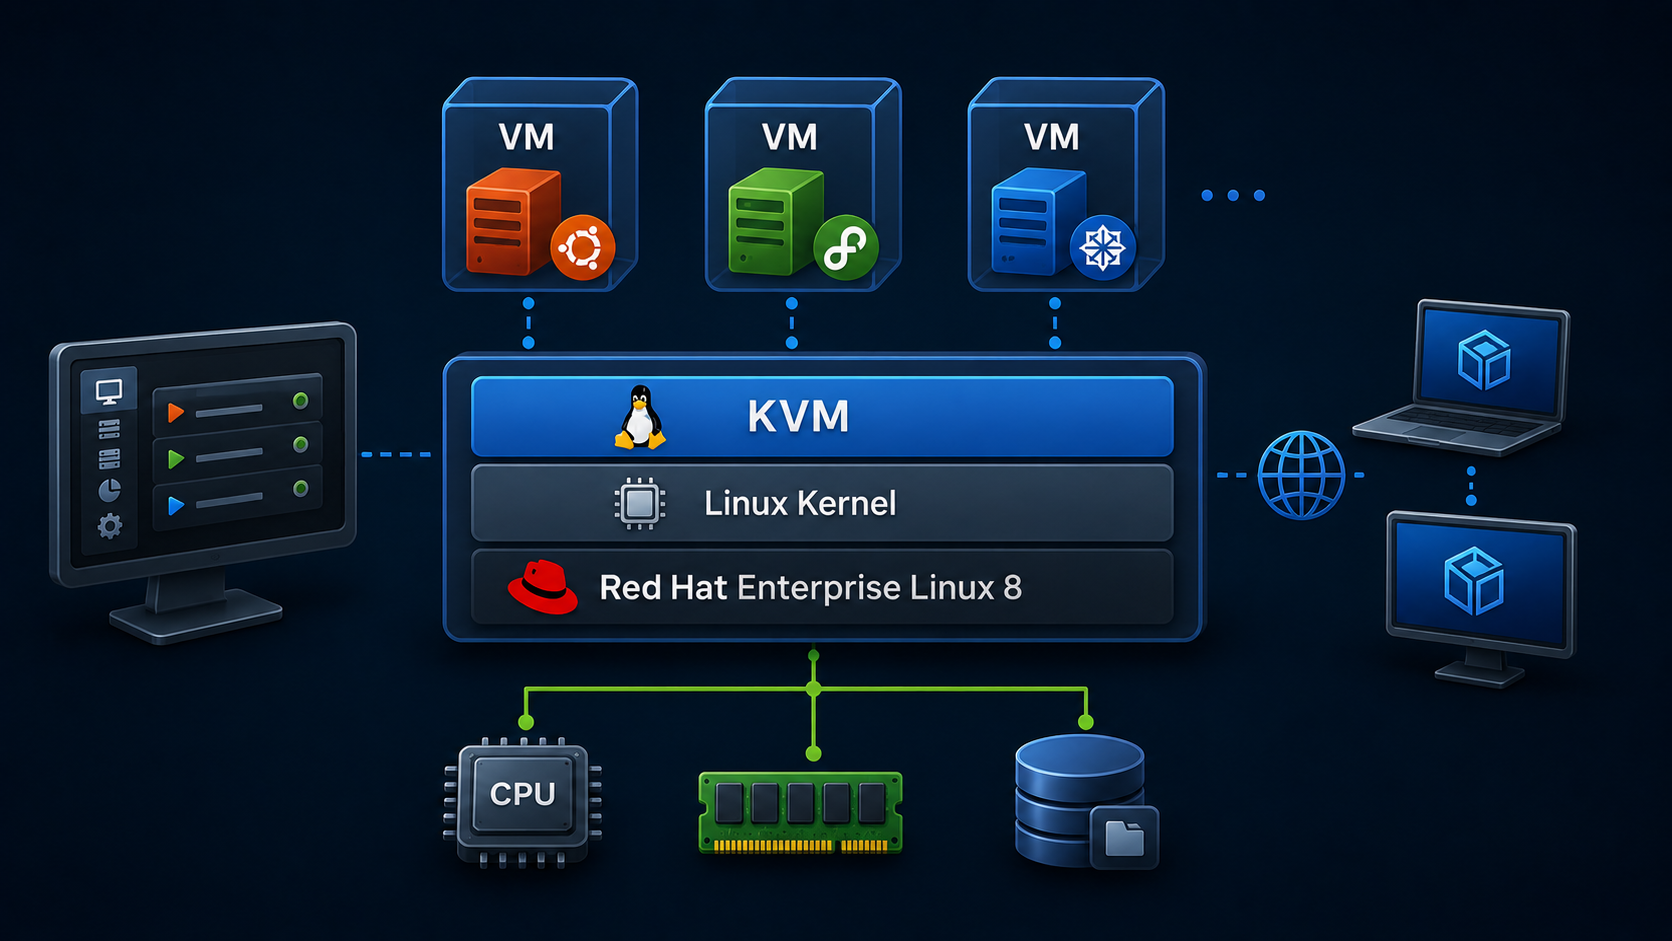
Running VMs on RHEL 8 allows administrators to transform a Red Hat Enterprise Linux system into a virtualization host capable of creating and managing virtual machines. Using KVM, RHEL 8 provides a powerful virtualization platform integrated directly with the Linux kernel.
We’ve written some interesting articles that may help you before following them:
How to install RHEL 8 on Lab – https://dpcvirtualtips.com/how-to-install-rhel-8-on-lab/
Configuring Bonding + Bridge Interface on RHEL 8 – https://dpcvirtualtips.com/configuring-bonding-bridge-interfaces-on-rhel-8/
First and foremost: What is KVM?
KVM (Kernel-based Virtual Machine) is a full virtualization solution built into the Linux kernel. It allows you to run multiple virtual machines (VMs), each with its isolated operating system, using your host’s hardware. In this context, after installing all KVM packages, your RHEL has become a Hypervisor!
Key Features:
- Uses hardware virtualization (Intel VT-x or AMD-V).
- Integrated with the Linux kernel.
- Managed via
libvirt,virt-manager,virsh, or Cockpit. - Supports live migration, snapshots, and virtual networking.
What is a Hypervisor?
A hypervisor is software that pools computing resources—like processing, memory, and storage—and reallocates them among virtual machines (VMs). This technology makes virtualization possible, meaning you can create and run many VMs from a single physical machine.
A hypervisor is sometimes called a virtual machine monitor (VMM). Think of it as the supervisor in charge of dispersing the components that make up VMs. A hypervisor takes these resources from physical hardware and supplies them to multiple VMs at once, allowing the creation of new VMs and the management of existing ones. The physical hardware, when used as a hypervisor, is called the host, while the many VMs that use its resources are guests.
Overview of Hypervisor Types
Type 1 Hypervisor (Bare-Metal)
- Definition: Runs directly on the physical hardware without a host OS.
- Examples: VMware ESXi, Microsoft Hyper-V, Xen, KVM (when used directly)
- Characteristics:
- High performance and security.
- Ideal for data centers and production environments.
- Manages hardware resources directly.
Note: KVM qualifies as a Type 1 hypervisor because it integrates directly with the Linux kernel and runs at the hardware level.
Type 2 Hypervisor (Hosted)
- Definition: Runs on top of a host operating system as an application.
- Examples: VirtualBox, VMware Workstation, Parallels Desktop
- Characteristics:
- Easier to install and use.
- There is more overhead due to the host OS layer.
- Best for desktop or development use.
In summary:
| Hypervisor Type | Runs On | Performance | Use Case | Examples |
|---|---|---|---|---|
| Type 1 | Bare Metal | High | Servers, cloud, production | KVM, ESXi, Hyper-V, Xen |
| Type 2 | Host OS | Moderate | Desktop, testing, dev | VirtualBox, VMware Workstation |
Install and Configure KVM
1- Check if the hardware supports virtualization:
egrep -c '(vmx|svm)' /proc/cpuinfoIf the result is 0, enable virtualization in BIOS.
In our case, the result was four, meaning that our CPU has four cores with the required flags (vmx or svm):

2- Install the KVM and all the required packages:
dnf update -y
dnf install -y qemu-kvm qemu-img libvirt virt-install virt-manager libvirt-client
dnf install -y xauth
3- Start and enable the “libvirtd” daemon:
systemctl enable --now libvirtdAfter enabling and starting the “libvirtd” daemon, a network interface named “virbr0” should be created:
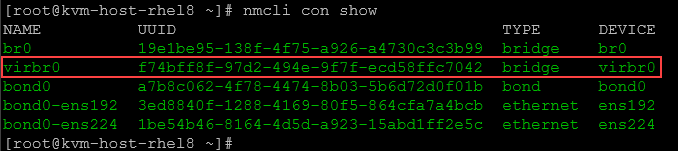
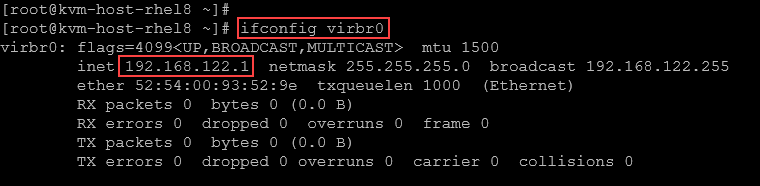
This is a NAT interface used by the KVM to assigned internal IPs for the virtual machines:
We can also confirm if the KVM modules were loaded:
lsmod | grep kvm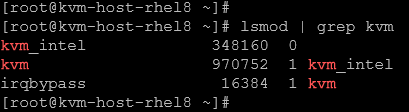
Note: You should see kvm_intel or kvm_amd depending on your CPU.
4- To create virtual machines, we can use the command line or the graphical tool “virt-manager”.
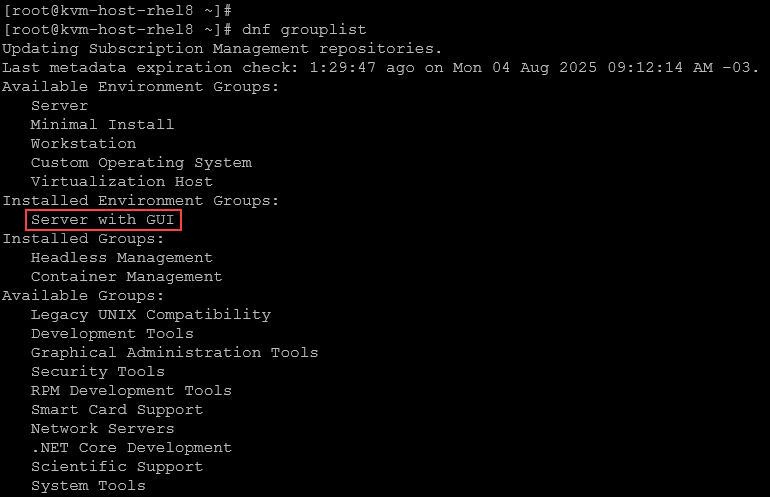
To use “virt-manager”, we need to have the graphical environment installed. We can check it with the following command:
dnf grouplistThe group “Server with GUI” must be installed:
If you need to install it:
dnf groupinstall "Server with GUI" -yAfterward, we need to check what the default target is for our system:
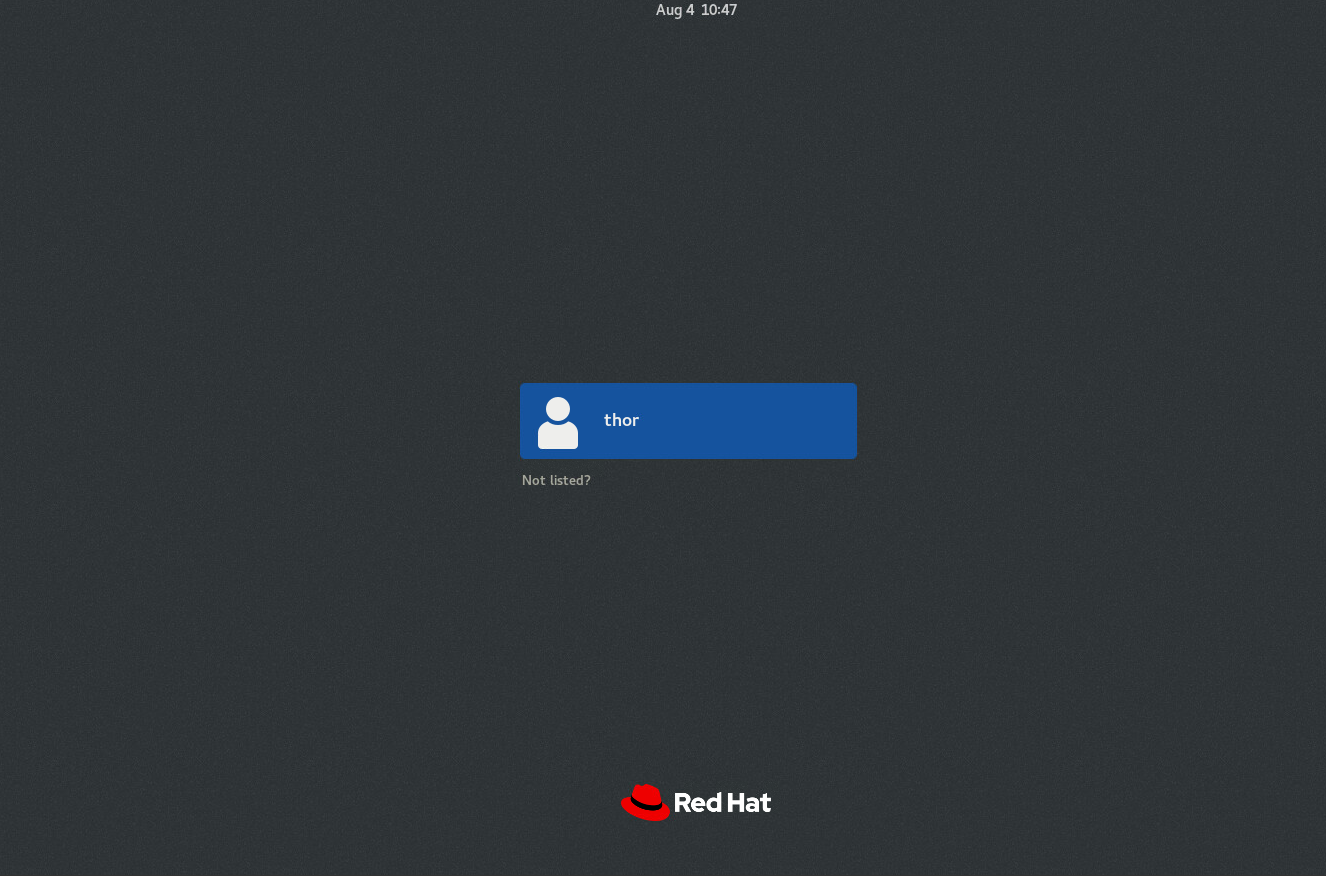
systemctl get-defaultIf the default target is “multi-user.target”, it means that we’re not using the graphical interface. To change to the graphical target:
systemctl isolate graphical.targetNote: Change to the “graphical.target” does not reboot or do anything with your system. It just loads the graphical environment!
Go to the virtual machine console and check if the graphical environment was loaded:
5- Before executing the virt-manager, we need to copy all ISO files into the KVM host.
We can create a directory like “/ISOs” and copy all ISO files into this directory – You can use Powershell, WinSCP, or your preferred transfer files tool for that.
Note: Ensure that the KVM host has sufficient disk space to store the required ISO files!
We’re using PowerShell for that, copying an ISO file from the local machine to the KVM host:

We’ve copied the RHEL 8.10 DVD ISO:

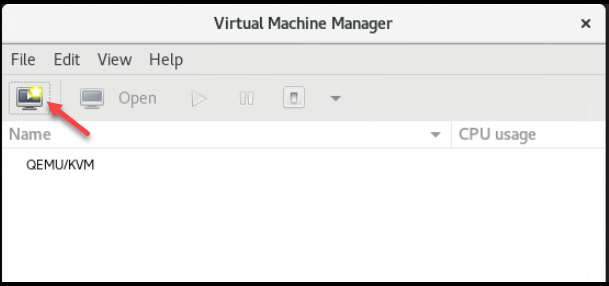
6- Execute the virt-manager and create a virtual machine:
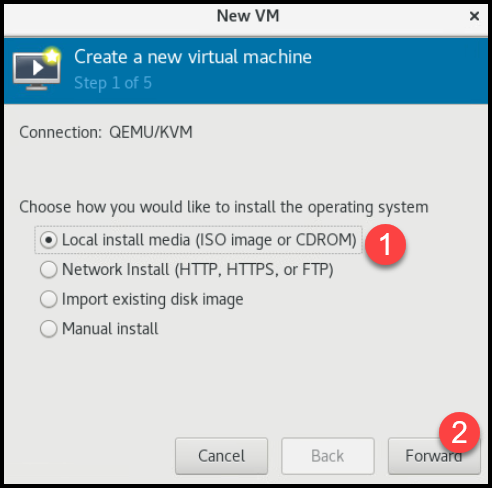
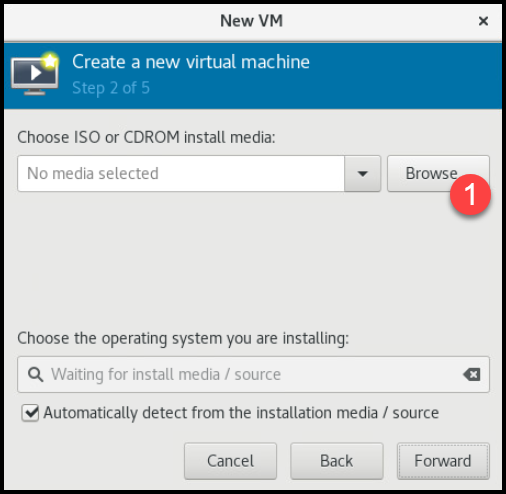
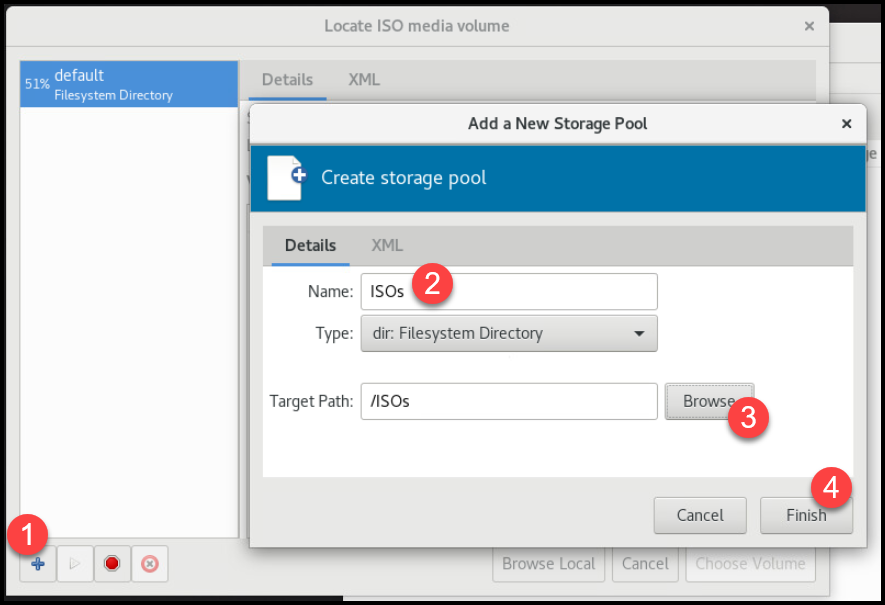
We need to create a pool, specifying the ISO directory:
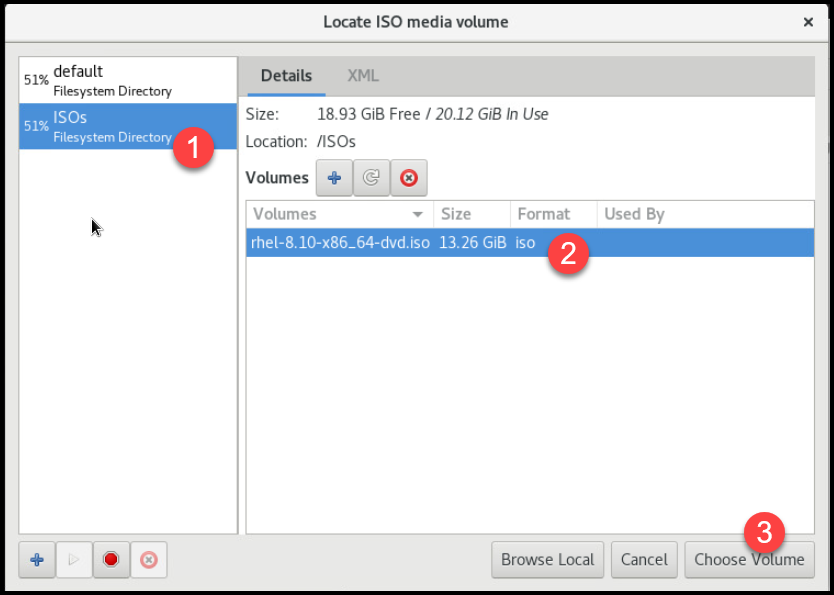
Select the ISO:
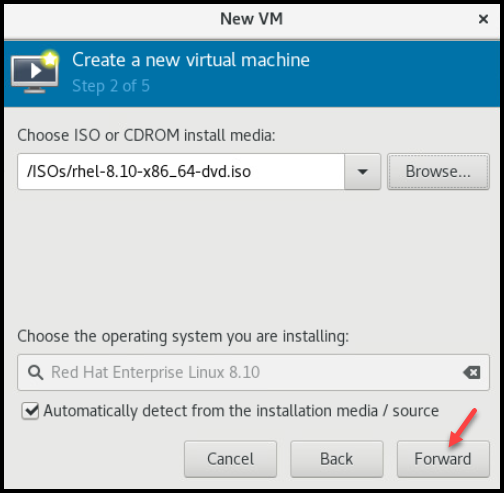
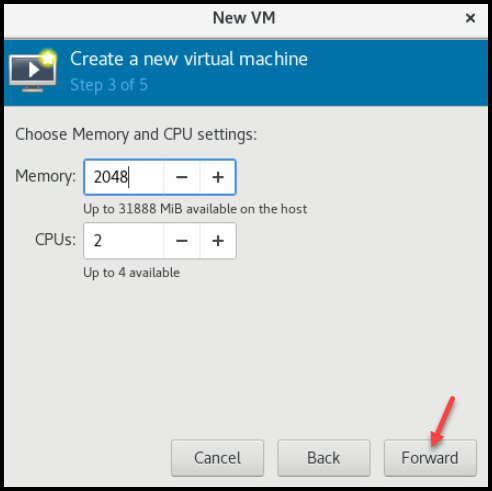
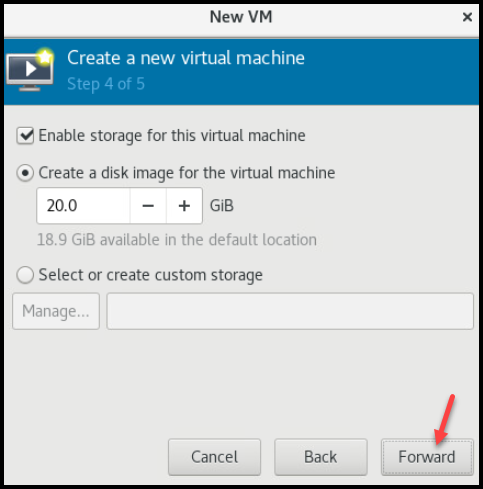
Look at “Network selection”, we’re selecting the NAT interface:
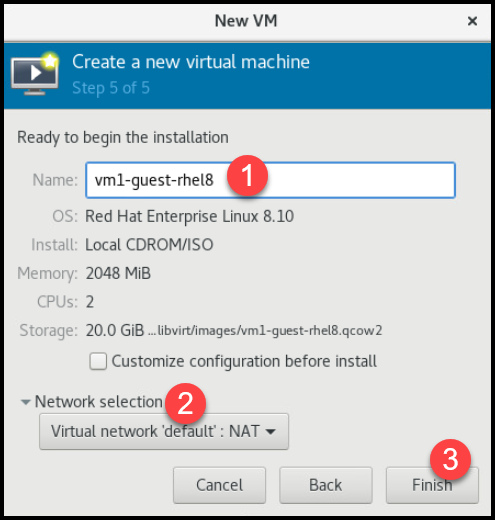
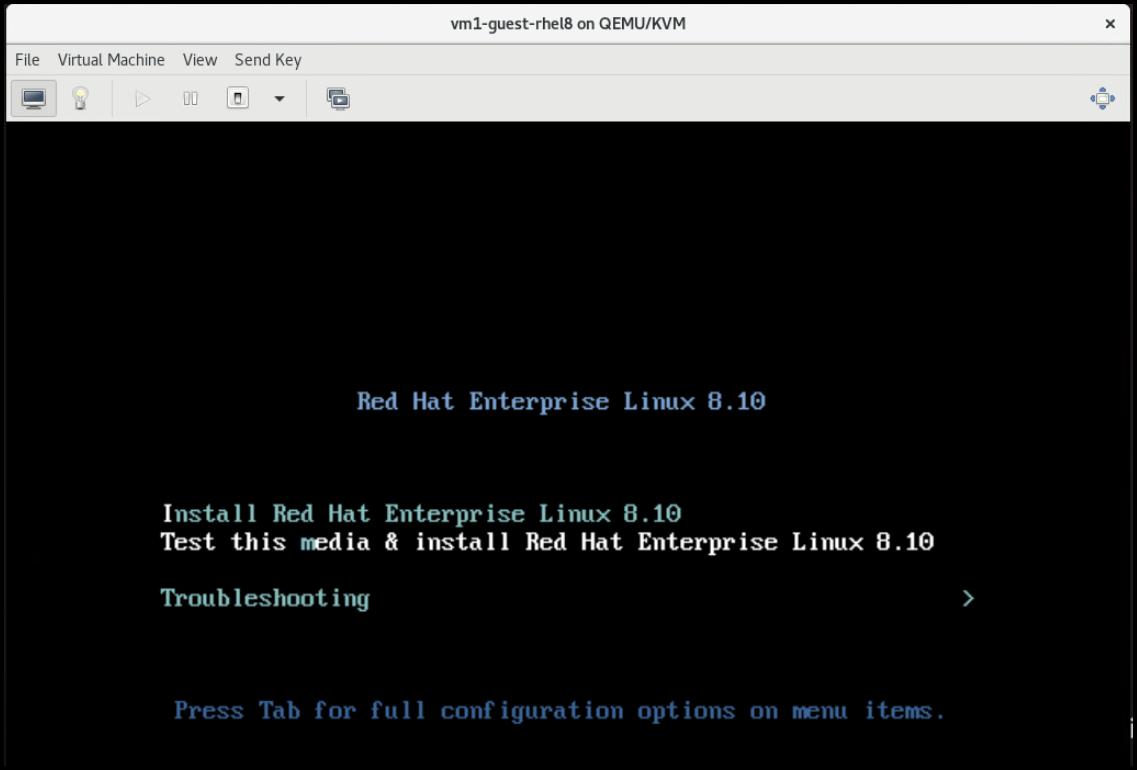
After finishing the virtual machine creation wizard, the Red Hat Installation wizard will appear – basically follow the default installation:
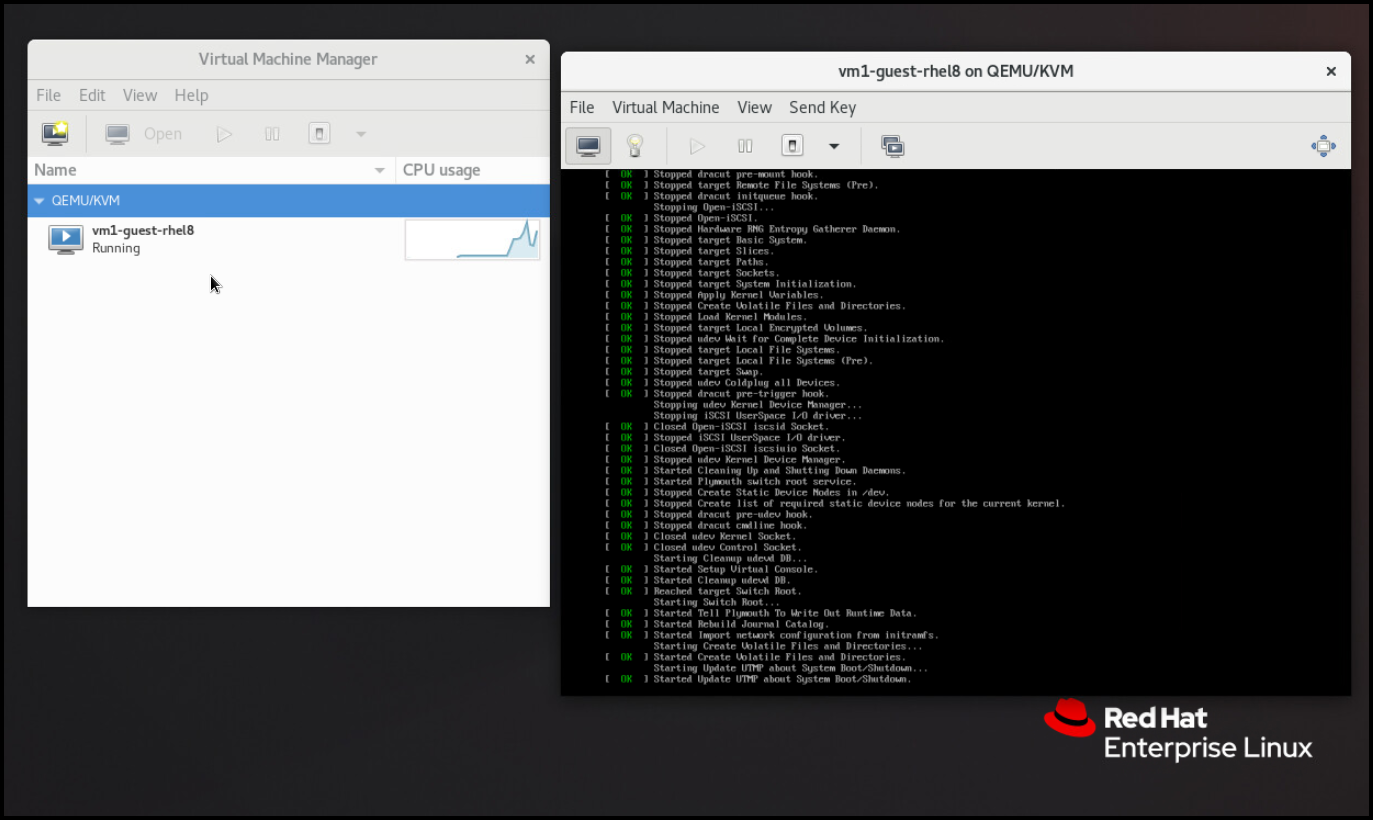
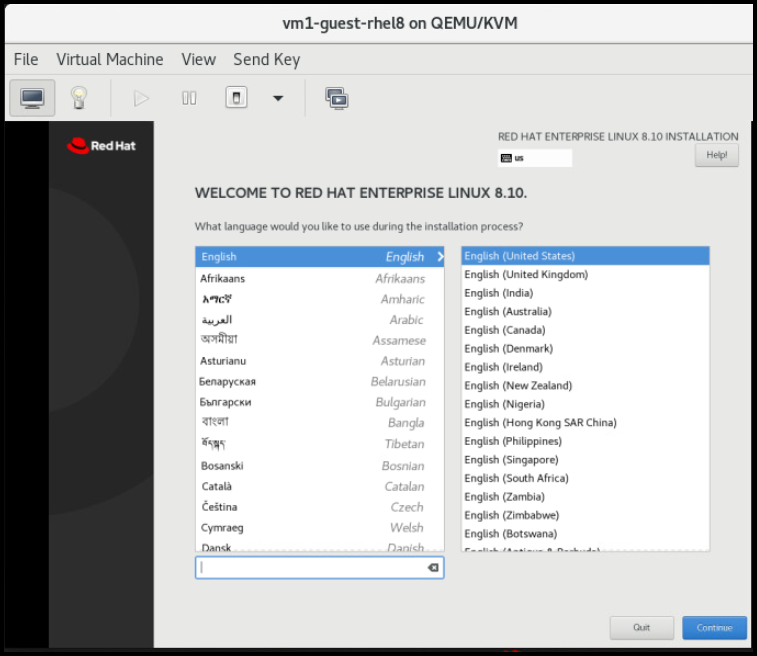
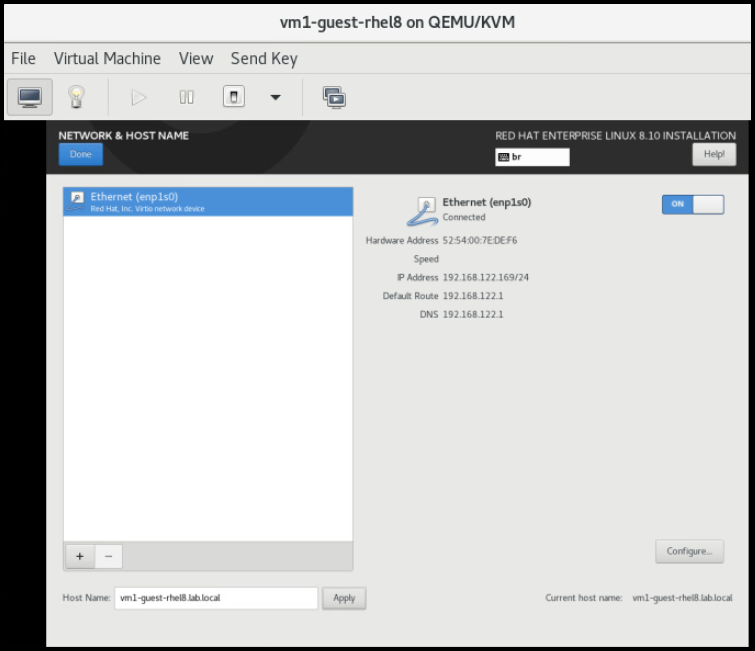
Under “Network &Hostname” configuration, check that the virtual network interface got an IP address from the network 192.168.122.0/24. By default, this is the network for the NAT network (internal network) used by the KVM to lease IPs from the virtual machines.
Otherwise, you can choose the bridge network adapter during the VM creation – it means that your VM will get an IP address from your physical network:
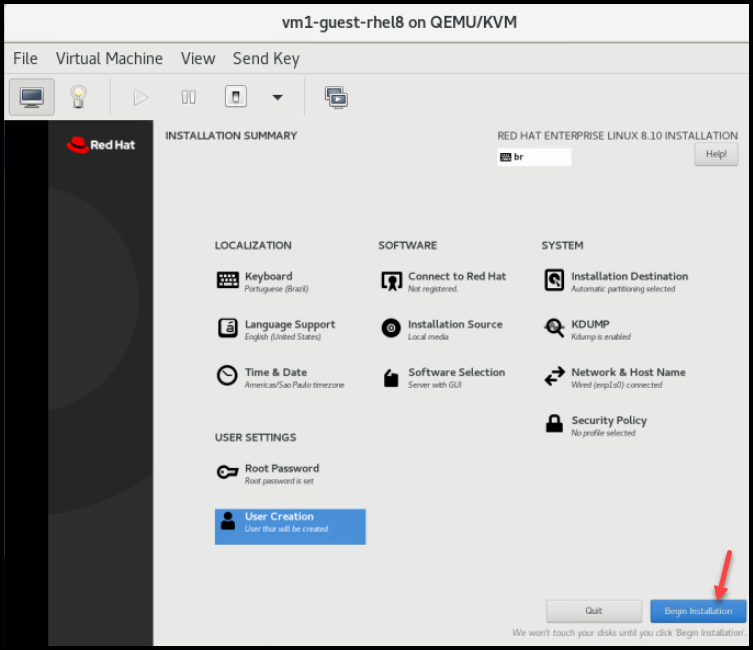
Afterwards, click on “Begin Installation” to start the installation process:
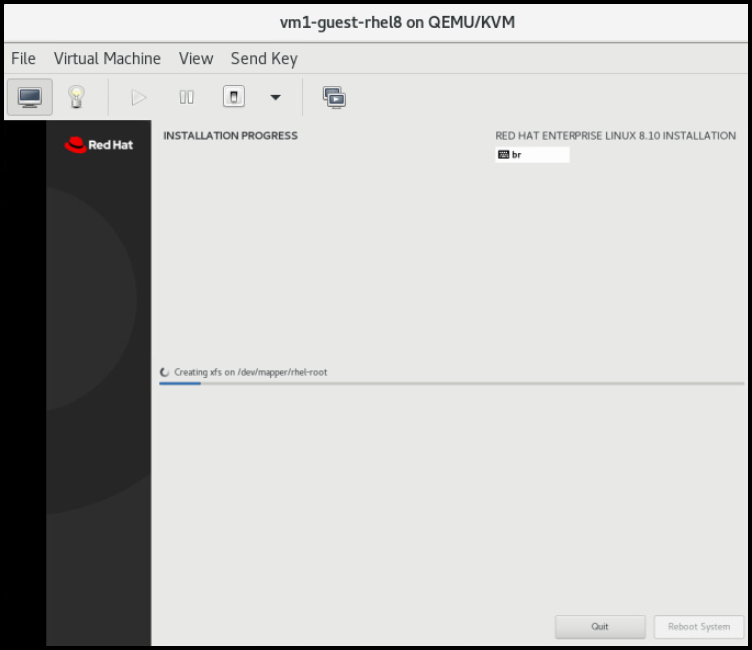
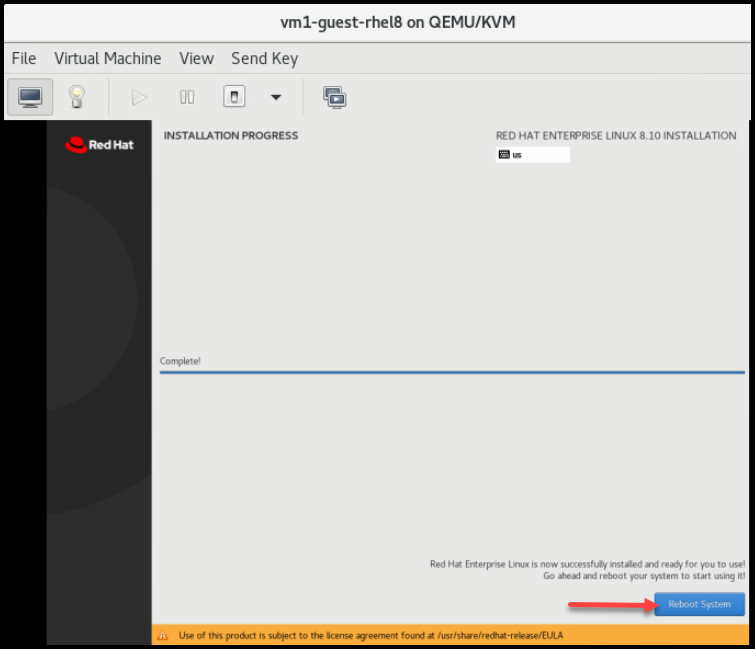
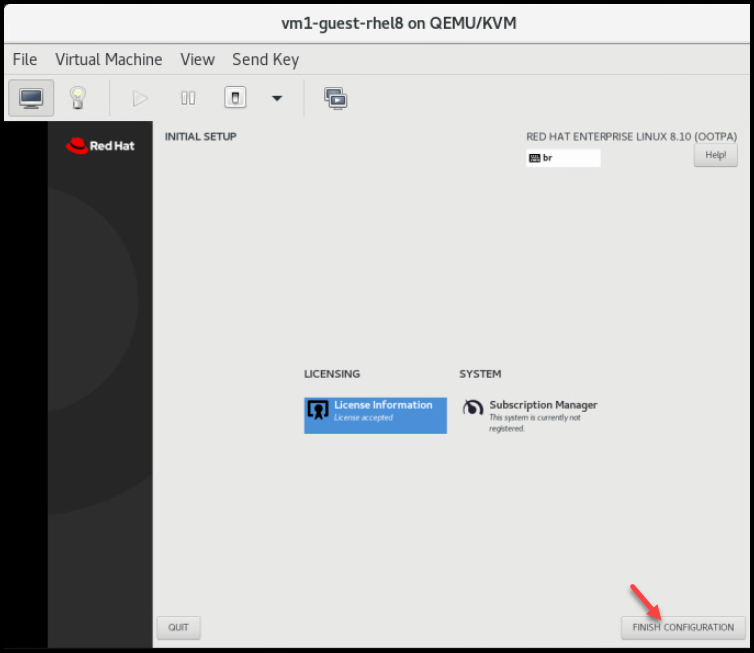
Finally, after rebooting, you may be asked to accept the License Agreement – this is the last step of the install process:
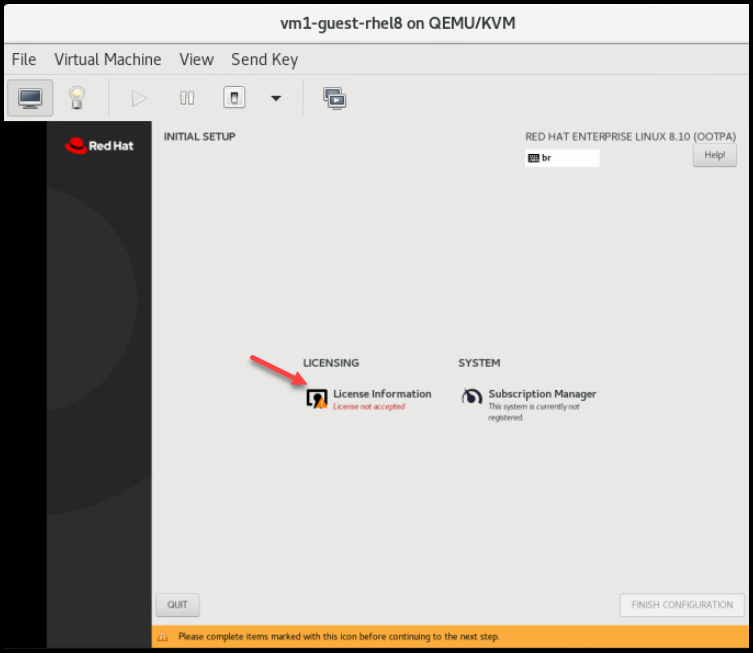
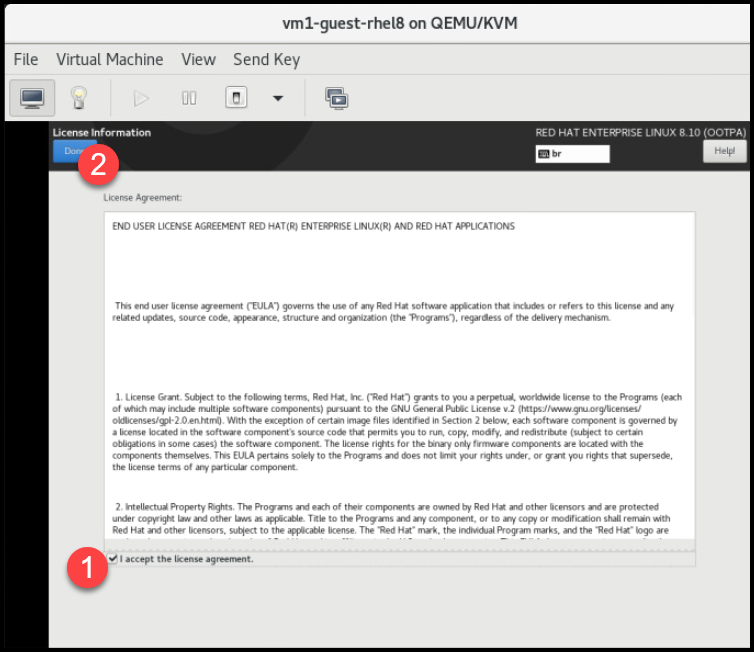
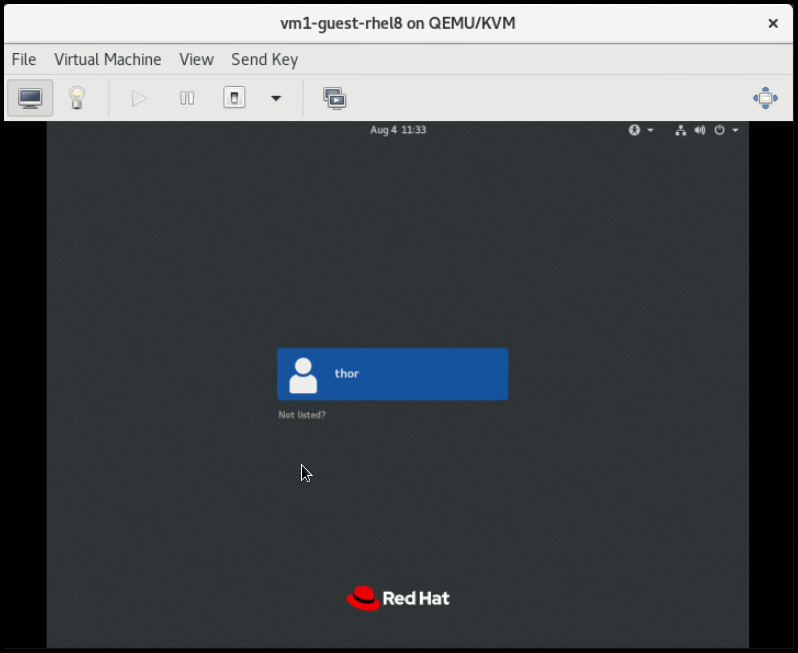
So, now, you can access your system:
That’s it for now 🙂
