Creating an Internal Certificate Authority is a practical guide that explains how to enable and configure a private CA (Certificate Authority) using the Microsoft Active Directory Certificate Services (AD CS) role. This solution allows organizations to manage their own digital certificates for users, devices, and services.
Microsoft AD CS provides a secure and efficient way to issue, manage, and distribute certificates inside an enterprise environment. Certificates generated by an internal CA can be used for different technologies, including SSL/TLS, secure wireless networks, VPN connections, IPsec, smart card authentication, and digital signatures.
In this article, we will demonstrate step-by-step how to install and configure the AD CS role on a Windows Server environment. The lab scenario uses Windows Server 2022 Standard Edition and creates a new internal Certificate Authority integrated with Active Directory.
More details about the Microsoft AD CS:
Adding the AD CS Role on the Windows Server
In our laboratory, for instance, we are using the Windows Server 2022 Standard Edition (Evaluation) version.
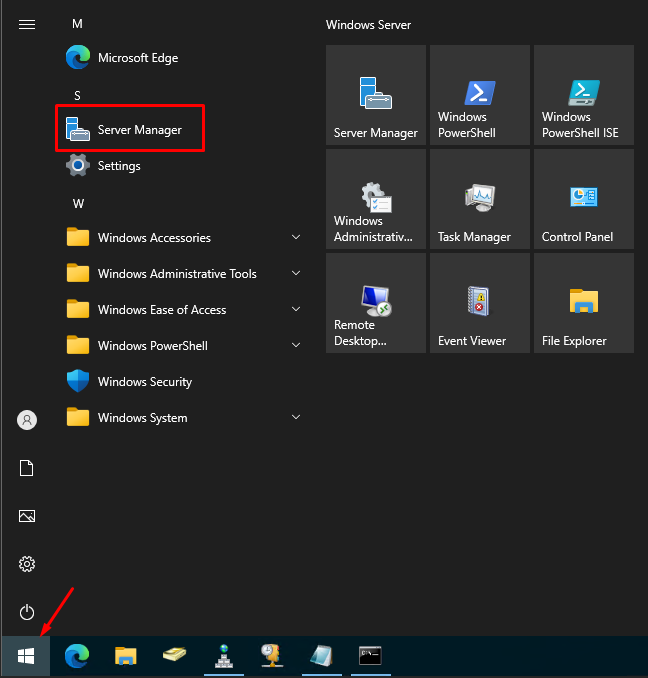
Firstly, we need to install the AD CS role on the Windows Server. For doing it, click on the menu Start –> Server Manager:
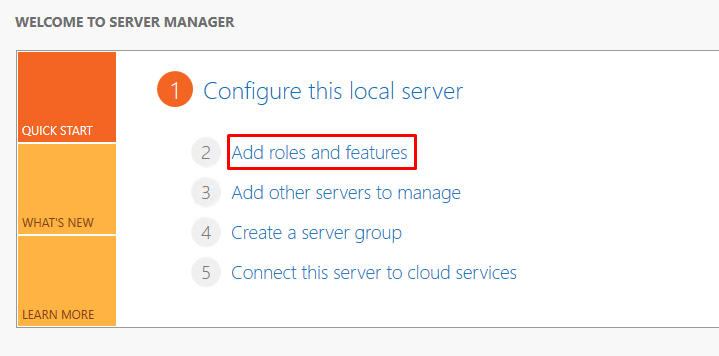
Click on “Add roles and features”:
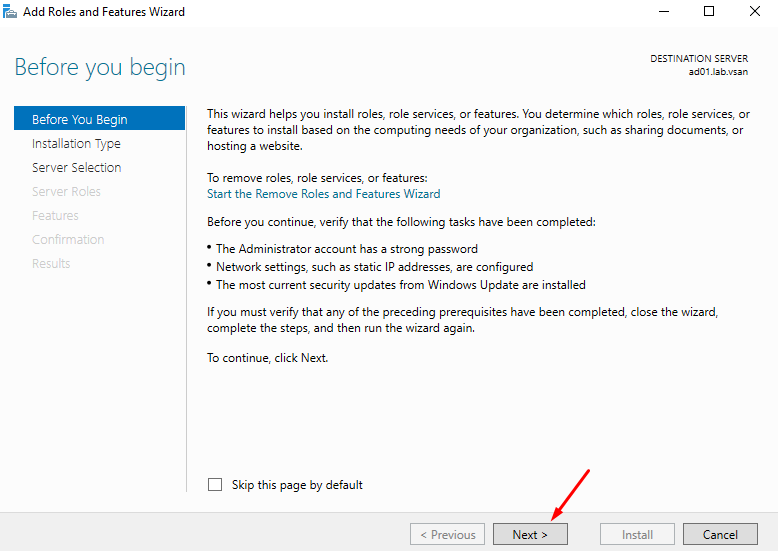
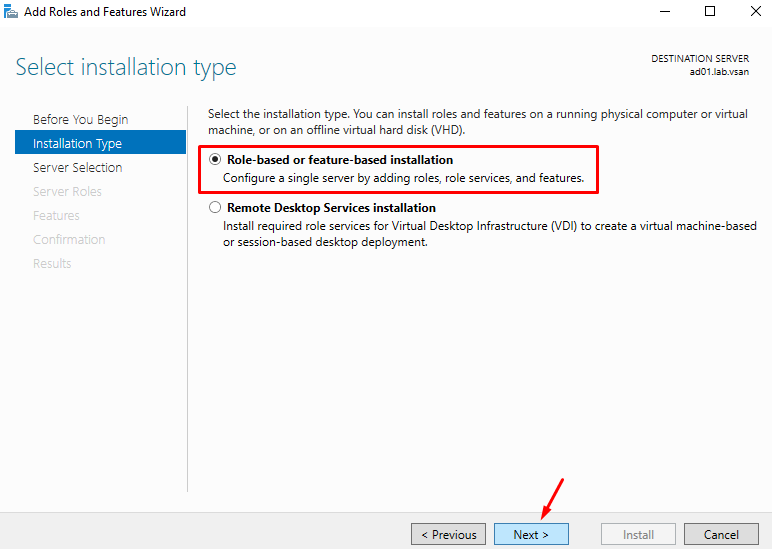
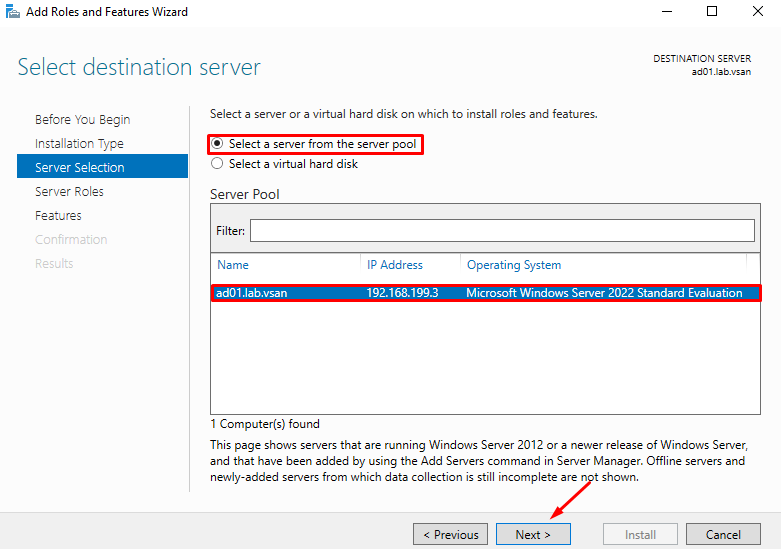
Click on NEXT –> NEXT–> NEXT to continue:
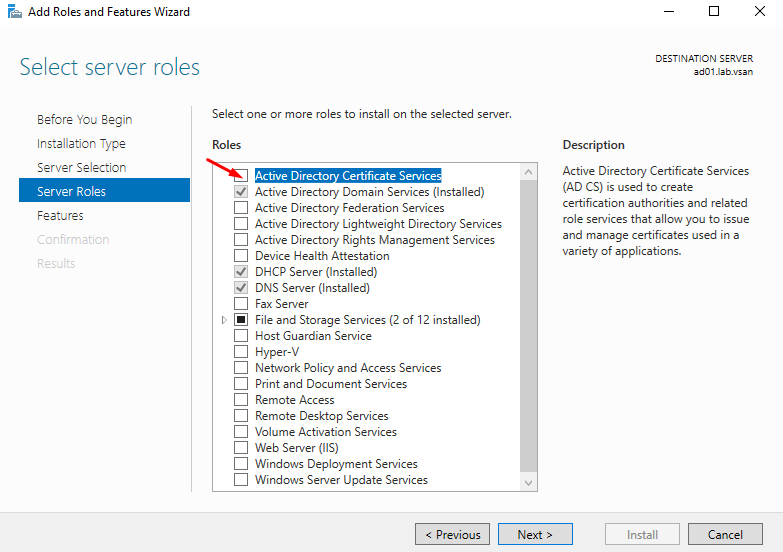
Here, we can see all server roles available. But, some roles have been enabled and others roles are available to enable.
So, mark the box next to the role “Active Directory Certificate Services”:
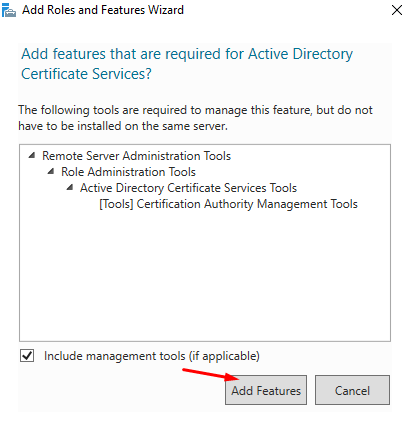
Click on “Add Features” for adding the features related to the AD CS role:
After that, click on NEXT to continue:
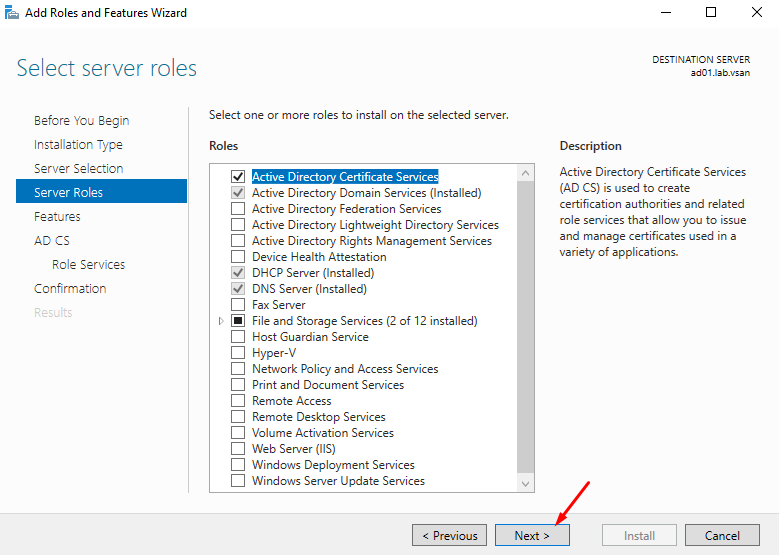
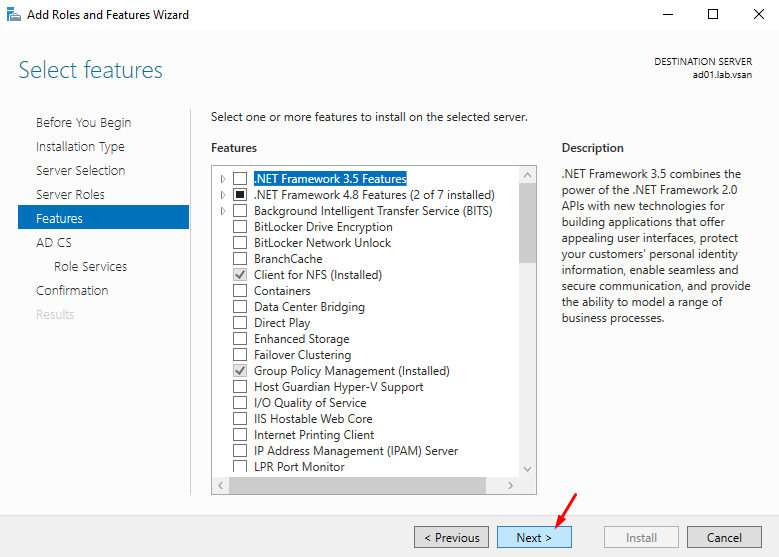
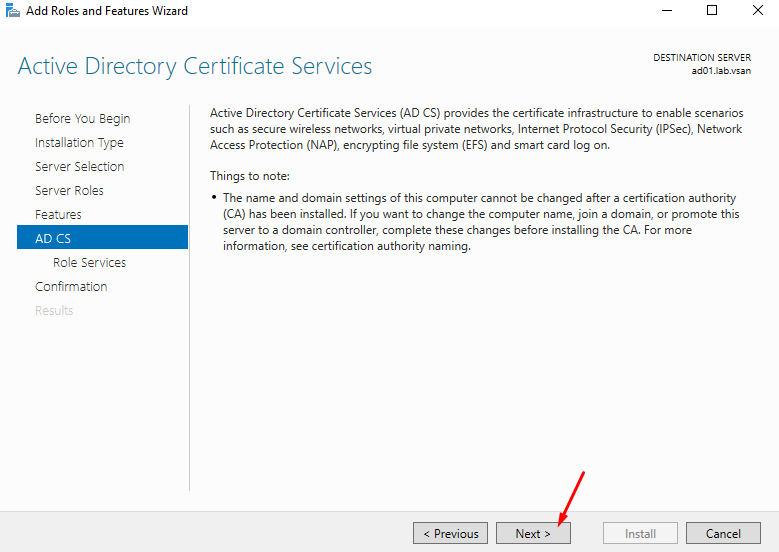
Click on NEXT –> NEXT:
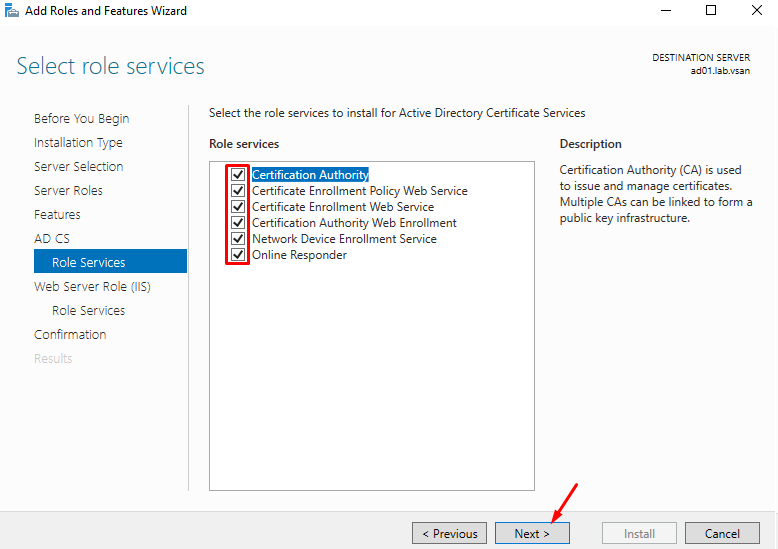
Mark all Role services as shown in the picture below. Click on NEXT to continue:
Click on NEXT –> NEXT –> Install:
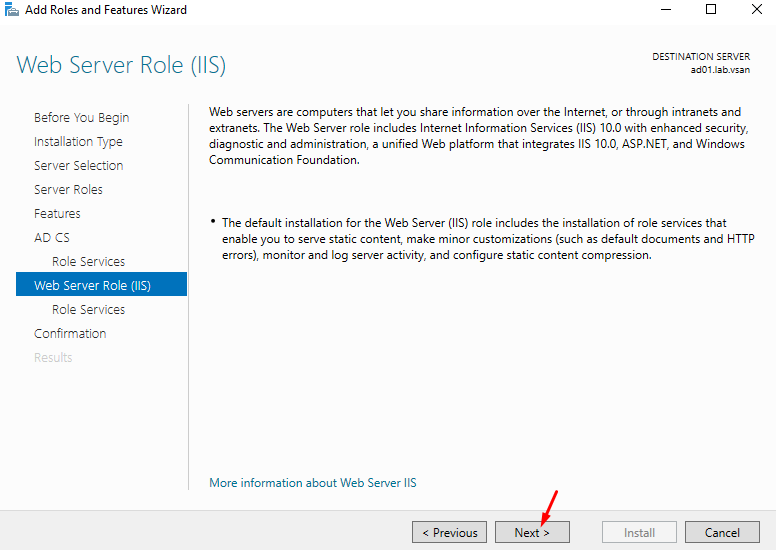
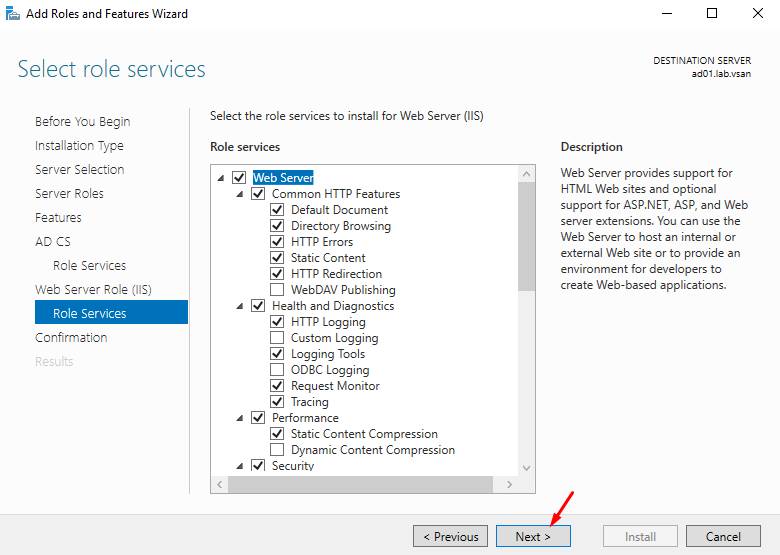
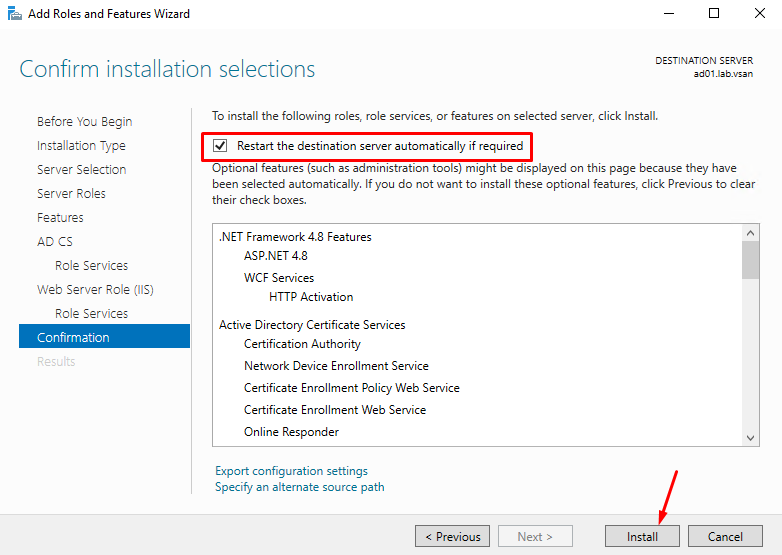
At this point, it is necessary to wait a few minutes while the features are installed:
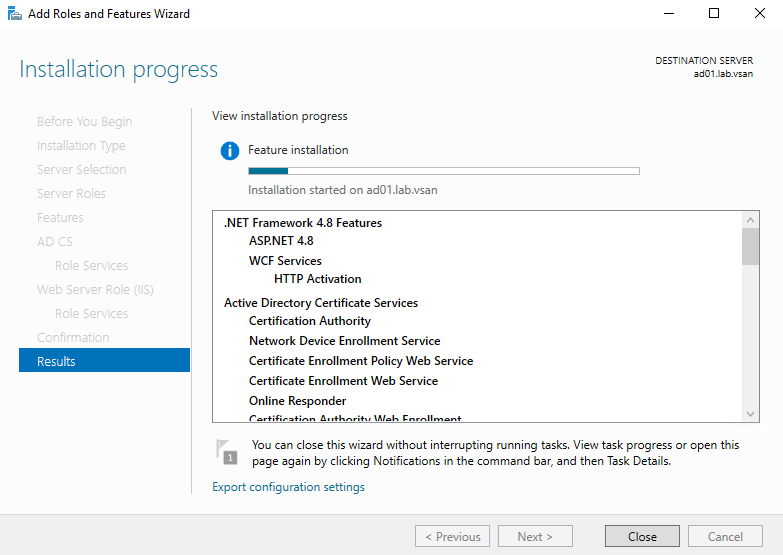
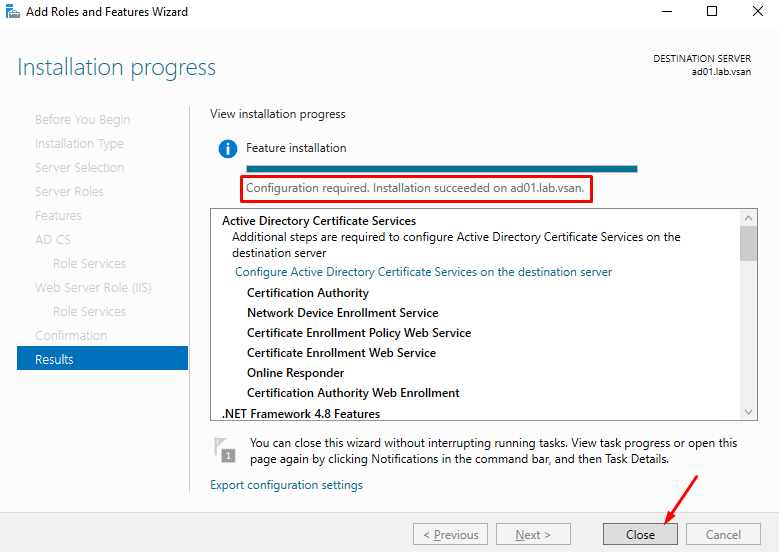
As the process finished, the message “Configuration required. Installation succeeded….”.
Click on Close to finish the Add Roles and Features Wizard. At this point, the installation process is finished:
Configuring the AD CS Role
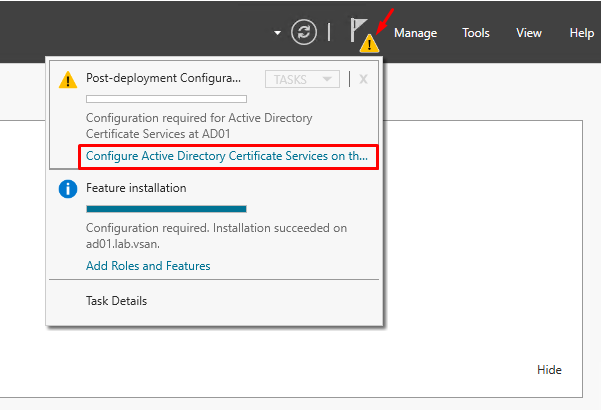
Click on the yellow exclamation icon and then, click on “Configure Active Directory Certificate Services….” for starting the configuration wizard:
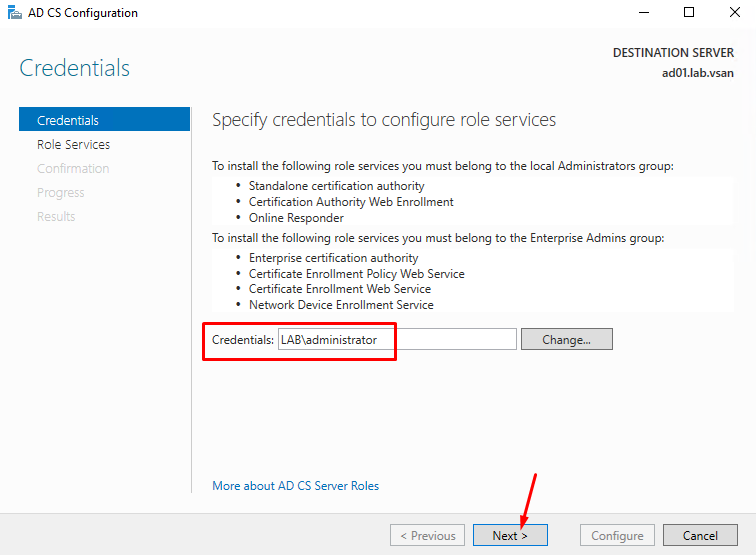
Firstly, it is necessary to type the credentials for installing the services.
In this case, we are using the Administrator account (This account is the Administrator for our Active Directory Domain).
Note: If you intend to use another account, be careful and read this page. Here it is possible to see all privileges that the user should have.
So, click on NEXT to continue:
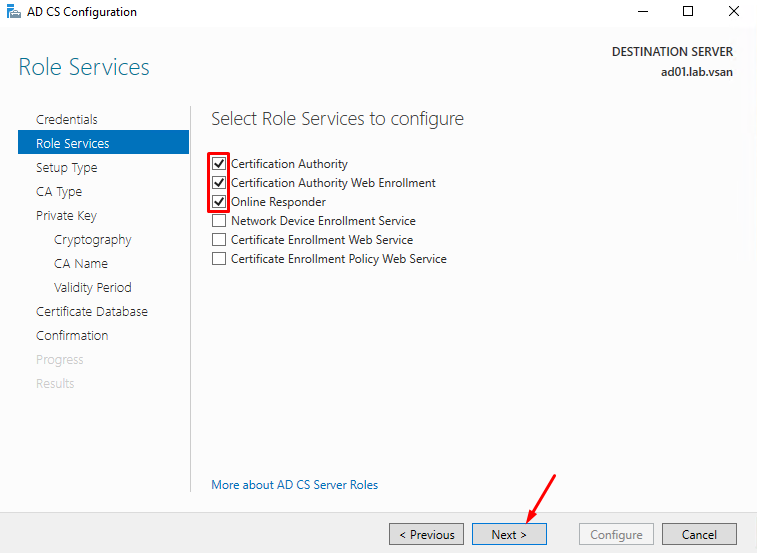
Select the Roles Services that we will configure at this moment and click on NEXT to continue:
As we said before, the CA is the acronym for Certificate Authority.
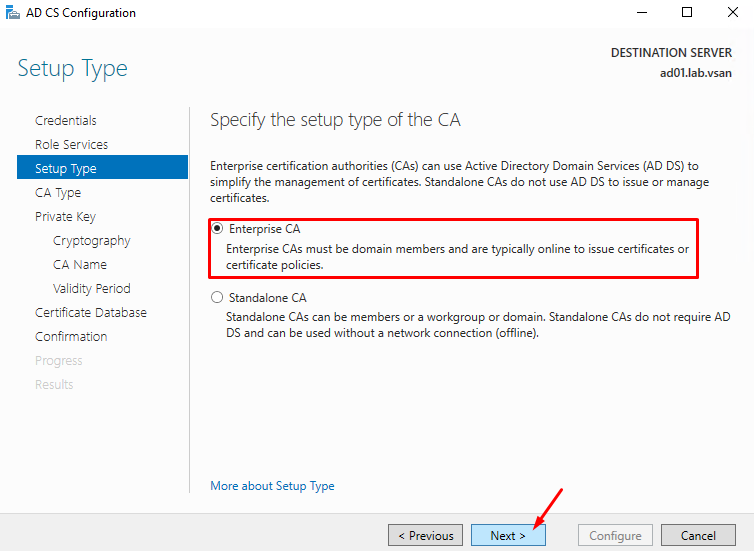
On this page, however, we need to choose the type of the CA. We have two options:
- Enterprise CA
- Standalone CA
Basically, as we have an Active Directory Domain, we are choosing the Enterprise CA. But, you can choose the best option for your deployment.
Click on NEXT to continue:
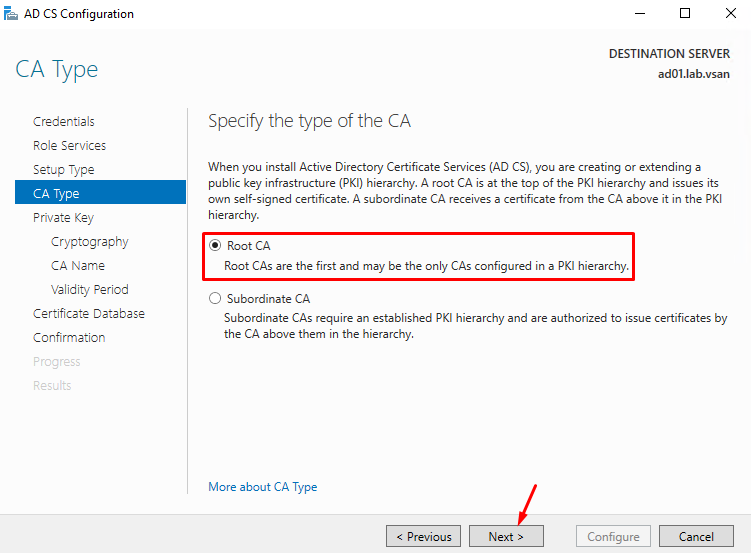
Such we do not have any CA in our environment (this will be the first CA), we are choosing the Root CA.
Click on NEXT to continue:
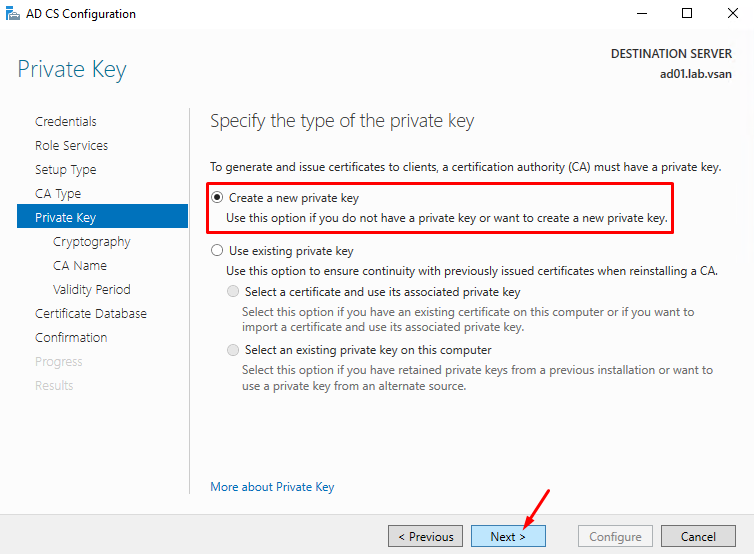
To generate and issue certificates to clients, the CA must have a private key.
So, click on “Create a new private key” and click on NEXT to continue:
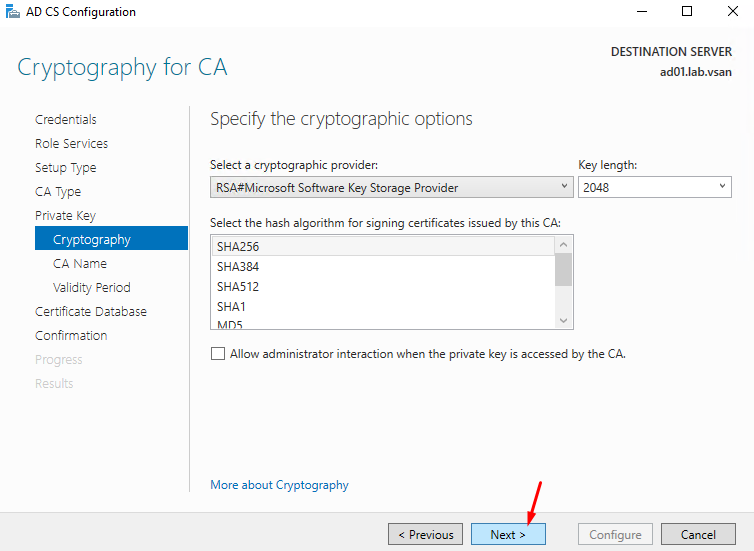
Keep the default values and click on NEXT to continue:
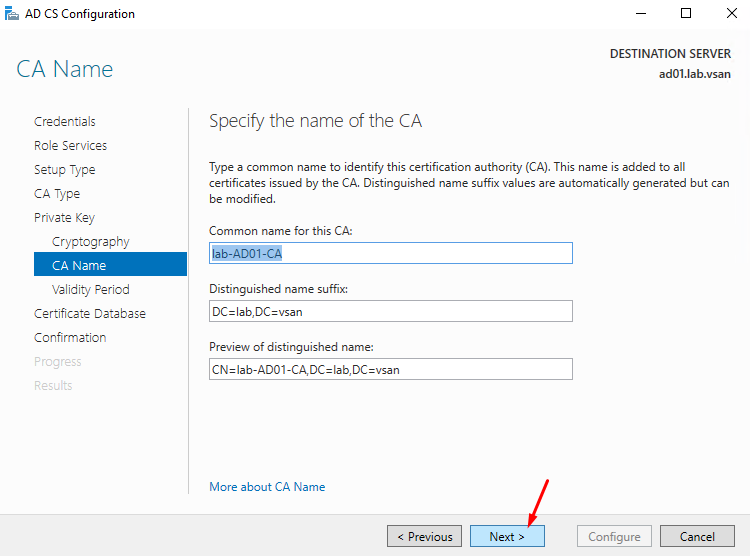
At this point, it is necessary to define the Common name for this CA.
Note: This name is added to all certificates issued by the CA.
Click on NEXT to continue:
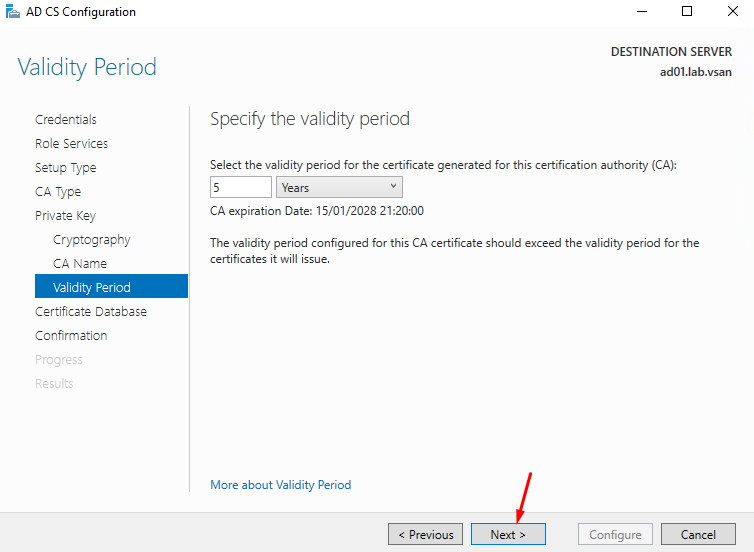
Specify the validity period for the certificate generated for this certificate authority.
Note: This validity period is for the CA certificate only. It is not referred to the certificates issued by this CA.
Click on NEXT to continue:
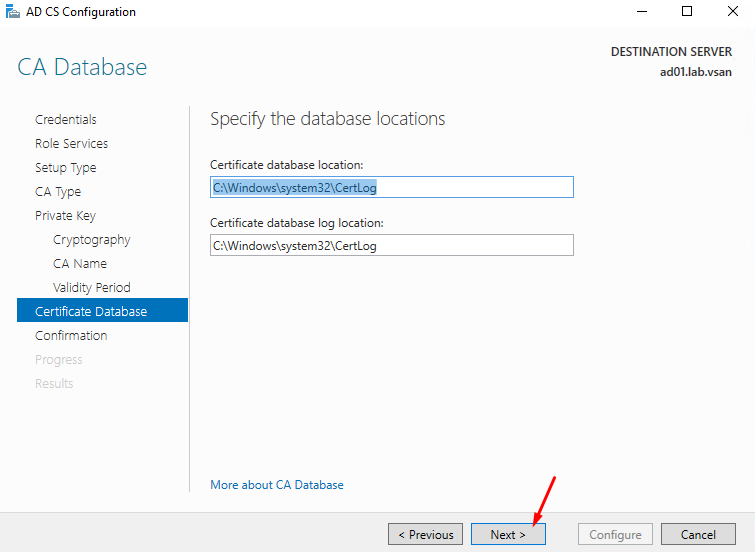
Keep the default values and click on NEXT to continue:
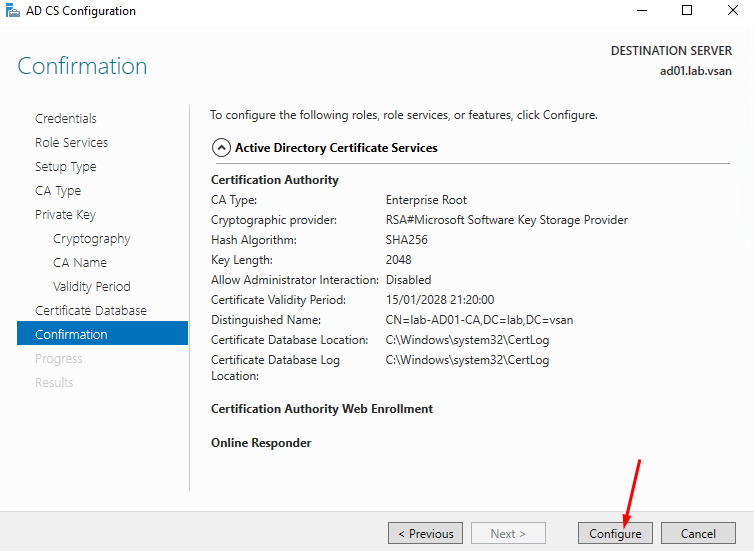
Click on Configure for starting the configuration process:
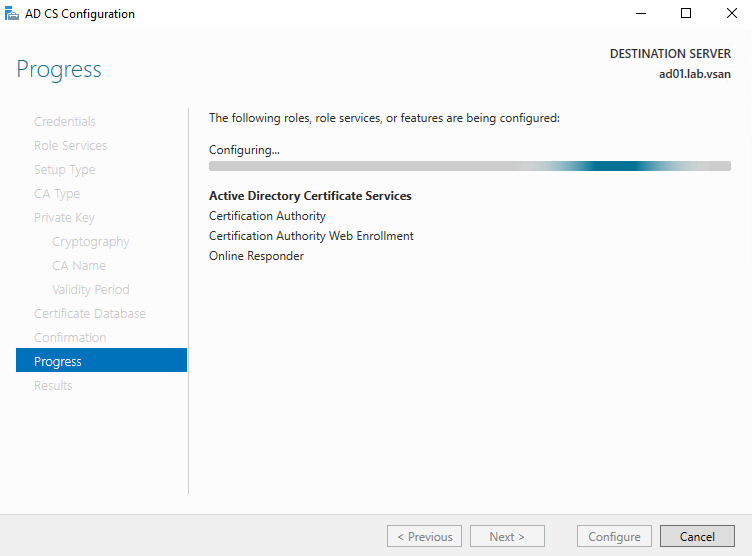
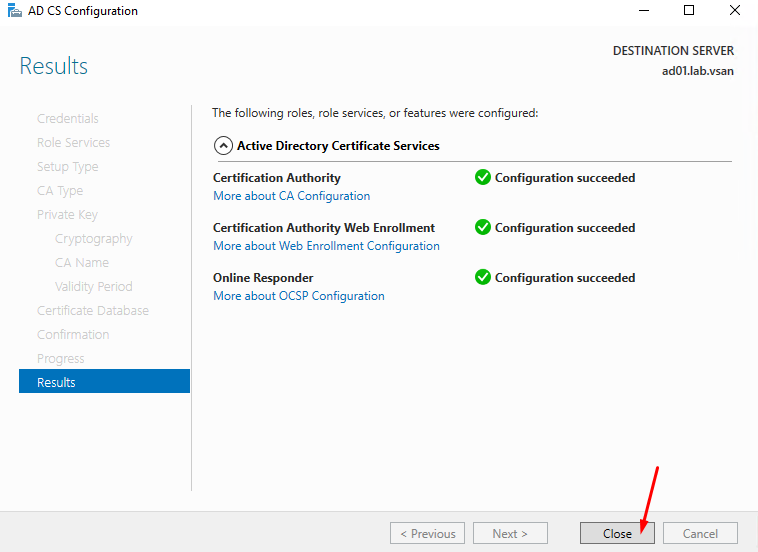
After a few minutes, the configuration process will be finished. The picture below should be shown.
Click on Close:
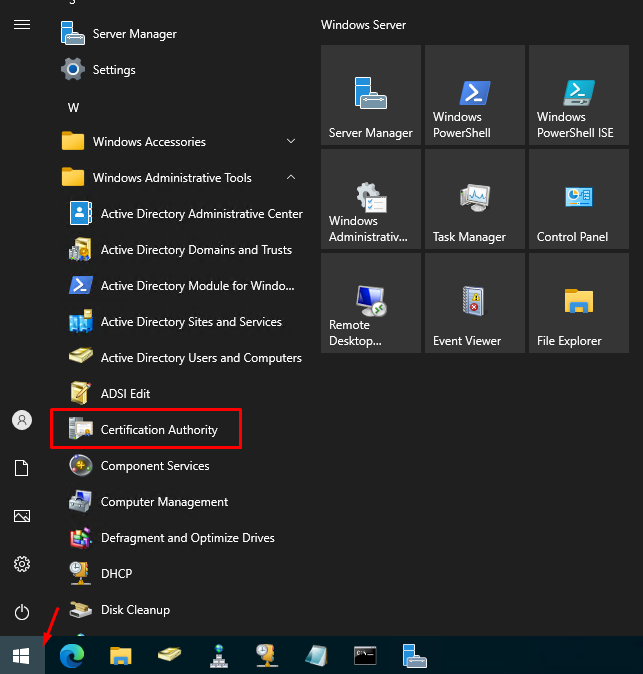
After that, click on Start Menu –> Windows Administrative Tools –> Certification Authority to open the Certification Authority menu:
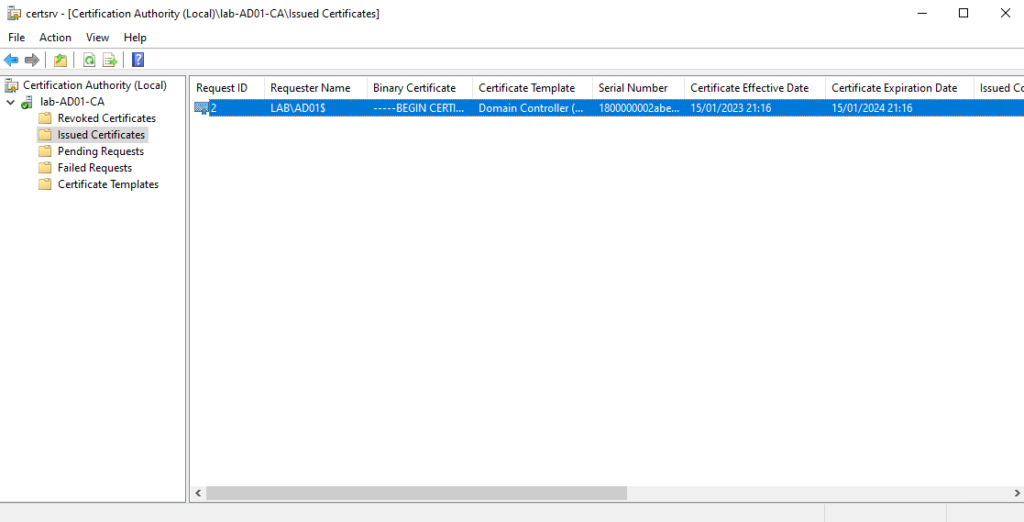
On this page, we have the Certificate Authority menu. We can see a lot of details about the certificates, such as Revoked Certificates, Issued Certificates, Pending Requests, etc:
Accessing the Web Site for the AD CS Services
Open your browser and type the address:
http://IP_or_FQDN_for_the_CA/certsrv
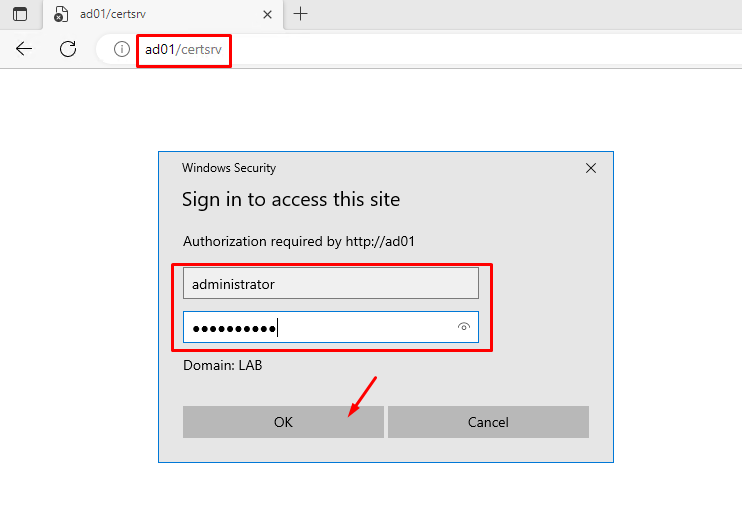
In our case, the CA hostname VM is “ad01”, so, the address for accessing the CA Web Site Services is:
http://ad01/certsrv
Type the Domain Credentials to open the Web Site:
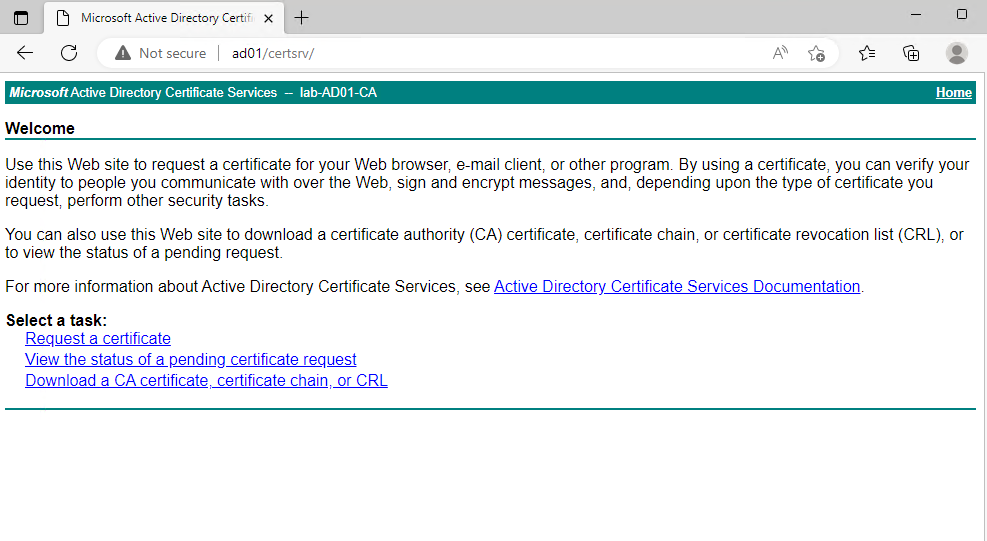
At this page, we can do a lot of tasks, such as Request a certificate, View the status of a pending certificate request, etc: