How to use a custom SSL certificate on ESXi is an article that explains how to change the default host’s certificate with a custom SSL certificate.
Warning: All procedures below are performed in a lab environment. So, we highly recommend you read it all first and do the same in a lab environment before making changes in your production environment. We will not be responsible for any impact on your environment!Why I should do it?
We can have a lot of answers to this question. But, if your corporate policy requires that you use custom certificates, this article can be useful to you!
So, let’s get started 🙂
Create a CSR Request
1) Create the file that will be used to create the CSR file. Below, is an example of the file content that will be used to create the CSR file:
[ req ]
default_bits = 2048
distinguished_name = req_distinguished_name
req_extensions = req_ext
prompt = no
[ req_distinguished_name ]
countryName = BR
stateOrProvinceName = SP
localityName = SP
organizationName = VXRAIL
organizationalUnitName = IT
commonName = esxi8-01.vxrail.local
[ req_ext ]
subjectAltName = @alt_names
[alt_names]
DNS.1 = esxi8-01.vxrail.local
Note: Be careful with the following lines:
commonName = esxi8-01.vxrail.local
DNS.1 = esxi8-01.vxrail.local
In this example, “esxi8-01.vxrail.local” is the FQDN of our ESXi host. So, in your case, you need to change this value with your FQDN.
You can create this file with Notepad, notepad++, or with your preferred text editor. Save this file.
2) After that, we will create the CSR with the OpenSSL tool. If you are interested to know more detail about OpenSSL, we have an article that explains more detail about that. Click here to read this article about OpenSSL.
Run the below command to create the CSR:
openssl.exe req -out C:\Temp\Hosts-CSR\esxi8-02.vxrail.local-CSR.csr -newkey rsa:2048 -nodes -keyout C:\Temp\Hosts-CSR\esxi8-02.vxrail.local.key -config C:\Temp\Hosts-CSR\esxi8-02.vxrail.local-CSR_file.txt -sha256
Where:
C:\Temp\Hosts-CSR\esxi8-02.vxrail.local-CSR.csr –> CSR output file
C:\Temp\Hosts-CSR\esxi8-02.vxrail.local.key –> Key of the certificate
C:\Temp\Hosts-CSR\esxi8-02.vxrail.local-CSR_file.txt –> File used to create the CSR
Create the ESXi Certificate
3) Now, we need to create the certificate. We are using Windows CA to assign this certificate.
On Windows CA Server, open a cmd and execute the command:
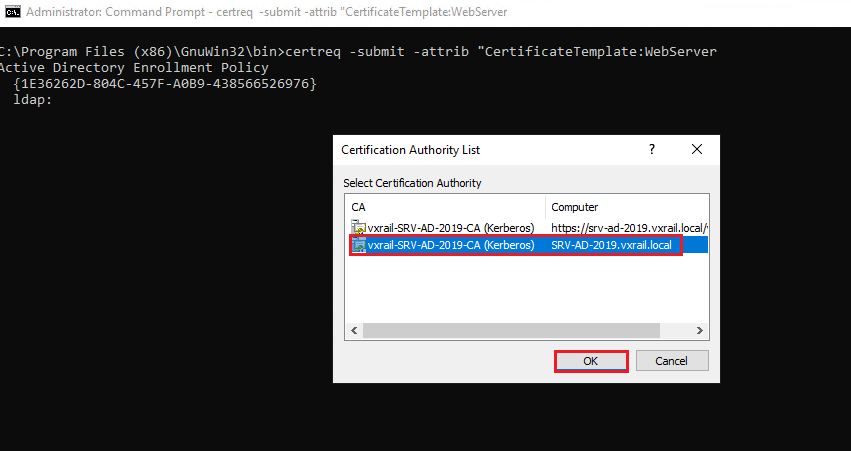
certreq -submit -attrib “CertificateTemplate:WebServer
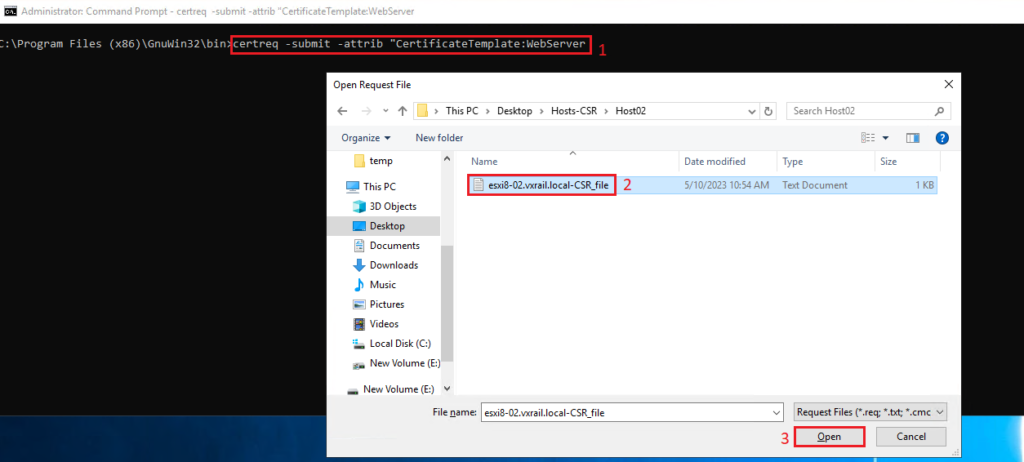
Select the CA and click on OK:
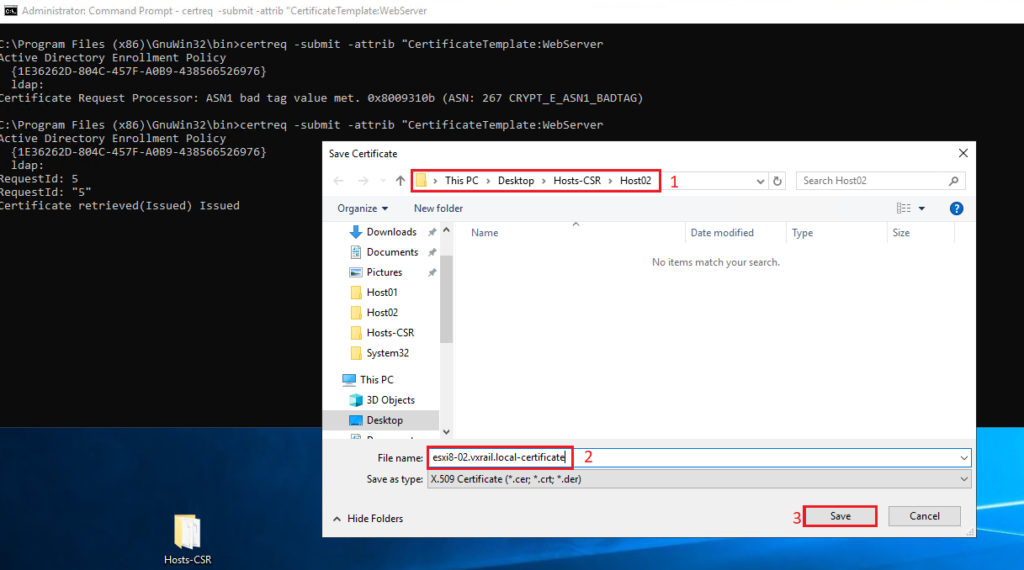
Select the directory to save the certificate. Also, type the certificate name and click on Save:
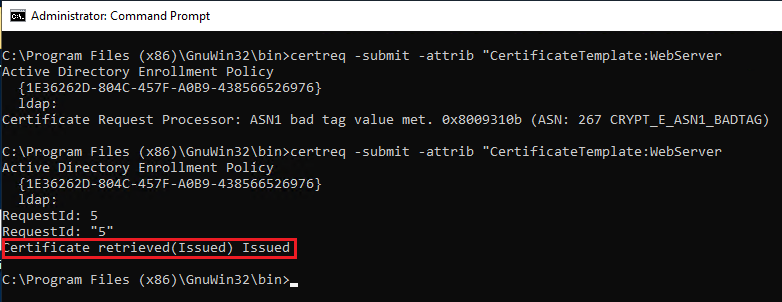
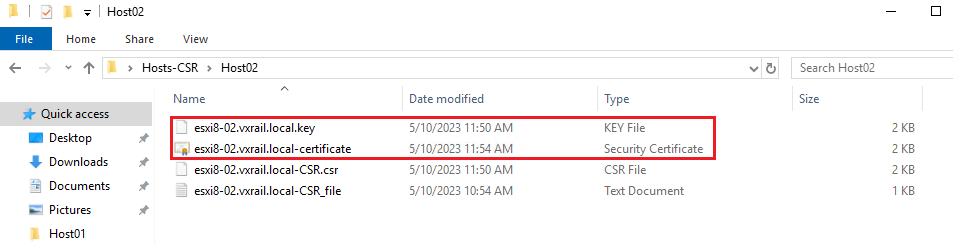
Here, we have the certificate file (.cer) + the certificate key (.key):
Export the Root CA Certificate
4) Open the ESXi certificate and export the Root CA certificate in a separate file:
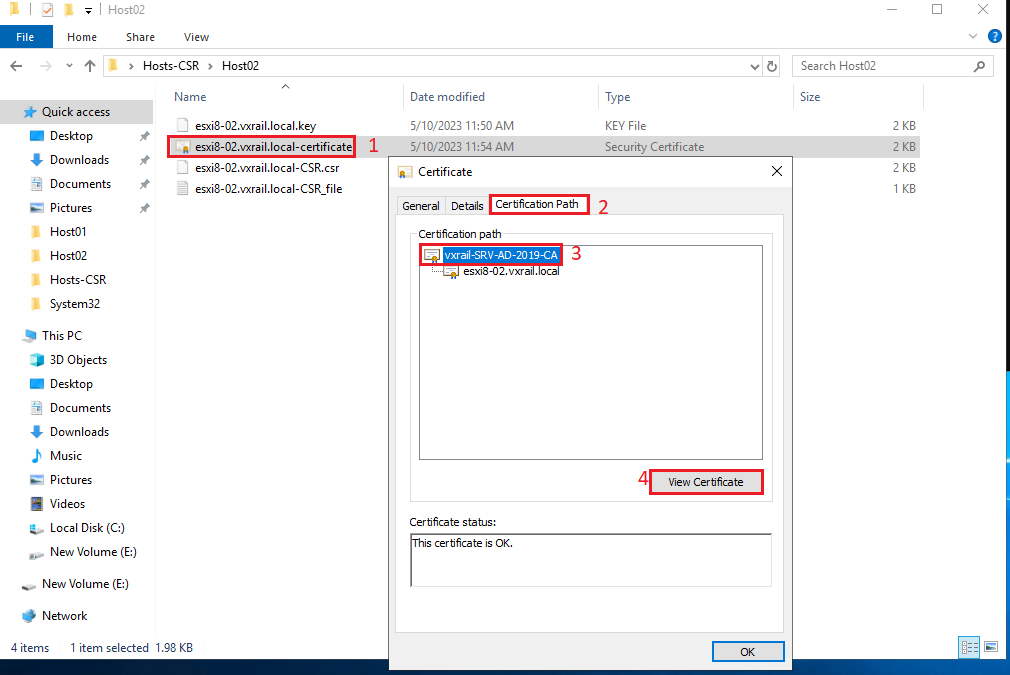
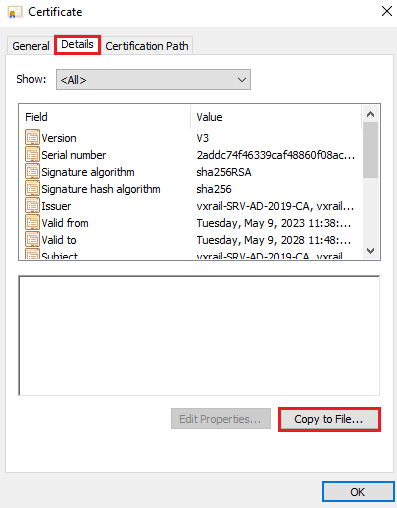
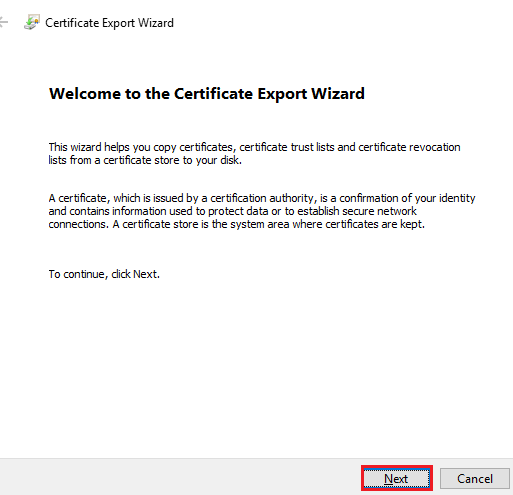
Follow the Certificate Export Wizard:
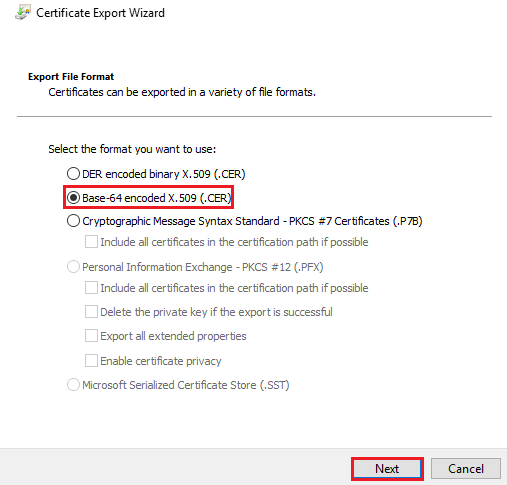
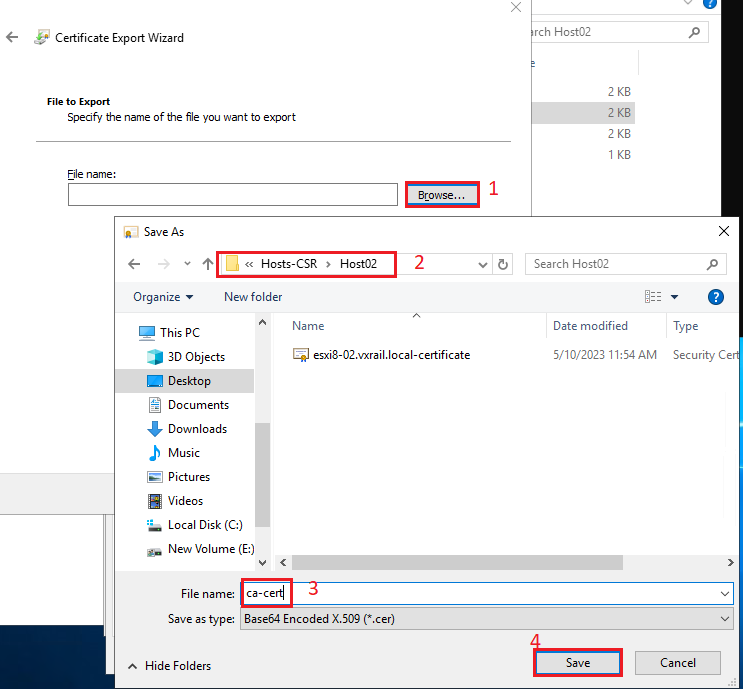
Select the directory that will be used to store the Root CA certificate. And also, type the name of the certificate:
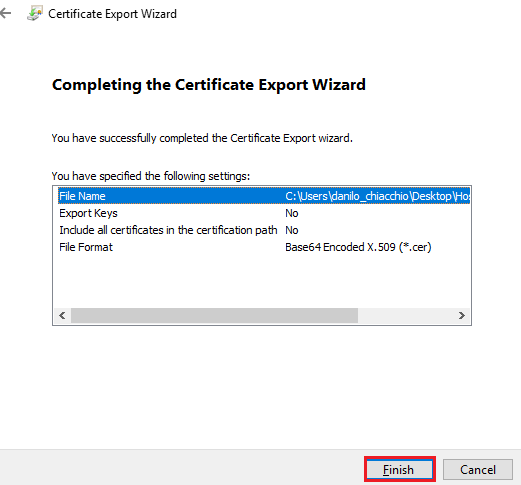
Click on FINISH to finish the wizard:
Copy files to the target ESXi host
5) Copy the below files to the target ESXi host:
ca-cert.cer
esxi8-02.vxrail.local.key
esxi8-02.vxrail.local-certificate.cer
You can use the WinSCP tool or your preferred tool to achieve that. In this example, we are using Windows Powershell to copy these files to the target ESXi host.
Access the ESXi host by SSH and create the directory on the ESXi host:
mkdir /tmp/certs
From our Windows Desktop, copy all files with Windows Powershell:
scp -o StrictHostKeyChecking=no * root@10.237.180.157:/tmp/certs
Change the vCenter Certificate Mode
6) Access the vCenter Server by vSphere Client. We will change the Certificate Mode. An important warning that you need to know about this:
**** IMPORTANT ****
Use VMCA to provision the ESXi hosts in your environment unless corporate policy requires that you use custom certificates. To use custom certificates with a different root CA, you can edit the vCenter Server vpxd.certmgmt.mode advanced option. After the change, the hosts are no longer automatically provisioned with VMCA certificates when you refresh the certificates. You are responsible for the certificate management in your environment.Procedure:
- In the vSphere Client, select the vCenter Server system that manages the hosts.
- Click Configure, and under Settings, click Advanced Settings.
- Click Edit Settings.
- Click the Filter icon in the Name column, and in the Filter box, enter vpxd.certmgmt to display only certificate management parameters.
- Change the value of vpxd.certmgmt.mode to custom if you intend to manage your own certificates, and to thumbprint if you temporarily want to use thumbprint mode, and click Save.
- Restart the vCenter Server service (vpxd service):
service-control –restart vmware-vpxd
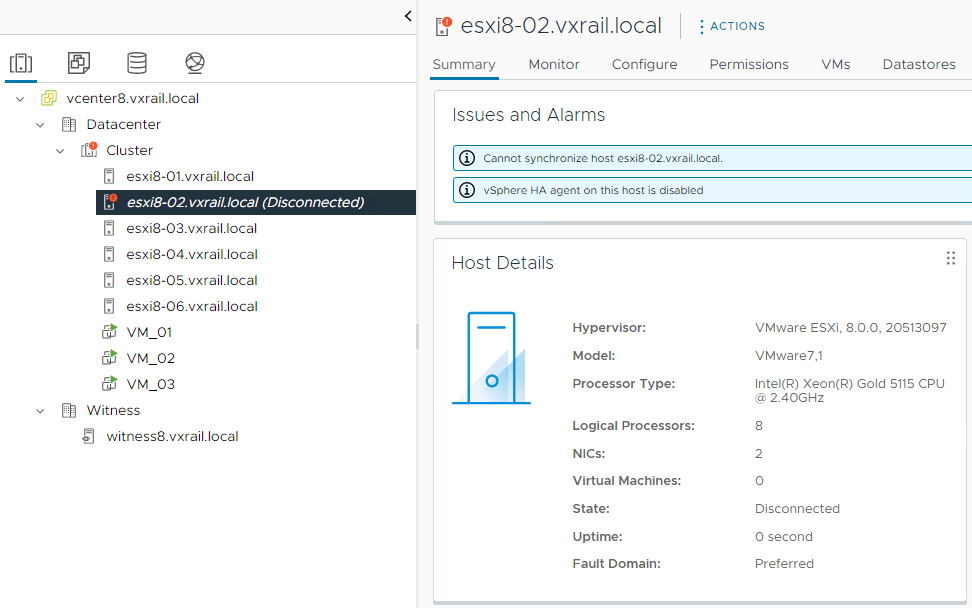
Put the ESXi Host in Maintenance Mode and Disconnected from the vCenter
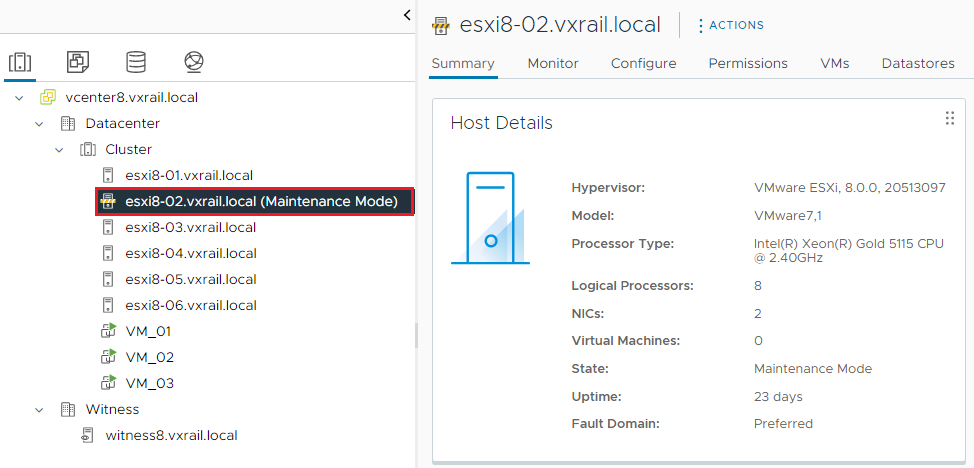
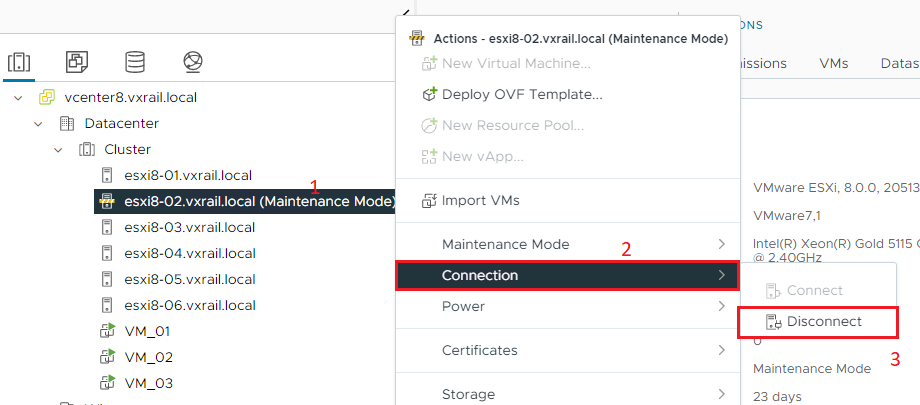
7) Put the ESXi host in maintenance mode and disconnect it from the vCenter Server:
Apply the new Certificate on the ESXi
8) Access the ESXi host by SSH and make a backup of the file castore.pem:
cp -p /etc/vmware/ssl/castore.pem /etc/vmware/ssl/castore.pem.bak
9) Append the Root CA certificate to castore.pem file by the command:
cd /etc/vmware/ssl
cat /tmp/certs/ca-cert.cer >> castore.pem
10) In the directory /etc/vmware/ssl, rename the existing certificates using the following commands
cd /etc/vmware/ssl
mv rui.crt orig.rui.crt
mv rui.key orig.rui.key
11) Copy the certificates that you want to use to /etc/vmware/ssl and rename the new certificate and key with the correct names:
cd /etc/vmware/ssl
cp -p /tmp/certs/esxi8-02.vxrail.local.key rui.key
cp -p /tmp/certs/esxi8-02.vxrail.local-certificate.cer rui.crt
12) Adjust the file permissions:
cd /etc/vmware/ssl
chmod 644 rui.crt
chmod 400 rui.key
13) After applying the custom certificate in ESXi hosts, the user needs to persist those changes into the system disk by running the command:
/sbin/auto-backup.sh
14) Reboot the ESXi host;
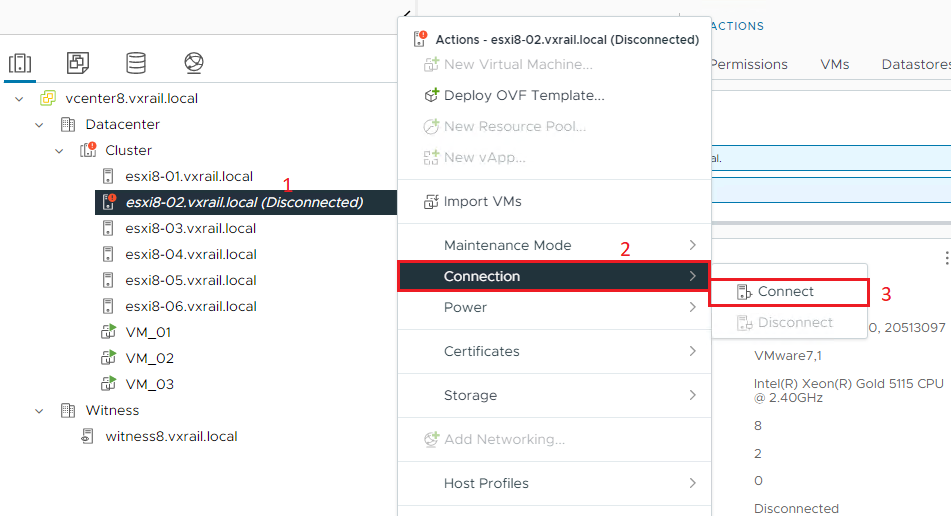
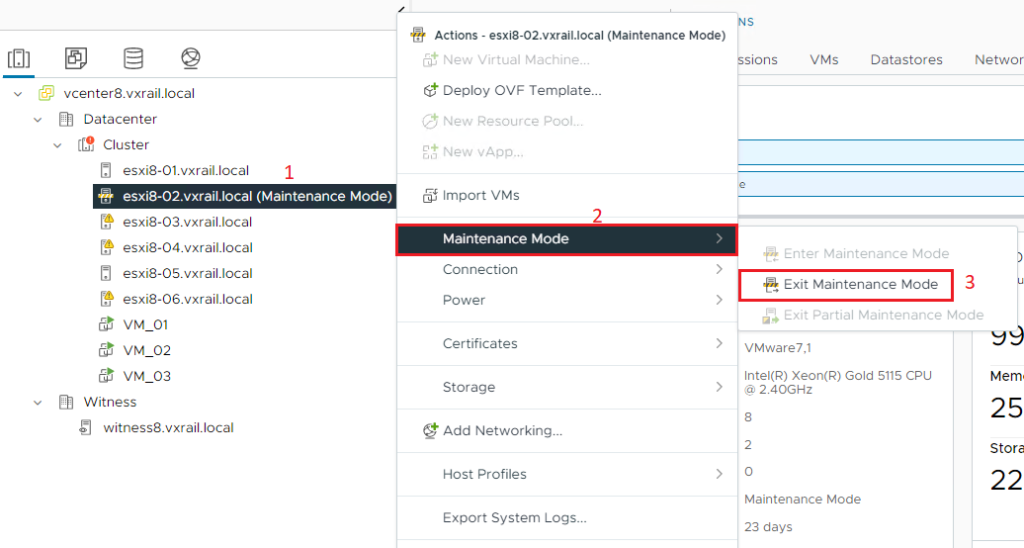
15) On the vSphere Client, connect the host again and remove it from maintenance mode:
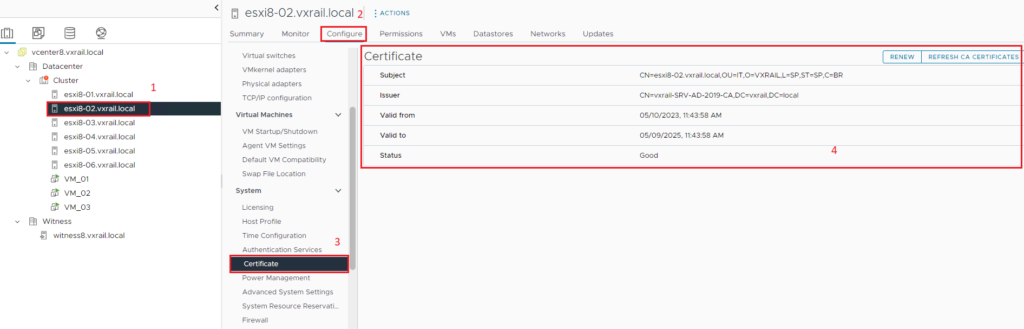
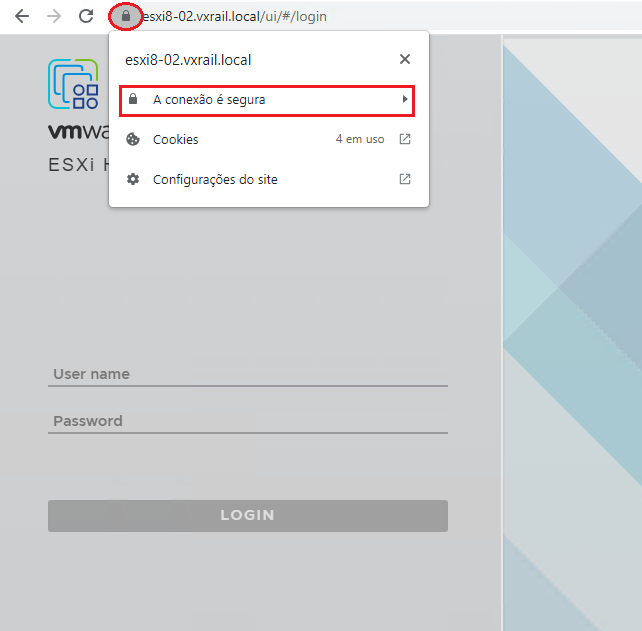
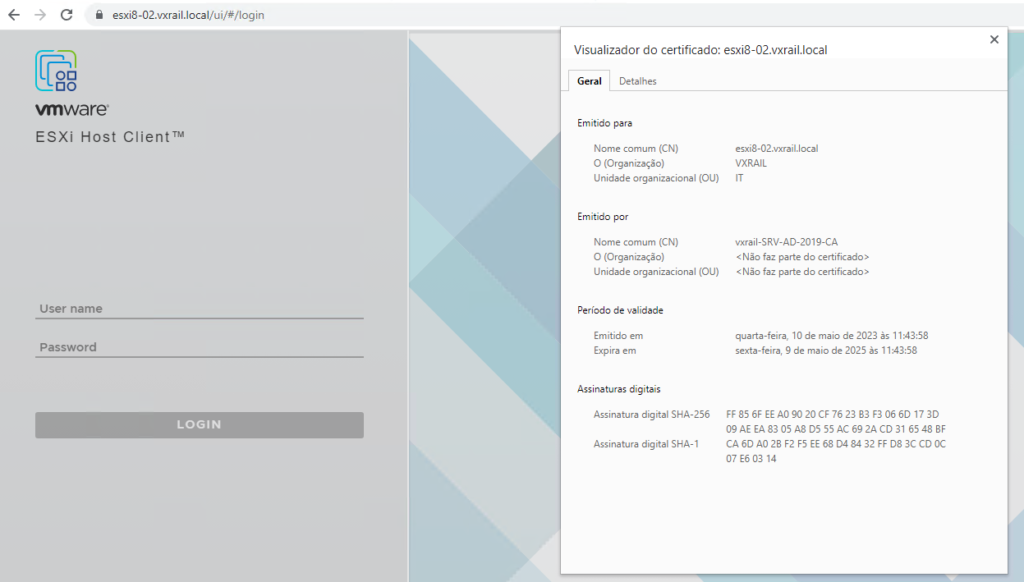
Checking the Certificate after applied