

How to use a custom SSL certificate on vCenter is an article that explains how to change the default Machine SSL certificate on the vCenter Server with a custom SSL certificate.
Warning: All procedures below are performed in a lab environment. So, we highly recommend you read it all first and do the same in a lab environment before making changes in your production environment. We will not be responsible for any impact on your environment!There are some ways to do that, but in this article, we will explain how to do that in a simple way, with some pictures to help the reader get the correct comprehension of the process.
Important: Our External CA (Certificate Authority) is provided by the Windows AD CS. We have an article that explains how to create an internal CA with Windows AD CS. Click here to read this article.
Your connection isn’t private
I believe that everyone who works with IT already saw the message below when accessing some application or website:
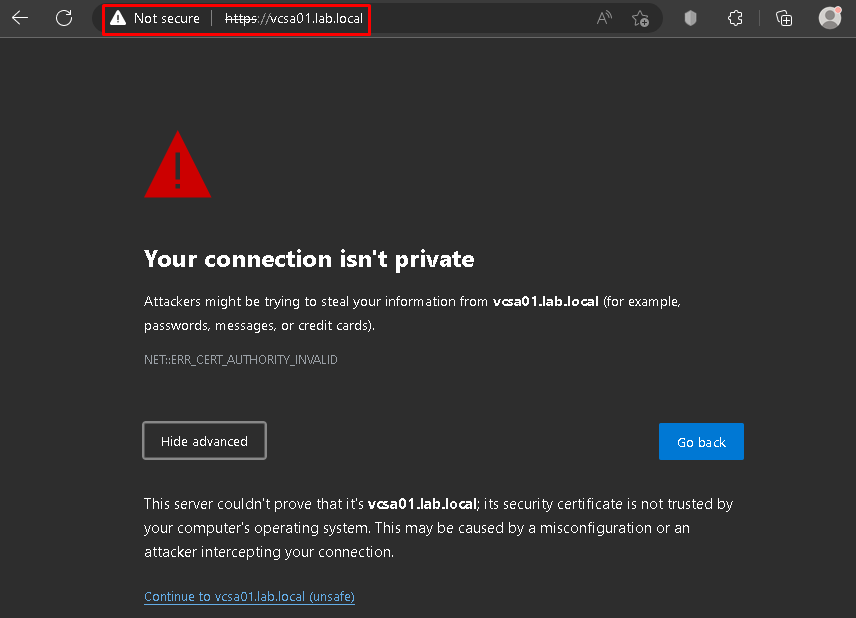
In this example, when we access our vCenter Server by vSphere Client, we are receiving this message because our PC and/or our Web browser does not trust the CA (Certificate Authority) that assigned the certificate that is being used by the vCenter Server.
Basically, we can solve this in 3 ways:
1- Install the Root CA certificate on a PC and/or Web Browser;
2- Install a custom SSL certificate assigned by an Internal CA;
3- Install a custom SSL certificate assigned by an External/Valid CA.
In this case, we will explore the second option: Install a custom SSL certificate assigned by an Internal CA.
Our Action Plan
The action plan that we will execute in this case is described in the below picture:
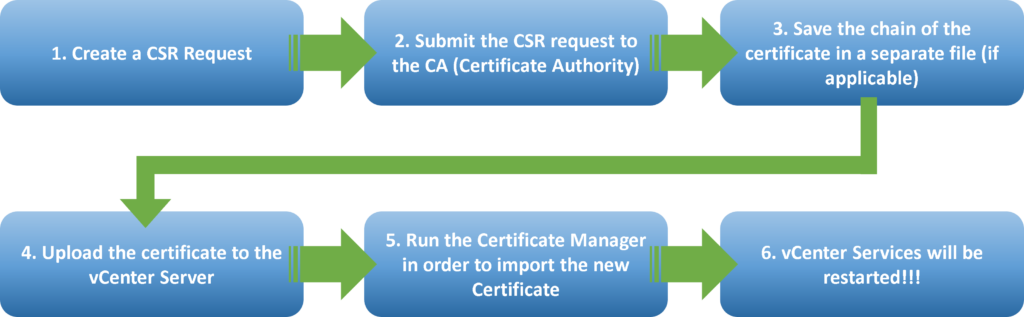
So, be careful with the time that will do that, because all vCenter Server needs to restart to apply the new certificate and the vSphere UI will be unavailable for some minutes.
1. Create a CSR Request
Access the VAMI page (https://VCENTER_FQDN:5480) and enable the SSH and Bash Shell.
Access the vCenter Server by SSH and create the structure directory that we will use to store the files that we will create:
mkdir /tmp/certsExecute the Certificate Manager tool:
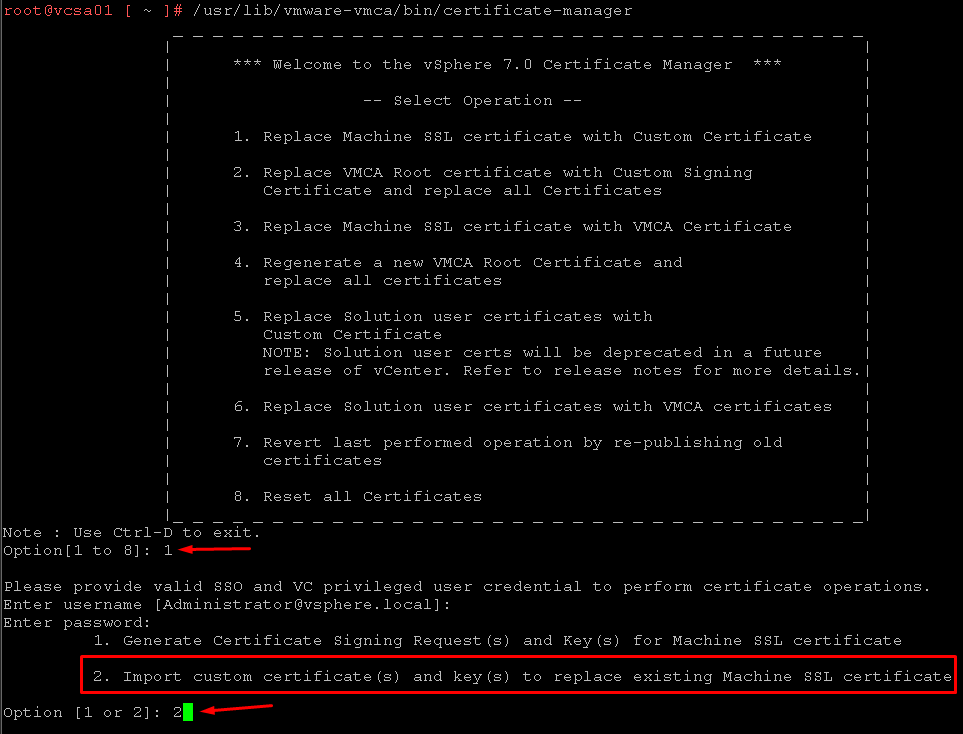
/usr/lib/vmware-vmca/bin/certificate-managerAnd select the first option “1. Replace Machine SSL certificate with Custom Certificate”:
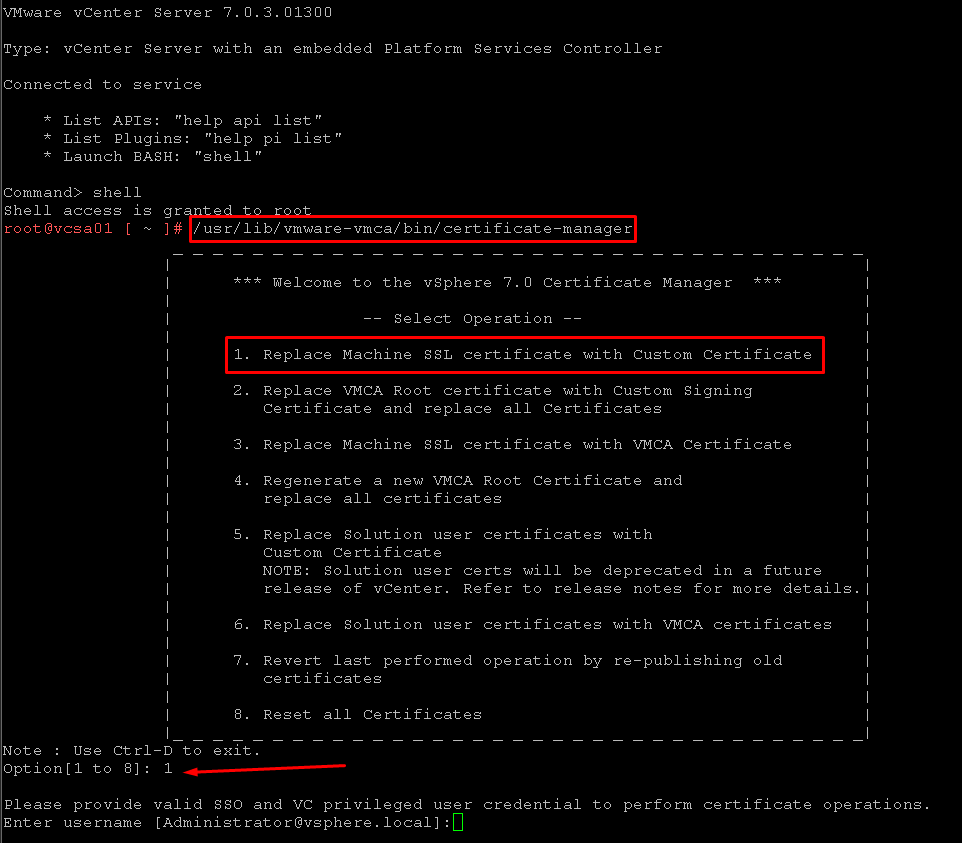
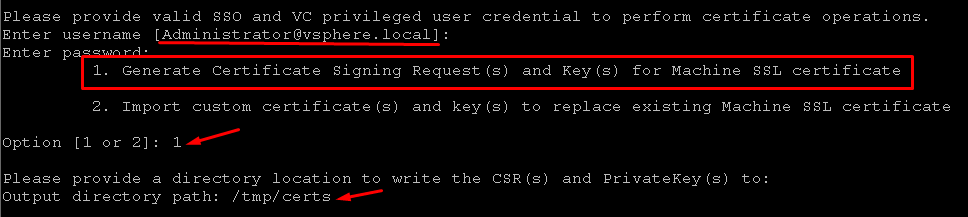
Type the SSO credentials to perform certificate operations. After that, select the option “1. Generate Certificate Signing Request(s) and Key(s) for Machine SSL certificate”.
Also, type the Output Directory path. In this example, we are using the directory path “/tmp/certs”:
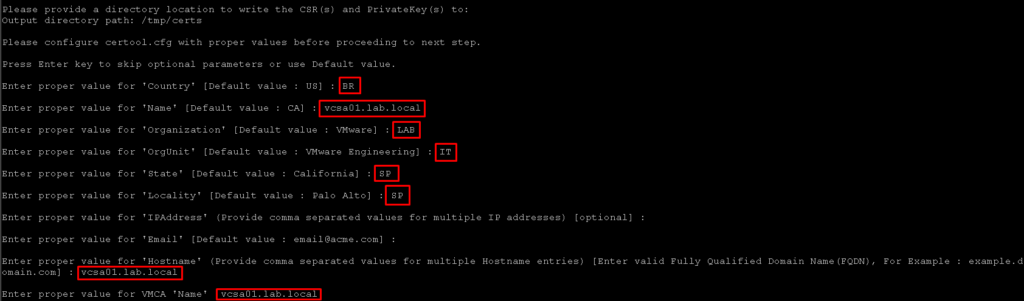
The next step is type the properties below:
- Country: Default, specify your value;
- Name: FQDN of the vCenter Server;
- Organization: Default, specify your value;
- OrgUnit: Default, specify your value;
- State: Default, specify your value;
- IP Address: IP address of the vCenter Server (optional);
- Hostname: FQDN of the vCenter Server (mandatory);
- VMCA Name: FQDN of the vCenter Server:
After that, check if the command was executed with success and type the option “2. Exit certificate-manager”:

Access the Output Directory and check the files:
cd /tmp/certs/
ls -l

Where:
- vmca_issued_csr.csr –> Certificate requisition file
- vmca_issued_key.key –> Key of the certificate
2. Submit the CSR request to the CA (Certificate Authority)
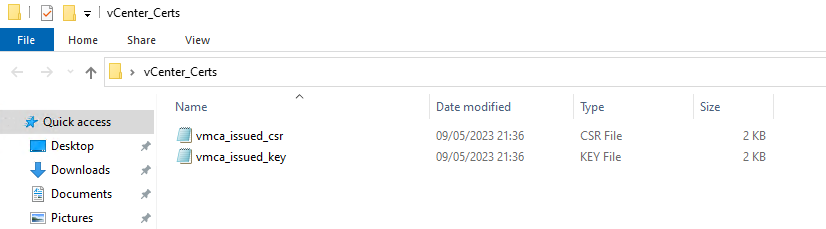
Download the CSR file “vmca_issued_csr.csr” to your PC (you can use the tool WinSCP to achieve that).
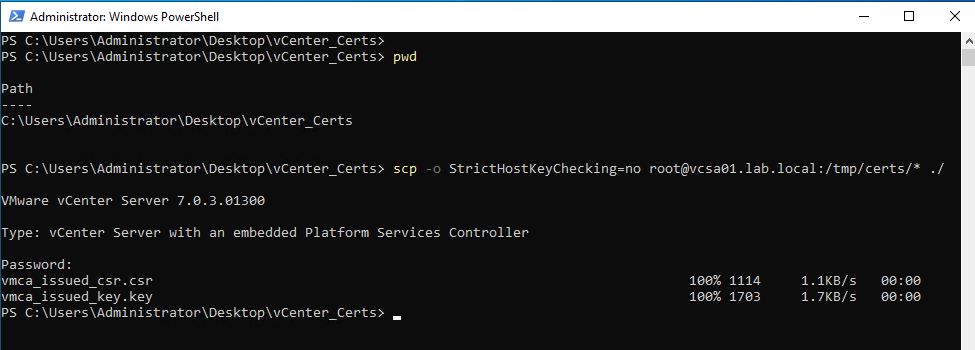
In my case, I am using Windows Powershell on the CA Server to copy both files from the vCenter Server to the local Server. The command that I am using is:
scp -o StrictHostKeyChecking=no root@vcsa01.lab.local:/tmp/certs/* ./
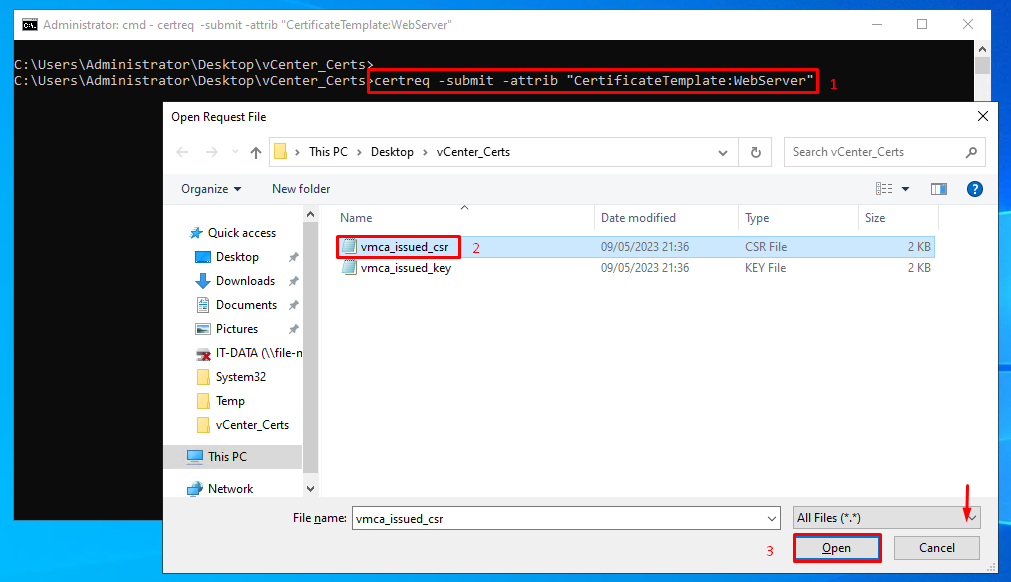
On the CA Server, run the below command on cmd:
certreq -submit -attrib “CertificateTemplate:WebServerSelect the CSR file and click on OPEN:
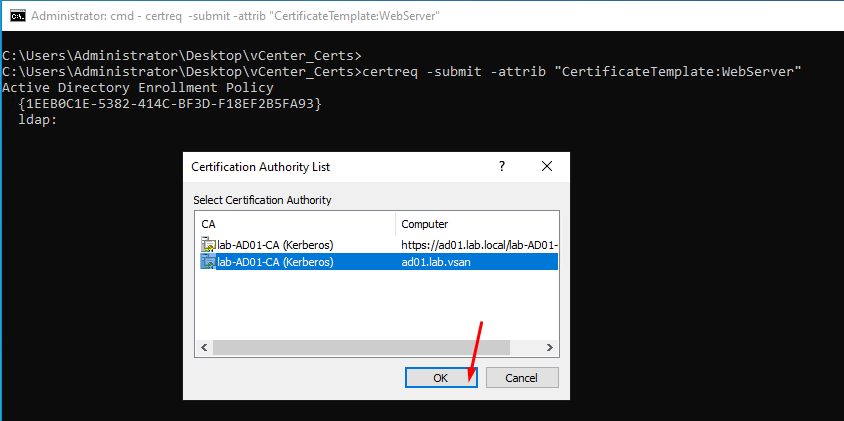
Select the Certificate Authority and click on OK:
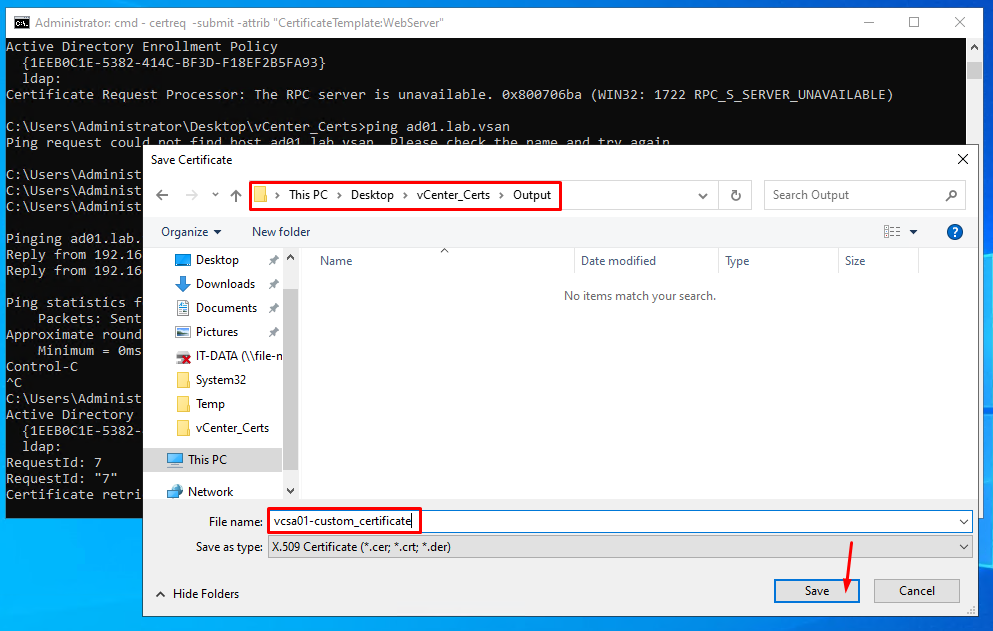
So, now we need to specify in what directory the certificate will be stored.
In this example, we are selecting the directory “Output” in our Windows Client. Type the name of the certificate and click on SAVE. In this example, the name of the certificate is “vcsa01-custom_certificate”:

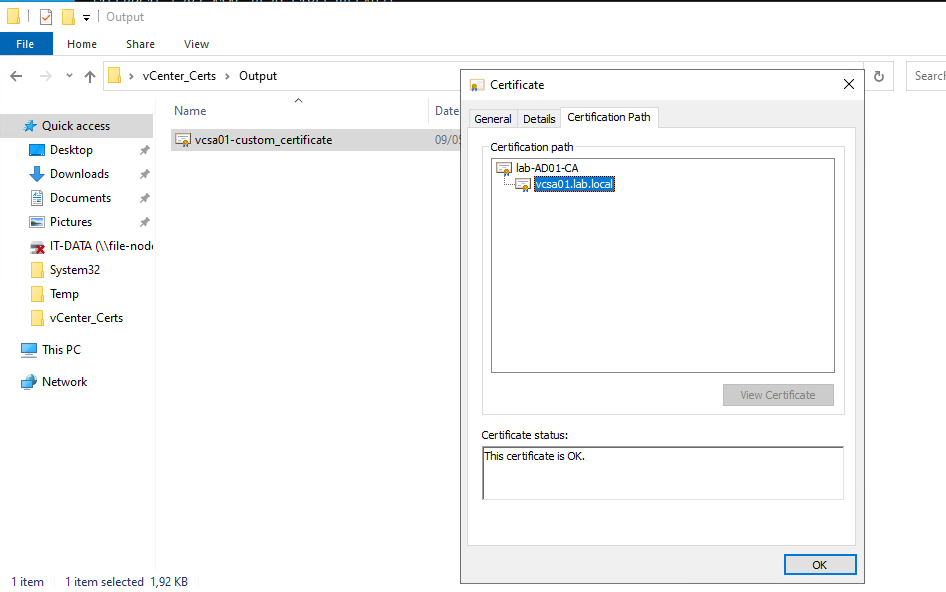
After that, we can see the certification details:
3. Save the chain of the certificate in a separate file
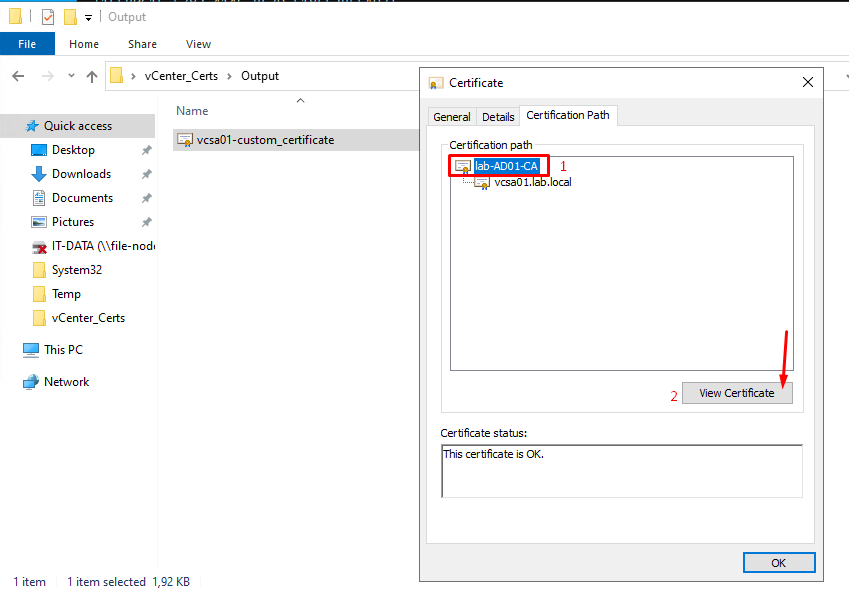
In this step, we will save the Root CA certificate in a separate file.
Do double-click on the custom vCenter Server certificate –> Certification Path –> Select the CA –> View Certificate:
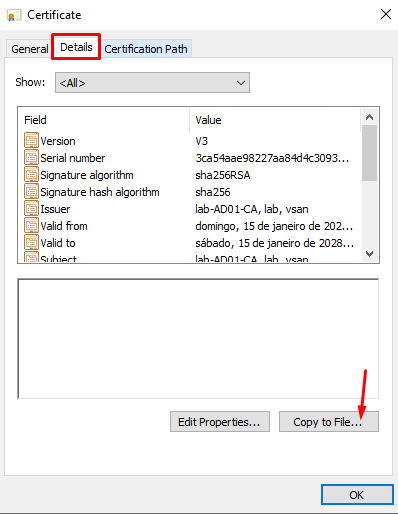
Click on Details tab –> Copy to File:
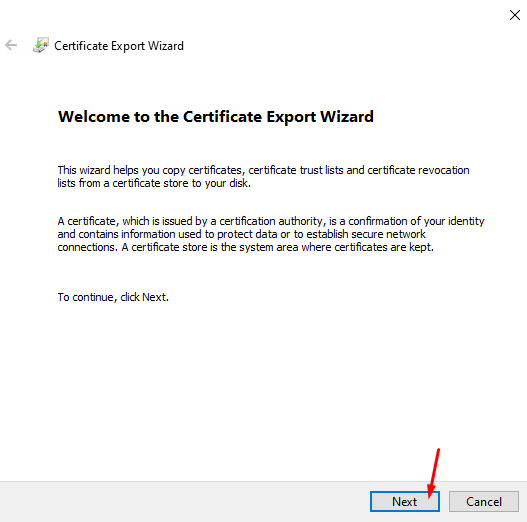
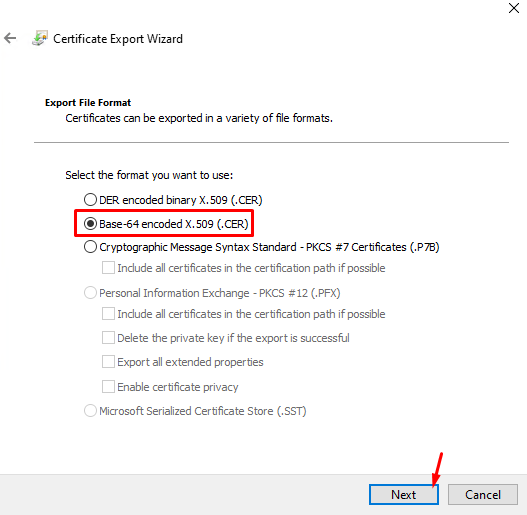
So, the Certificate Export Wizard will start. Now, we need to follow the wizard to export the Root CA certificate:
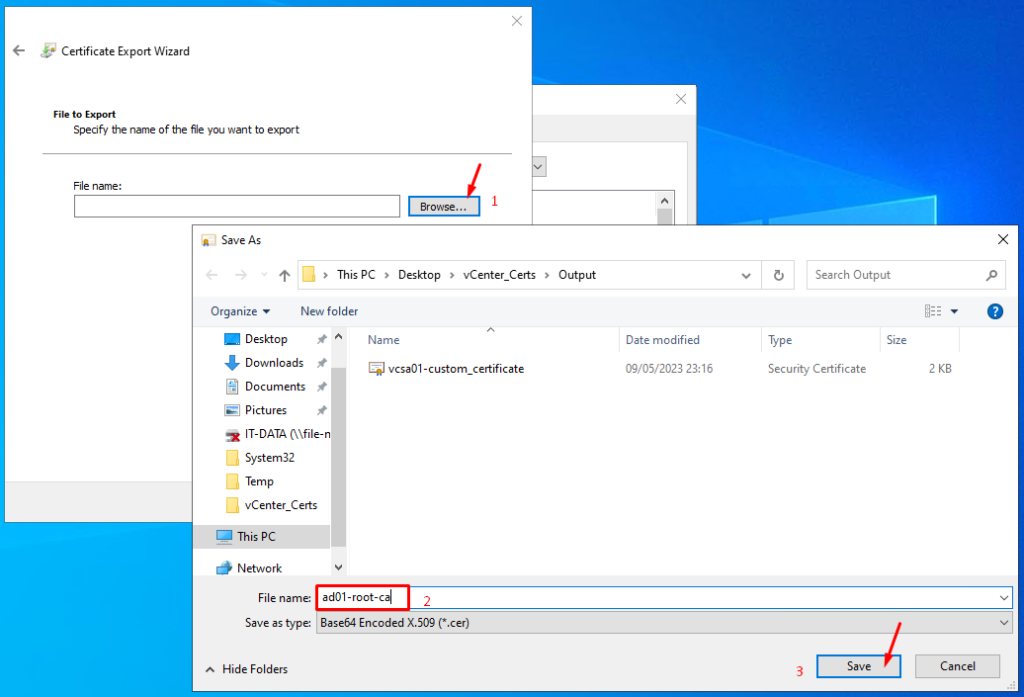
Select the directory where you will save the Root CA certificate and type the name of the certificate.
In this example, the certificate name is “ad01-root-ca”:
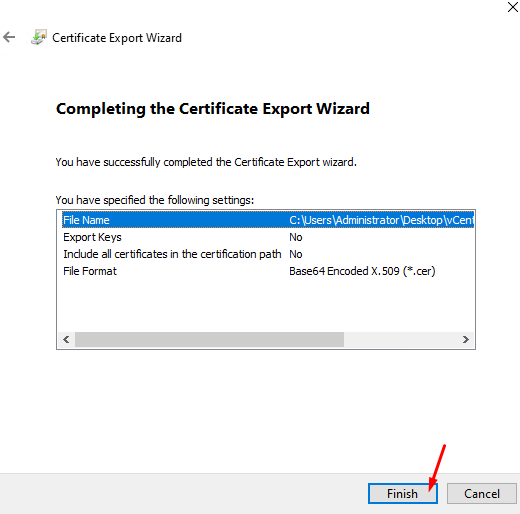
Click on FINISH to finish the wizard:
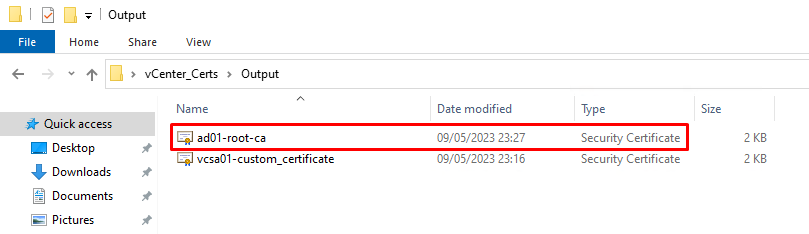
Finishing the Action Plan
Now it is the final step of our action plan. We will execute the final steps:
4. Update the certificate to the vCenter Server
5. Run the Certificate Manager in order to import the new Certificate
6. vCenter Service will be restarted
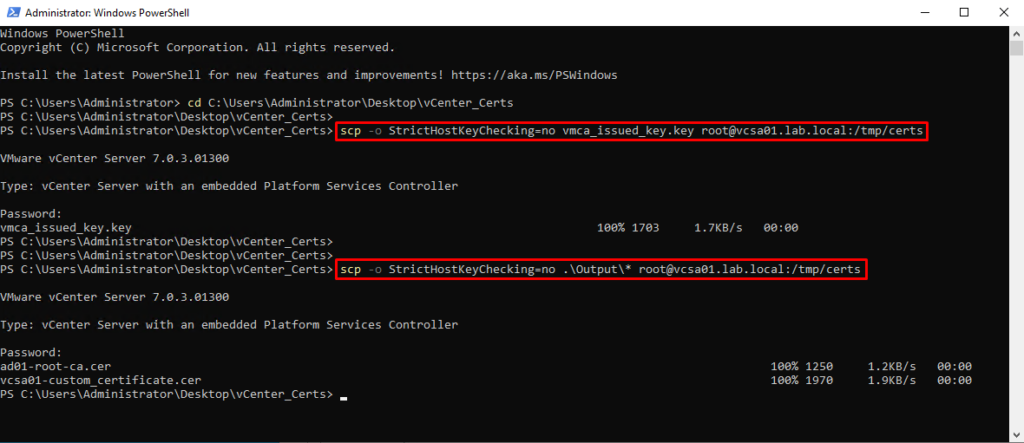
Copy the below files to the vCenter Server. You can use your preferred tool to do that. In our example, I am using the Windows Powershell to achieve this step:
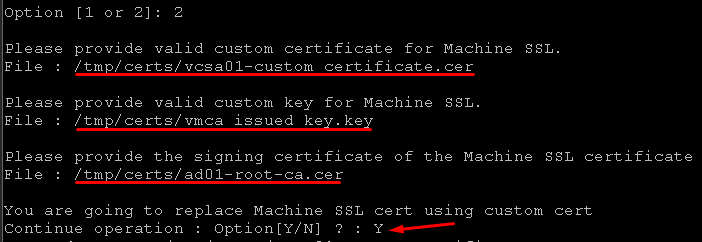
Machine certificate file: vcsa01-custom_certificate.cer
Key file machine SSL: vmca_issued_key.key
Root CA/Chain certificate: ad01-root-ca.cer
We will copy each file to the /tmp/certs directory in the vCenter Server:
scp -o StrictHostKeyChecking=no vmca_issued_key.key root@vcsa01.lab.local:/tmp/certsscp -o StrictHostKeyChecking=no .\Output* root@vcsa01.lab.local:/tmp/certs
********* NOW, WE WILL APPLY THE NEW CERTIFICATE TO THE VCENTER SERVER. ALL SERVICES WILL BE RESTARTED ********
On vCenter Server CLI, run the Certificate Manager:
/usr/lib/vmware-vmca/bin/certificate-managerSelect “1. Replace Machine SSL certificate with Custom Certificate”
And select “2. Import custom certificate(s) and key(s) to replace existing Machine SSL certificate”:
Specify the full path for each file and type Y to continue this operation:
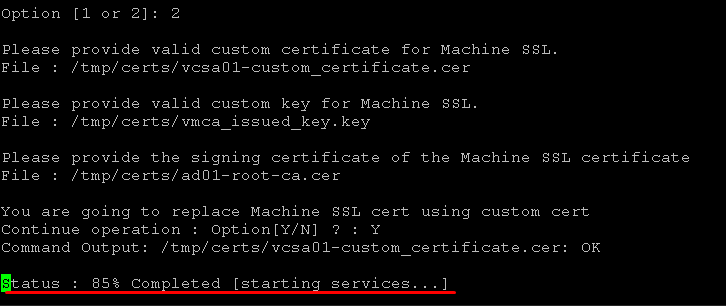
Waiting a few minutes while the new certificate is being applied and all vCenter Server is being restarted:
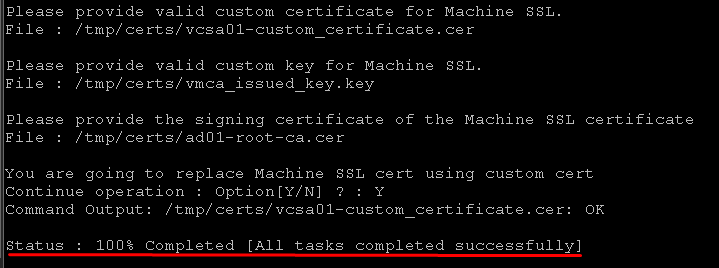
Now, the process has been finished successfully:
Validating the new certificate
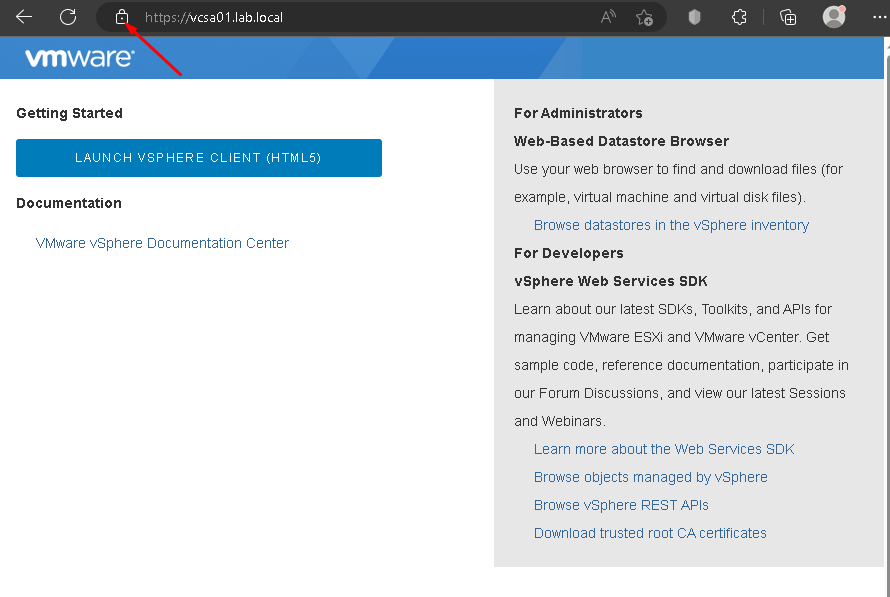
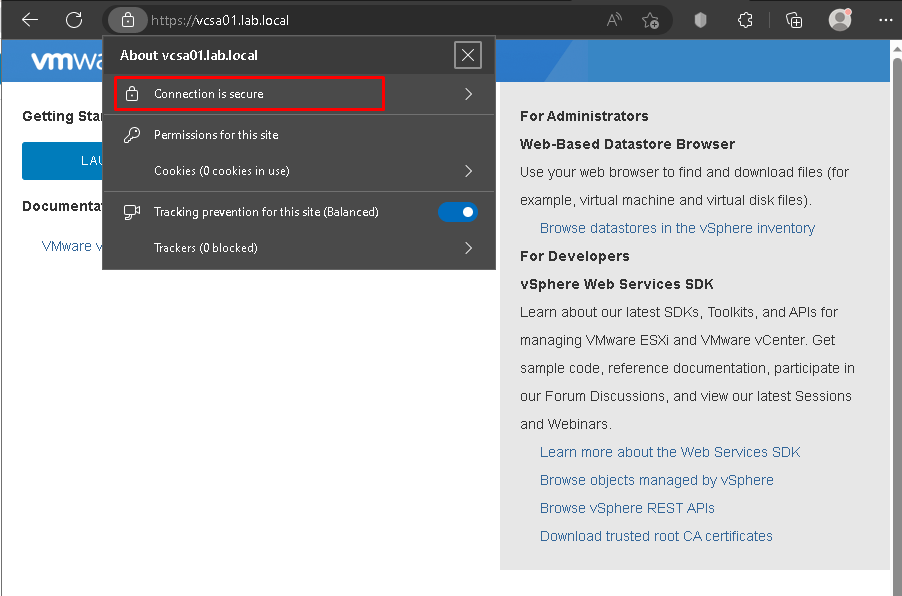
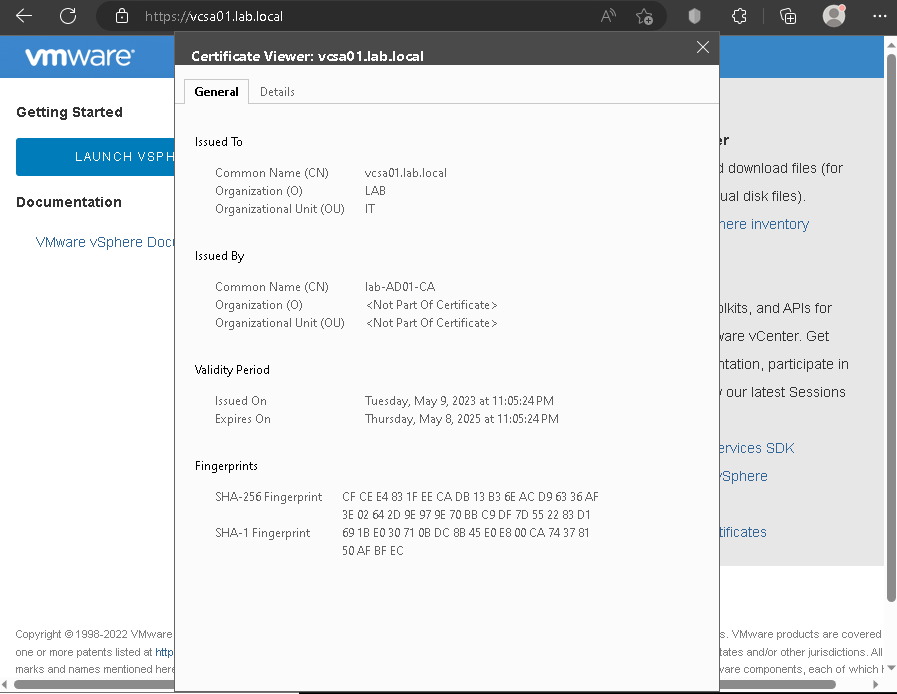
Now, when we are accessing the vCenter Server by vSphere Client, we can see that the connection is secure 🙂
Note: I am accessing the vCenter Server by vSphere Client using a PC that is joined at the domain lab.local:
I would like to share a wonderful link that helped me a lot in doing this article:
