

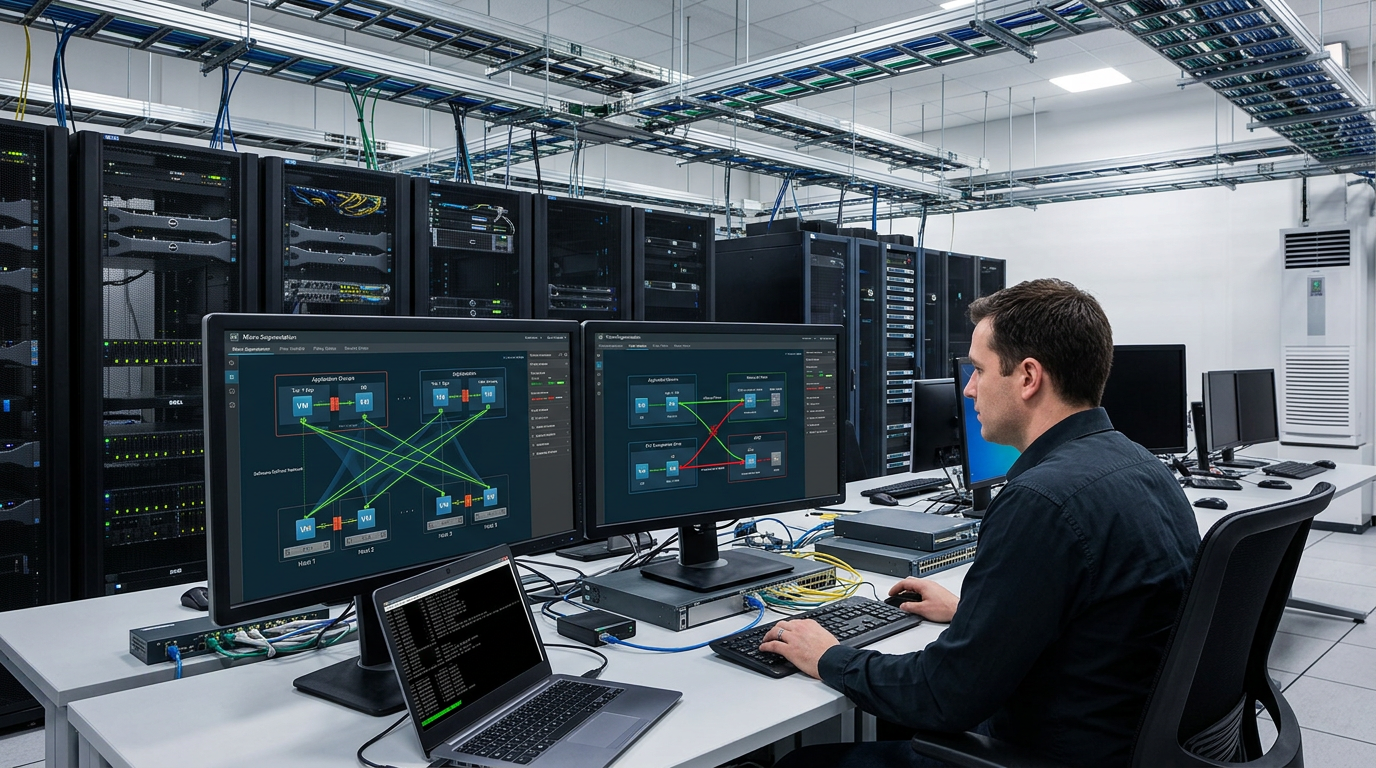
Implementing NSX Micro-Segmentation is an article that explains how VMware NSX Distributed Firewall can be used to protect workloads through advanced traffic filtering. In this example, we will explore how to apply micro-segmentation rules to control communication between virtual machines inside the same network segment.
First and Foremost, Do you talk about distributed firewalls? What is this and how does it work?
DFW is the acronym for Distributed Firewall or Distributed Firewalling.
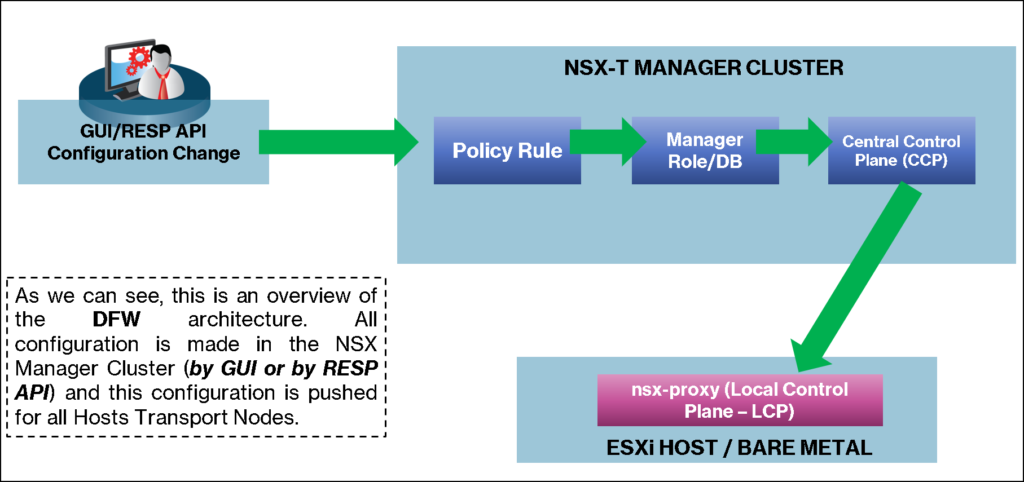
With this resource, all Host Transport Nodes (ESXi hosts) have your firewall modules locally implementing the firewall. Because of that, we called it a Distributed Firewall. So, in this case, with this architecture, we do not have a central firewall appliance or something like that, as we can be familiar to see.
The distributed firewall resource can provide the east-west traffic filter. So, the communication flow between two VMs, for instance, can be filtered by this distributed firewall even if both are in the same broadcast domain.
As we know, the NSX Management Plane is made for one to three NSX Manager Appliances. So, based on it, the NSX administrator interacts and creates the firewall rules using the NSX Manager GUI or with REST API commands. After that, the NSX Management Cluster sends the rules to all Host Transport Nodes, as we can see in the below picture:
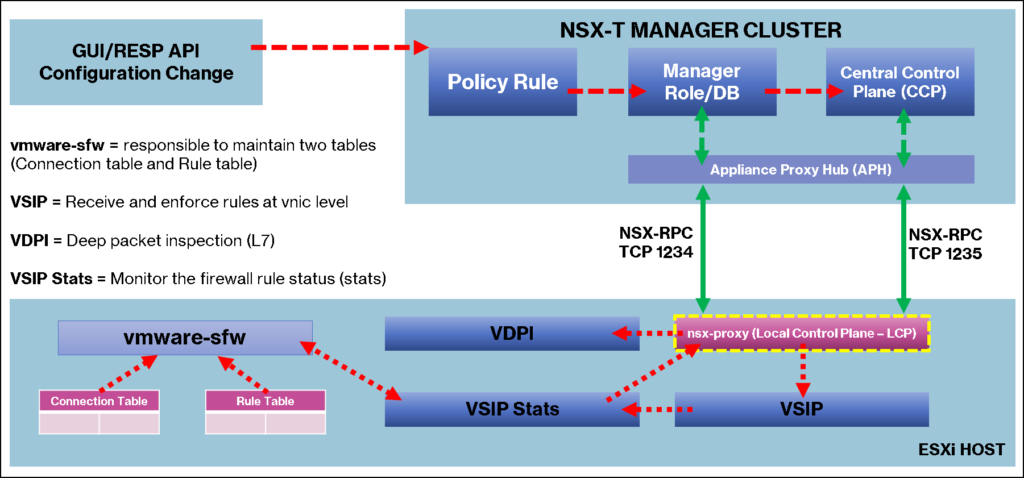
Additionally, in the below picture, we can see a more detailed diagram explaining the Distributed Firewall topology with all related components.
As we can see, in each Host Transport Node Device (ESXi), we have a lot of modules each one responsible for one task. The “nsx-proxy” running on the Host Transport Node is responsible for providing the communication interface between the Data Plane with the Management/Control Plane.
As a result, inside each Host Transport Node Devices, we have two main tables:
- Connection Table: As the name suggests, in this table we have all the information on all connections
- Rule Table: In this table, we have all rules enforced by the NSX Control Plane
Basically, What is the NSX Micro-Segmentation?
Segmentation is the process that dividing data center infrastructure into small zones, allowing fine-grain control and inspection of traffic flows. In this context, the distributed firewall simplifies and automates both macro-segmentation and micro-segmentation:
- Macro-segmentation isolates and secures specific environments
- Micro-segmentation isolates and secures specific applications in an environment, even if the applications are in the same broadcast domain
In this article, we will show an example of how to apply a micro-segmentation to isolate one application or to restrict the communication between VMs in the same broadcast domain.
About Our Lab Environment
So, before showing how to apply the micro-segmentation, I would like to show more details of our lab environment. We can access the network topology view created by the NSX Manager. This is a great functionality that enables us to see our network topology deeply. With this tool, we can have a logical view of each component/device in the topology. To access this menu, you should:
Networking –> Network Topology
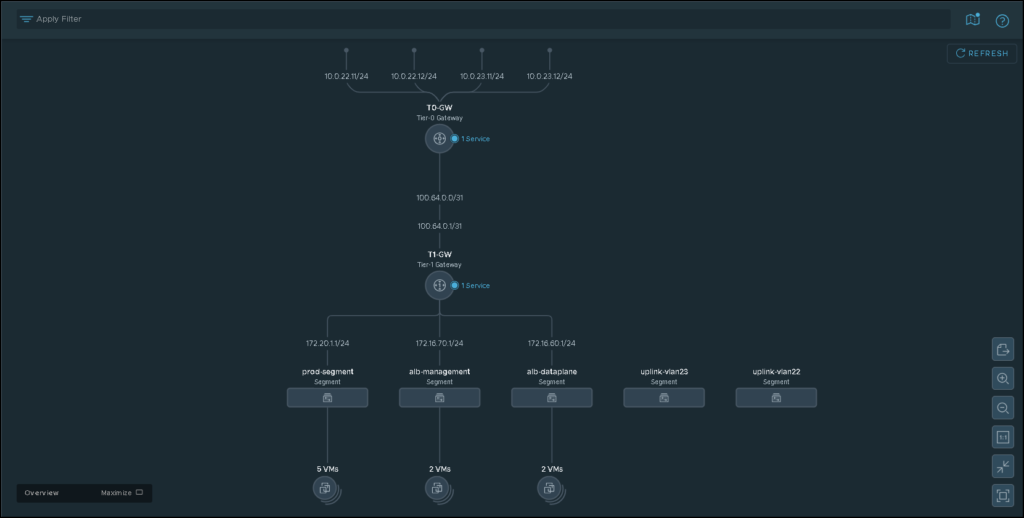
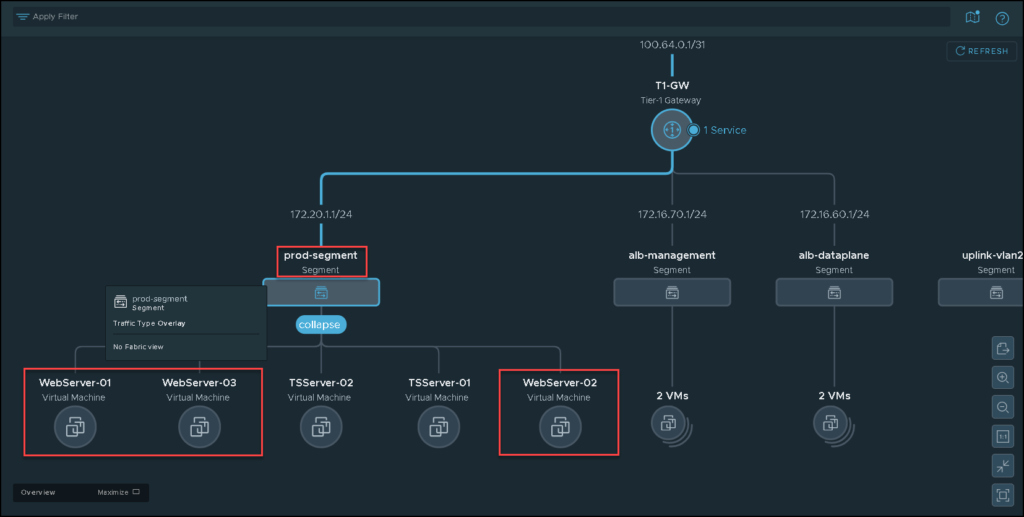
As we can see in the above picture, we have one Tier-0 gateway and one Tier-1 gateway. The Tier-0 gateway has four uplinks to the physical network or upstream router. These uplinks are responsible for providing the “North/South” traffic.
Under the Tier-1 gateway, we have some Segments or Virtual Switches. This gateway is responsible for handling the “East/West” traffic.
Look that we have a Segment called “prd-segment”. In this segment, we have three web server VMs. Our distributed firewall rules will be created to segment the communication of these web server VMs:
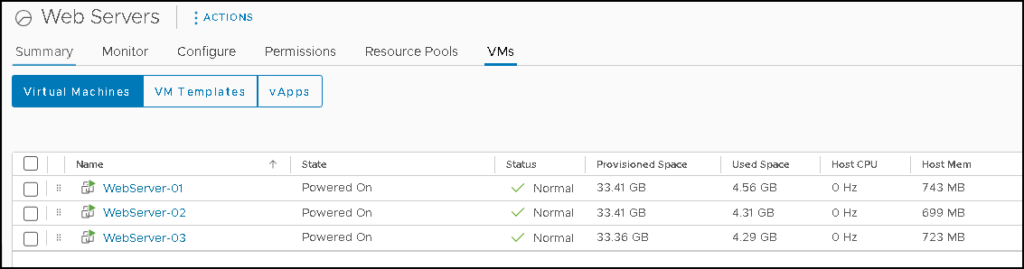
On the vSphere Client, we can also see these VMs – all are running normally and have access to the network normally as well:
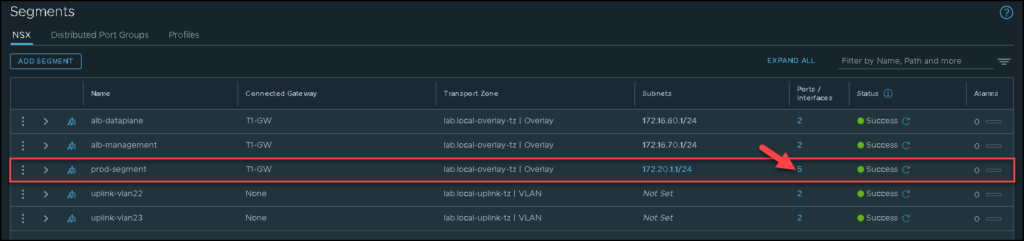
On the NSX Manager, we can see details of each port connected to a specific segment or virtual switch. In this example, we have 5 logical ports or interfaces in the “prd-segment”, as we can confirm in the below picture:
After clicking on the number of ports/interfaces, we can see some details of each one:
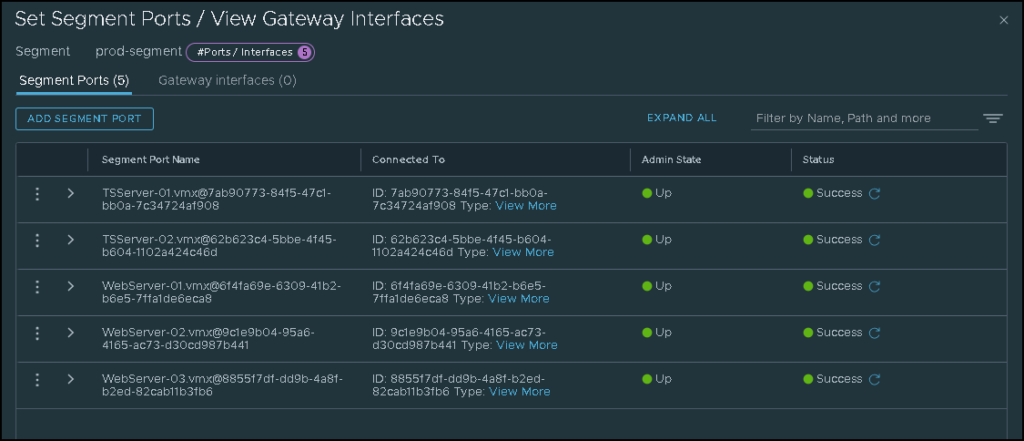
Under the “WebServer-01′ segment port name, for instance, we can see what address have been learned by the NSX Manager. Under the segment port name, expand the “Address Binding” option:
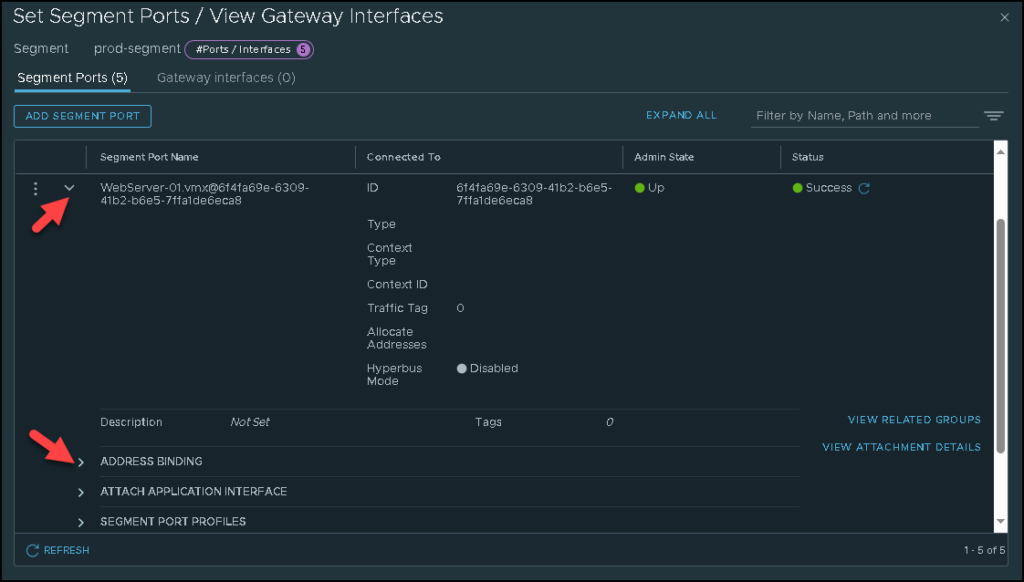
And click on View on “Discovered Bindings”:
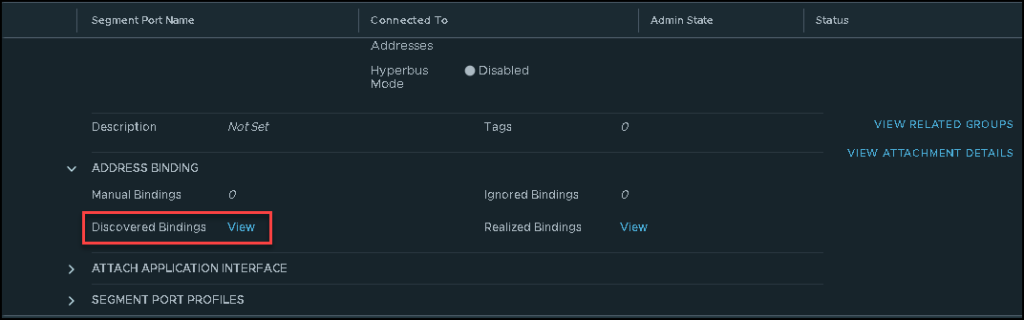
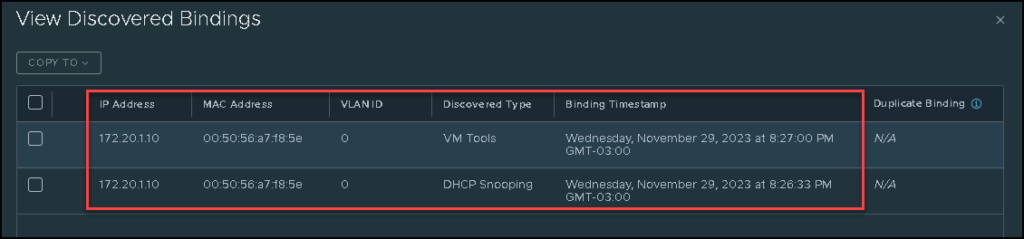
Now, we can see all IP addresses learned by the NSX Manager for this specific VM.
Look at the column “Discovery Type”. Here, we can see what method was used by the NSX Manager to learn these addresses. In this example, VM Tools and DHCP Snooping were the methods used to learn these addresses – Just to share with you, the discovery type method is configured under the IP Discovery Profile 😉
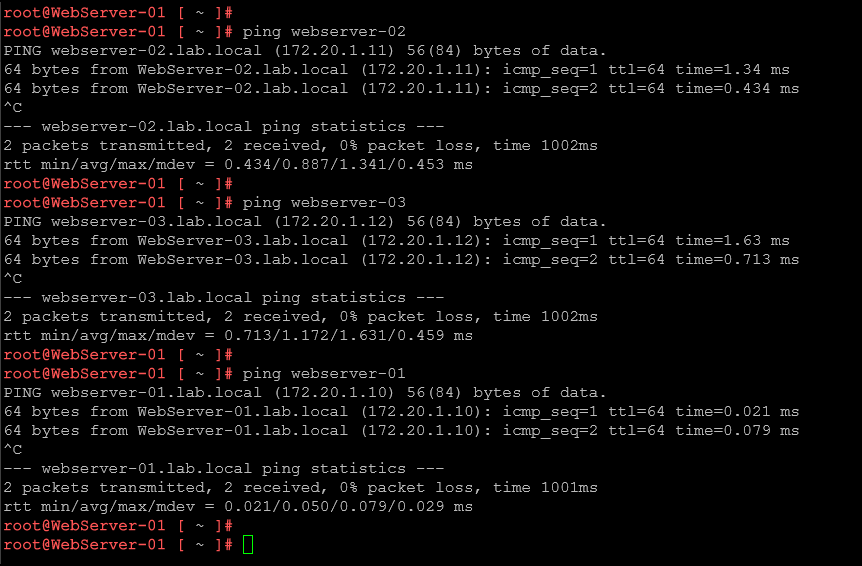
Accessing the webserver-01 by SSH, we can ping normally the other web servers (and ping itself too 🙂 ):
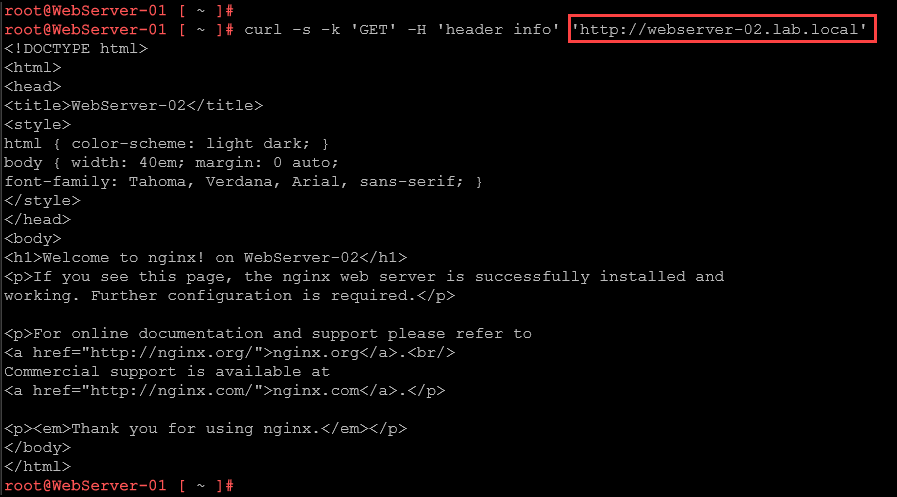
From the webserver-01, it can access normally the web application in the webserver-02:
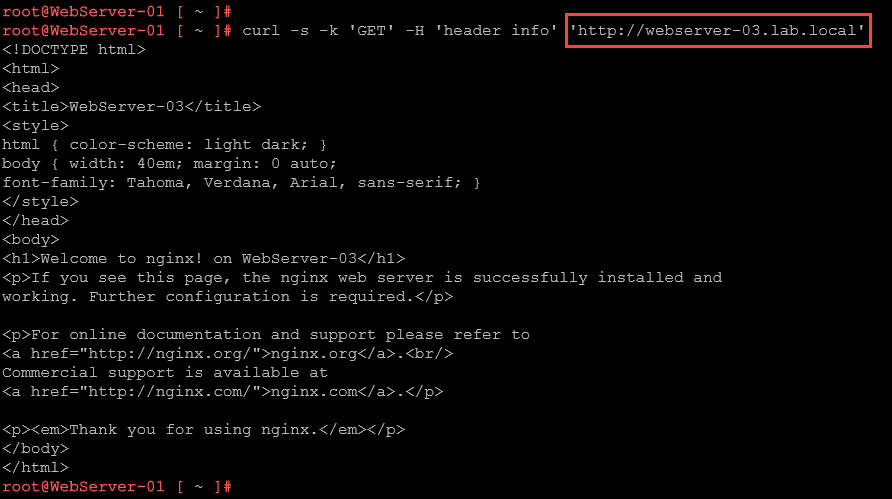
The application in the webserver-03:
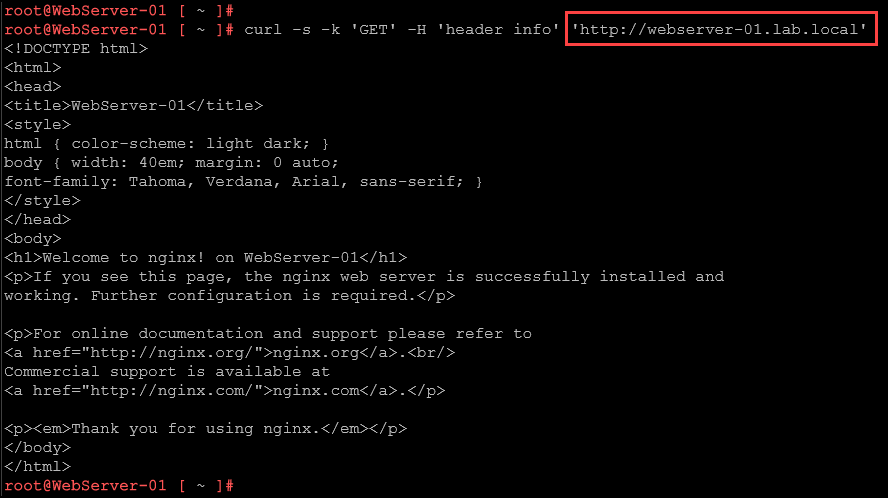
And the application in itself:
Creating a Firewall Rule to block ICMP traffic between VMs in the same Segment
Here, we will create a firewall rule to block the ICMP traffic between all web server VMs.
Firstly, we will create a TAG. We can create and apply TAGs on the VMs to attend several purposes: For example, we can create a tag “web-server” and apply this tab (labor) on all web server VMs. It will help us to create groups of VMs, for instance.
To create and apply a TAG, access the following menu:
Inventory –> Tags –> ADD TAG
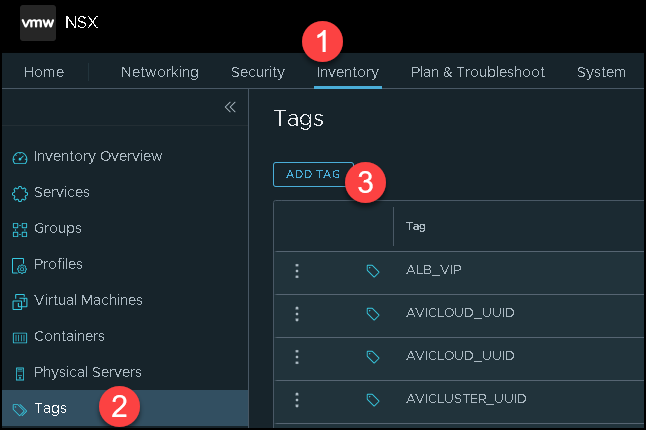
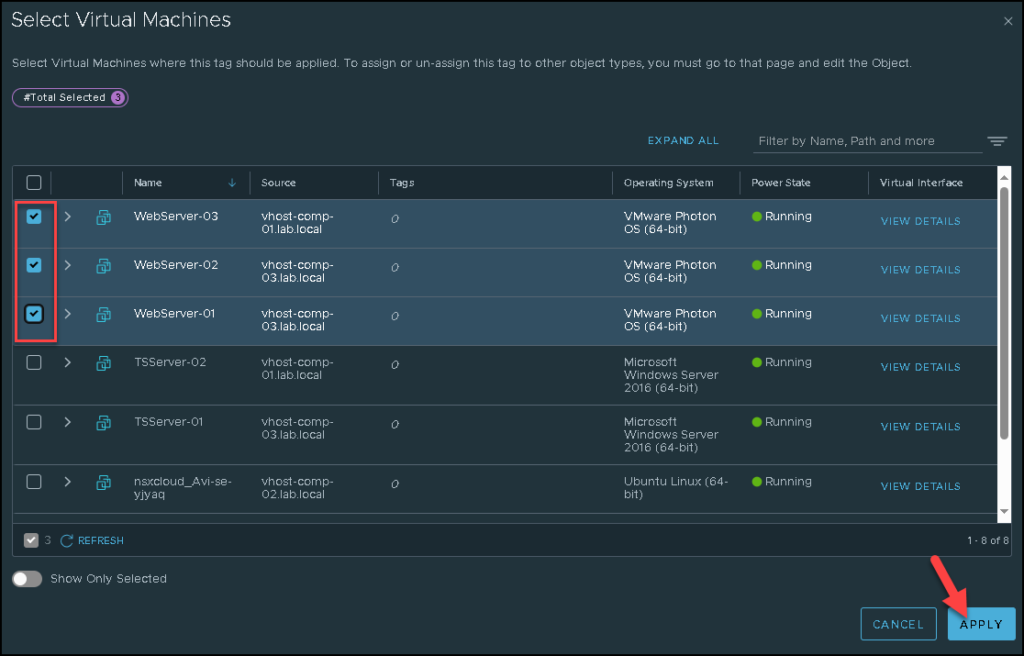
Type the tag name and click on “Set Virtual Machines” just to specify what VMs will be tagged:

Select all VMs and click on APPLY:

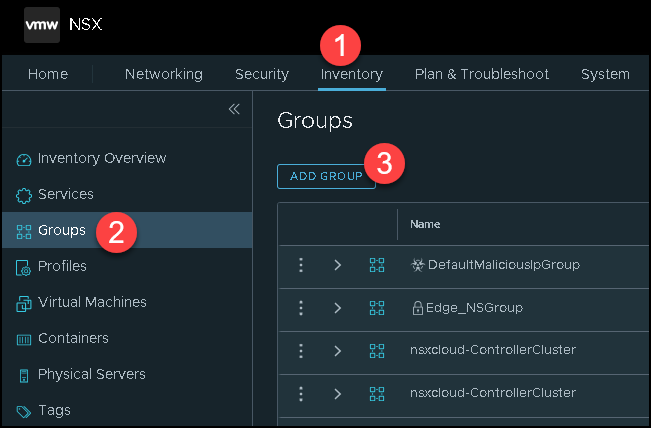
Secondly, we will create an object group just to group all web servers VMs. We will use this group object during the firewall rule creation. Access the menu:
Inventory –> Groups –> ADD GROUP
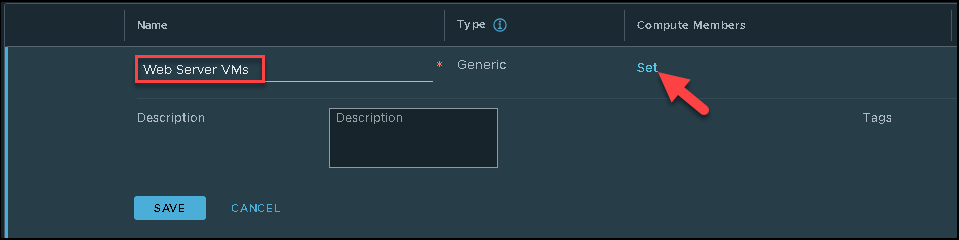
Type the group name and click on “Set” just to specify the group members:
Here, we need to specify which criteria will be used to populate this group.
In this example, we are using the tag as the criteria. Look that we are choosing the tag “web-server” that we previously created:
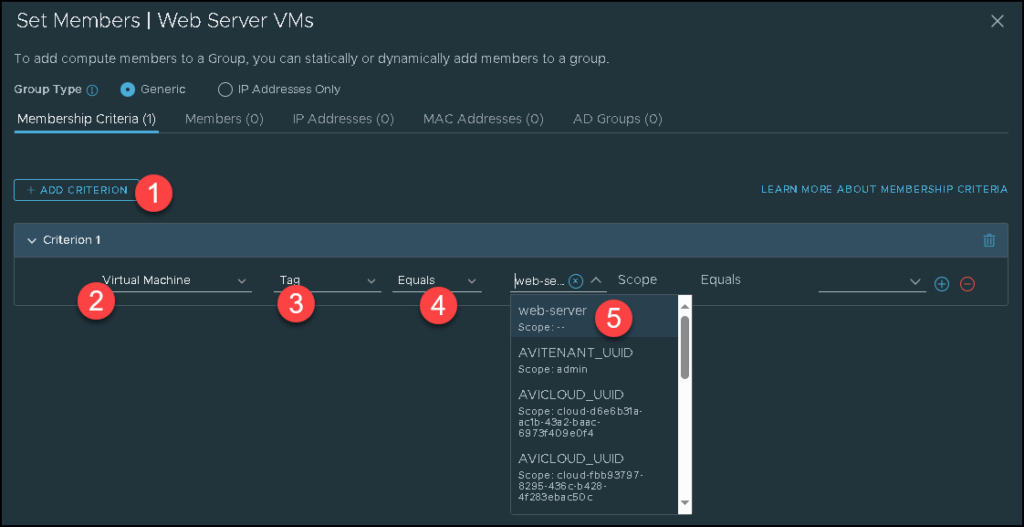
After that, click on APPLY:
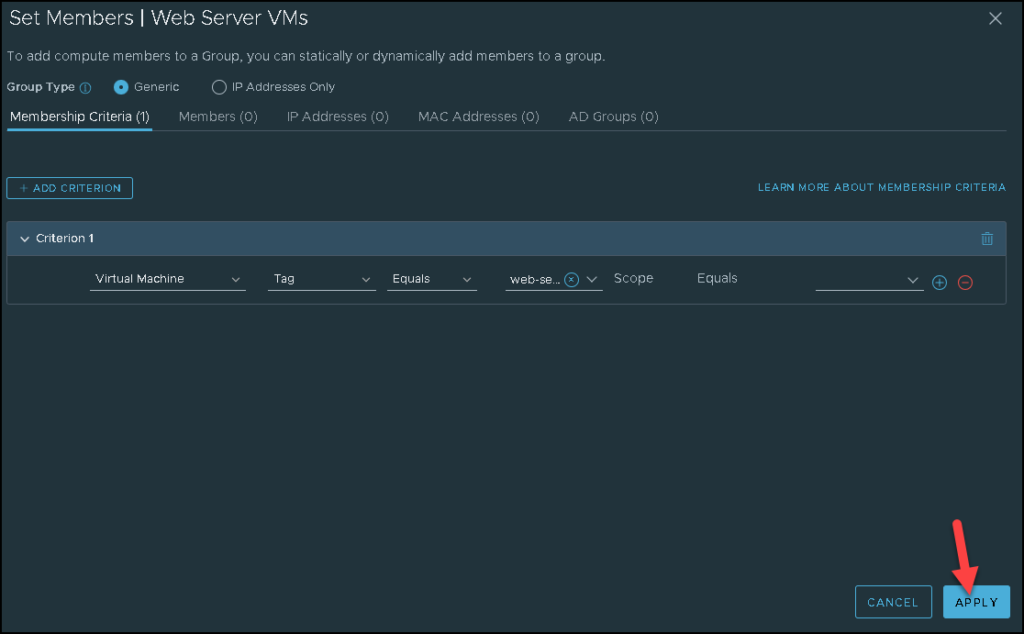

Now, we will create the firewall rule. To do that, access the following menu:
Security –> Policy Management –> Distributed Firewall –> Category Specific Rules –> Application –> ADD POLICY
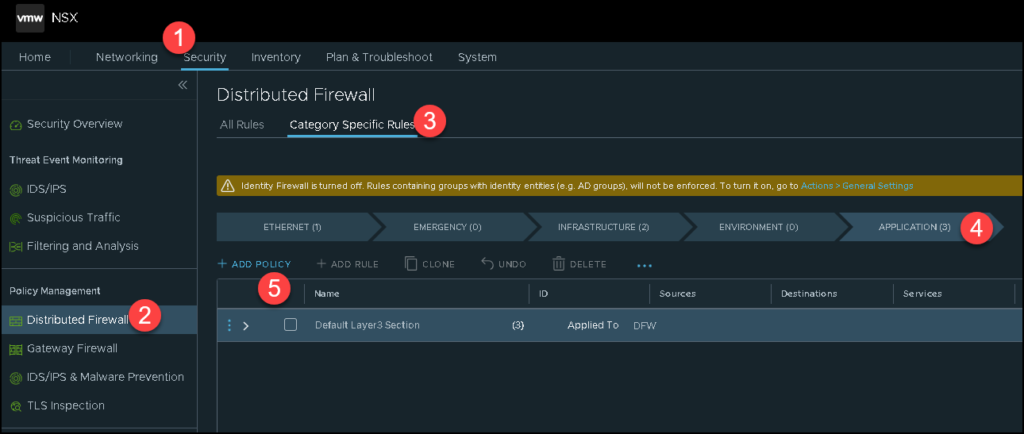
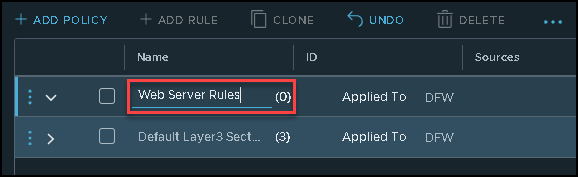
Type the policy name:
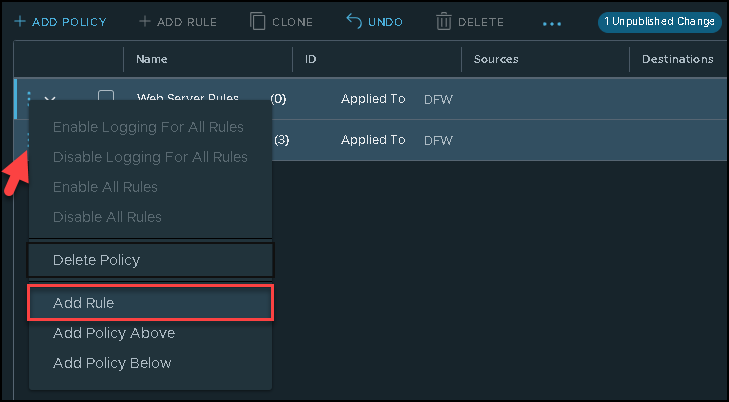
Click on the three points next to the policy name –> Add Rule:
Here, we need to configure our rule to perform our aim: To block the ICMP traffic between web server VMs:
1 – Type the rule name
2- Select the group of VMs as a source of traffic
3- Select the group of VMs as a destination of traffic
4- Services refers to the protocol, TCP/IP logical ports, etc
5- Applied to refers in which scope this rule will be applied
6- The action of the rule
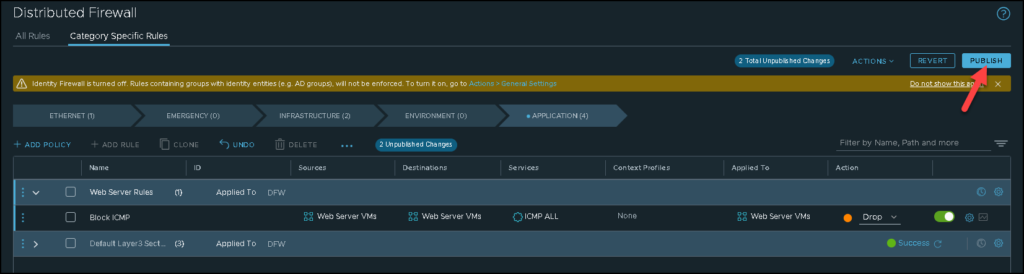
In our example, the source and destination fields have the same group – this is just to drop the ICMP between all VMs inside this group:

After creating the rule, we need to publish this rule. Click on “PUBLISH” for NSX Manager (Control Plane) to push this rule for the Host Transport Node devices:
Now, from the webserver-01 VM, the ping tests failed to the webserver-02 and webserver-03 VMs 🙂 – it works as expected:
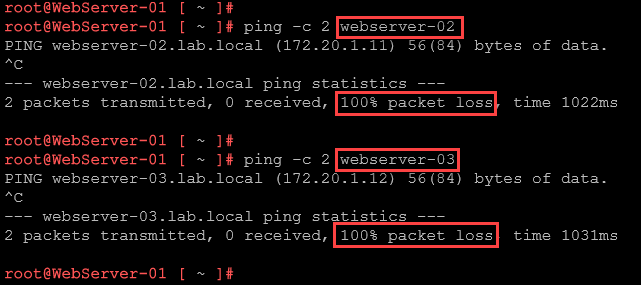
Note: Look, all VMs are on the same broadcast domain and have the same subnet ID. Besides that, with NSX we can apply polices to protect or filter the traffic of each VM, even all on the same broadcas domain!Creating a Firewall Rule to block WEB traffic between VMs in the same Segment
Now, we will create a firewall rule to block access to the web application running on each web server VM.
Here, the idea is the same as we showed above: each web server VM should not access the web application running on another web server VM:

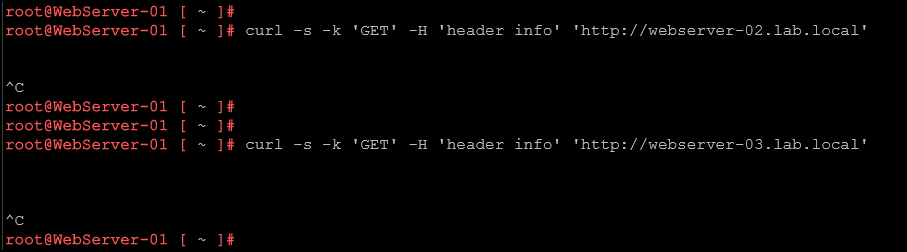
From the webserver-01, we cannot access the web application running on the webserver-02 and webserver-03 VMs:
Wrapping This Up
So, the rule action “drop” blocks the traffic and does not send any message to the source device.
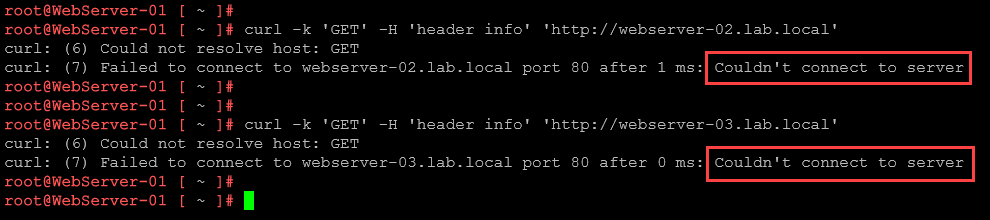
The rule action “reject”, however, blocks the traffic but sends messages to the source device just to finalize this behavior. We can change the action from drop to reject and perform some tests again:
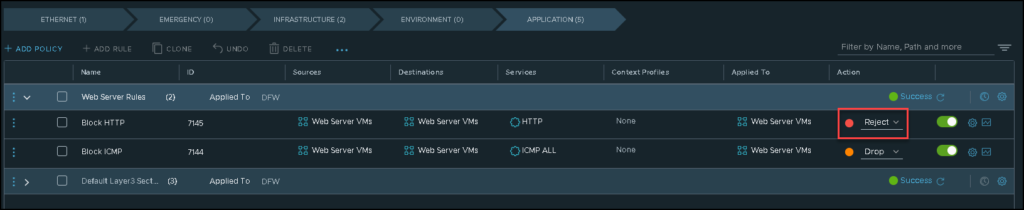
From webserver-01 again, for instance, we can perform some tests and now it is possible to see a message, indicating that the connections are not possible or something like that:
In conclusion, NSX micro-segmentation can add an extra and important layer to make an environment more secure and avoid laterally exploration. But, you should analyze each scenario just to apply the firewall rule where is necessary!
Generally, it is a good idea to know the applications running inside the environment and which relations they have. It will help to create the best firewall rules to meet the security business requirements!
